| 1964 Jaguar E Type (AD)
Team CJ restoration |
|
| 1964 Jaguar E Type (AD)
Team CJ restoration |
|
|
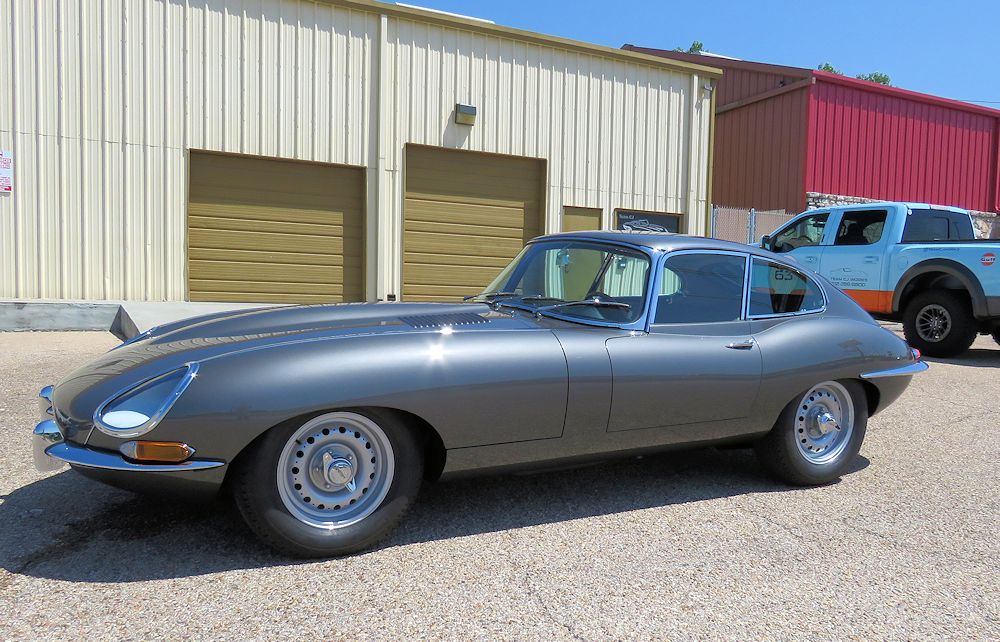
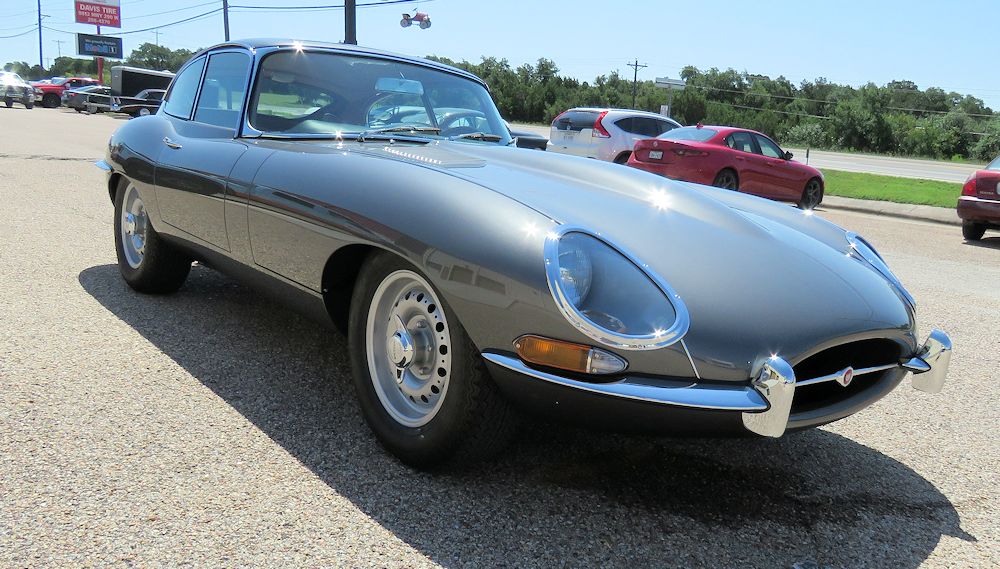
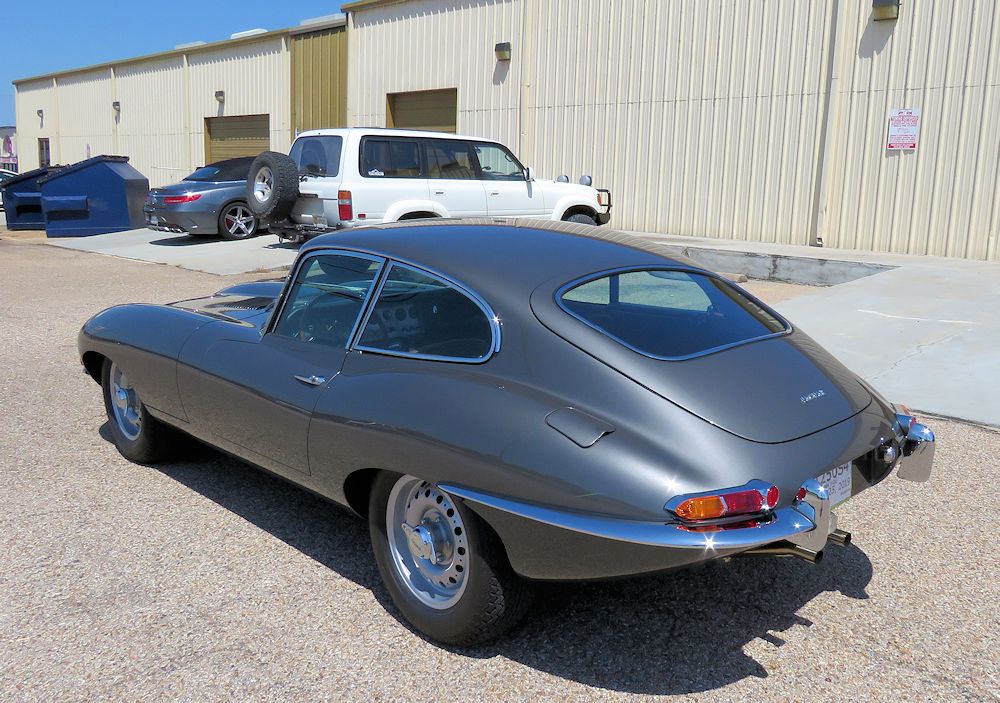
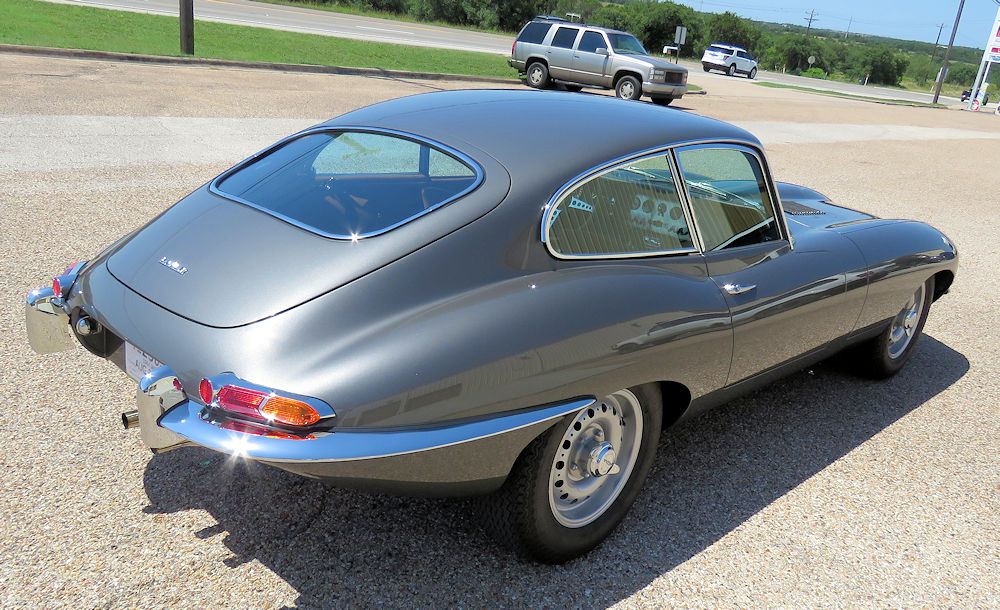
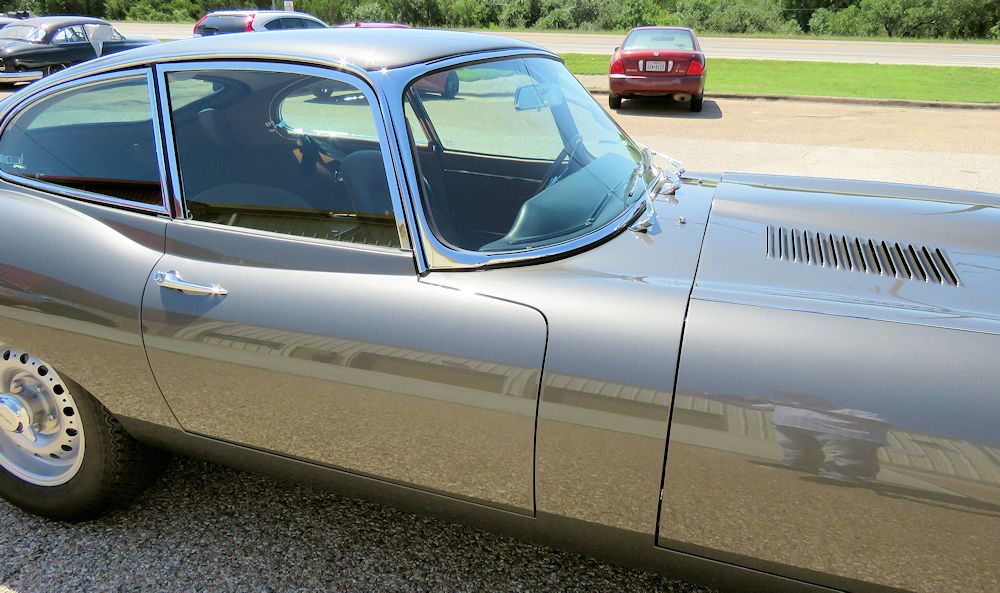
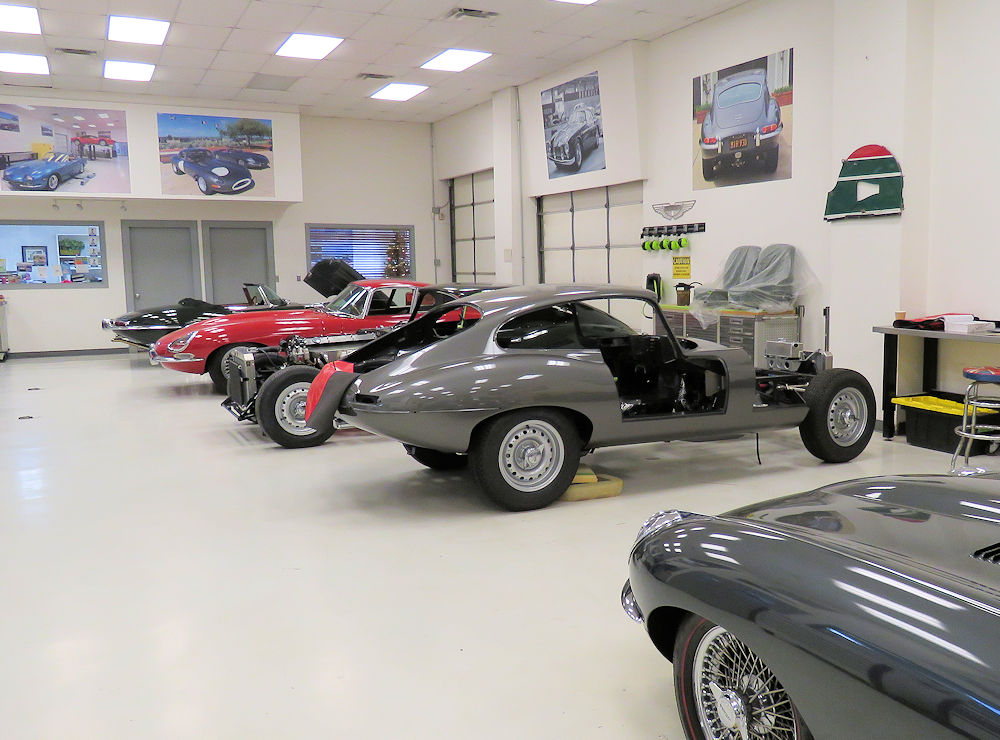
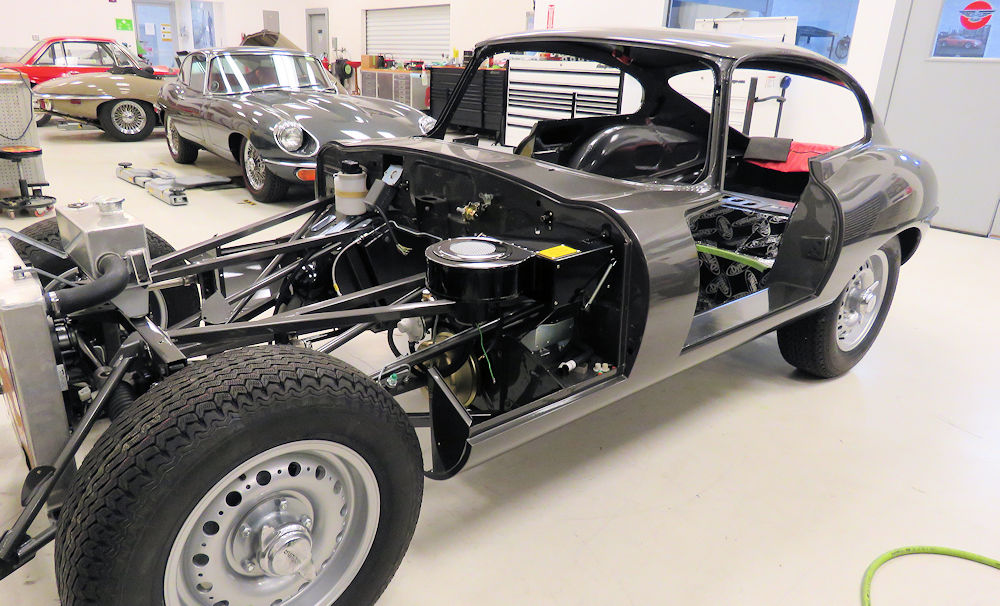
Another Team CJ restoration wrapped up and ready for a trip across the Atlantic!
 |
 |
 |
 |
 |
 |
 |
 |
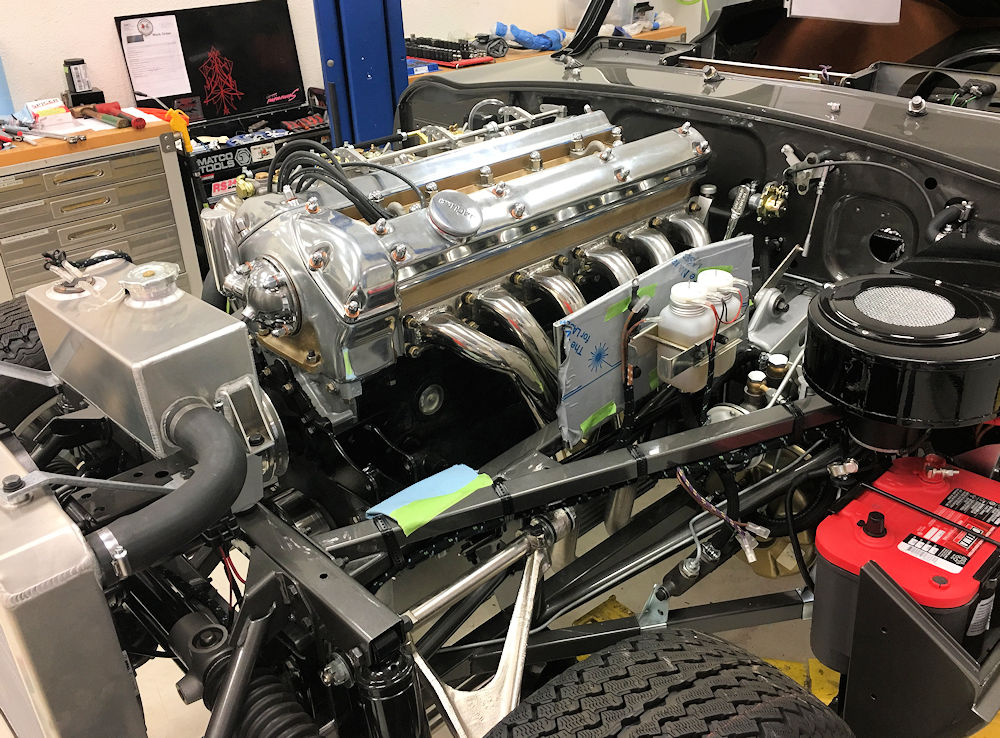
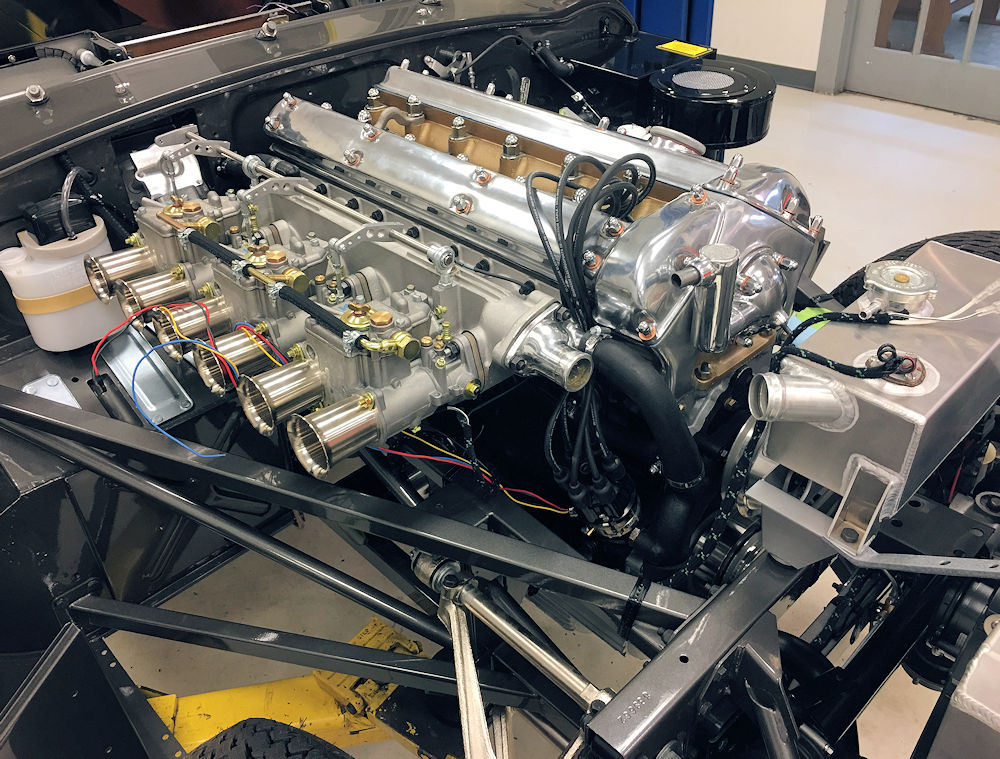
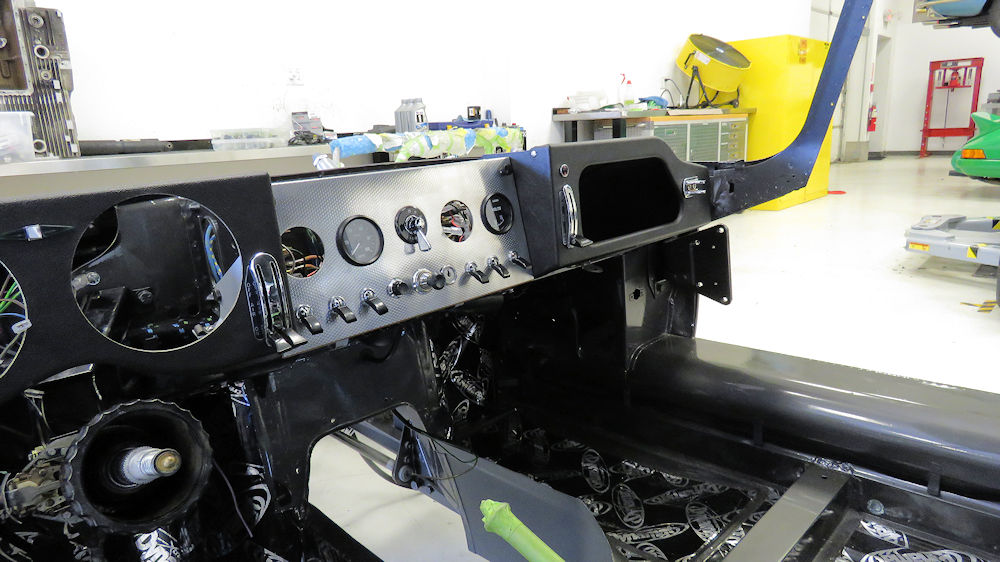
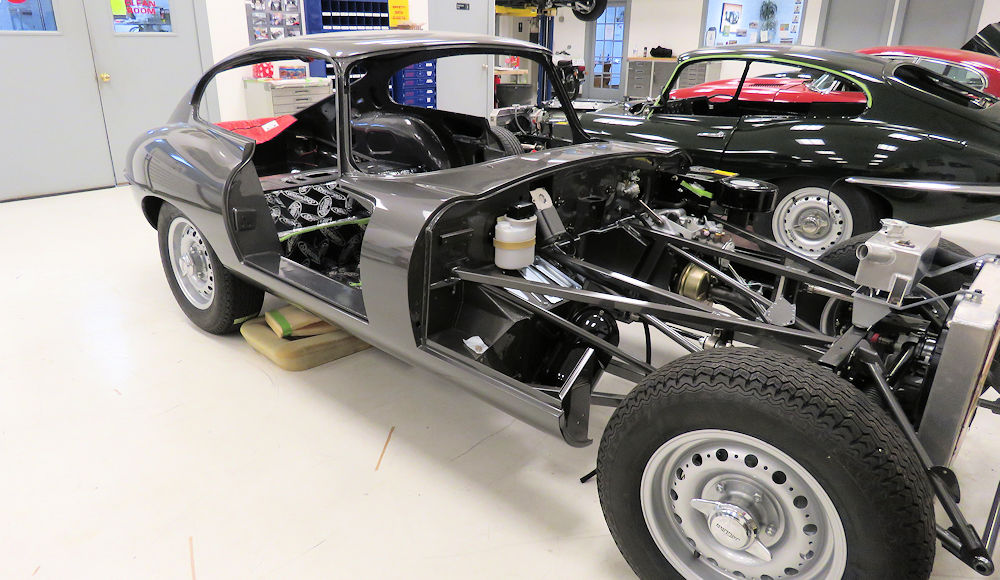
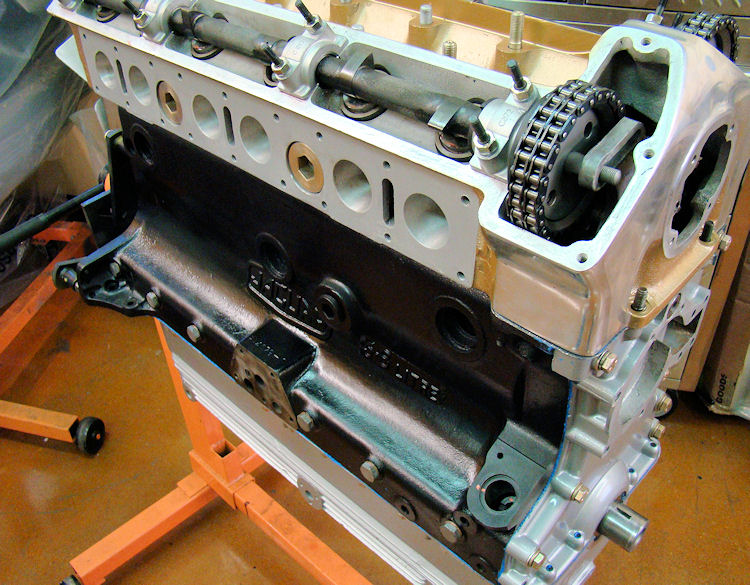
Engine, transmission, headers and Webers installed.
 |
 |
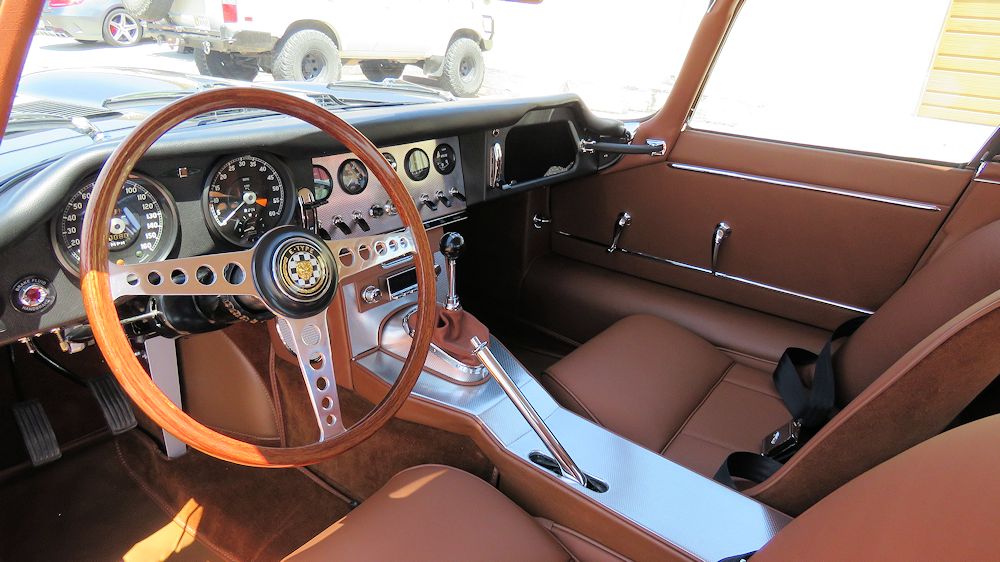
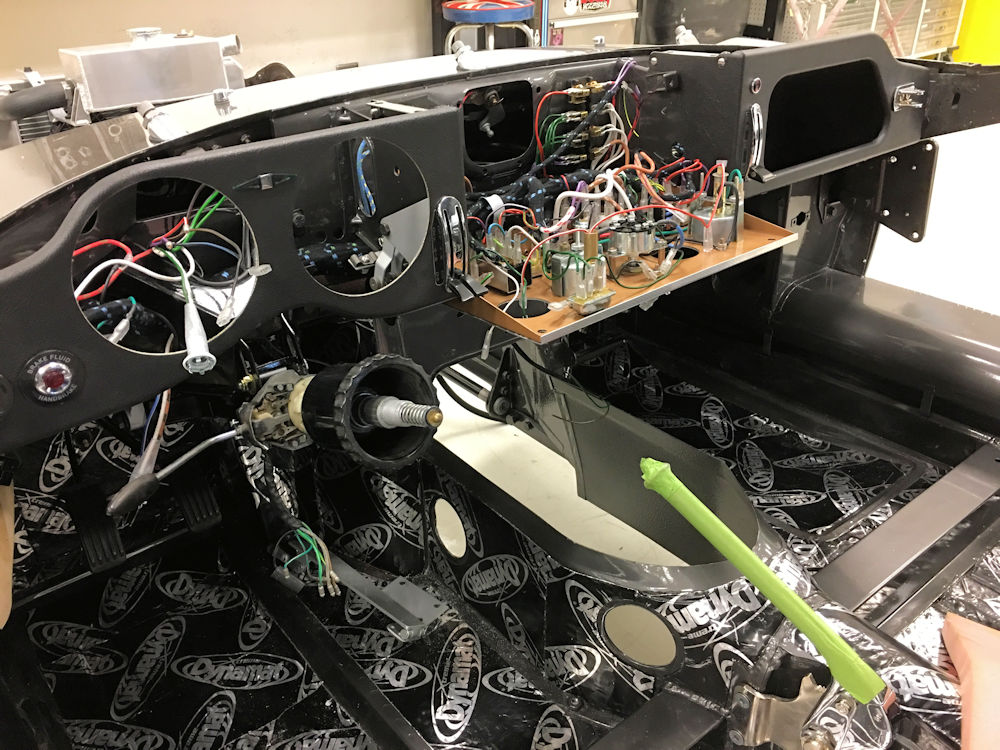
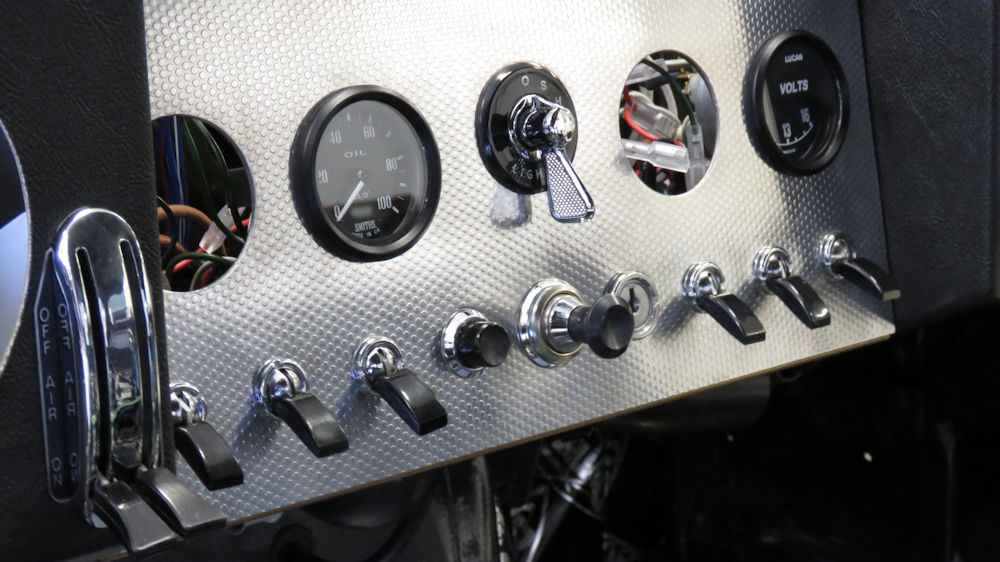
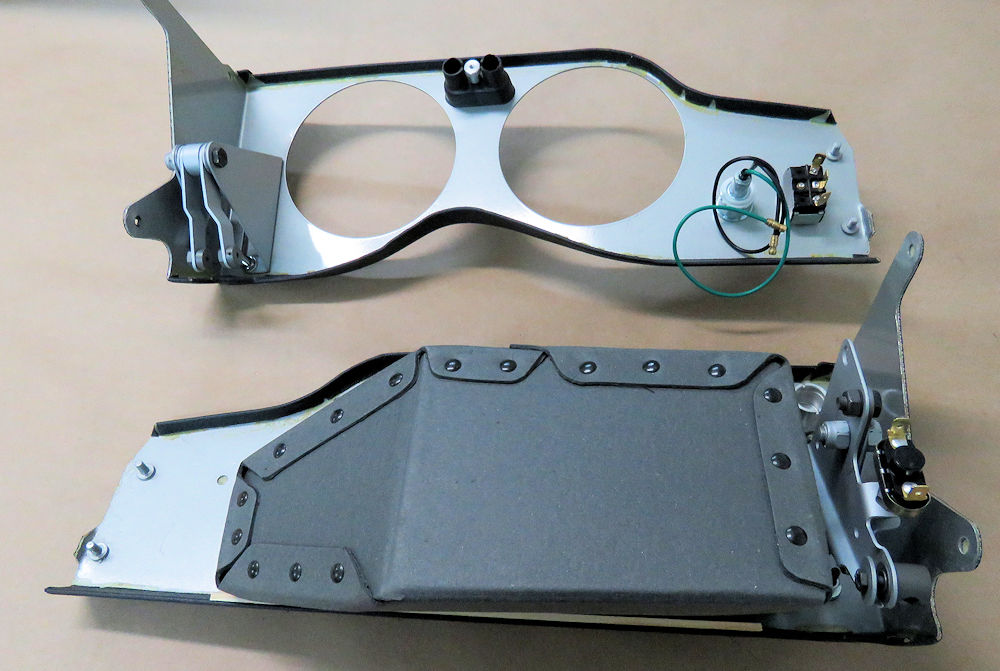
Wiring the dash and gauges, starting to install chrome and lights.
 |
 |
 |
 |
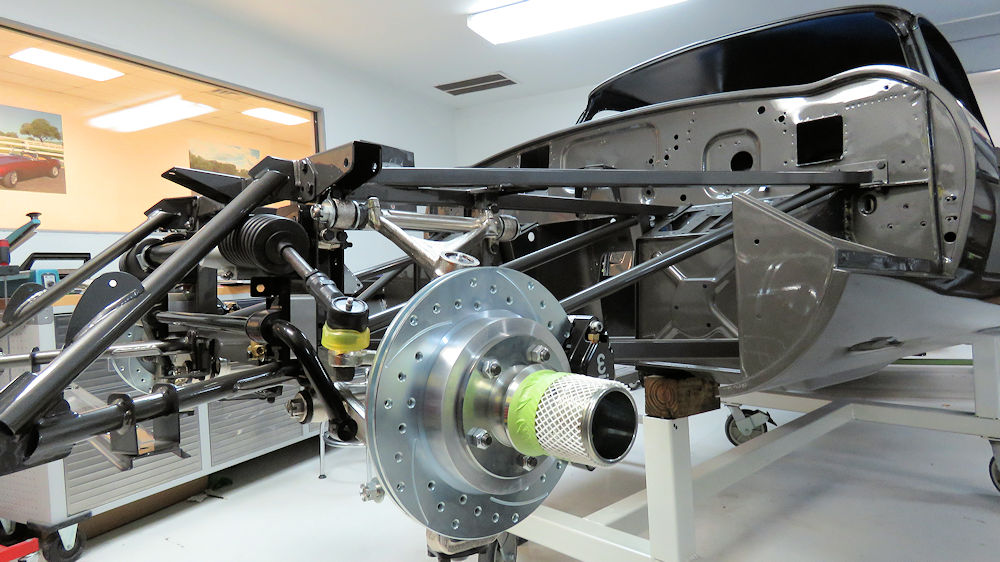
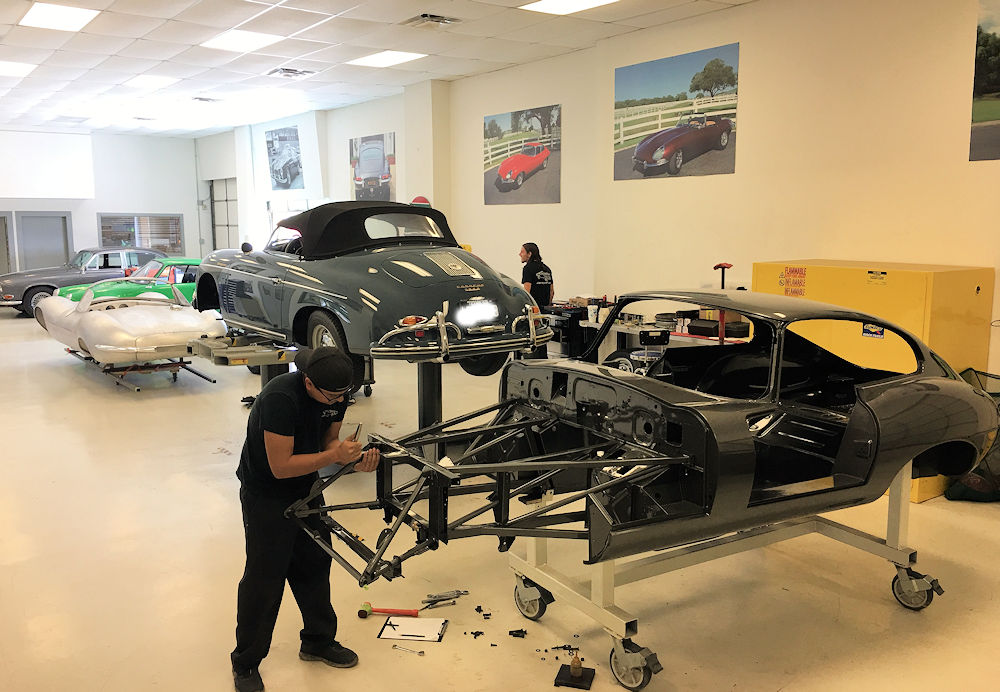
Your car is now back on its wheels, almost time to install the engine and transmission.
 |
 |
| Your car is now back on its wheels |
|
 |
 |
 |
 |
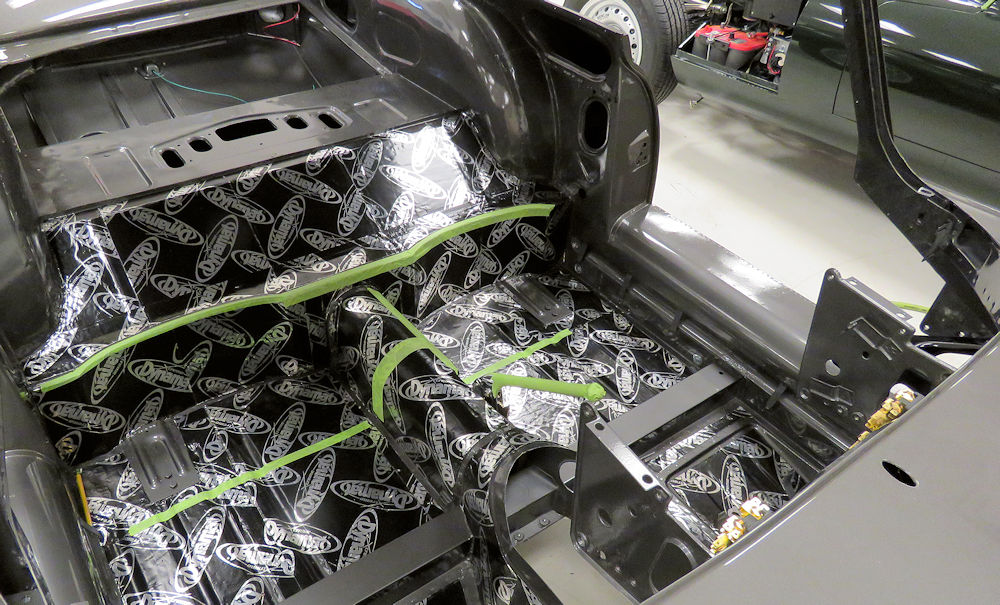
| Dynamat being installed throughout the cabin |
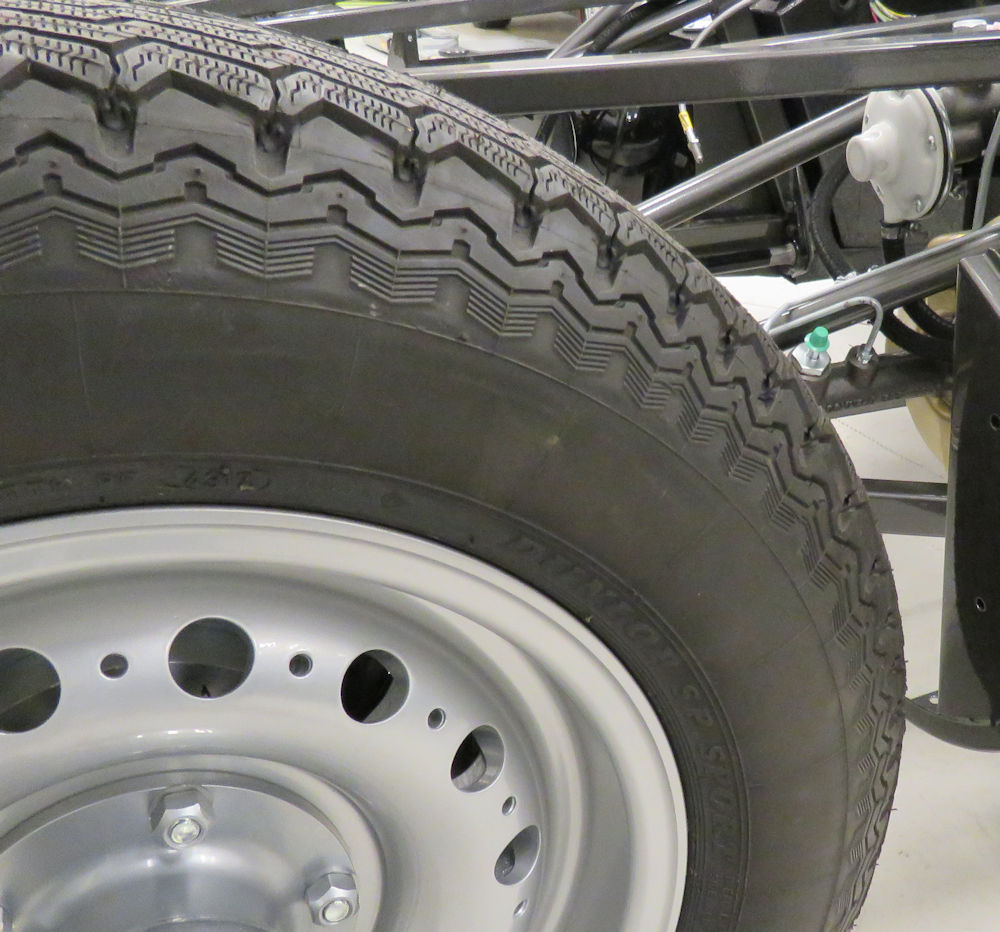
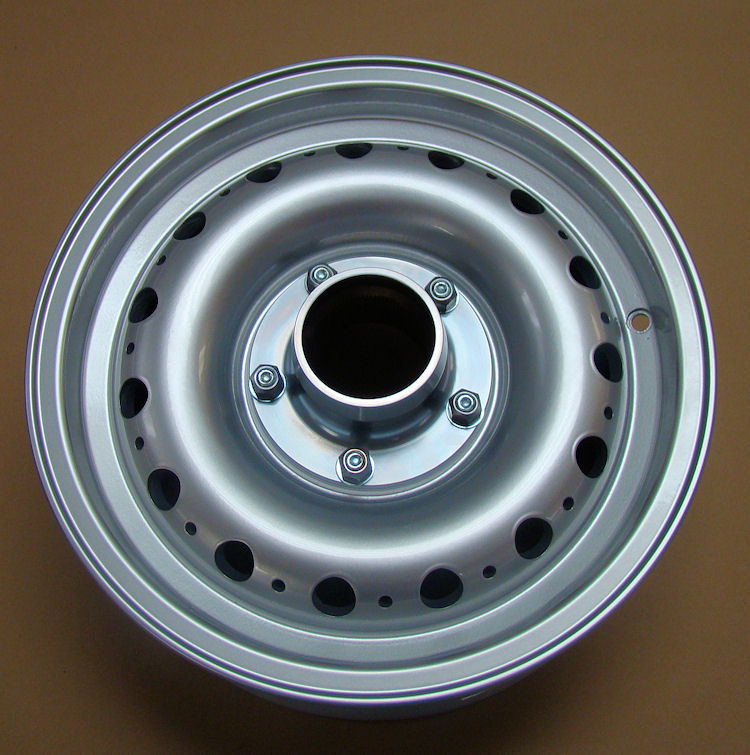
Dunlop SP Sport radials installed on Dunlop replica alloy wheels |
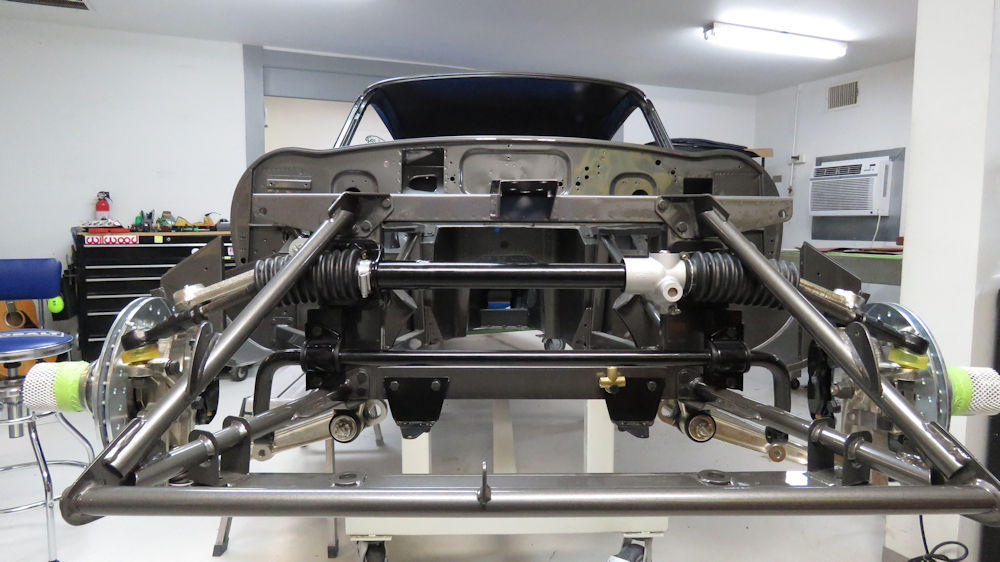
Installing front suspension, brakes and steering.
 |
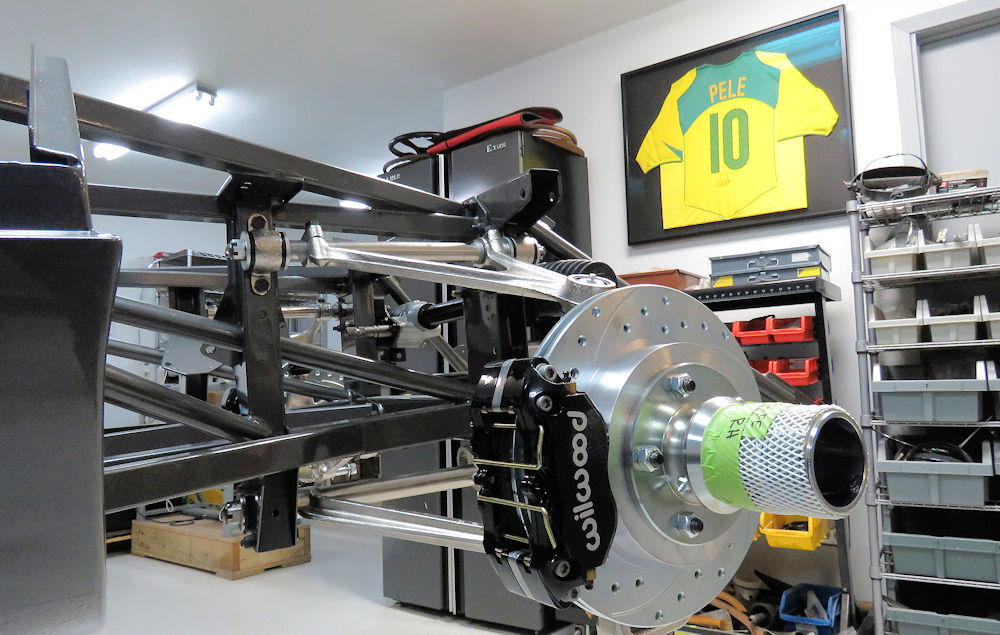 |
| Work being done under Pele's watchful eyes! |
|
 |
 |
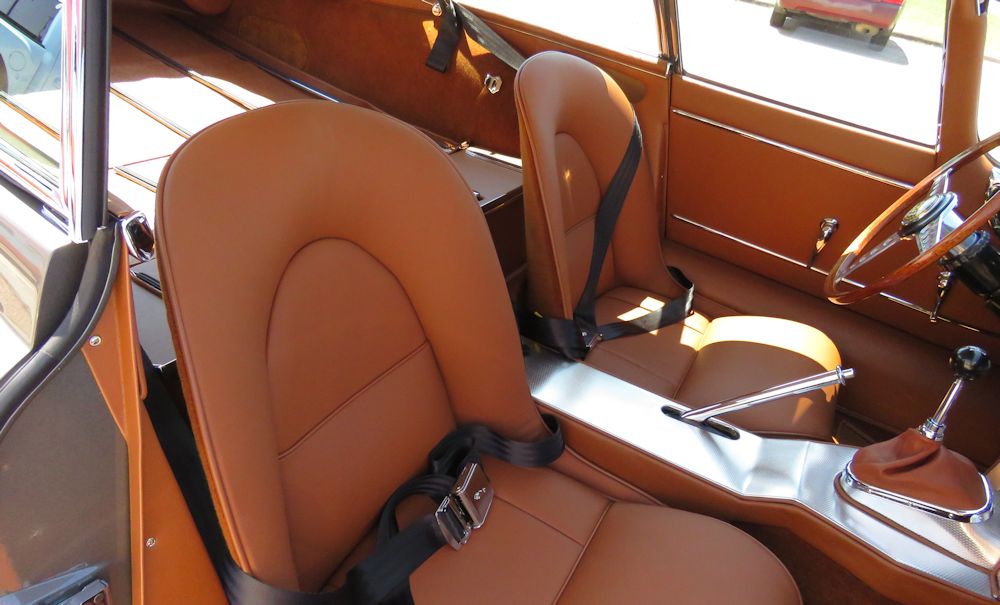
Installing engine frames and trimming the seats.
 |
 |
| Engine frames painted and ready to install |
Time to start putting this car back together |
 |
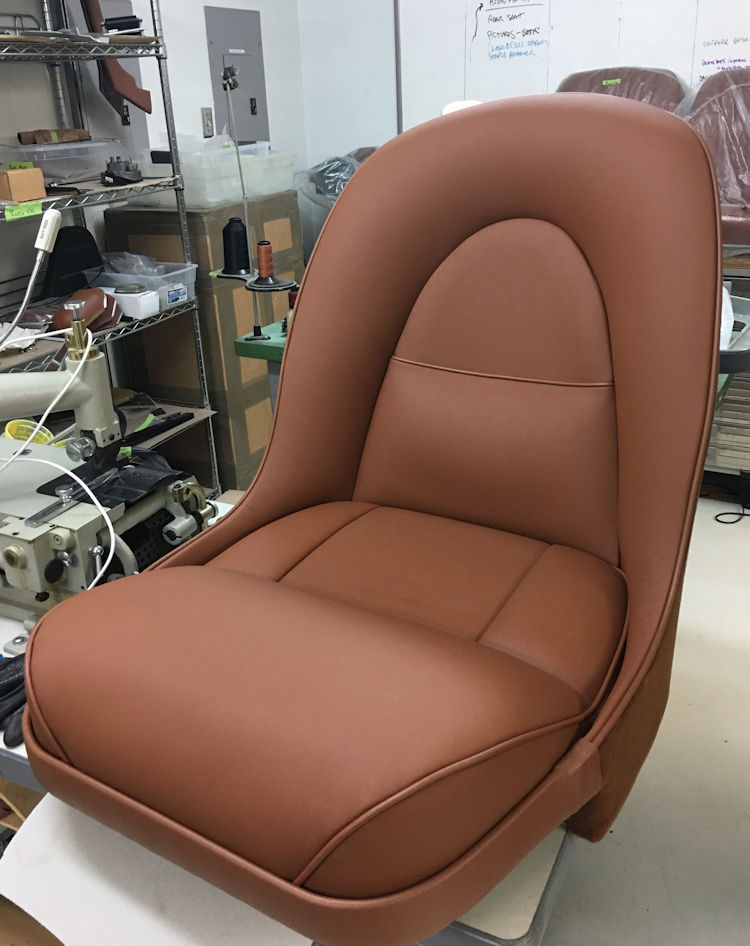 |
| Hector busy trimming your seats |
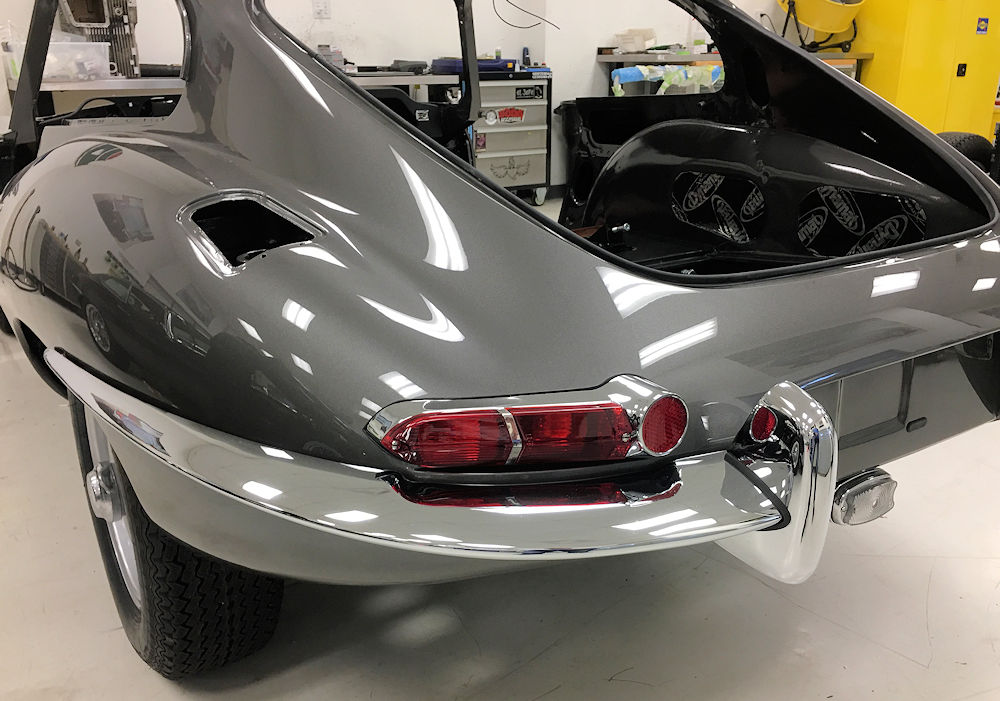
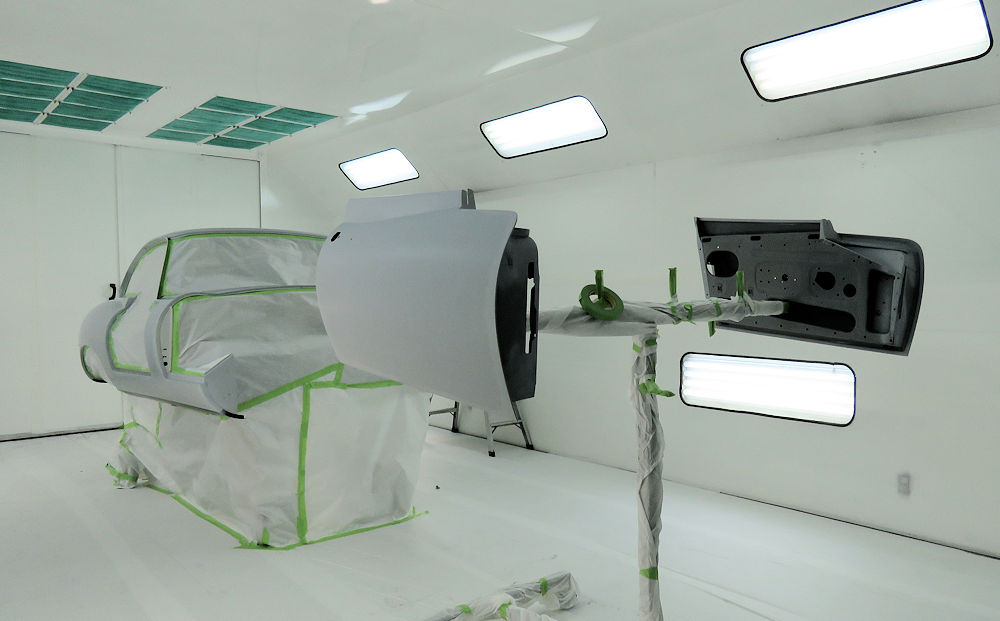
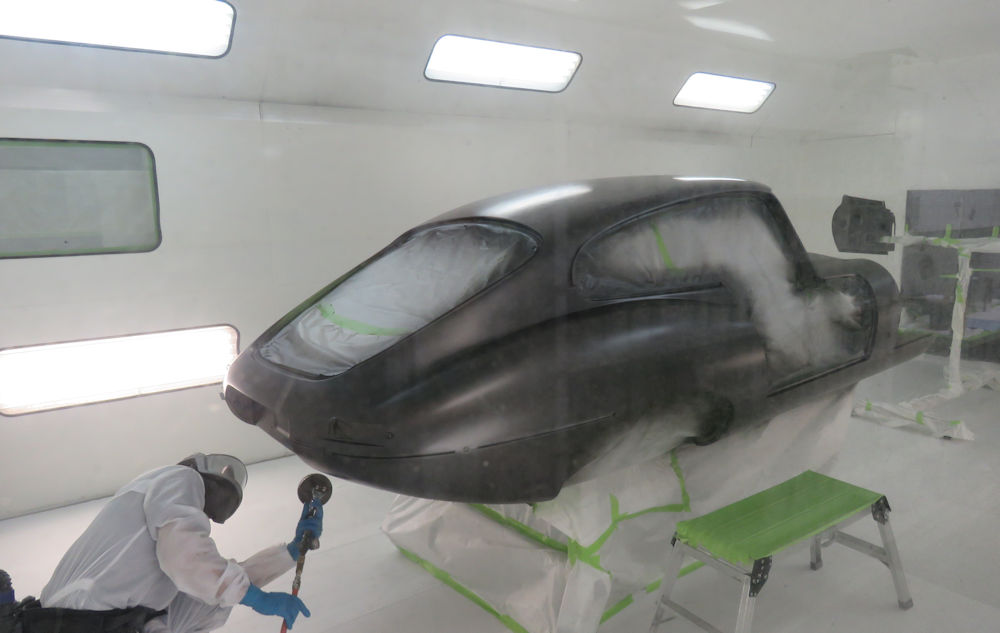
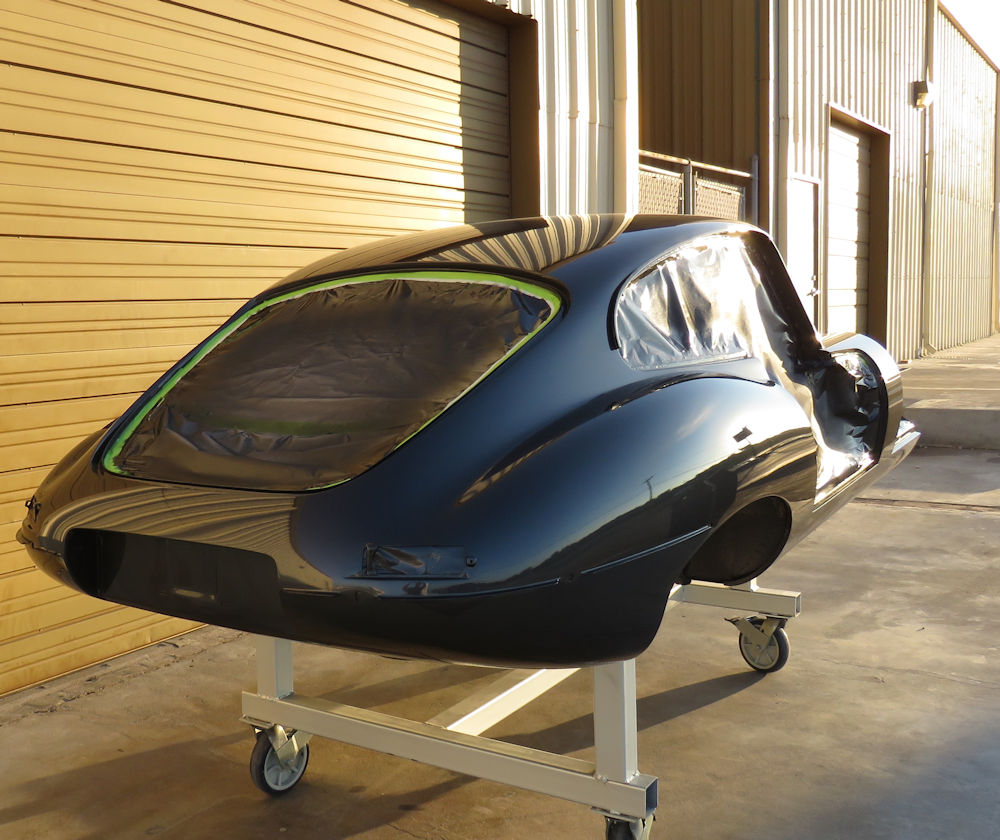
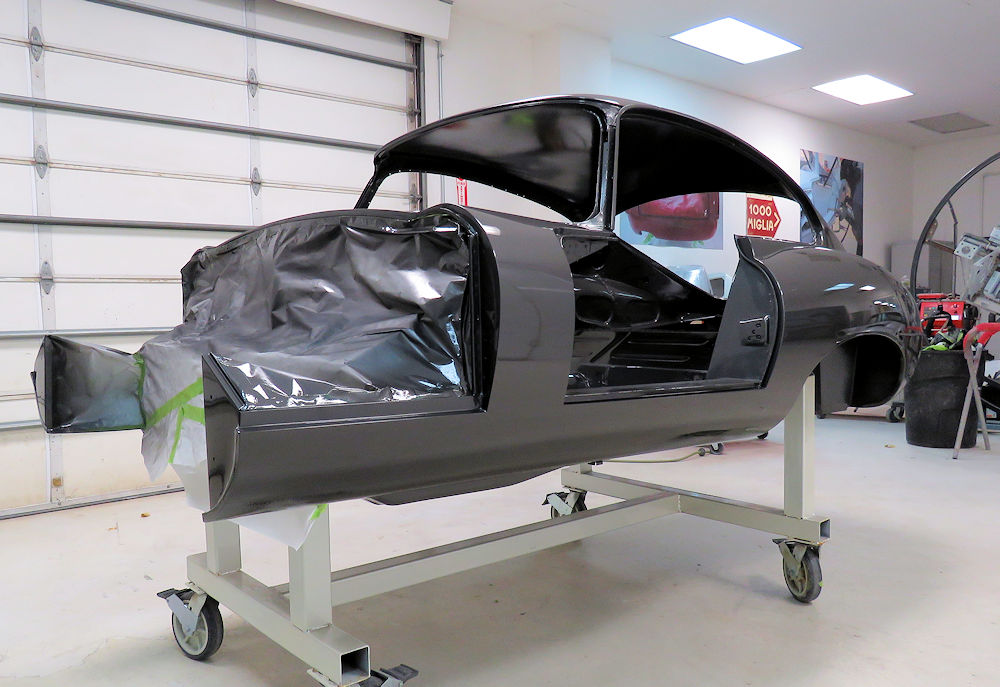
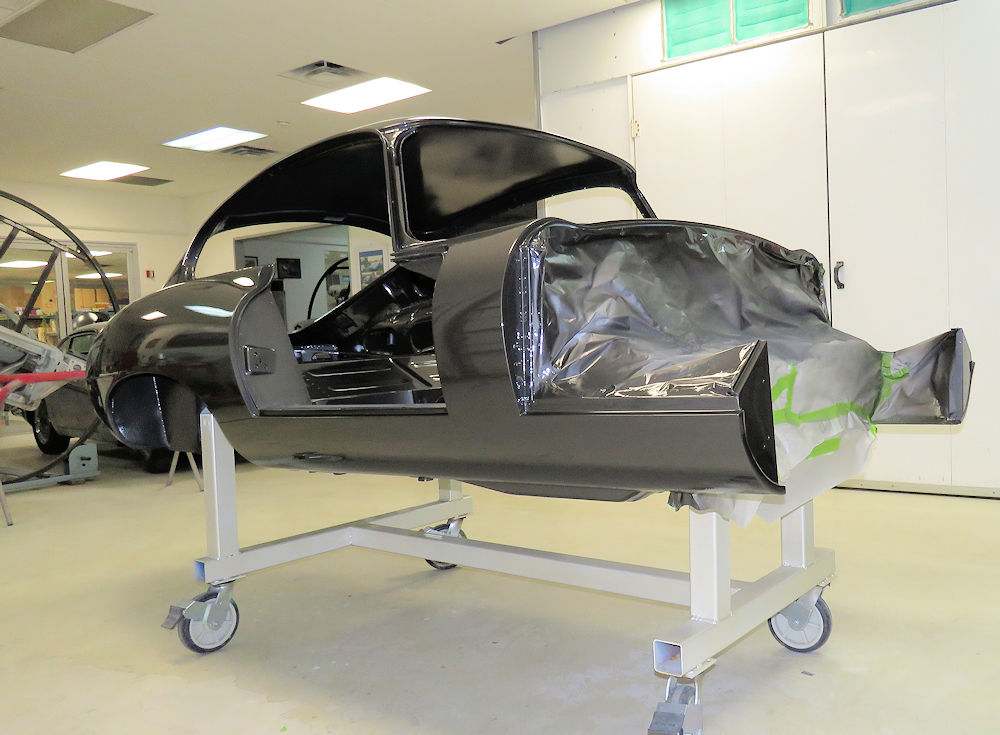
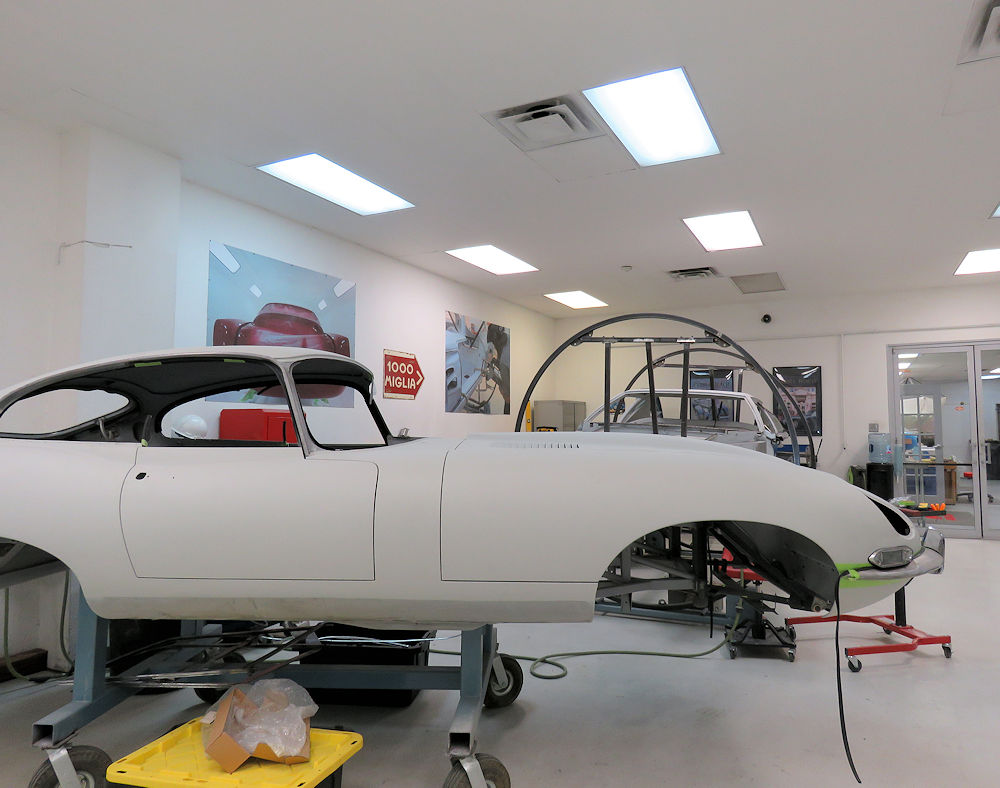
I am delighted to report that we have now completed the process of painting the body, bonnet, doors and tailgate.
 |
 |
 |
 |
| View through the booth window as Gerardo
starts applying the Opalescent Gunmetal base coat |
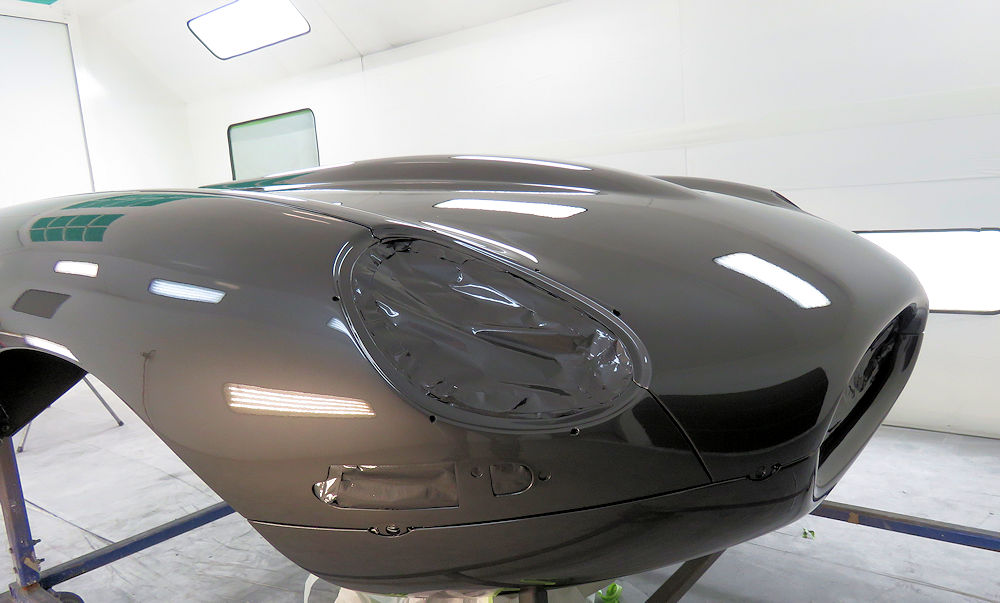
Four coats of base followed by three coats of
clear |
 |
 |
| Unmasking the body |
|
 |
 |
 |
 |
| Painting the bonnet |
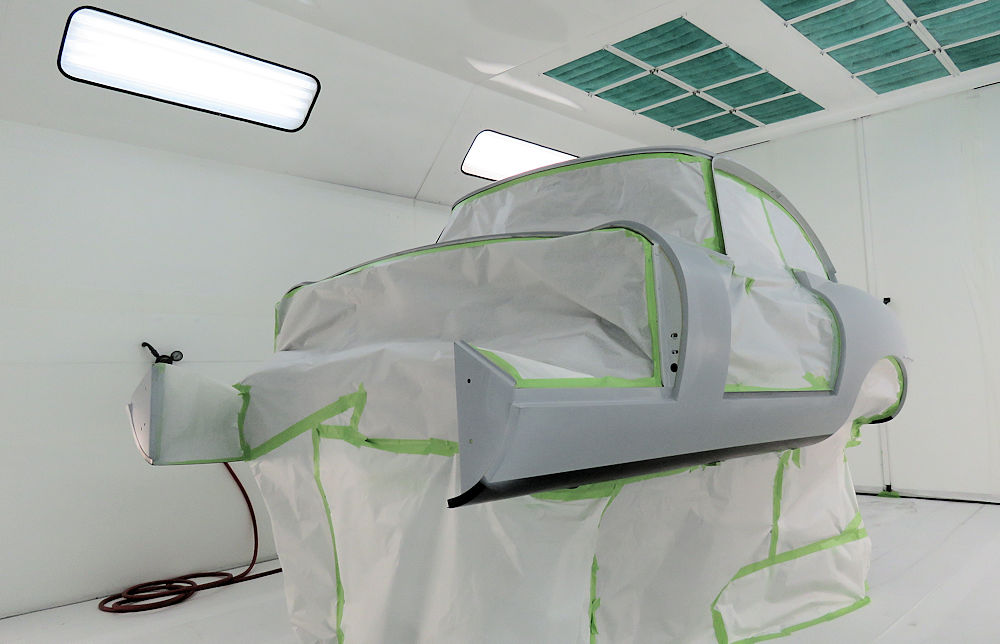
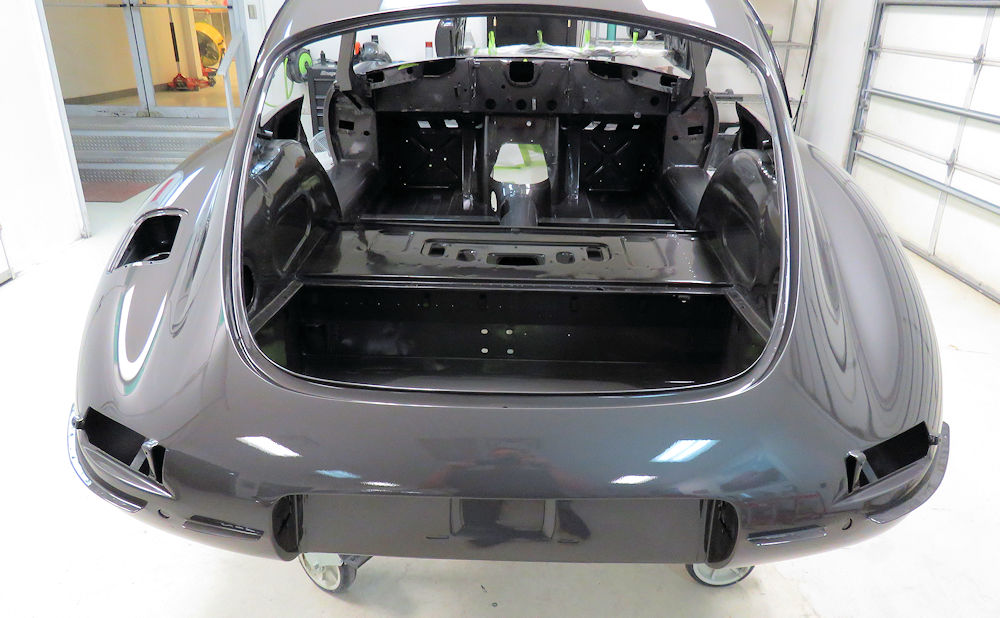
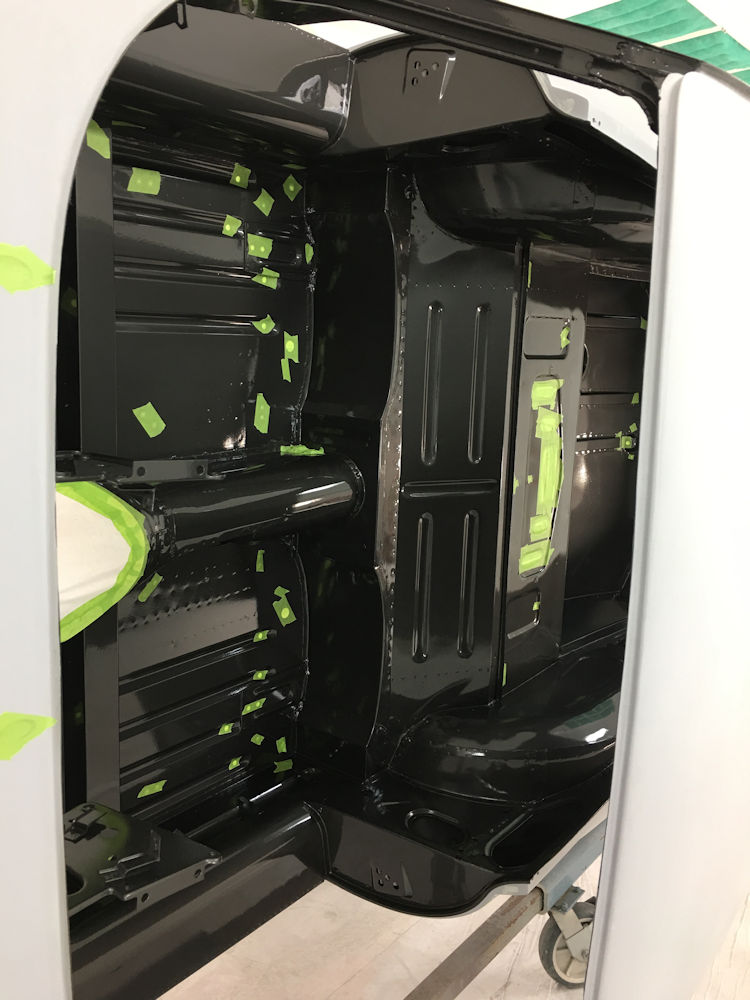
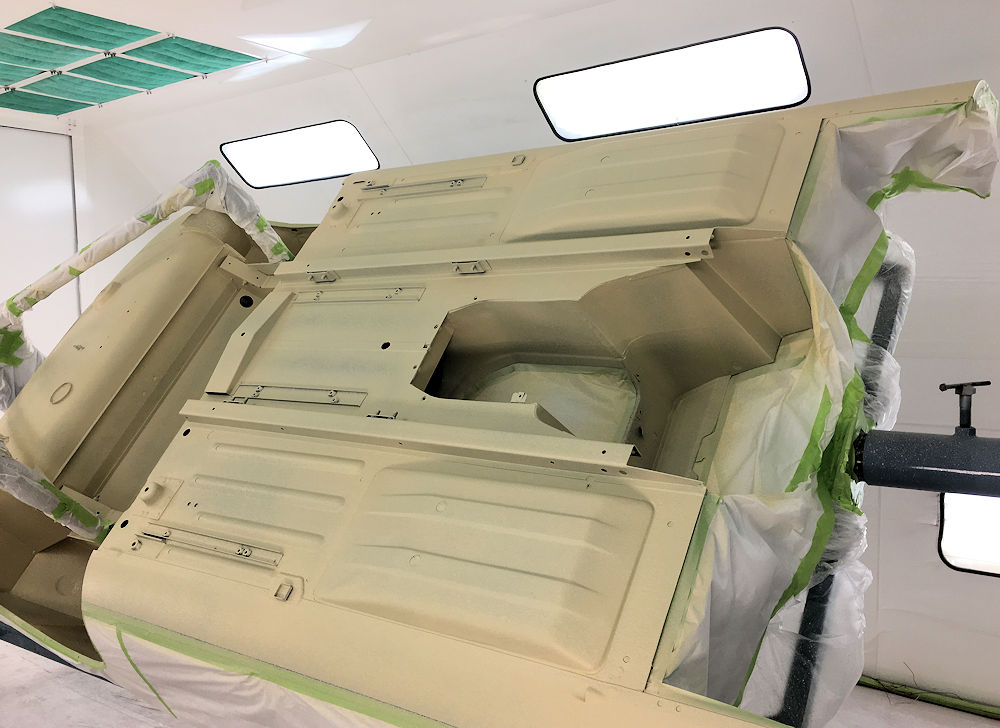
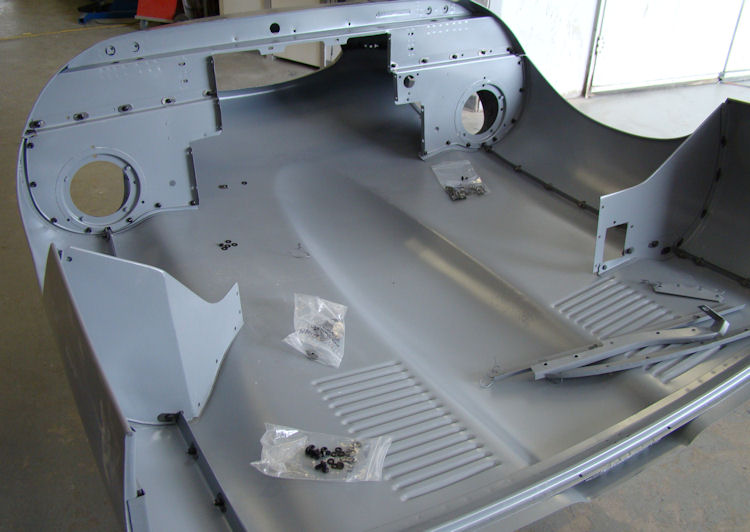
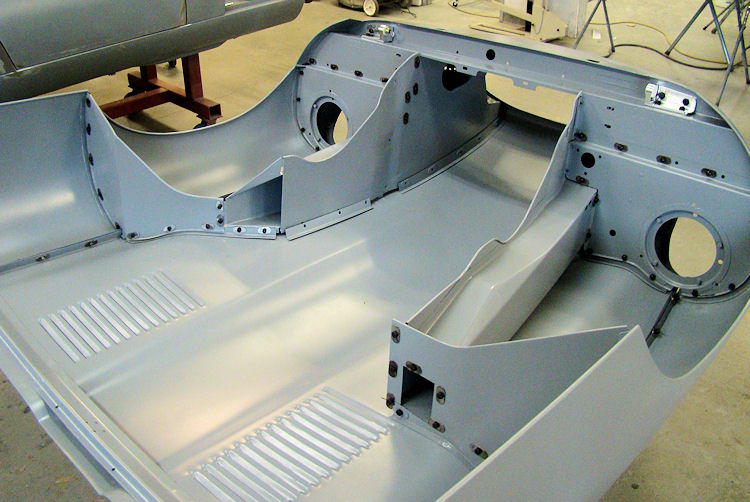
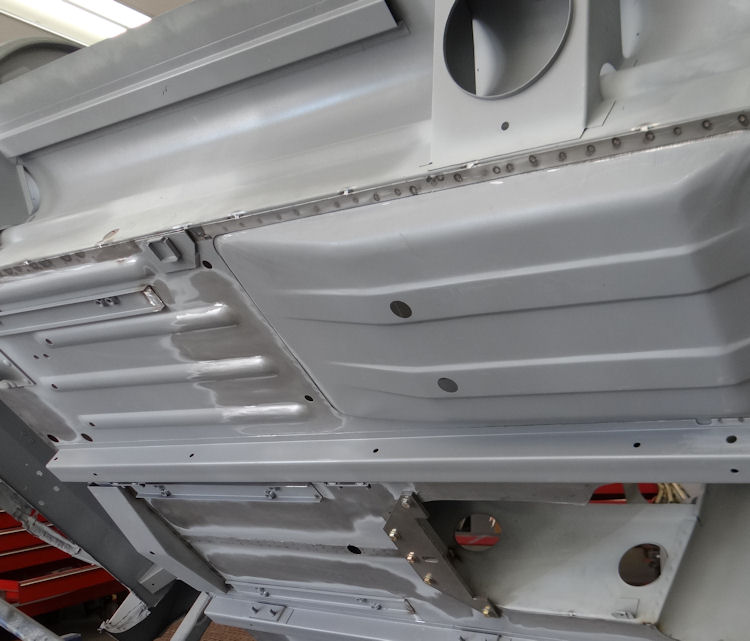
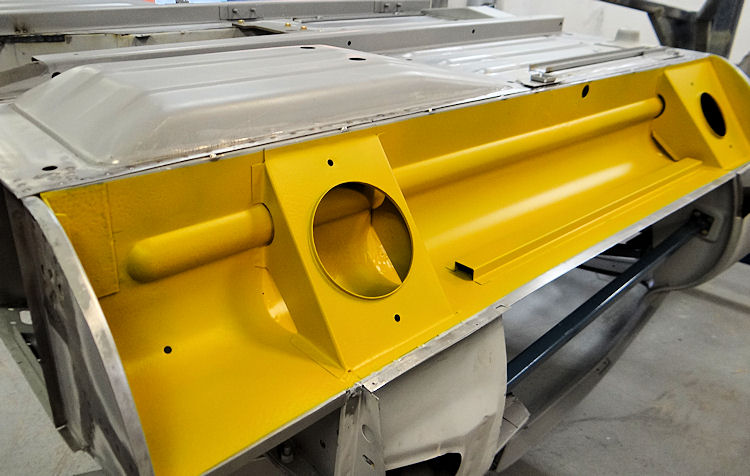
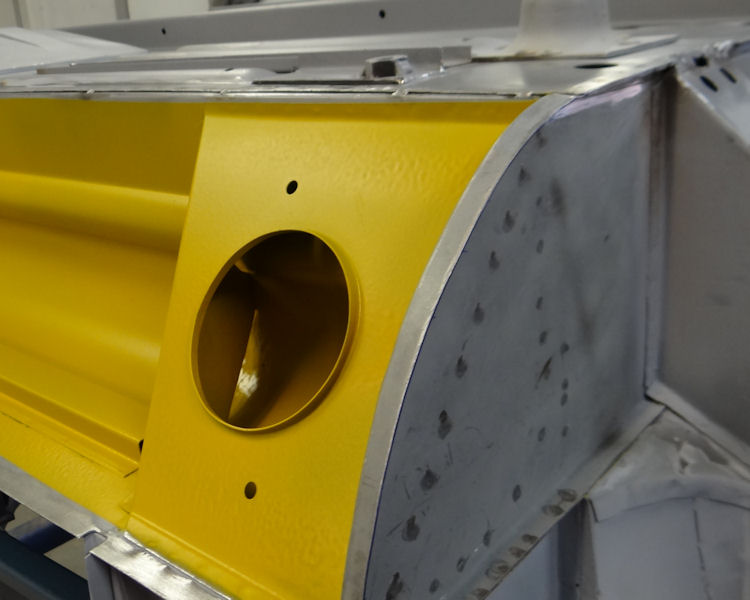
One of the most exciting stages of any restoration project is the painting process and I am delighted to report that we have begun applying the first of the Opalescent Gunmetal paint to this special E Type. Yesterday we painted the cabin and boot compartment and earlier today we rocker guarded and painted the underside of the car.
Lots more photos to follow over the next few days!
 |
 |
| Cabin and boot compartment was painted first |
|
 |
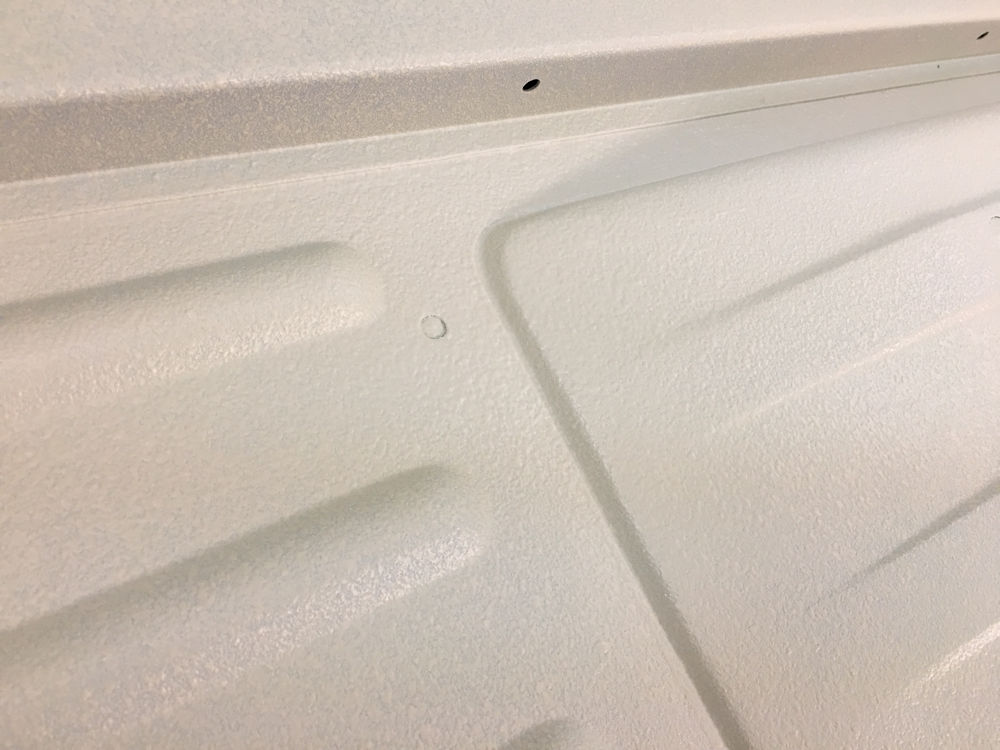 |
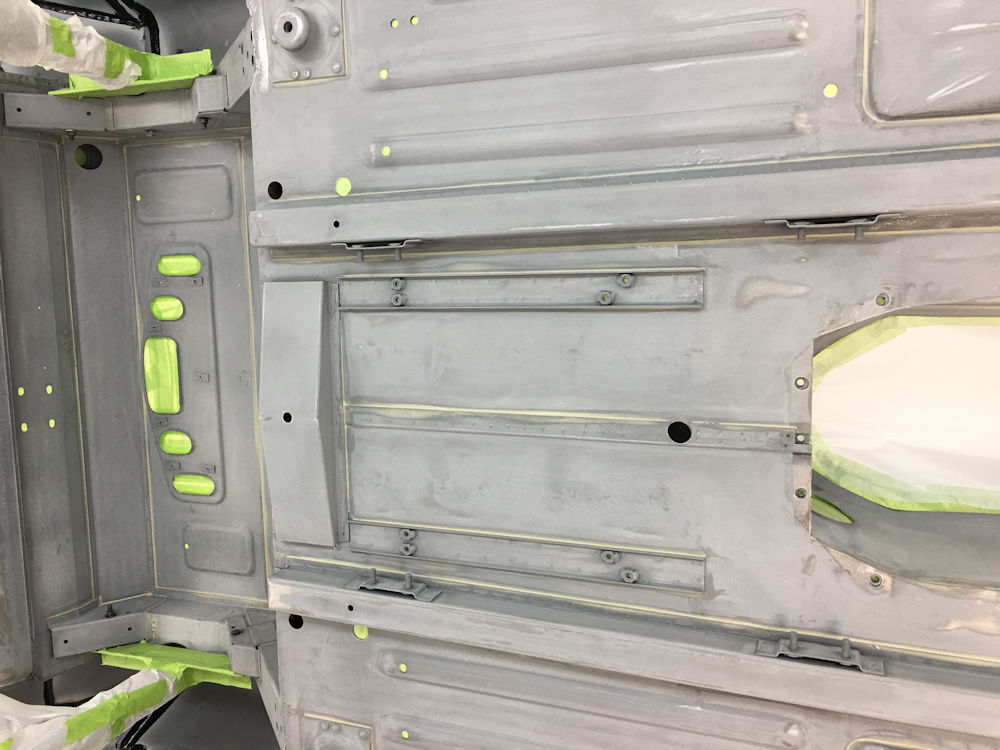
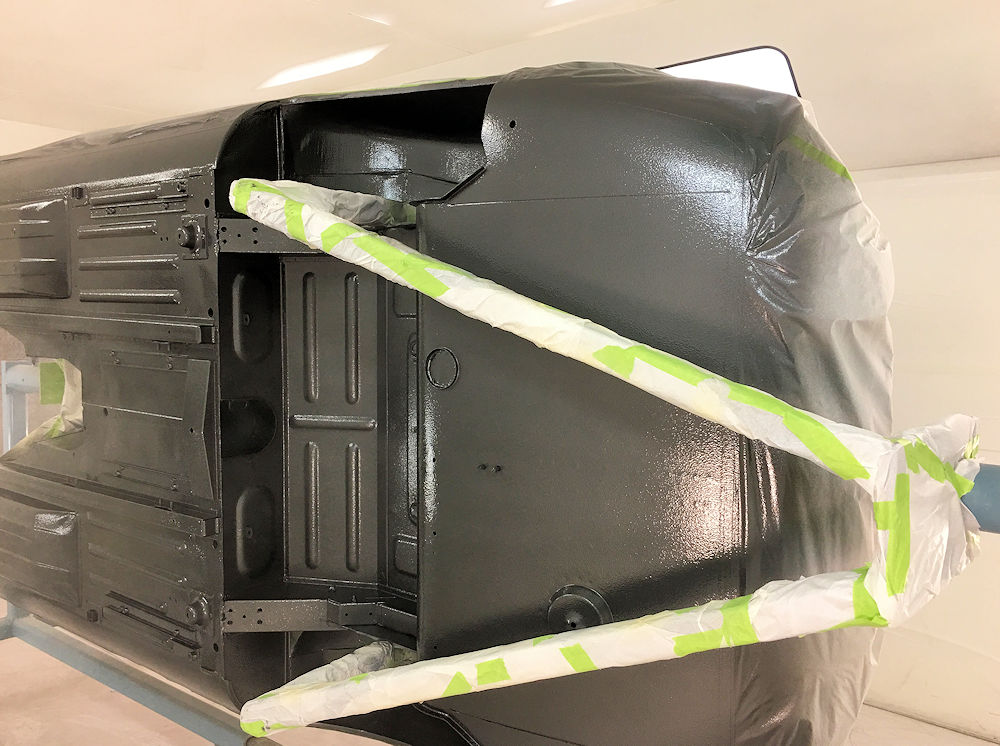
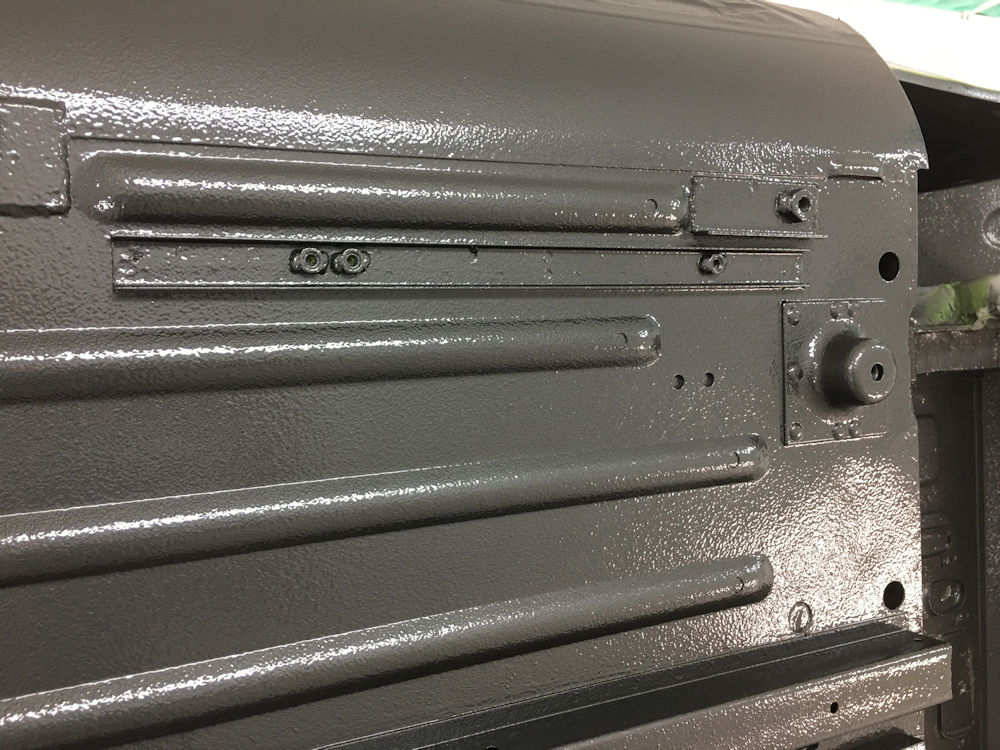
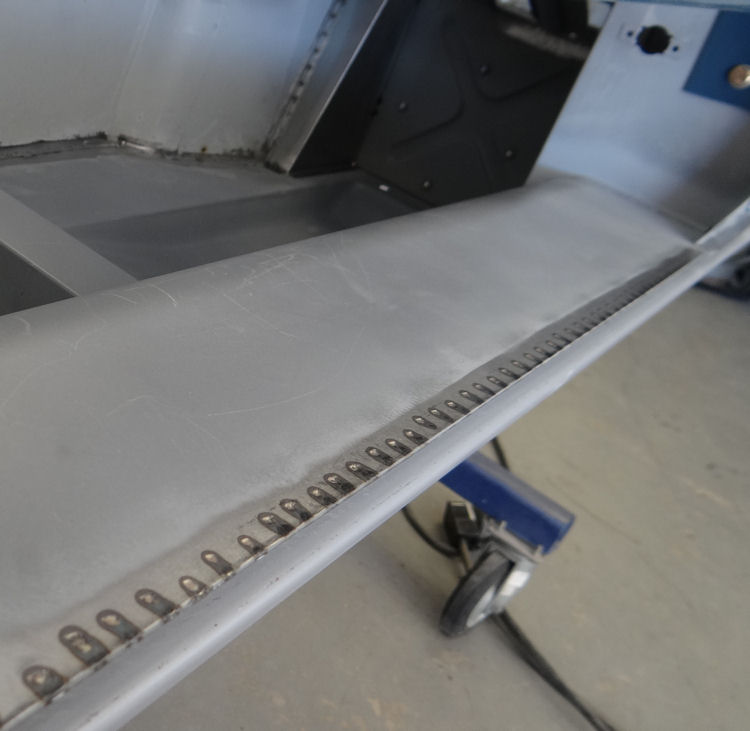
| After sealing, the underside of the floors
were rocker guarded |
A close up of the 3M rocker guard texture |
 |
 |
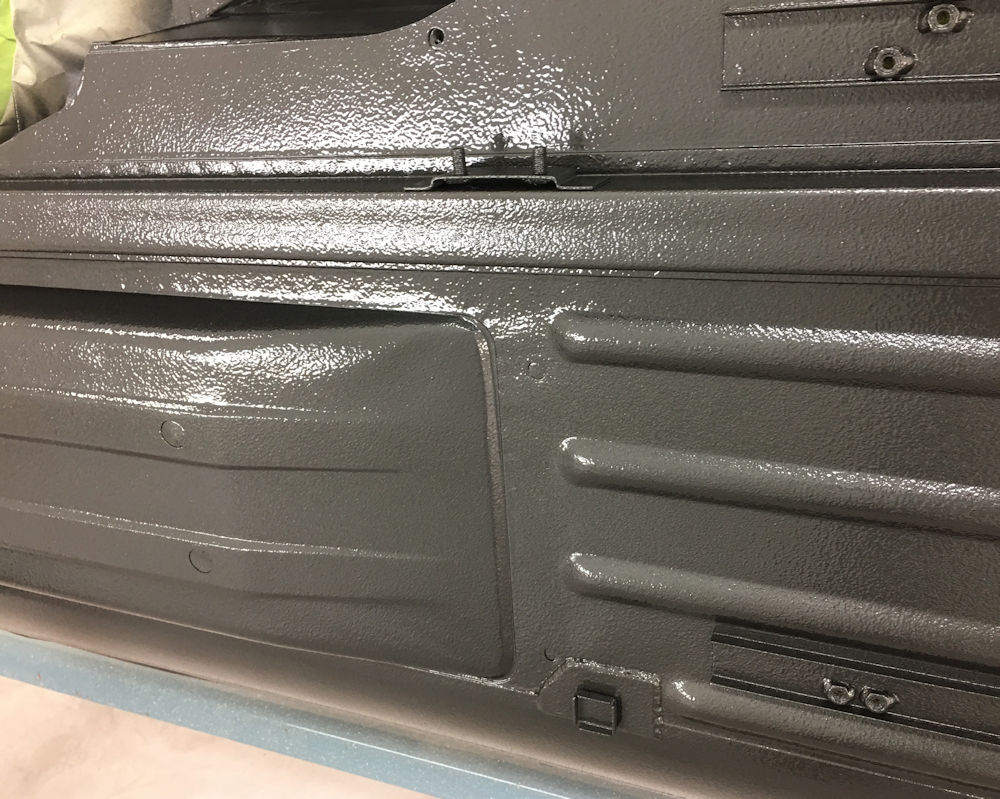
| The underside was then painted and cleared |
|
 |
 |
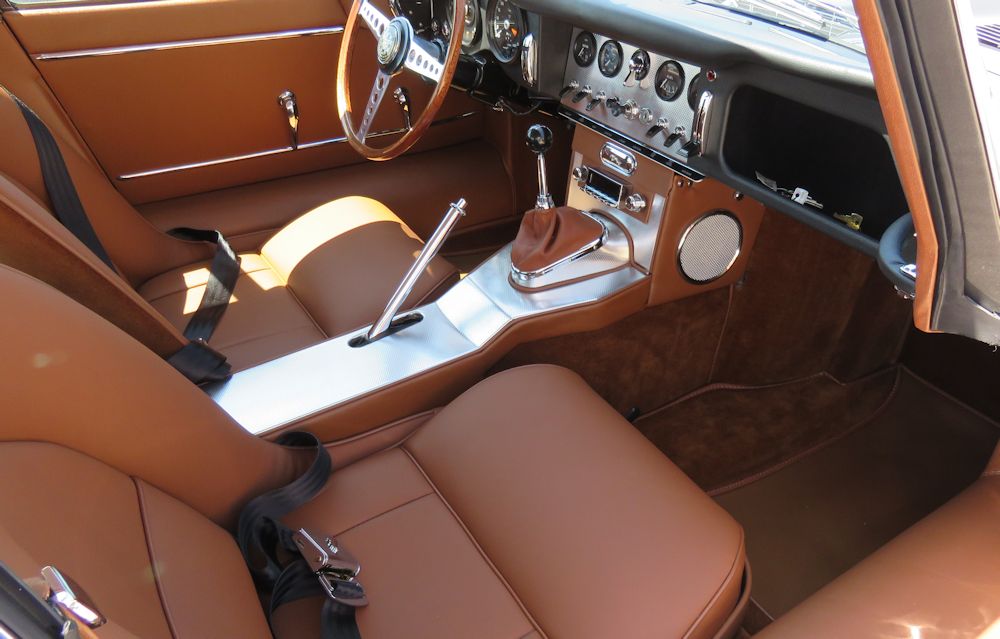
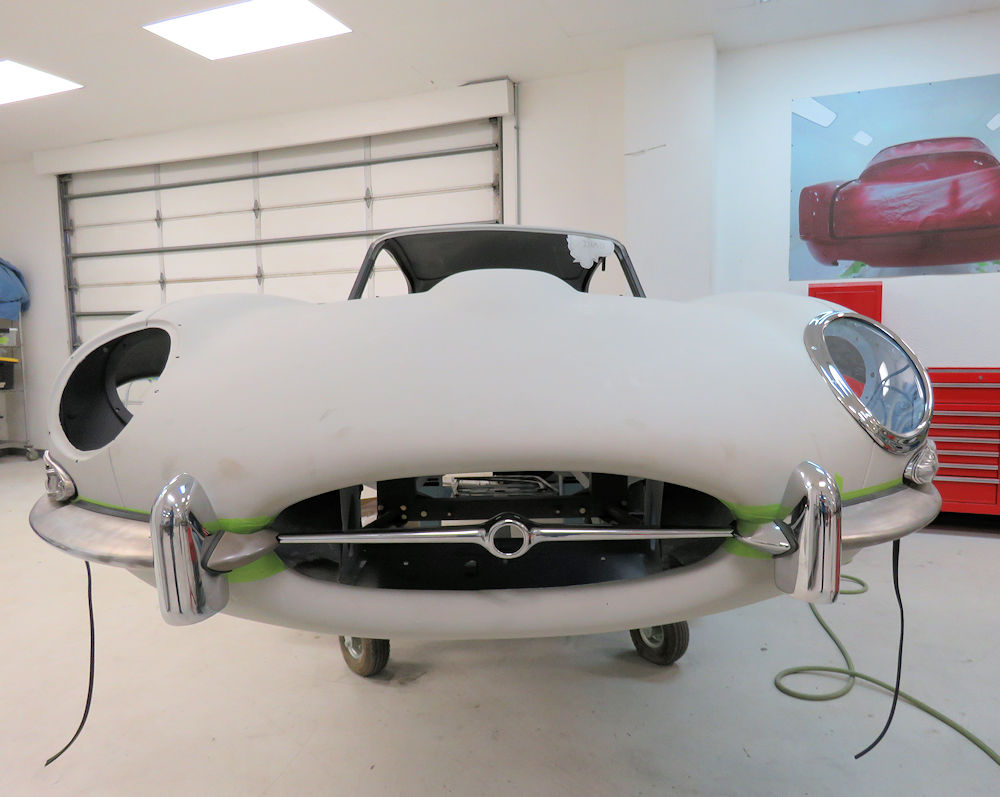
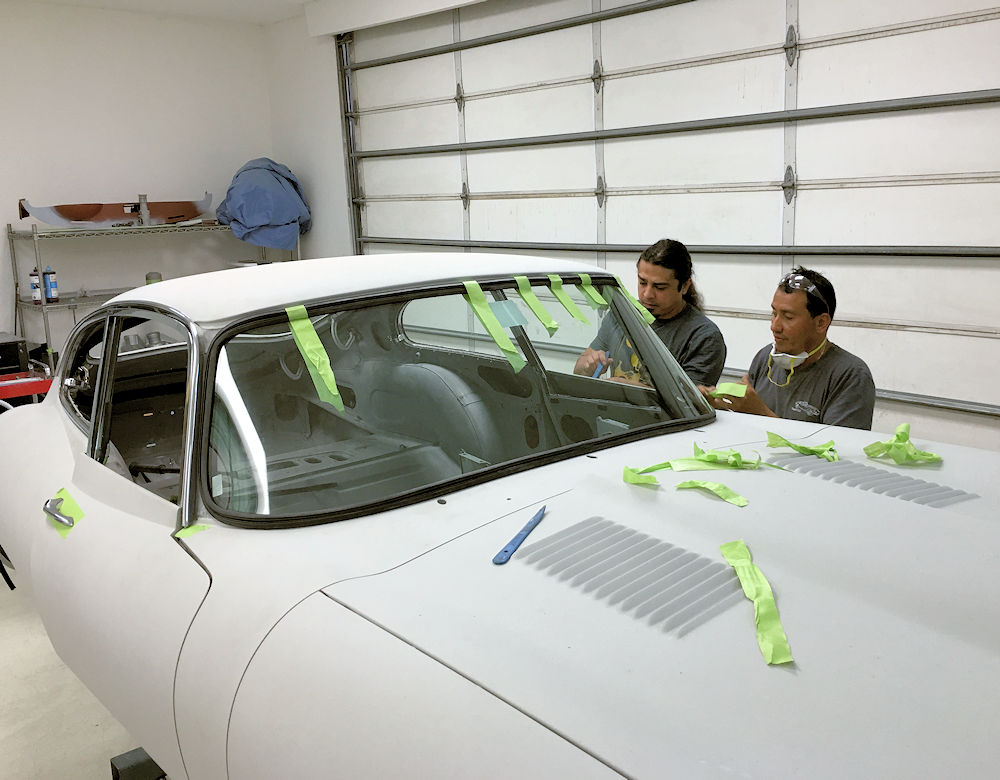
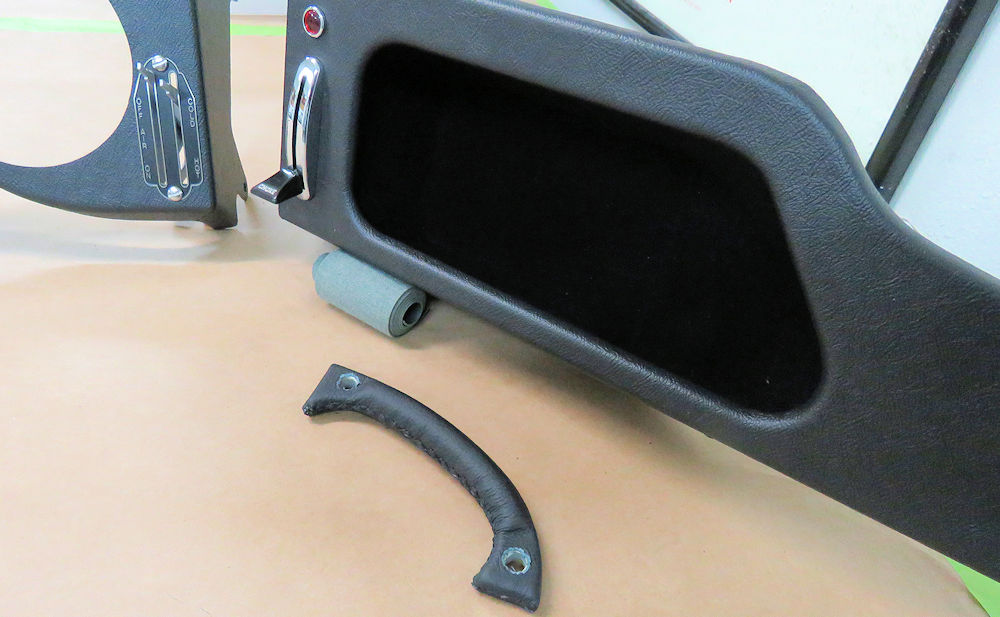
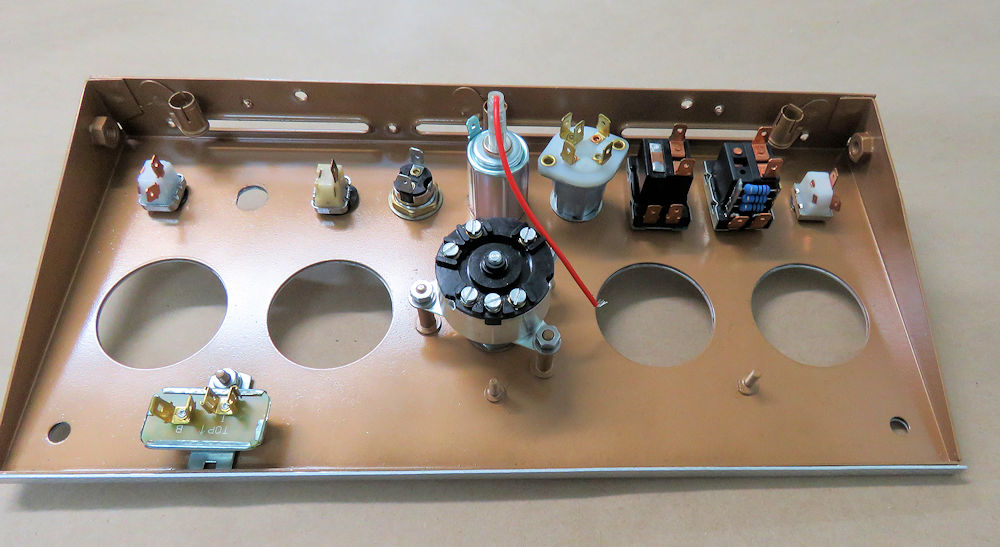
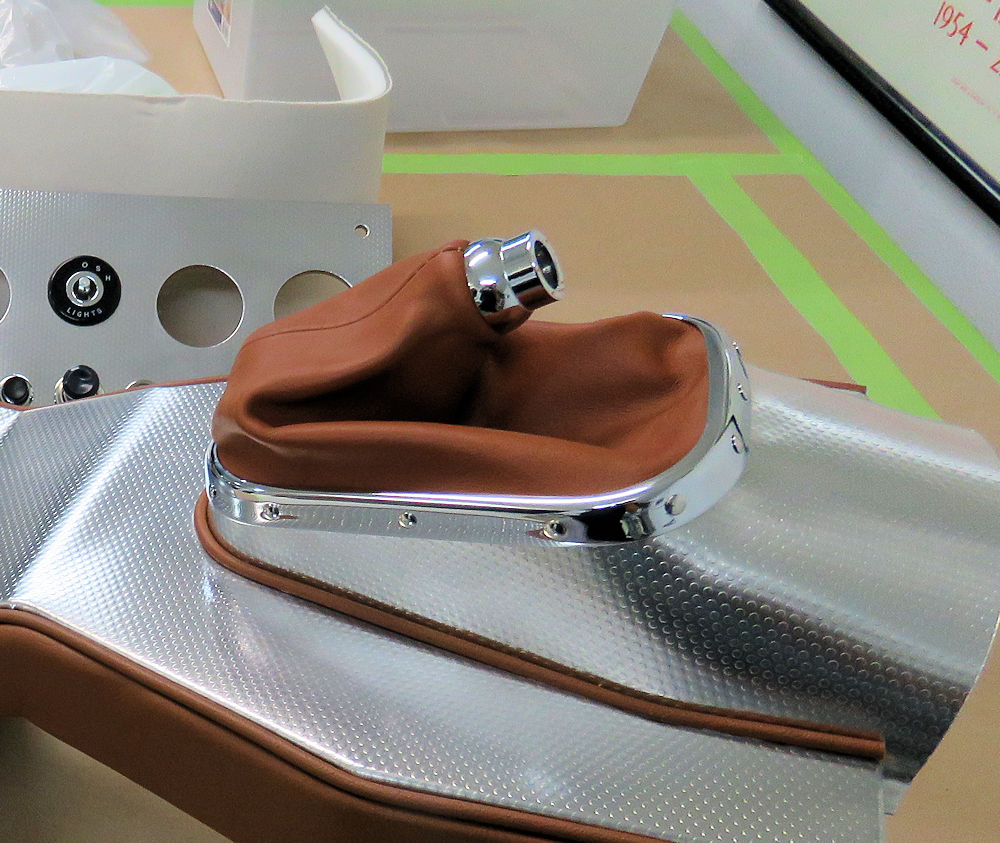
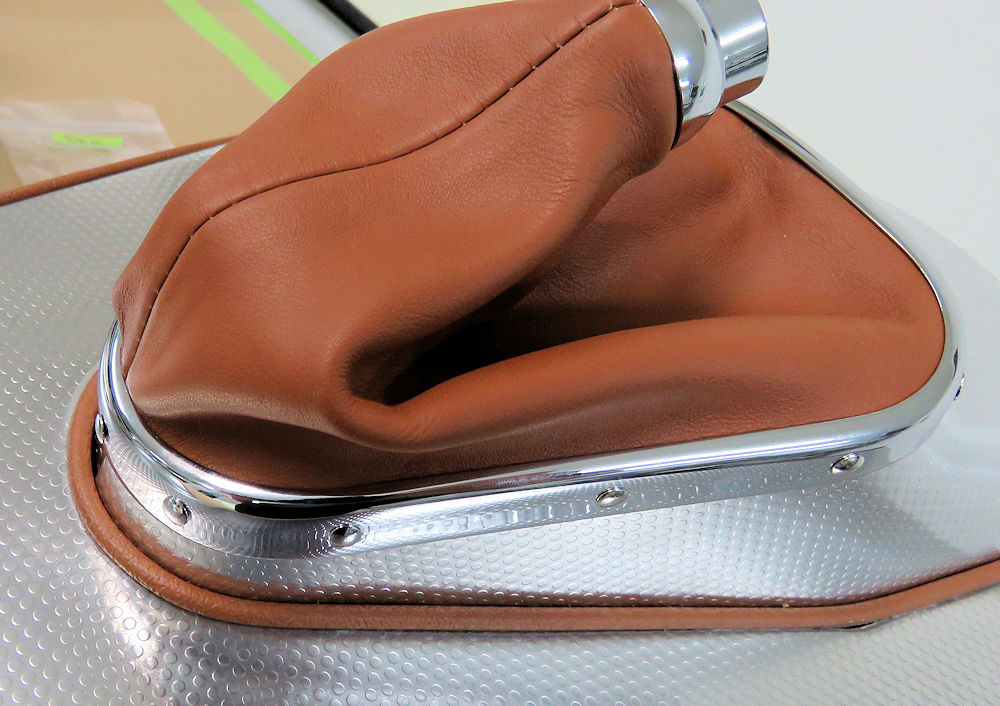
We have now completed the chrome trial fitting process and all of your brightwork has been submitted for chrome plating. In the trim room, Hector has been busy restoring and trimming the dash panels and the center console.
 |
 |
 |
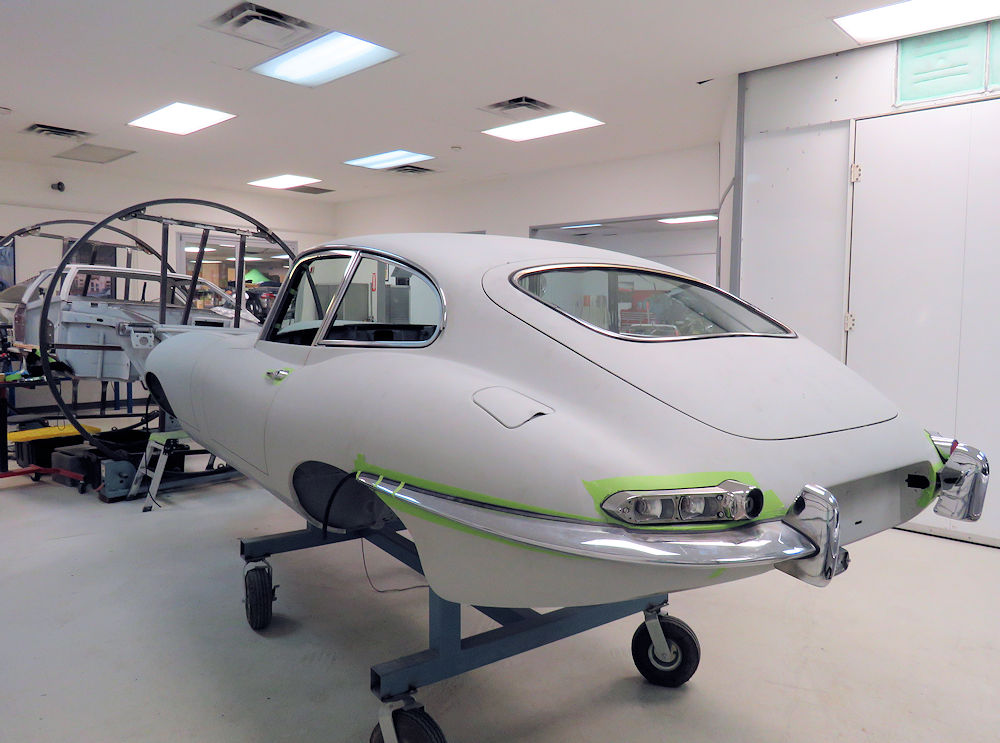 |
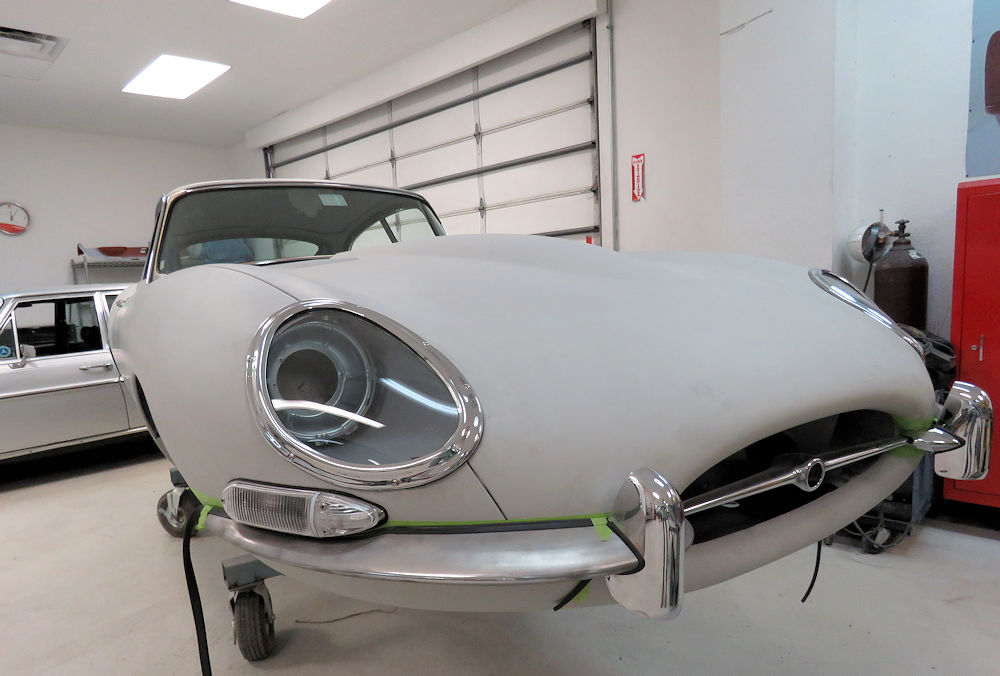
| All chrome and glass has now been trial fitted |
|
 |
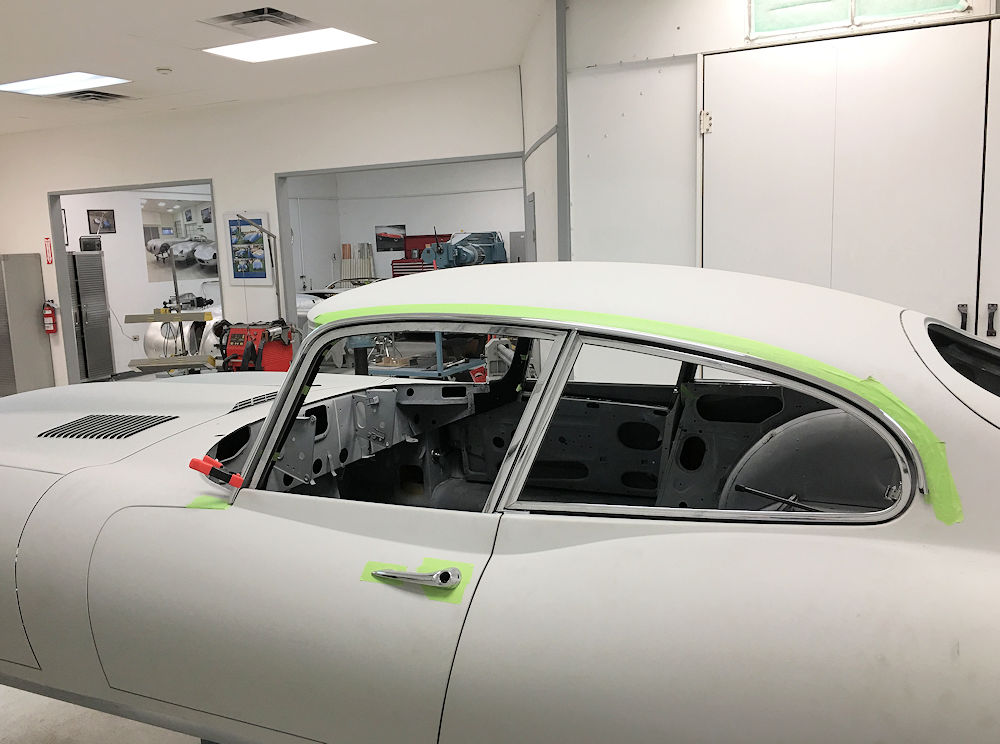 |
| Trial fitting the new Triplex windscreen |
|
 |
 |
| Seats have been stripped and powder coated |
|
 |
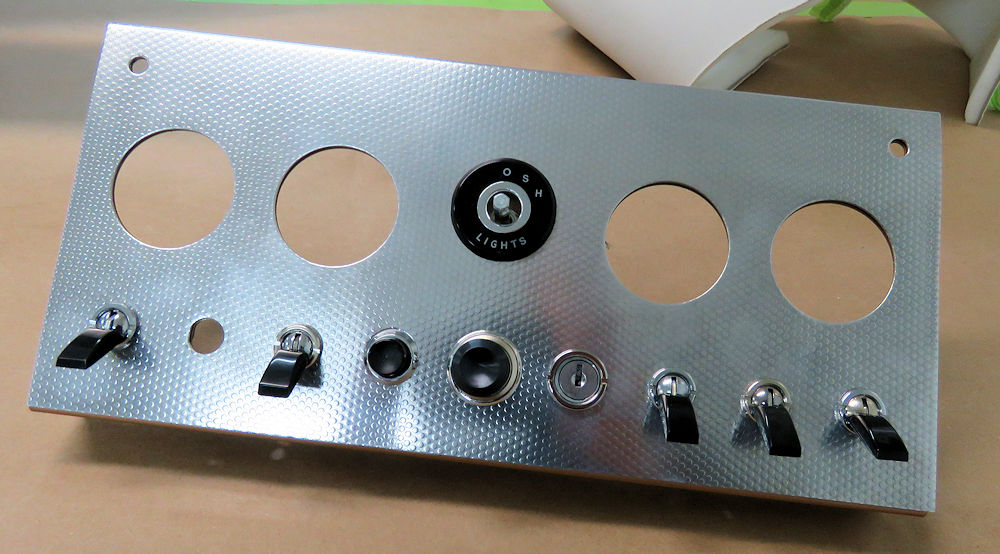 |
| Dash panels have been restored and trimmed |
|
 |
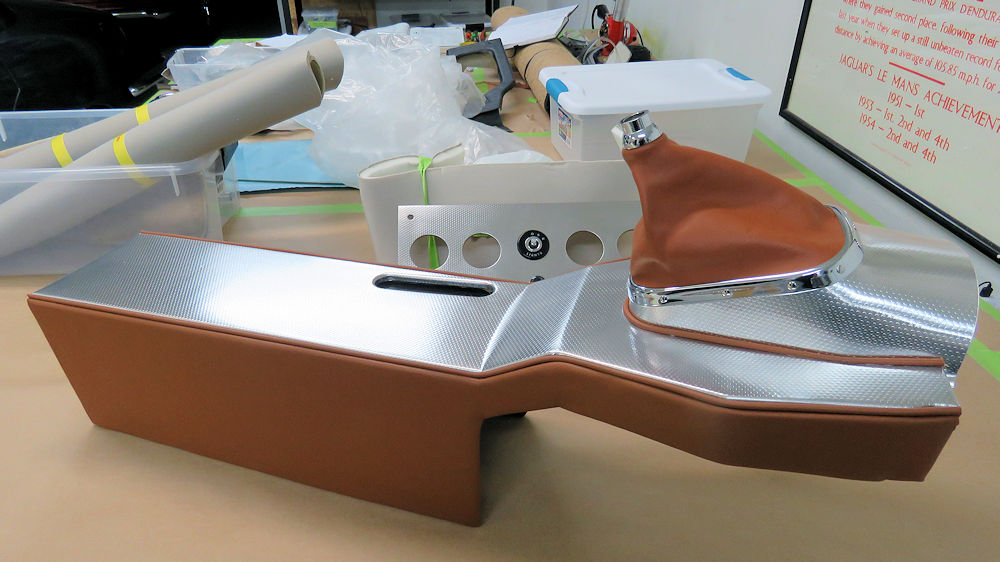 |
| Center console has been restored and trimmed |
|
 |
 |
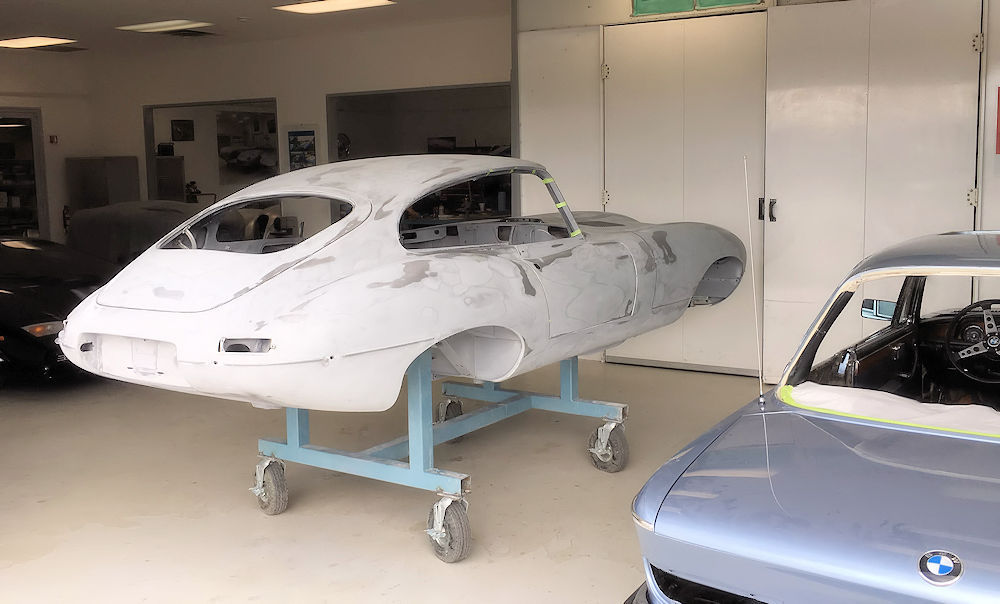
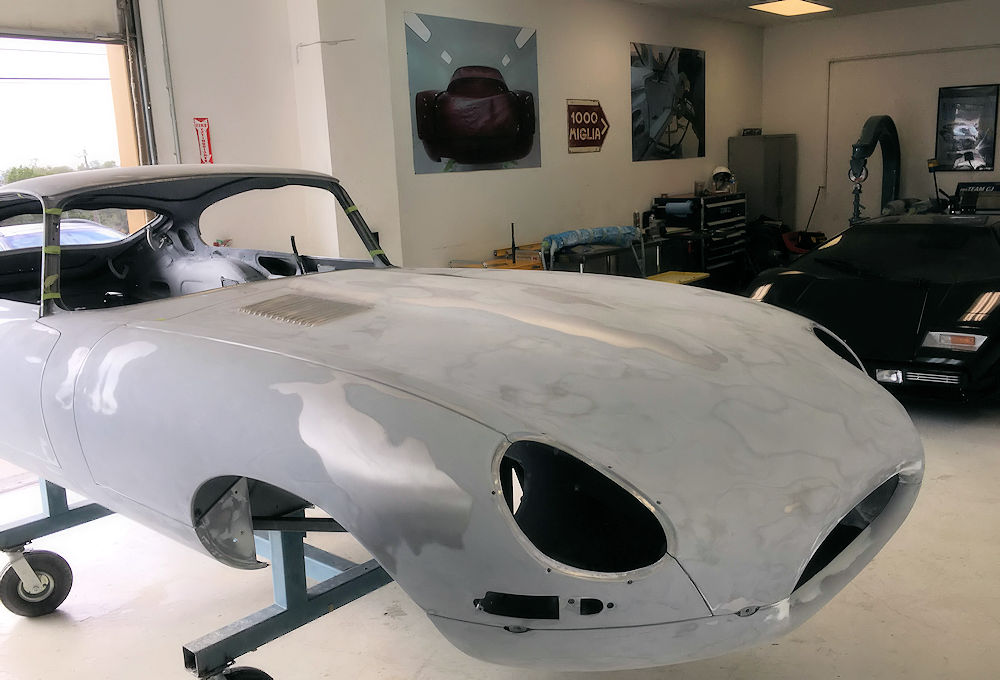
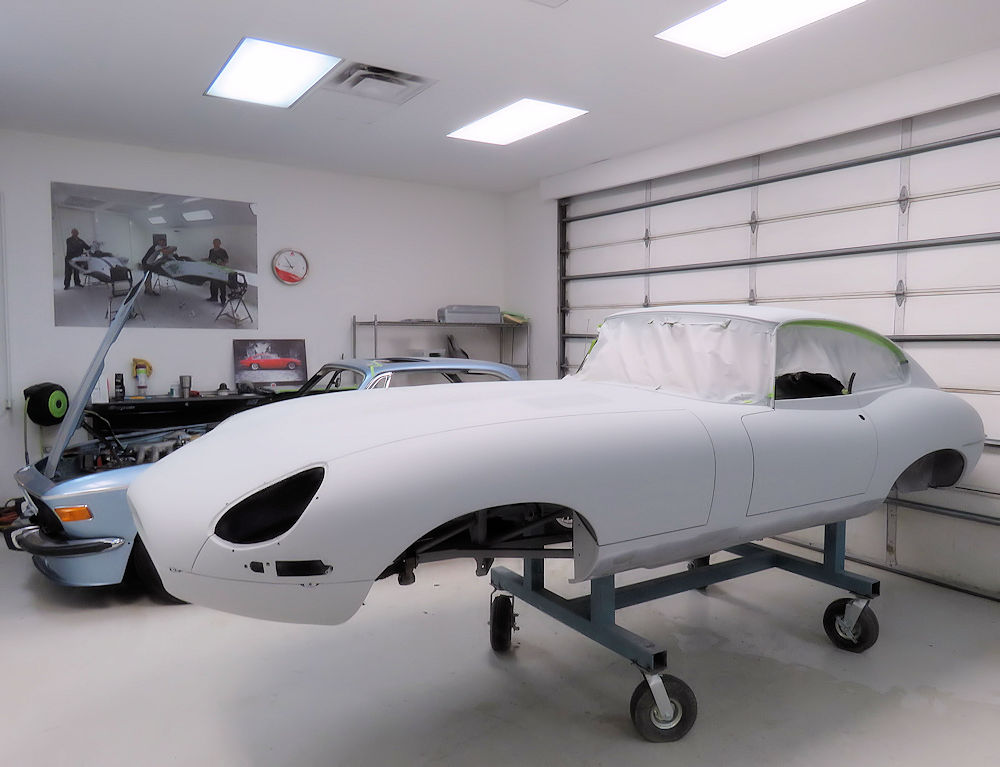
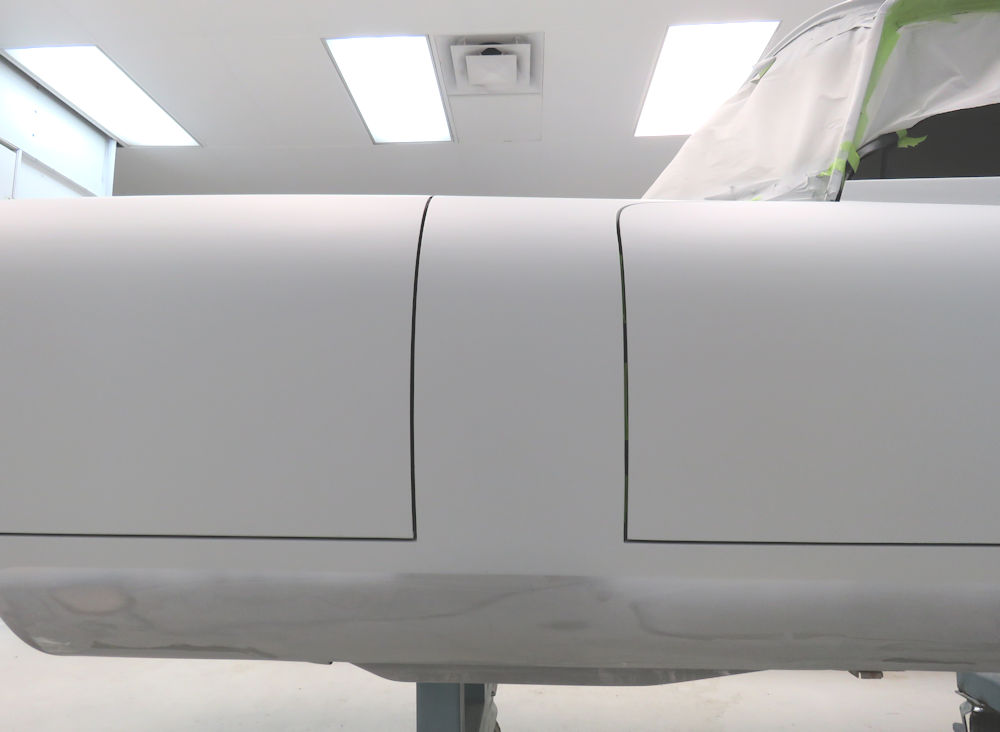
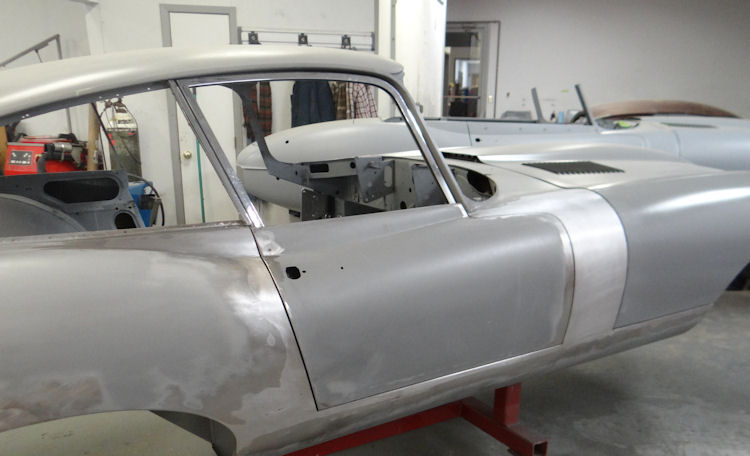
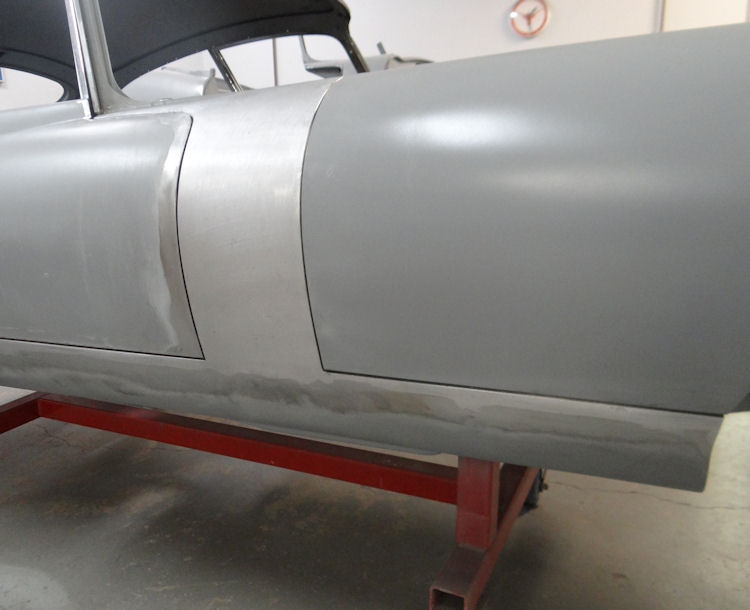
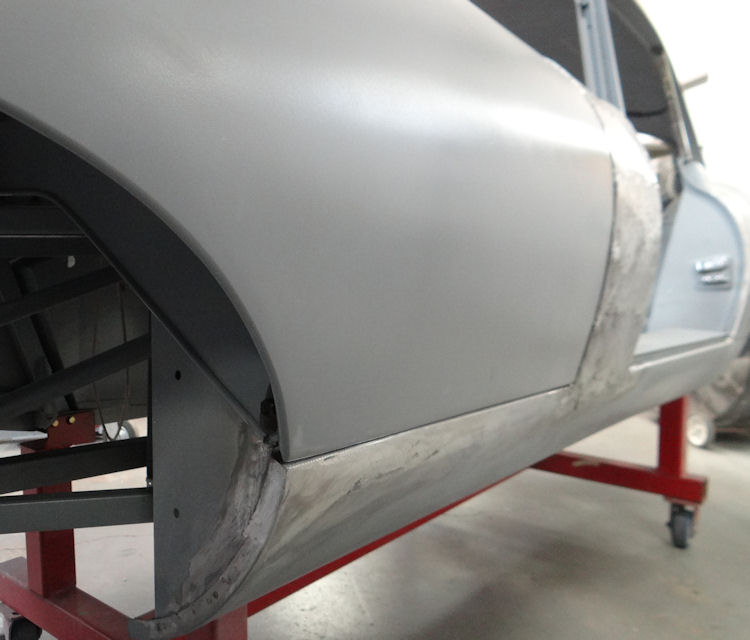
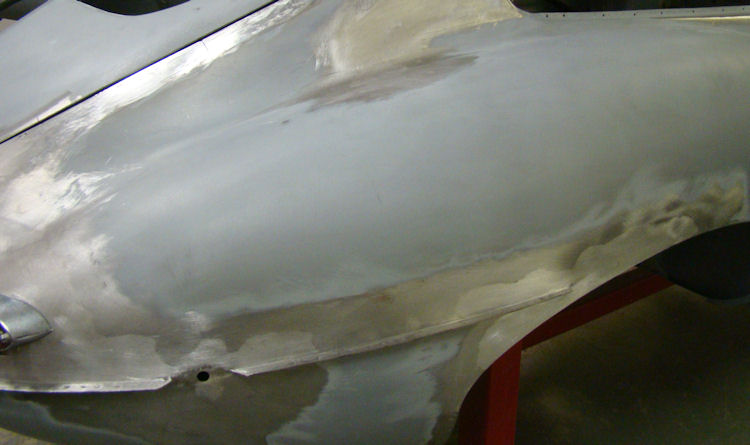
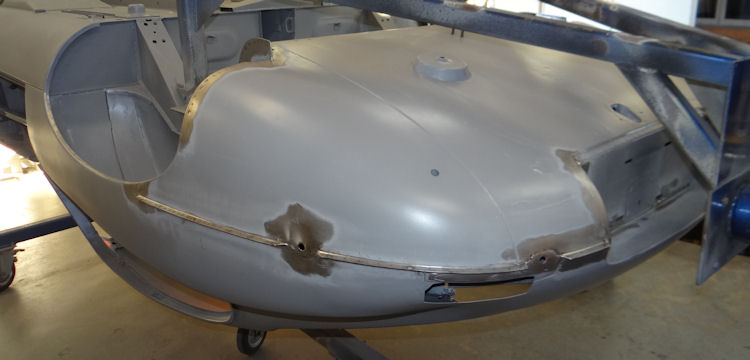
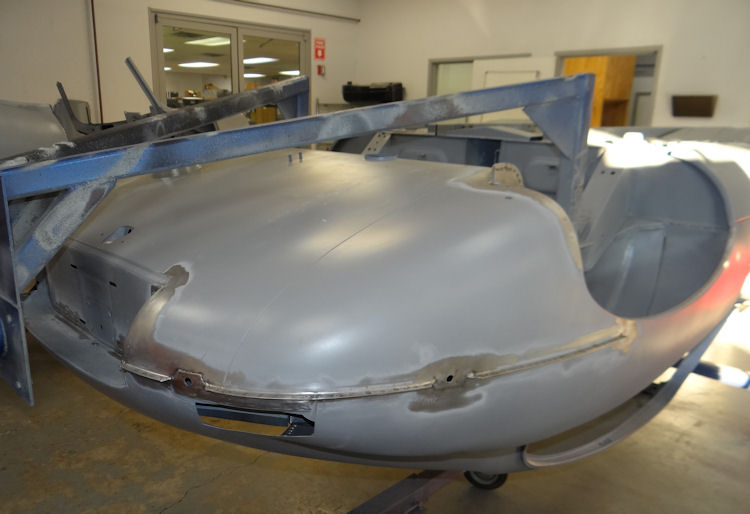
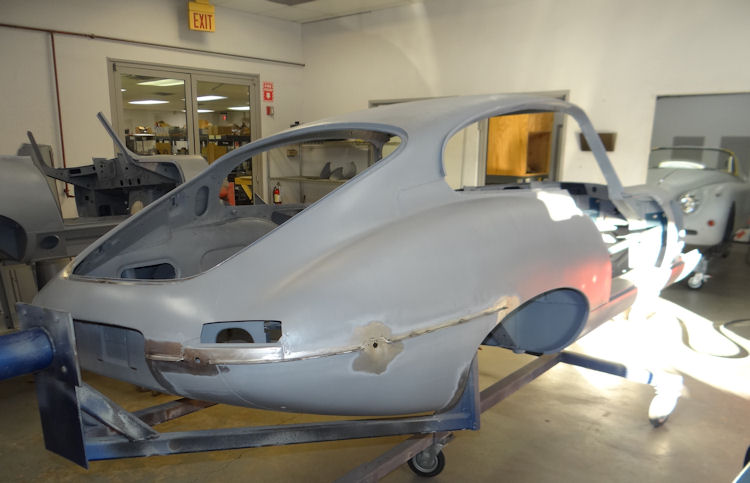
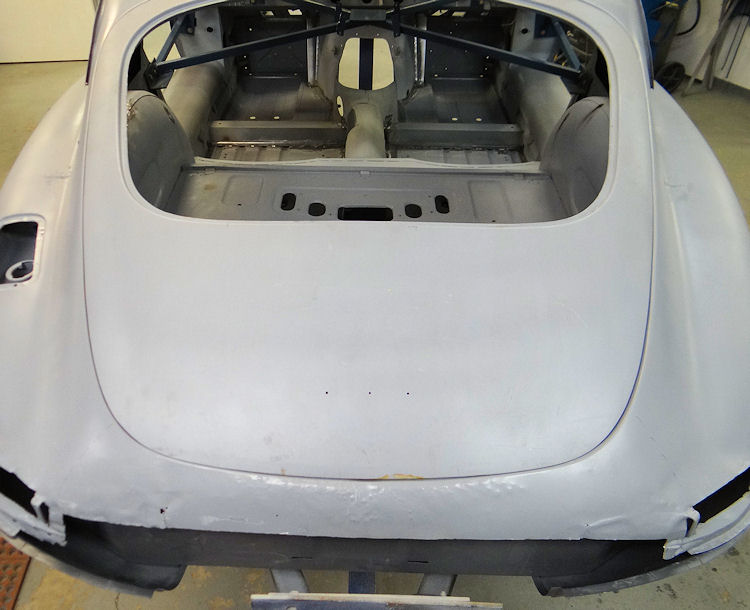
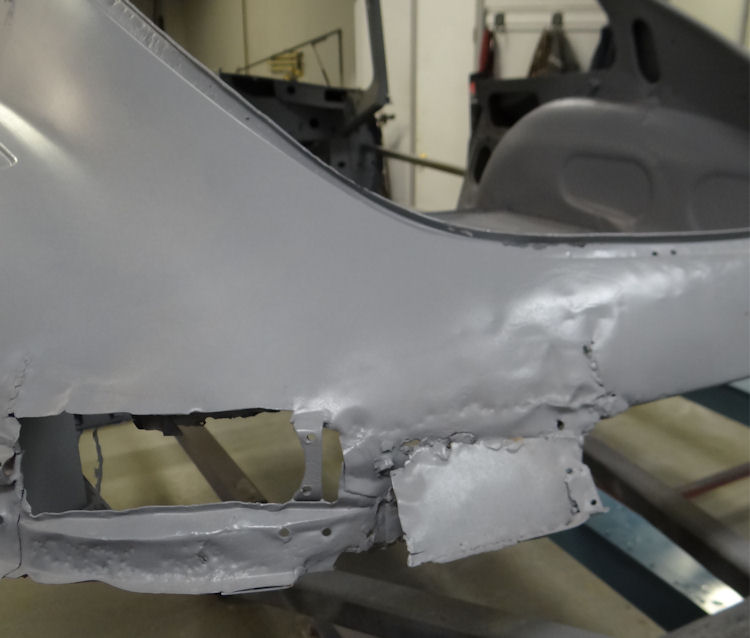
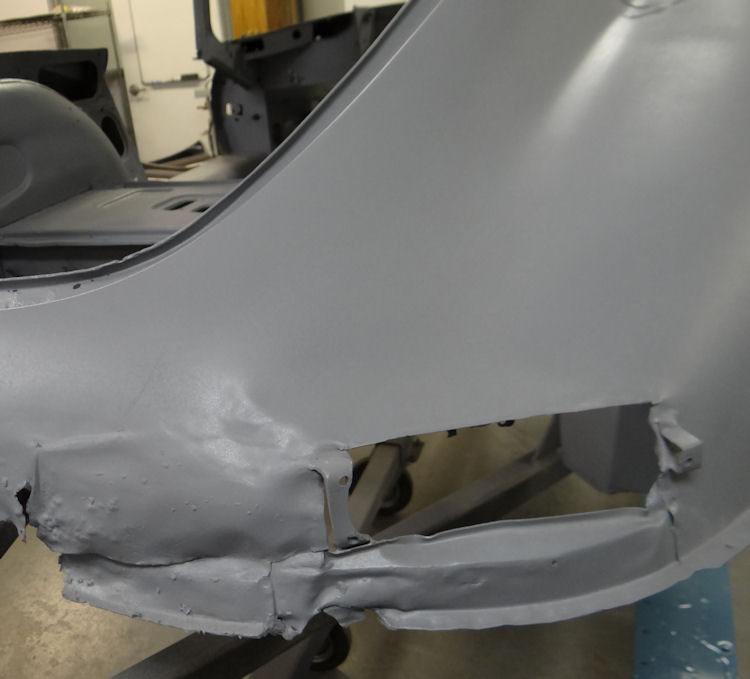
We have now completed all of the bodywork and applied three coats of Superbuild Polyester primer.
 |
 |
| Lead and filler work has been completed |
|
 |
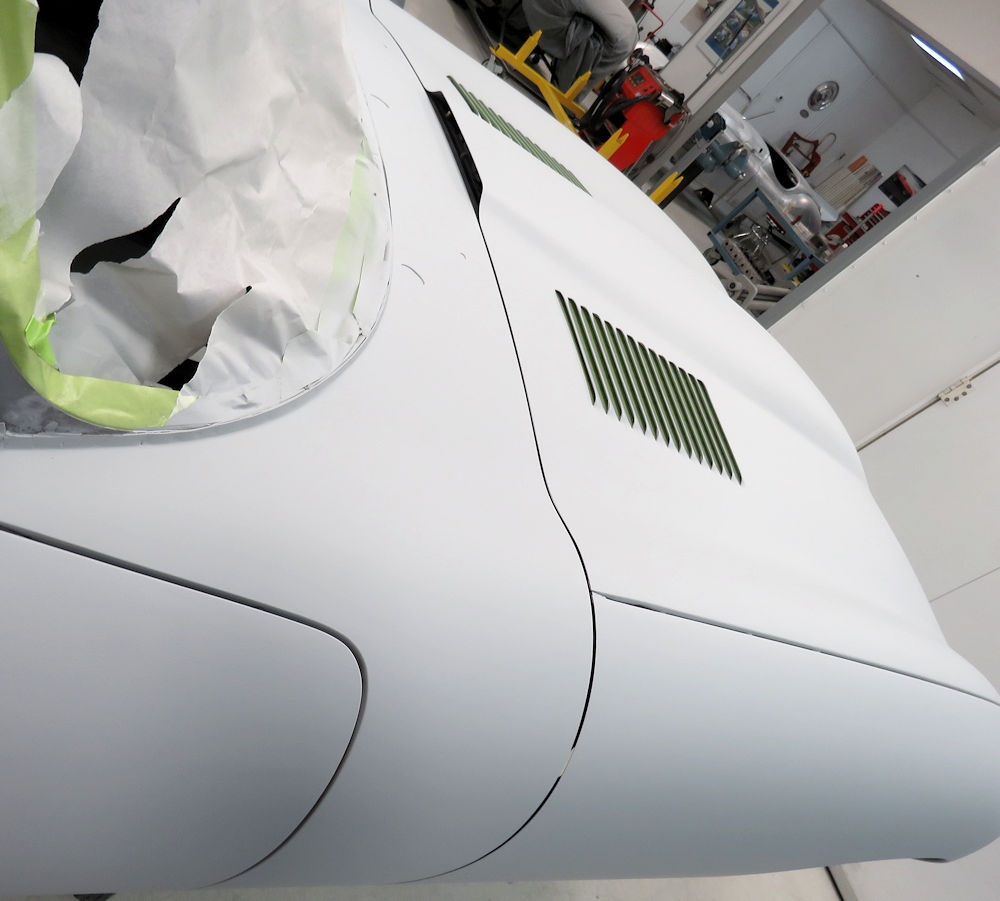 |
| Superbuild Polyester primer has been applied |
|
 |
 |
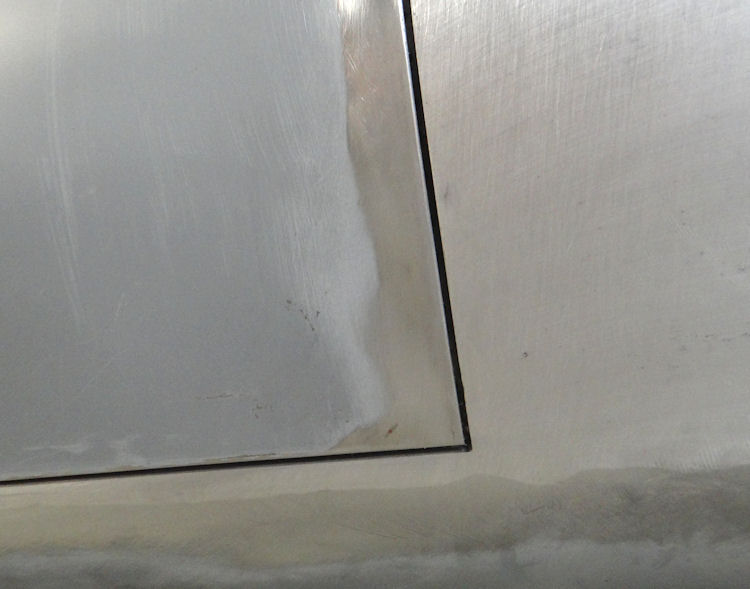
| Panel fit exemplary throughout |
Another Stage One engine rebuild wrapped up in the CJ machine shop...
 |
 |
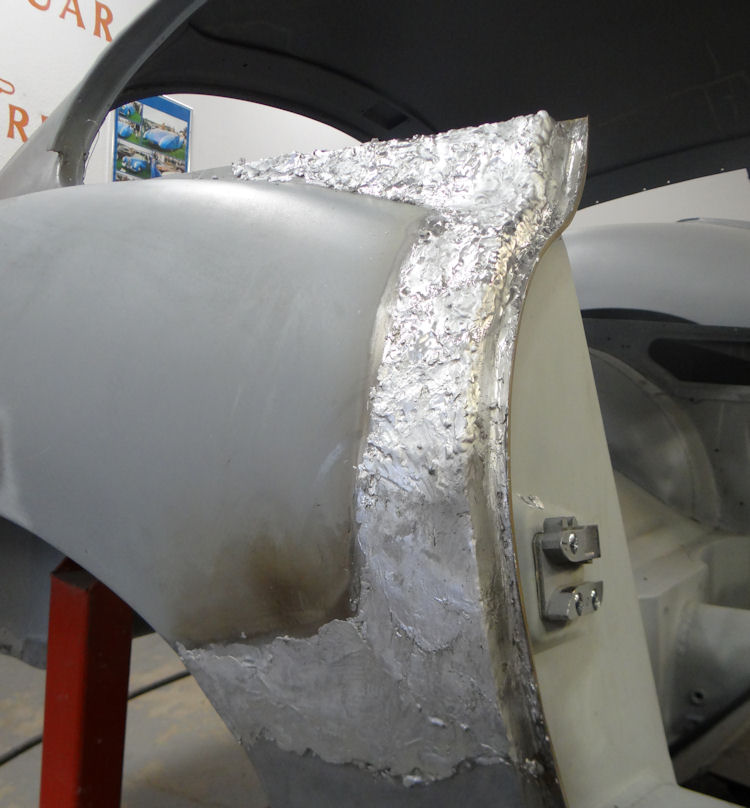
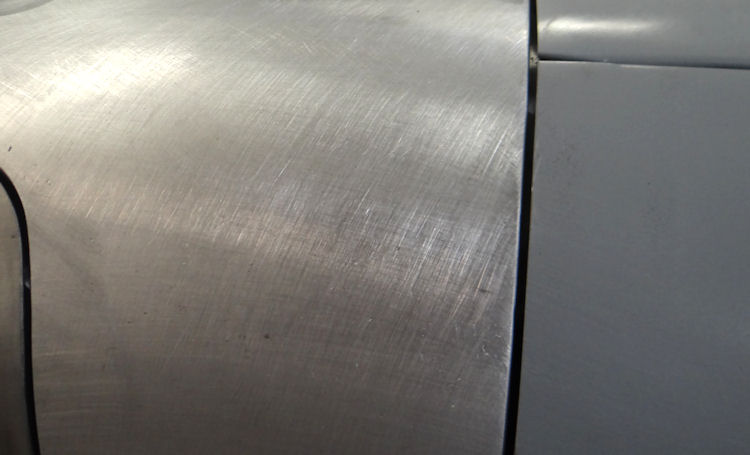
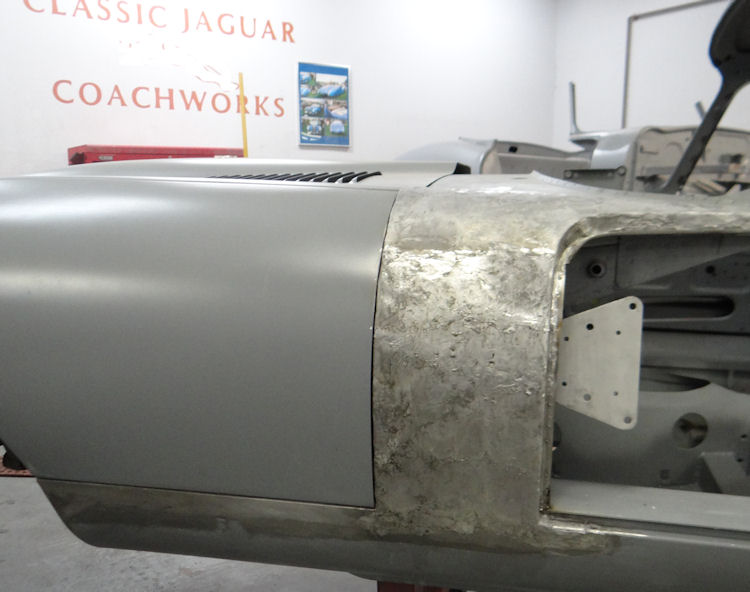
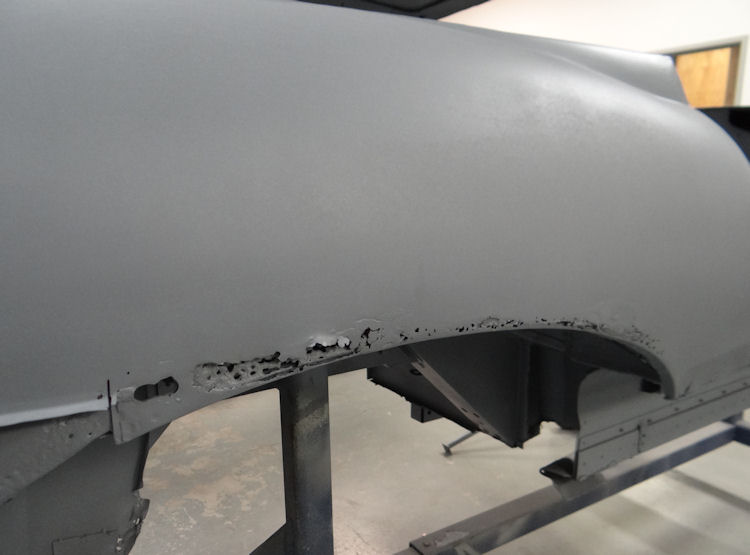
We have now completed the lead loading process along the right side of the car and turned our attention to the left....
 |
 |
|
|
|
|
|
|
 |
 |
|
|
|
|
|
|
 |
 |
|
|
|
|
|
|
 |
 |
|
|
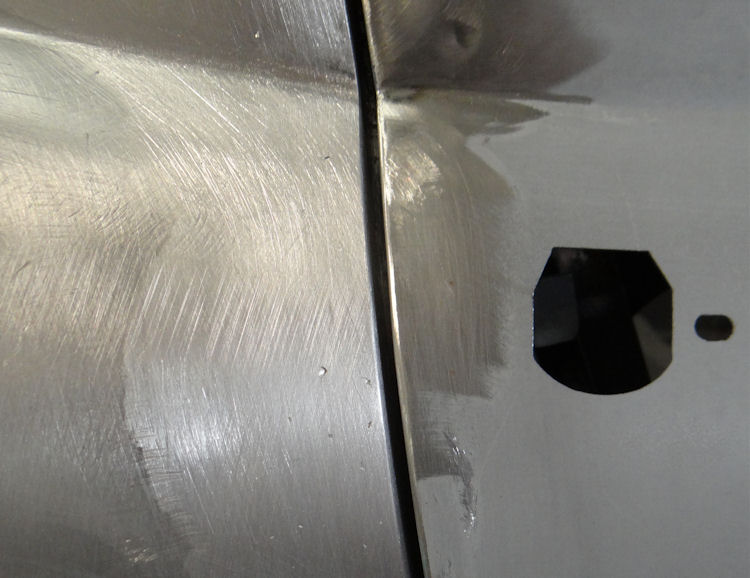
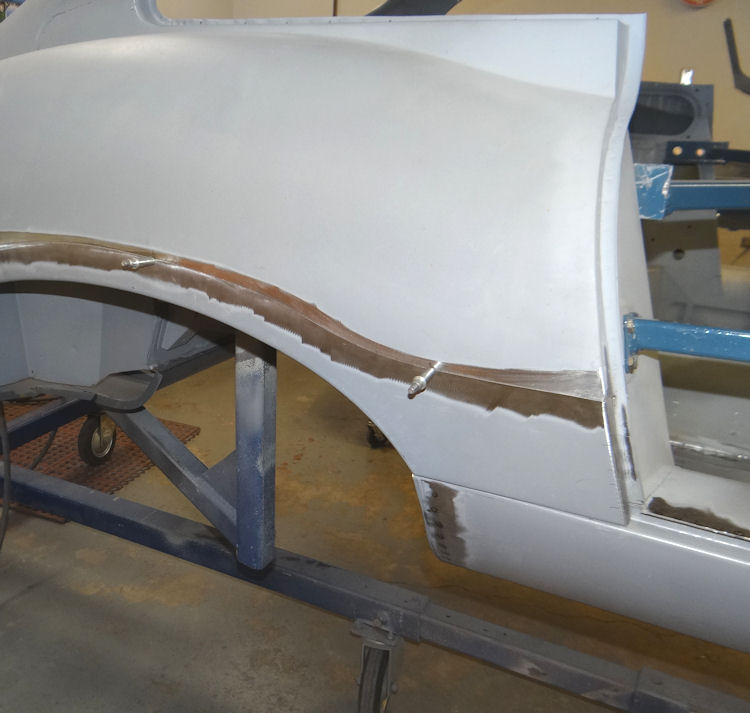
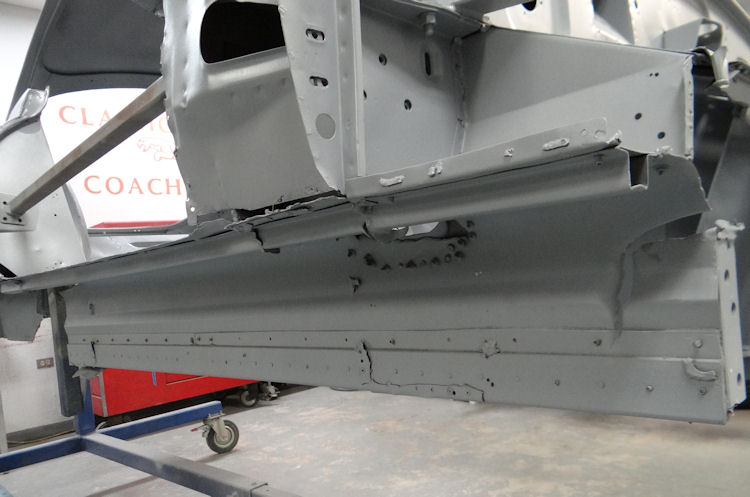
Fitting the new bonnet, lead loading continued...
 |
 |
|
|
|
|
|
|
 |
 |
|
|
|
|
|
|
 |
 |
|
|
sill and the front wings |
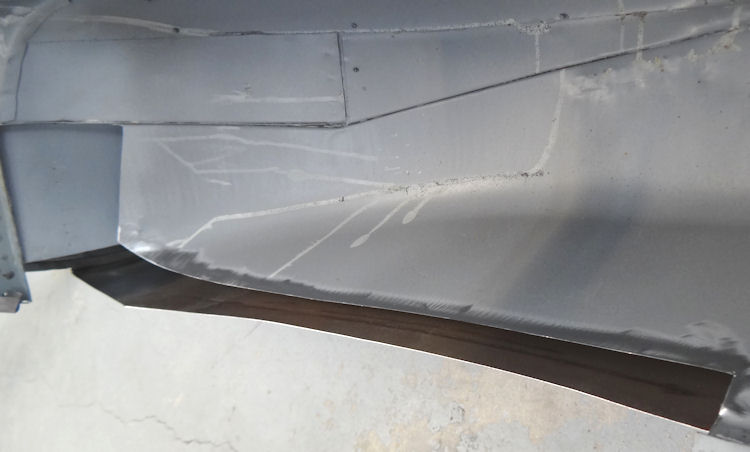
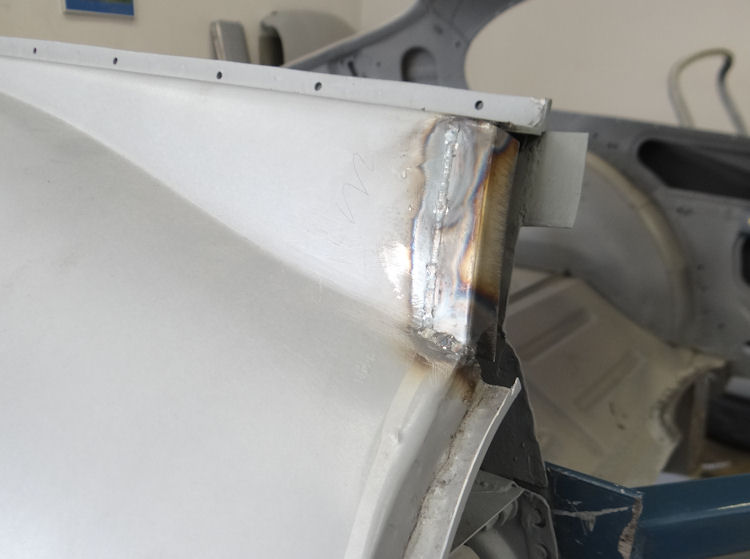
Installing the new bonnet, lead loading around the rear hatch and lamp area...
 |
 |
|
|
|
|
|
|
 |
 |
|
|
|
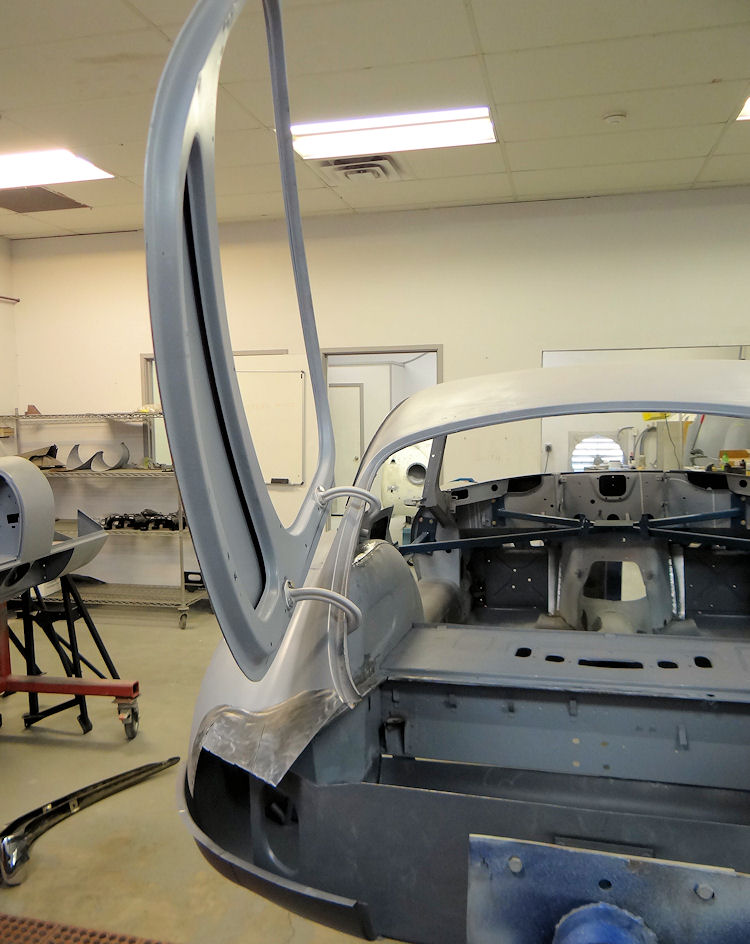
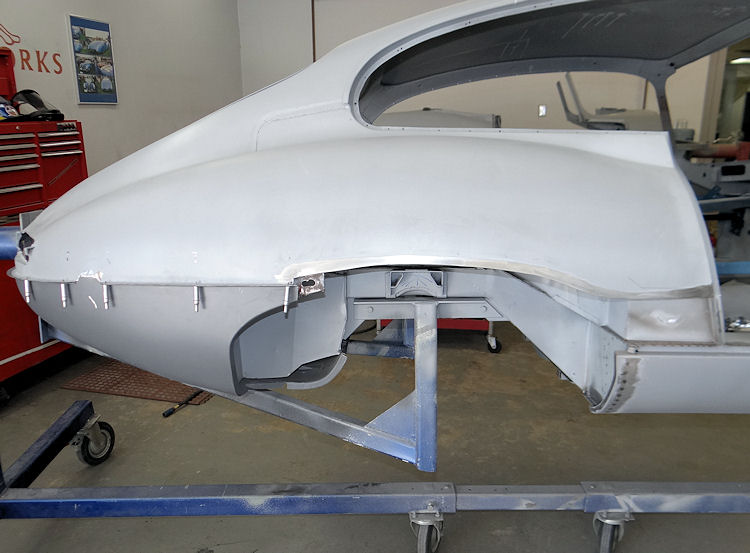
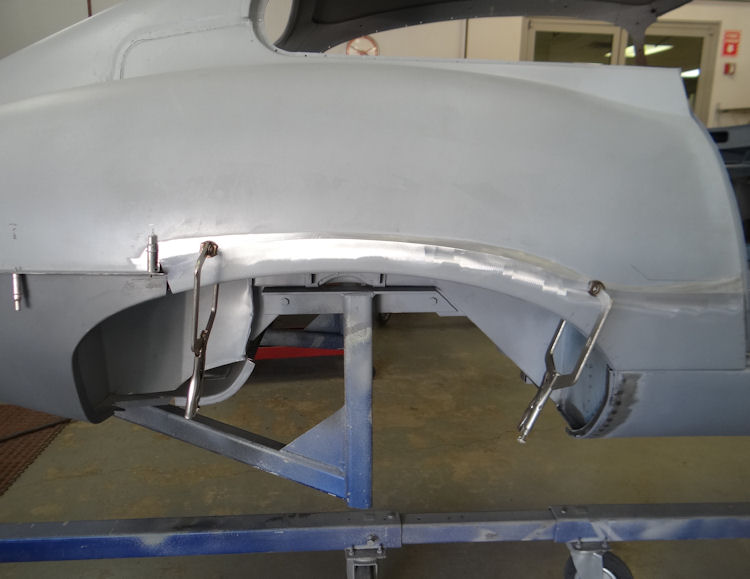
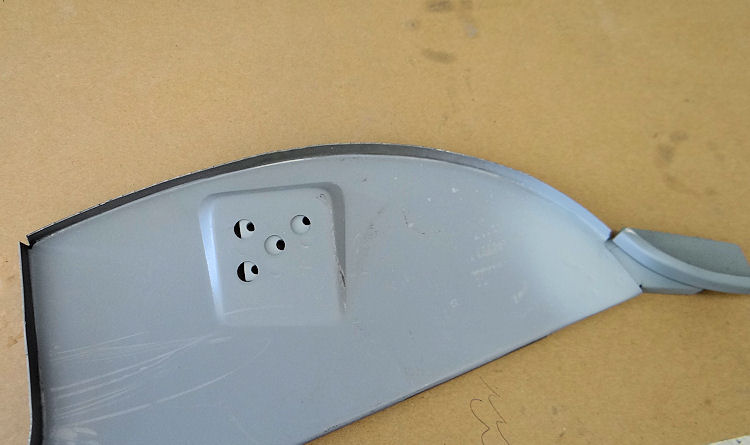
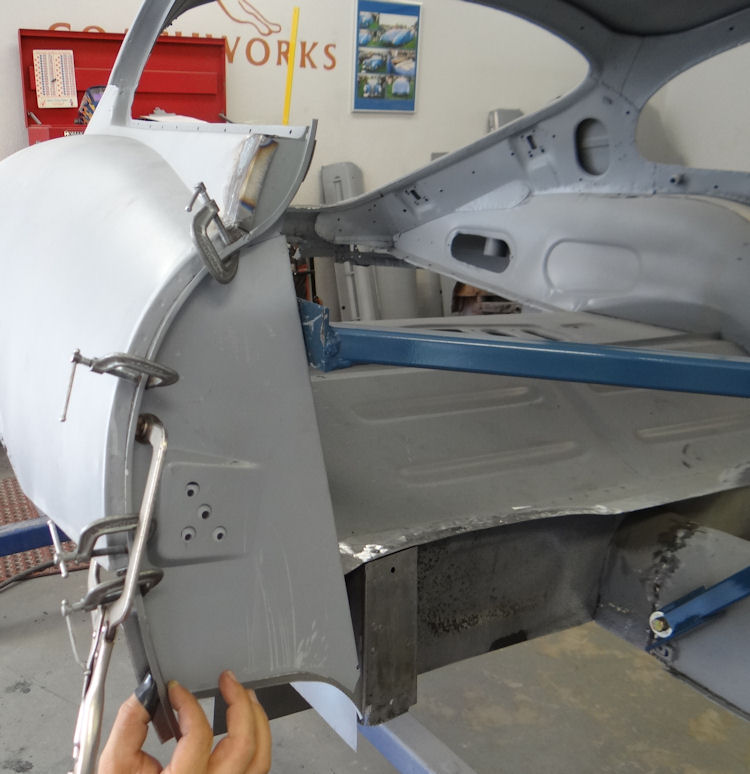
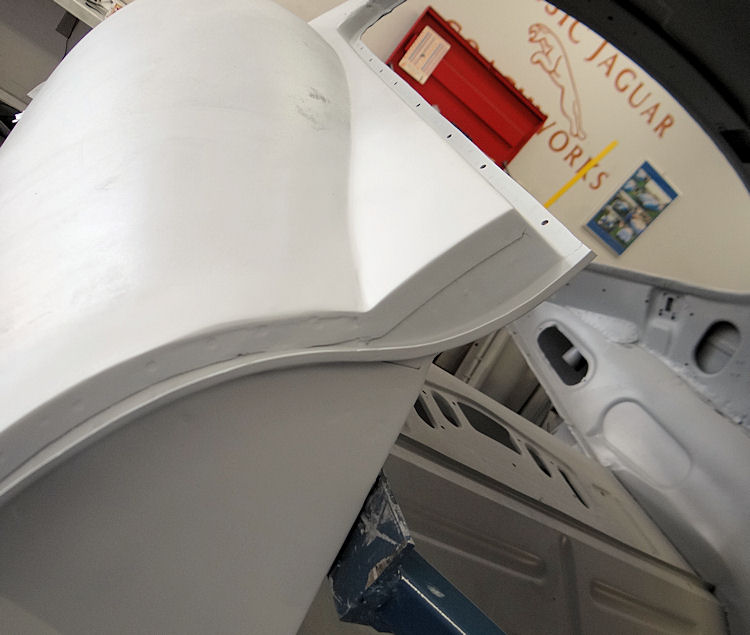
It is now time to assemble and begin fitting your new bonnet..
 |
 |
|
|
|
 |
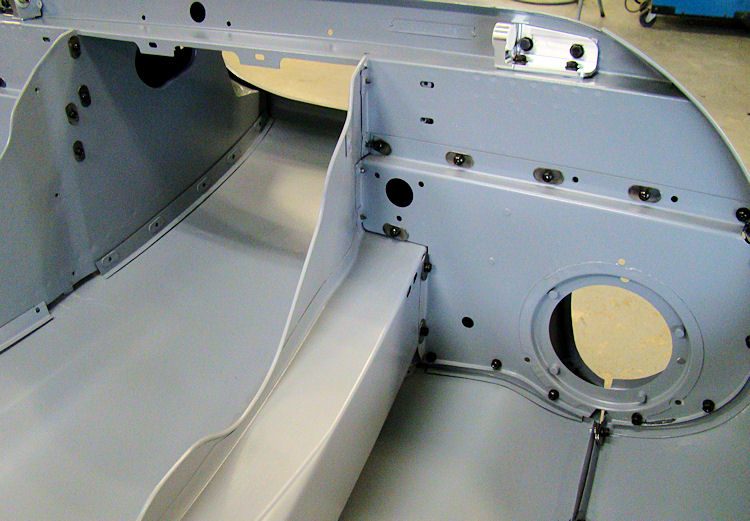 |
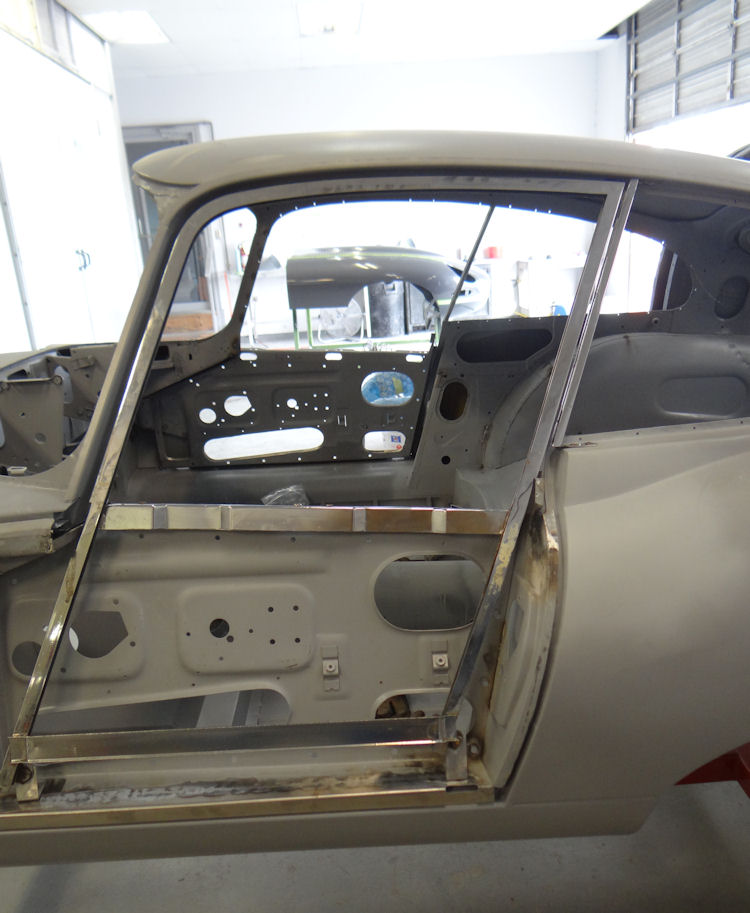
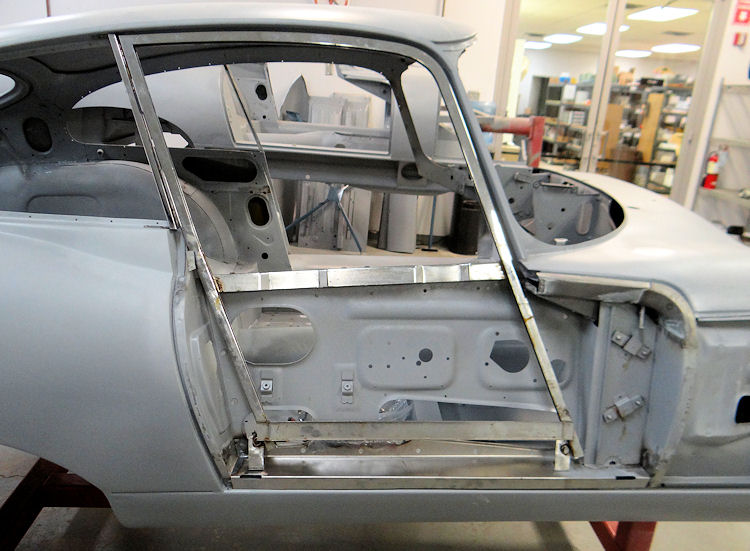
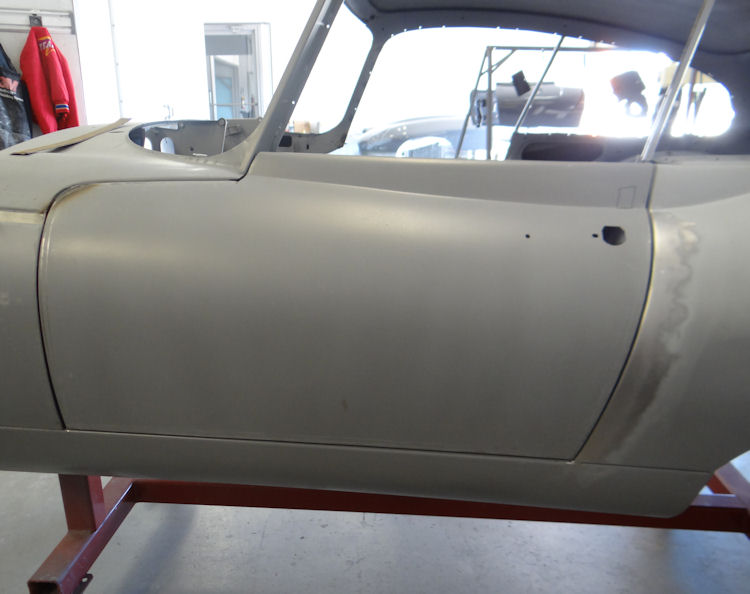
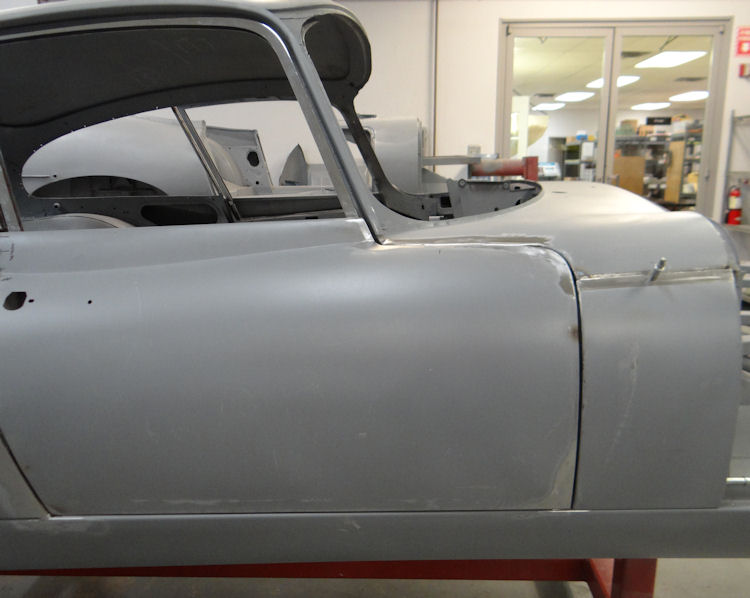
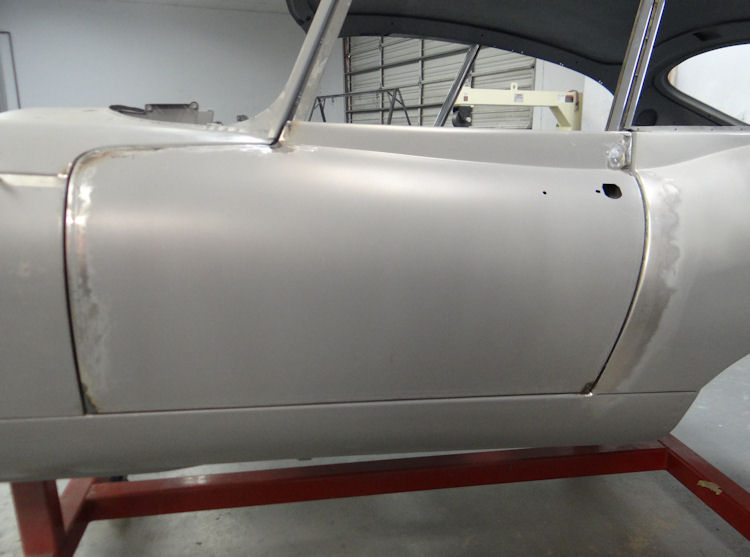
Having replaced substantial sections of both door frames, we trial fitted the window frames and chrome B pillars prior to installing the outer door skins.
 |
 |
|
|
|
|
|
|
 |
 |
|
|
|
|
|
|
 |
 |
|
|
|
Lots of progress in the Coachworks....
 |
 |
|
|
|
 |
 |
|
|
and welded in place |
|
|
|
 |
 |
|
|
|
|
|
|
 |
 |
|
|
|
 |
 |
|
|
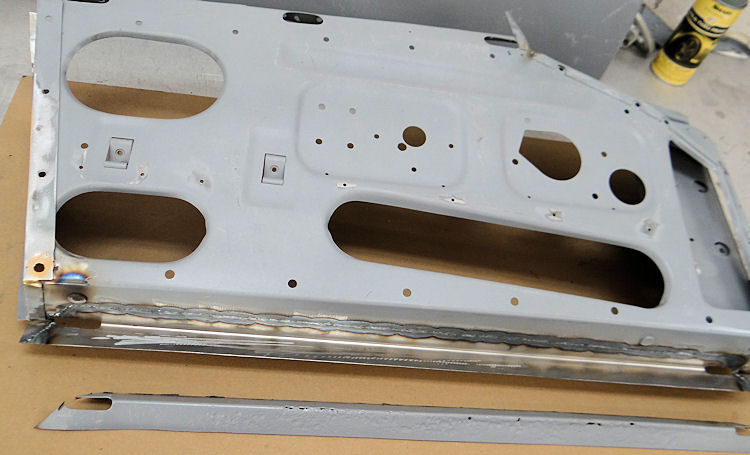
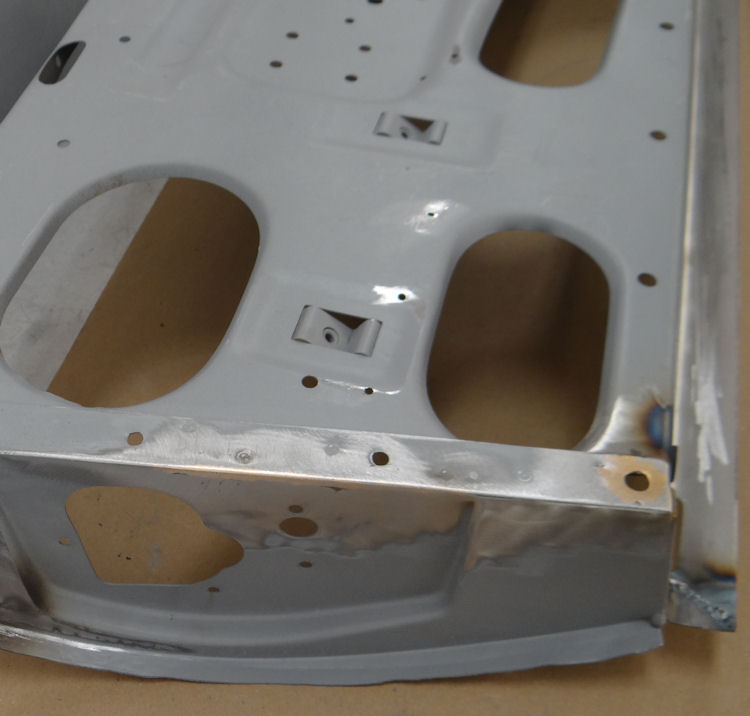
Rebuilding very rusty door frames...
 |
 |
|
|
|
|
|
|
 |
 |
|
|
|
 |
 |
|
|
|
 |
 |
|
|
|
 |
 |
|
reconstruct the door frames |
|
|
|
|
 |
 |
|
extremely difficult to make |
|
|
|
|
 |
 |
|
|
|
 |
 |
|
|
|
|
|
|
 |
 |
|
|
|
 |
 |
|
|
completely replaced |
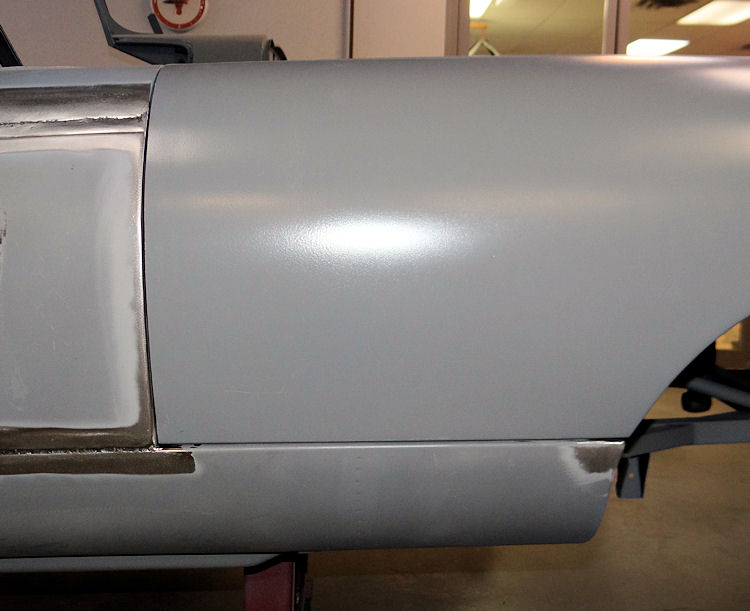
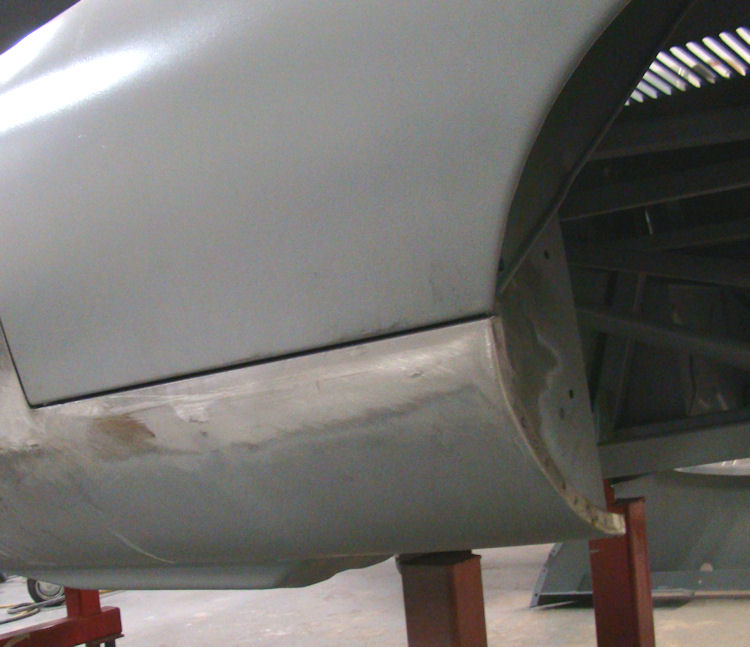
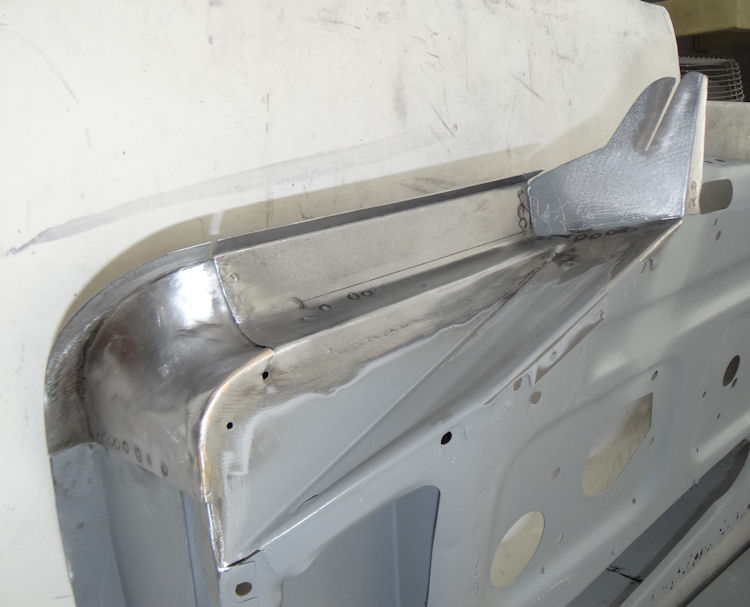
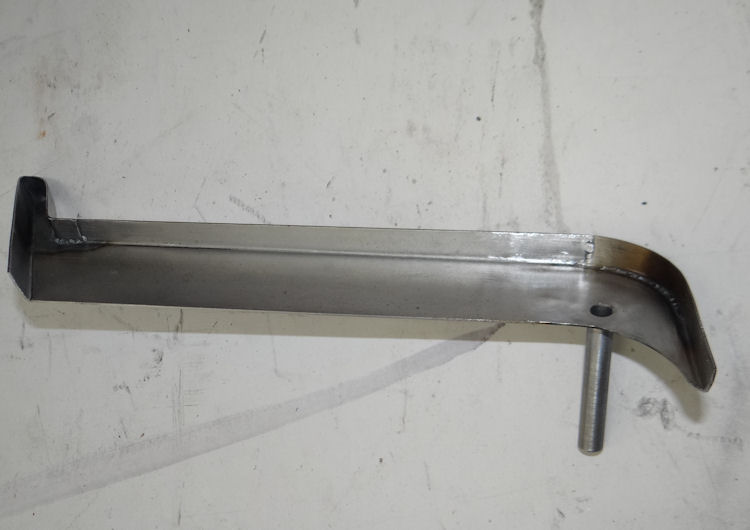
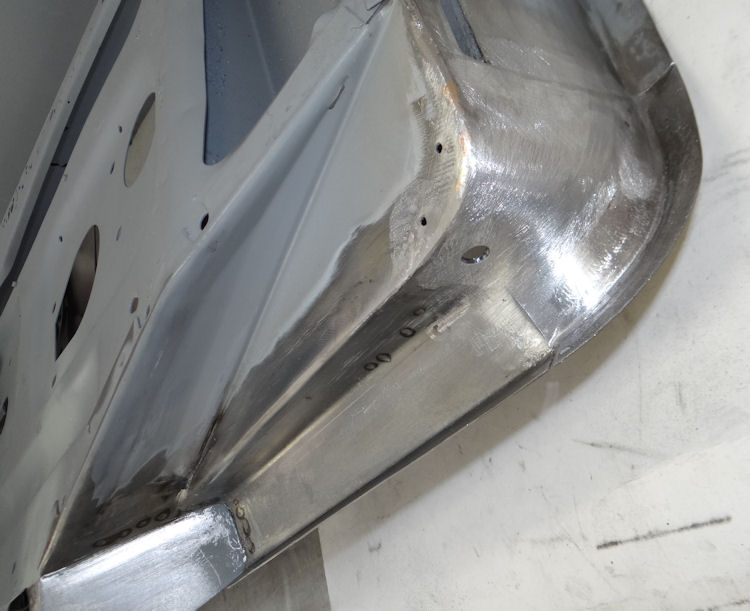
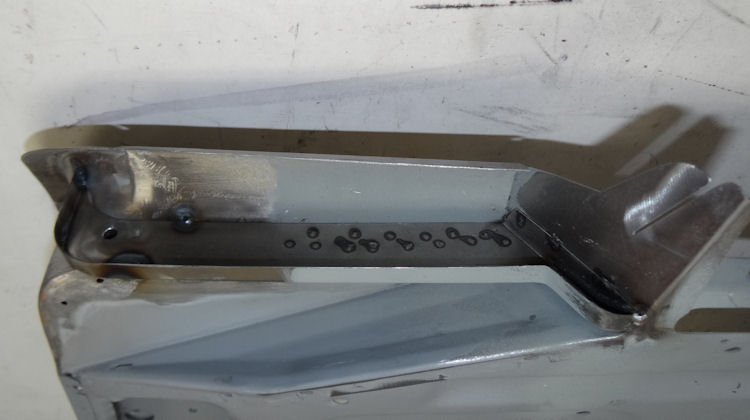
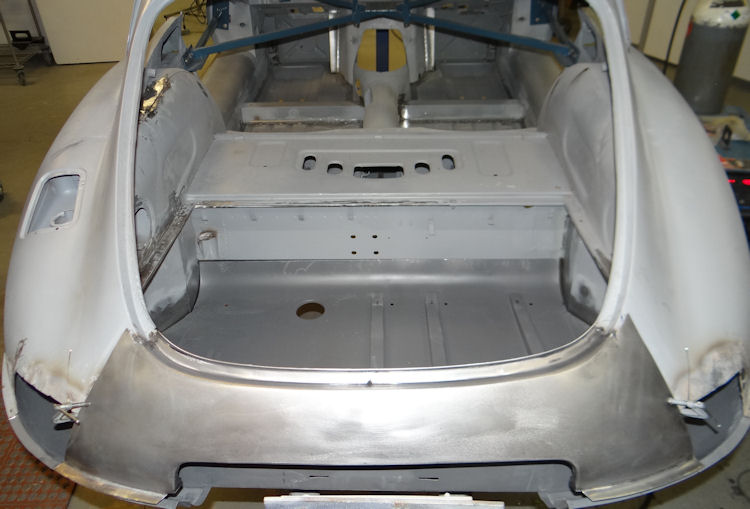
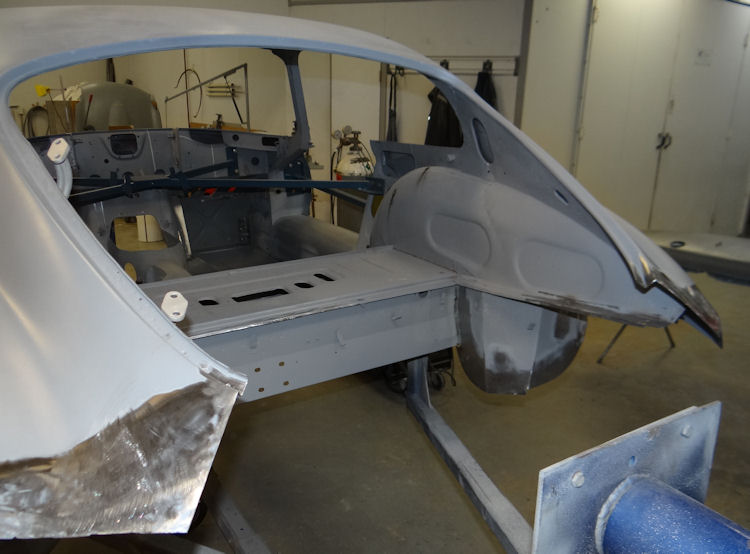
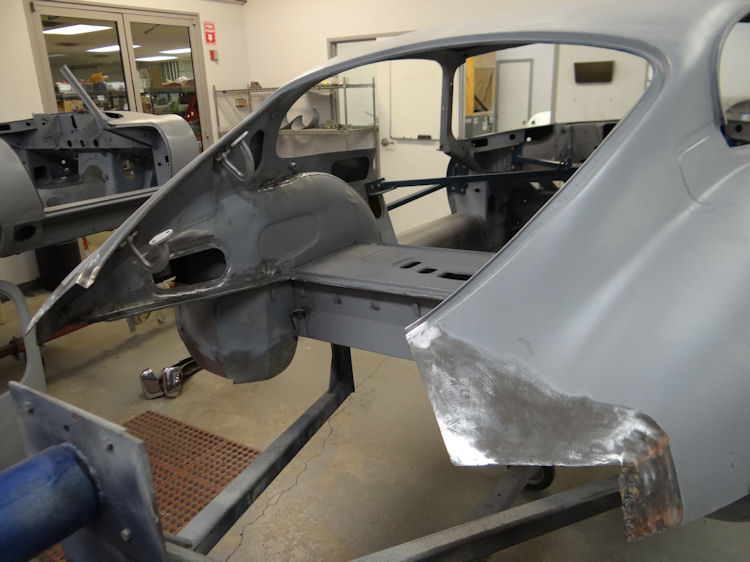
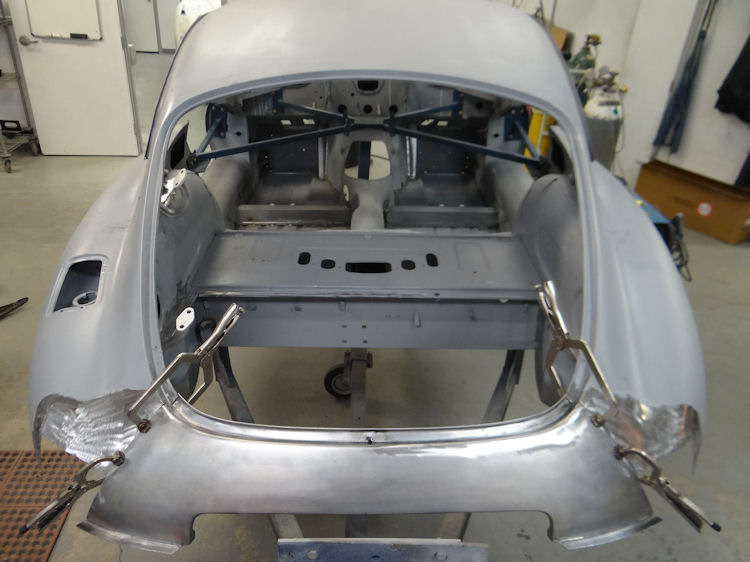
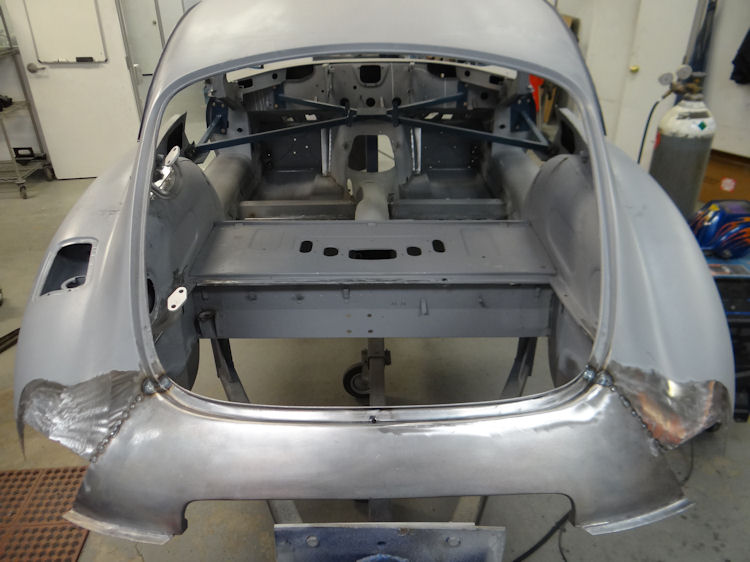
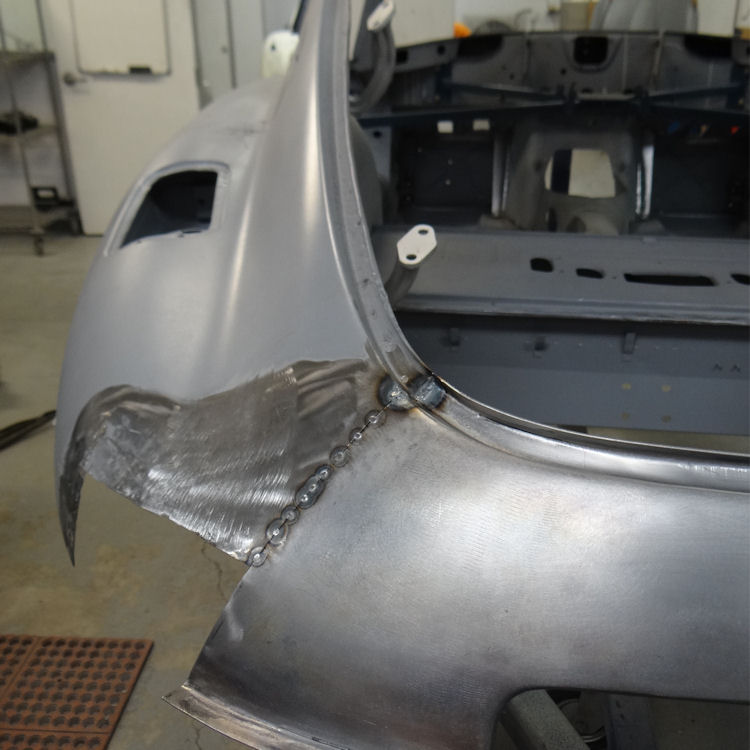
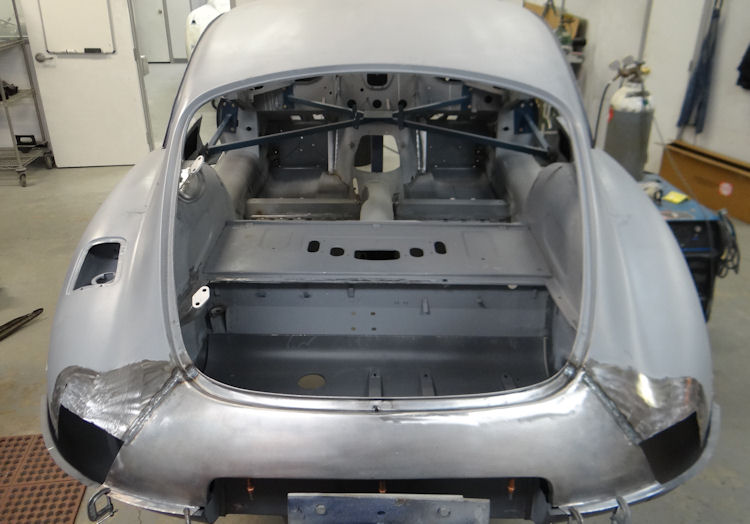
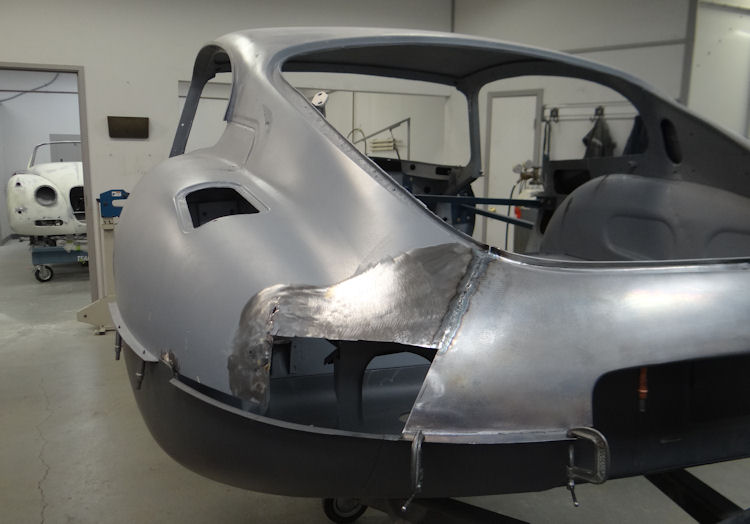
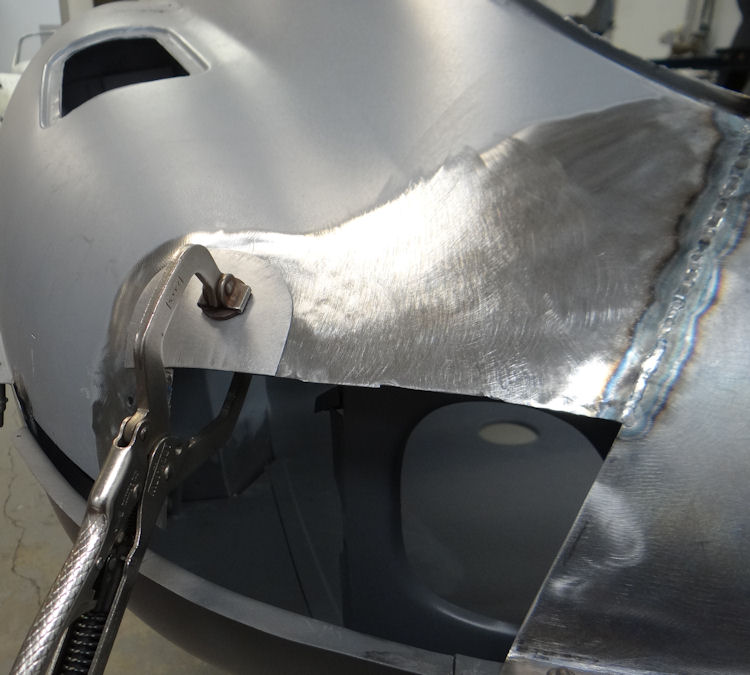
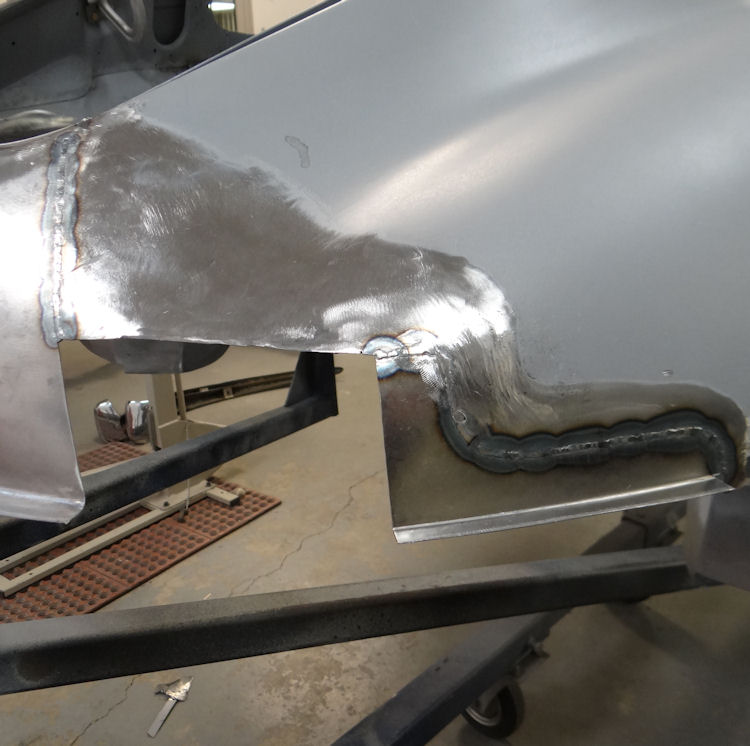
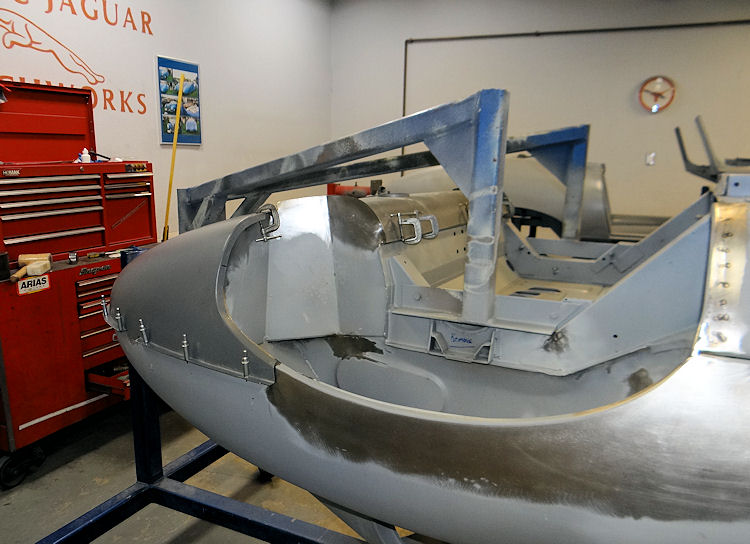
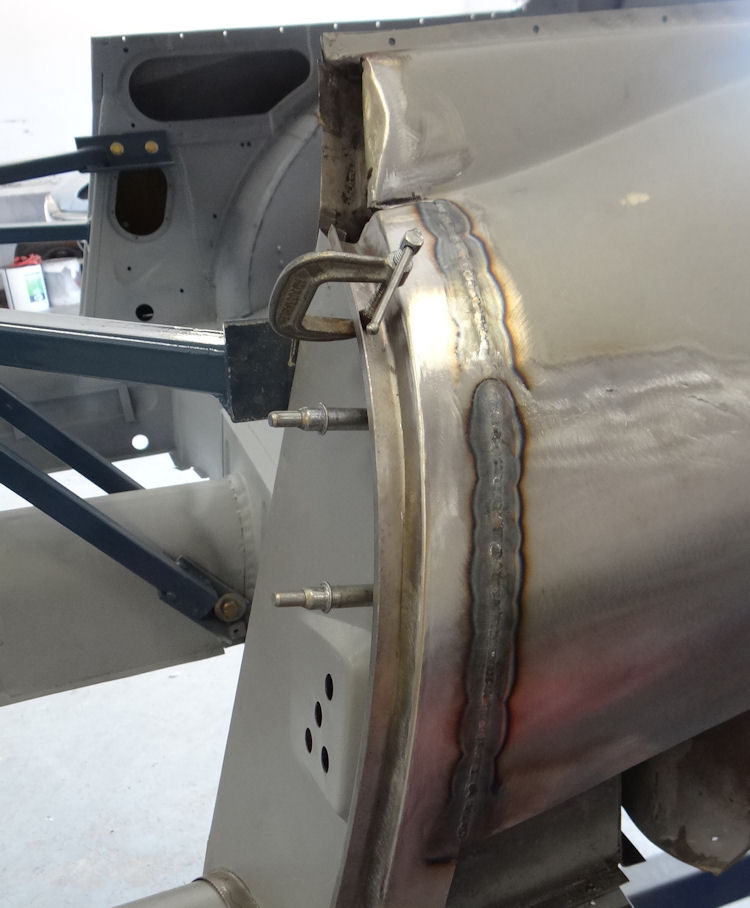
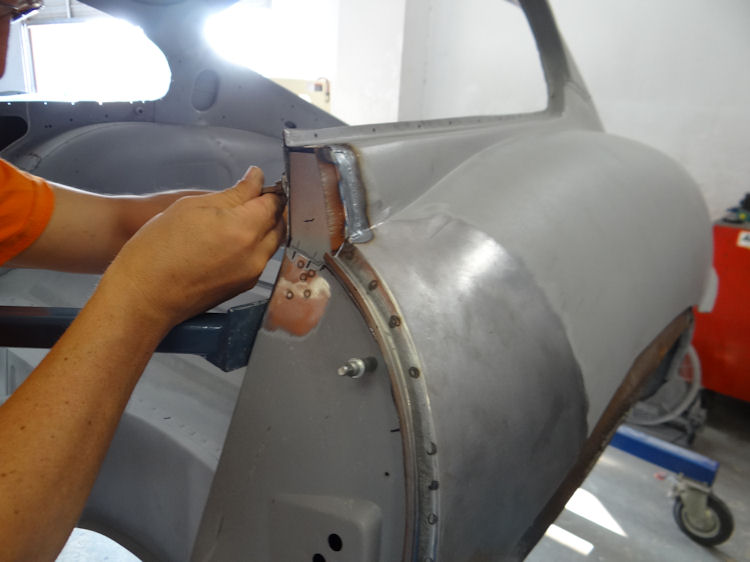
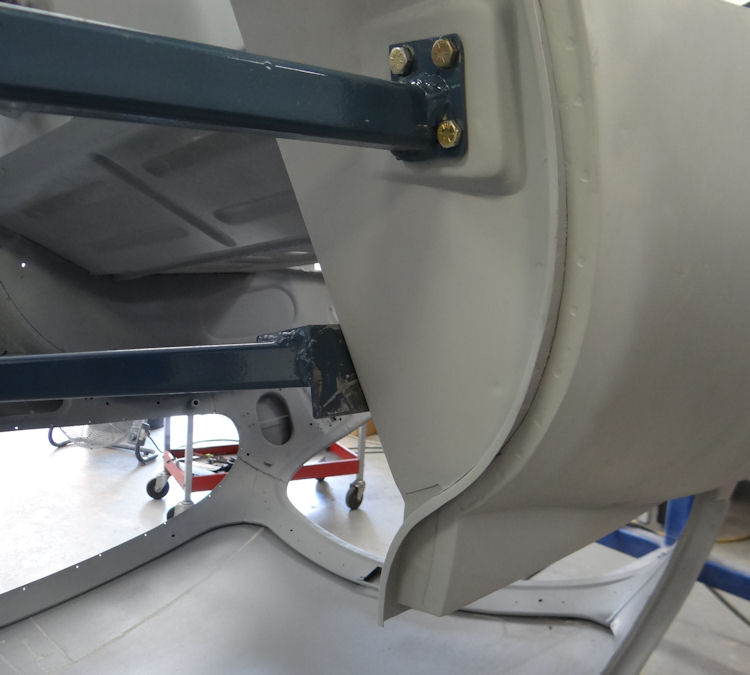
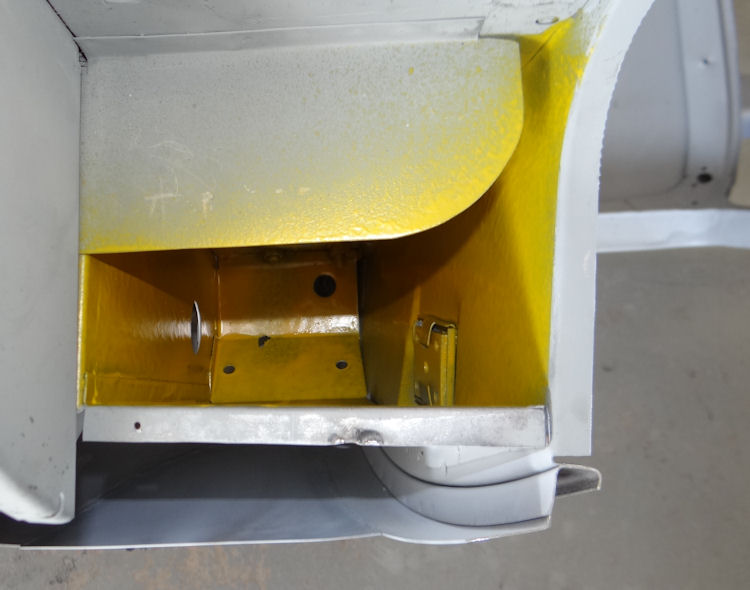
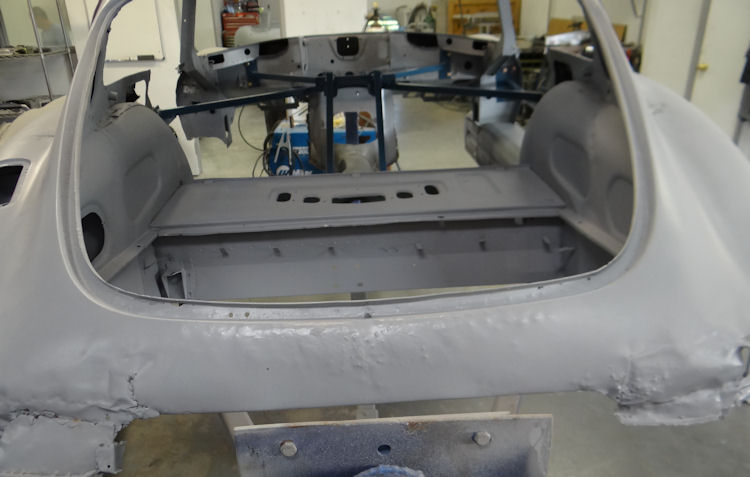
Rear of the car starting to take shape in the Coachworks...
 |
 |
|
|
|
|
|
|
 |
 |
|
|
|
 |
 |
|
start getting better! |
|
|
|
|
 |
 |
|
|
|
|
|
|
 |
 |
|
|
|
|
|
|
 |
 |
|
|
|
 |
 |
|
|
|
|
|
|
 |
 |
|
|
|
 |
 |
|
|
|
 |
 |
|
|
|
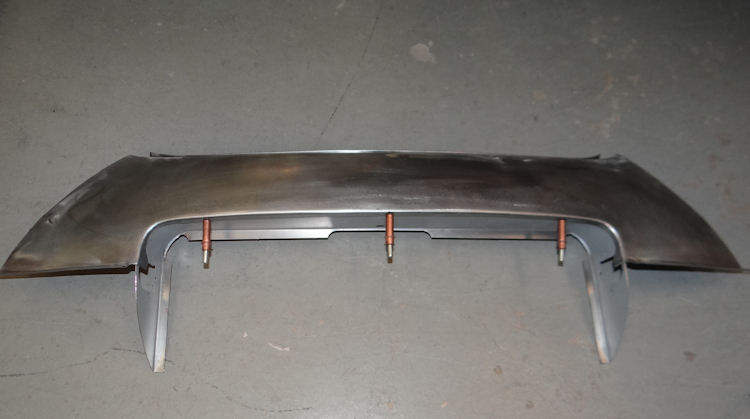
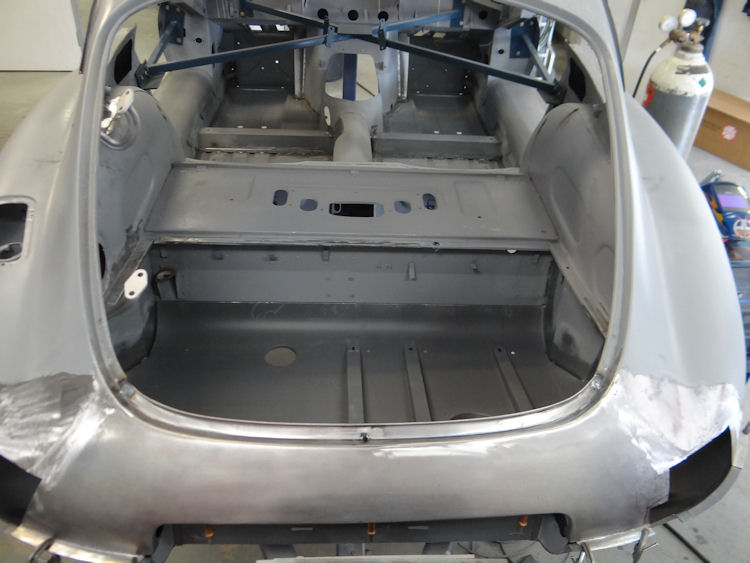
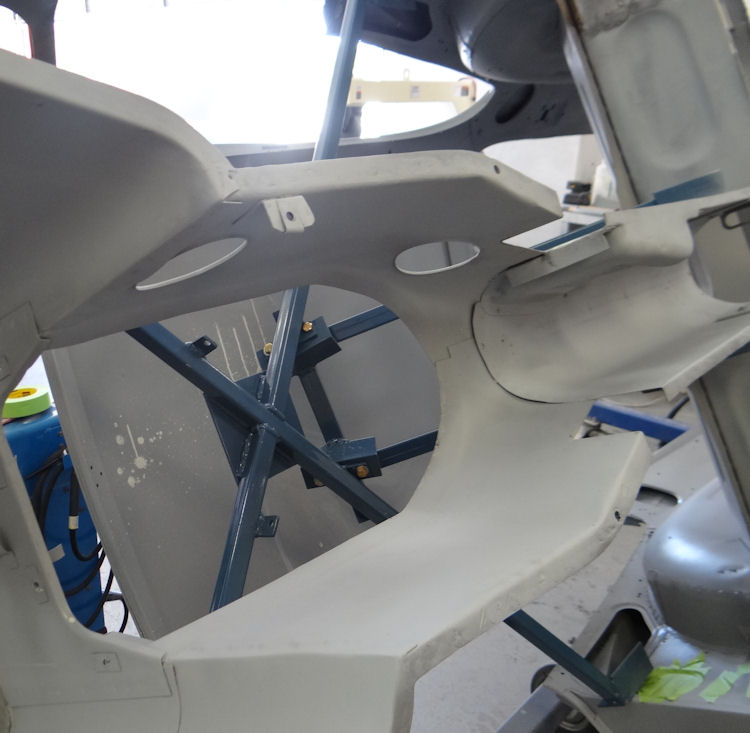
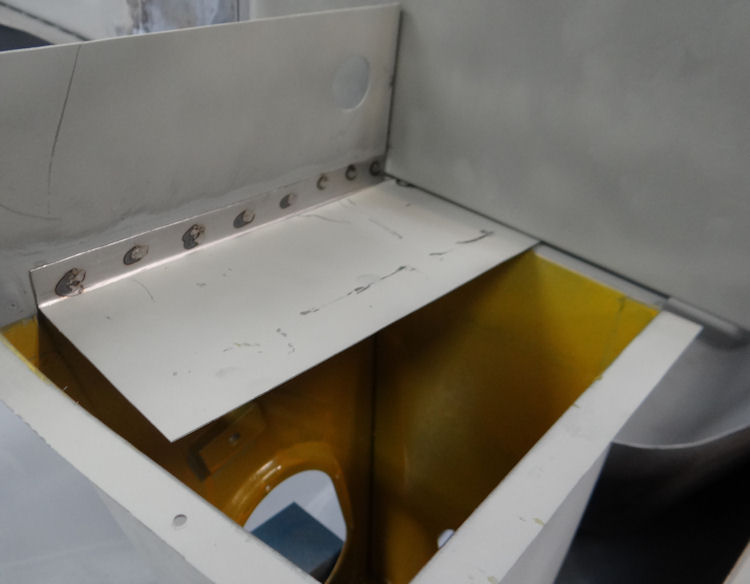
More progress in the CJ Coachworks...
 |
 |
|
the new boot floor assembly could be fitted |
|
|
|
|
 |
 |
|
|
will have to be replaced... |
|
|
|
|
|
 |
|
|
|
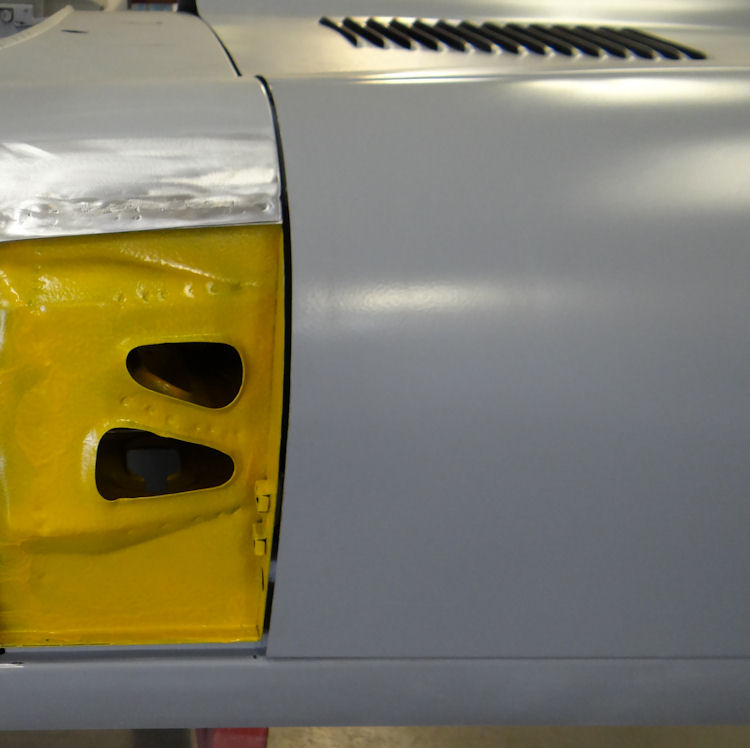
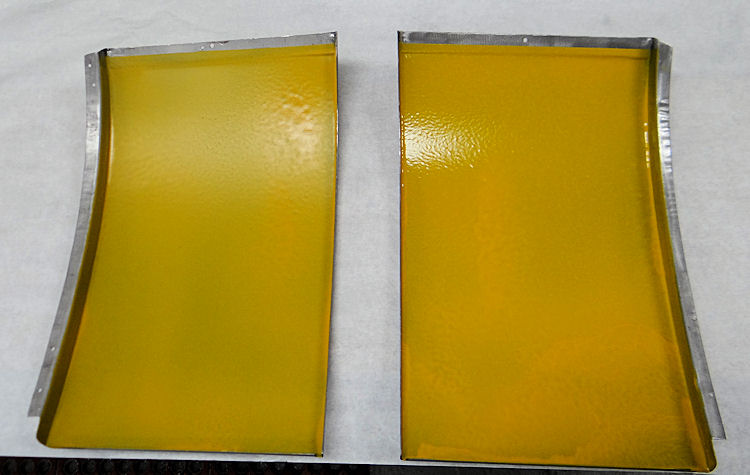
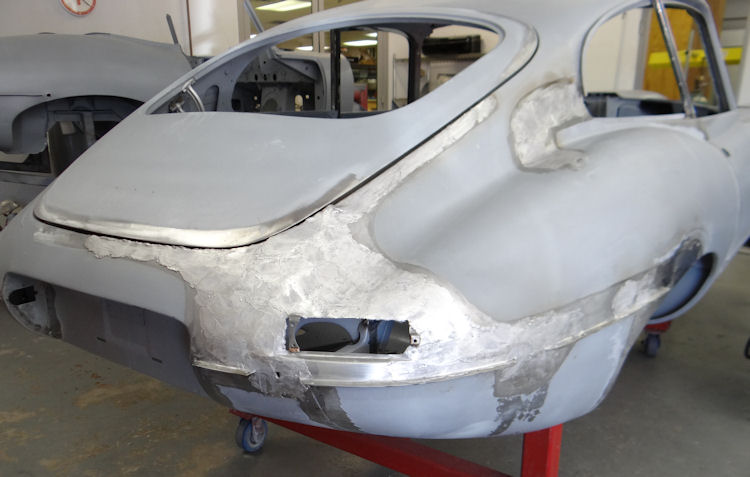
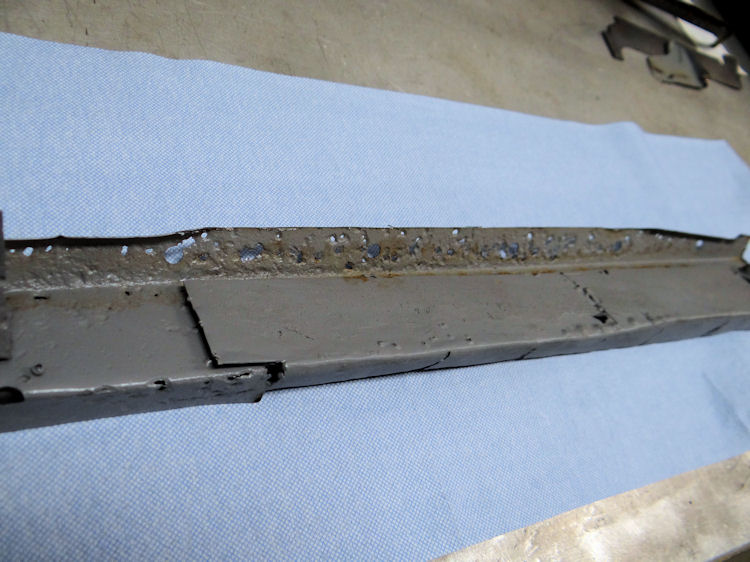
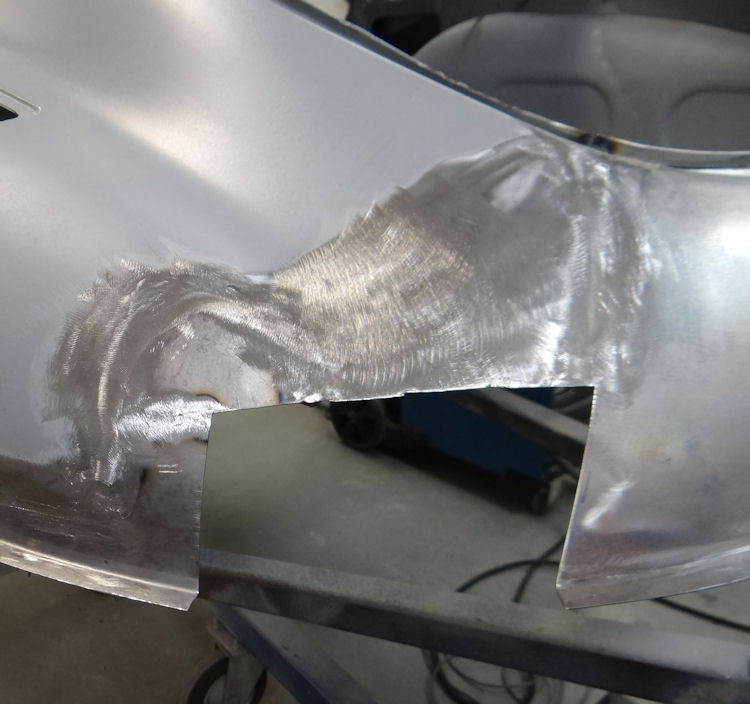
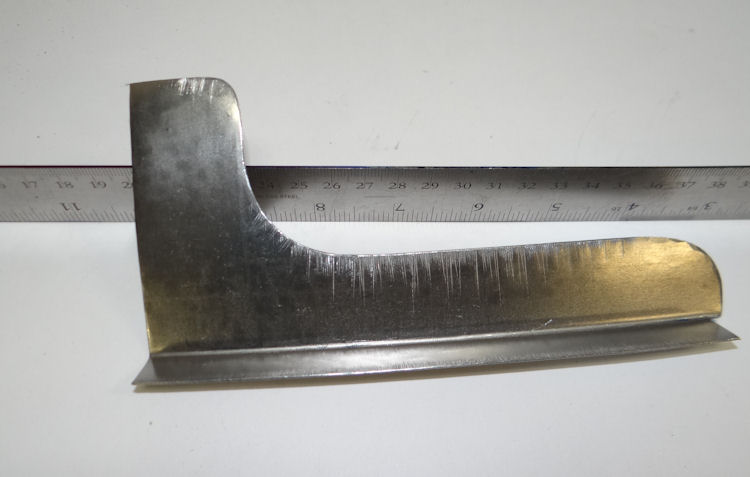
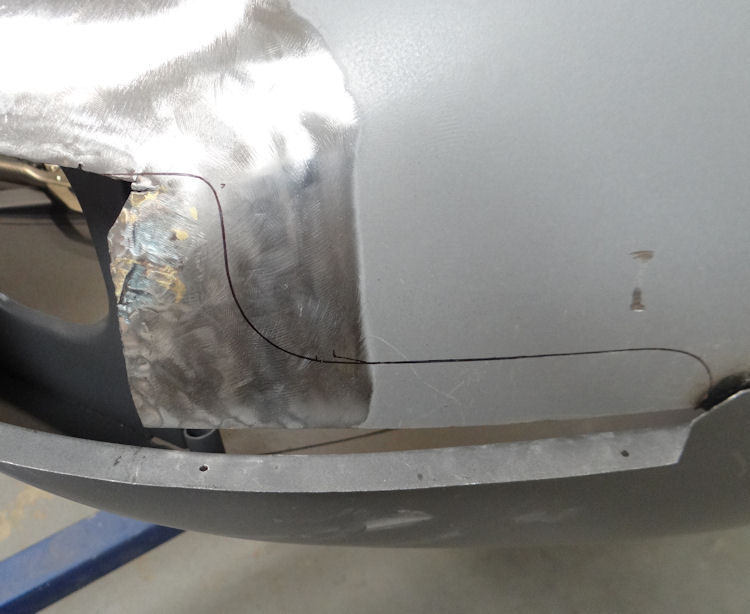
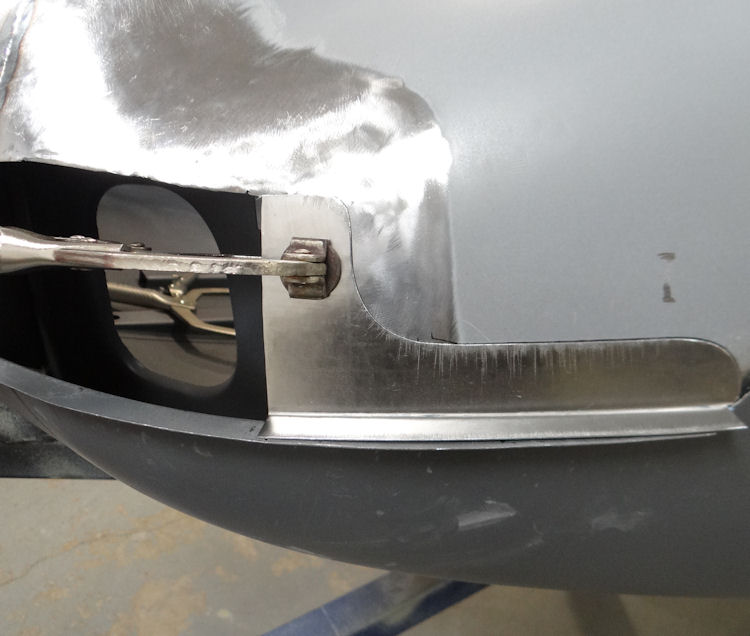
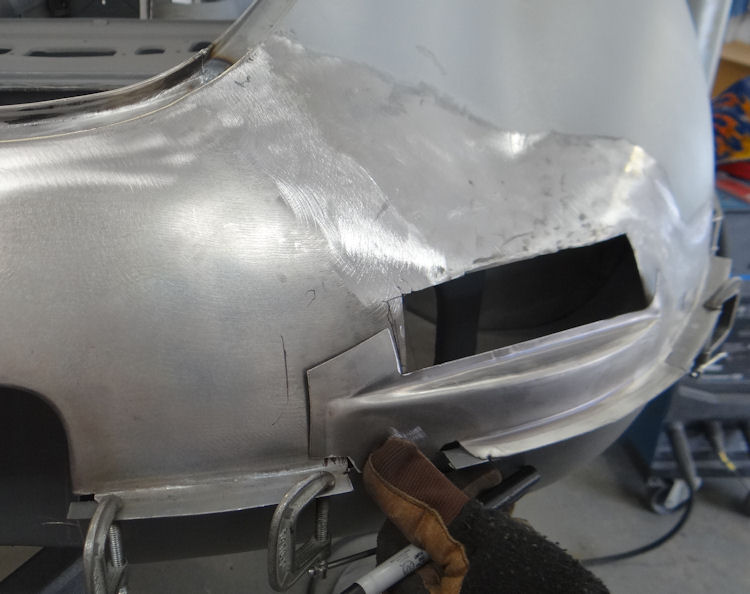
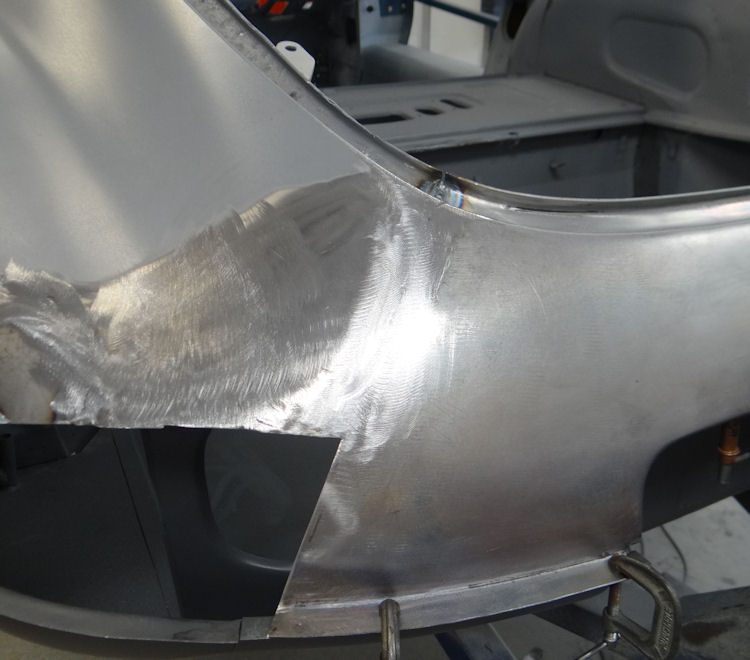
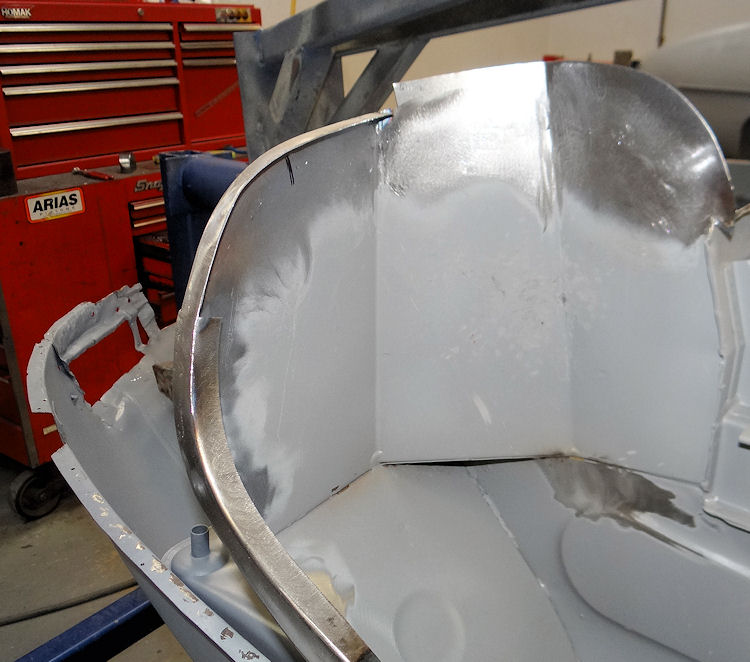
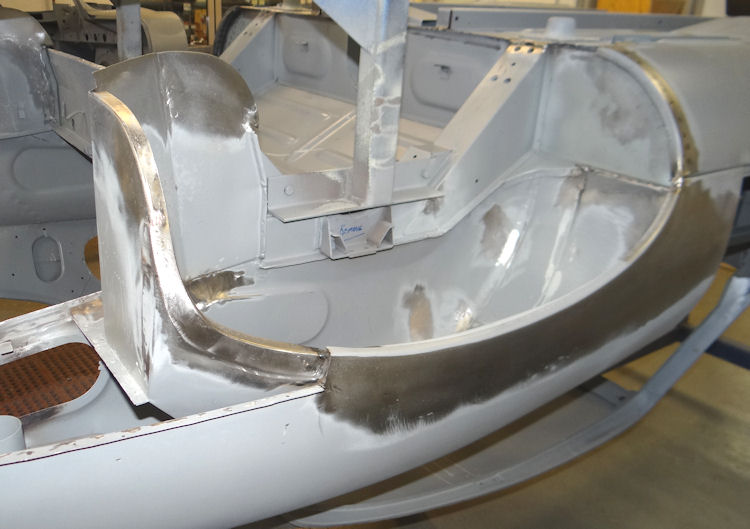
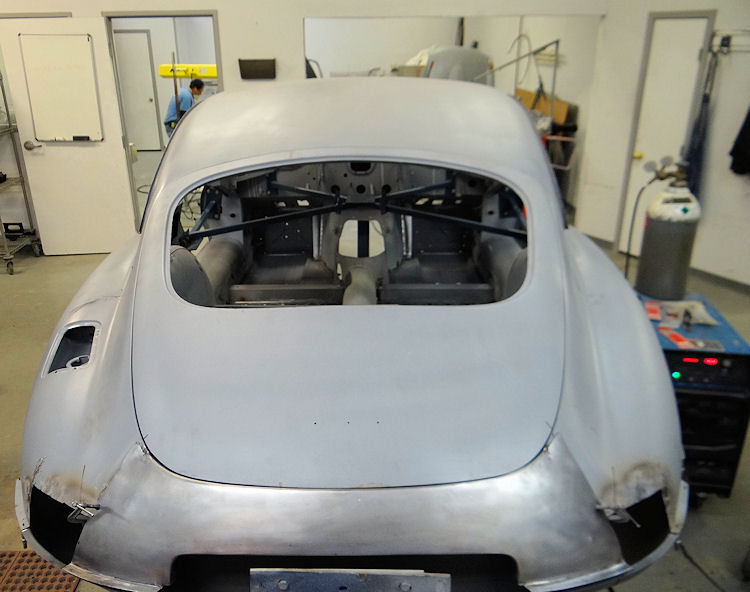
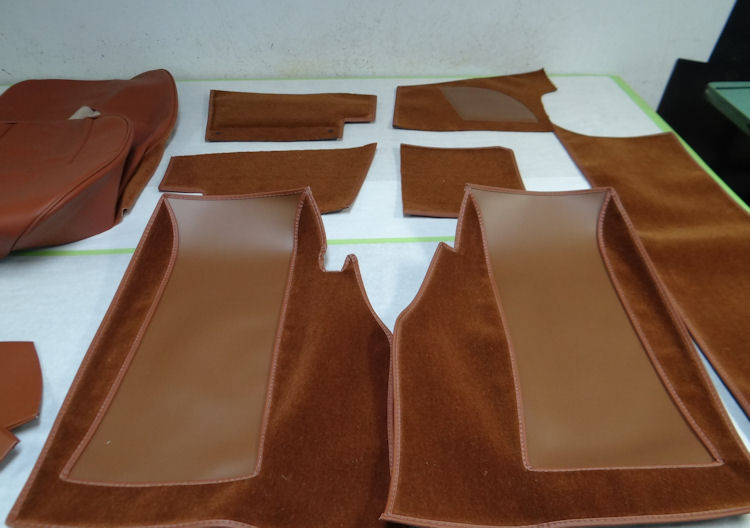
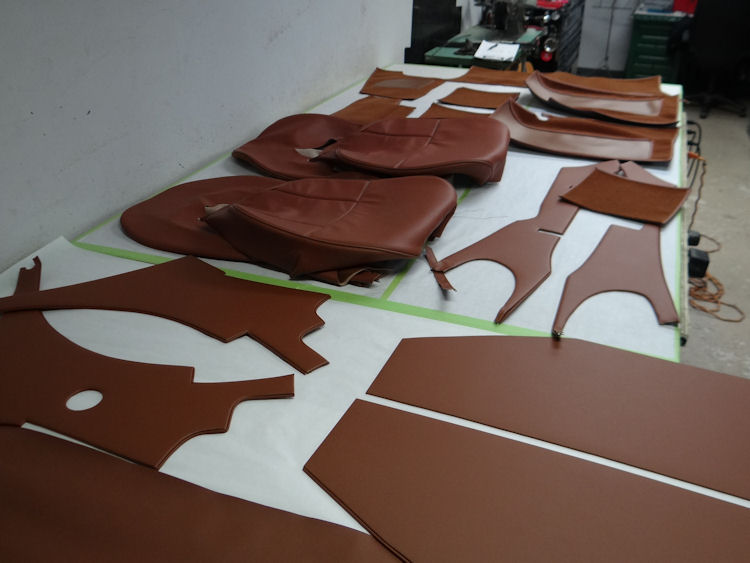
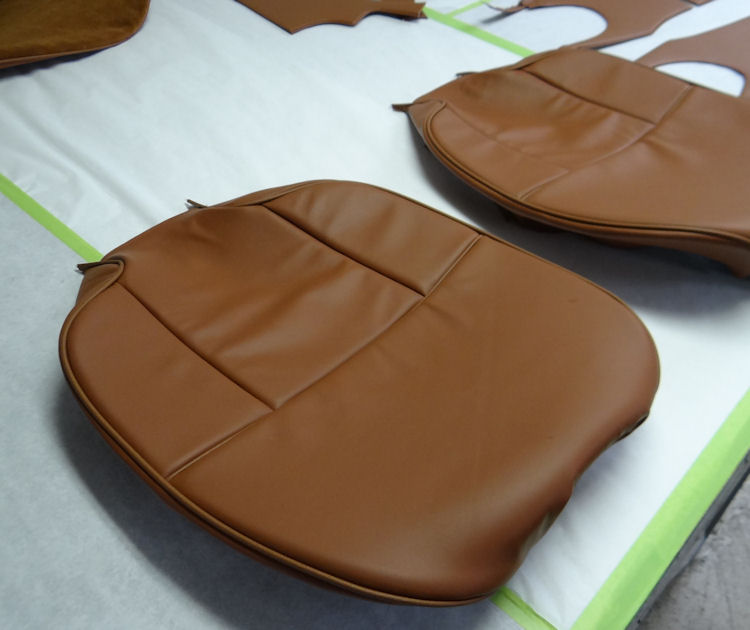
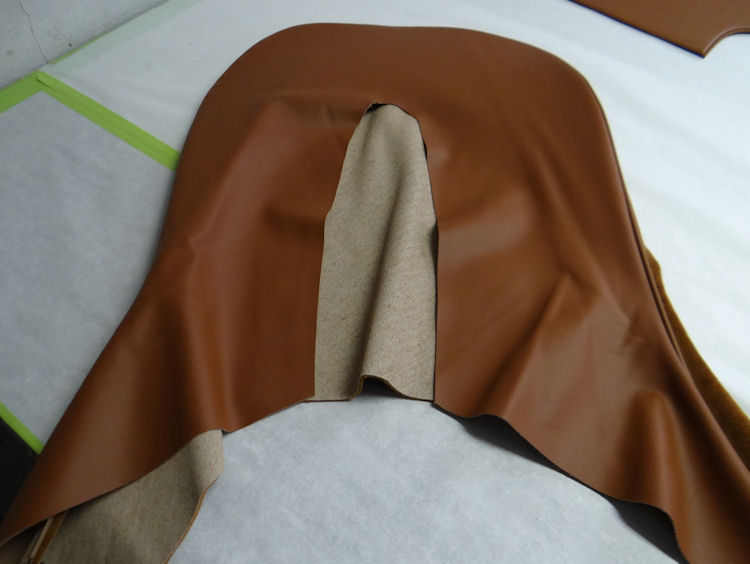
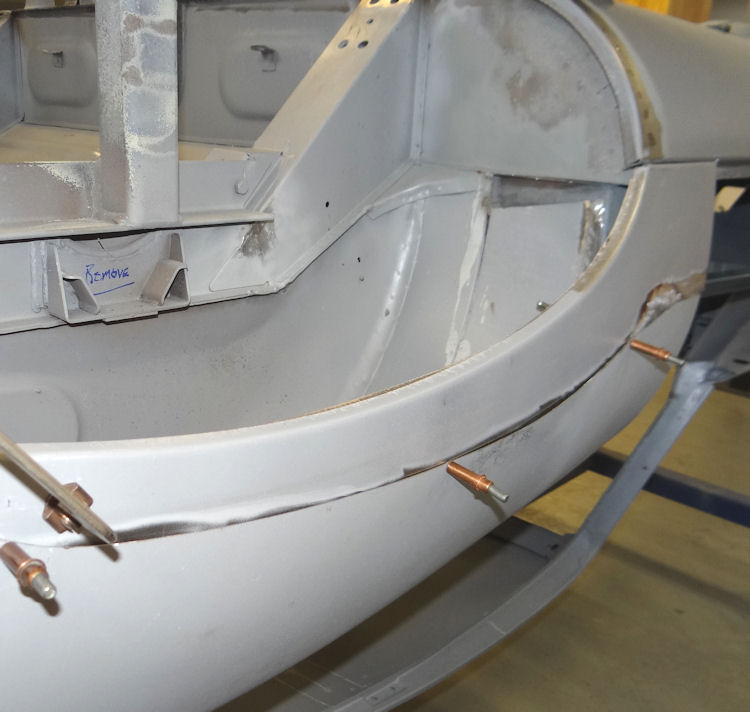
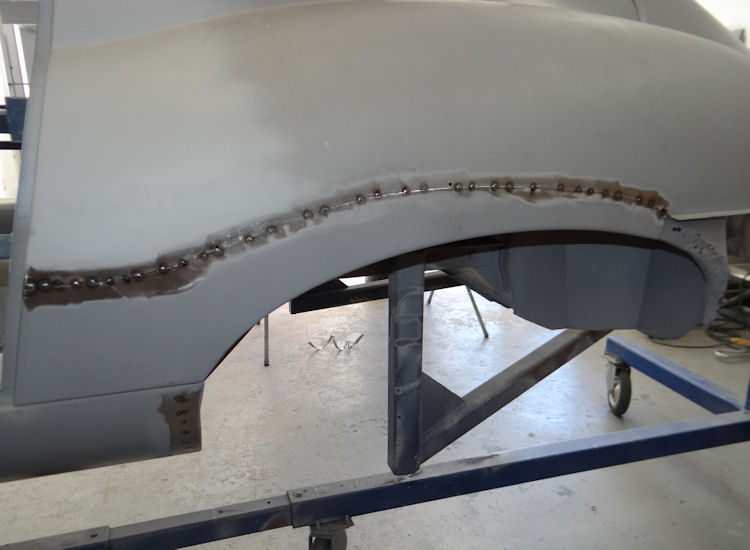
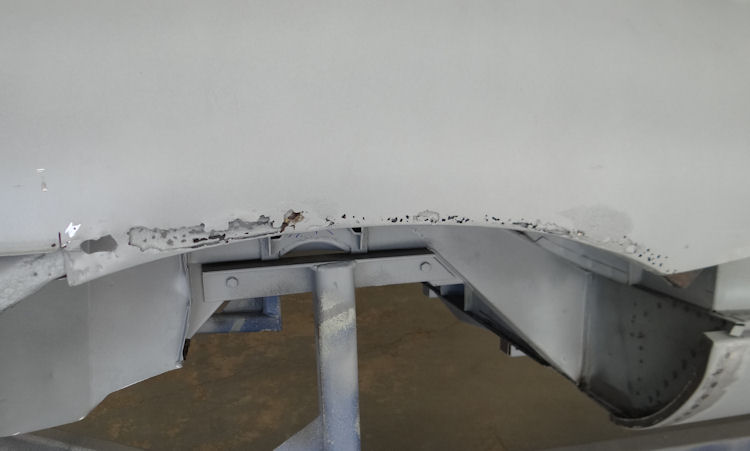
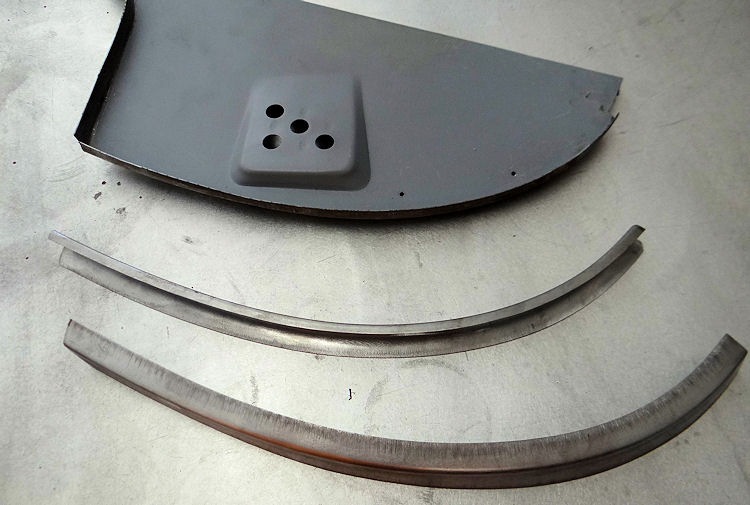
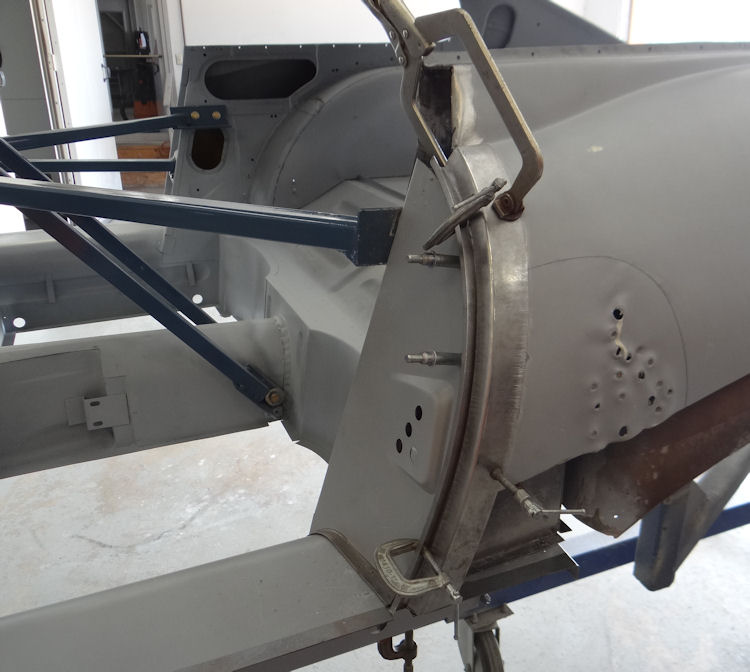
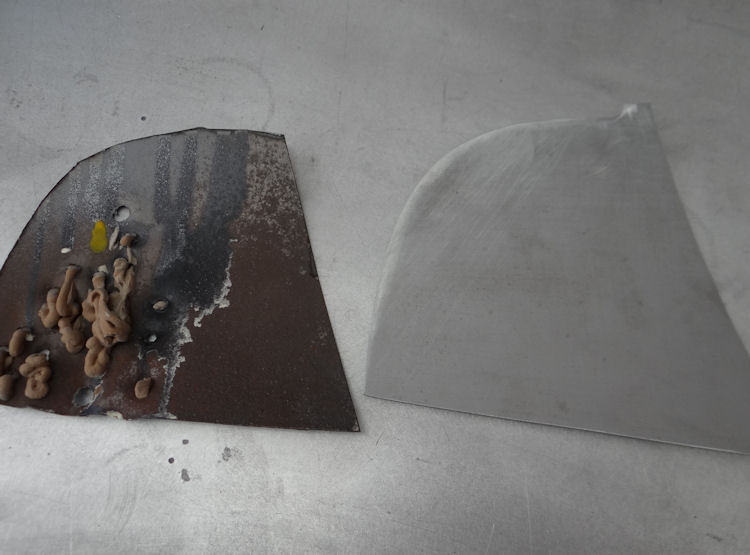
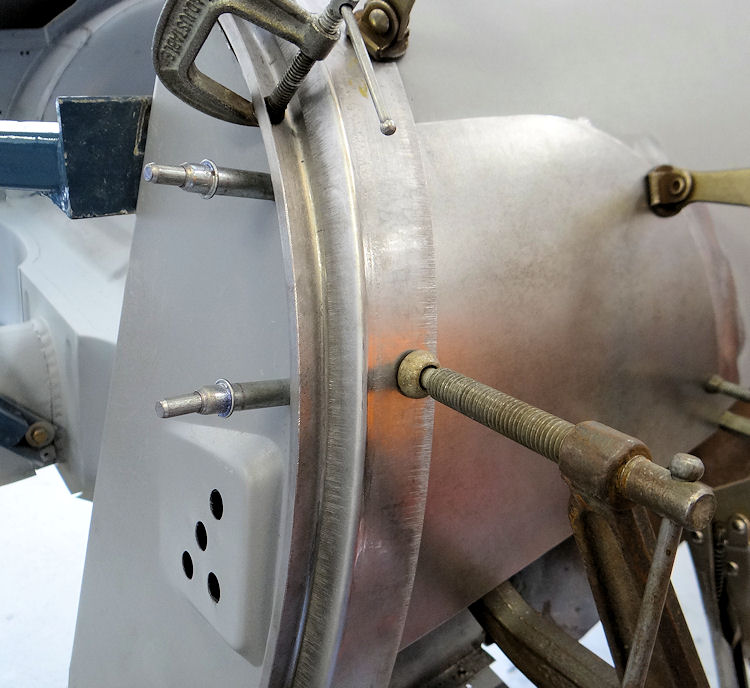
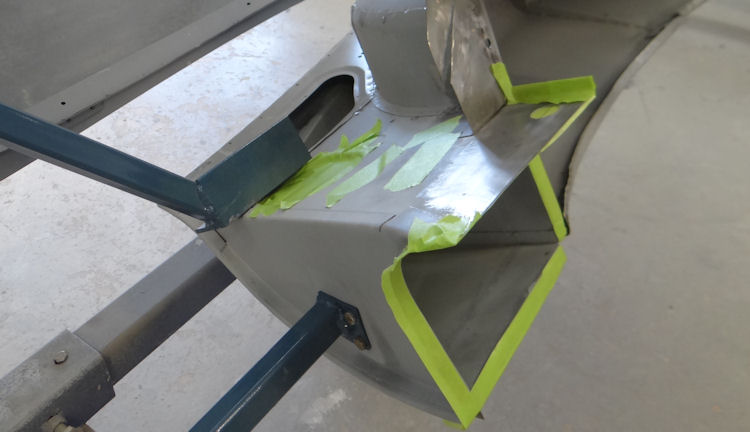
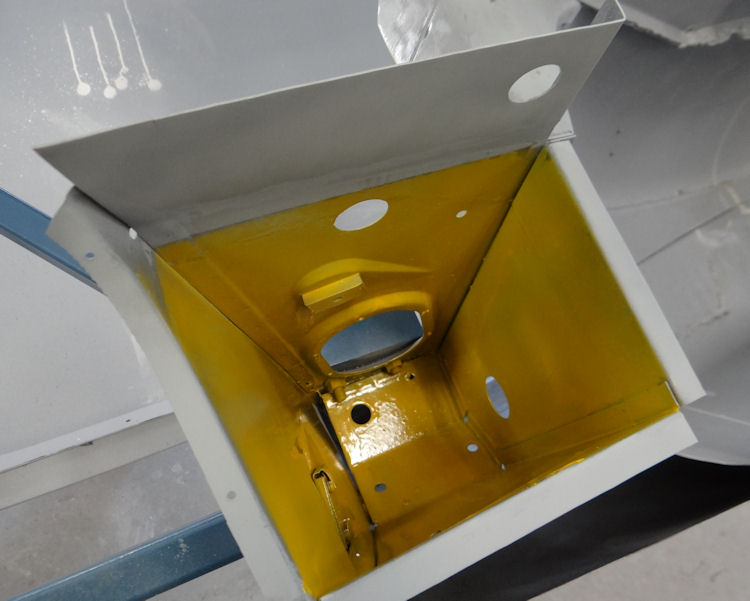
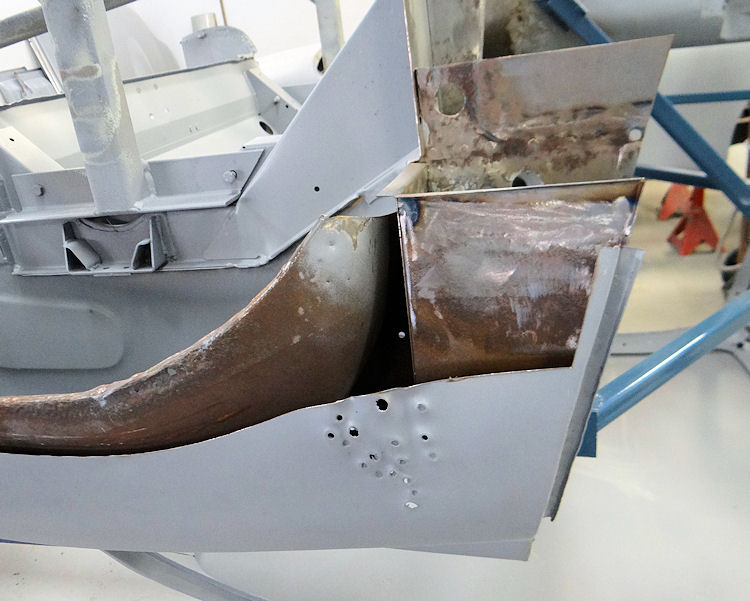
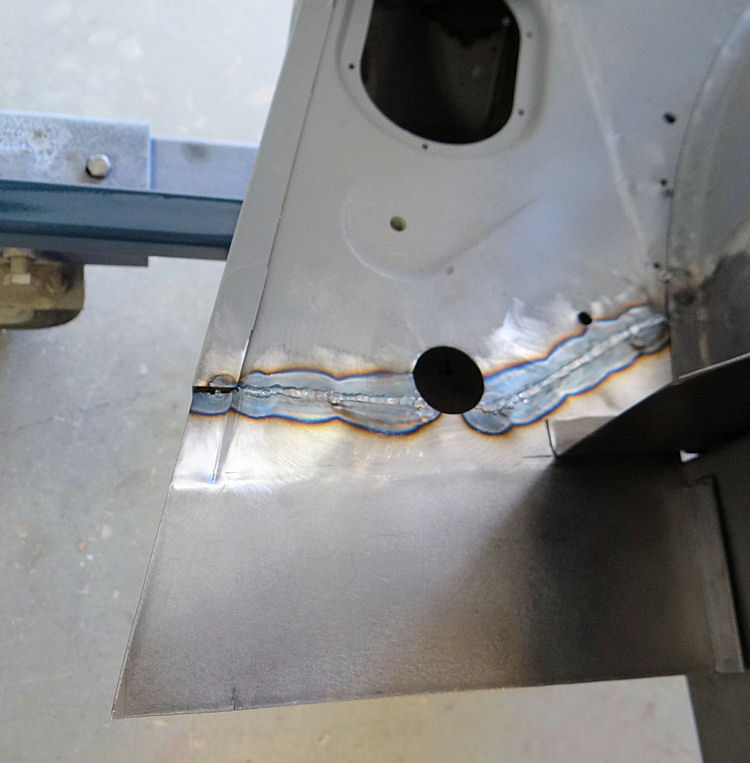
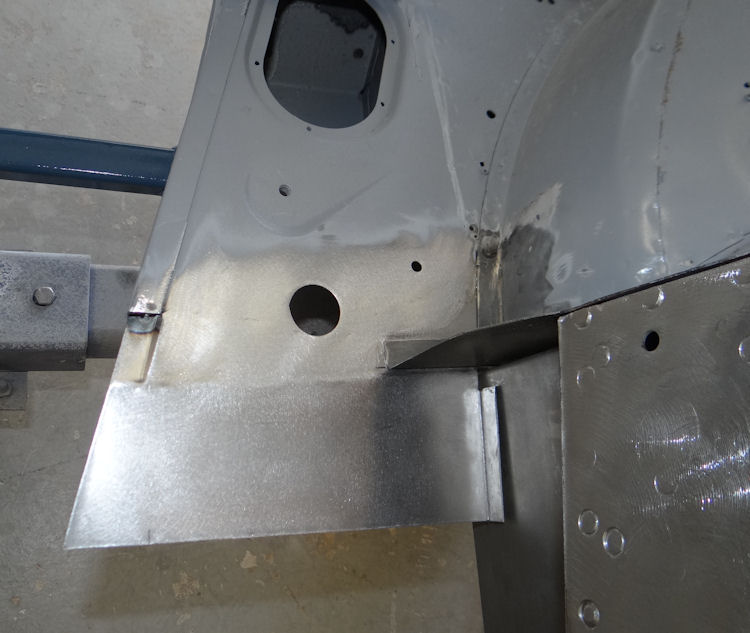
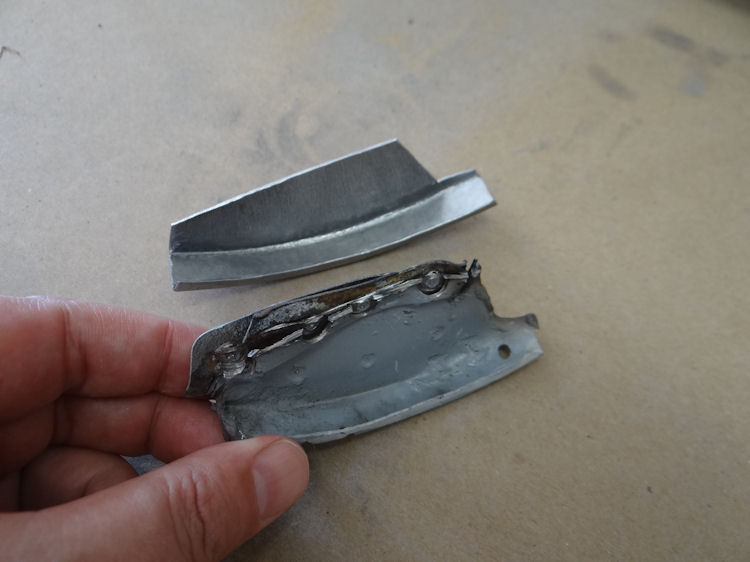
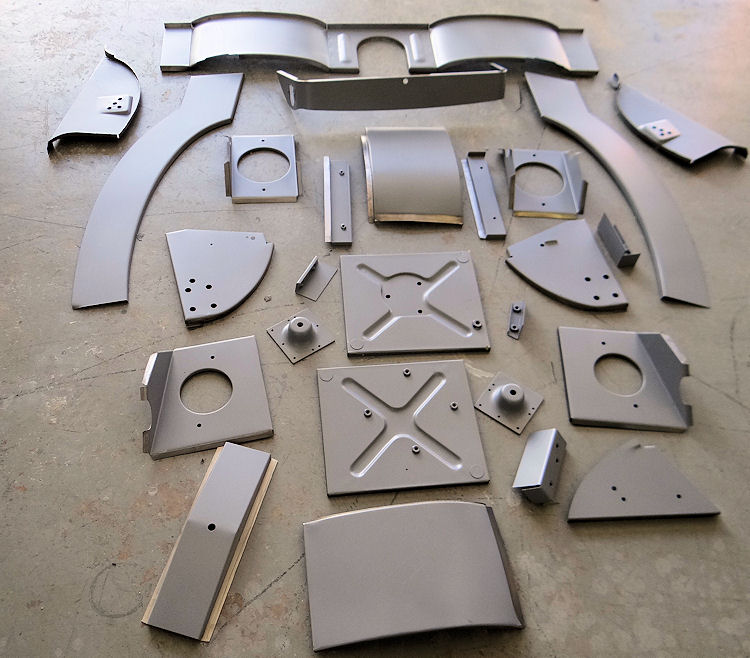
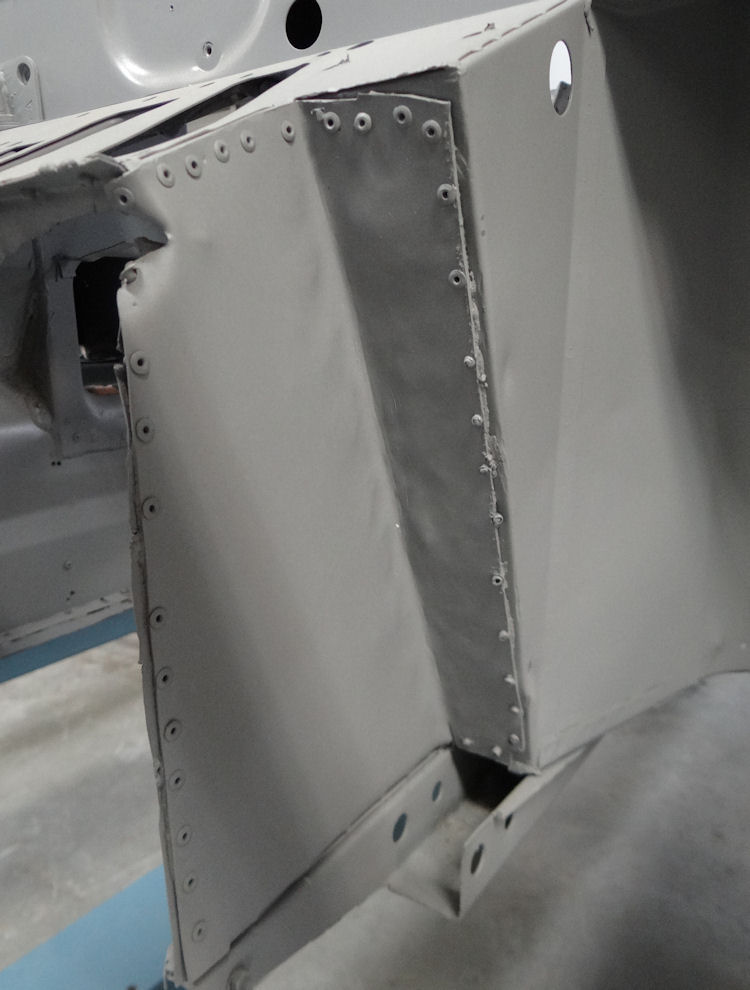
The following sequence of photos show your Suffolk & Turley interior kit, as well as the repair of both inner and outer rear wheel arches...
 |
 |
|
|
|
|
|
|
 |
 |
|
|
|
|
|
|
 |
 |
|
|
|
|
|
|
 |
 |
|
|
|
|
|
|
 |
 |
|
|
|
|
|
|
 |
 |
|
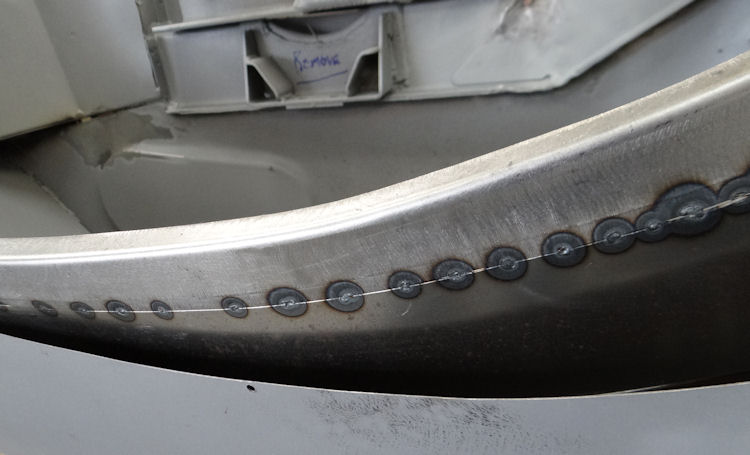
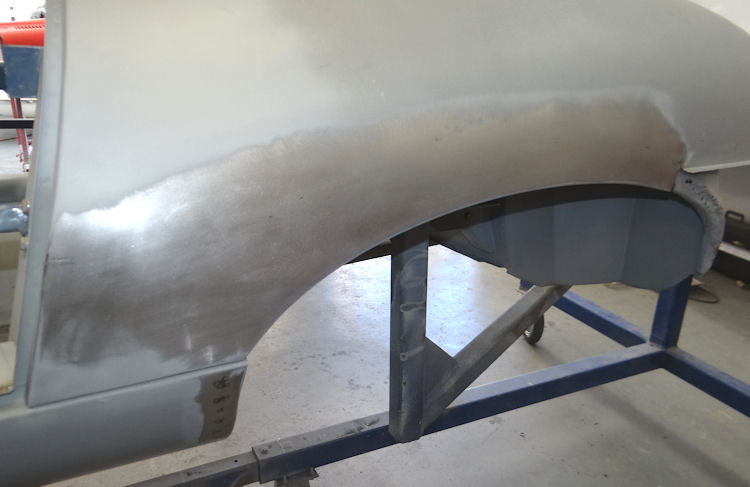
until the repair is virtually invisible |
|
|
|
|
 |
 |
|
|
|
|
|
|
 |
 |
|
|
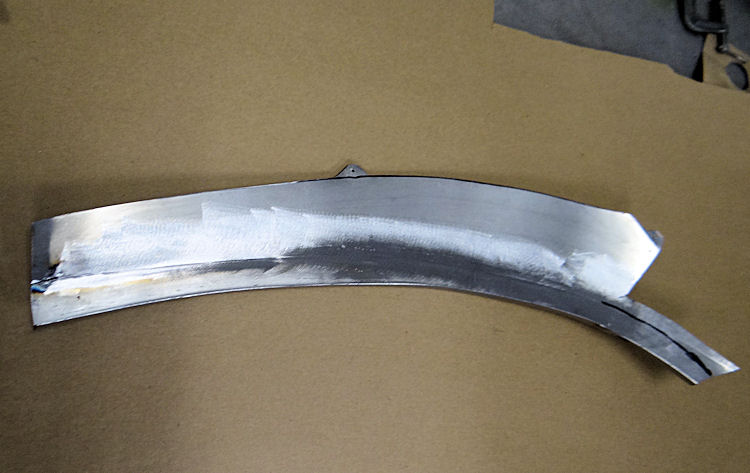
with outer wheel arch repair panels |
|
|
|
 |
 |
|
|
|
|
|
|
 |
 |
|
|
|
|
|
|
 |
 |
|
|
|
|
|
|
 |
 |
|
|
|
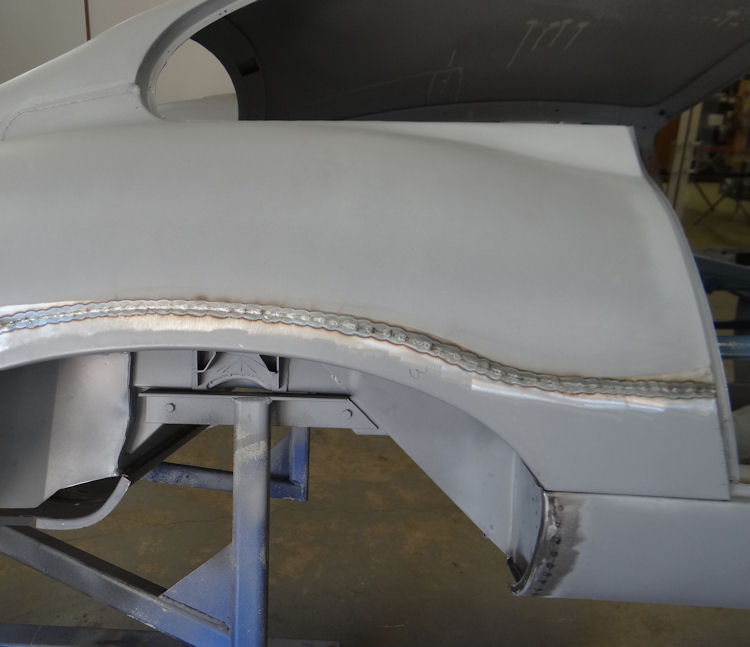
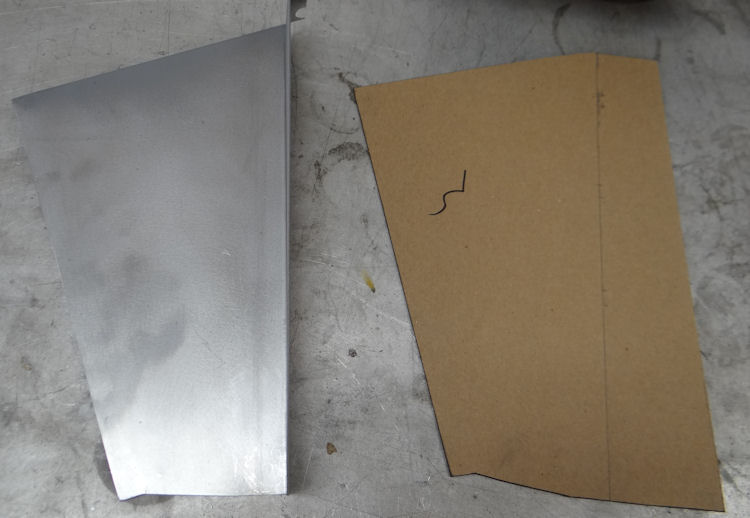
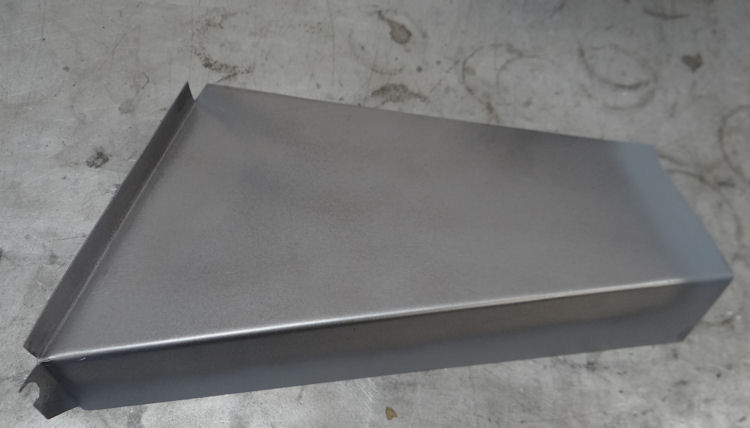
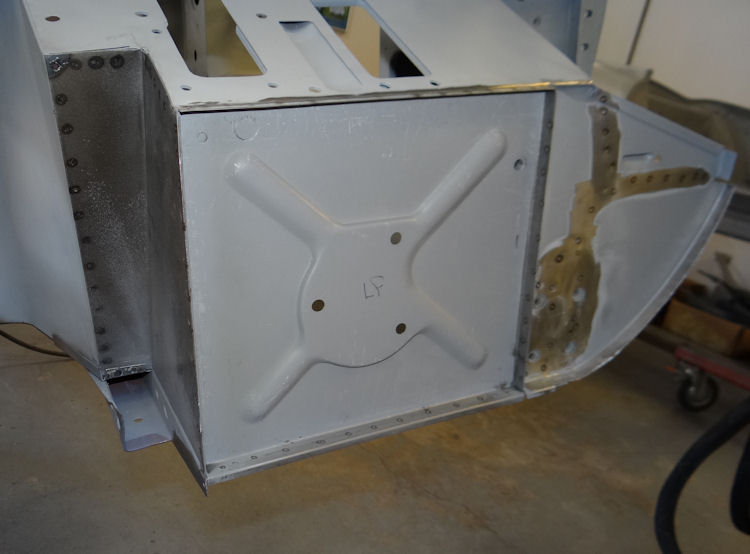
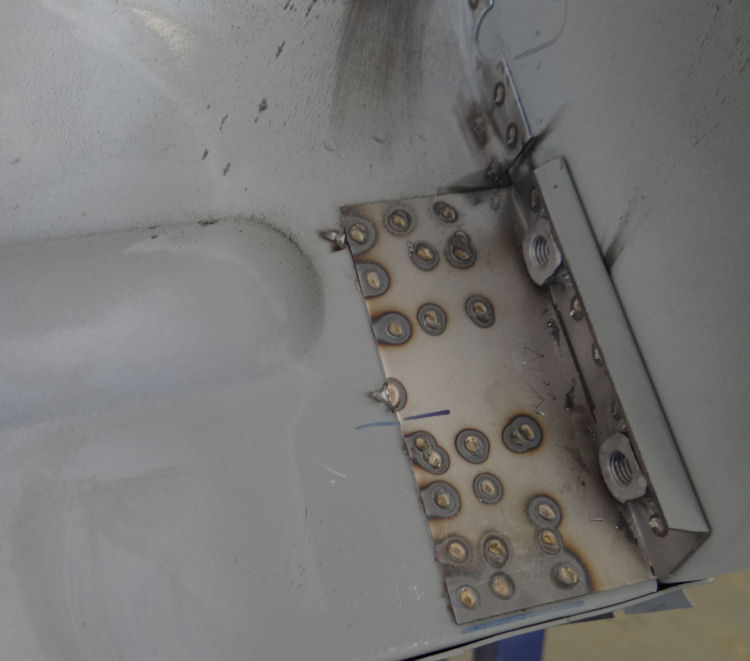
Lots of progress in the CJ Coachworks....
 |
 |
|
|
|
|
|
|
 |
 |
|
|
|
|
|
|
 |
 |
|
|
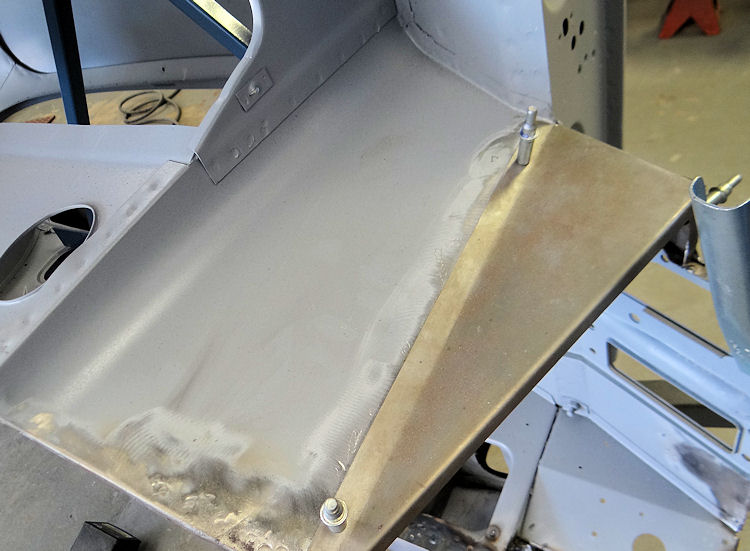
that will eventually be enclosed |
|
|
|
 |
 |
|
|
|
|
|
|
 |
 |
|
|
|
|
|
|
 |
 |
|
|
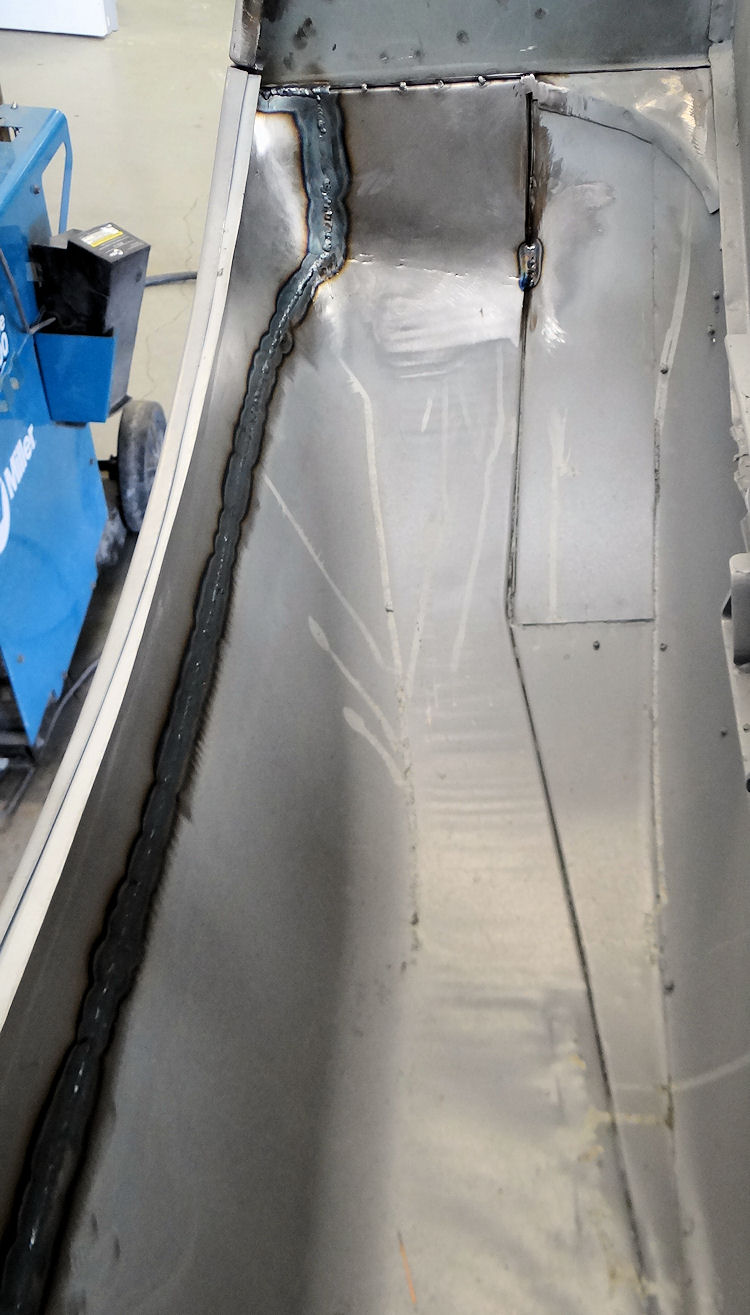
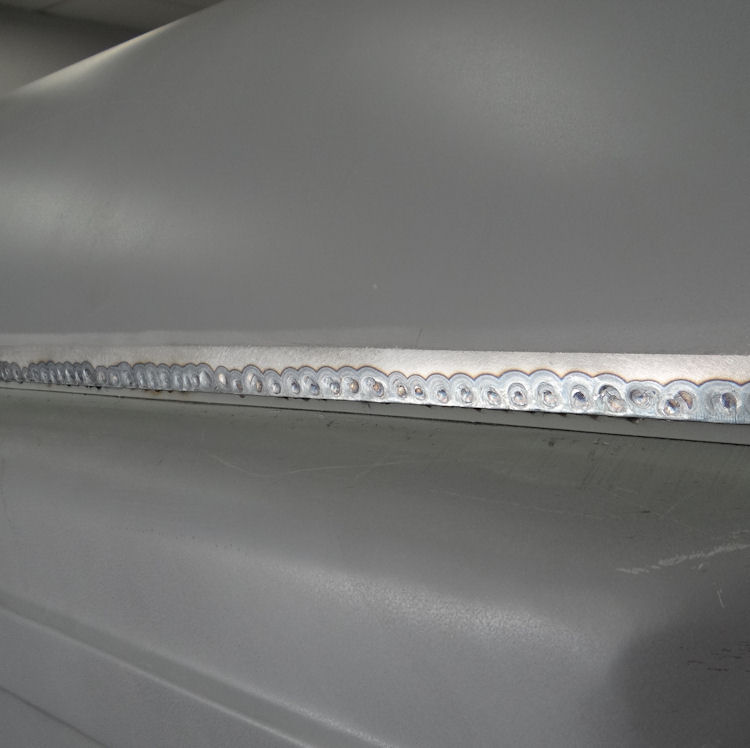
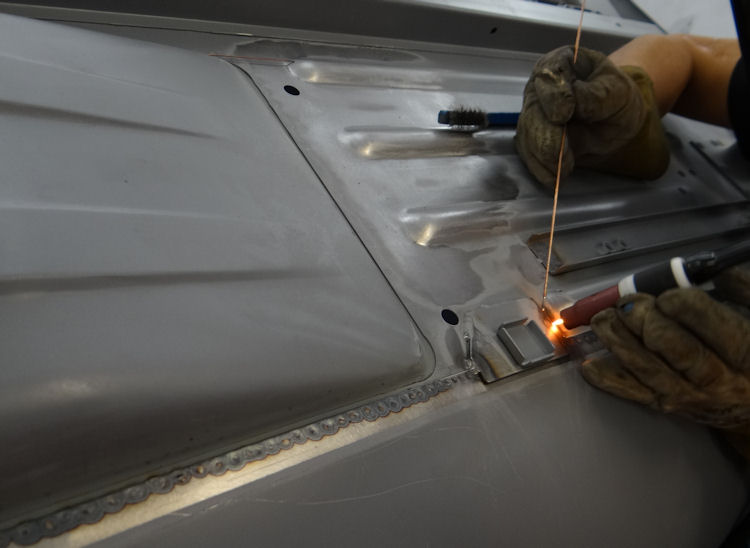
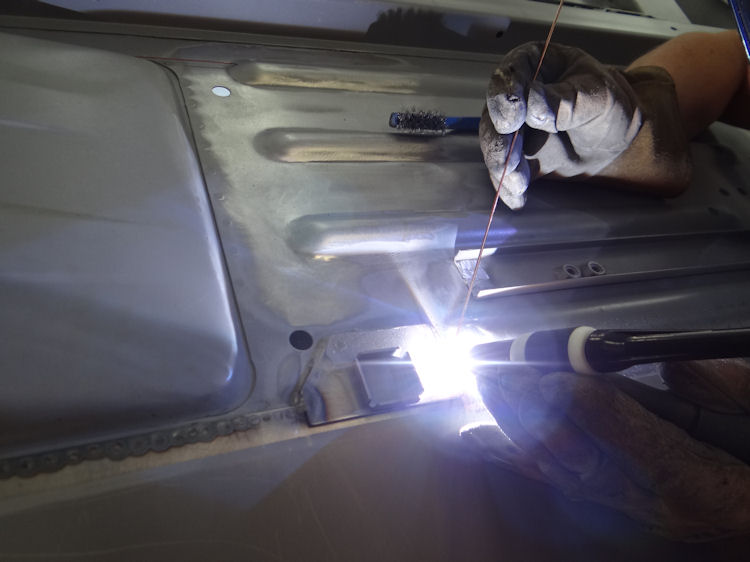
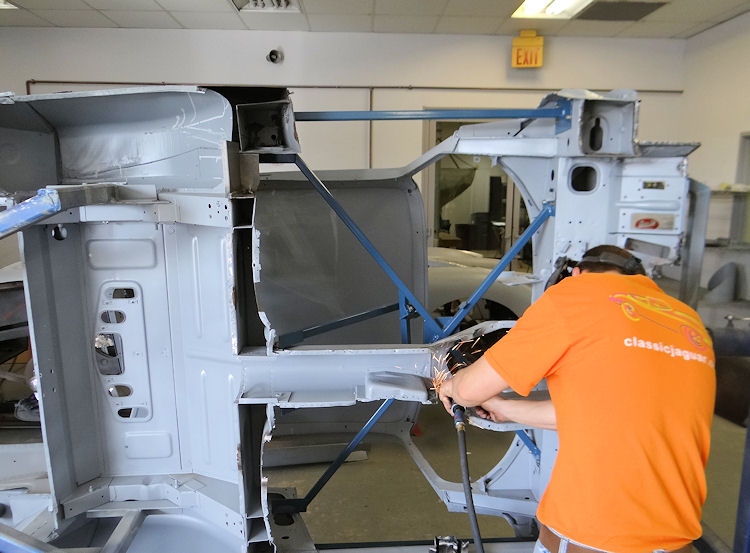
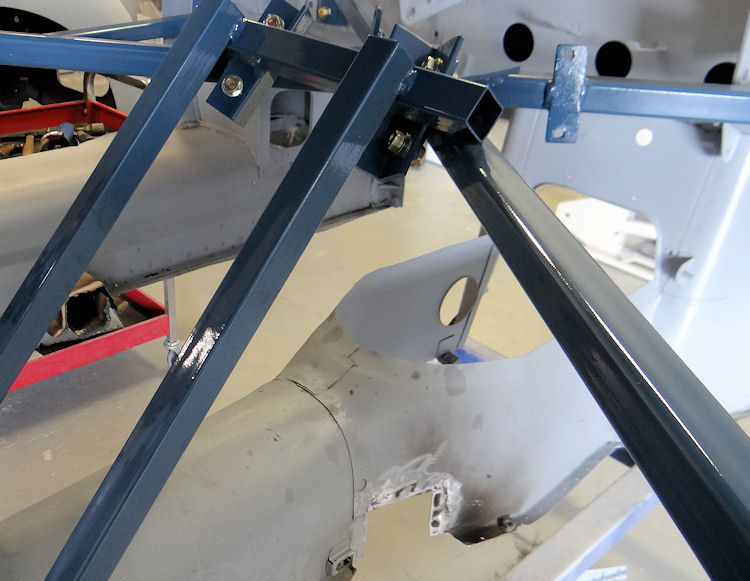
hundreds of welds |
|
|
|
 |
 |
|
|
|
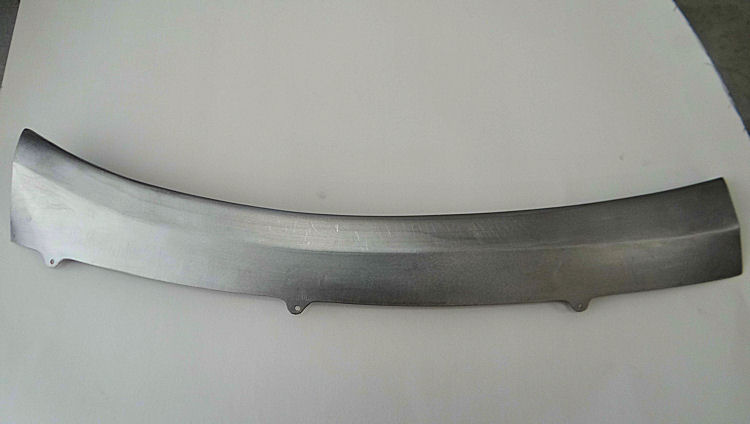
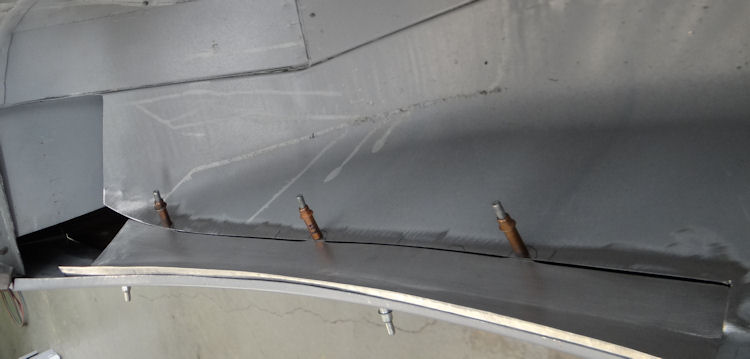
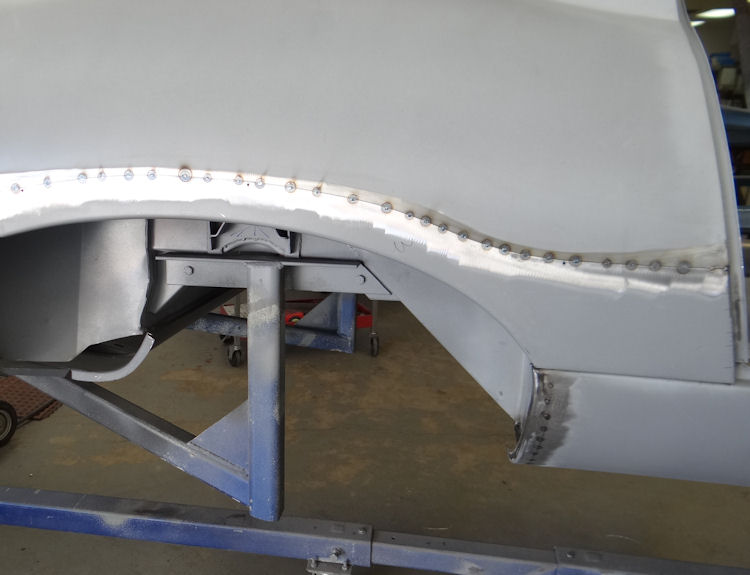
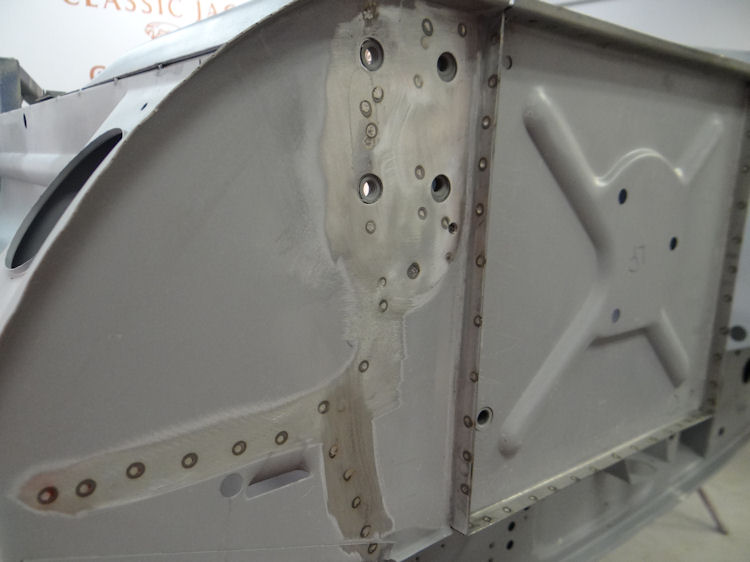
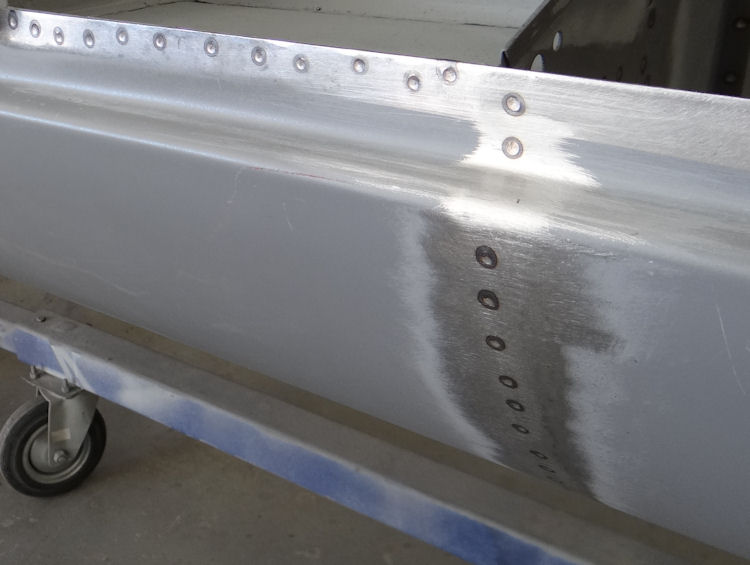
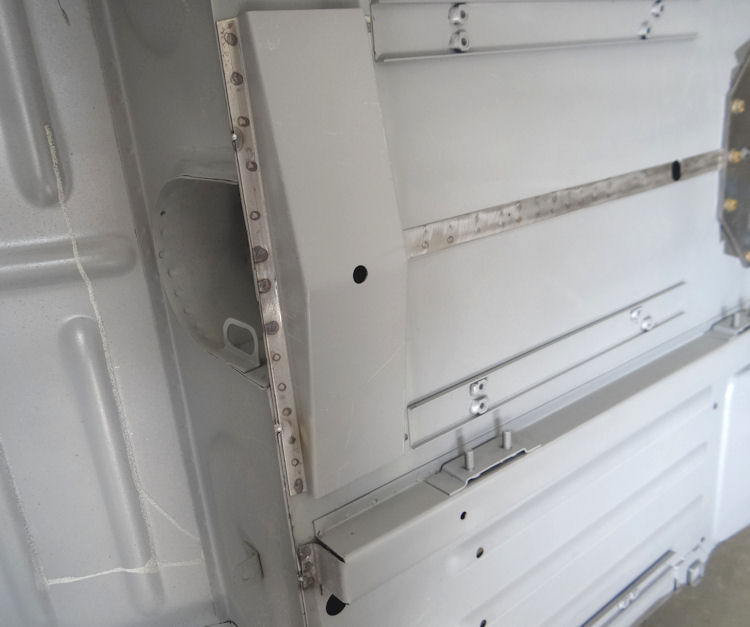
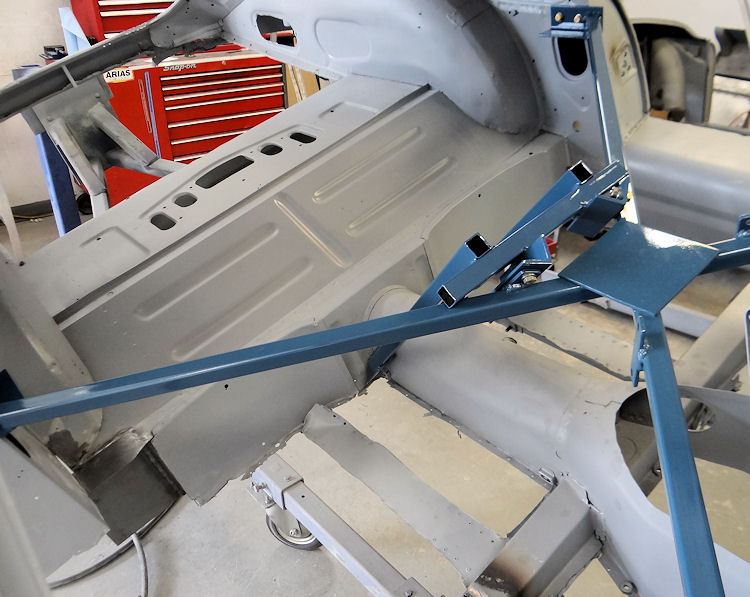
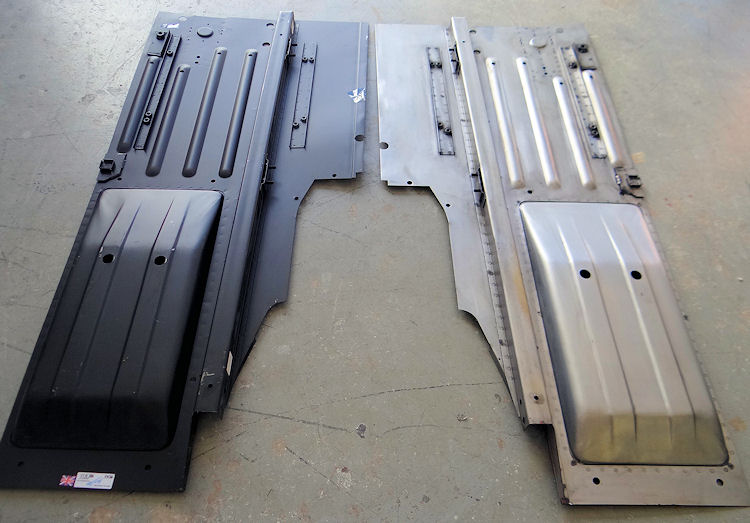
Installing new floors in the CJ Coachworks....
 |
 |
|
|
|
 |
 |
|
|
|
 |
 |
Happy Birthday, Andre! Lots of progress in the Coachworks....
 |
 |
|
|
|
 |
 |
|
|
|
 |
 |
|
|
|
 |
 |
|
|
|
 |
 |
 |
 |
|
|
|
 |
 |
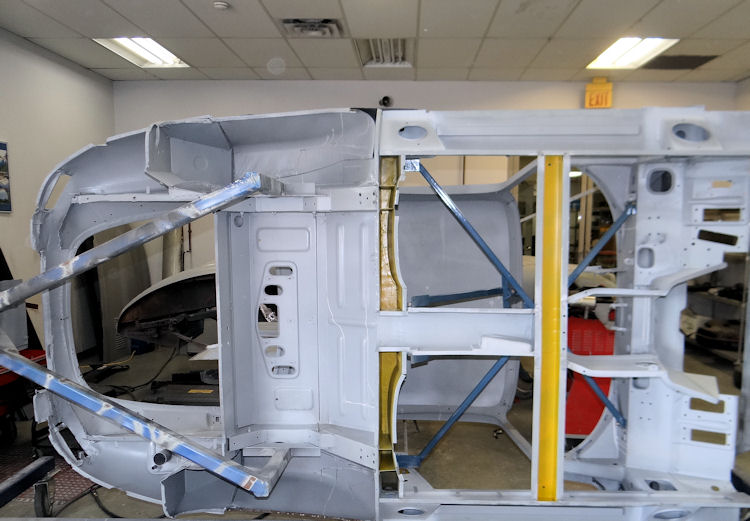
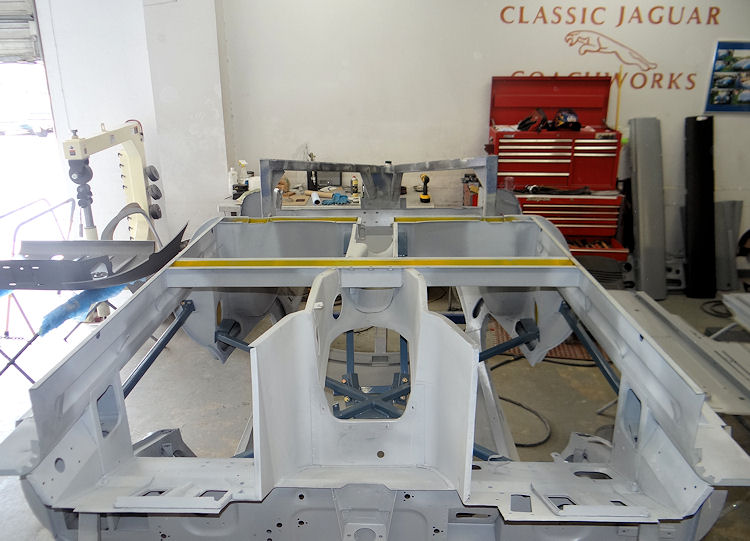
Starting to see the light at the end of the tunnel, now.
 |
 |
|
|
|
|
|
|
 |
 |
|
|
|
|
|
|
 |
 |
|
|
|
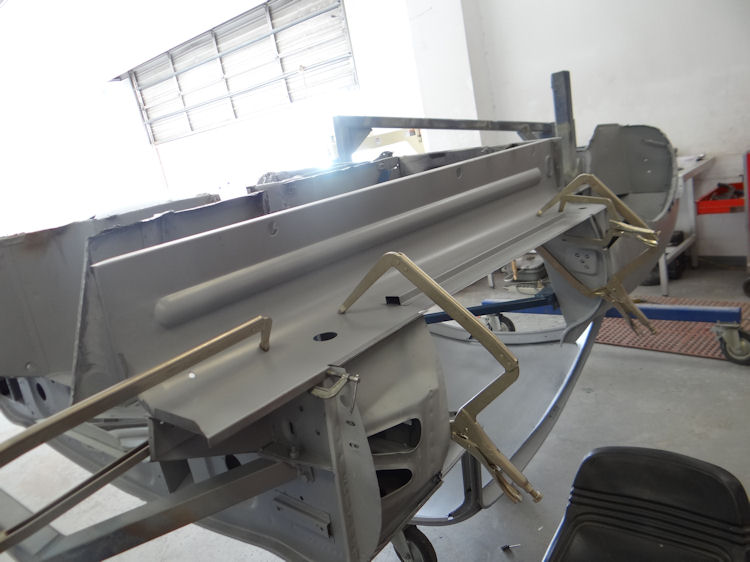
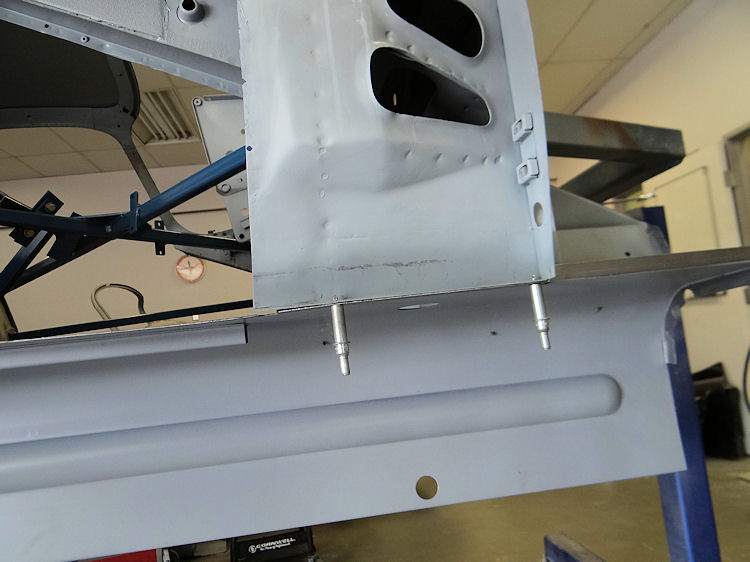
Lots of progress in the Coachworks...
 |
 |
|
|
and B pillar |
 |
 |
|
|
|
|
|
|
 |
 |
|
|
|
|
|
|
 |
 |
|
|
|
|
|
|
 |
 |
|
|
|
|
|
|
 |
 |
|
|
|
 |
 |
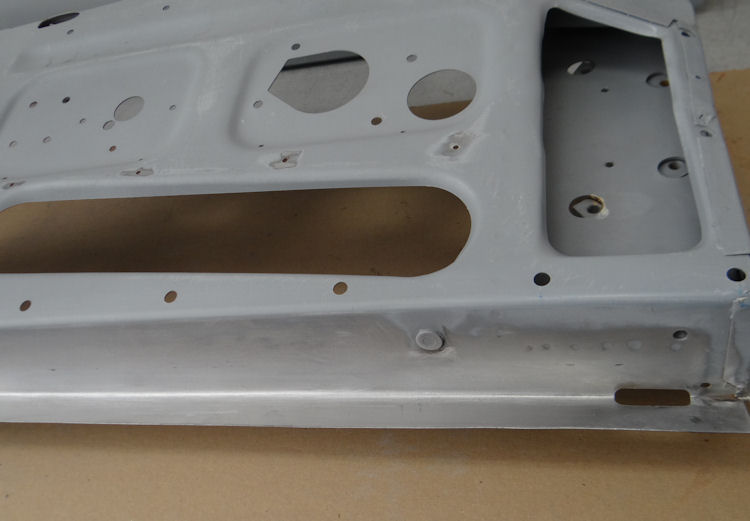
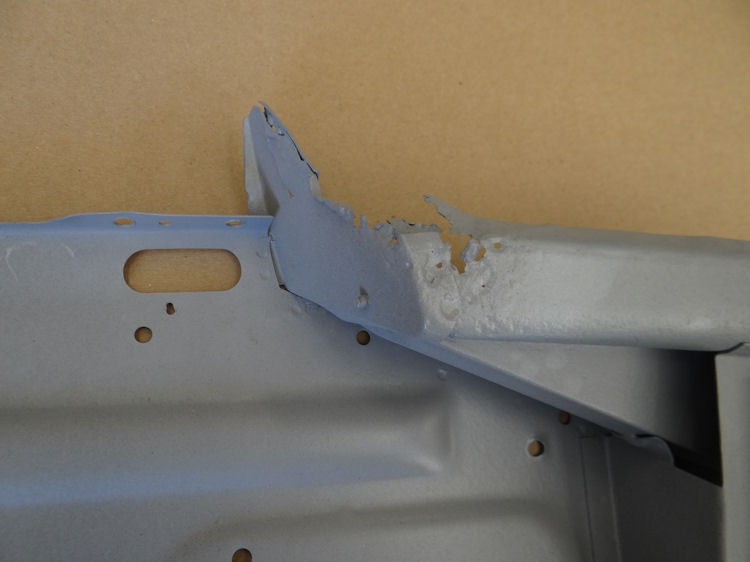
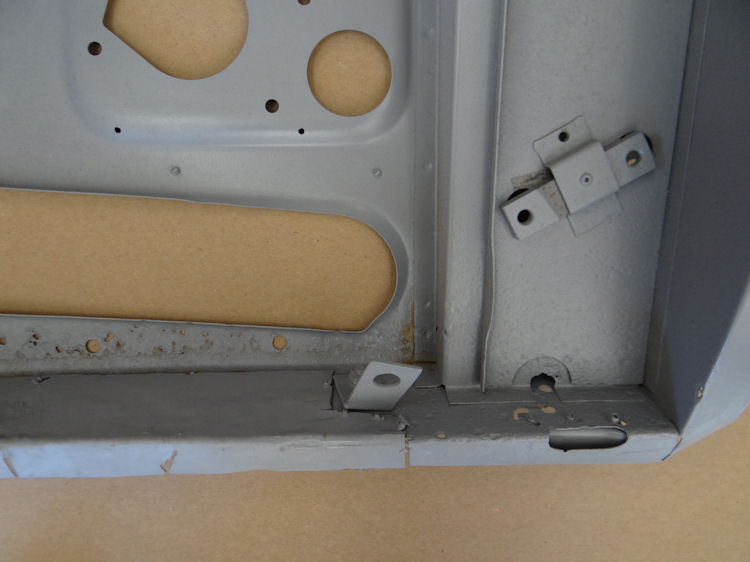
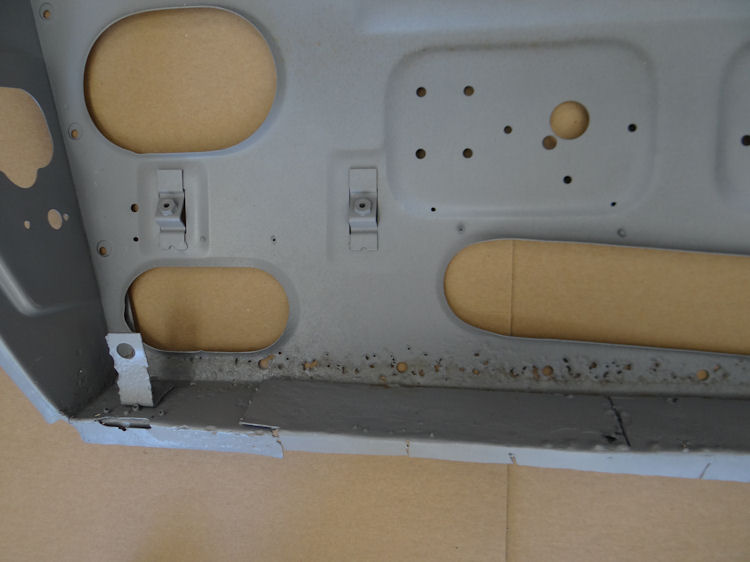
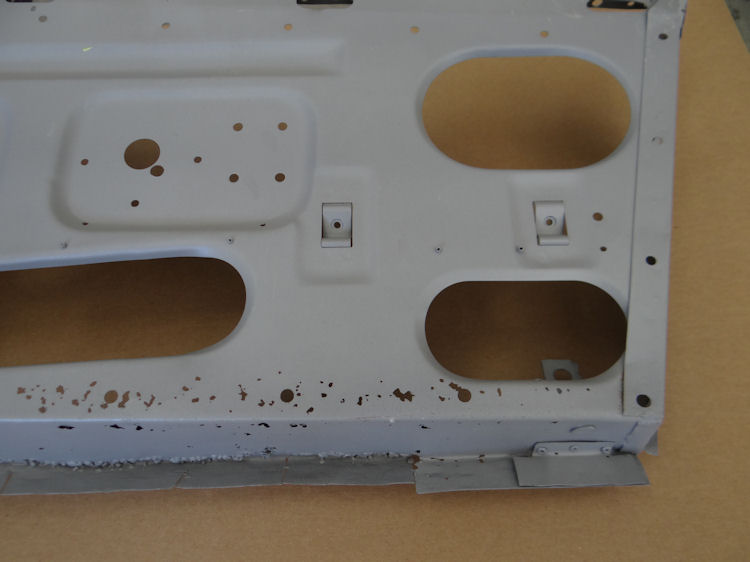
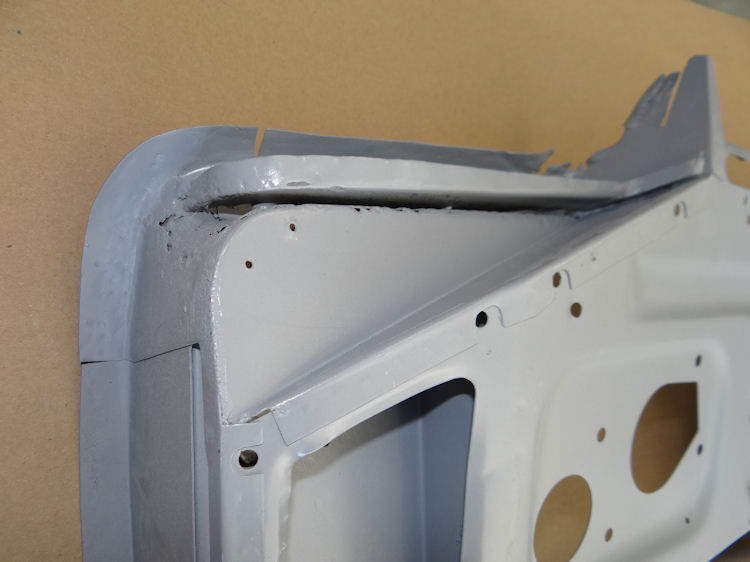
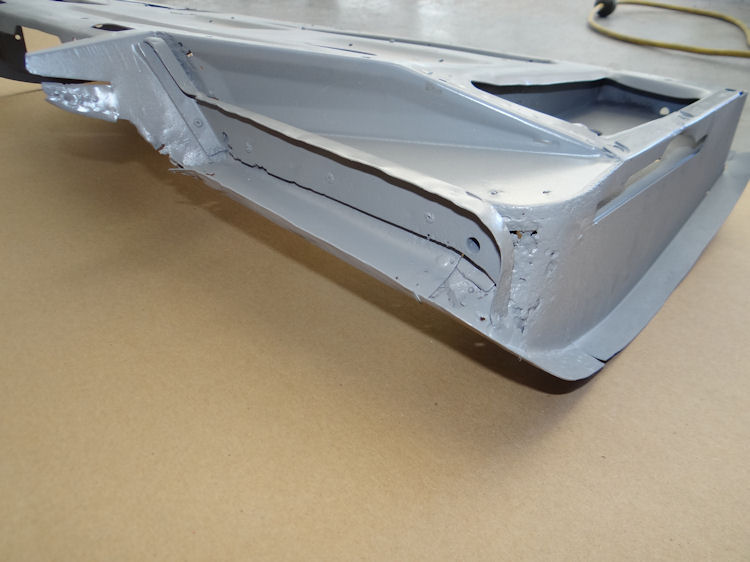
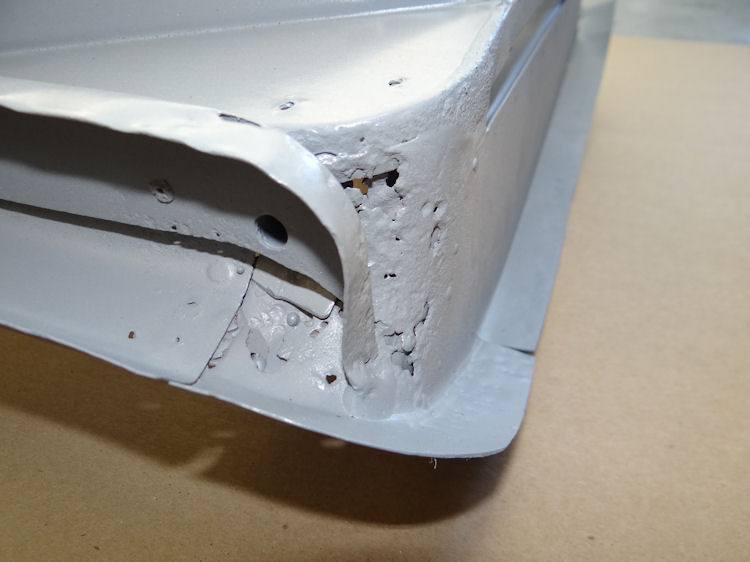
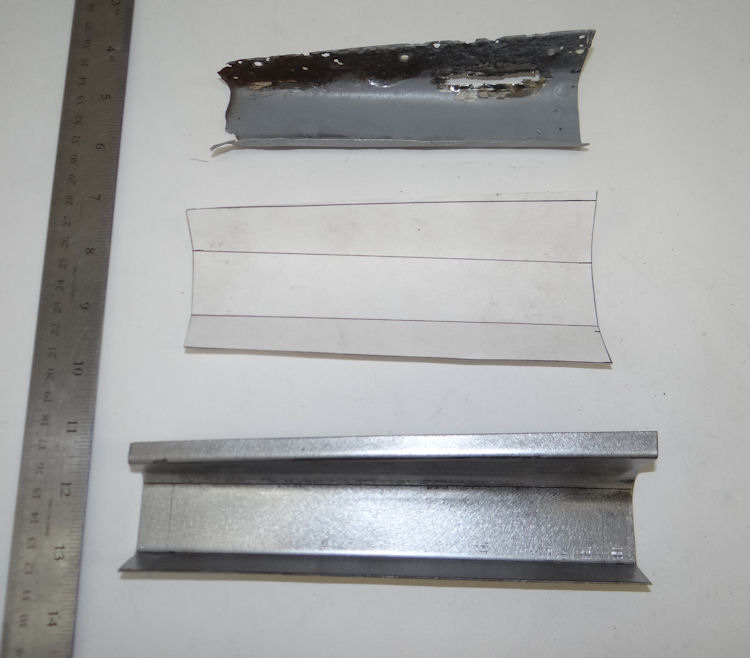
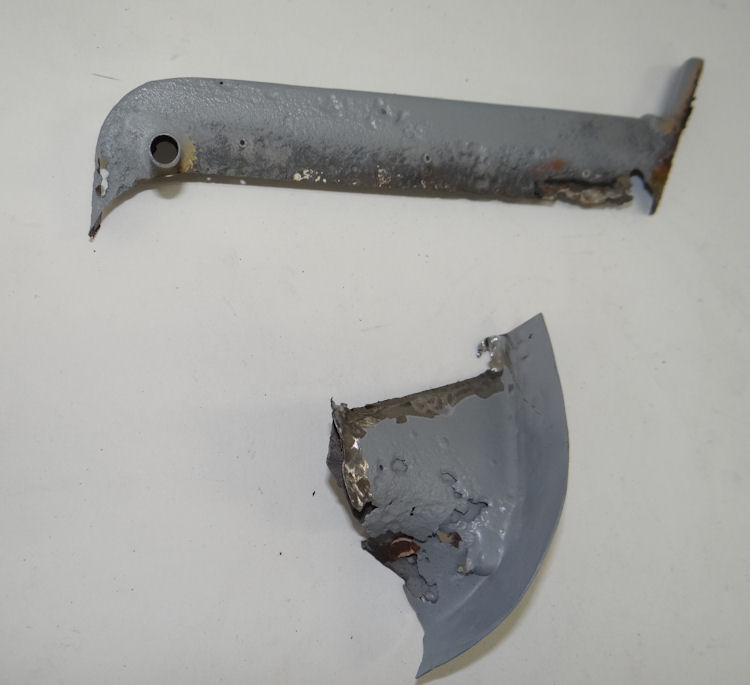
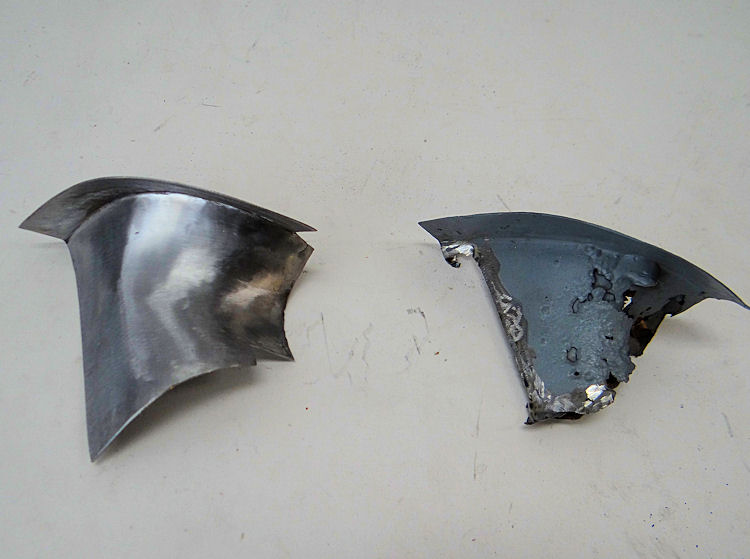
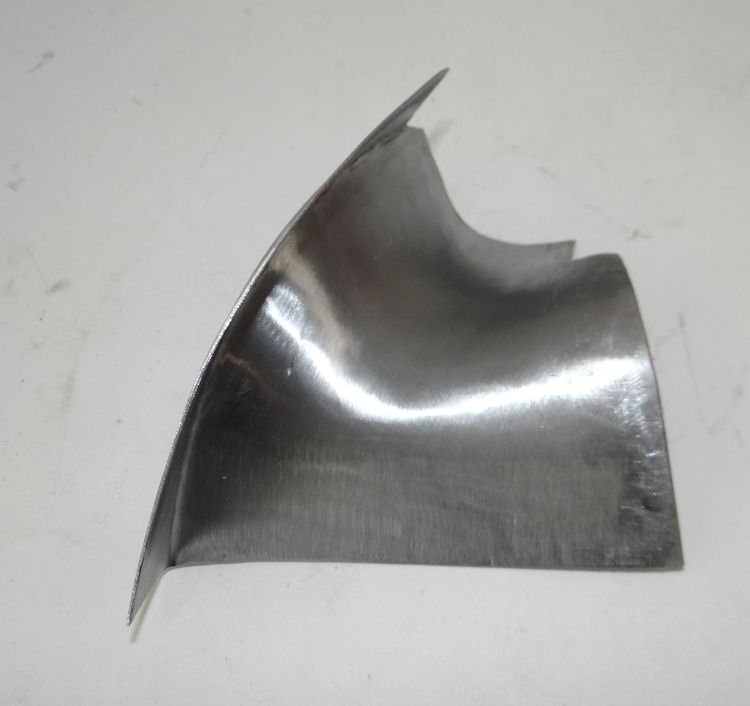
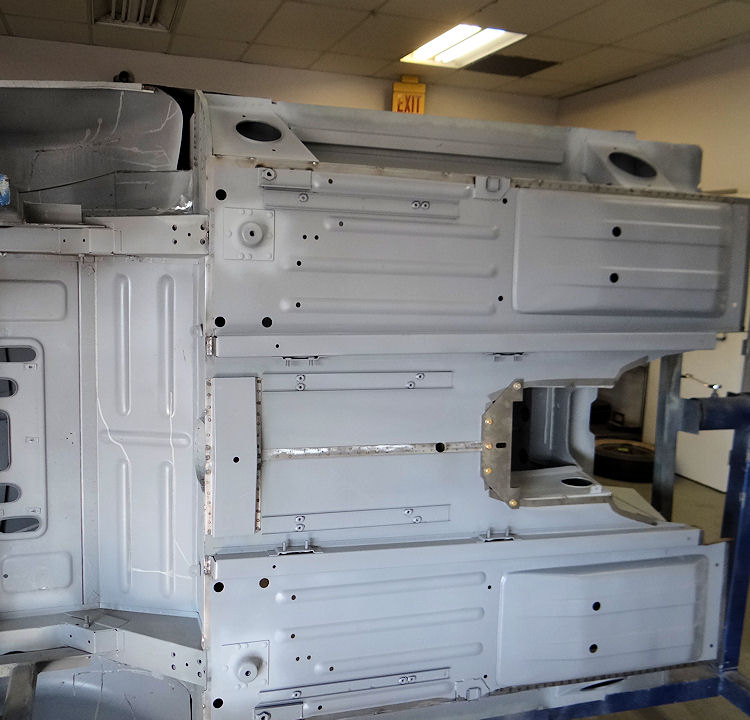
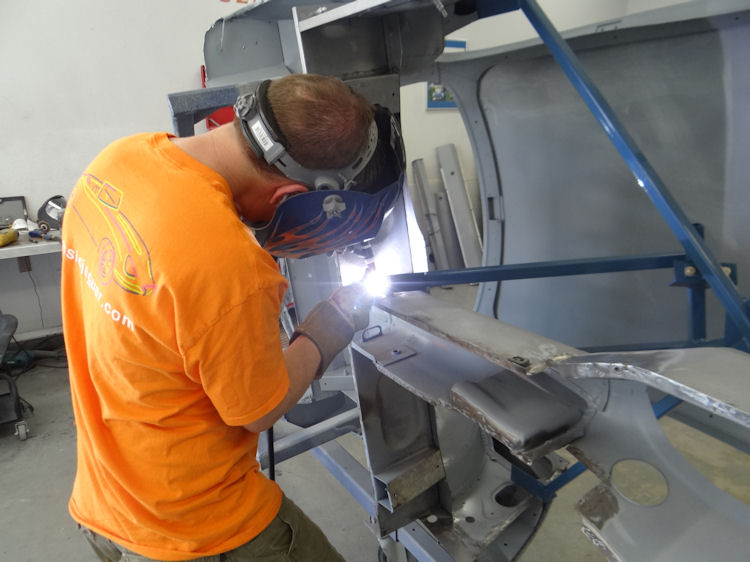
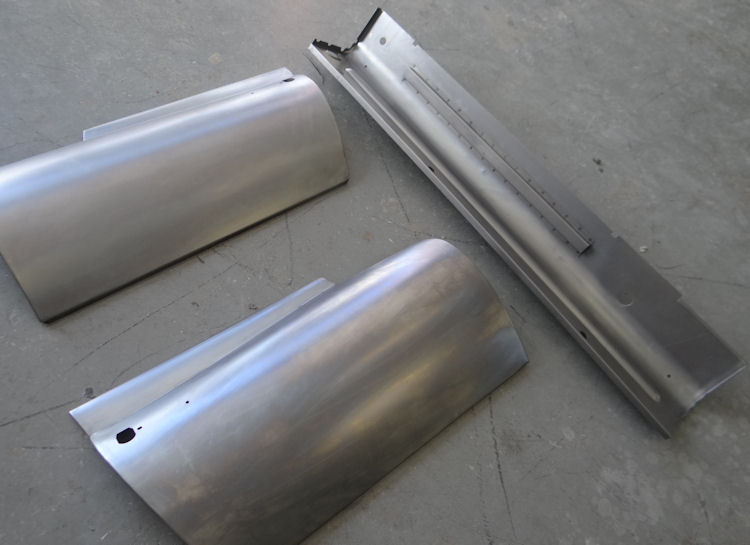
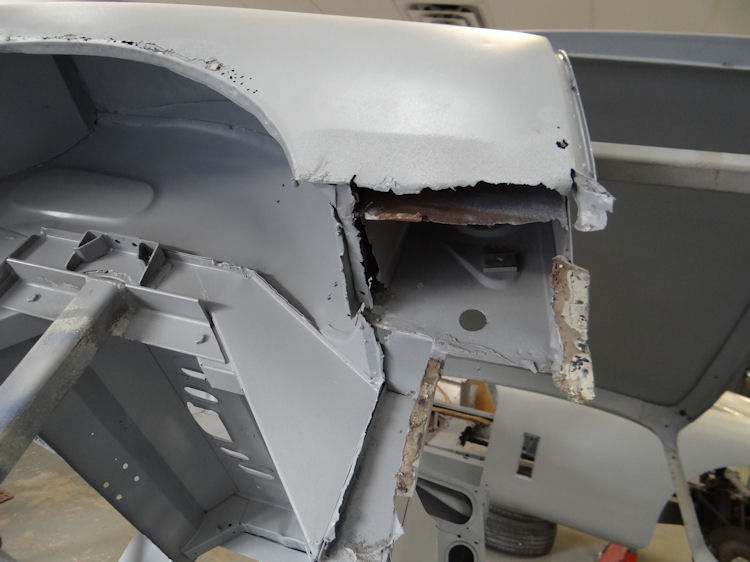
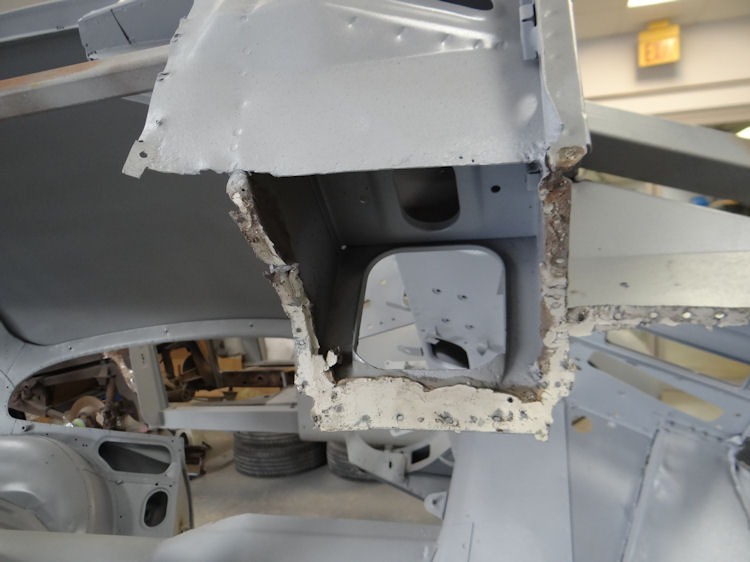
Cutting away corroded sheet metal, stripping shipping primer from new panels...
 |
 |
|
|
|
|
|
|
 |
 |
|
|
|
|
|
|
 |
 |
|
|
|
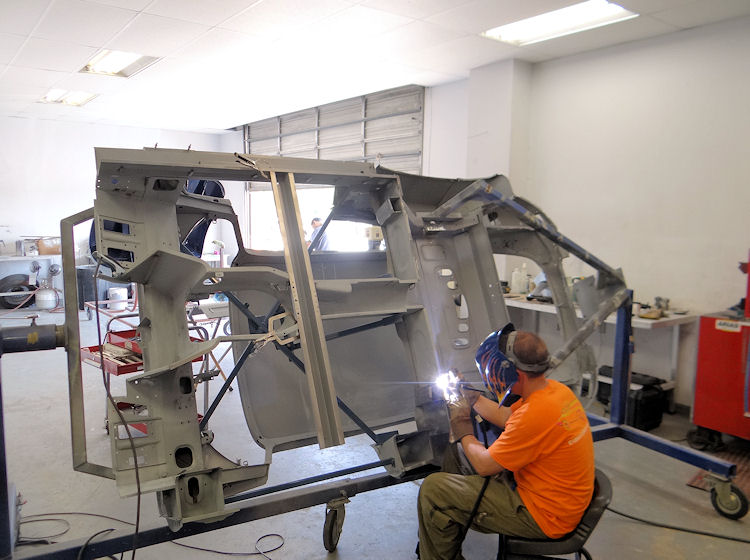
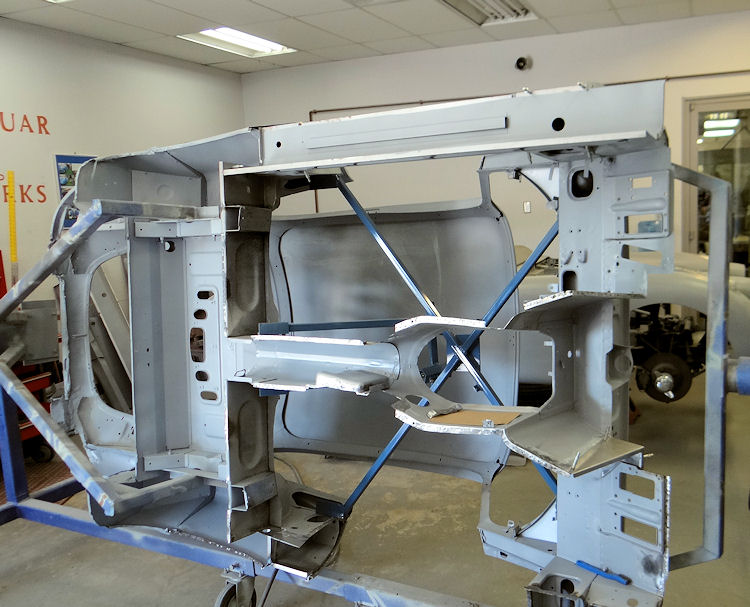
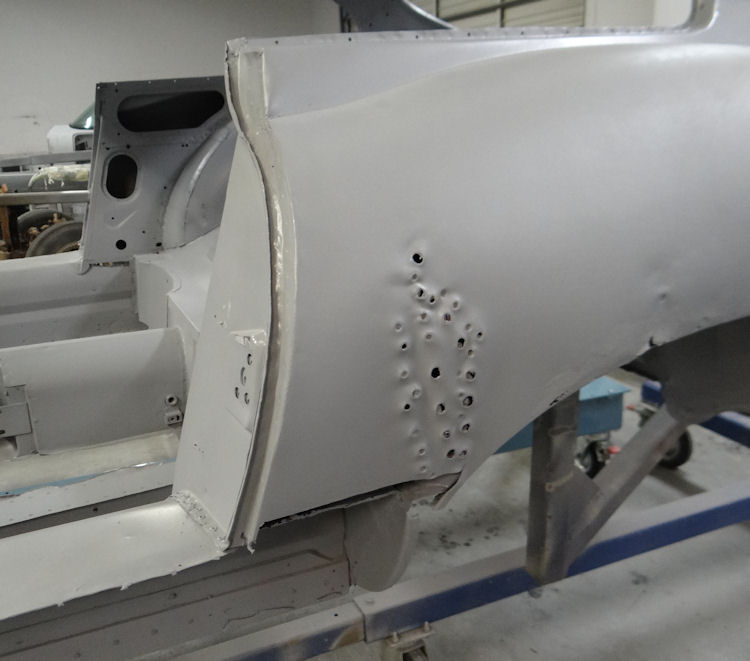
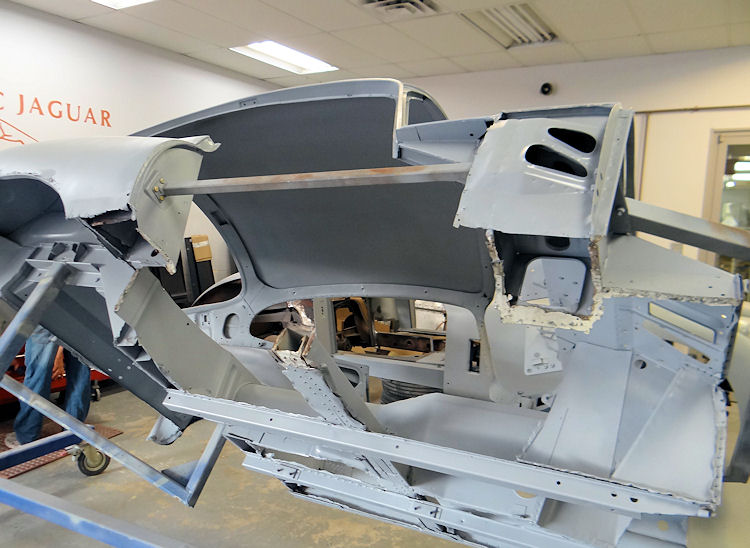
Total body restoration getting underway....
 |
 |
|
|
|
|
|
|
 |
 |
|
|
|
 |
 |
|
|
|
|
|
|
 |
 |
|
|
|
|
|
|
 |
 |
|
around the roof panel |
back with new sheet metal |
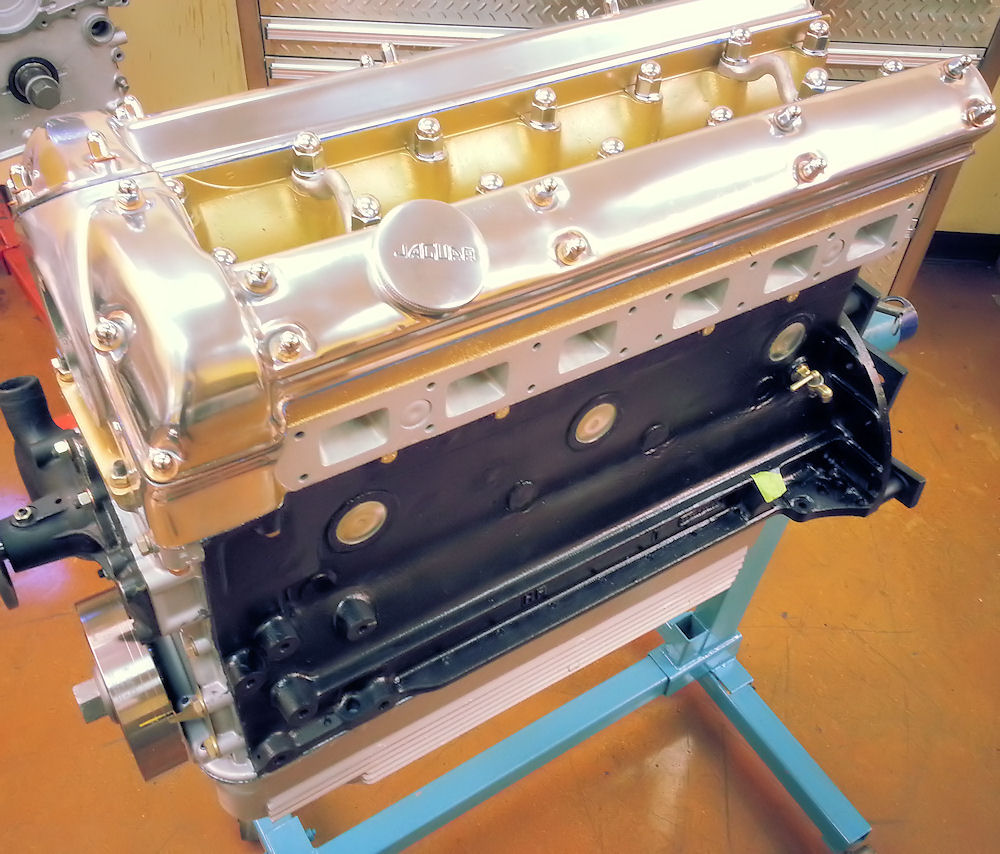
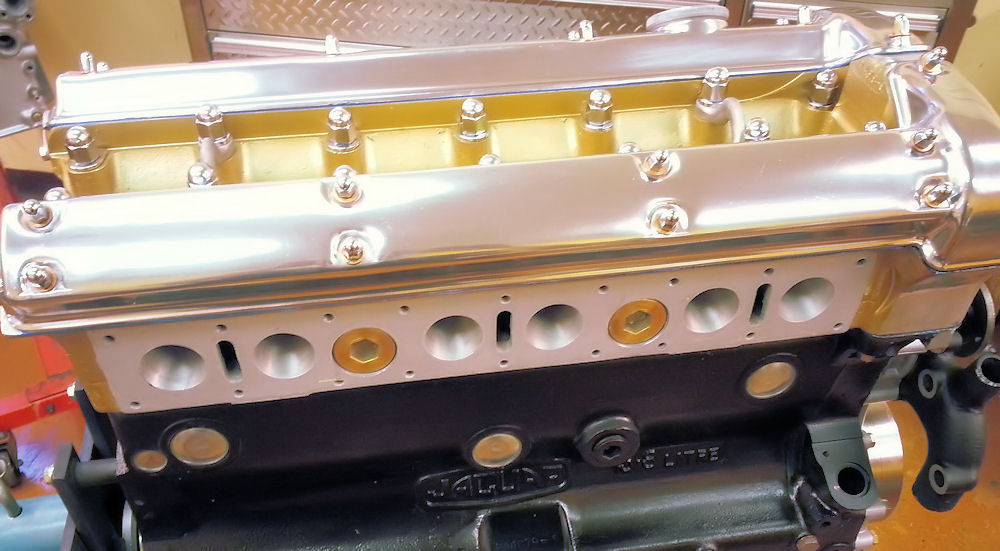
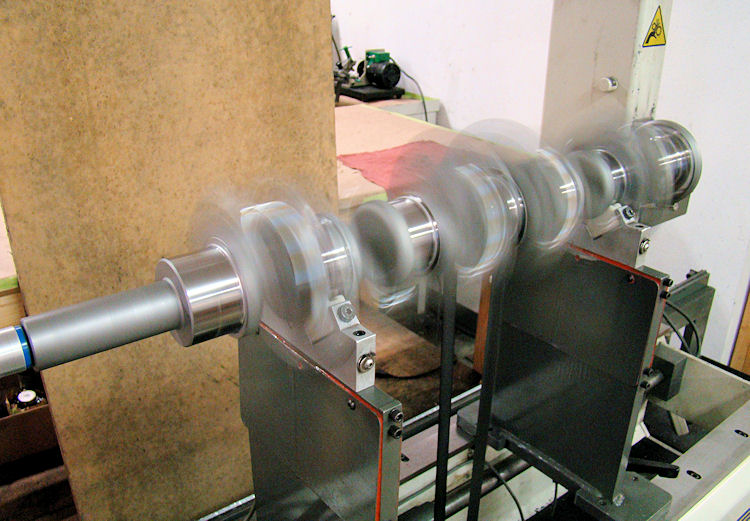
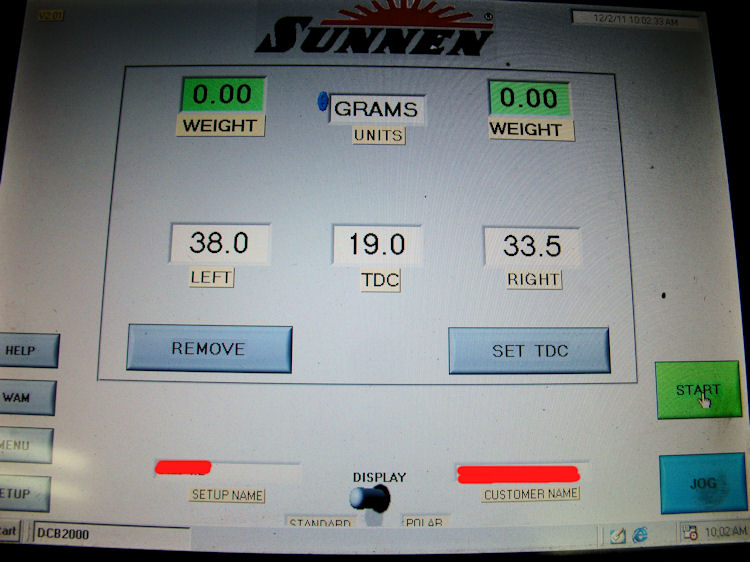
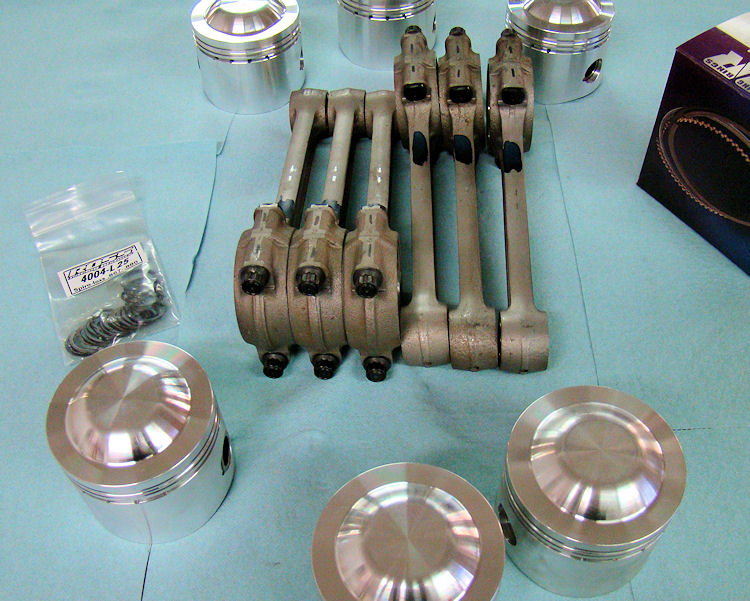
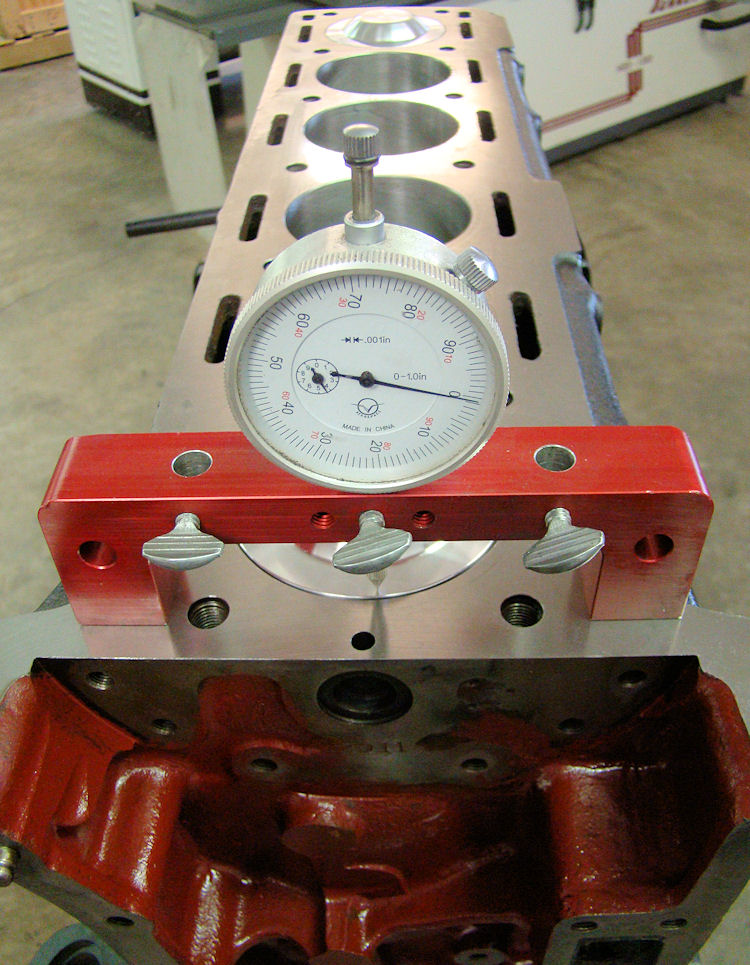
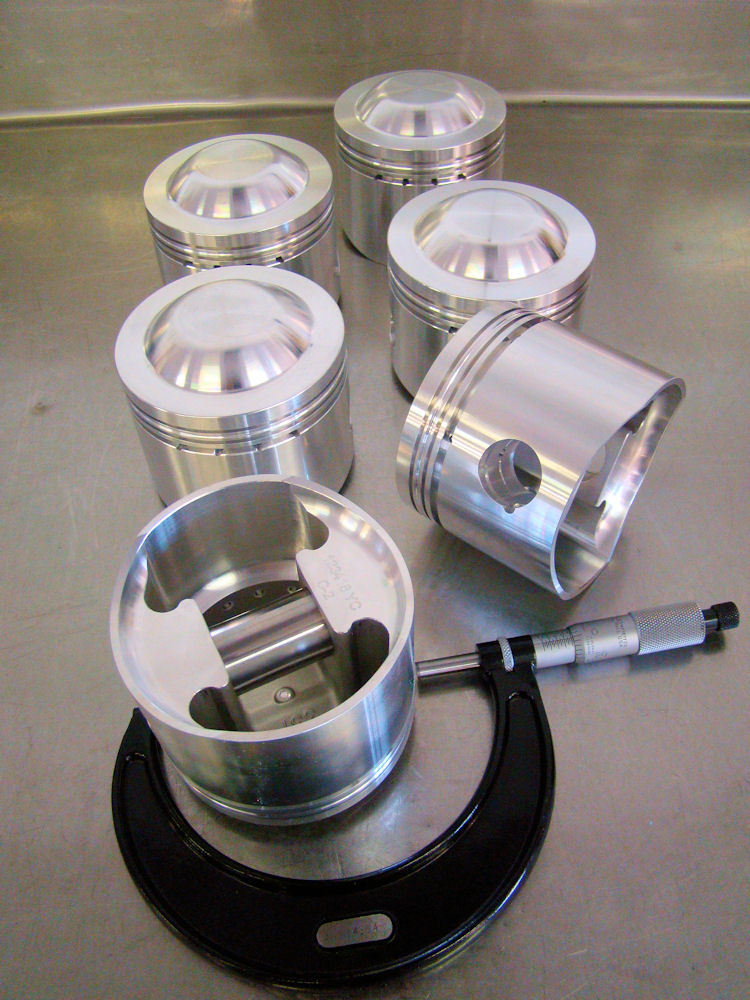
Final assembly of your Stage One engine....
 |
 |
|
|
|
|
|
|
 |
 |
|
precise compression ratio |
|
|
|
|
 |
|
|
|
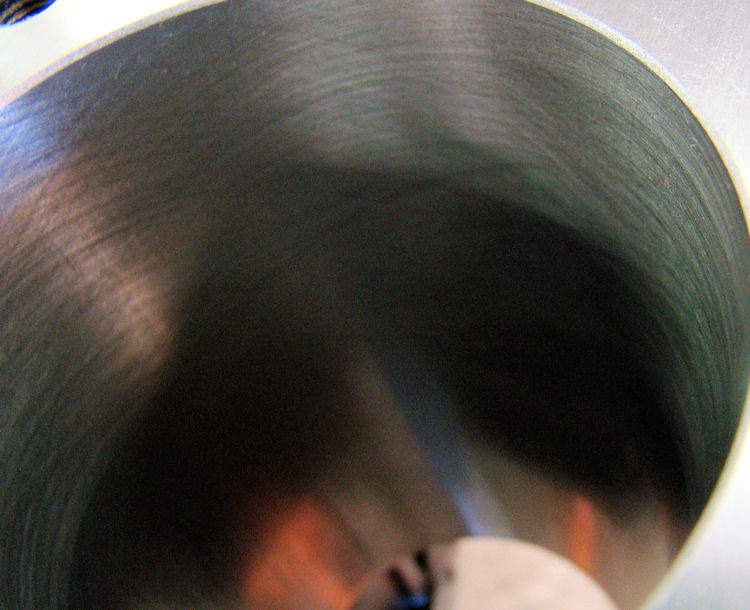
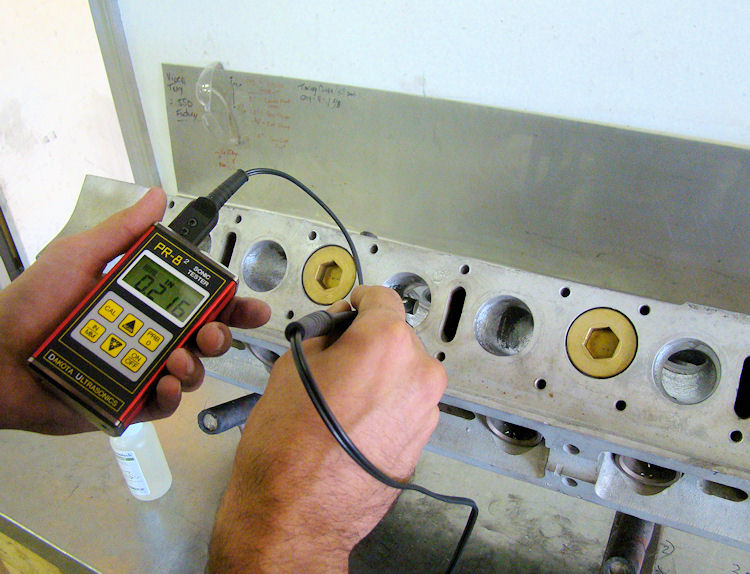
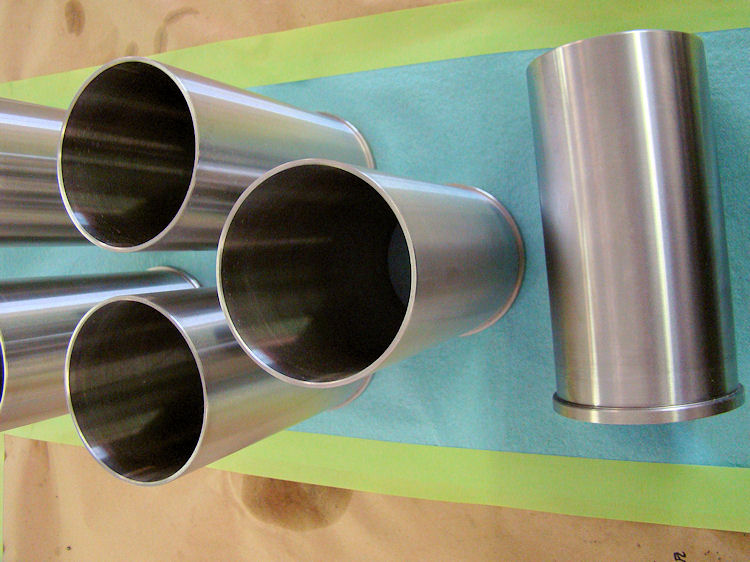
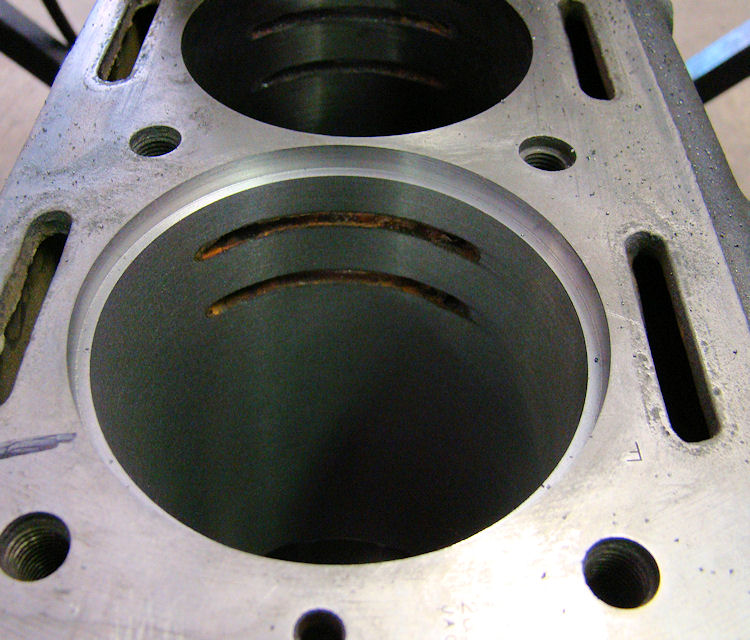
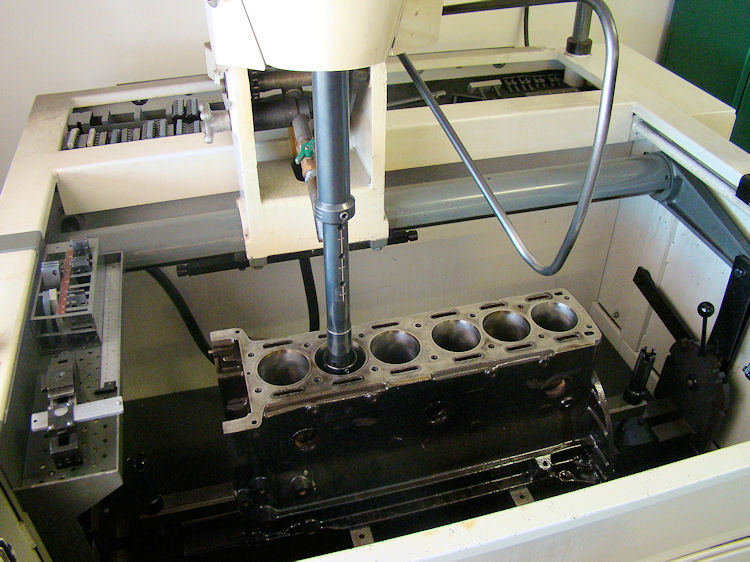
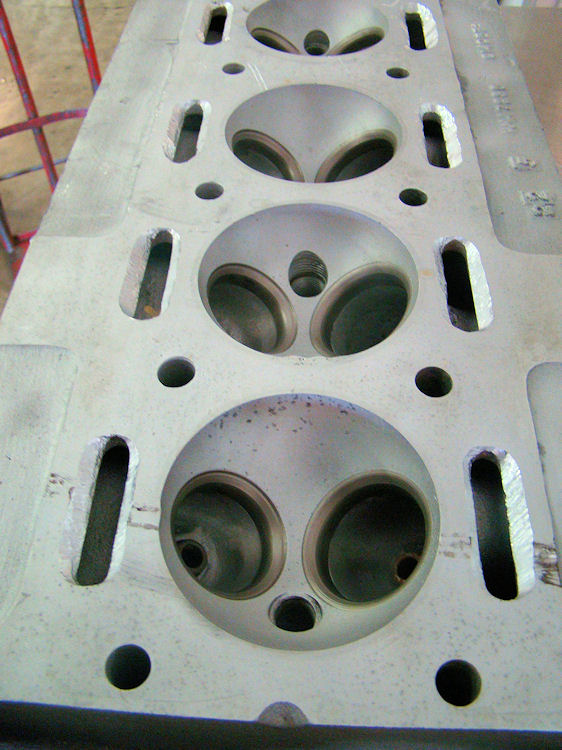
We have now completed the repair and rebuild of your cylinder head, and will be assembling the block next week.
 |
 |
|
after the honing process |
|
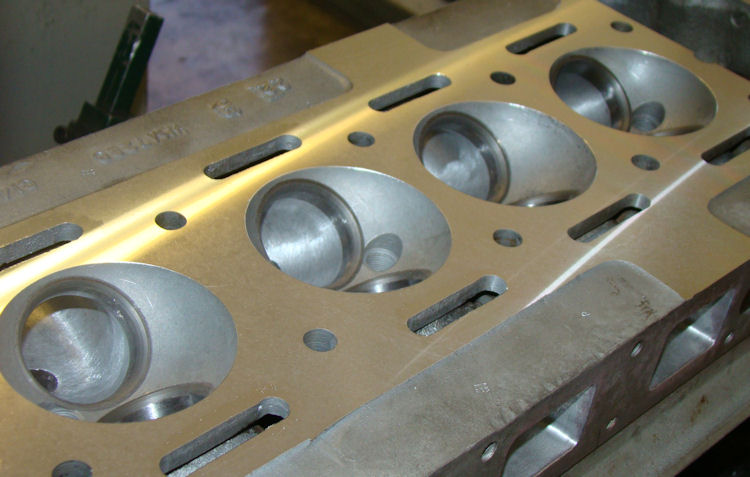
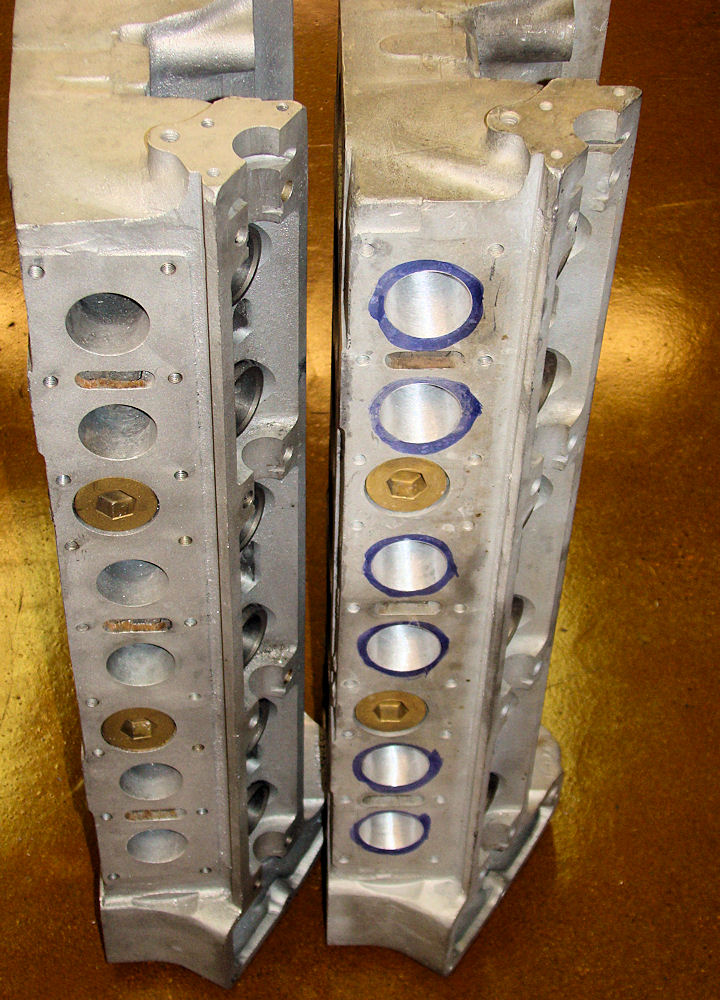
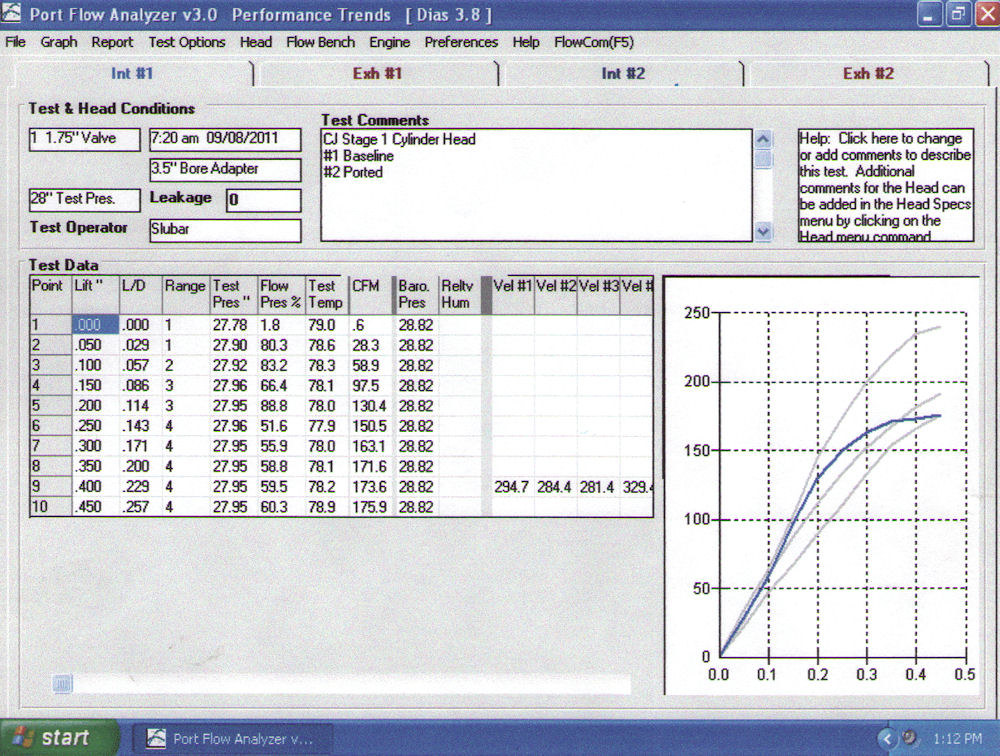
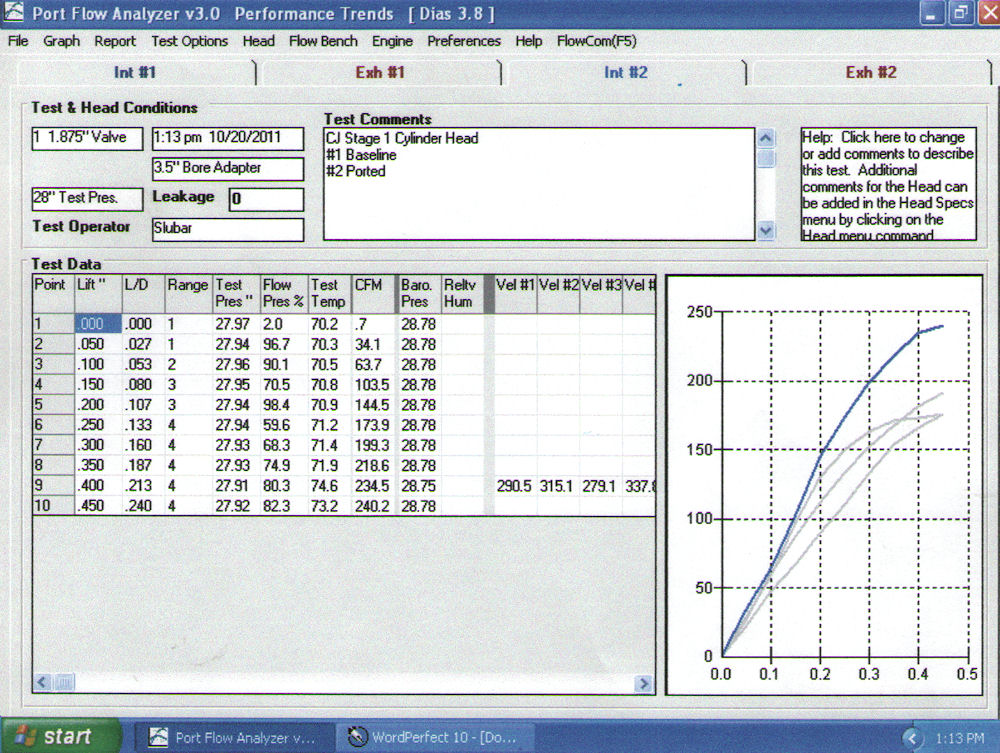
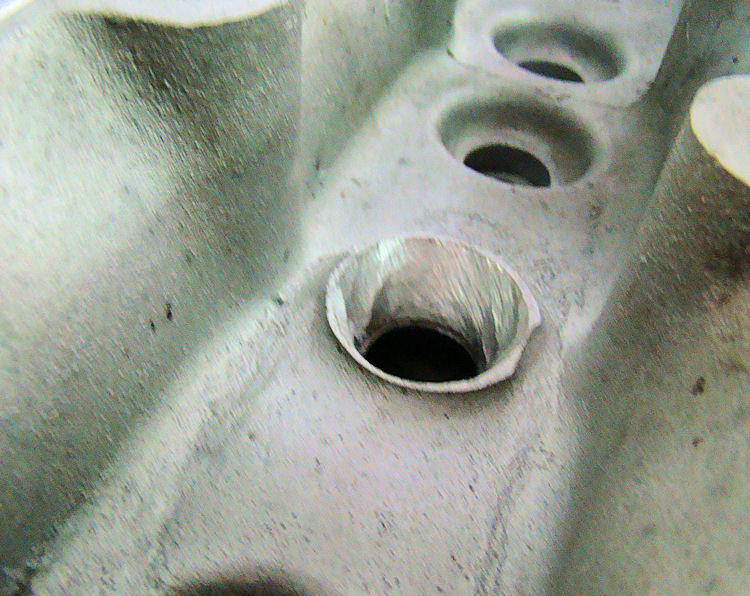
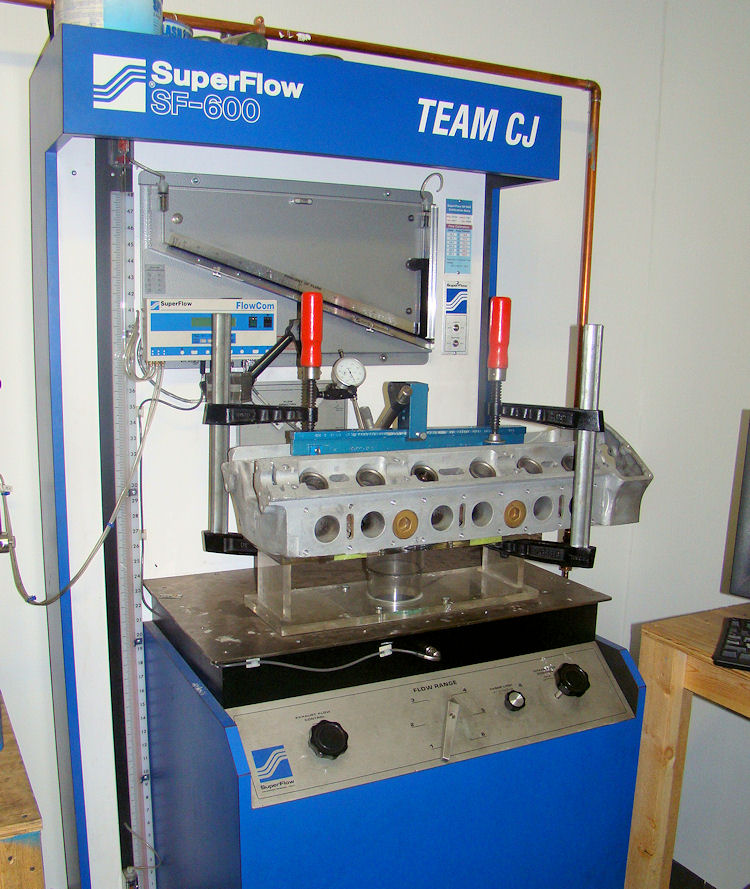
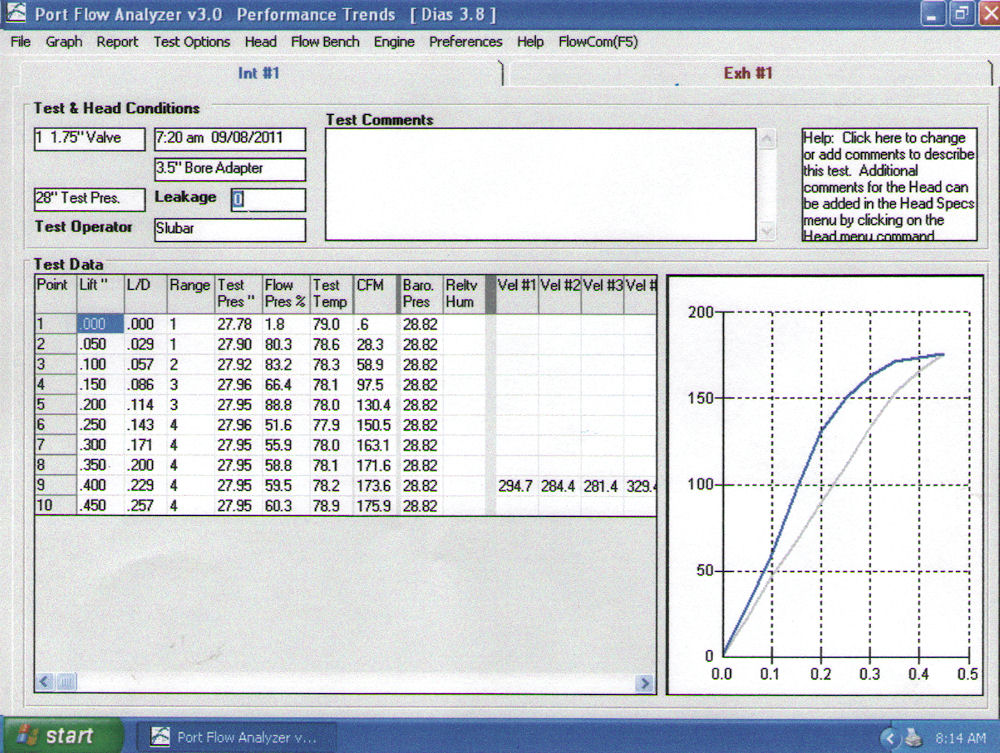
I am pleased to report that Chris has now finished all of the machine work and porting to your cylinder head, and we saw some huge gains on the flow bench. We actually picked up more than 64 cfm on the intake runners, which represents a spectacular improvement in flow.
 |
 |
|
|
|
|
|
|
 |
 |
|
|
intake runners |
|
|
|
 |
 |
|
a standard, unported head (left) |
|
|
|
|
 |
 |
|
|
|
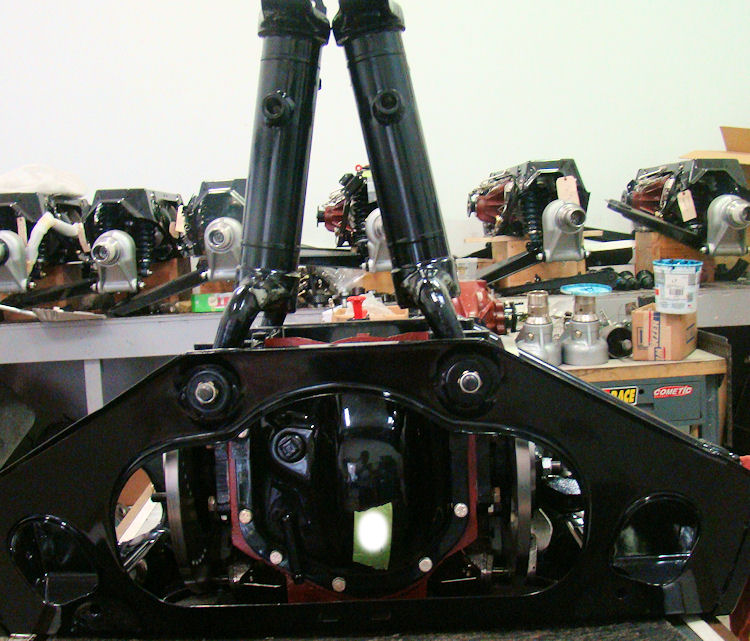
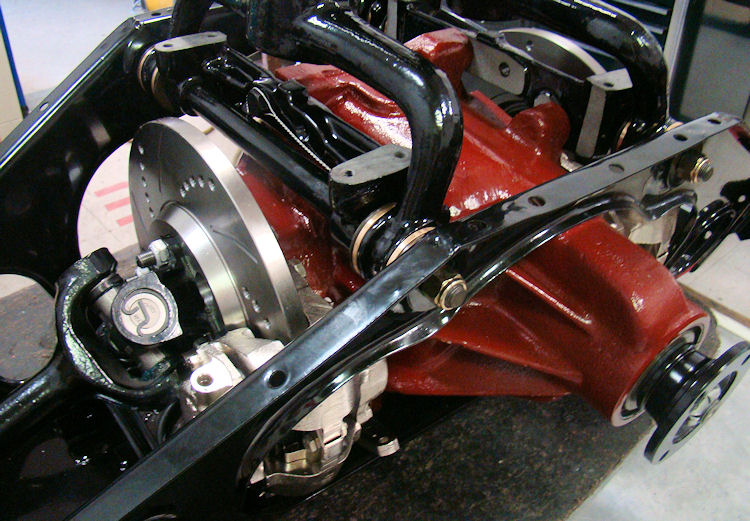
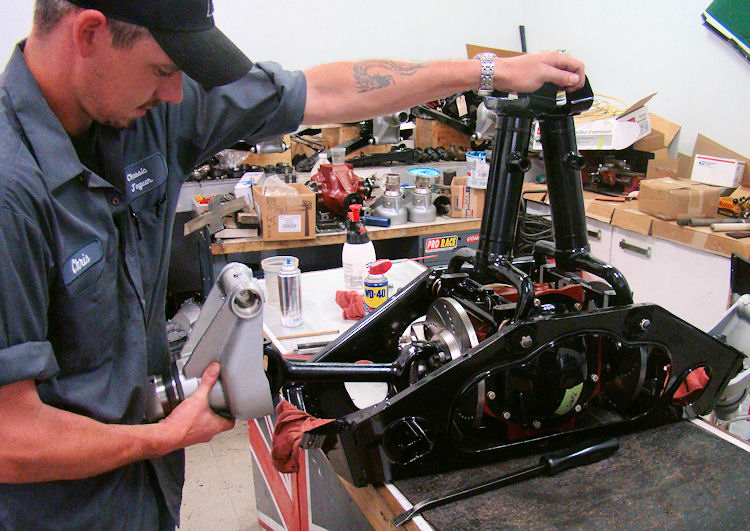
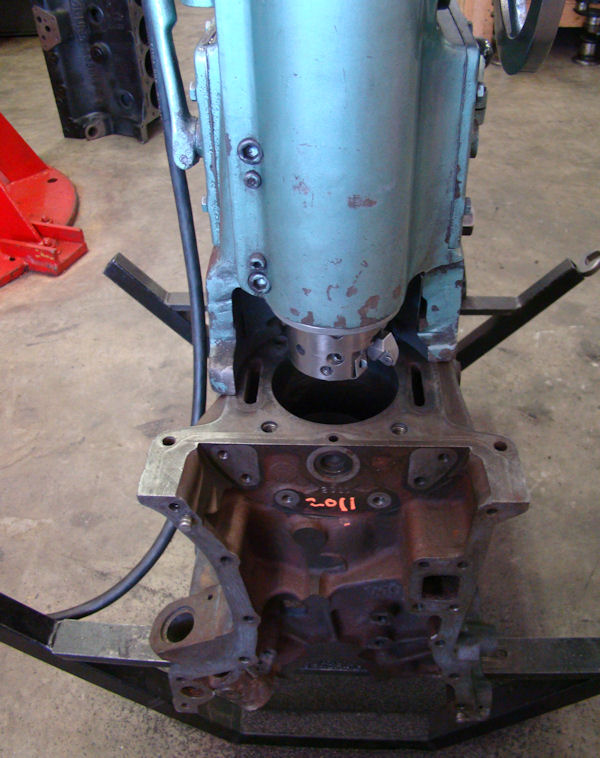
The following sequence of photos show Chris rebuilding your IRS and Kevin doing your engine block machine work.
 |
 |
|
|
|
|
|
|
 |
 |
|
|
|
|
|
|
 |
 |
|
|
|
|
|
|
 |
 |
|
|
|
|
|
|
 |
 |
|
|
|
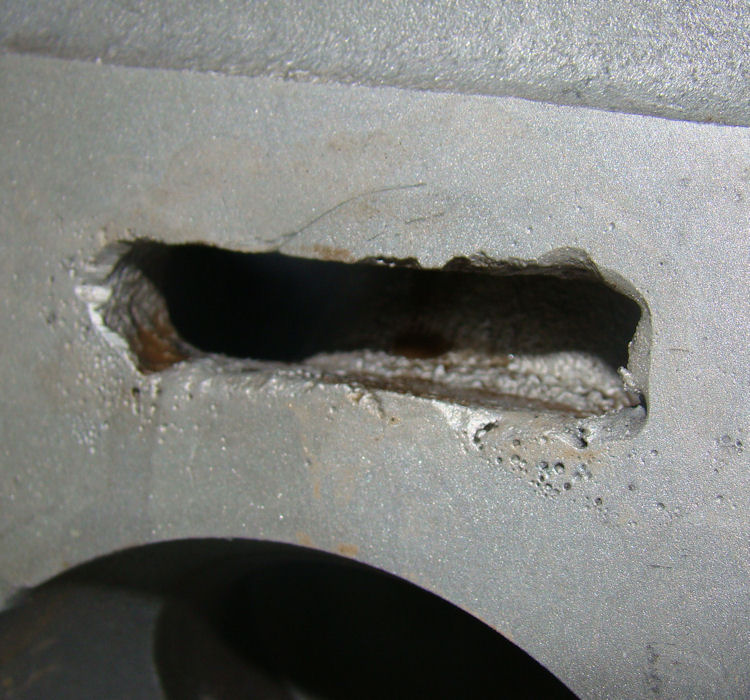
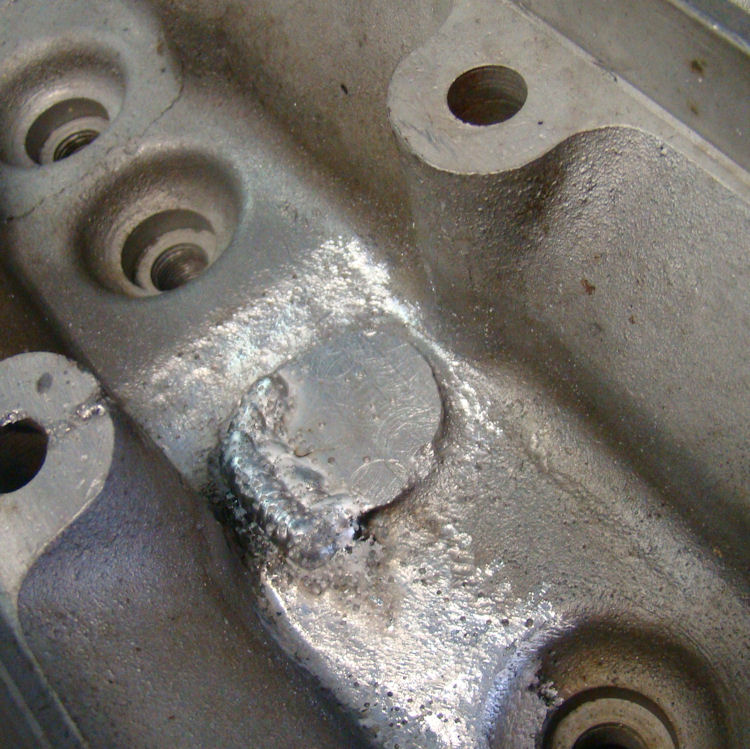
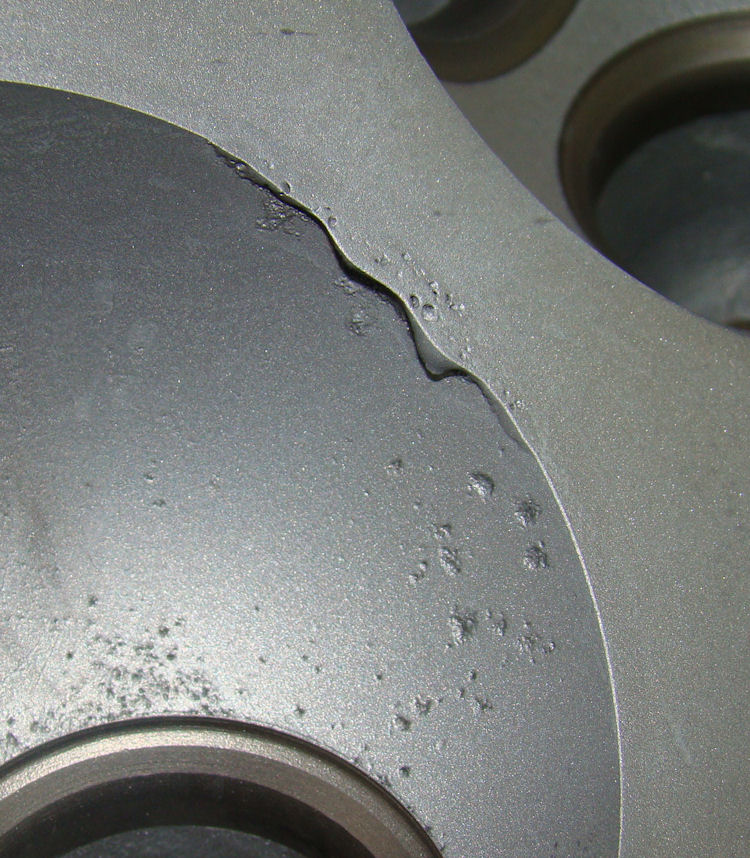
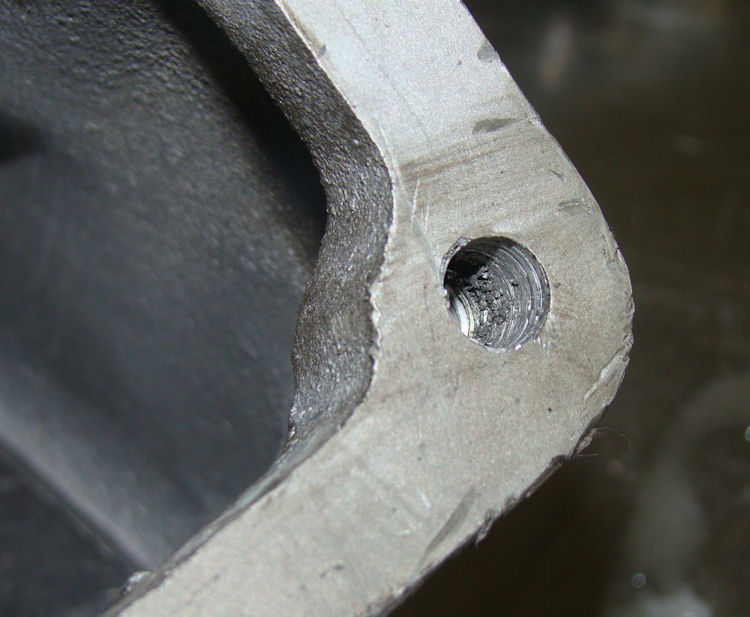
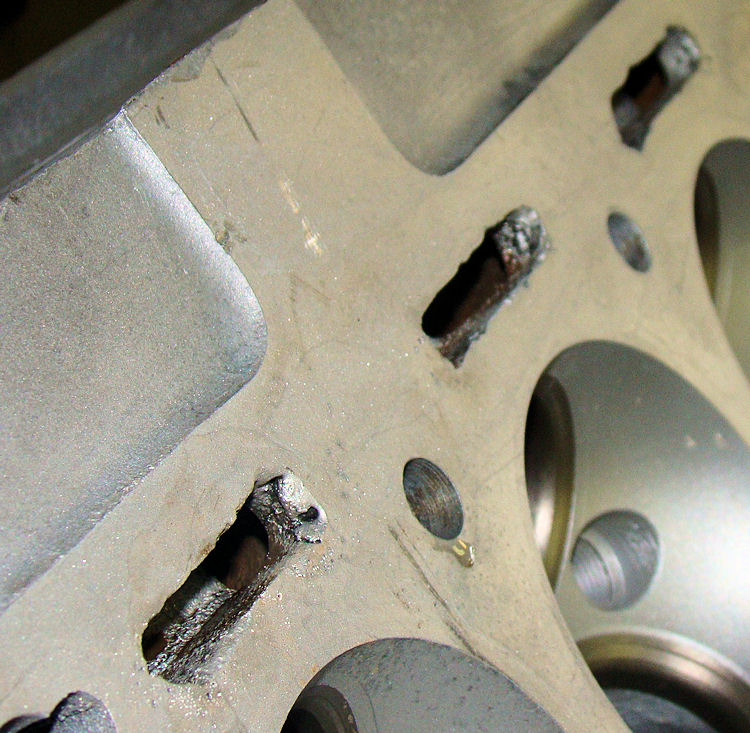
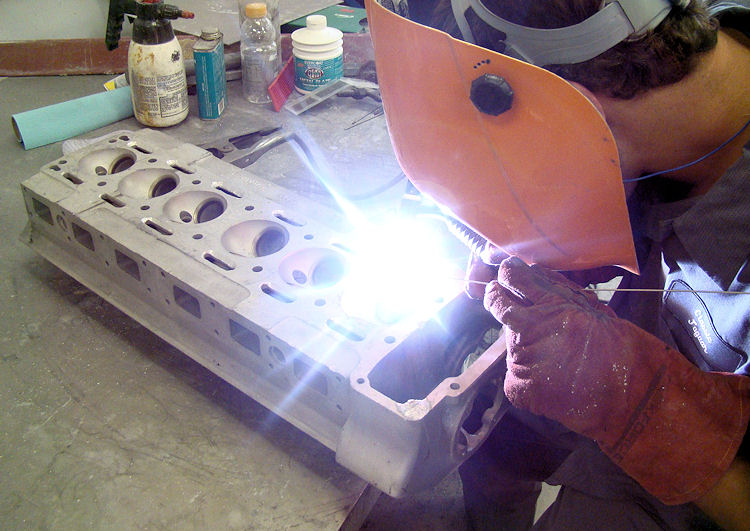
I am pleased to report that we have now finished repairing all the various cracks and corroded areas on your cylinder head. It is a while since we have seen one that was quite this bad.
 |
 |
|
|
|
|
|
|
 |
 |
|
|
|
|
|
|
 |
|
|
using an old head gasket as a template |
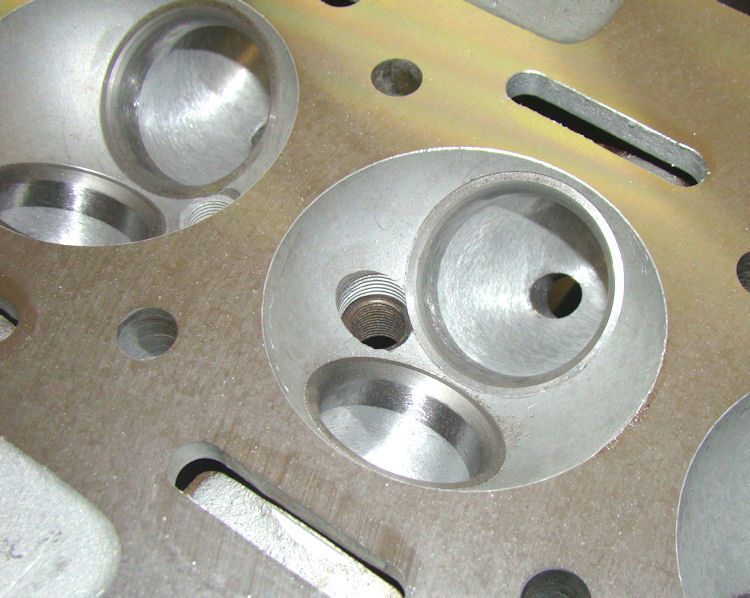
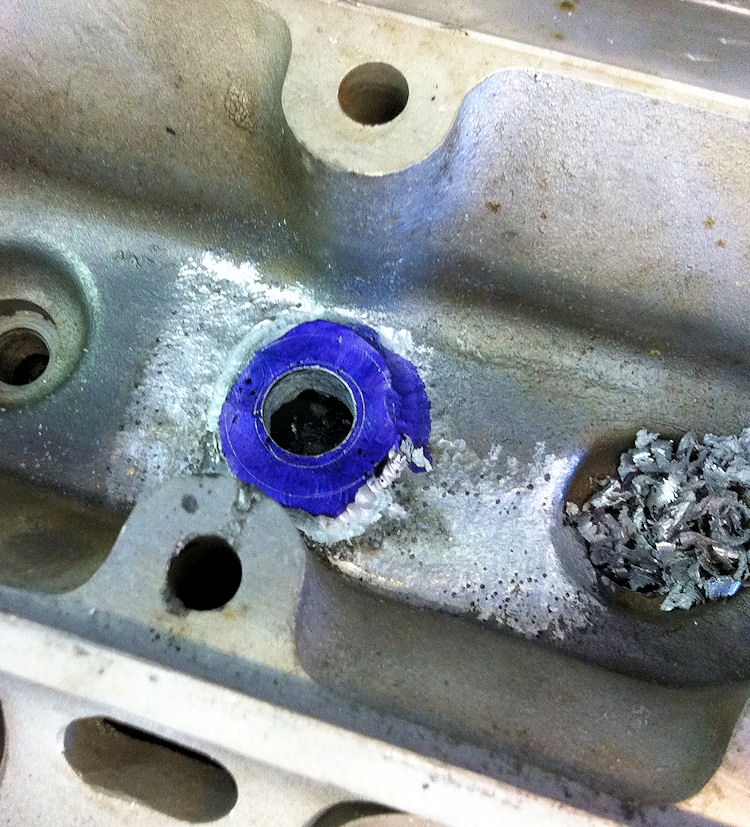
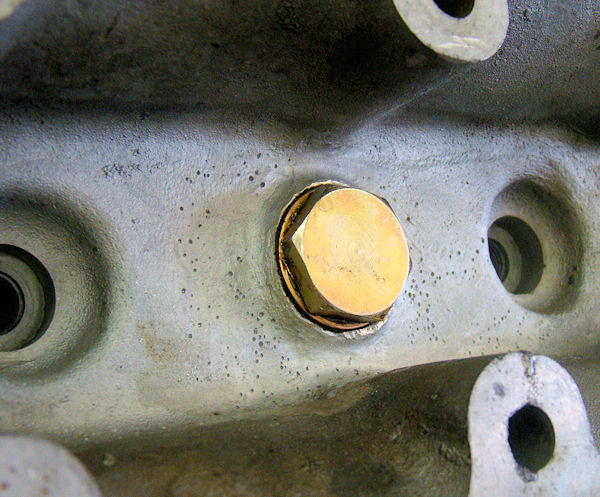
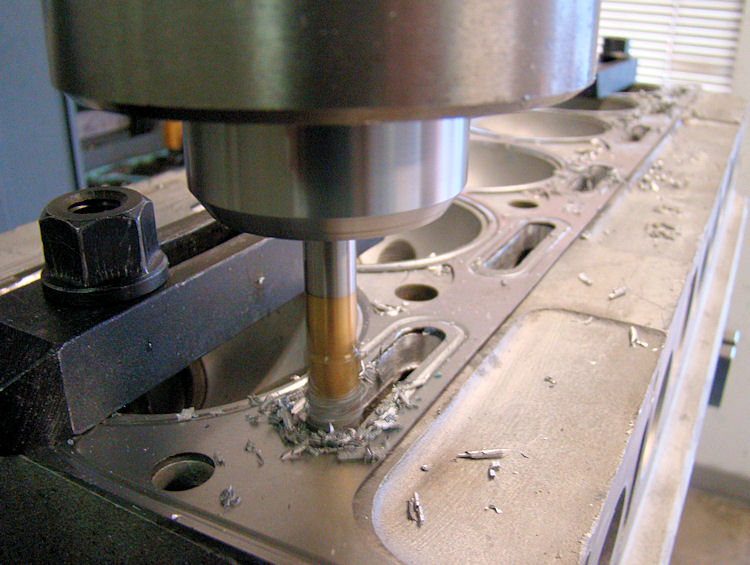
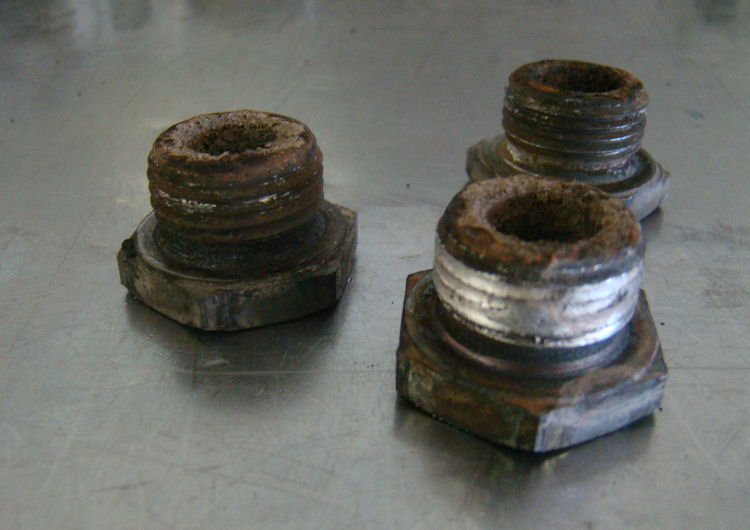
We have our work cut out for us with this cylinder head rebuild. It really is in terrible shape and needs extensive weld repairs to deal with corrosion damage, stripped out threads, cracks and internal porosity issues. It has also had cam caps installed backwards, damaged cam saddles and is significantly warped.
 |
|
|
|
|
|
|
|
 |
 |
|
didn't bother to re-shape the combustion chambers |
|
|
|
|
|
|
 |
|
and re-shaped on the mill |
|
|
|
|
 |
 |
|
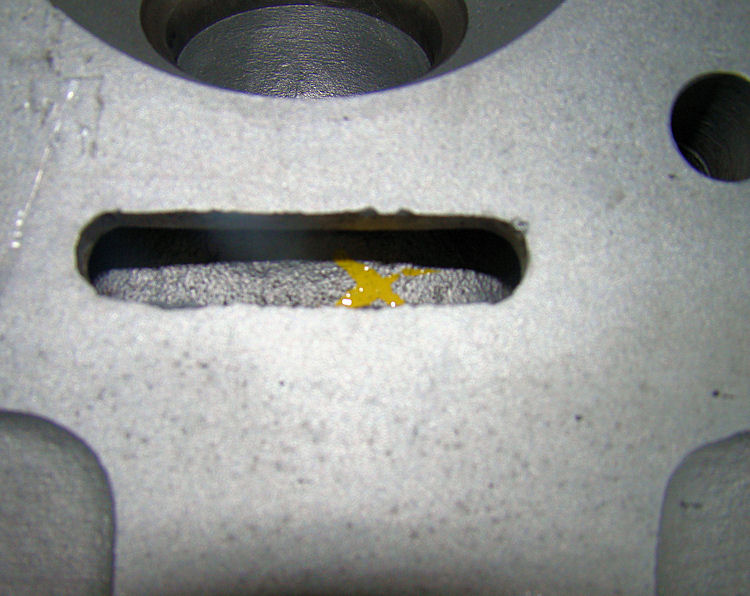
to welding |
|
|
|
|
 |
 |
|
|
|
|
|
|
 |
|
|
the deck surface (marked X) |
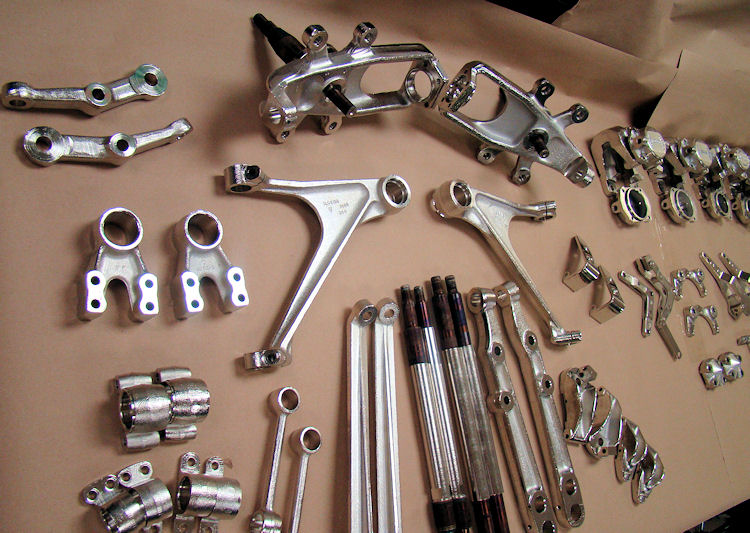
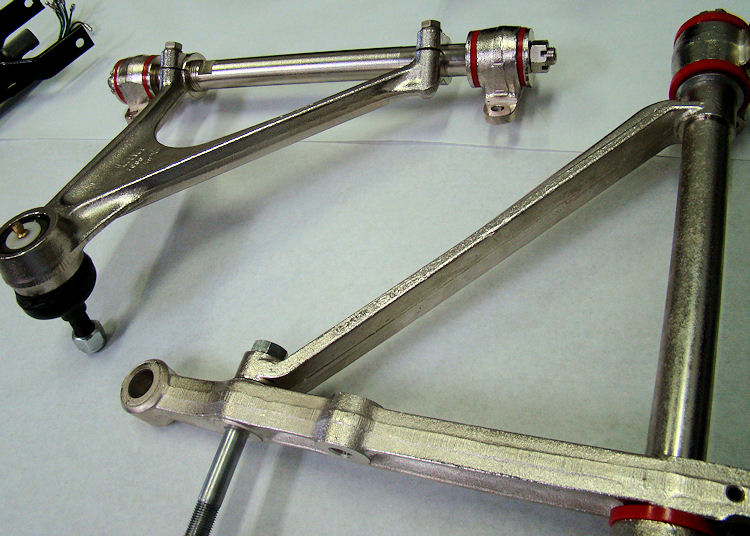
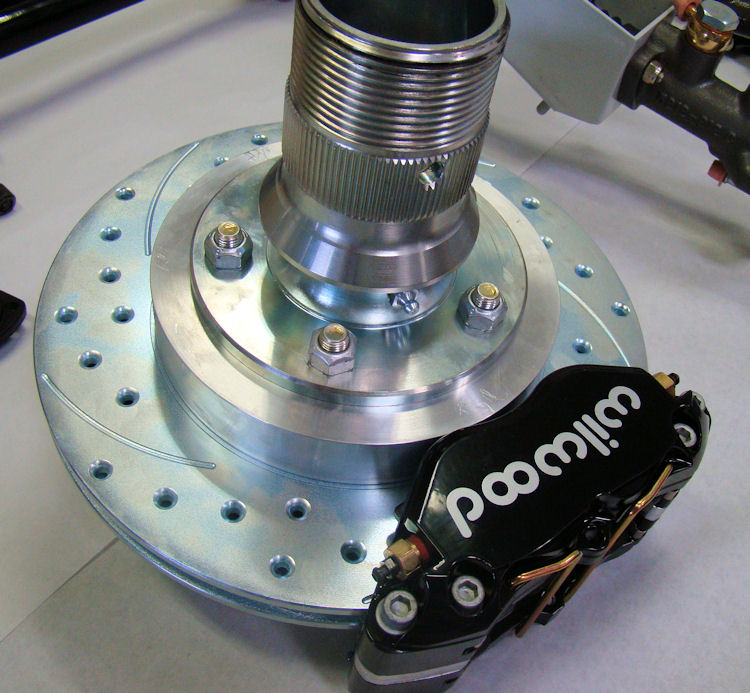
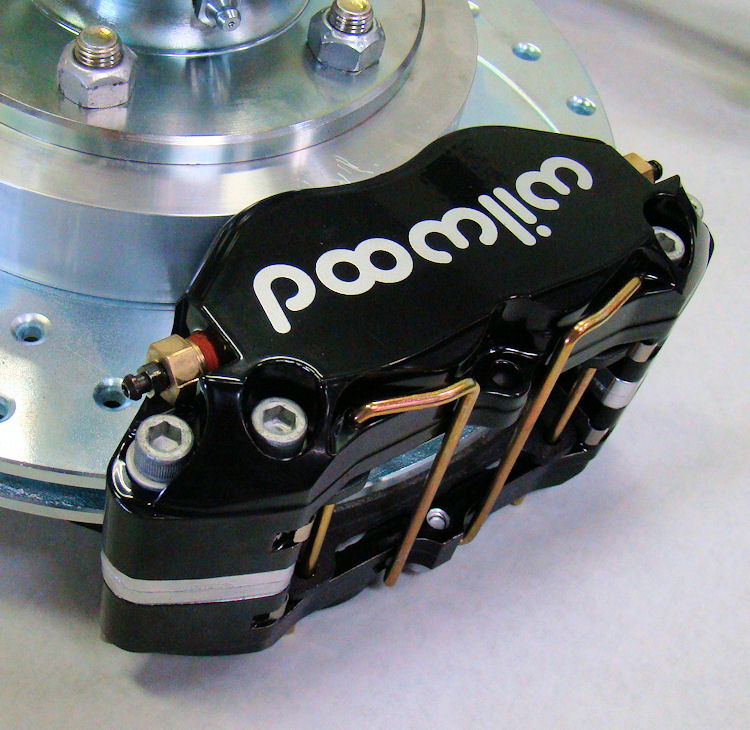
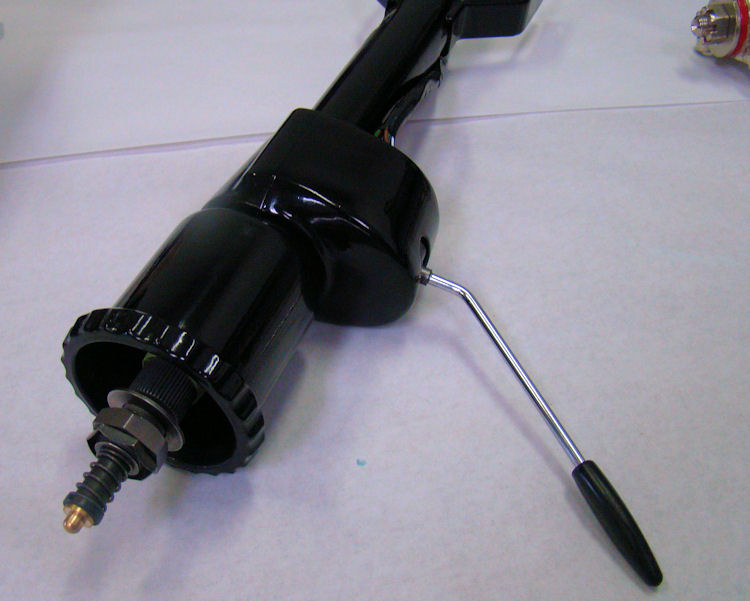
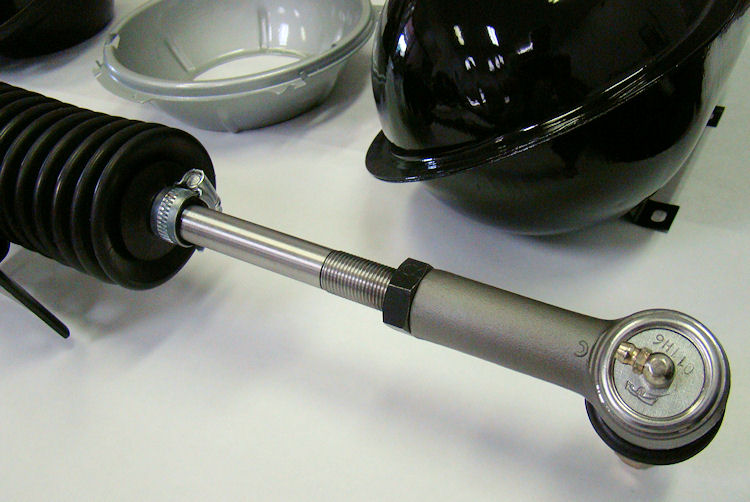
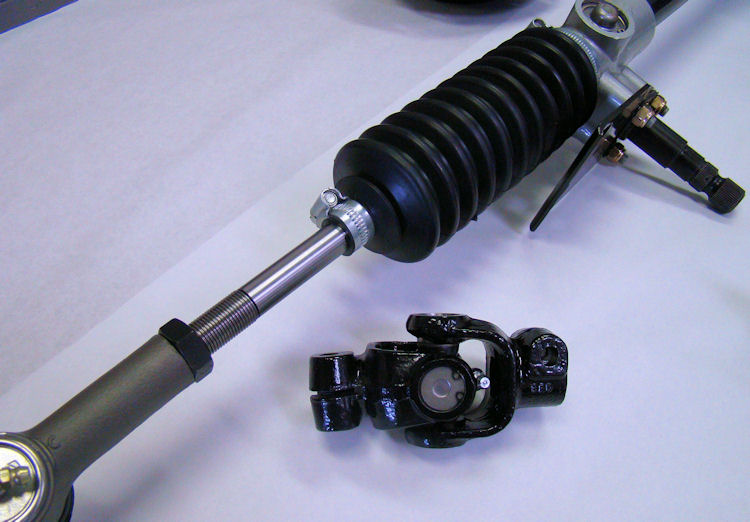
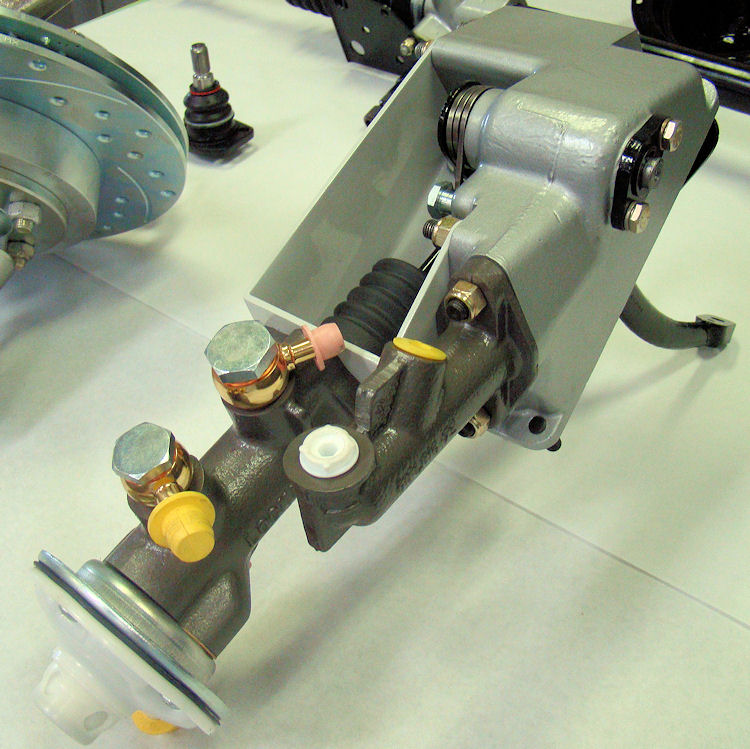
Rebuilding front suspension, brakes, steering rack, steering column, etc. Pedal box has been converted to use upgraded brake master cylinder and booster from later 4.2 and V12 models.
 |
 |
|
|
|
|
|
|
 |
 |
|
|
|
|
|
|
 |
 |
|
|
|
|
|
|
 |
 |
|
|
cylinder and booster |
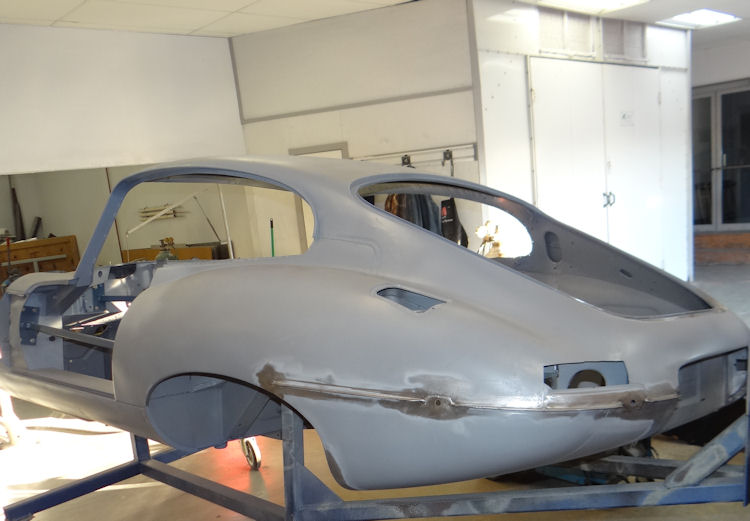
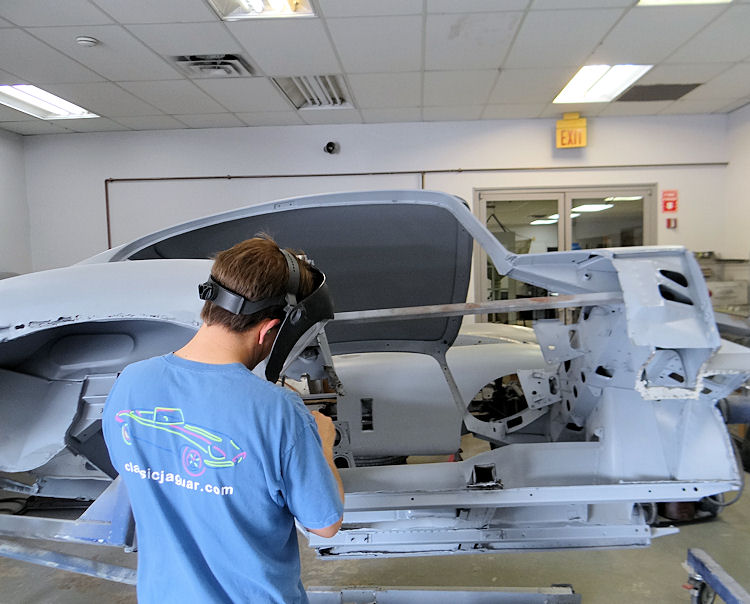
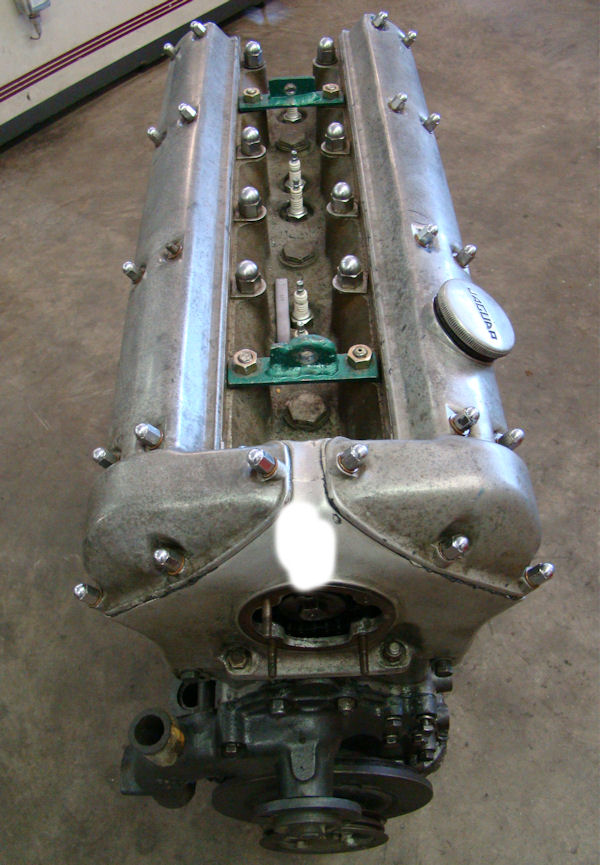
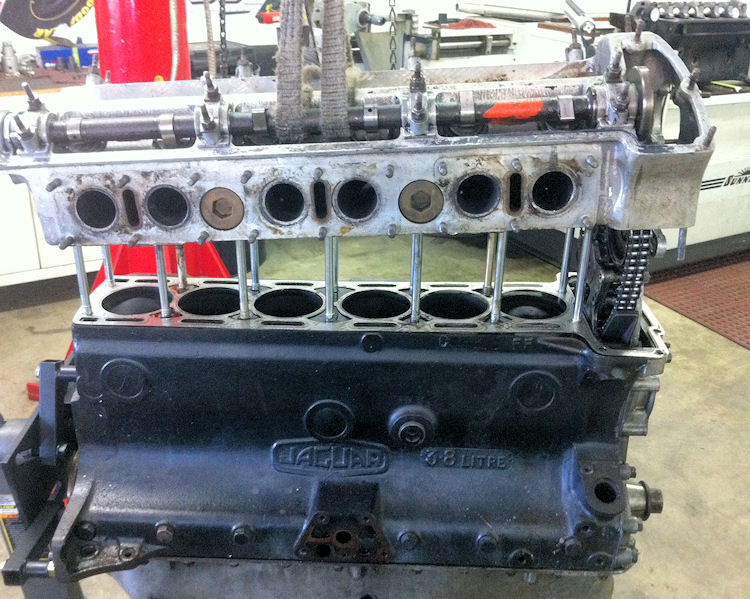
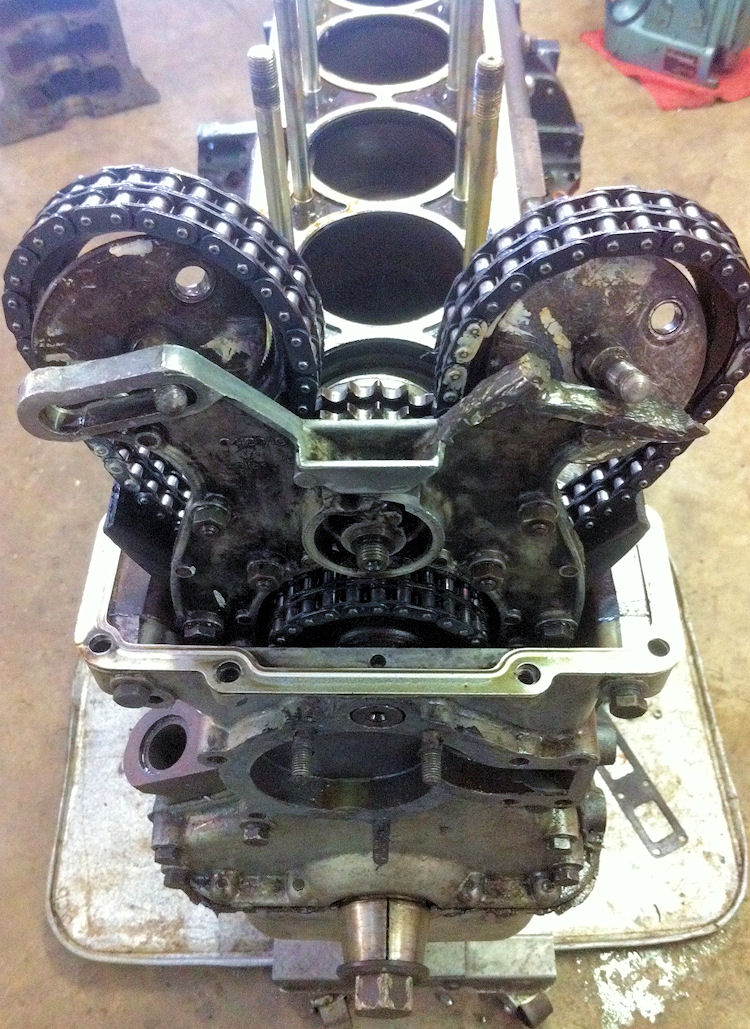
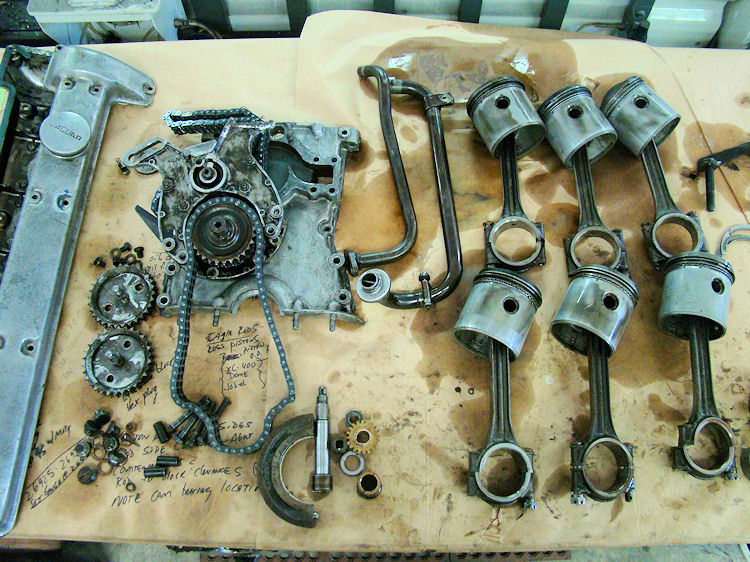
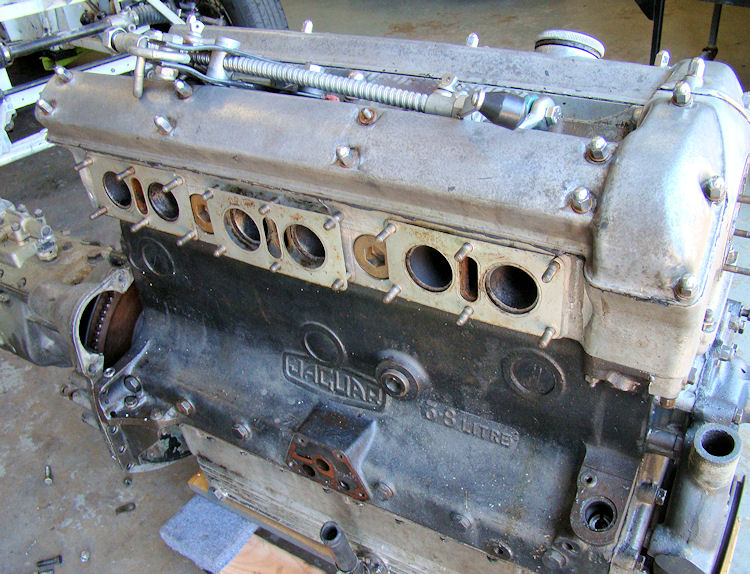
Engine rebuild underway, body about to go out for media blasting...
 |
 |
|
|
|
|
|
|
 |
 |
|
|
|
|
|
|
 |
 |
|
|
|
|
|
|
 |
 |
|
|
|
|
|
|
 |
 |
|
|
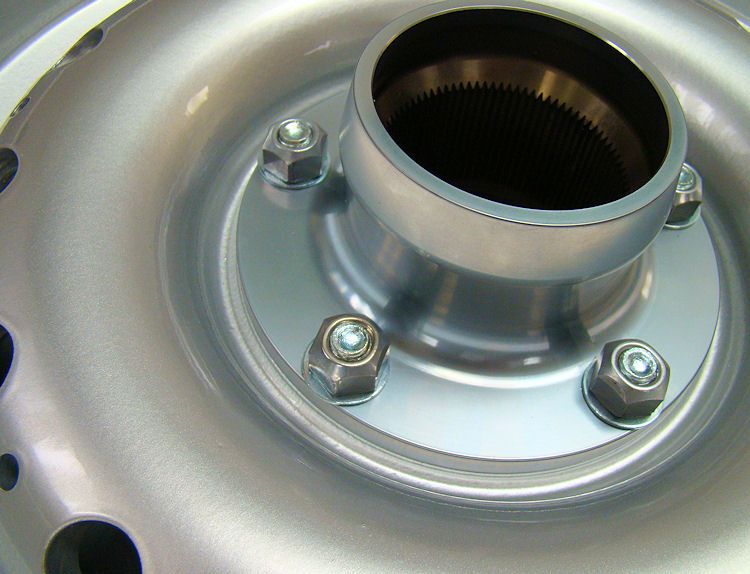
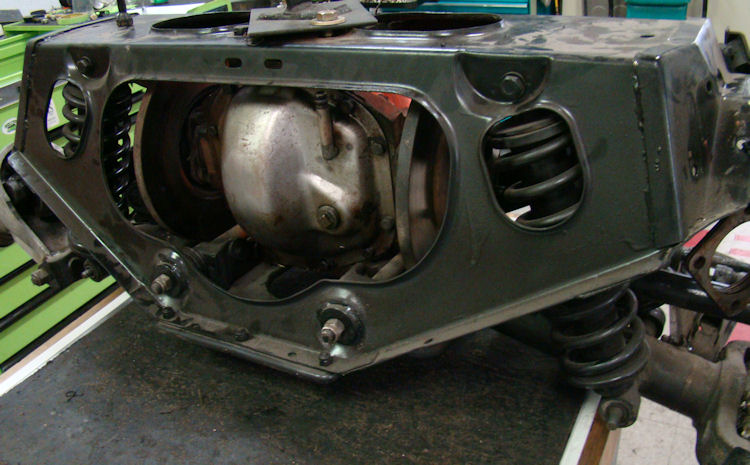
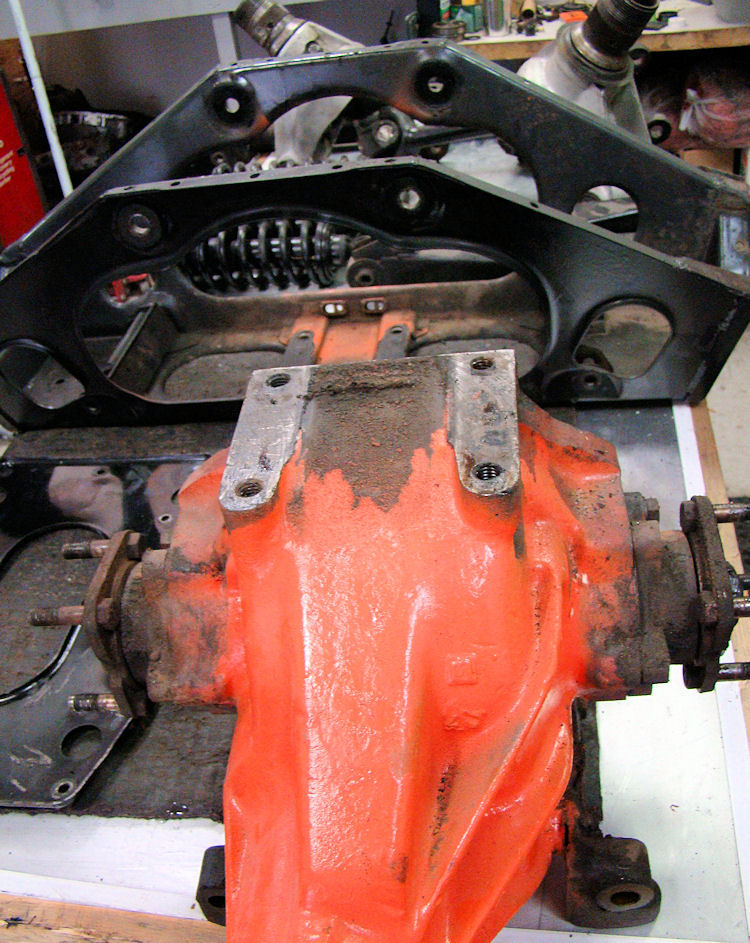
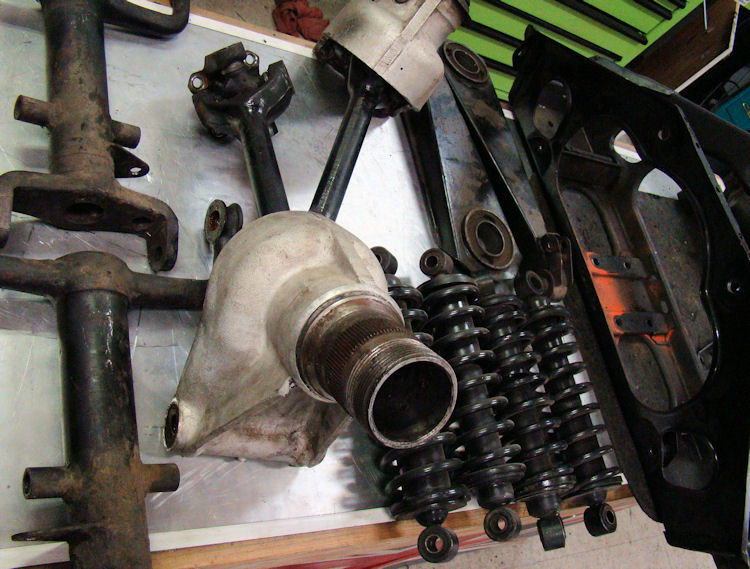
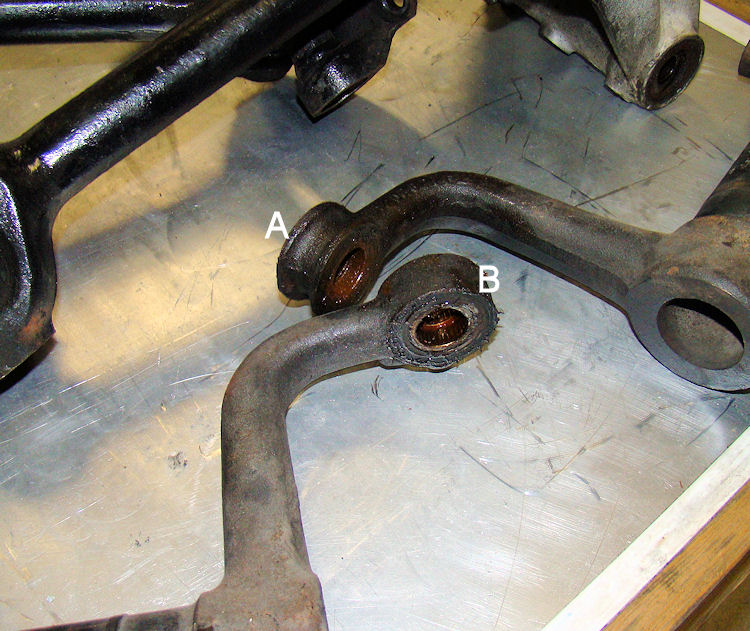
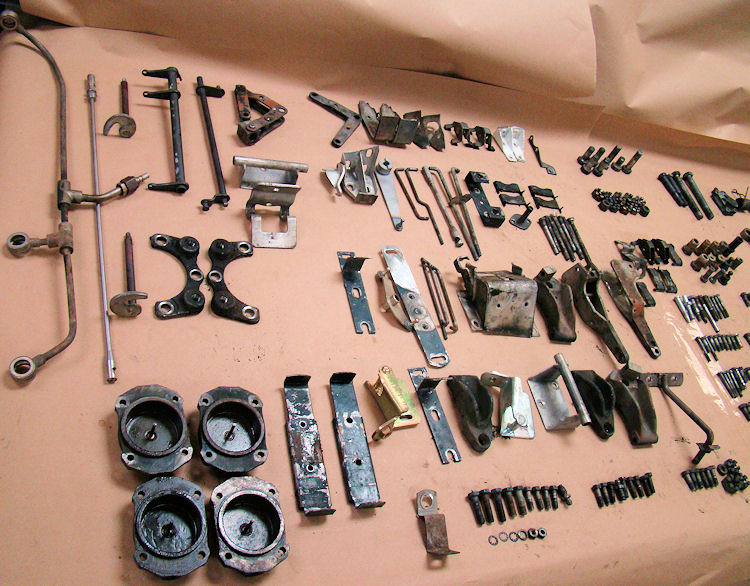
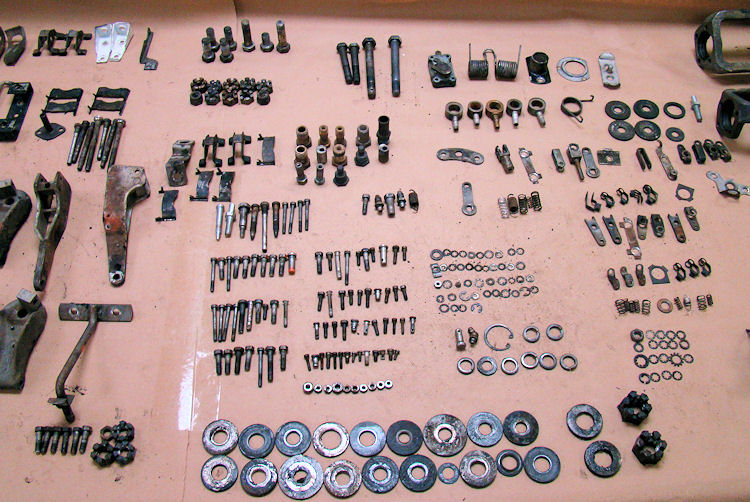
IRS rebuild underway, 438 items submitted for Nickel plating...
 |
 |
|
|
|
|
|
|
 |
 |
|
fulcrum ends marked A & B |
|
|
|
|
 |
 |
|
|
|
|
|
|
 |
|
|
|
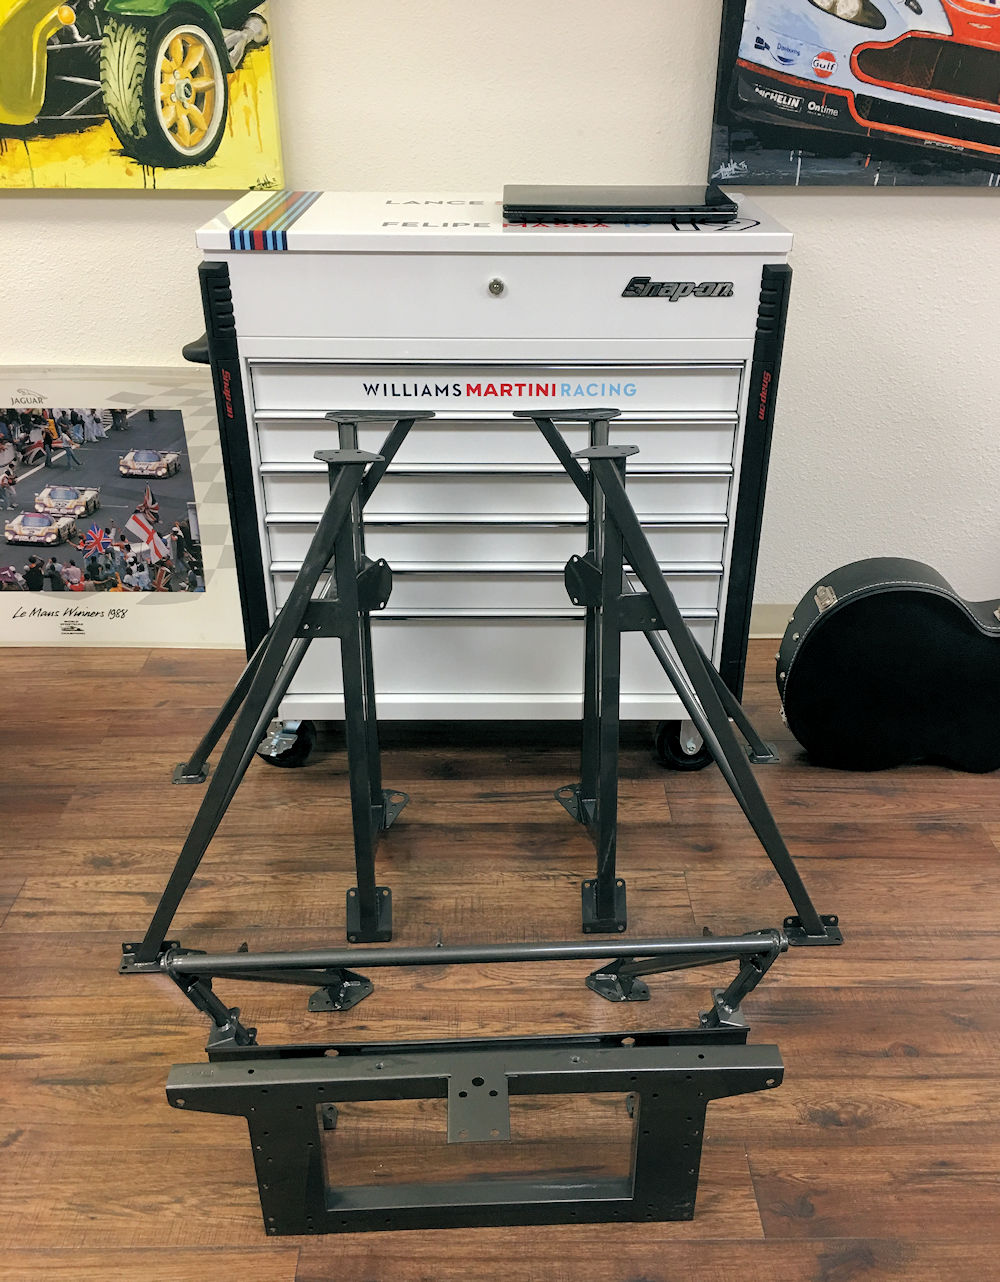
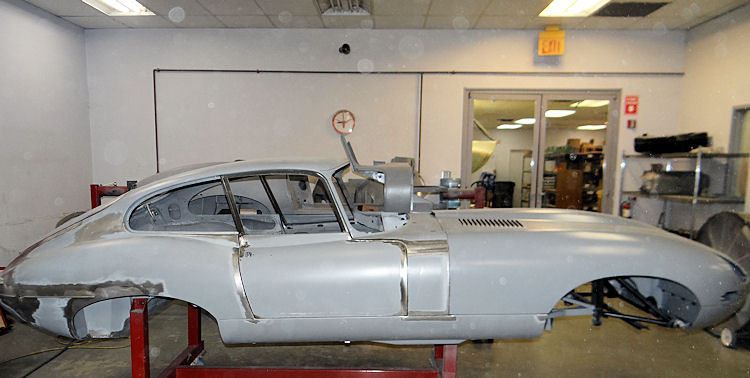
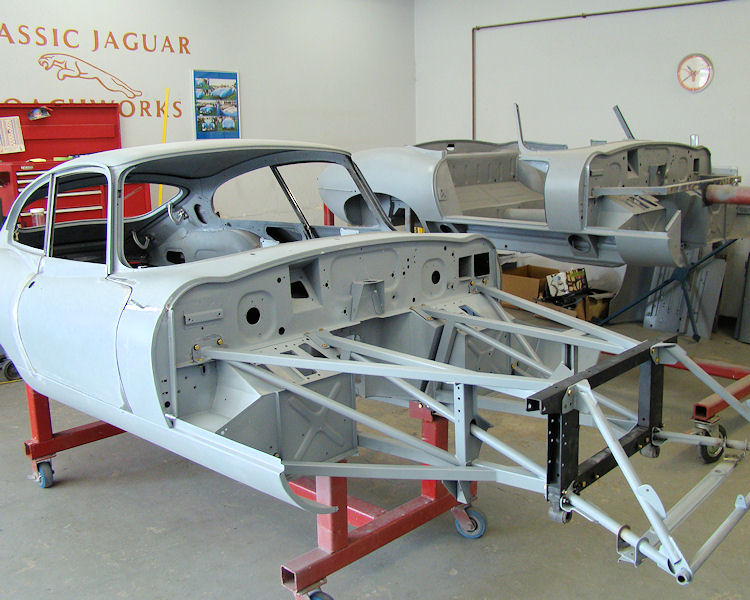
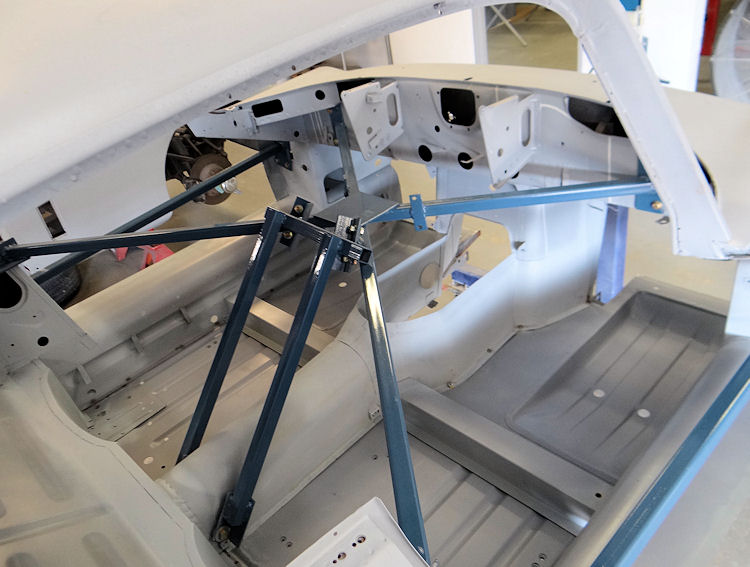
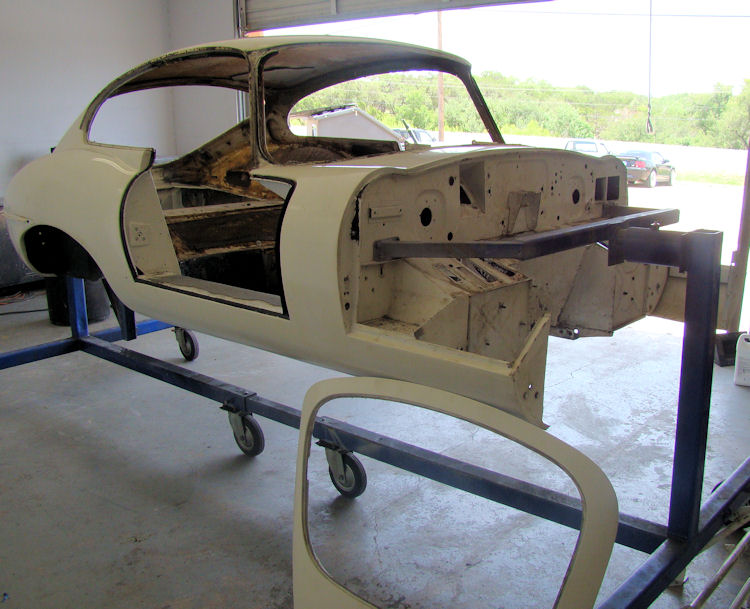
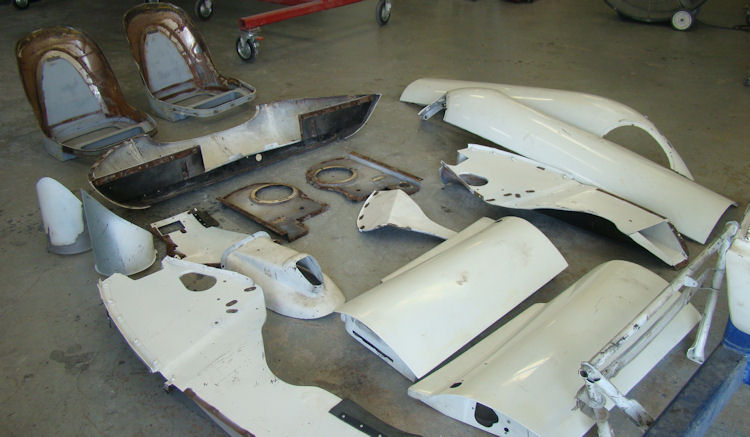
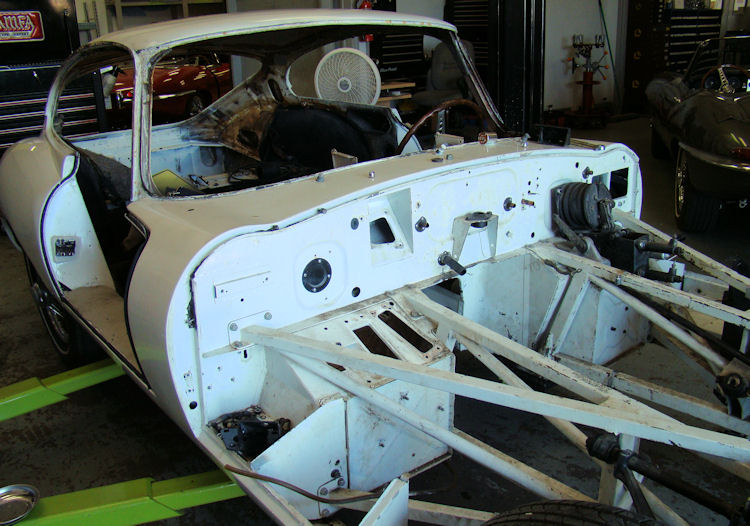
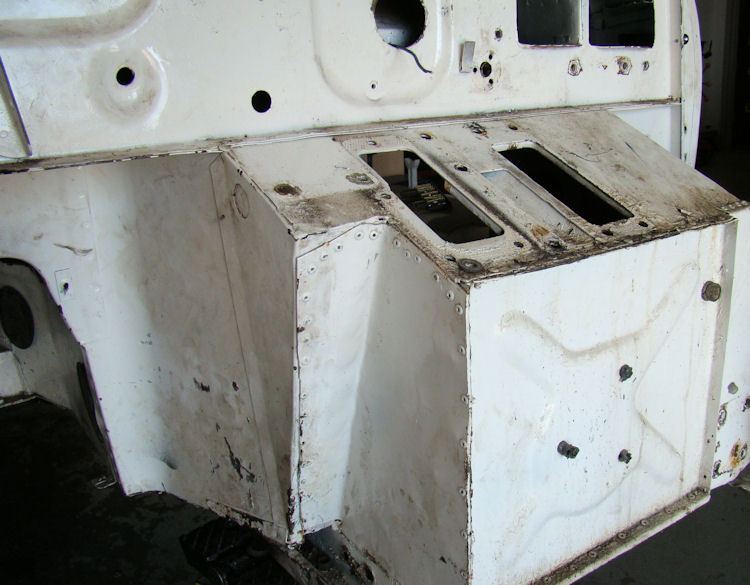
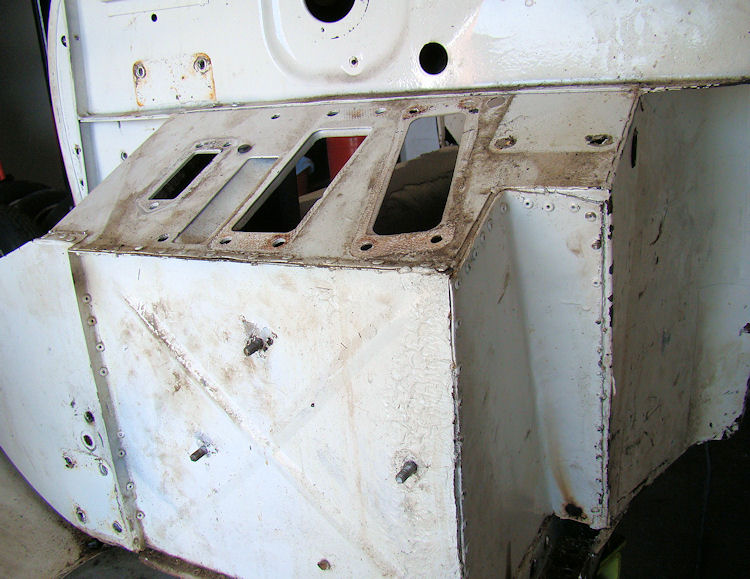
We now have your car completely disassembled and ready to be placed on one of the rotisserie jigs. As soon as one becomes available, we will start preparing the monocoque for media blasting.
 |
 |
|
|
replaced with a CJ5/600 five speed |
|
|
|
 |
 |
|
|
|
|
|
|
 |
 |
|
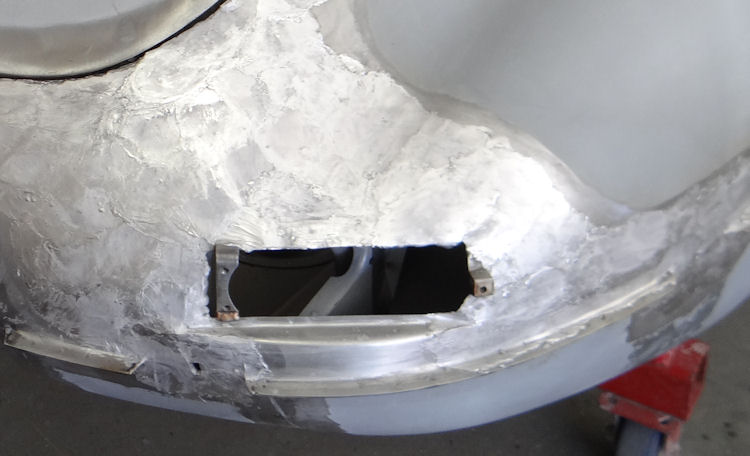
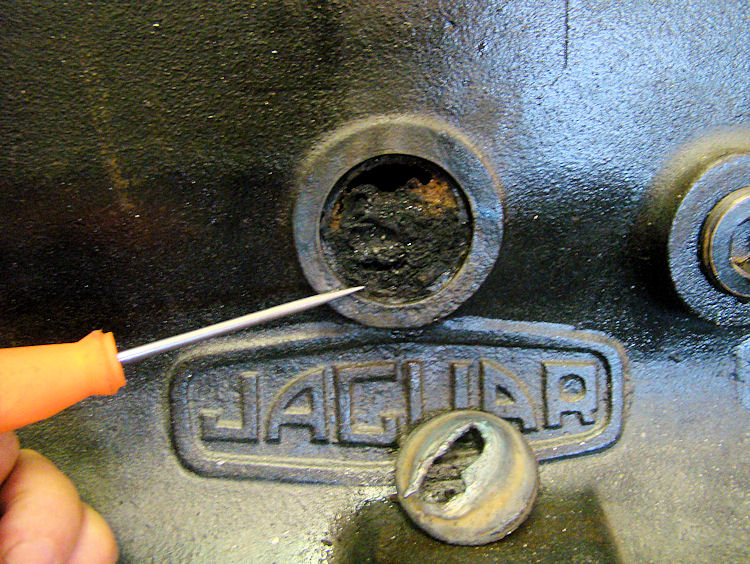
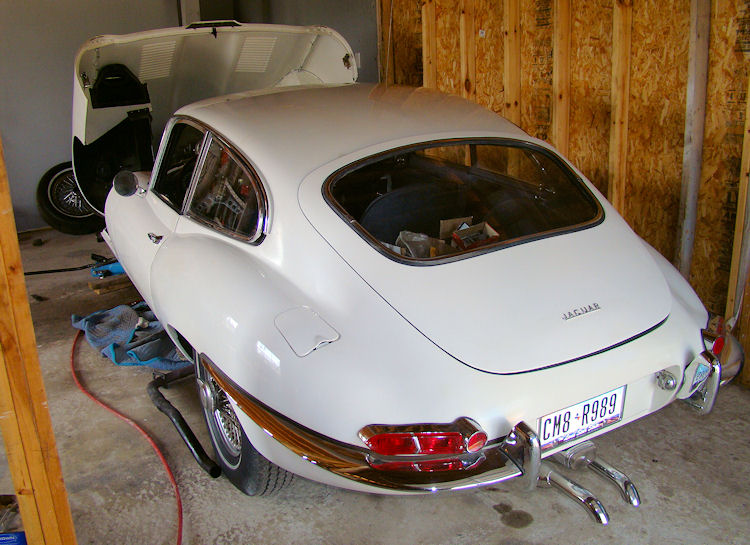
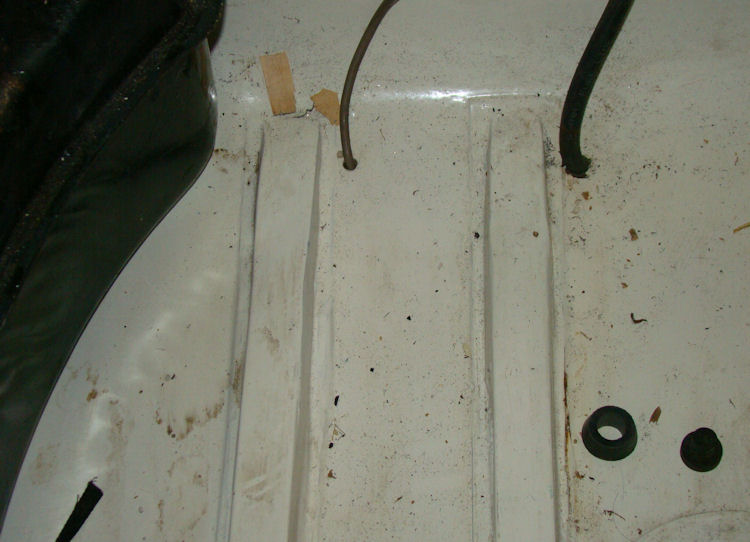
lurks beneath the white paint, so we'll see... |
transmission and body |
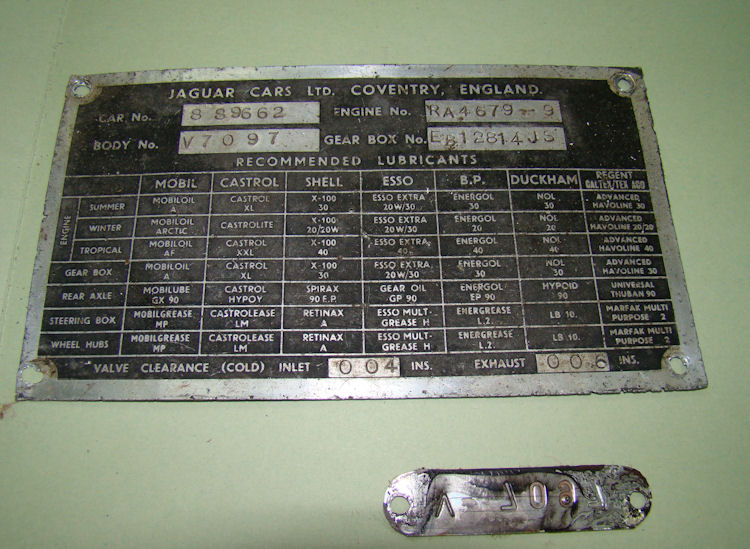
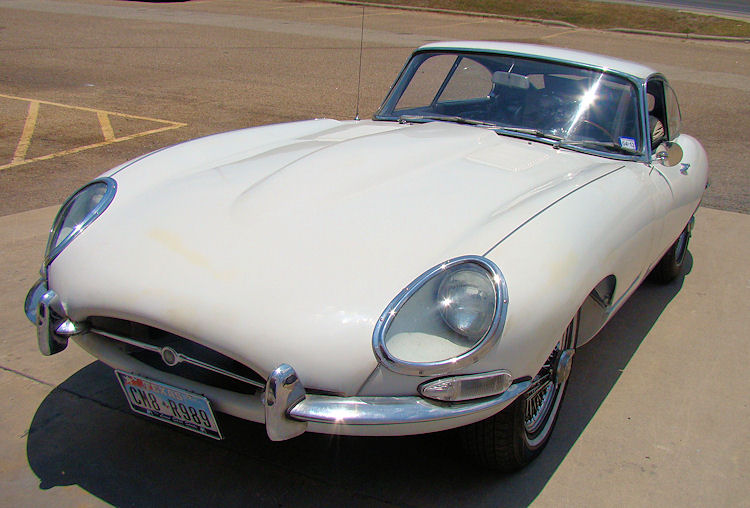
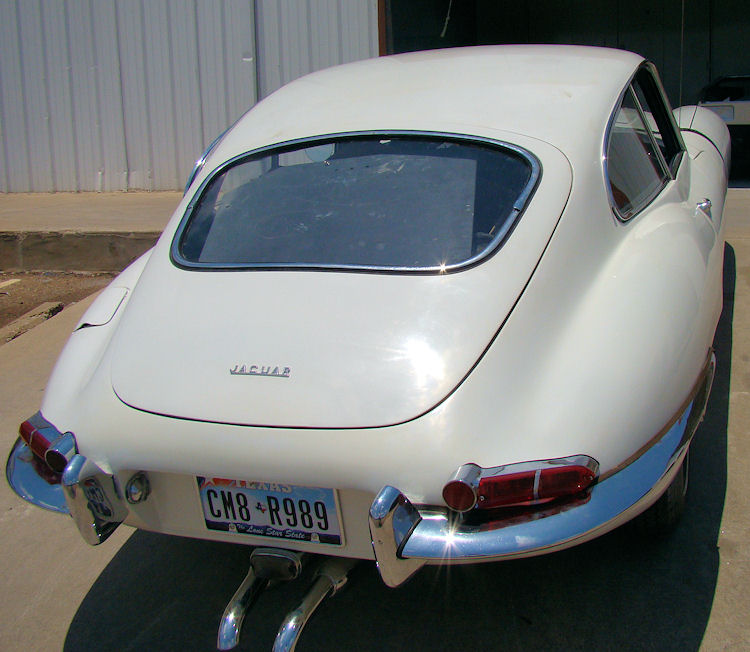
I am pleased to report that your car has arrived safely at Classic Jaguar and we will have the restoration underway in the next few days!
 |
 |
|
|
|
|
|
|
 |
 |
|
|
|
|
|
|
 |
 |
|
|
bondo and paint |
|
|
|
 |
 |
|
|
|
