Team CJ restoration
| 1964
E Type roadster (AS)
Team CJ restoration |
|
|

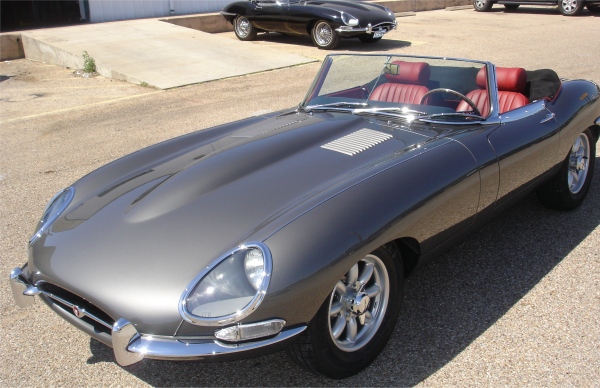
The owners of this 64 roadster flew in to take delivery of their 'new' E Type and immediately set off on a 3000 mile road trip from Texas to Canada, via Southern California. Keep your fingers crossed for our intrepid travelers!
 |
 |
 |
 |
 |
 |
|
|
 |
 |
 |
 |
 |
|
|
More sounds....
 |
 |
 |
|
installed |
beneath steering column |
|
 |
 |
|
|
|
Your stereo CD/DVD?Sat Nav system has now been installed. I am pleased to report that the sound quality is outstanding (CD player). Click on the large photograph to see a video clip of the DVD screen opening up!

 |
 |
 |
|
|
inside stock 3.8 console |
|
|
|
|
|
 |
 |
 |
|
passenger seat |
|
ourselves to mount it on the dash |
|
|
|
|
 |
 |
|
|
|
|
|
Your CD - DVD - Satellite Navigation system arrived on Friday and we will be installing that for you early next week.
 |
 |
 |
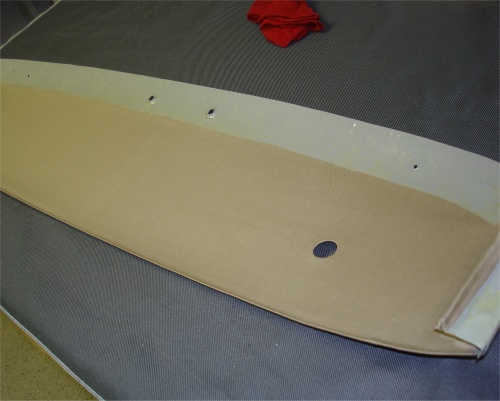
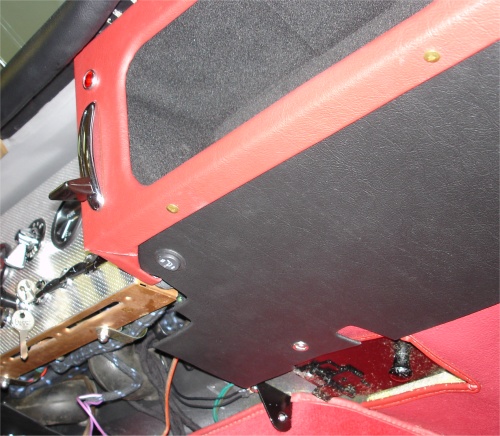
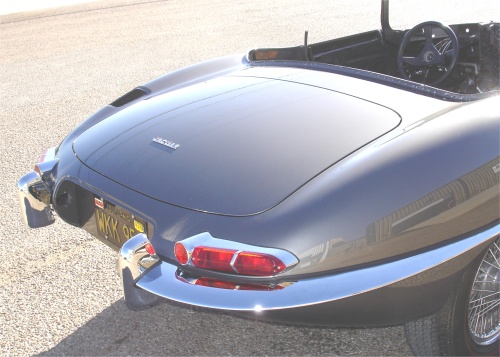
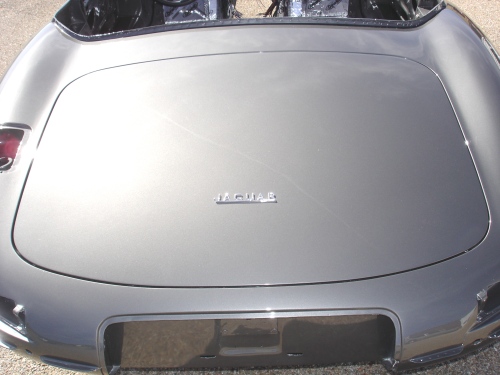
As you can see, we have now installed your new soft top boot. Tomorrow we will be installing the full tonneau cover.
 |
 |
|
being installed |
of your stereo system! |
 |
 |
|
|
than it is |
 |
 |
 |
|
|
the stitching for the zip-out window |
|
 |
 |
 |
|
afternoon |
possible fit between window and top cantrail seal |
|
 |
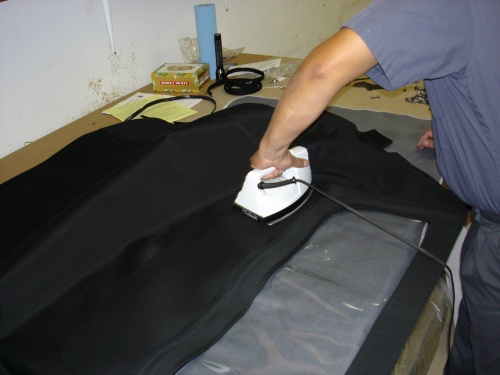
Trimming out the header bow, installing the top frame and trial fitting the new canvas top. Look for more photos tomorrow of the completed installation.
 |
 |
 |
|
|
|
|
|
|
|
|
 |
 |
 |
|
new webbing |
|
|
|
|
|
|
 |
 |
 |
|
out rear window |
|
Time to restore the convertible top frame and install the new top, etc.
 |
 |
 |
|
rear tack strip |
interior light panel |
top frames |
 |
 |
 |
|
|
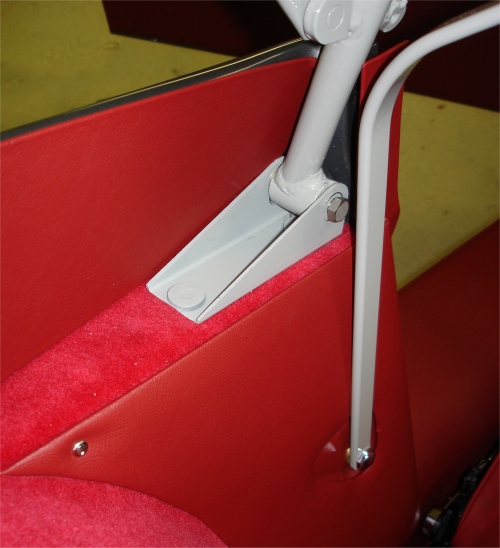
We investigated the possibility of using one of the factory dash switches to operate the heated seats, although that proved impossible due to electrical resistance issues. In the end we decided to install the switches discreetly beneath the dash (see below).
 |
 |
 |
|
|
|
|
 |
 |
 |
|
|
|
|
 |
||
|
|
The following photographs show the seats actually being trimmed and the installation of the custom heated back and base pads.
 |
 |
 |
|
|
|
with Teflon adhesive tape |
|
|
|
|
 |
 |
 |
|
|
at bottom of seat back |
|
|
|
|
|
 |
 |
 |
|
|
|
|
|
|
|
|
 |
 |
 |
|
|
|
|
|
|
|
|
 |
 |
 |
|
friendly than original 3.8 buckets |
|
|
|
|
|
|
 |
|
|
|
|
|
|
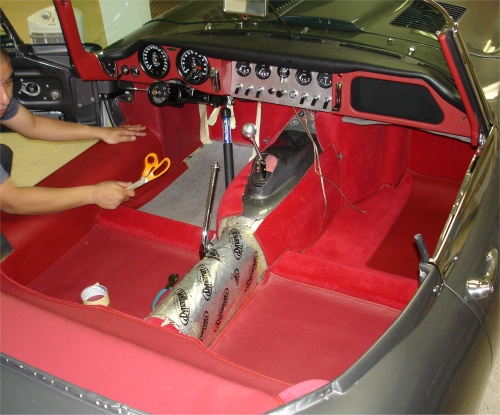
Installing the underfelt, carpeting, moquette and hardura panels.
 |
 |
 |
|
|
|
|
|
|
|
|
 |
 |
 |
|
|
|
|
|
|
|
|
 |
||
With the major road testing now completed, it is time to install your new interior. When you get a moment, please give me a call as I would like to discuss how we can best help you regarding the routing of any stereo related wiring. You may even be able to persuade me to install the stereo for you
 |
 |
 |
|
squeeze in the rear arches |
now installed |
|
 |
 |
 |
|
|
to the centre console and both footwells |
Update report - March 29, 2006
 |
 |
 |
|
the trim room |
|
|
|
|
|
|
 |
 |
 |
|
|
|
|
|
|
|
|
 |
 |
|
|
|
|
|
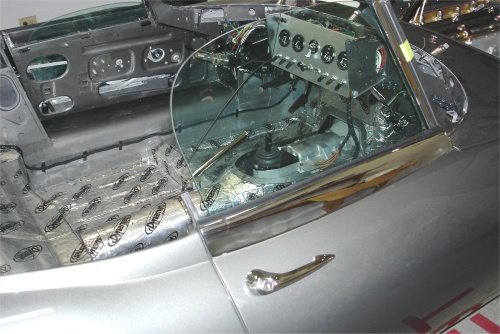
Over the last week we have been doing a lot of road testing and I am pleased to report that the car is running beautifully. As you can see from the photograph below, we have now installed the MSD 6AL ignition and it is working perfectly. Next stop the trim room!
 |
 |
 |
|
for road testing |
|
|
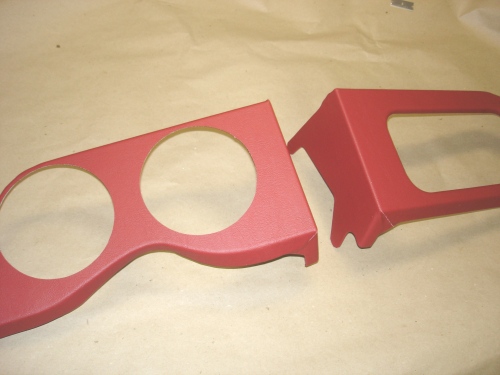
Your dash panels have been trimmed out in red vinyl, per your request.
 |
 |
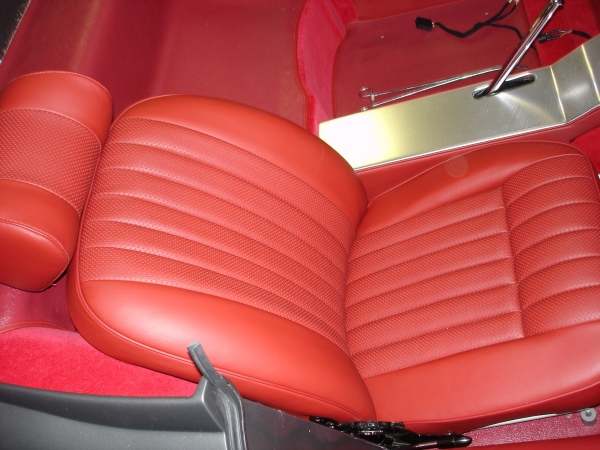
Having sourced a pair of V12 seats, we set about modifying the original 3.8 seat runners to work with the later model reclining seats and with a view to providing you with as much legroom as possible. I am pleased to report that we have succeeded in providing a lower than stock seating position with the absolute maximum possible rearward seat adjustment.
 |
 |
 |
|
eye level in relation to new seat base |
fit V12 seat bases |
|
 |
 |
 |
|
than stock 3.8 seats |
||
 |
 |
|
|
|
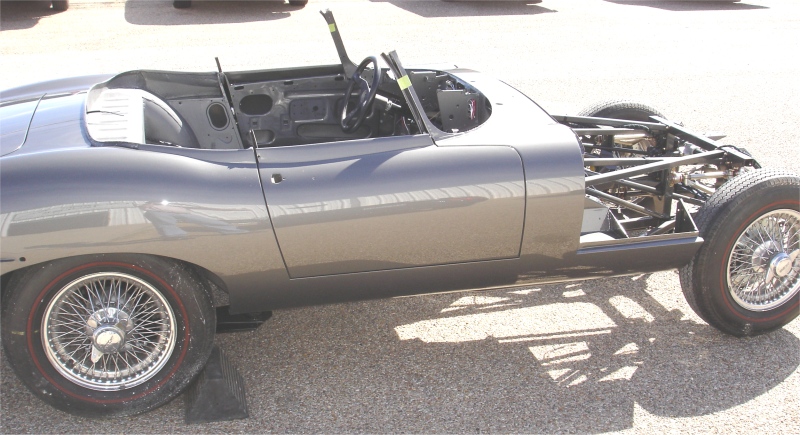
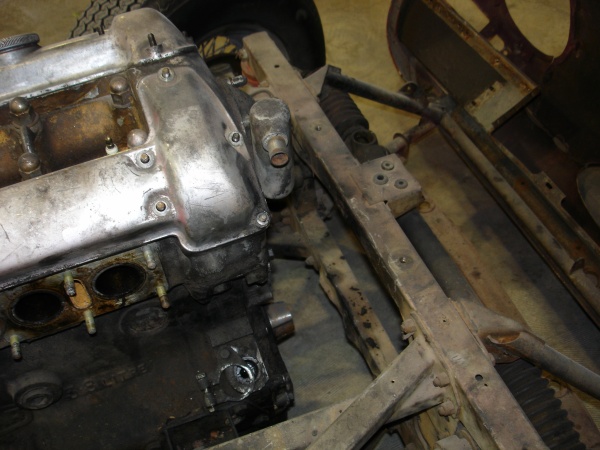
As you can see, we have now installed your rebuilt engine, CJ5 transmission, CJ headers, cooling system, rear bumpers and lights...and even the original California black plate.
 |
 |
 |
 |
 |
 |
 |
 |
|
As you can see, the doors and boot lid have now been installed and we have begun the installation of your new wiring harness.
 |
 |
 |
|
the cabin area |
the sun light |
|
 |
 |
 |
 |
 |
 |
|
loom is already underway |
As you can see, the bonnet is now painted and the car is having its front and rear suspension installed. Sorry some of my photographs are a little blurred!
 |
 |
 |
|
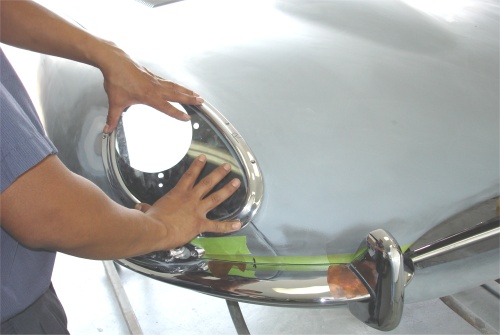
headlamps |
up and new holes drilled and tapped in the new bonnet |
tie plate |
|
|
|
|
 |
 |
 |
|
|
|
|
|
|
|
|
 |
 |
 |
|
installed |
|
|
|
|
|
|
 |
 |
|
|
|
|
|
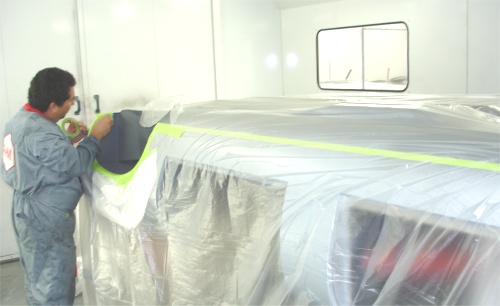
Yesterday we painted all the outer panels (except the bonnet) and I could not be more pleased with the finished result. The Opalescent Gunmetal looks truly stunning.
 |
 |
 |
 |
 |
 |
As you can see, we have now 'cut in' the cabin, the boot area and the underside of the floorpan. Because this car is likely to see a little track time, we gave it a little more 3M rocker guard protection than usual, especially behind the rear wheels/under the boot floor.We are hoping to paint the outer panels by the end of the coming week. Watch this space!
 |
 |
 |
|
line under boot floor |
body |
protection under the car |
 |
 |
 |
 |
 |
 |
|
boot floor |
compartment |
|
 |
 |
 |
 |
||
|
noticable when painted |
It has been a while since I updated this page - for which I apologise! As you can see, however, we have been making good progress with your car and should be applying the first of the Opalescent Gunmetal within the next few days.The photos below show the car just after it received two good coats of the Evercoat Polyester Slicksand and a guide coat. The next stage will be blocking with 120 then 180 grit paper, followed by two coats of high build BASF Powerfill primer. That will then be sanded with 320 dry followed by 600 wet - at which point it will be time to apply the paint. Not long now!
 |
 |
 |
 |
 |
 |
The new bonnet has now been massaged into place and the majority of the lead loading has been completed along the side bulkhead and the upper sill line.
 |
 |
 |
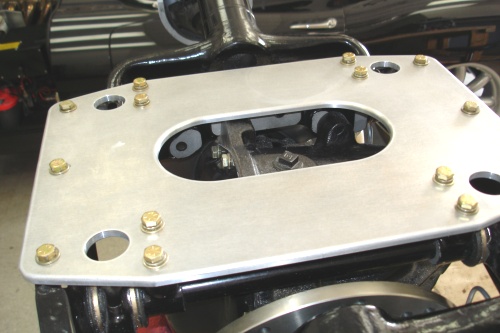
It is now time to install the new CJ engine frames and your new bonnet.
 |
 |
|
|
the engine frame jigs |
 |
 |
|
hinge frames installed |
|
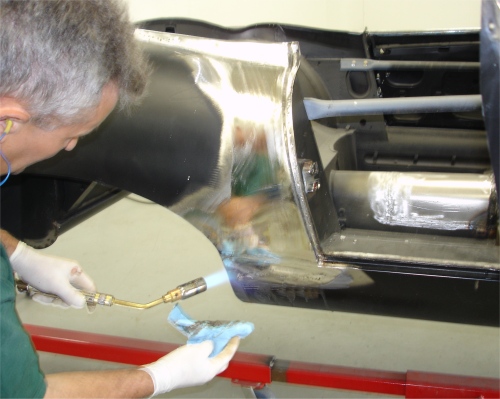
Time for some lead loading. Click on the larger photograph to view a short video clip of Lawrence in action!

 |
 |
 |
 |
 |
 |
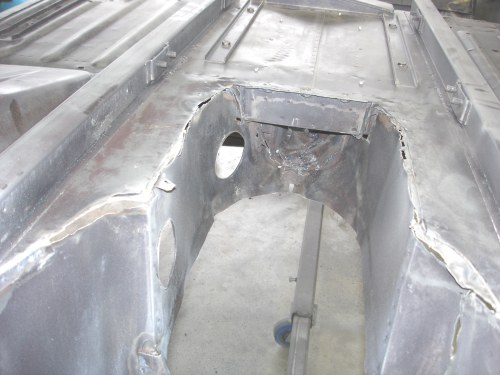
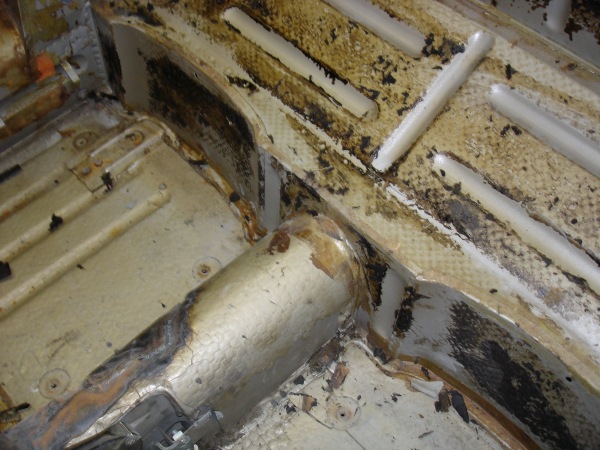
The following photographs show the installation of the outer sills as well as Lawrence fabricating and installing the LH outer bulkhead panel. We prefer to make this panel rather than use an aftermarket replacement as the available panels are shorter than we would like, and we make ours from heavier gauge steel which resists deformation from welding heat.The yellow sustance you can see on the inner sill is Wurth Body Wax, which we apply to all inner panels and box sections during the course of CJ restorations.
 |
 |
 |
|
|
|
|
 |
 |
 |
|
be fabricated |
is formed |
|
 |
 |
 |
|
|
section is a little trickier |
|
 |
 |
|
|
|
sheet metal is primed |
More sheet metal progress....
 |
 |
 |
|
had to go! |
welded into place |
pretty solid.... |
 |
 |
 |
|
repair before the new front floors can be installed |
out and replaced |
front floors |
 |
 |
 |
|
into place |
must be trial fitted at this stage |
|
 |
 |
|
|
|
new outer sills |
Starting in with the bodywork....the short video clip below shows Lawrence making a repair panel for the rear apron to the side of the license plate panel.
 |
 |
 |
|
rear of the car |
cut away |
fabricated and trial fitted |
|
|
|
|
 |
 |
 |
|
trial fit the boot floor |
into place |
|
|
|
|
|
 |
 |
 |
|
a smooth and consistent curve |
into place |
|
 |
 |
|
|
to installation |
into place |
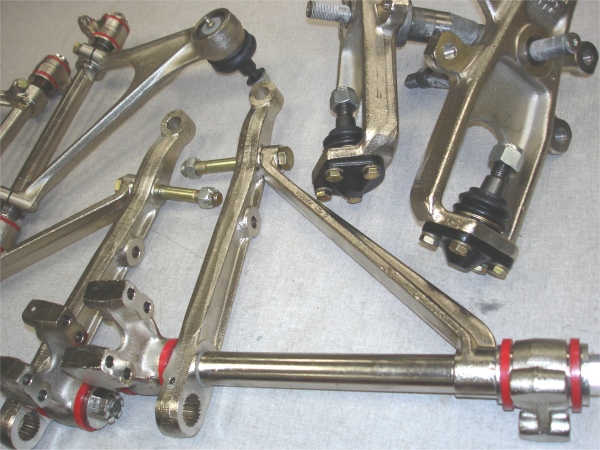
As you can see, we have been busy rebuilding the IRS and your front suspension as your body waits its turn in the CJ Coachworks.
 |
 |
 |
|
|
Nickel plated |
|
 |
 |
 |
|
on the rear |
|
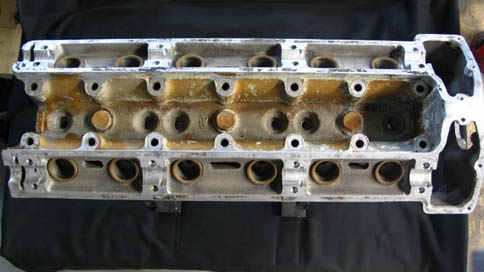
More engine photographs together with a complete on-line Blue Print. The first two photographs demonstrate how much work was required in order to weld up and the cut and re-shape the water jackets on the underside of the cylinder head. I think it might be about as impressive a 'before and after' series of photographs as I have ever put on the webpage!

 |
 |
 |
|
look like when we started |
|
significant increase in velocity |
|
|
|
|
 |
 |
 |
|
to the desired level |
|
|
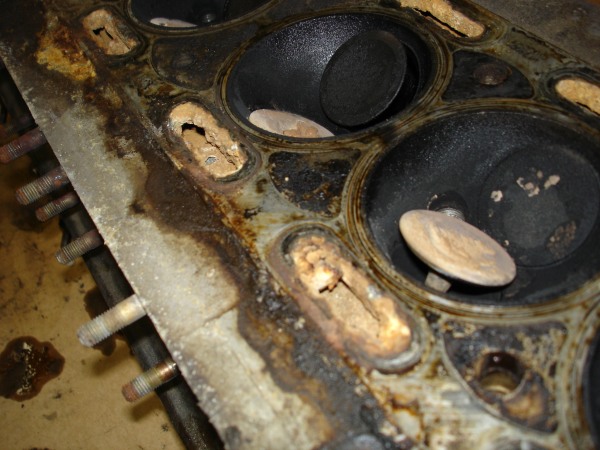
As you know from our various telephone conversations, your engine really was in a sorry state! The cylinder head was not only very badly corroded but it was also severely warped. As you can see from the photographs below, all of the various problems have now been dealt with and the engine is now better than new!This page will be updated as the engine goes together throughout the day.
 |
 |
 |
|
|
corroded |
required extensive welding and re-shaping |
 |
 |
 |
|
cleaning |
underway |
|
 |
 |
 |
|
|
|
calculate compression |
 |
 |
 |
 |
 |
 |
|
|
|
|
 |
throughout the day! |
|
|
|
 |
 |
 |
|
the front floors |
tunnel, rather than replacing it |
kick panel |
Time to start the sheet metal and panel replacement....
 |
 |
 |
|
replaced... |
||
 |
 |
 |
|
cut away |
remainder of outer sills |
in the background |
 |
||
|
|

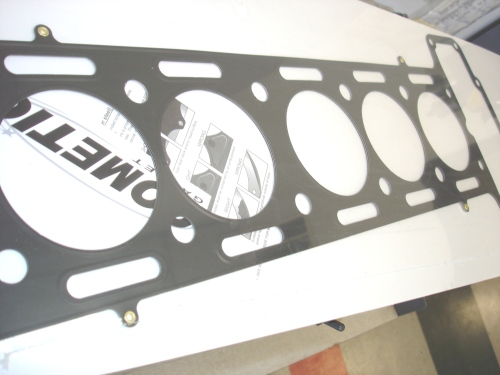
Gathering
some of the new parts for your Stage One cylinder head
(just
waiting for new seats)
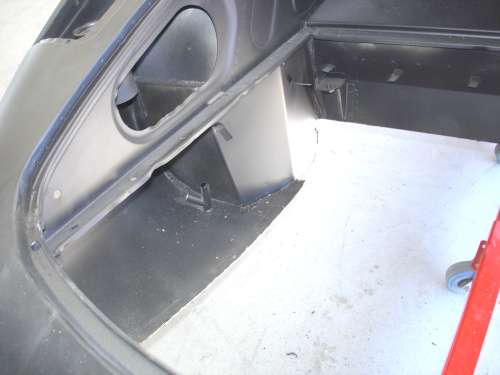
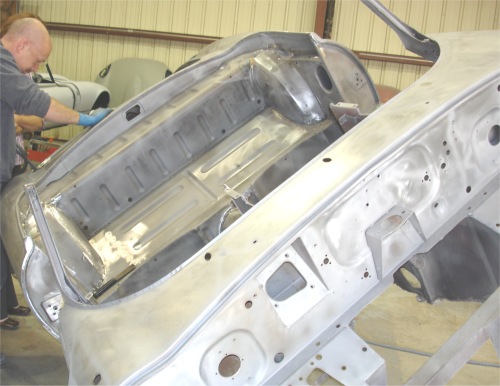
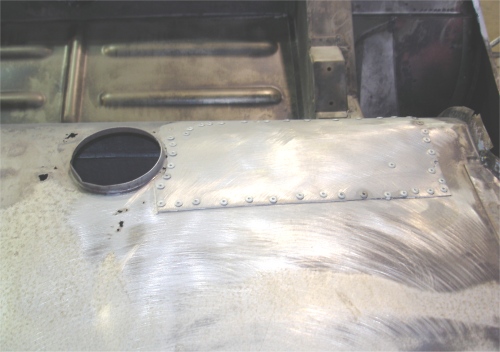
The following photographs show the car being primed earlier today. The also show why you really have to install new engine frames. The problem is they rust from the inside out. You can see below how an apparently innocuous pin hole is only the tip of the iceburg. Tapping the metal surrounding the pin hole with a blunt, lightweight awl gave a clear indication of the internal condition of your frames.
 |
 |
 |
 |
 |
 |
|
|
||
 |
 |
 |
|
|
|
in frame |
 |
 |
 |
|
|
the proverbial iceburg |
|
 |
 |
 |
 |
 |
 |
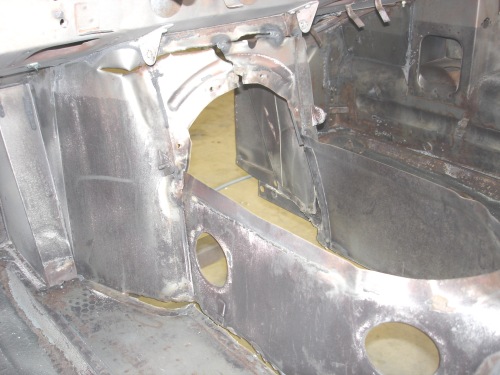
As you can see, we have now had the car bead blasted and disassembled the last of the mechanical components. No huge surprises after the blasting process, although we obviously have a fair amount of sheet metal replacement ahead of us.
 |
 |
 |
|
|
|
|
|
|
|
|
 |
 |
 |
|
|
|
|
|
|
|
|
 |
 |
 |
|
|
|
|
|
|
|
|
 |
 |
 |
|
|
|
|
|
|
|
|
 |
 |
 |
|
|
|
apparently lost!) |
|
|
|
|
 |
 |
 |
|
|
|
|
|
|
|
|
 |
 |
 |
|
|
introduced in CJ Coachworks |
|
|
|
|
|
 |
 |
|
|
|
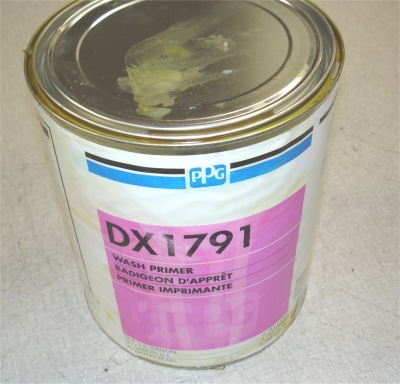
immediately after DX1791 |
|
 |
 |
 |
|
|
|
to machinework |
As you can see, the car came apart without any drama, although the engine is one of the grungiest we have come across in a while! The head has suffered some significant corrosion damage and will need some additional welding, although there really isn't anything to worry about. It was most unusual to find the lower half of the oil dipstick snapped off inside the oil pan!
 |
 |
 |
|
|
|
|
|
|
|
|
 |
 |
 |
|
the oil pan! |
corroded solid |
|
|
|
|
|
|
|
 |
 |
|
|
|
all factory standard sizes |
 |
 |
 |
|
solid |
untidy pop-rivetted repairs |
|
 |
 |
 |
|
from the main floor! |
|
|
 |
||
|
|
The restoration is underway! We have already set aside a new bonnet for your project, as well as new bonnet hinge and picture frames. The jury is still out on the engine side frames....
 |
 |
 |
|
|
been badly bashed about |
its share of pain |
 |
 |
 |
|
|
frame in this photograph |
to be very sound |
I am delighted to report that you car has arrived safely at Classic Jaguar and we will be getting the restoration underway in the next few days. I hope you enjoy watching the car come together over the coming months!
 |
 |
 |
 |
 |
|
