| 1960 Aston Martin DB4 S1 Total restoration to ultimate concours specification |
|
| 1960 Aston Martin DB4 S1 Total restoration to ultimate concours specification |
|
|
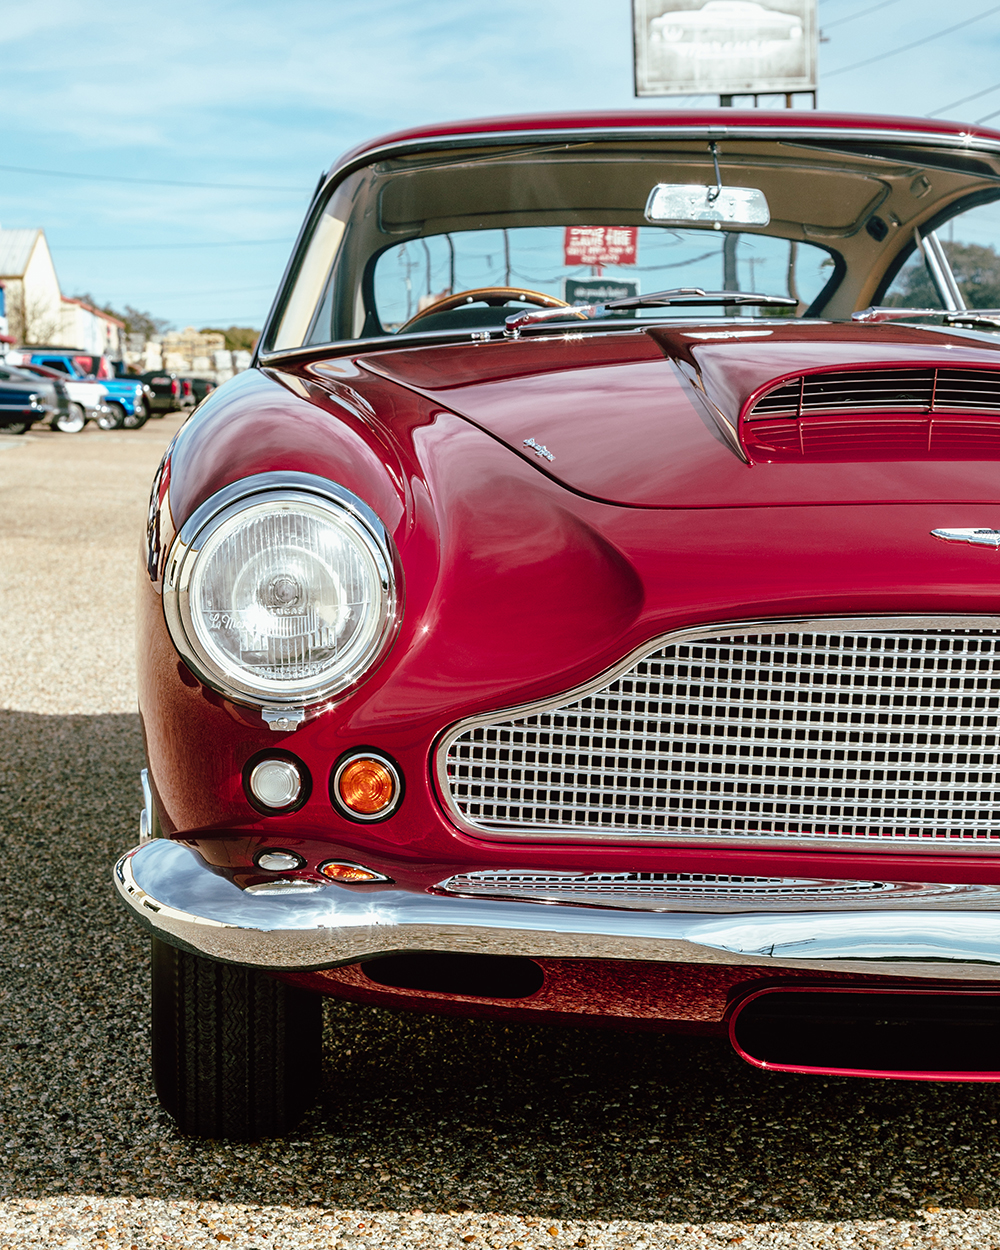
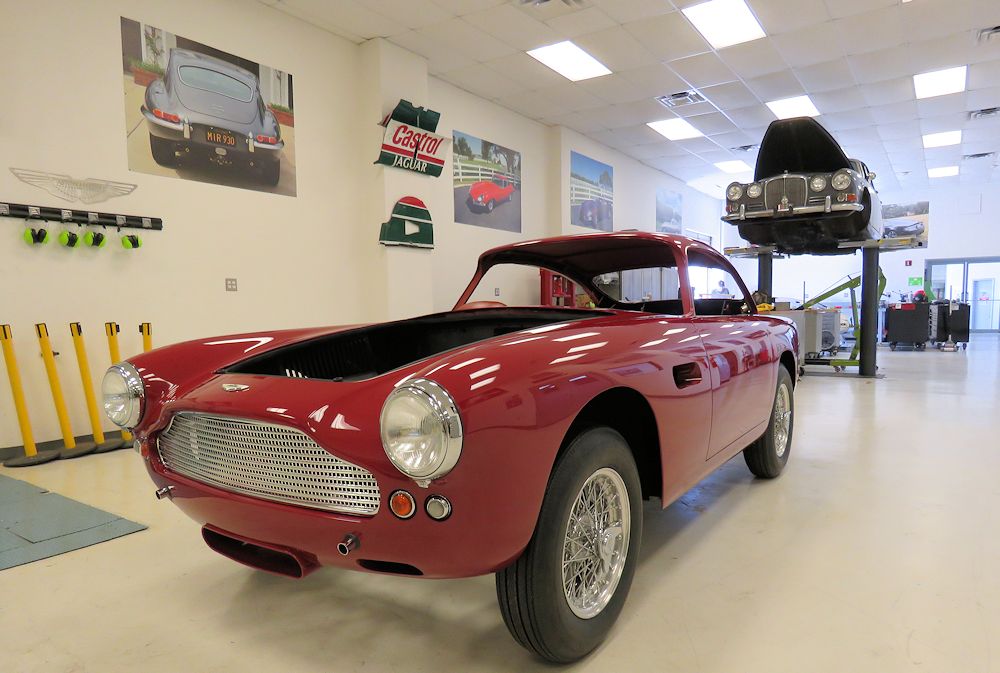
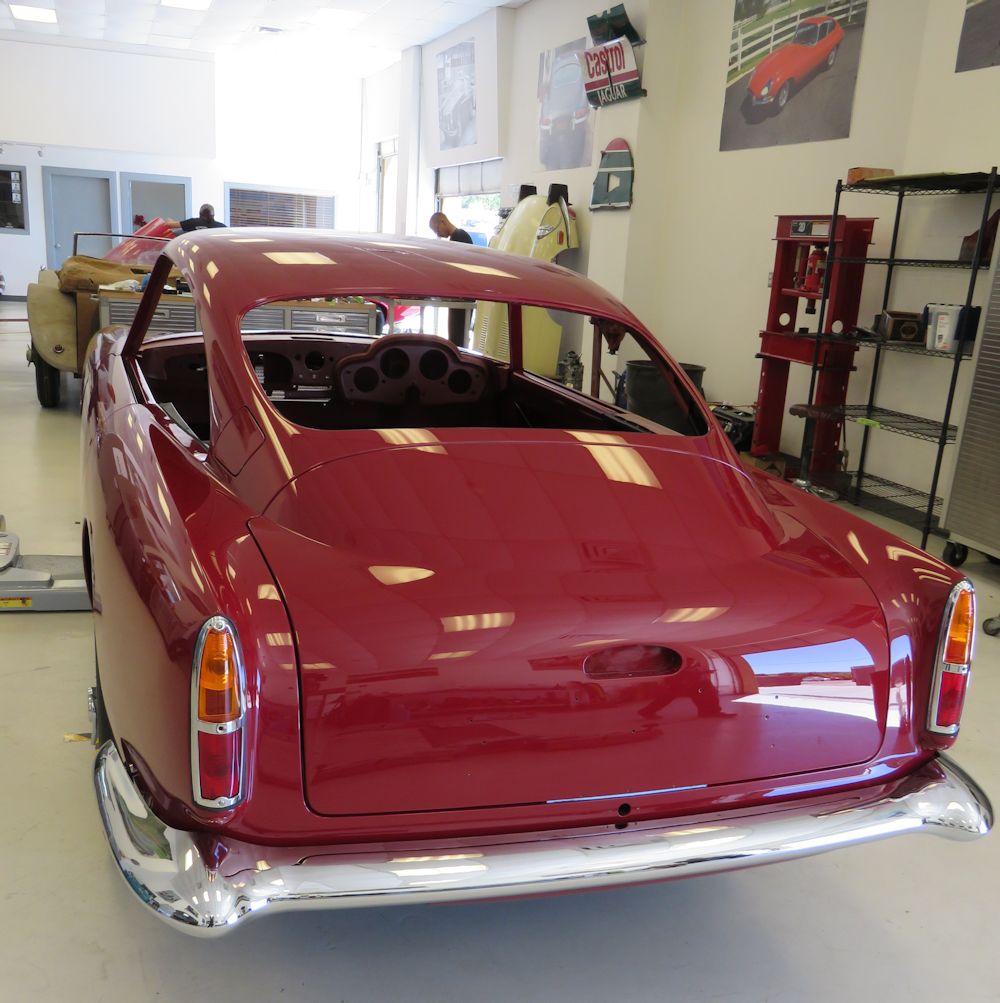
It seems fitting that the final photo (of several thousand) documenting this restoration
journey should be the finished car in its magnificent new home!
 |
 |
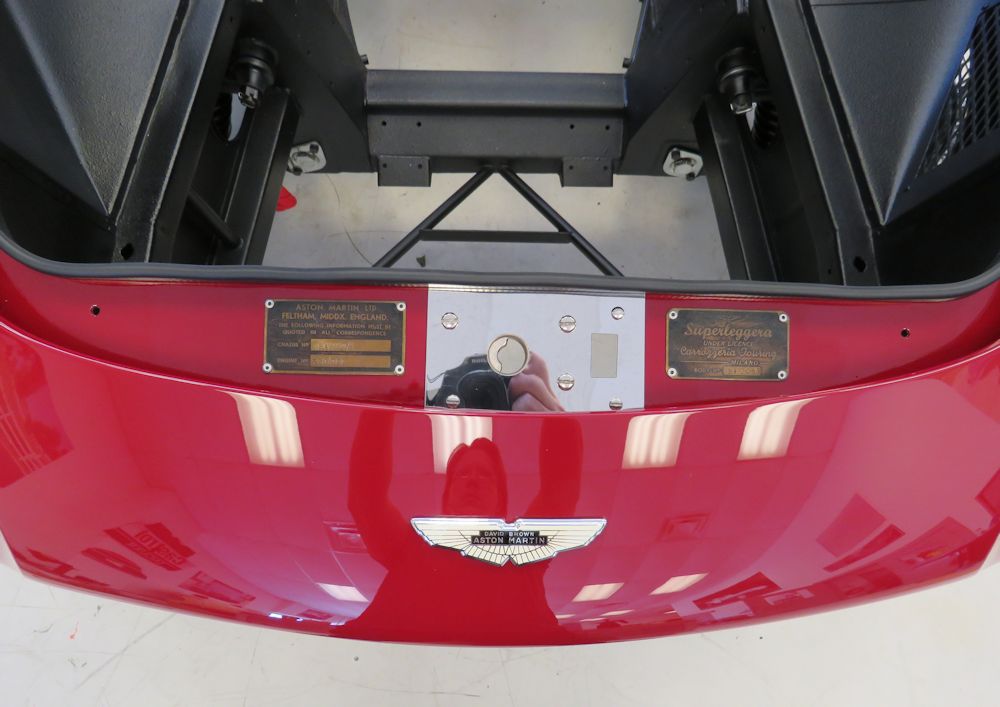
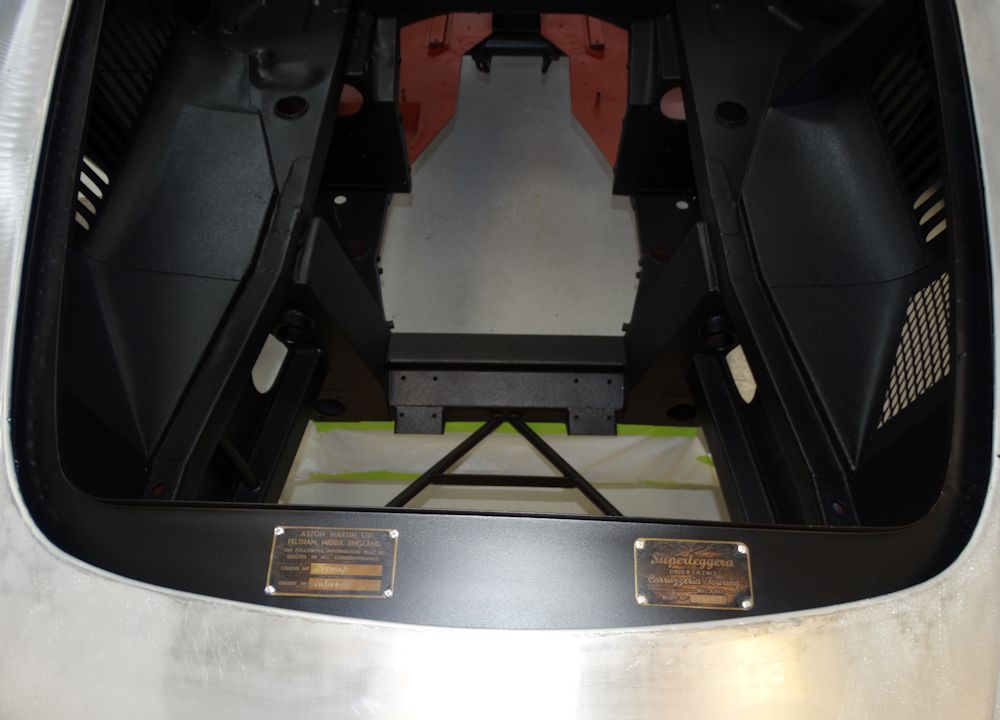
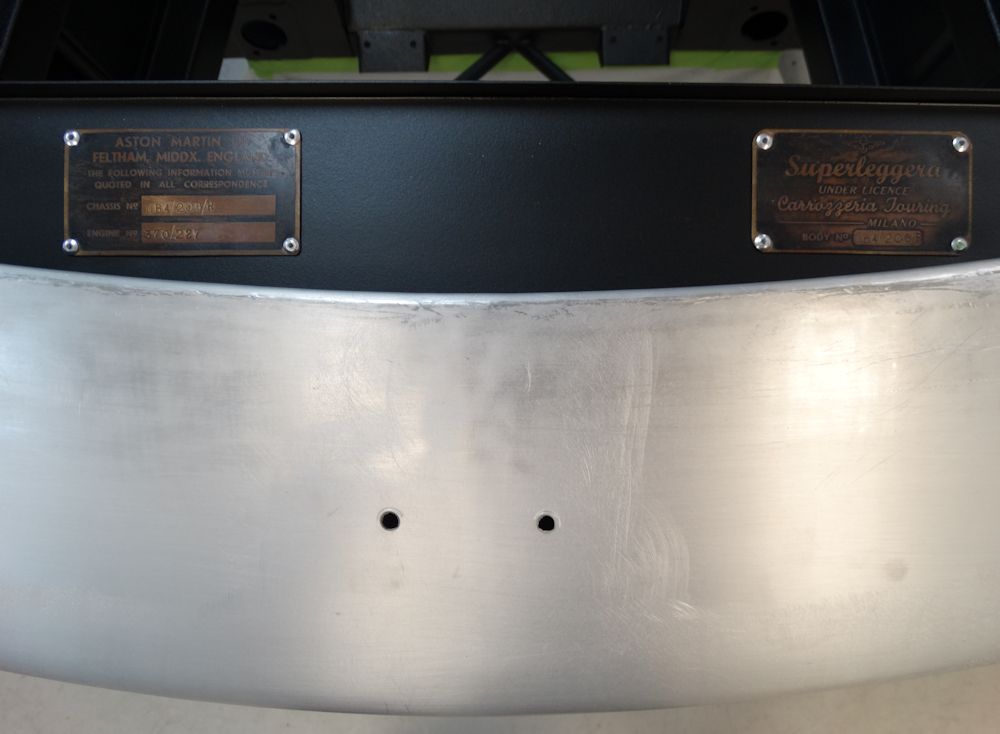
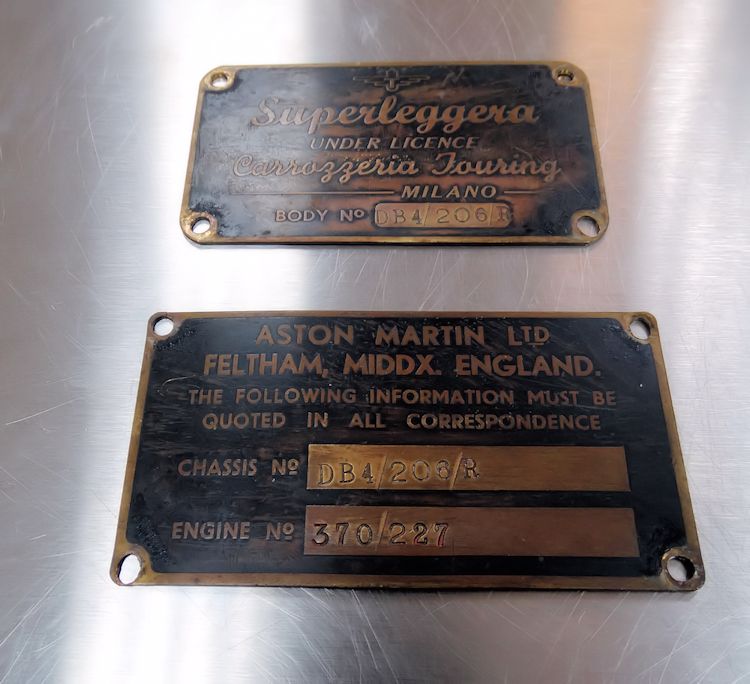
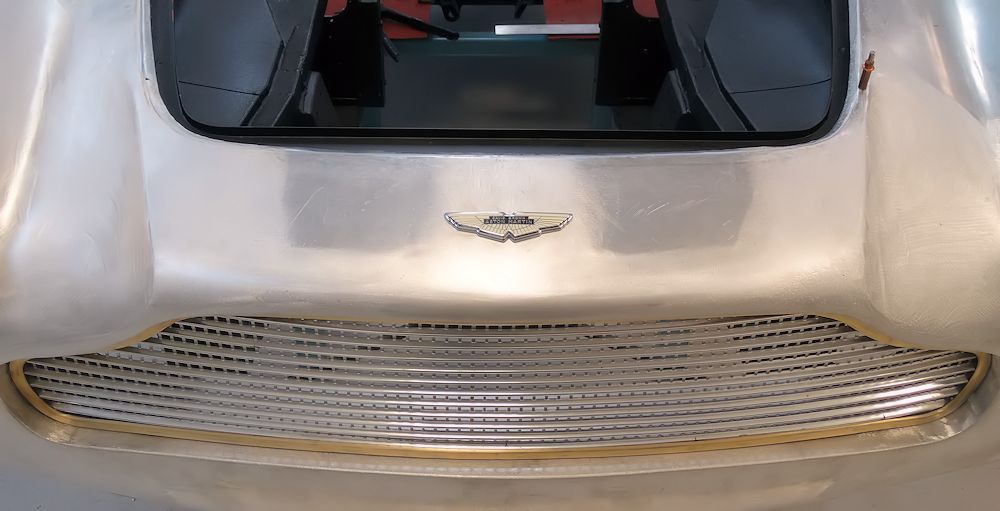
| The same "number plate" the car has had since January 1960 |
|
 |
 |
 |
 |
 |
 |
 |
 |
 |
 |
 |
 |
 |
 |
 |
 |
 |
 |
 |
 |
 |
 |
 |
 |
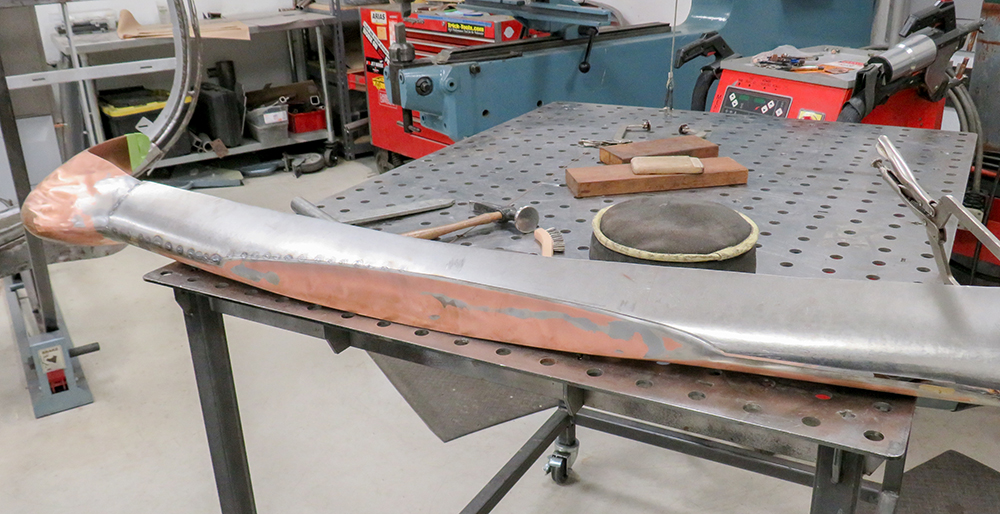
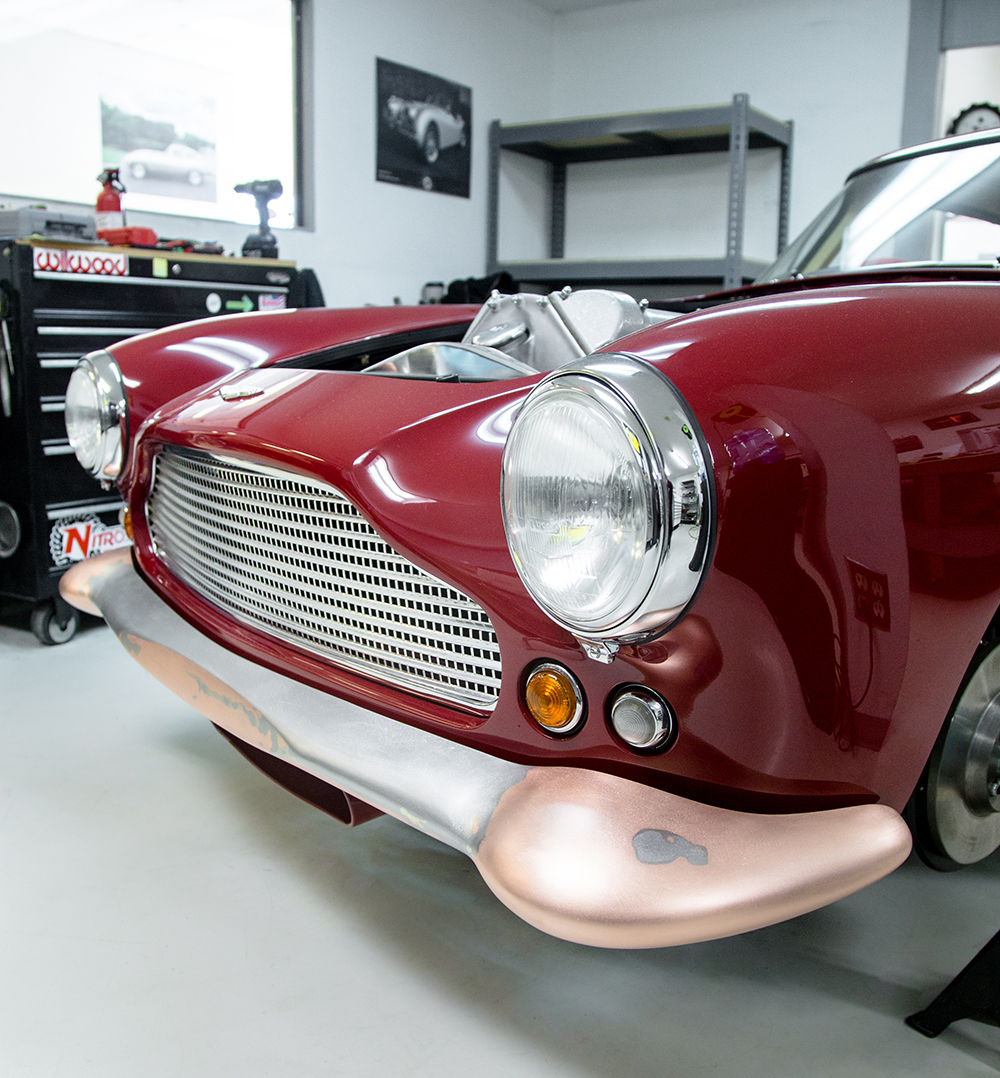
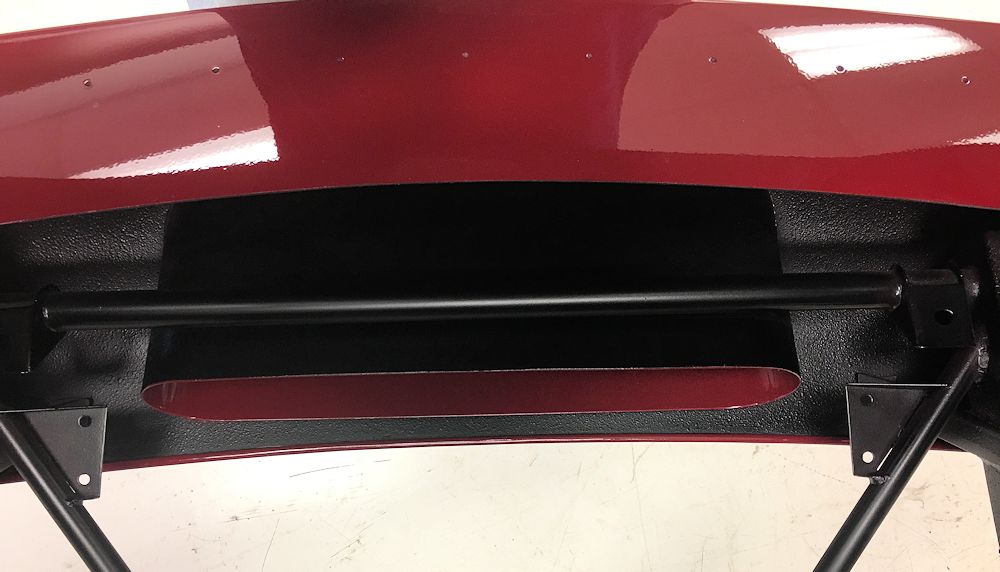
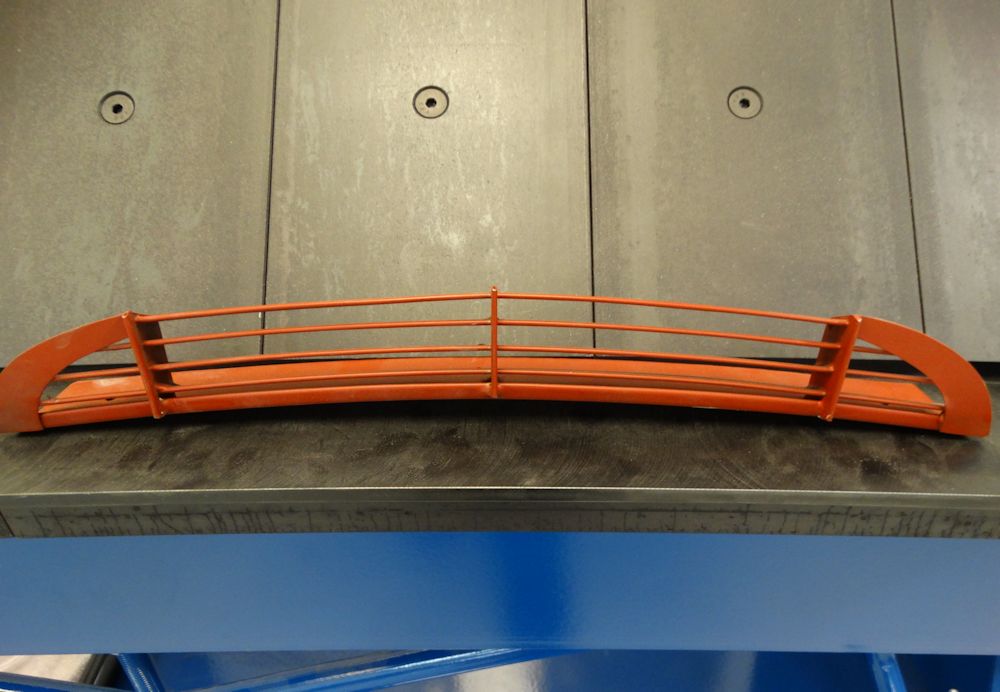
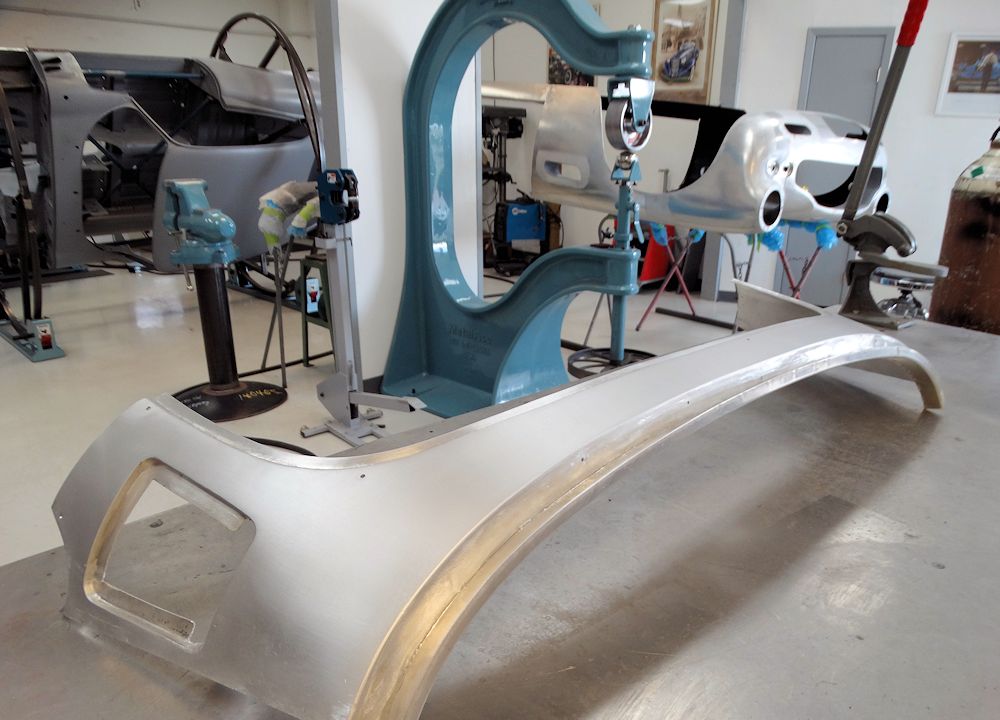
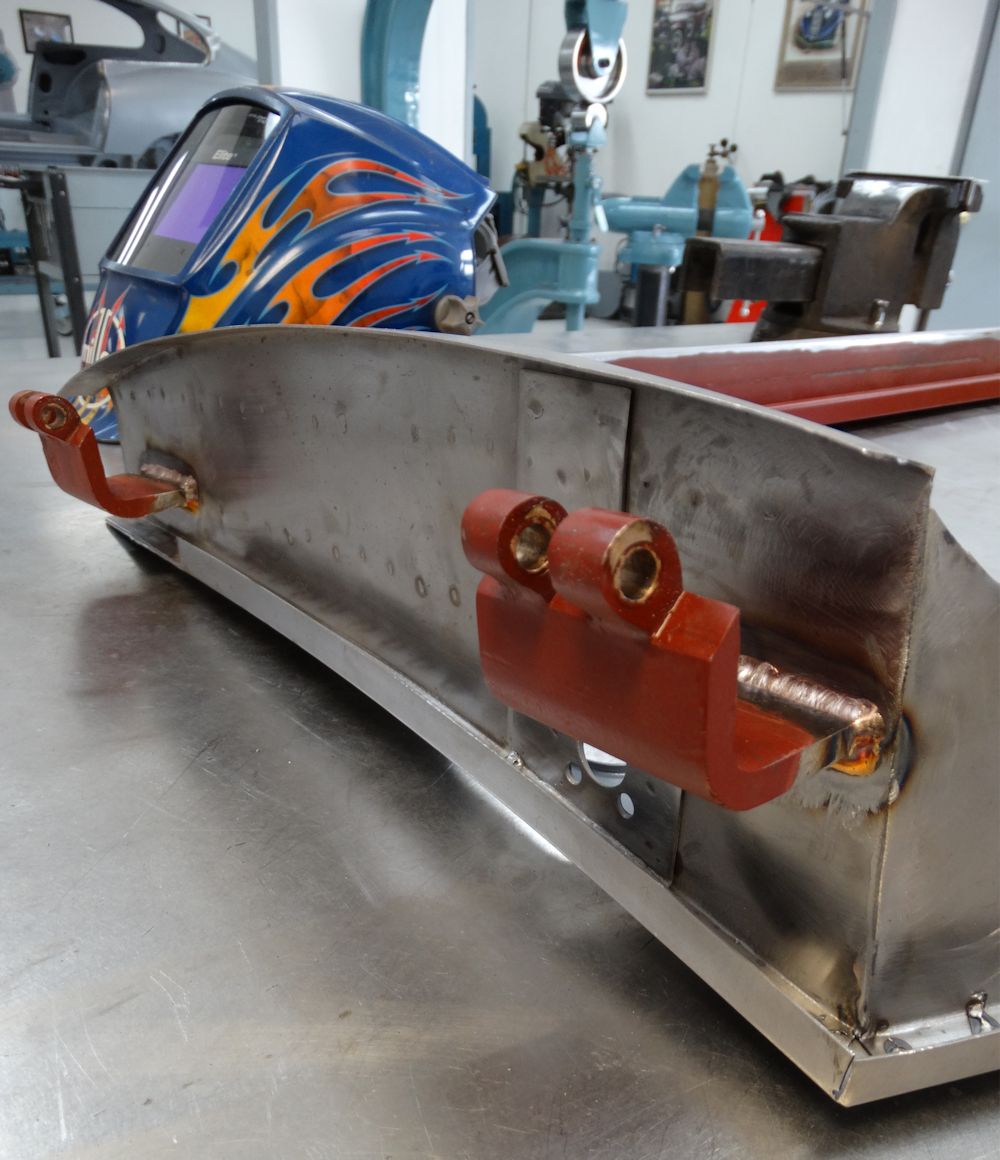
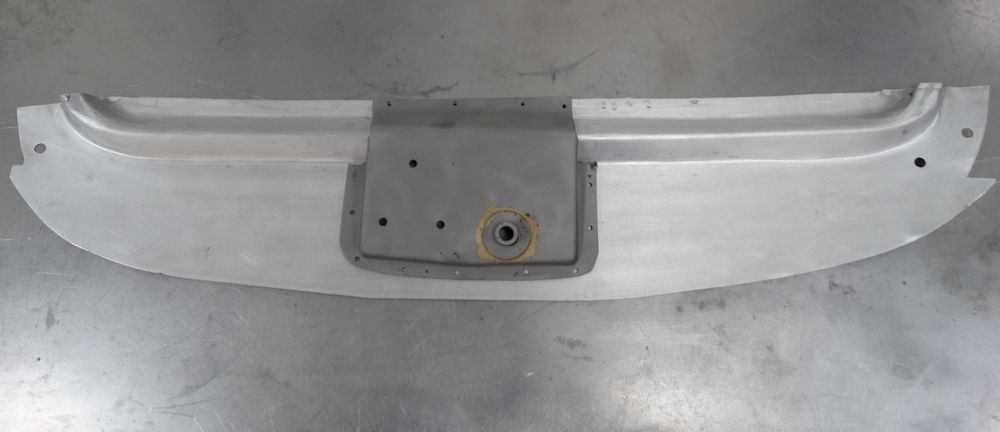
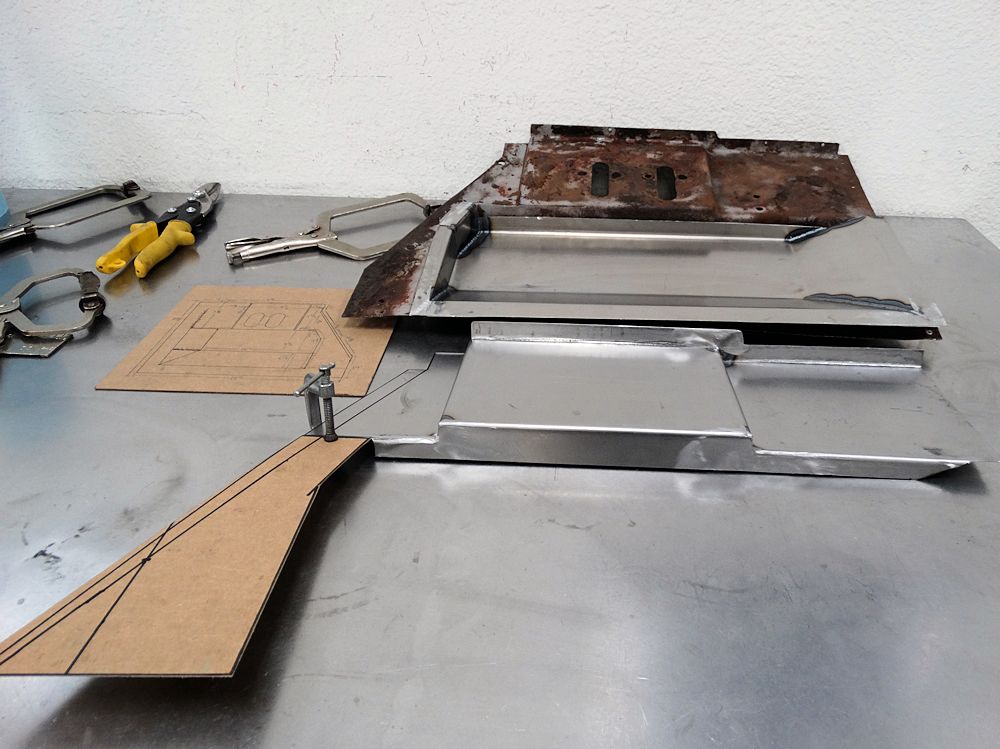
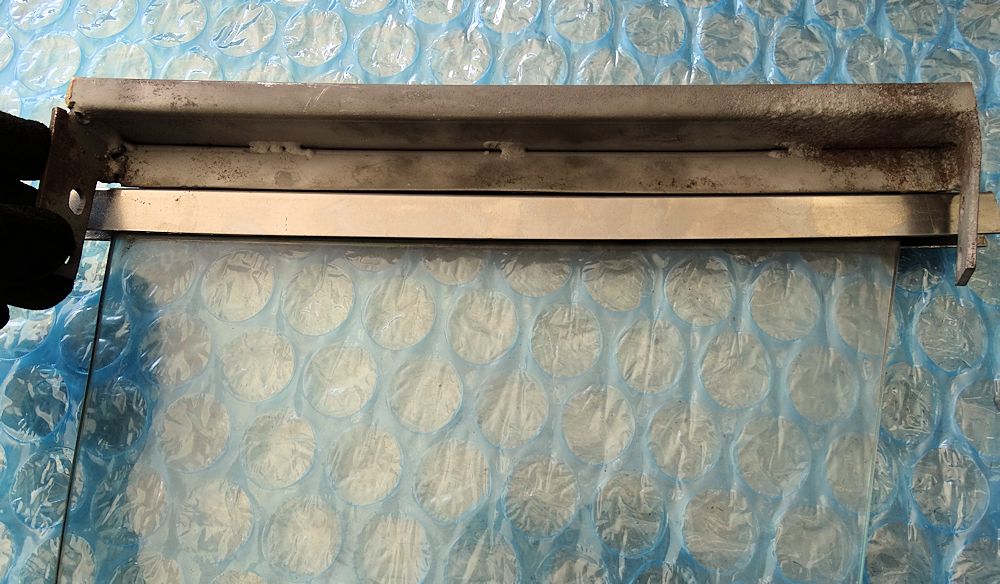
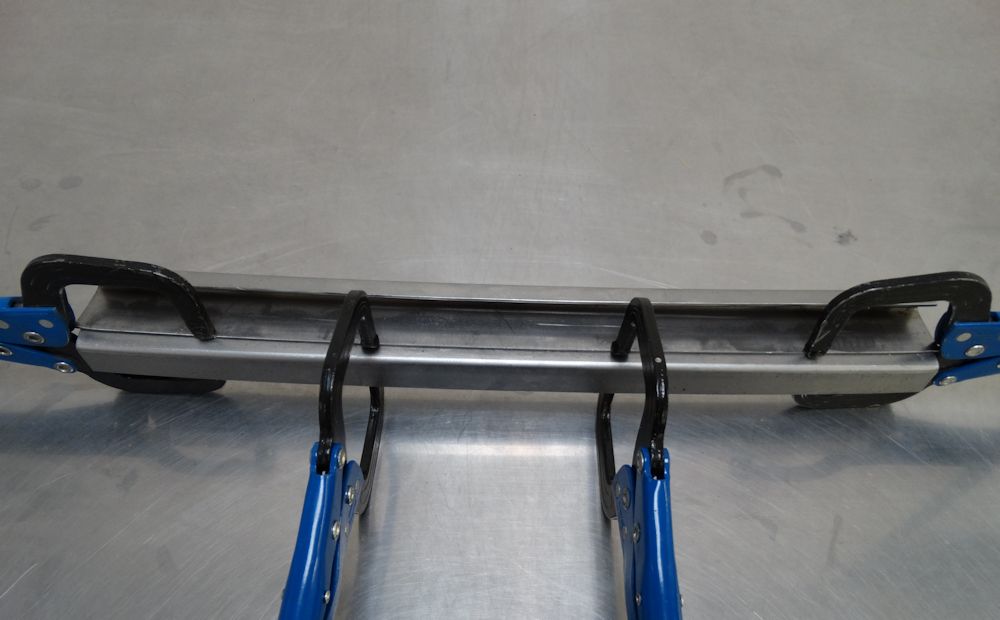
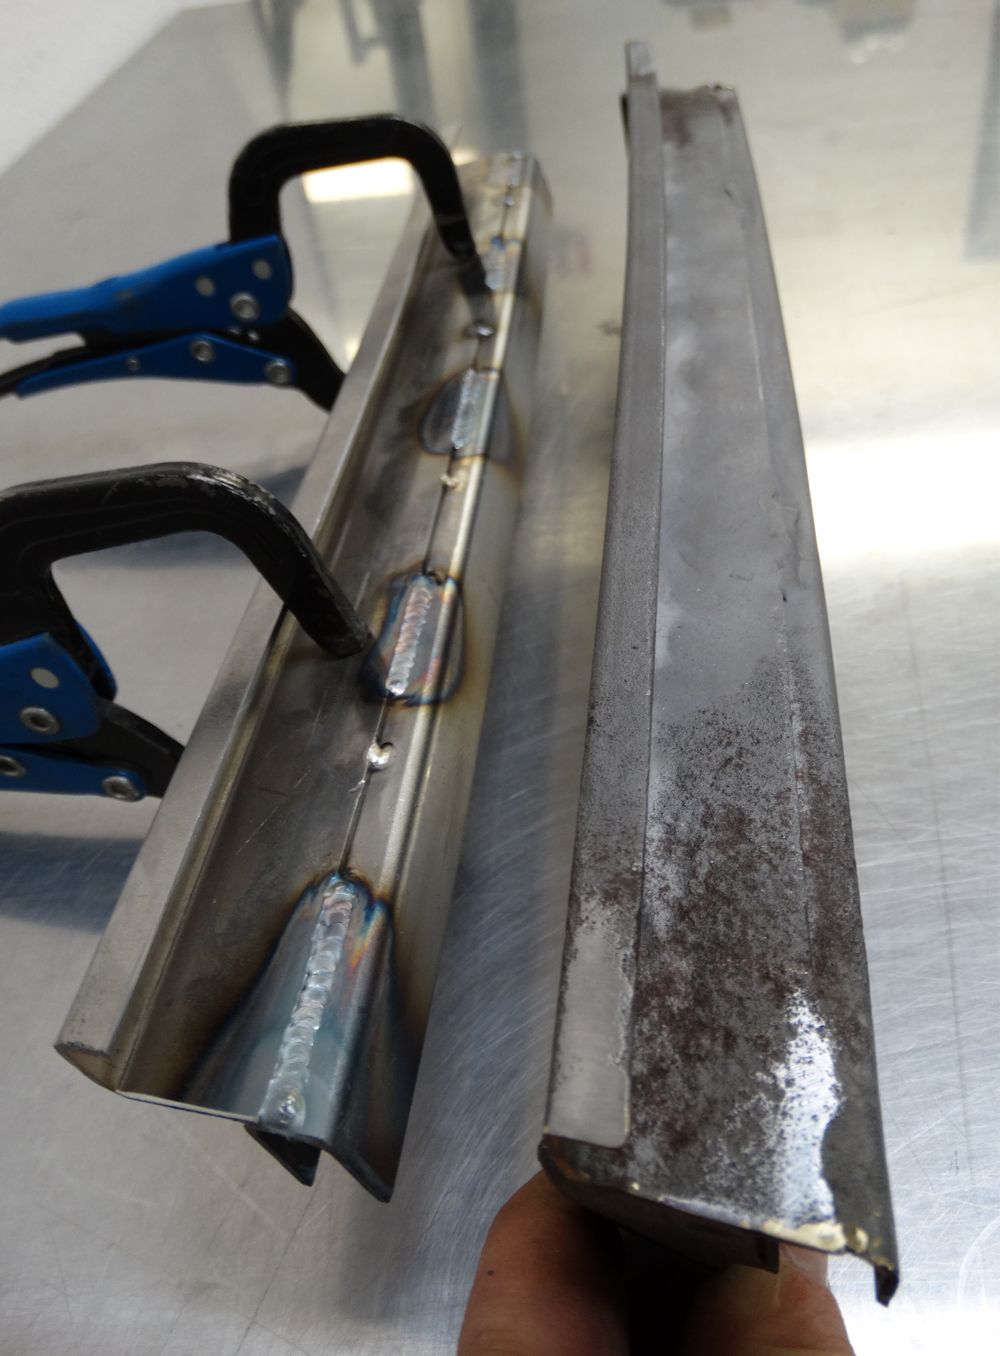
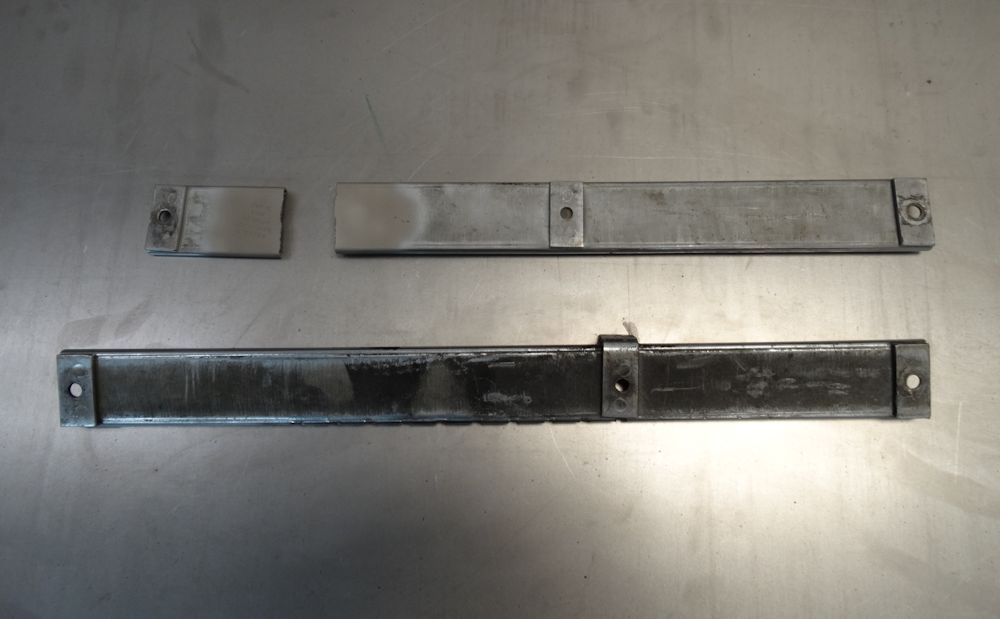
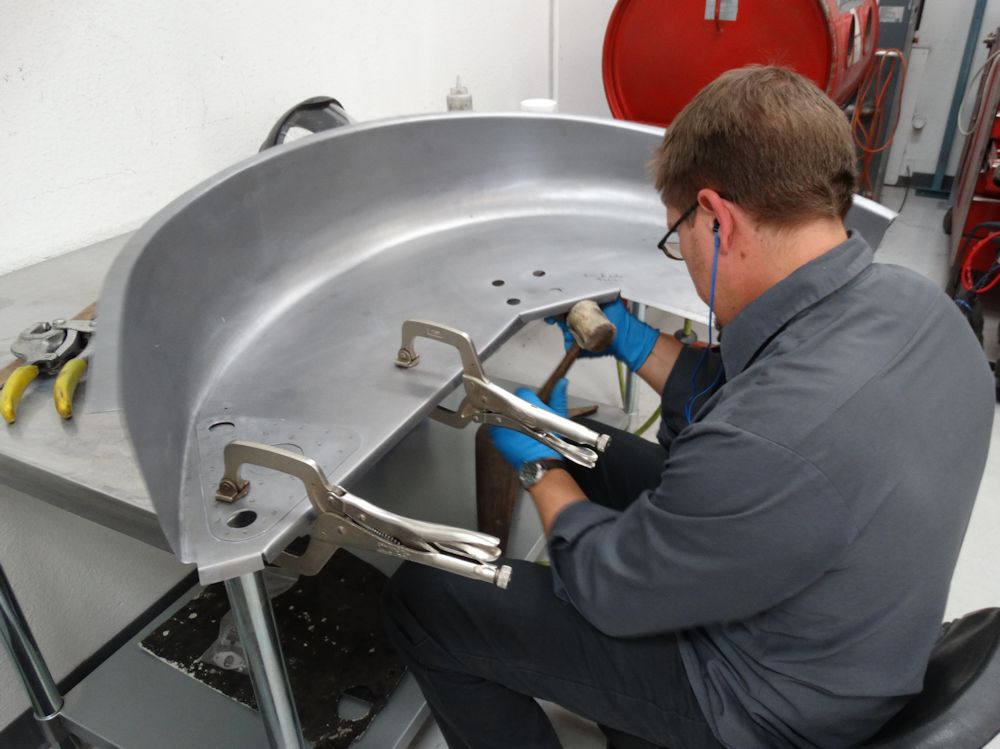
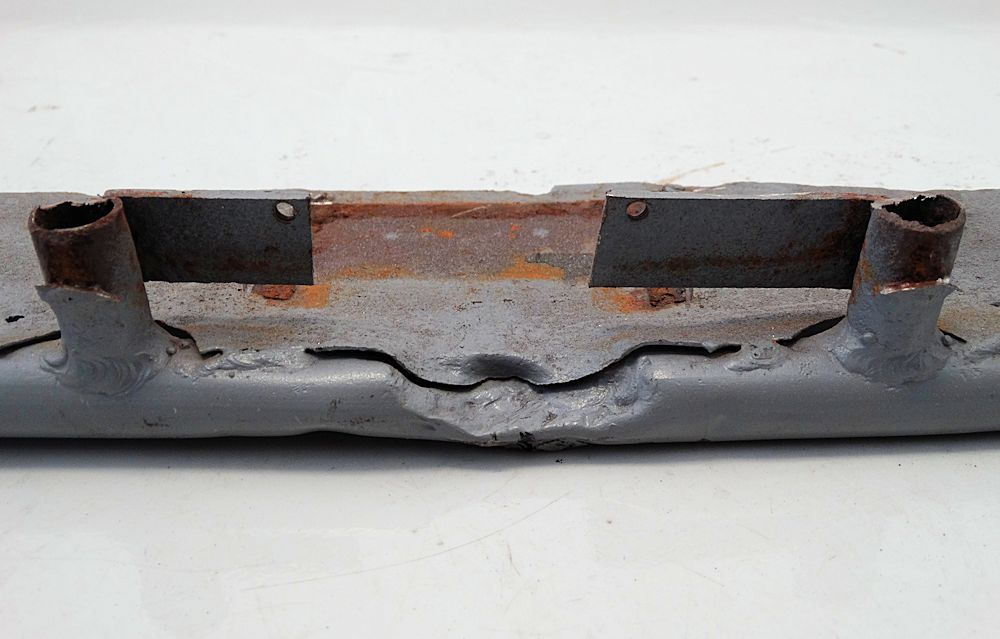
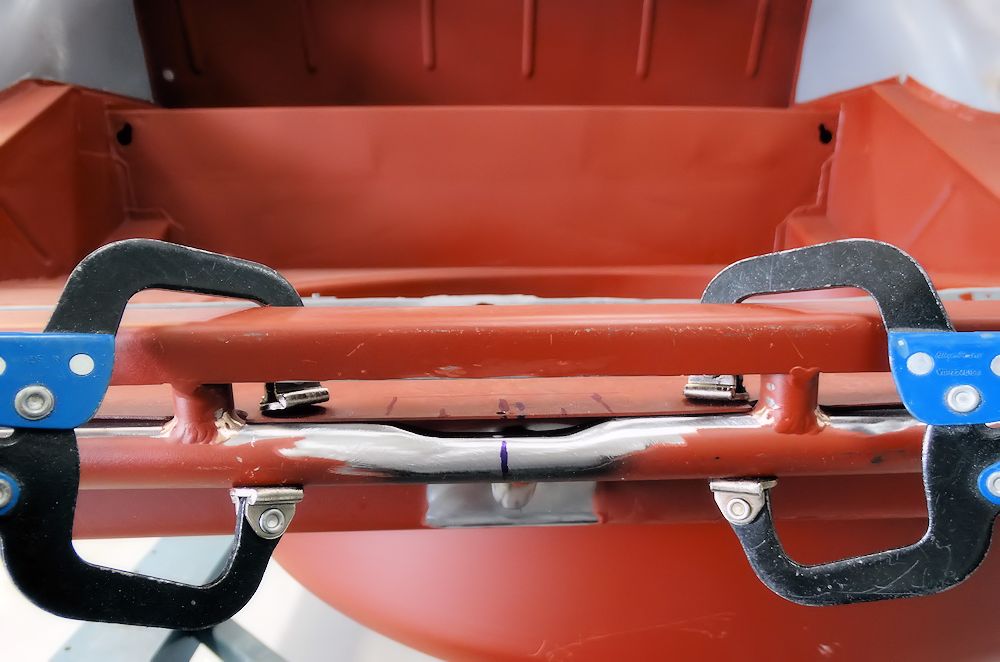
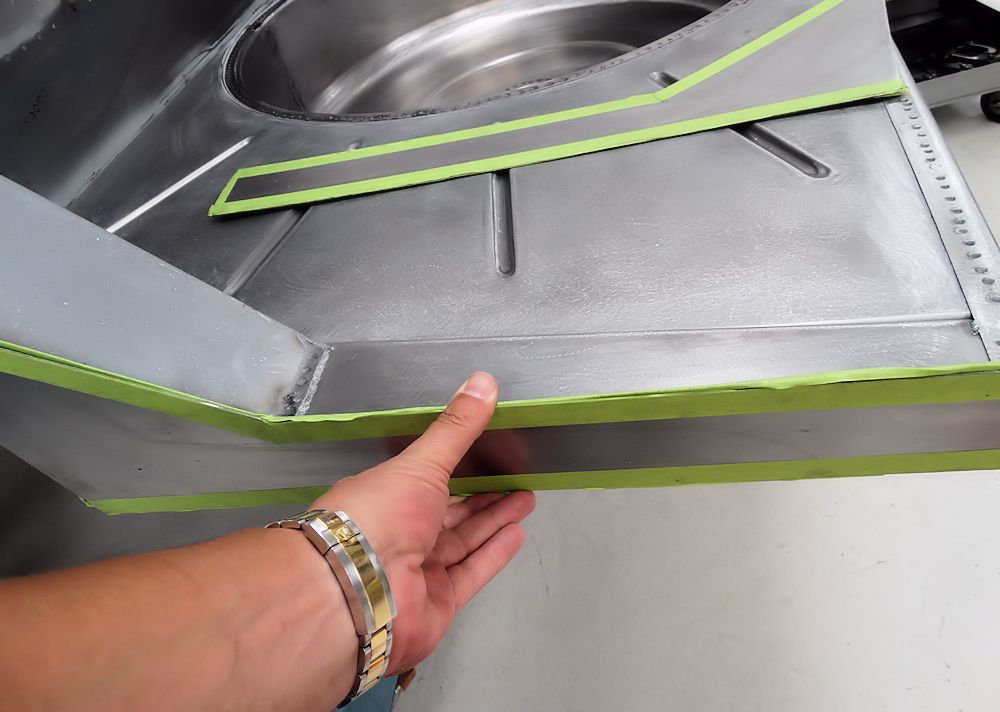
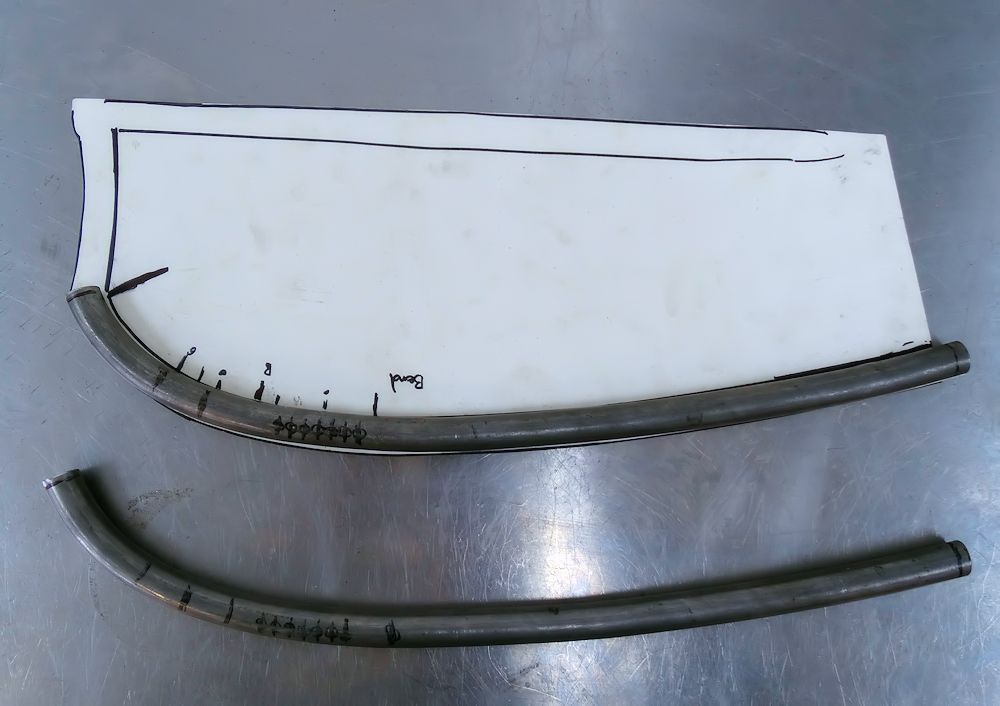
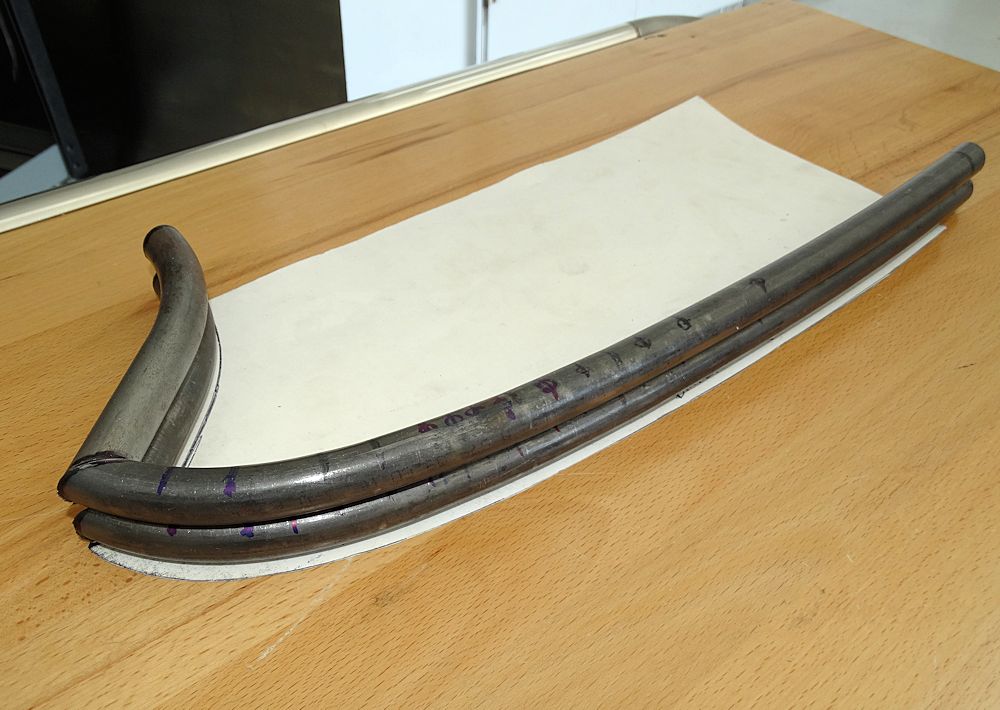
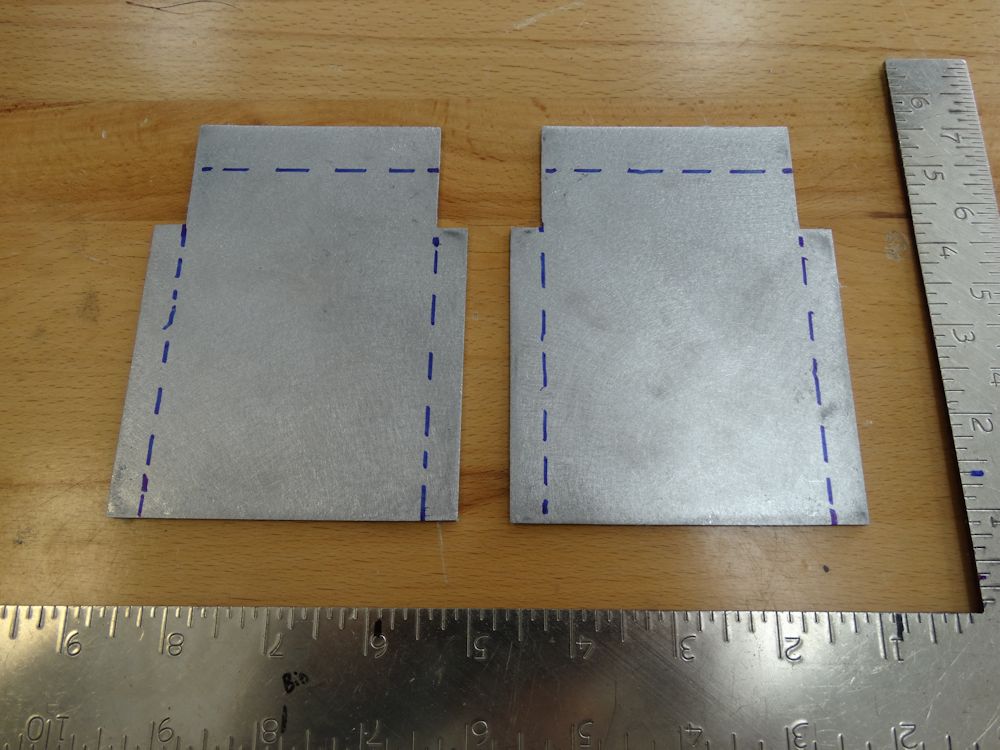
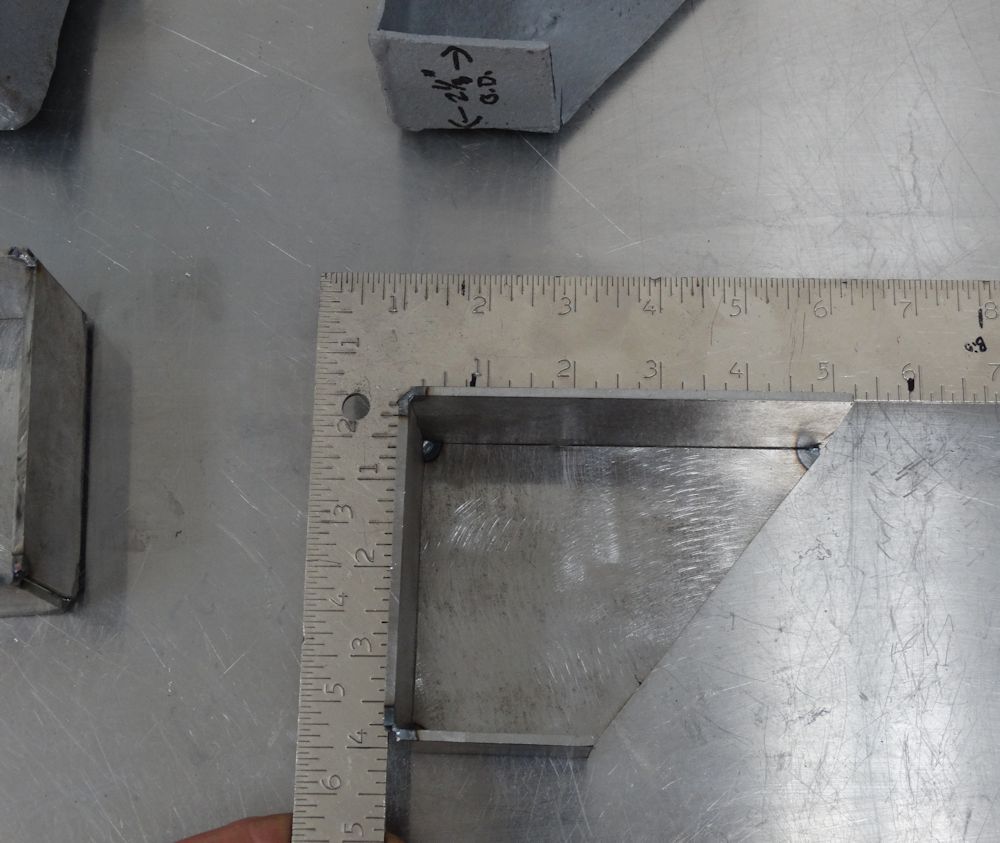
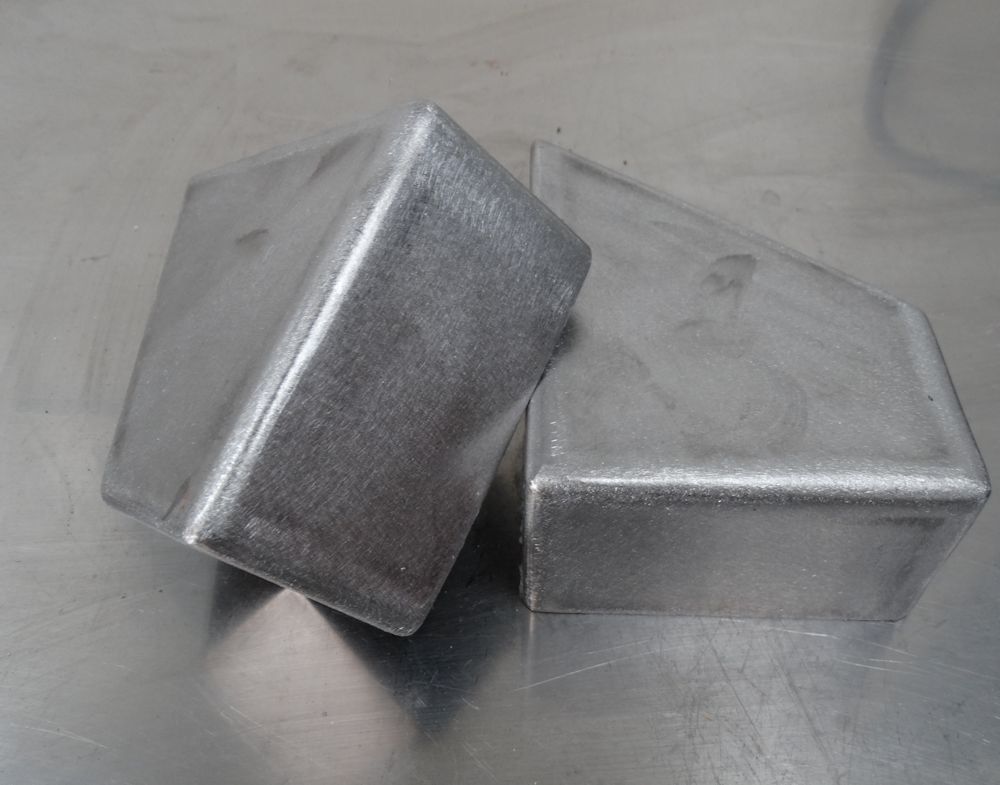
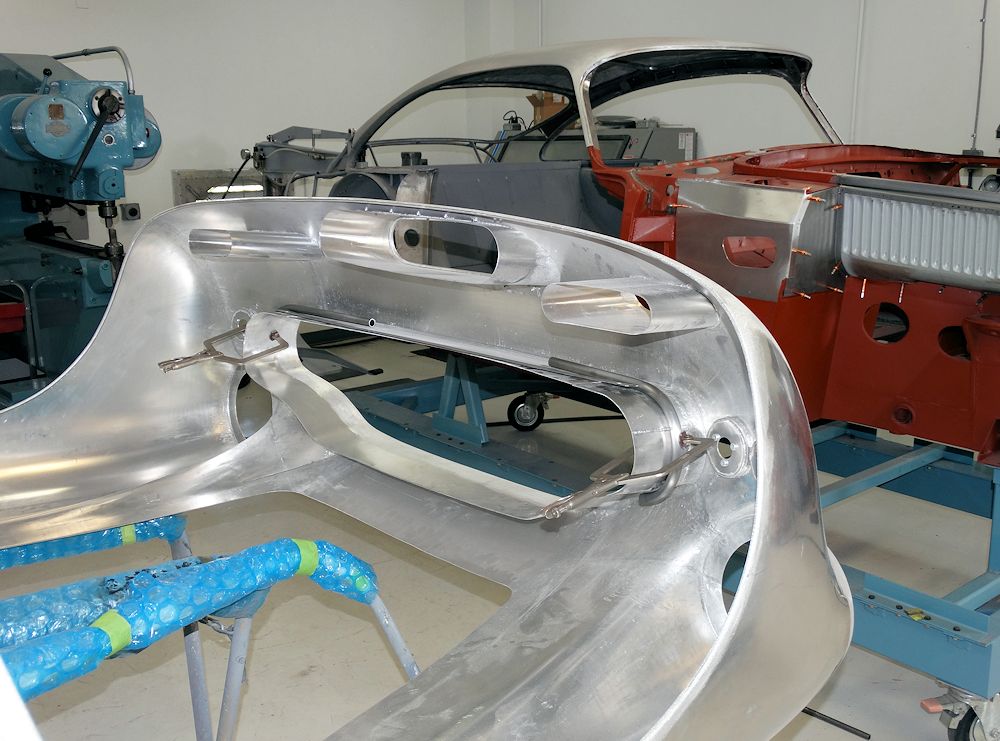
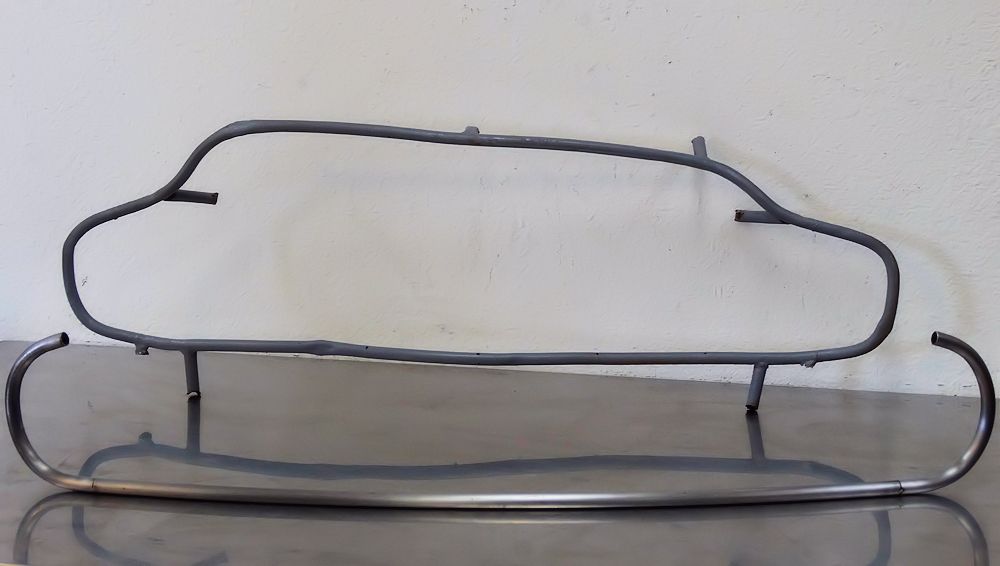
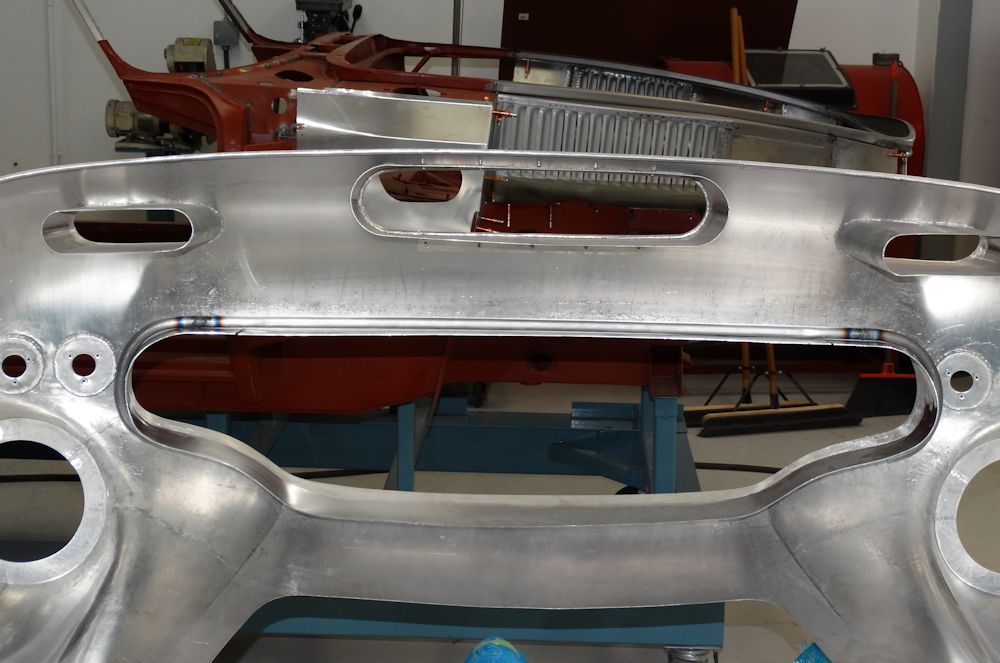
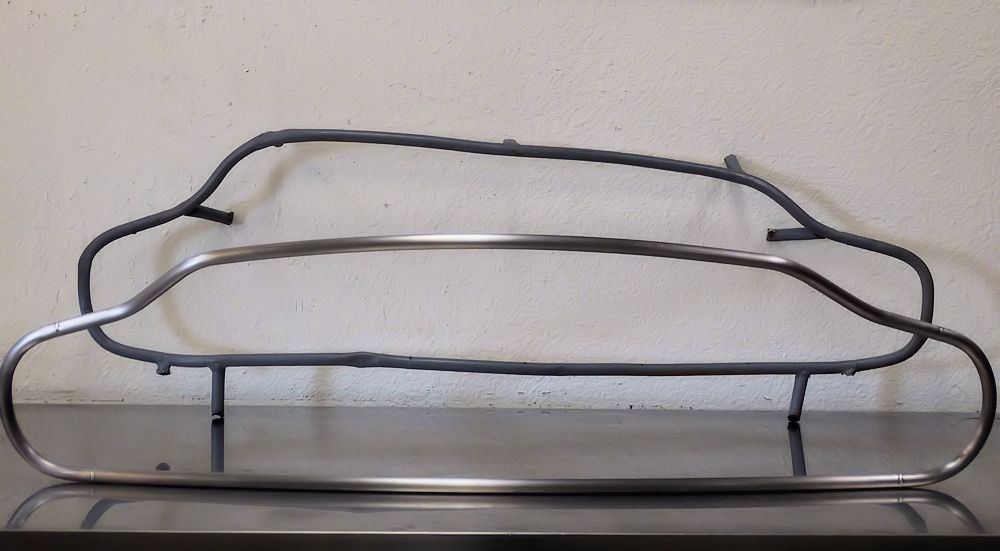
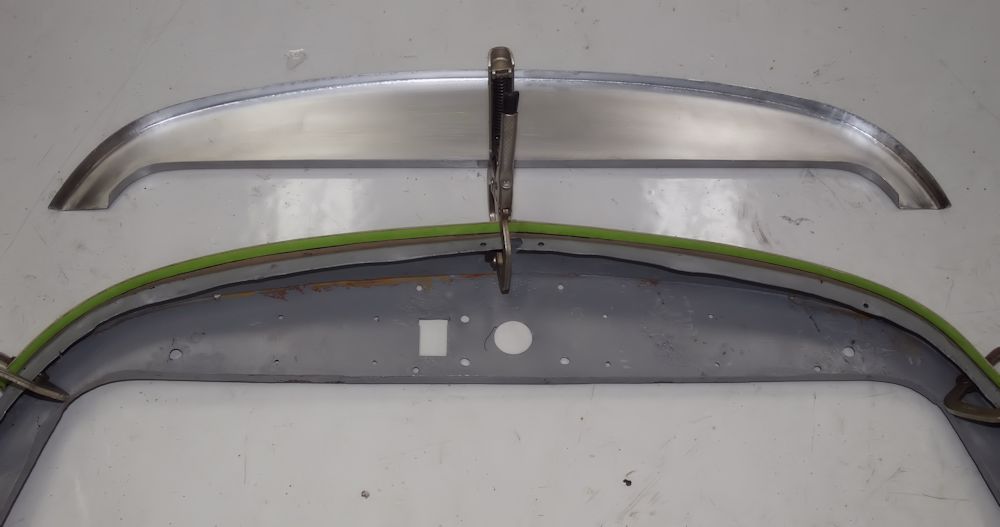
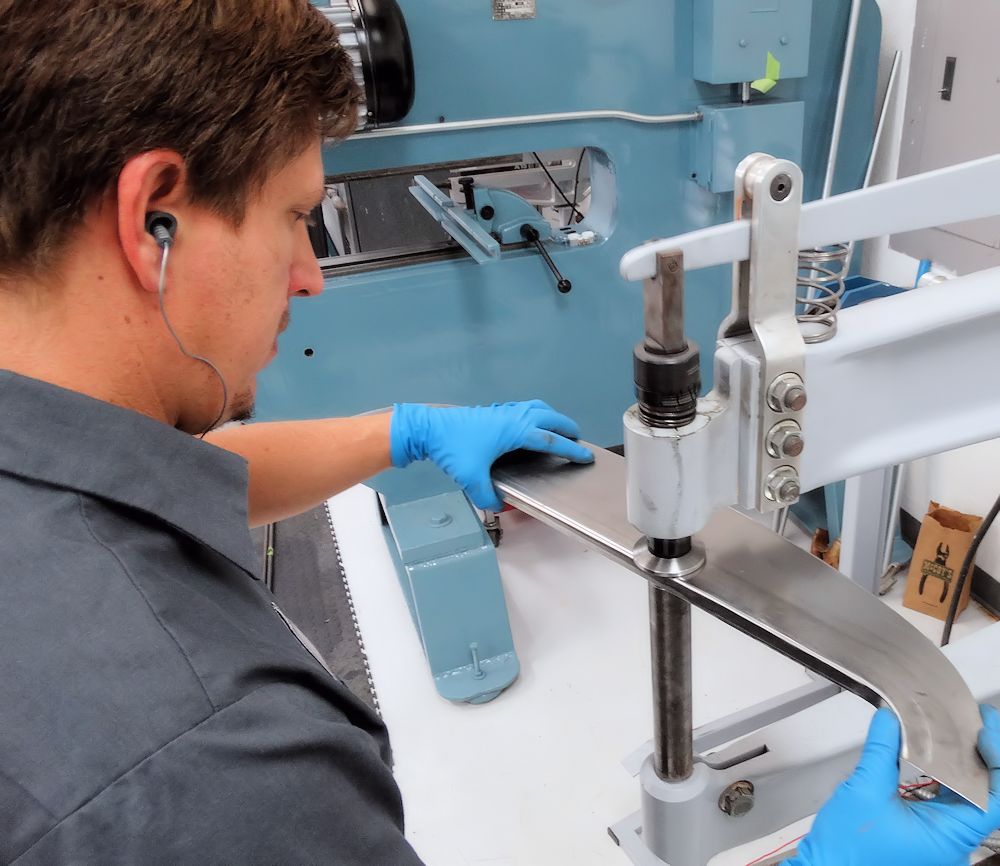
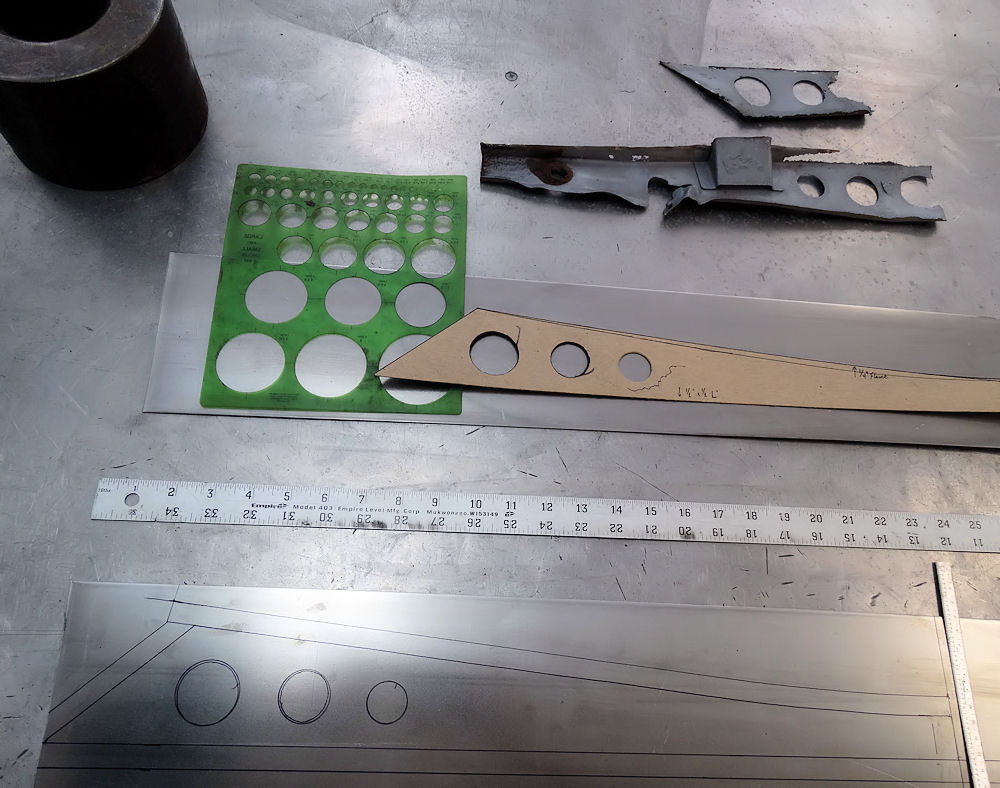
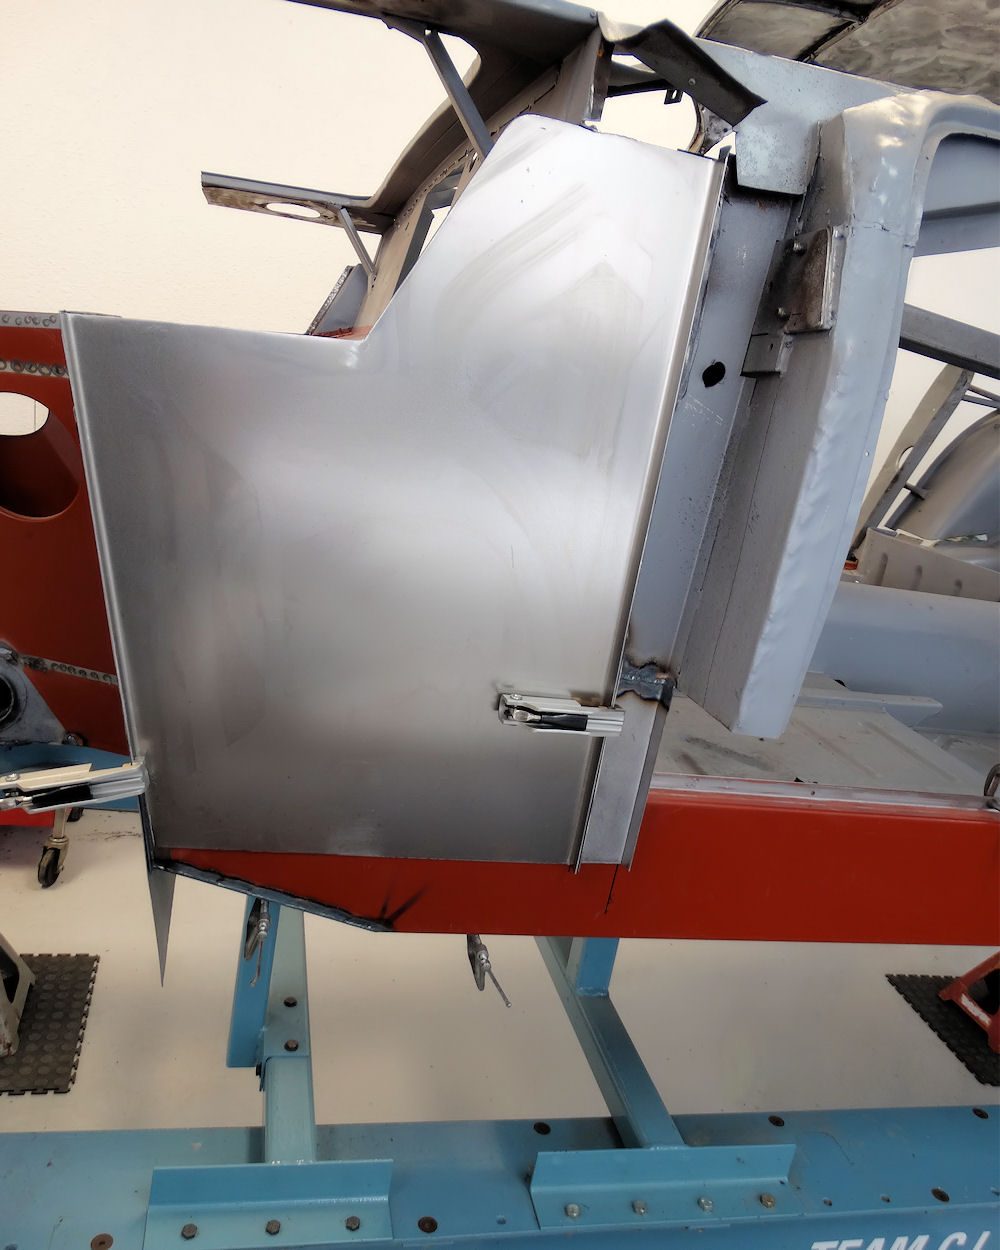
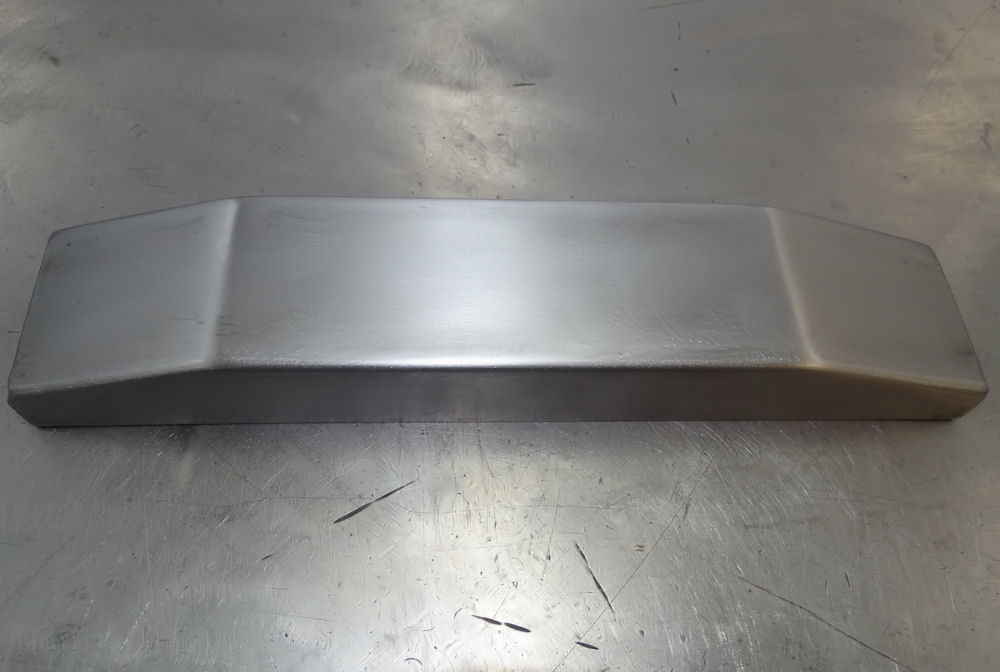
Jake has been busy fabricating a new top section for the DB4 front bumper. The bumper has now been sent off for chrome plating.
 |
 |
 |
 |
 |
 |
 |
 |
 |
 |
 |
 |
 |
 |
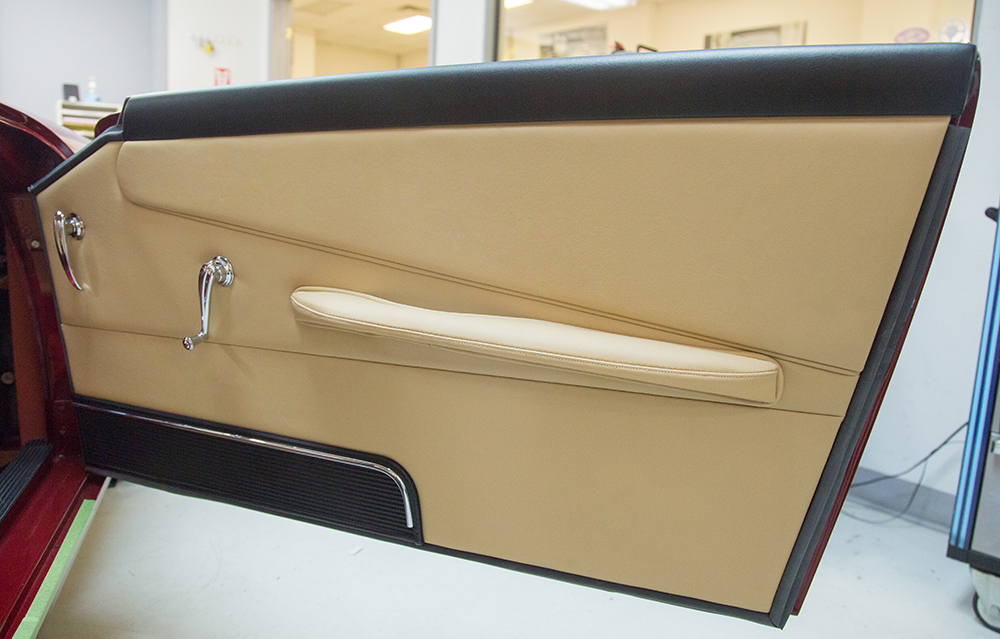
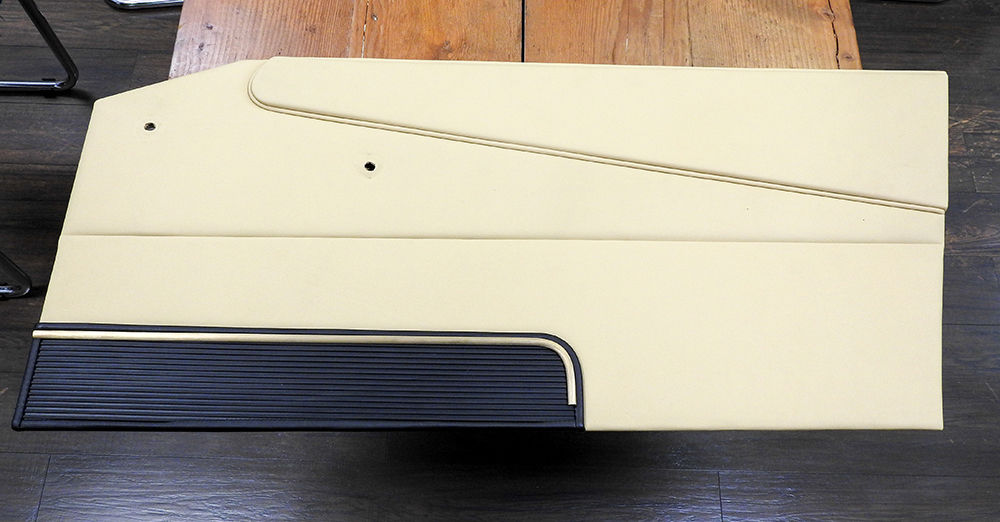
Carlos has been busy putting the finishing touches to the door panels and cabin carpeting, all of which he made from scratch. We are very much in the finishing straight with this project now!
 |
 |
 |
 |
 |
 |
 |
 |
 |
 |
 |
 |
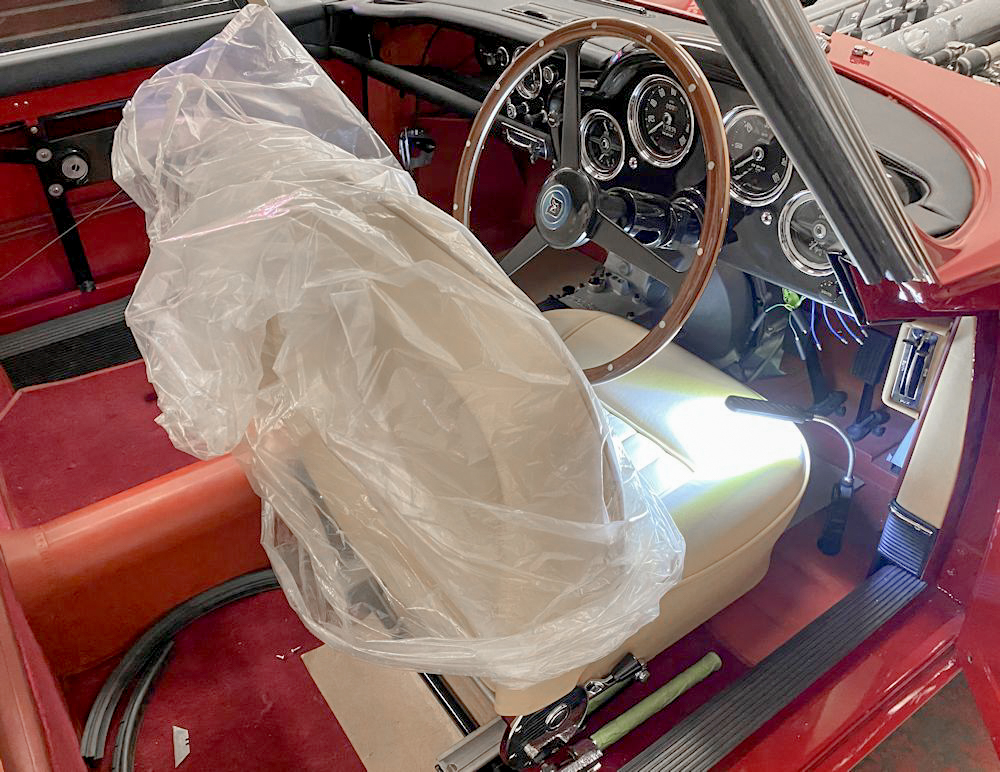
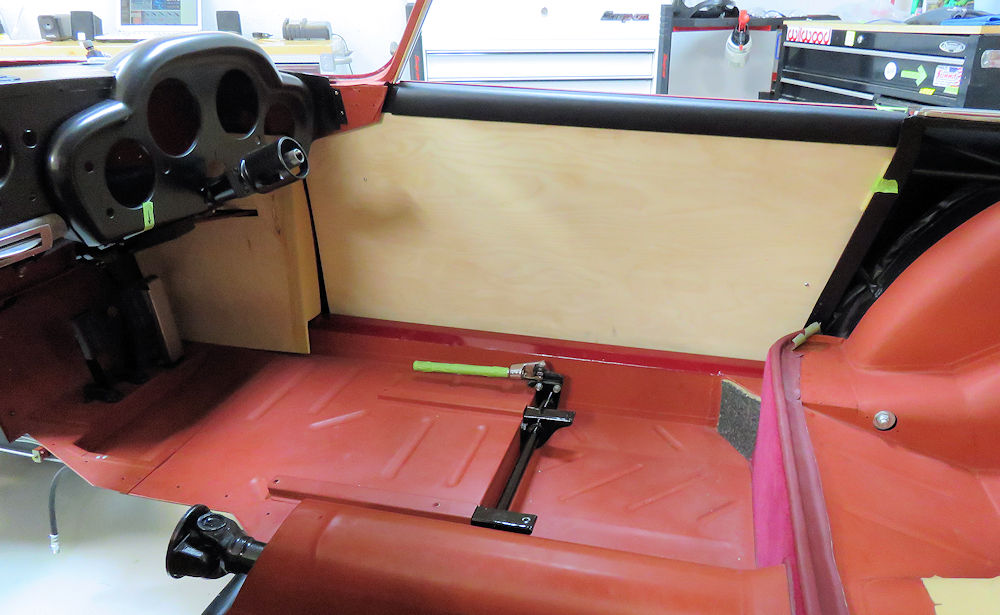
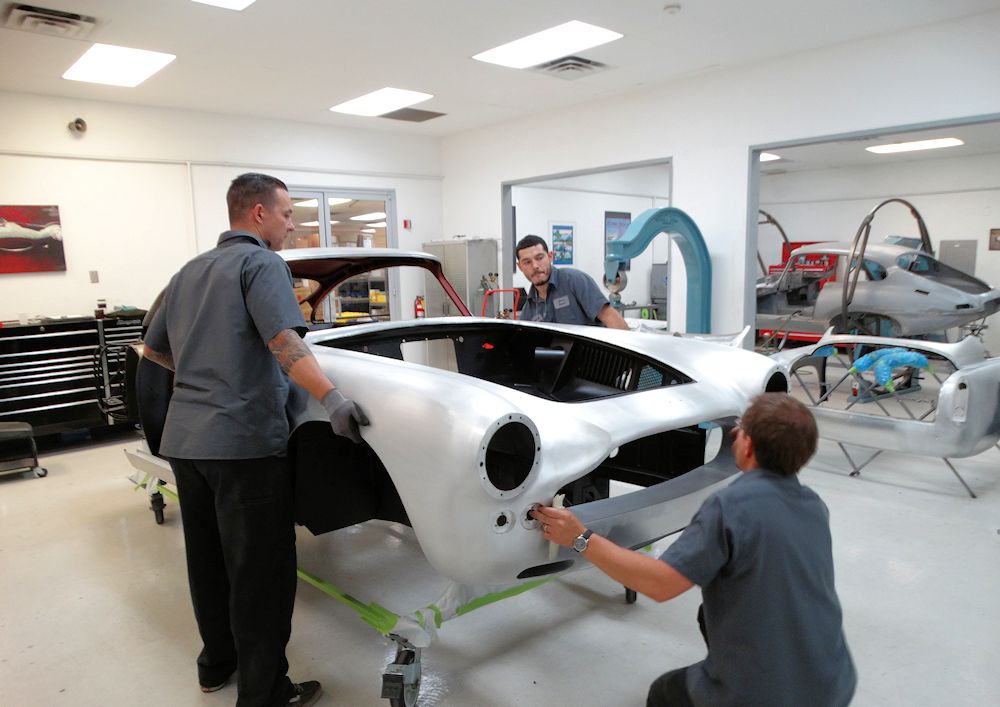
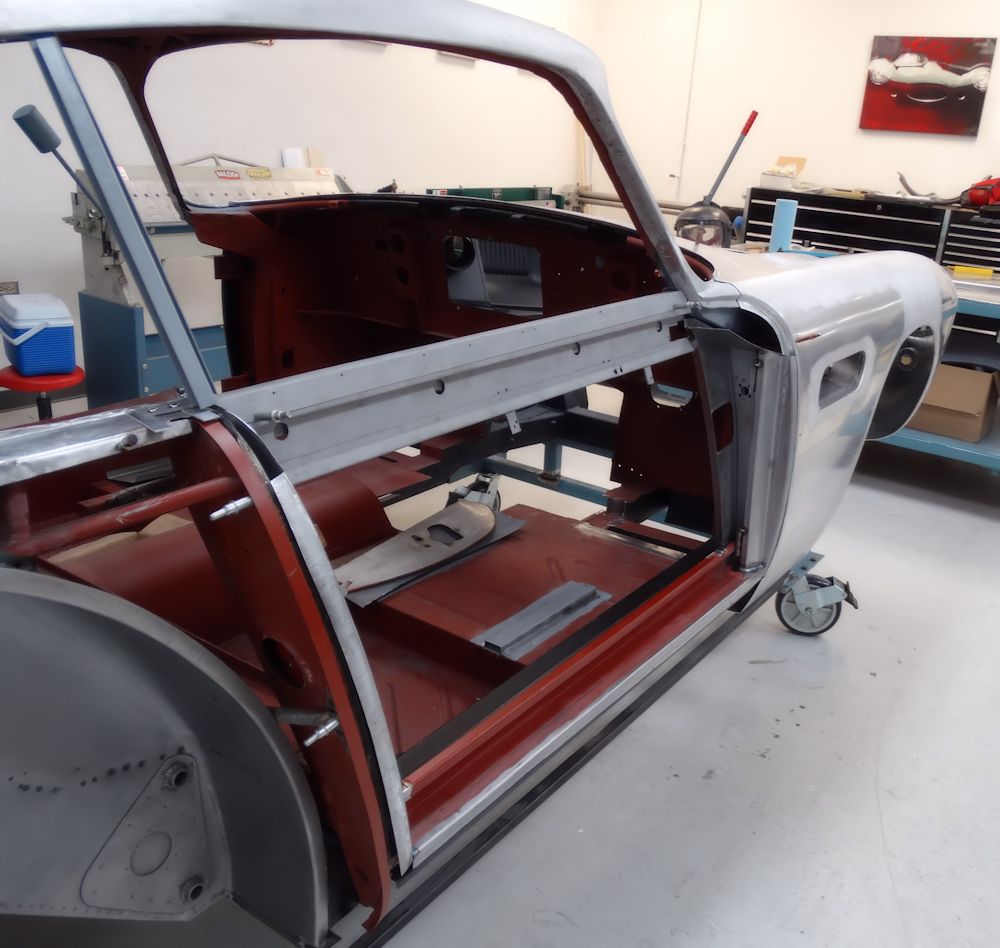
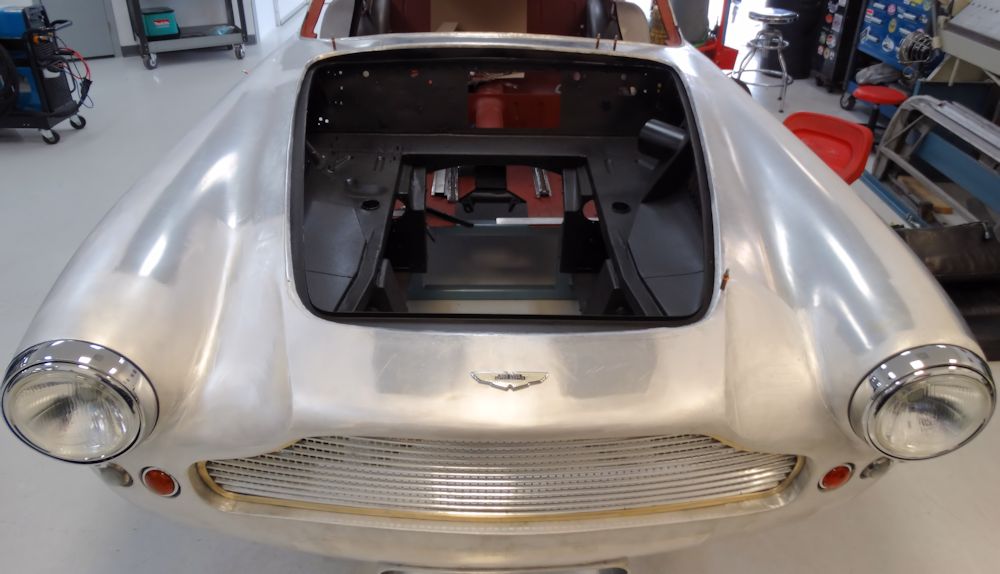
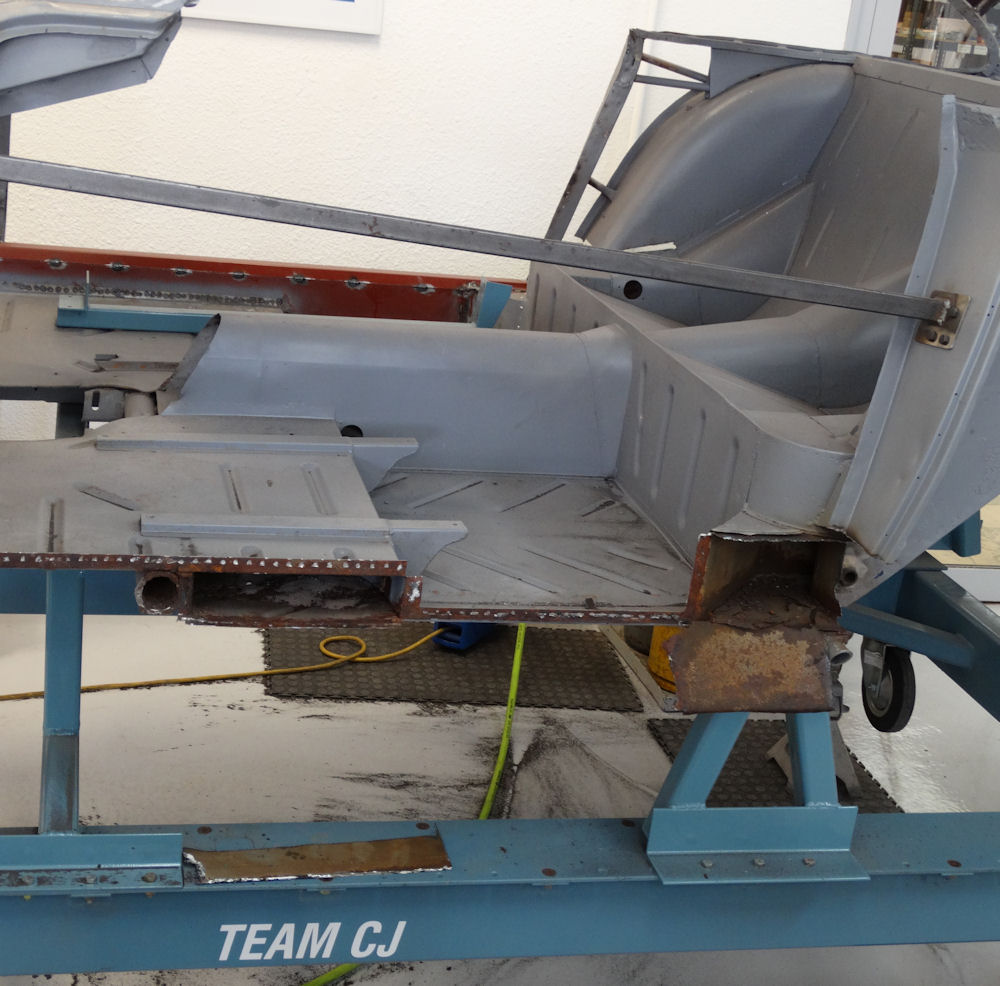
This is the first time the DB4 has moved under its own steam in 44 years!
 |
 |
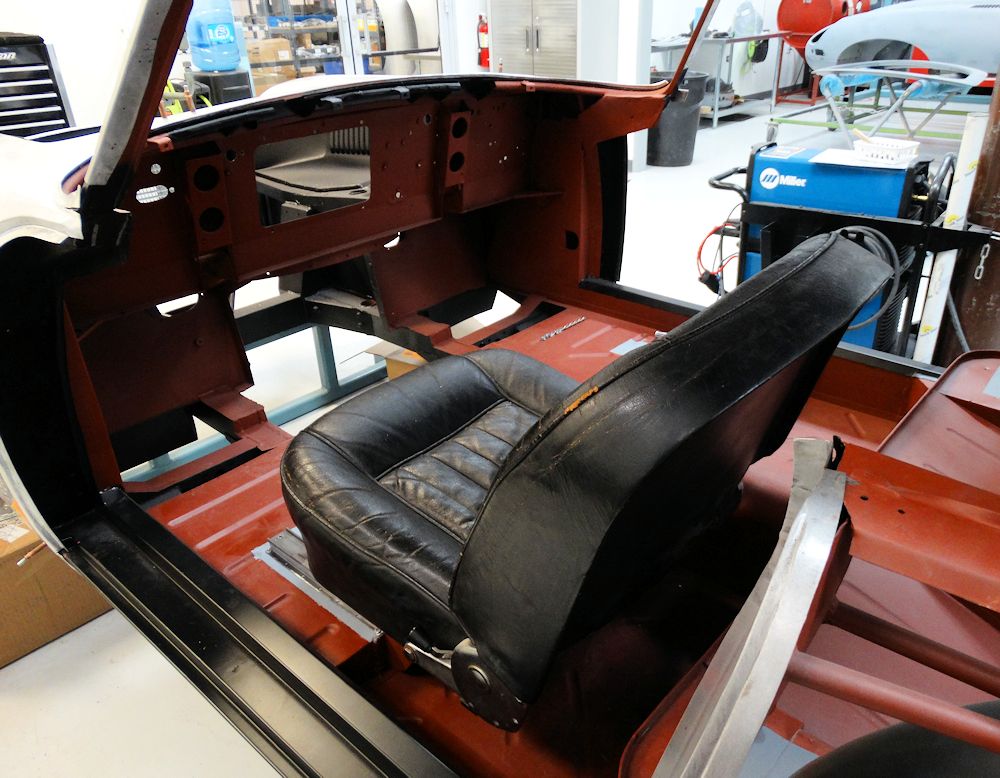
| Must be getting close to maiden voyage
time if they are installing the seat! |
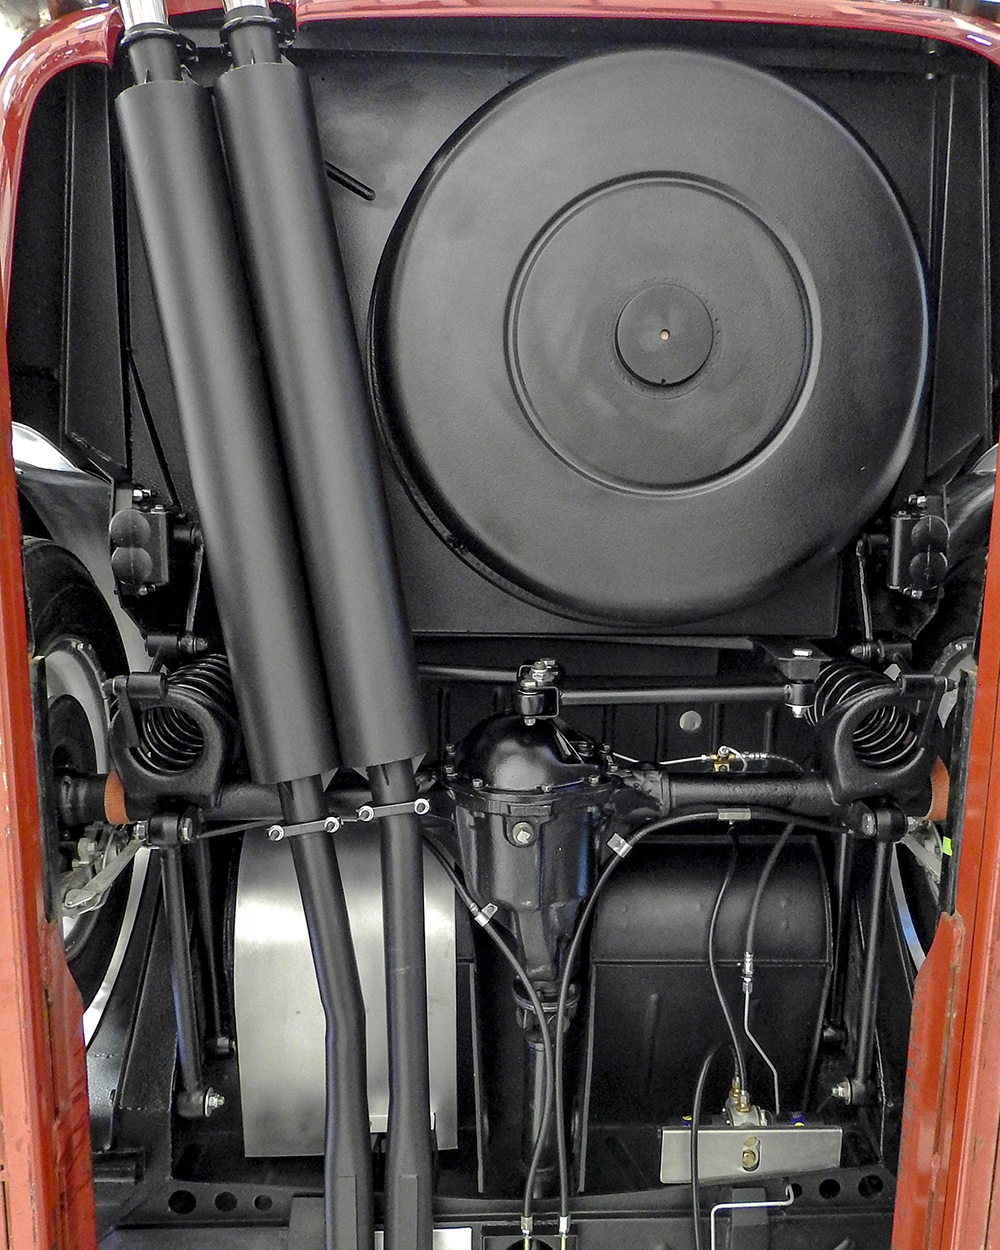
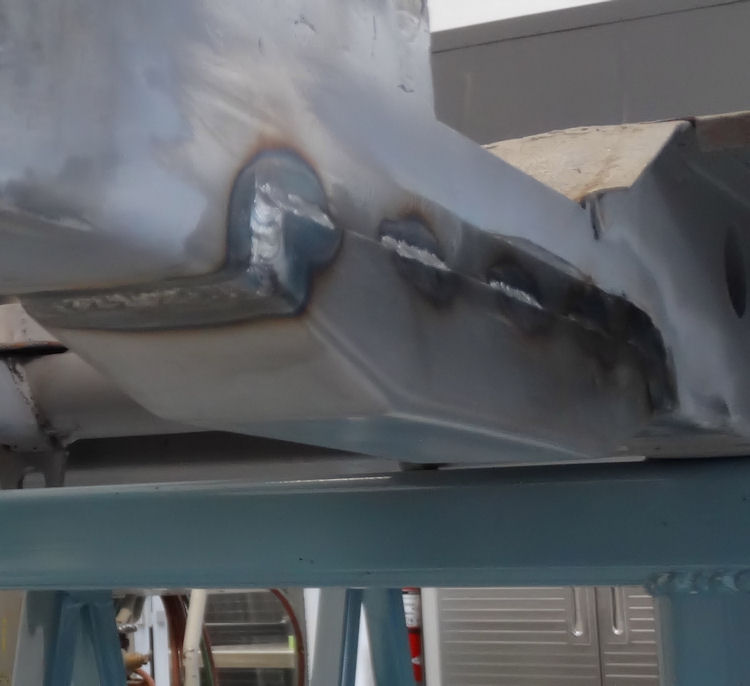
One final check over of the under carriage
before heading for the parking lot |
 |
 |
 |
 |
 |
 |
 |
 |
 |
 |
 |
 |
 |
 |
 |
 |
 |
 |
 |
 |
 |
 |
 |
 |
| Next up Carlos will install the rest of
the interior |
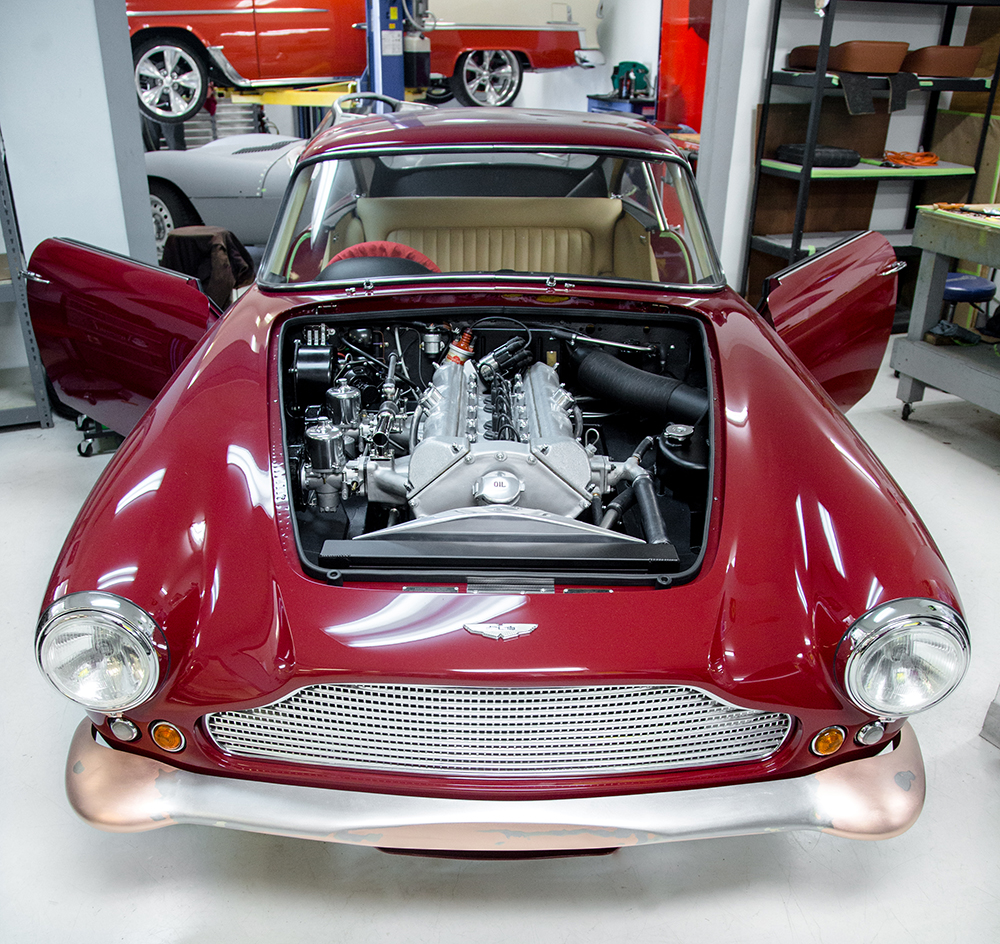
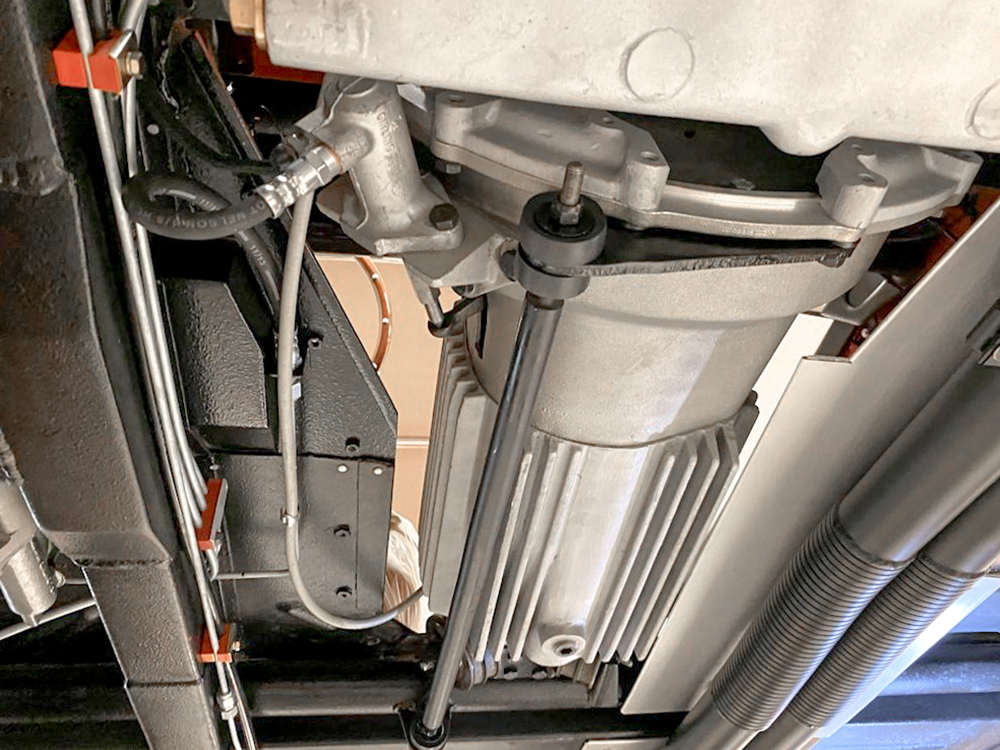
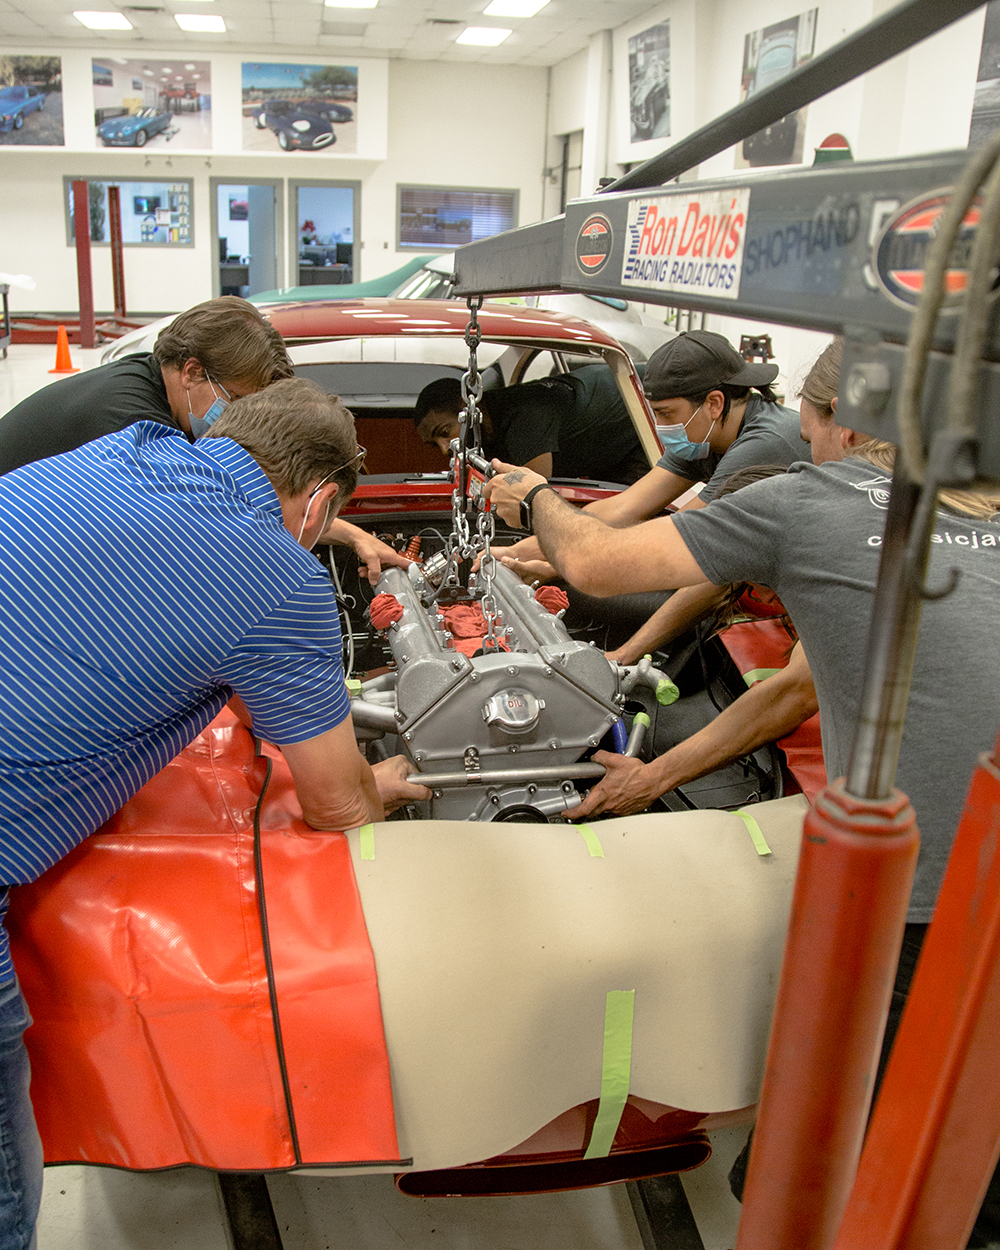
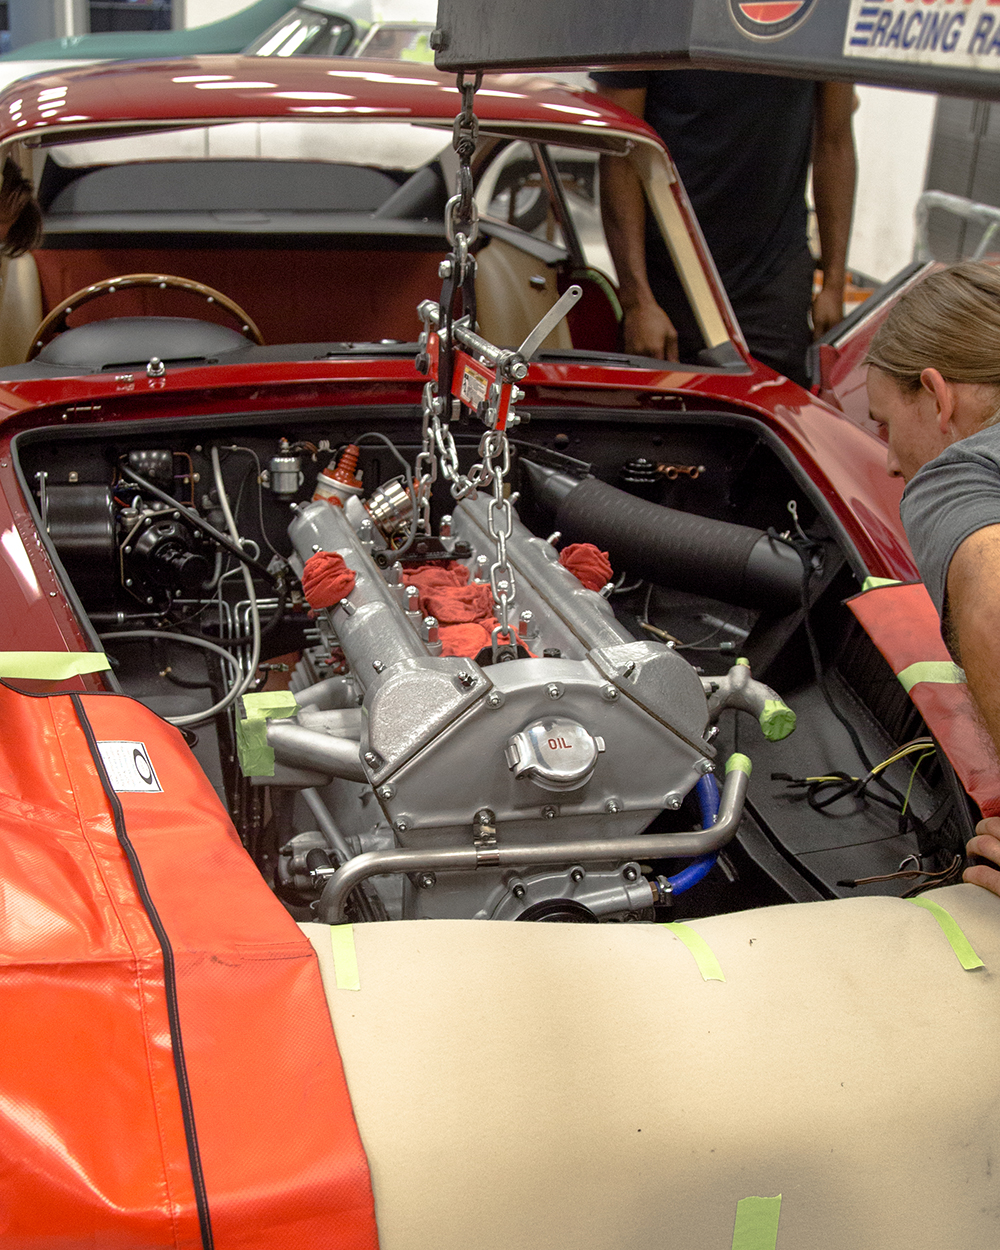
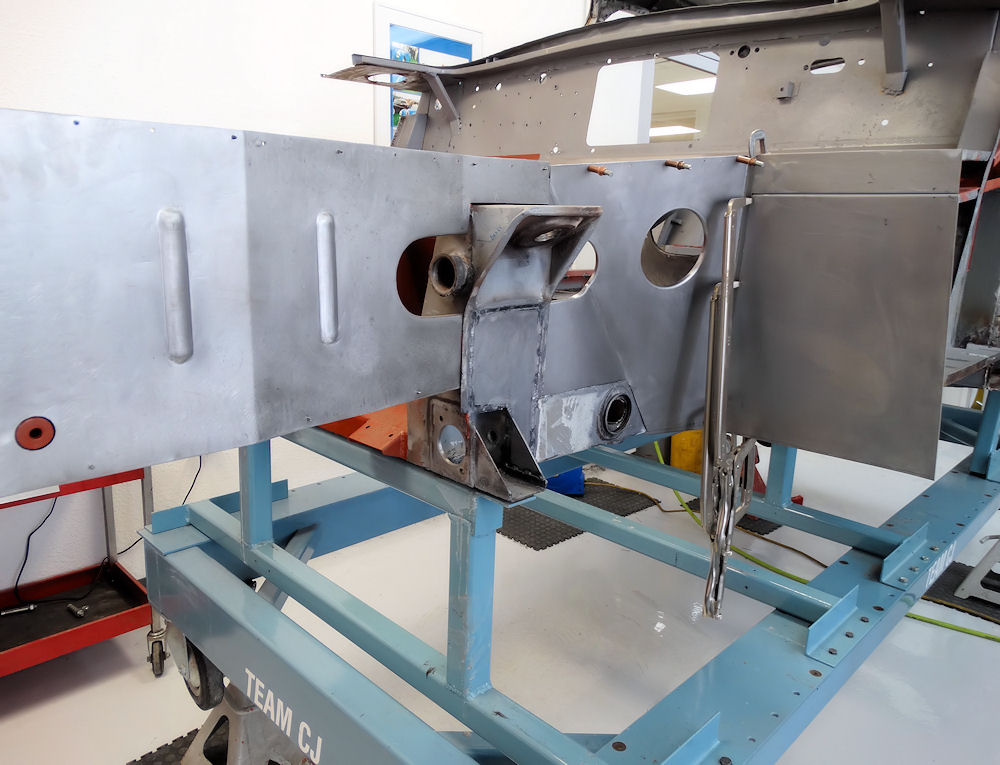
Installing the rebuilt engine and gearbox into the DB4 engine bay.
 |
 |
 |
 |
 |
 |
 |
 |
 |
 |
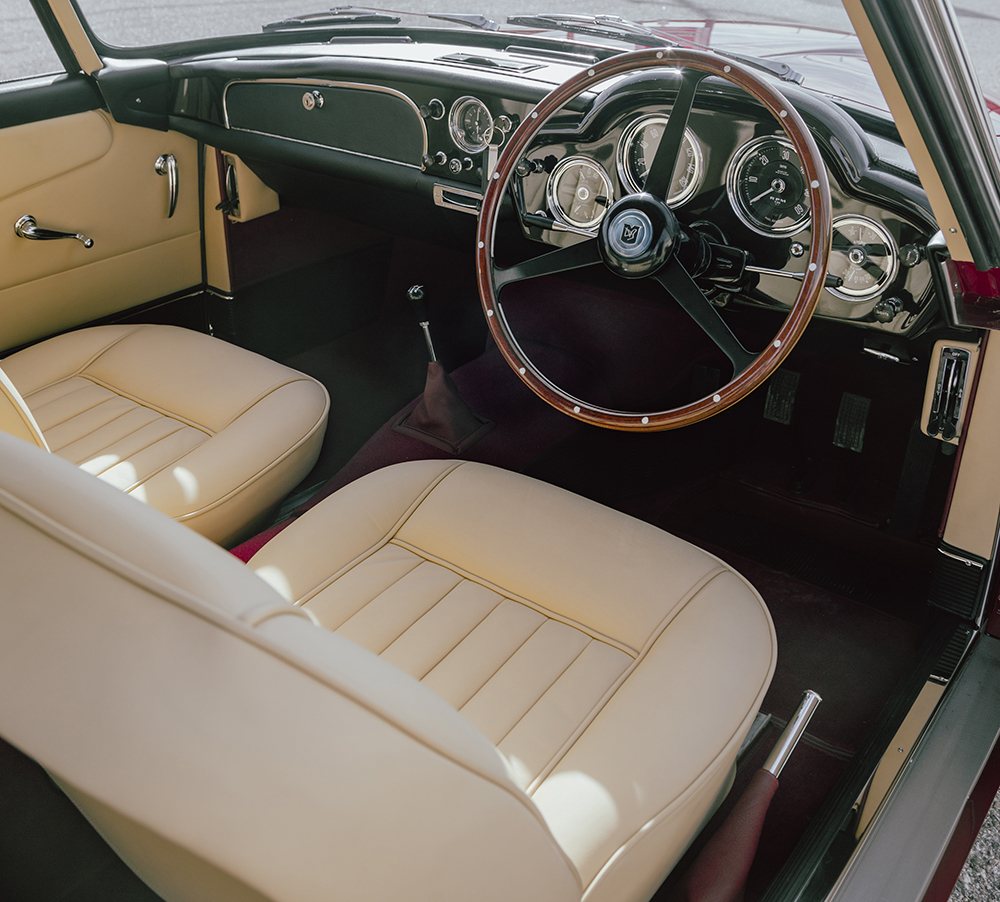
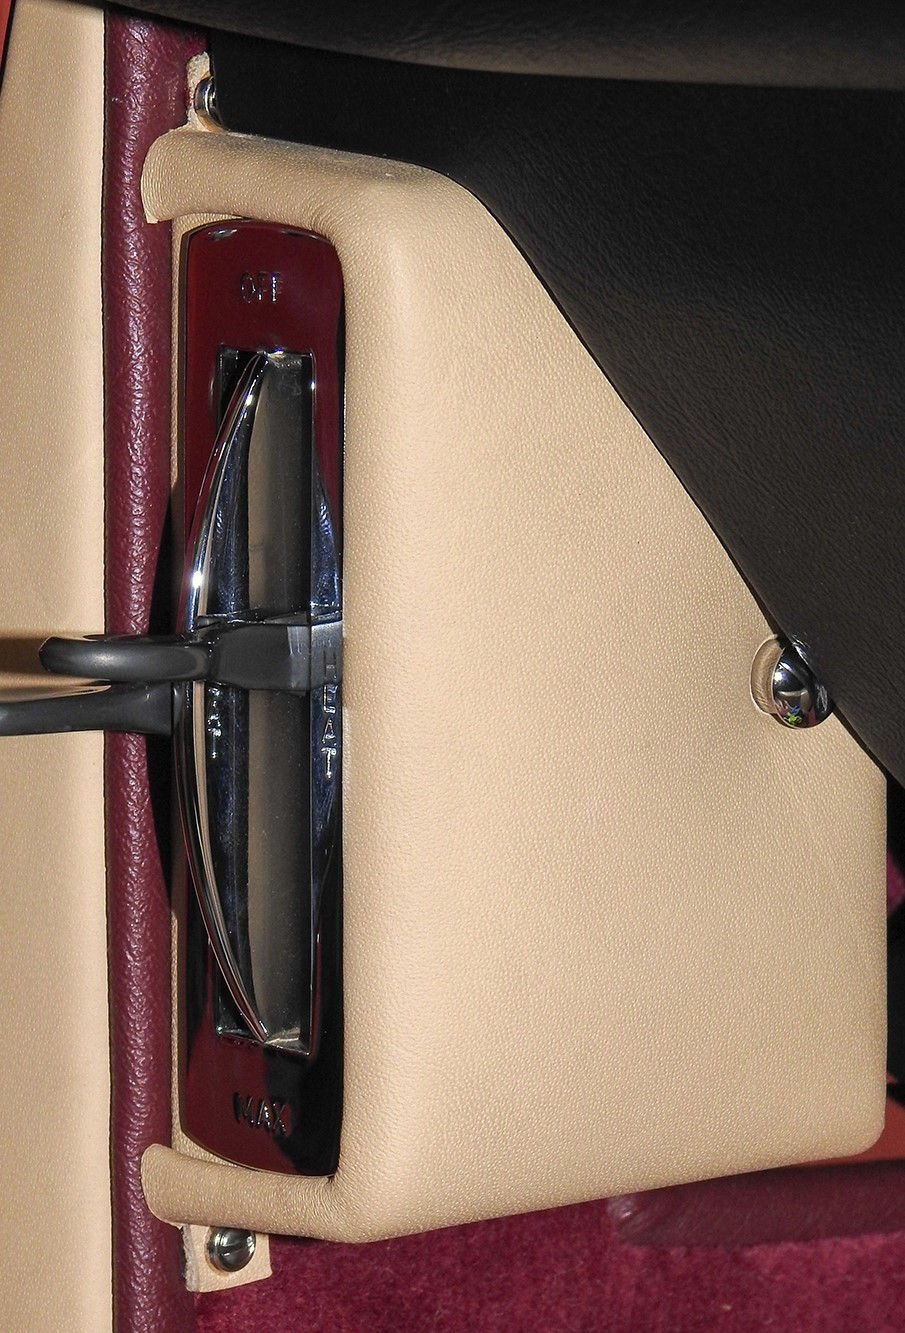
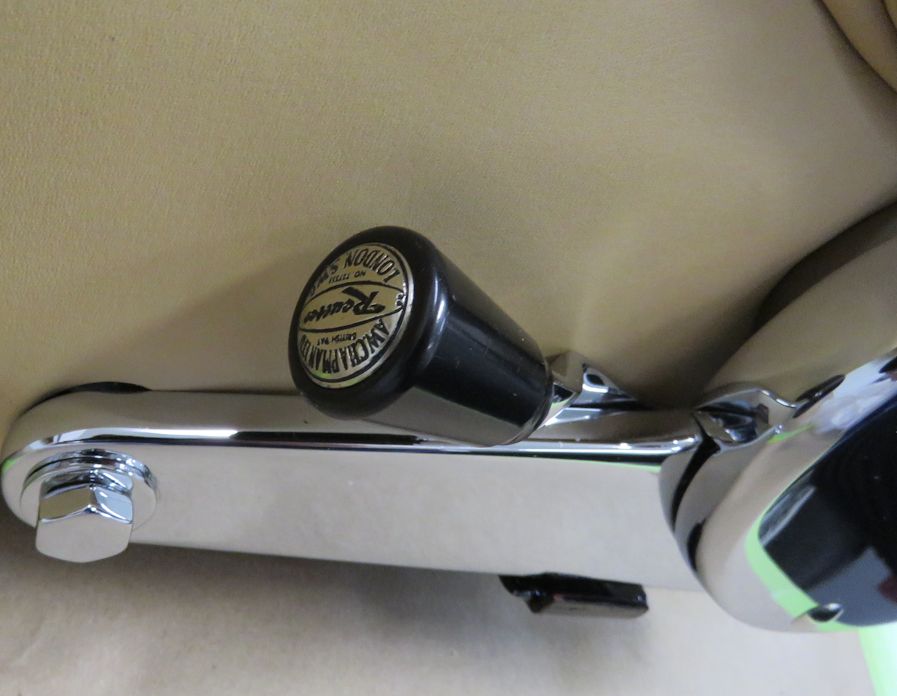
Carlos has been busy with the interior retrim which is progressing very nicely!
 |
 |
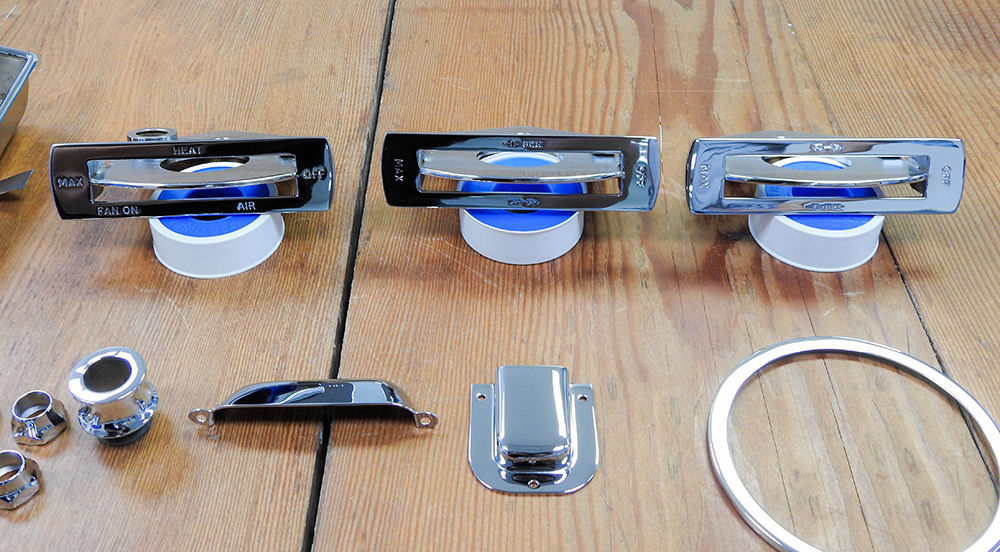
| Heater and vent controls |
Vent knobs were refinished in satin black
chrome for an original and very durable look |
 |
 |
 |
 |
 |
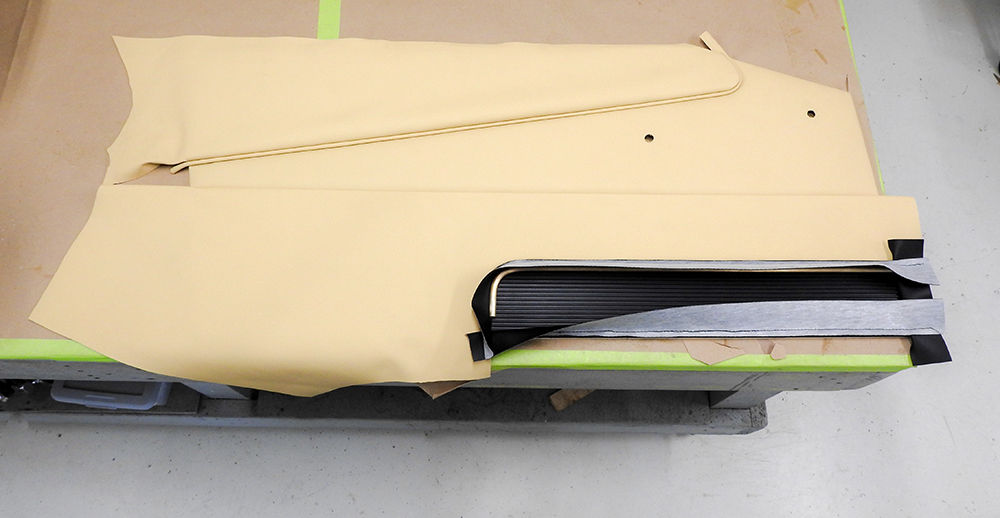 |
| DB4 door panels are intricate and difficult
to reproduce accurately |
|
 |
 |
| Carlos has done a superb job reconstructing
the door panels which now look brand new |
|
 |
 |
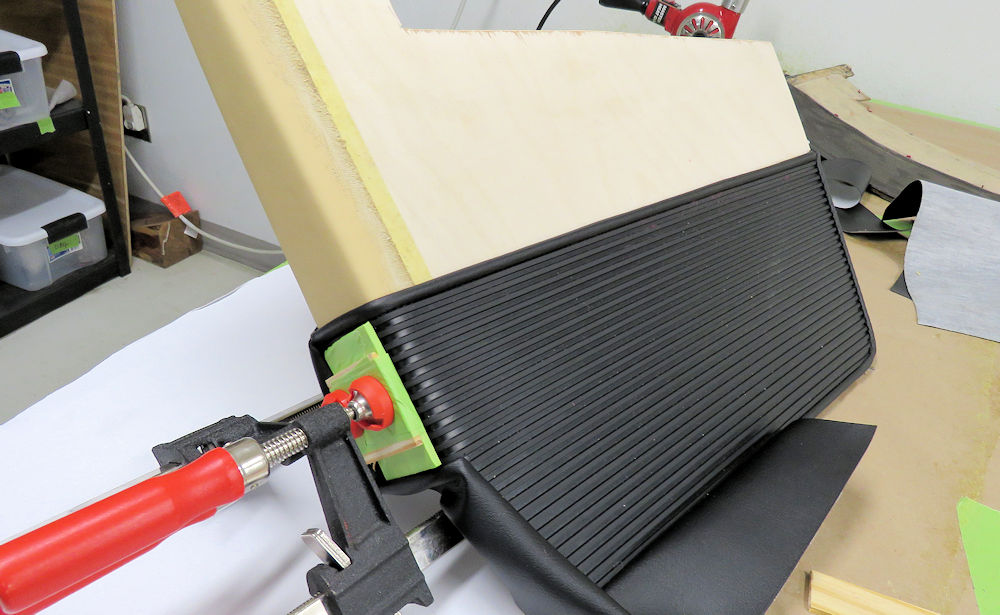
| Trimming out rear parcel shelf and fuel
filler neck |
|
 |
 |
 |
 |
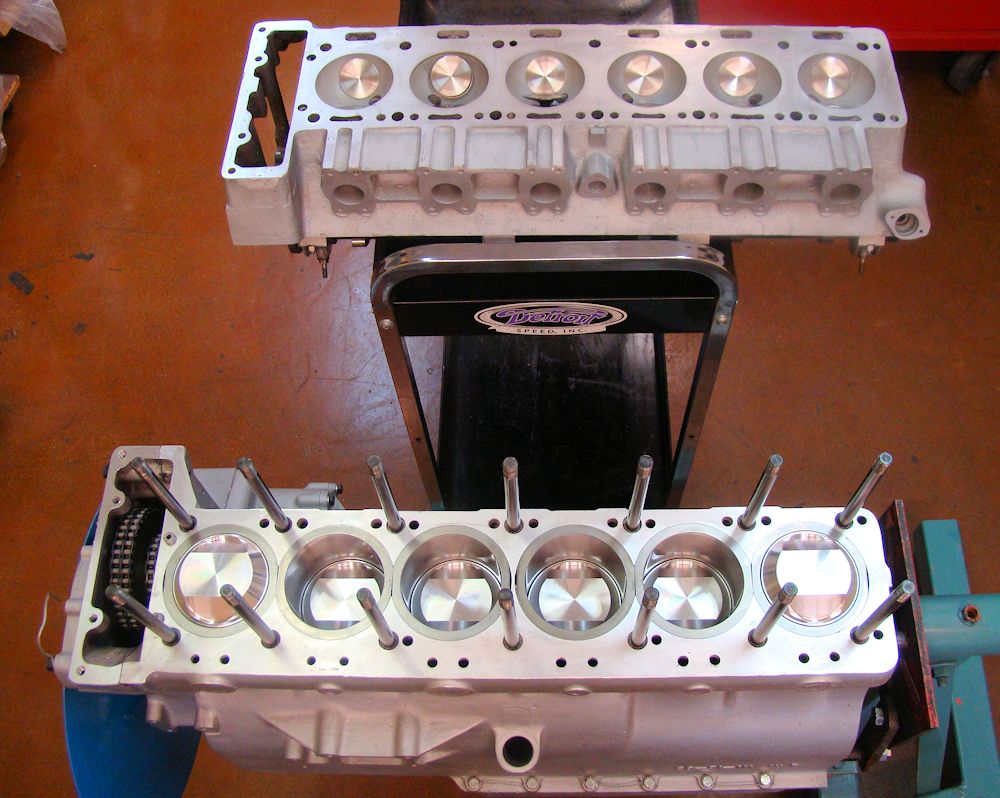
| Almost ready to install the rebuilt engine and transmission |
|
 |
 |
 |
 |
 |
 |
Carlos has now re-trimmed the dash top and passenger grab handle and permanently installed the assembly into the car together with the instrument binnacle.
 |
 |
 |
 |
 |
 |
We have been making steady progress over the last few weeks.
 |
 |
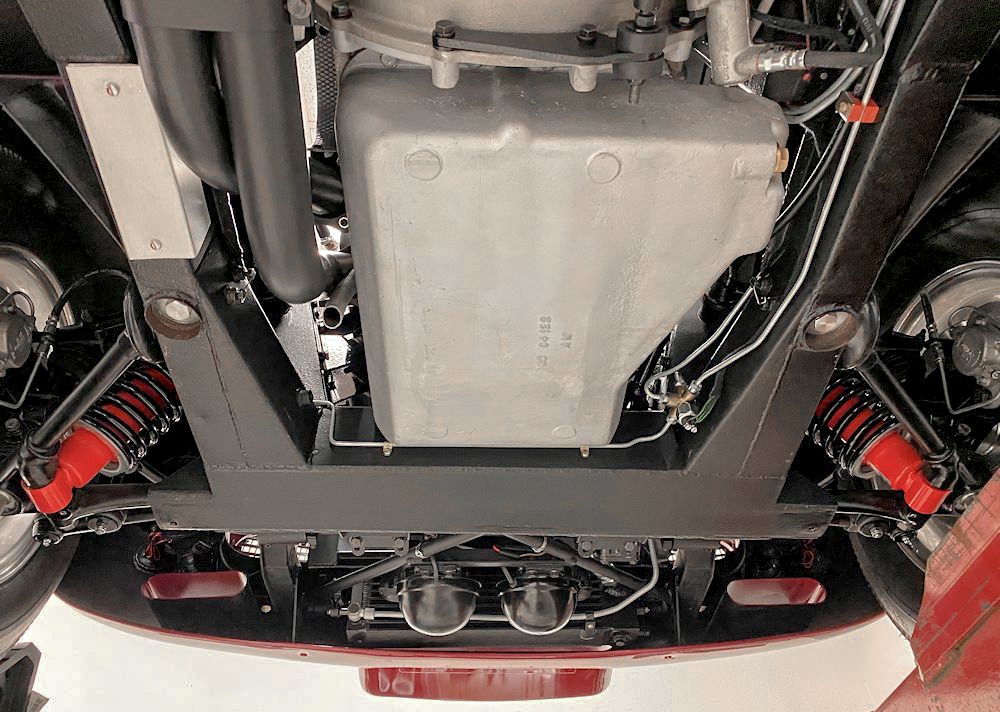
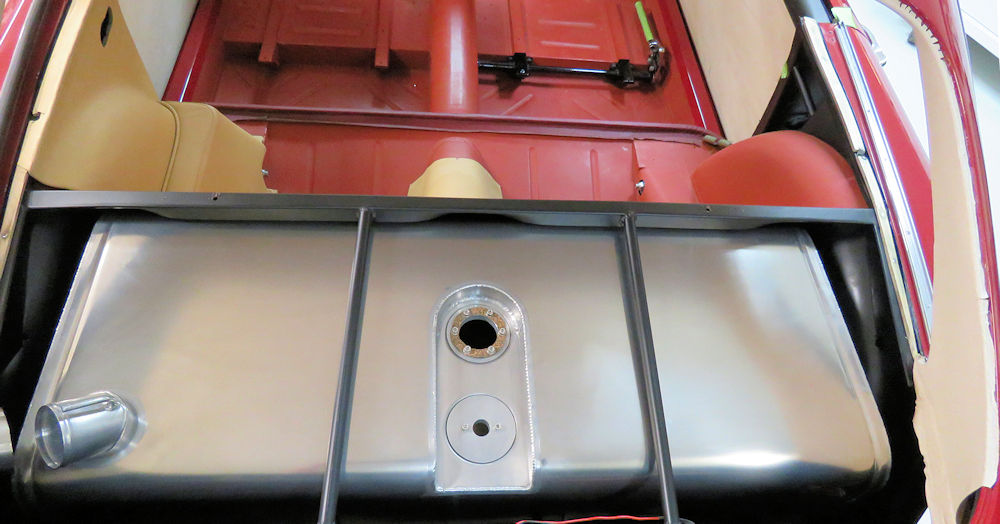
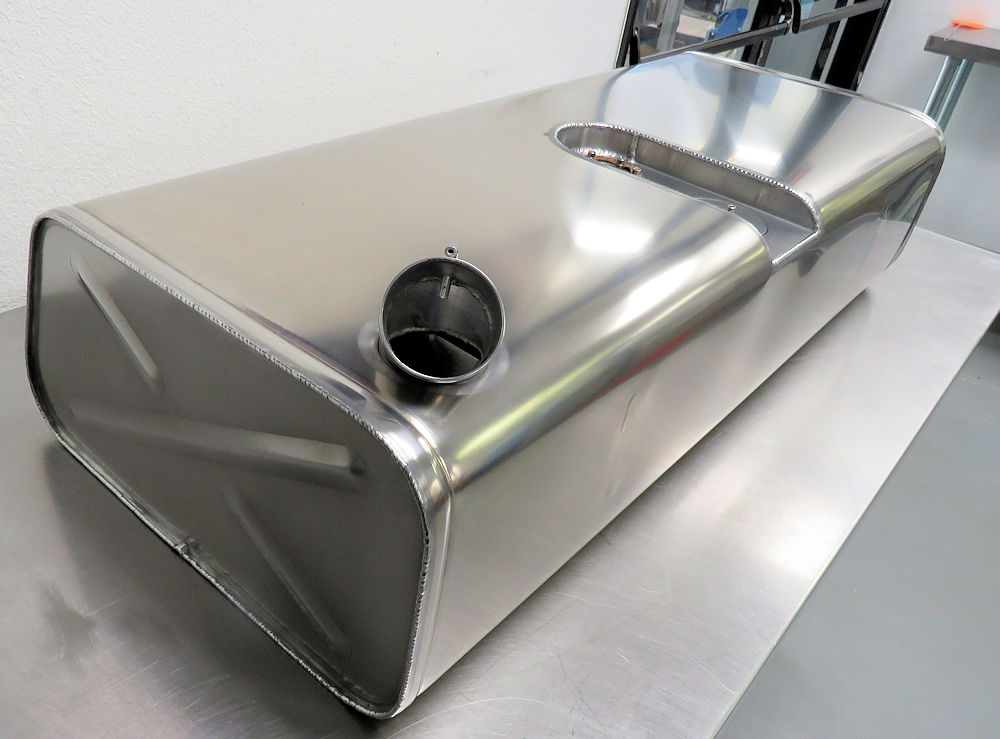
| Trial fitting the new Axminster fuel tank -
it fits perfectly |
Trimming the footwell side panels |
 |
 |
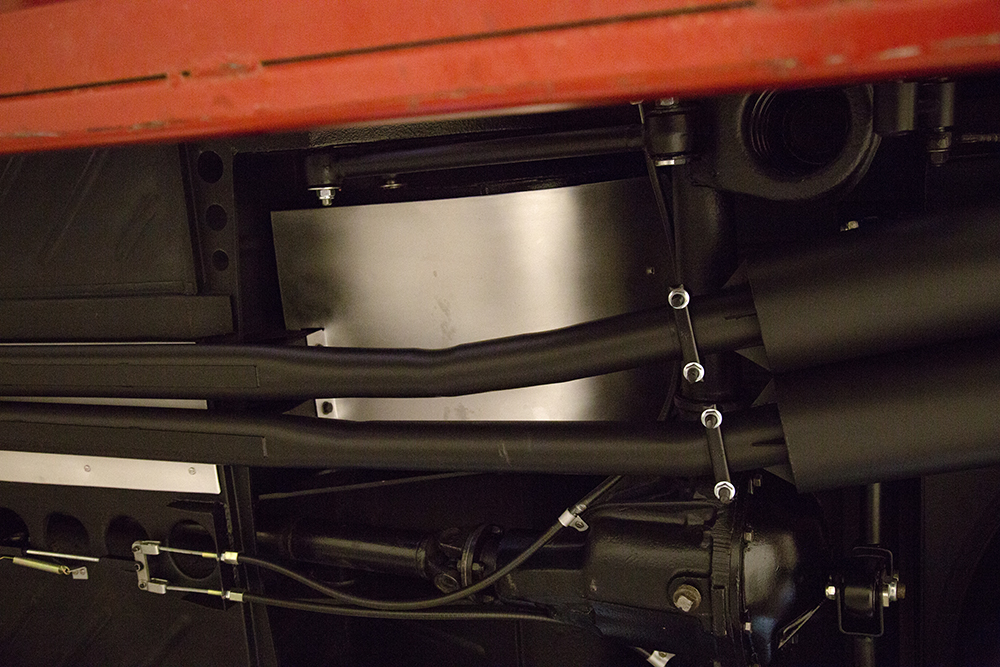
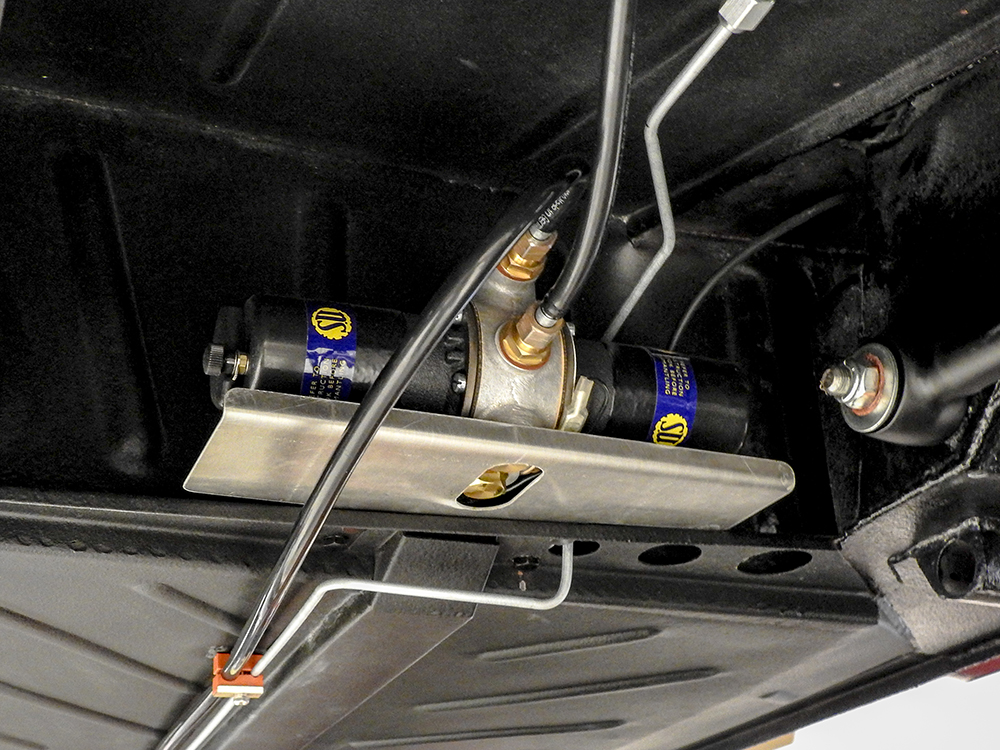
| Running all the firewall hard lines, heater
and brake booster installed |
|
 |
 |
| Trial fitting dash panels |
Fabricating and trial fitting new wooden
door panels |
We commissioned this stunning quality aluminum fuel tank for the DB4.
 |
 |
 |
 |
It has been some time since we updated this project as we have been working on other cars for the same client. I am pleased to report that we have now begun the process of installing the interior.
 |
 |
| Dash panels have been refinished in the correct Black Pearl |
|
 |
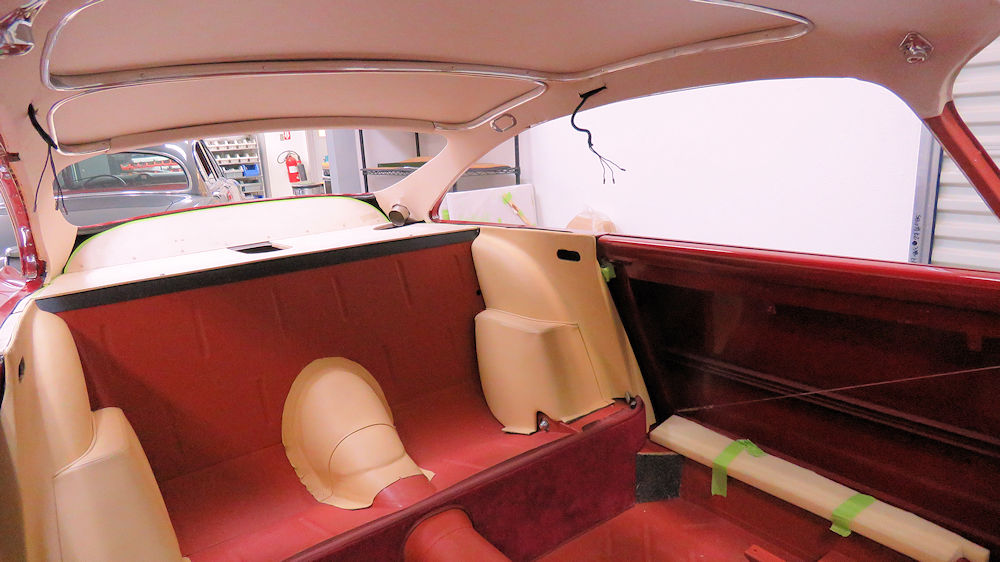 |
| Headliner now installed |
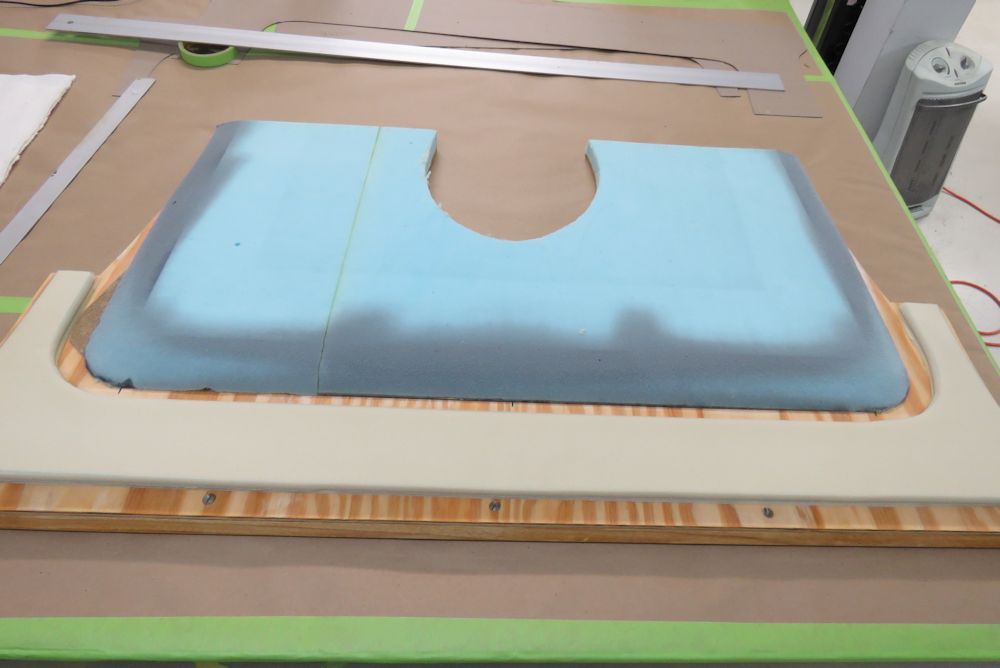
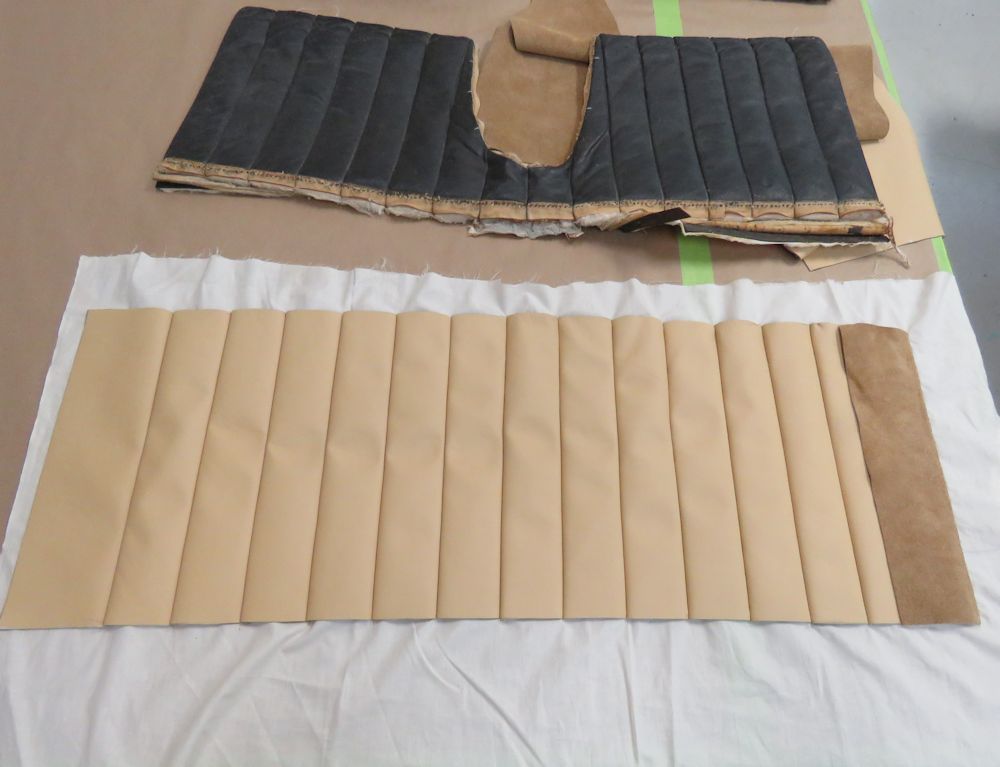
The following sequence of photos show Carlos fabricating a new rear seat back panel, as well as sewing and stuffing the pleats for the rear seat covers.
 |
 |
| New seat back board was fabricated |
Original ledge was transferred from the
factory panel |
 |
 |
| Foam pads were glued and sculpted to the desired shape and contour |
Holes closed off with hide, as the original
had been |
 |
 |
| Sewing pleats in new hide using the original
panel as a template |
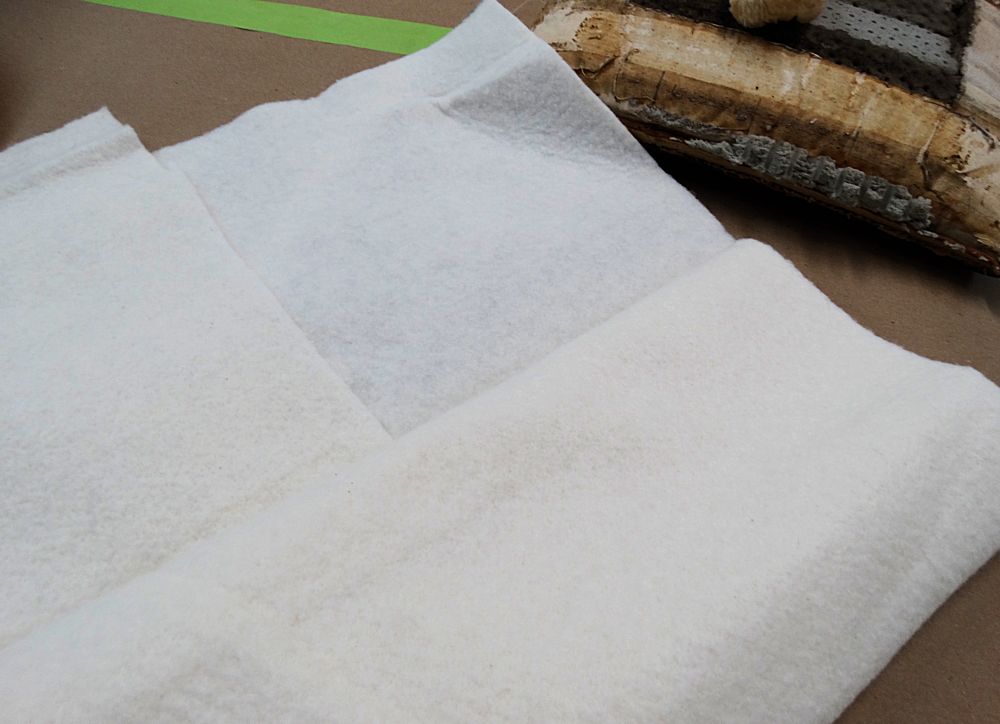
Stuffing pleats with cotton batting, again
precisely as the original covers had been made |
A few shots of the DB4 in the main workshop...
 |
 |
 |
 |
 |
 |
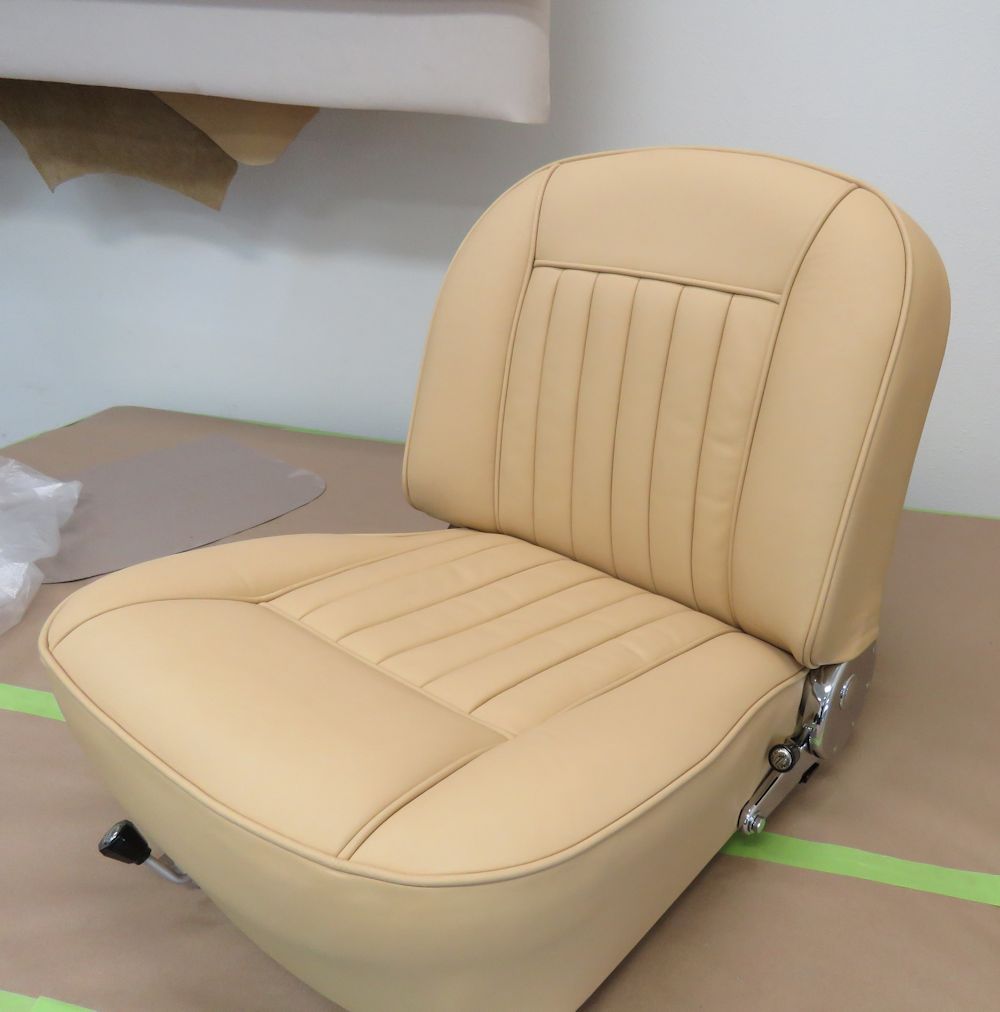
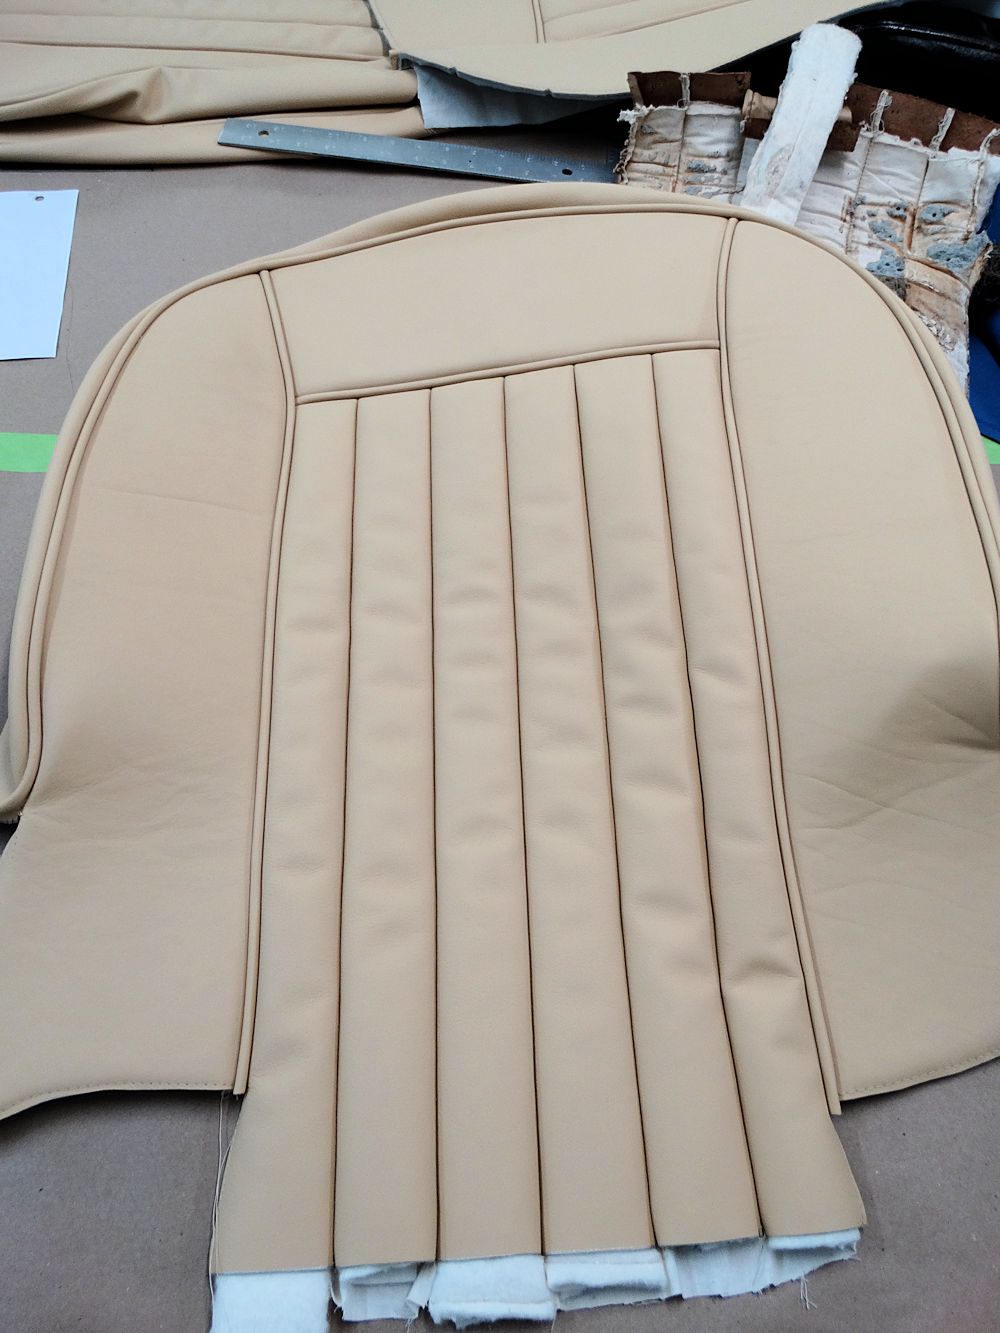
Carlos has now completed the fabrication and installation of your new hide front seat covers.

 |
 |
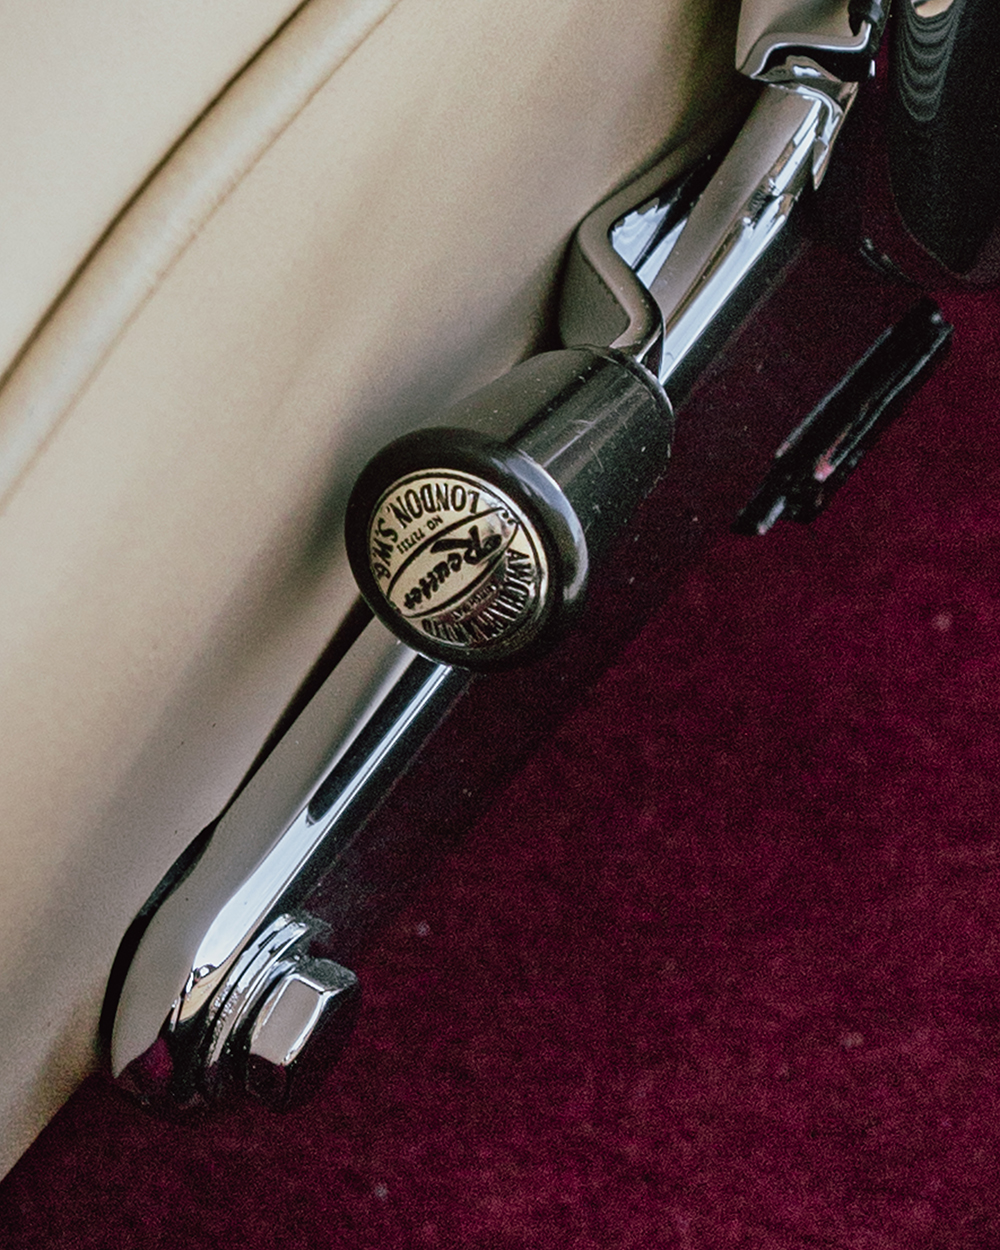
| Hector did a great job restoring the slider
knobs |
|
 |
 |
| The reclining knobs also came out almost as
new |
Making one of the seat back panels |
 |
 |
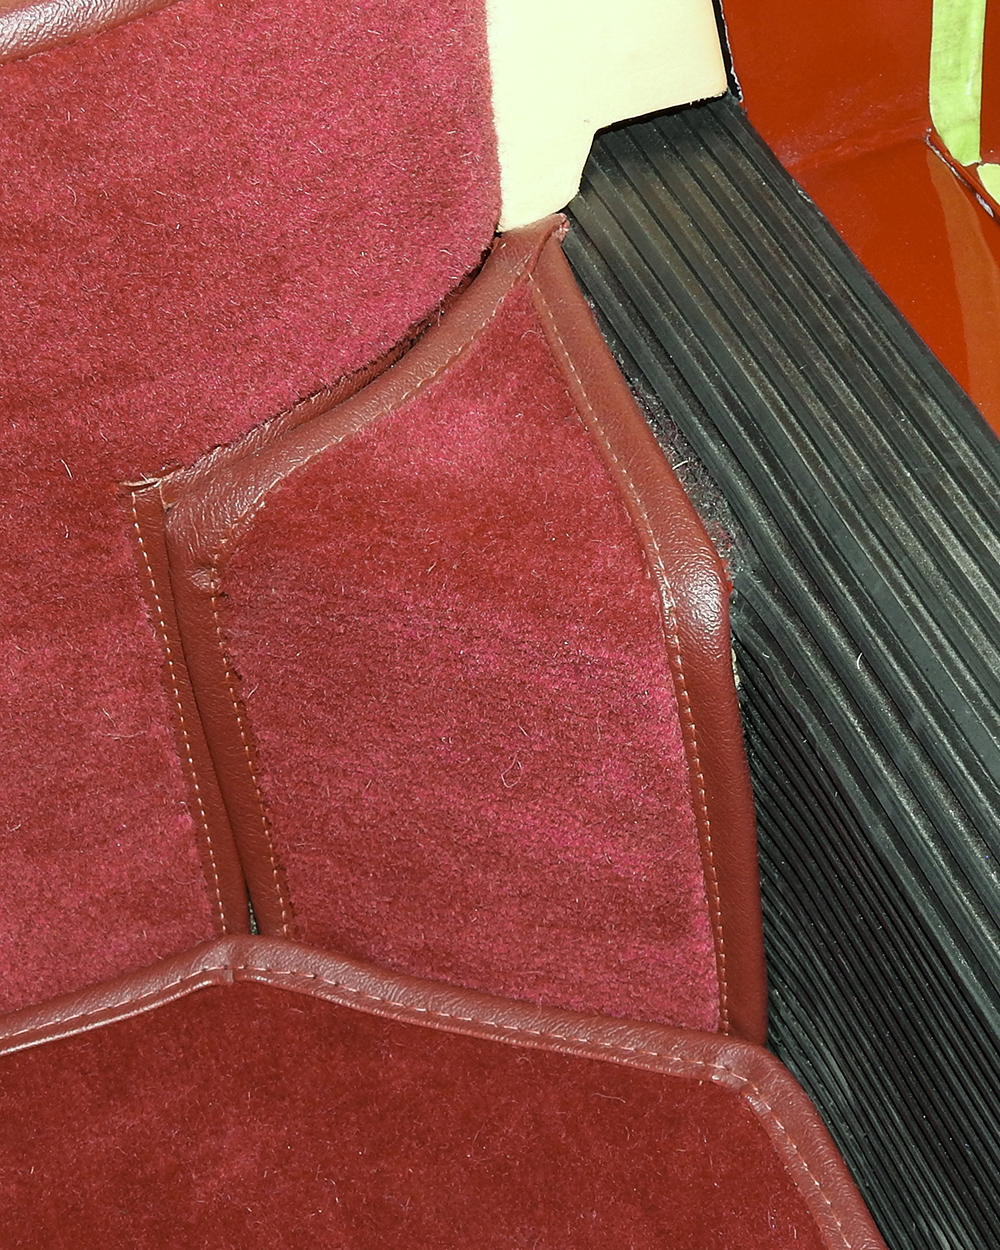
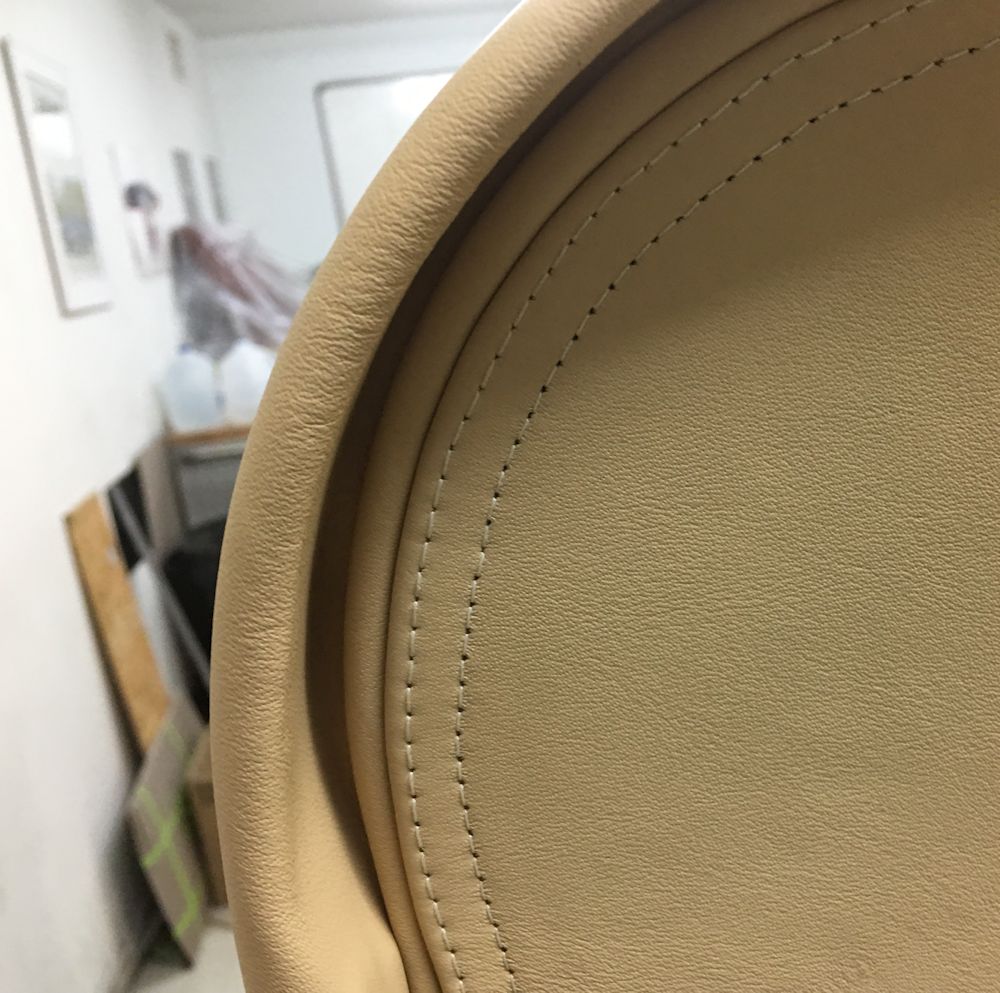
| Close up of the detail work around the edge of the rear panels |
|
 |
 |
 |
|
| Seat bases are extremely soft and very
comfortable |
Finished items are absolutely beautiful |
Carlos has now begun the process of trimming your restored seat frames.
 |
 |
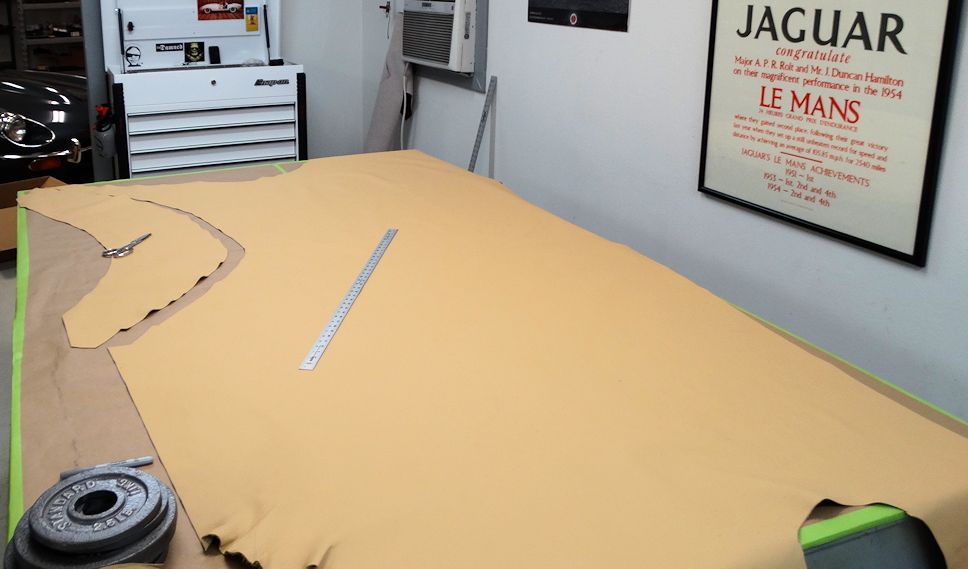
| We are using the same spec Connolly 3099
Vaumol hide used at Newport Pagnell in 1959 |
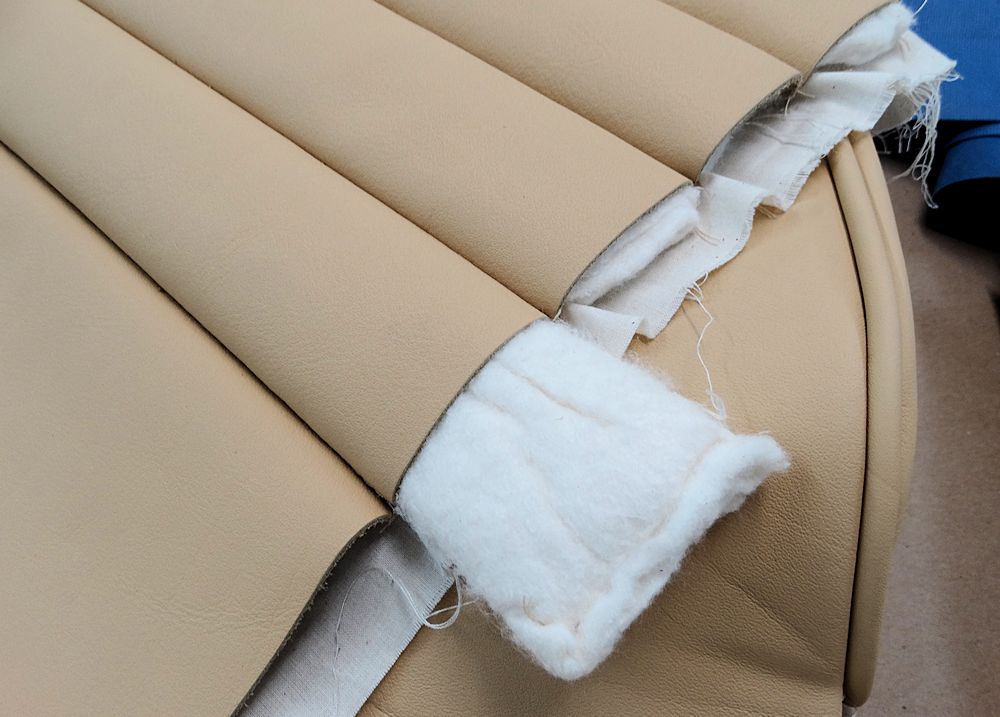
Original covers had flutes stuffed with
cotton batting |
 |
 |
| We are fabricating the new covers in
precisely the same way they were made originally |
Cutting strips of hide for the beading |
 |
 |
| New covers will be exact replicas of the original covers |
Carlos sewing flutes |
 |
 |
| Seat back frames are complex construction |
Hector took this artistic shot with the
actual car reflected in the back ground! |
 |
 |
| Reclining mechanism has been rebuilt and
works perfectly |
Installing the first new seat base cover |
 |
 |
| To be continued... |
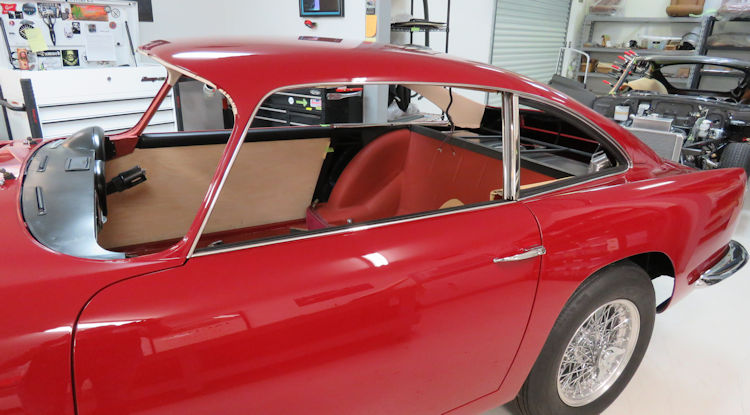
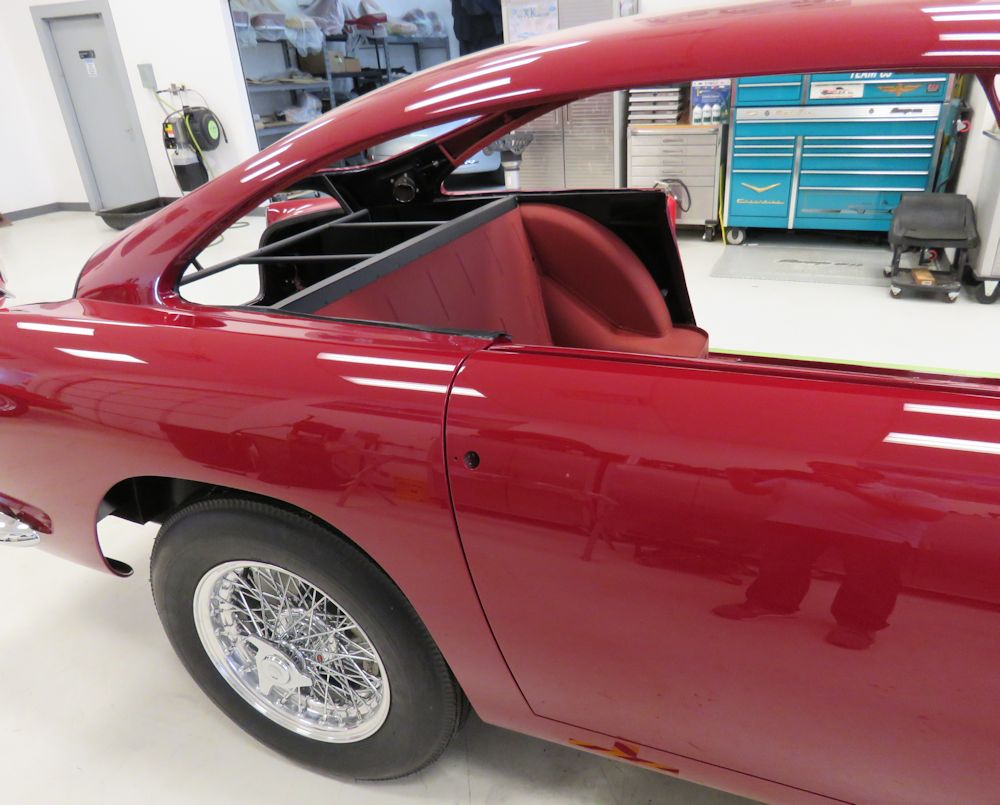
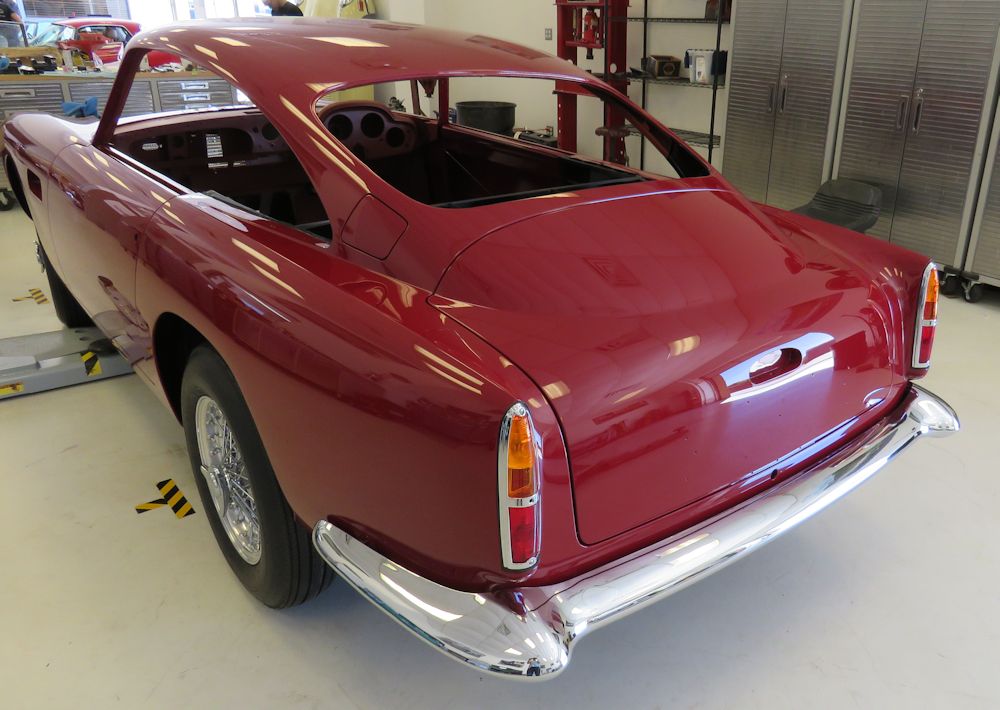
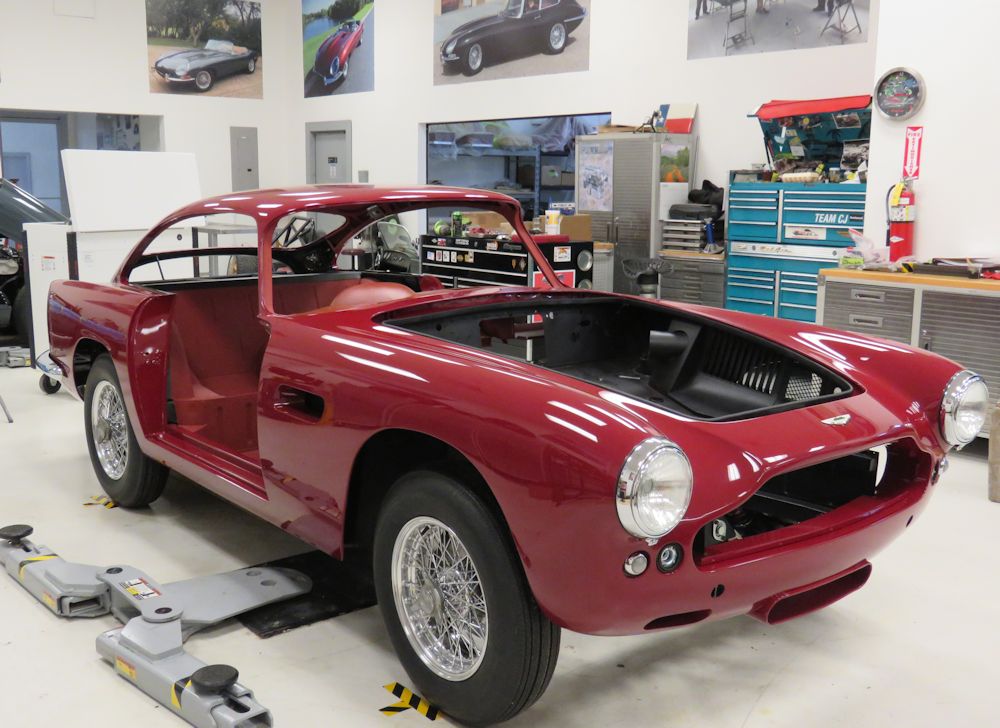
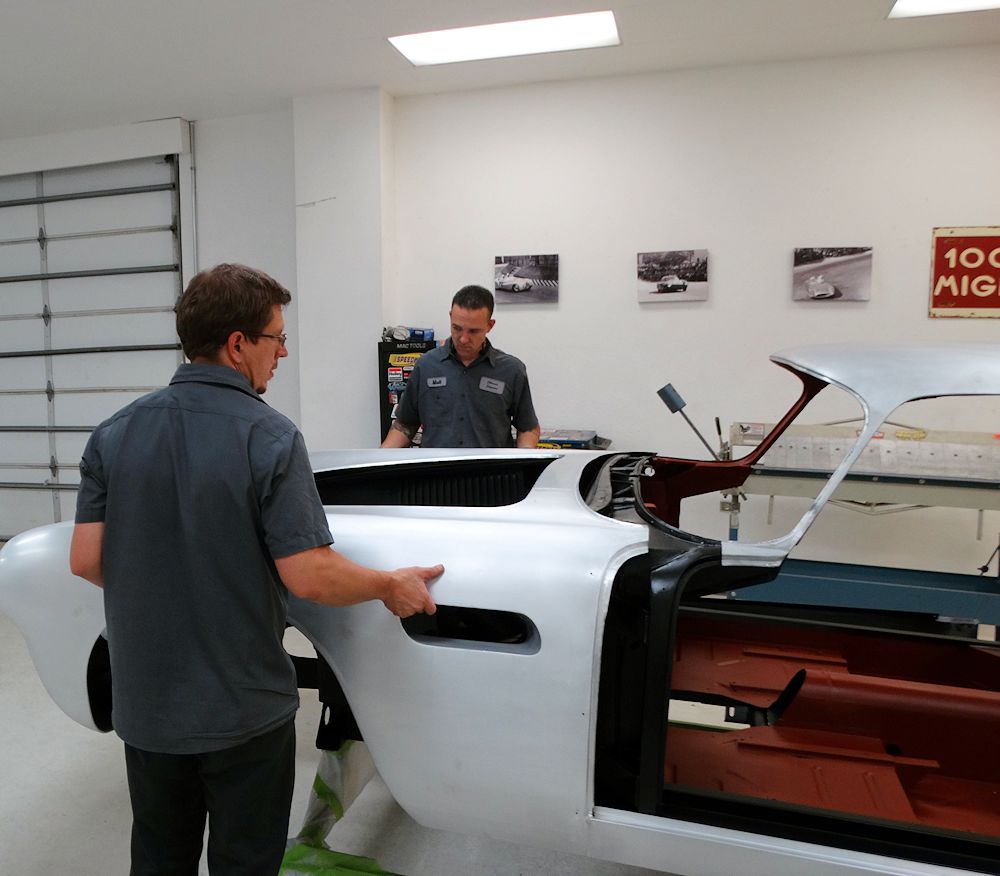
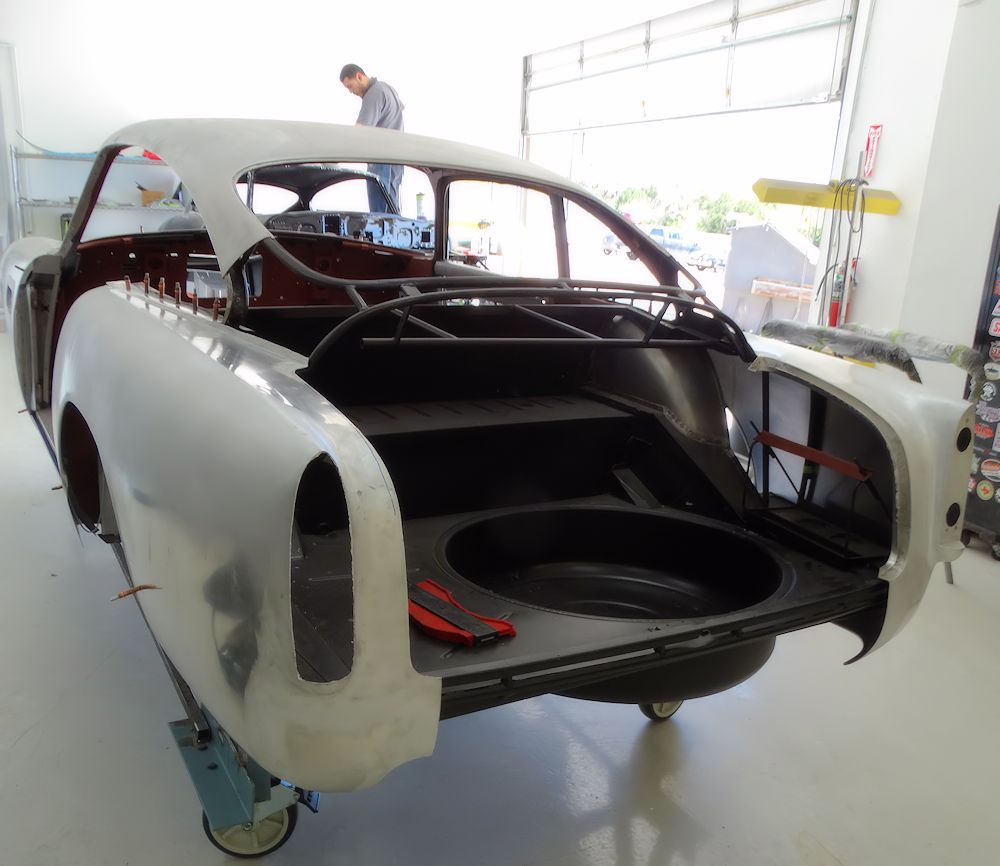
Trial fitting the doors and boot lid with the car resting on its wheels.
 |
 |
| Driver's door fits beautifully |
|
 |
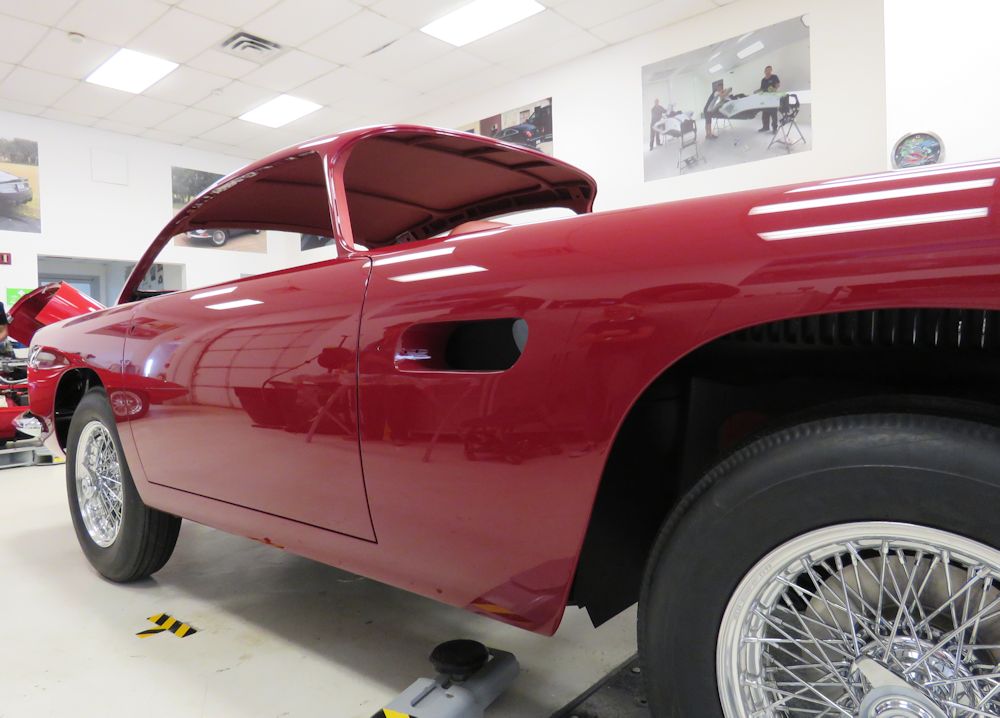 |
| Installing the door demonstrates the quality
of the bodywork beneath the paint |
This car is bullet straight along its flanks |
 |
 |
 |
 |
 |
 |
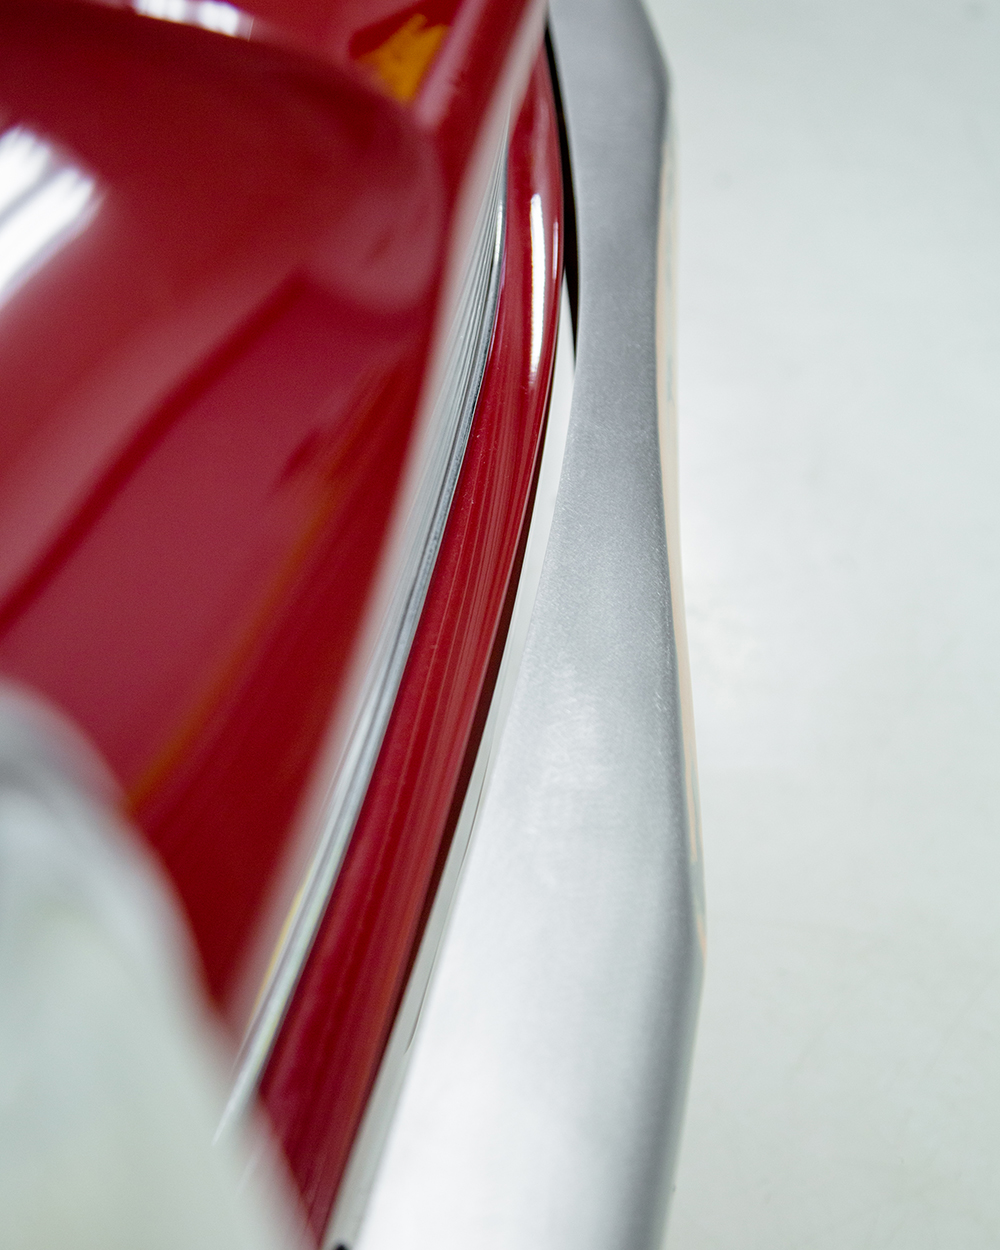
| The exquisite lines of the DB4 has to be
some of Touring's very best work |
Note how razor edge coach line flows along
top edge of rear wing and continues along door |
 |
 |
| Passenger door now installed |
Perfect panel gaps throughout |
 |
 |
| Installing the boot lid |
|
 |
 |
 |
 |
| Note how one panel flows into the next |
Looking more like a car every day! |
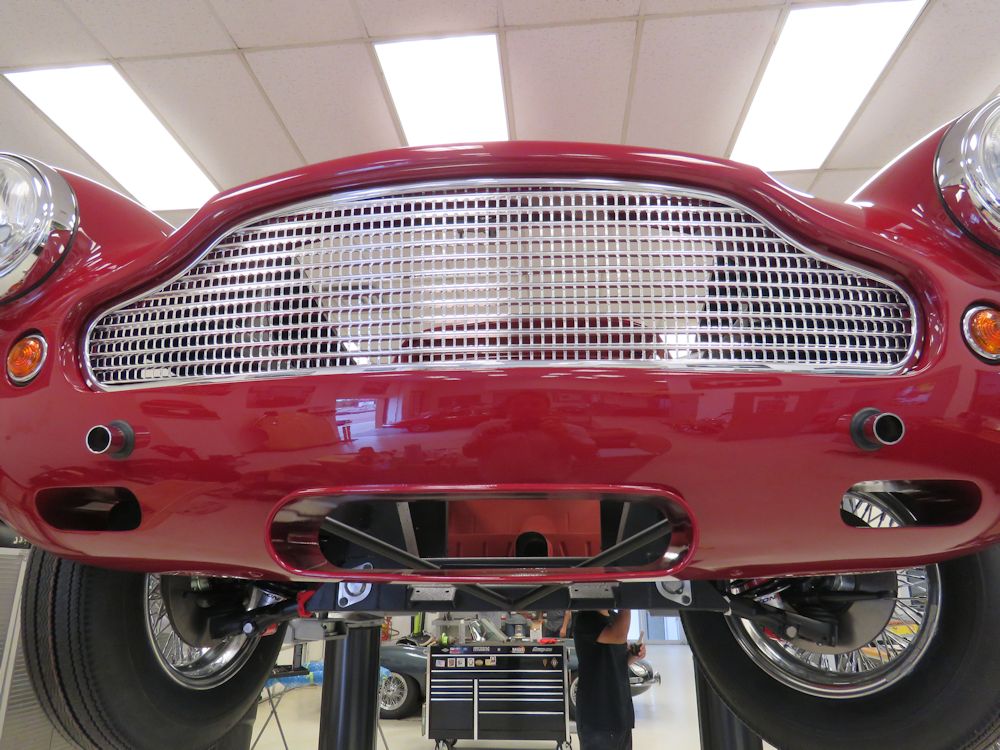
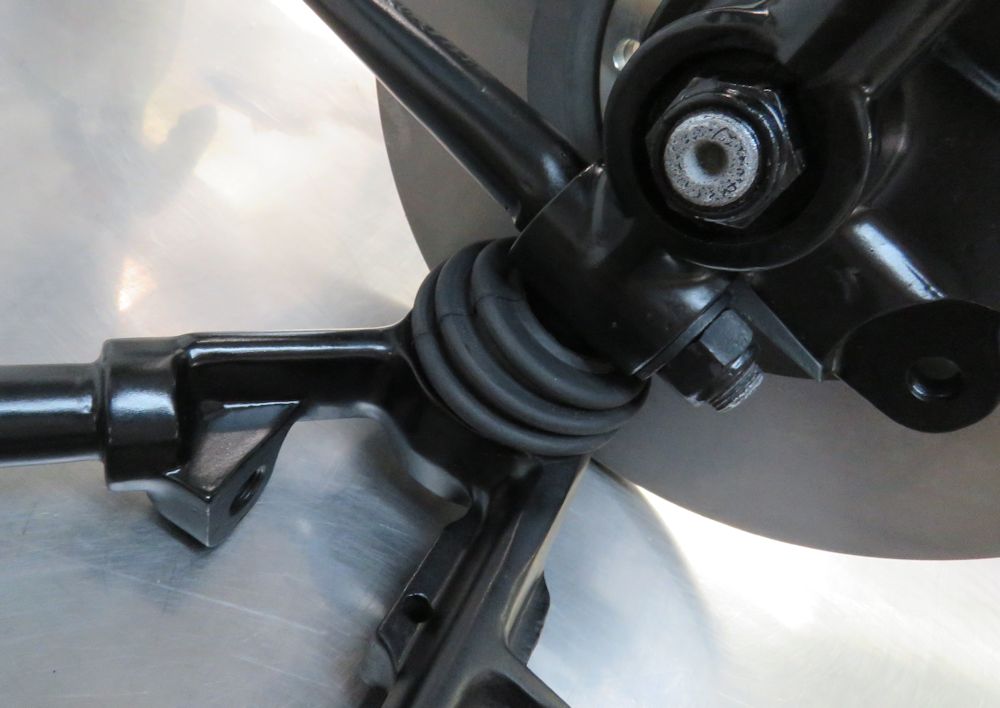
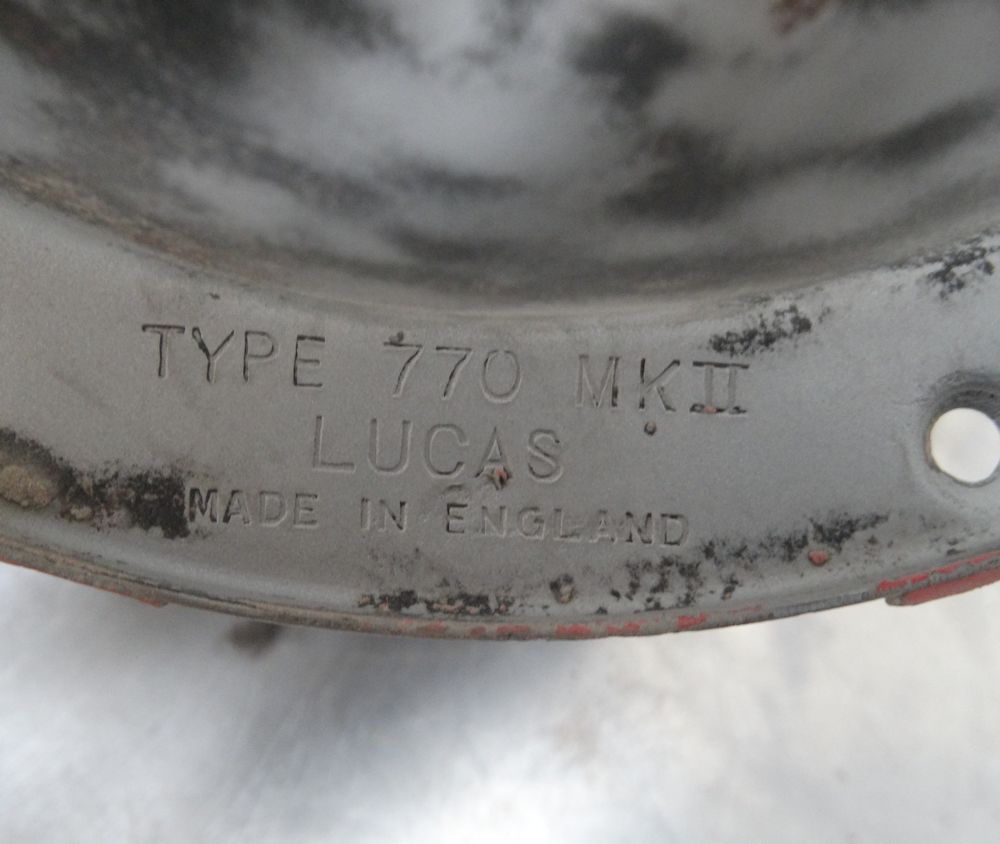
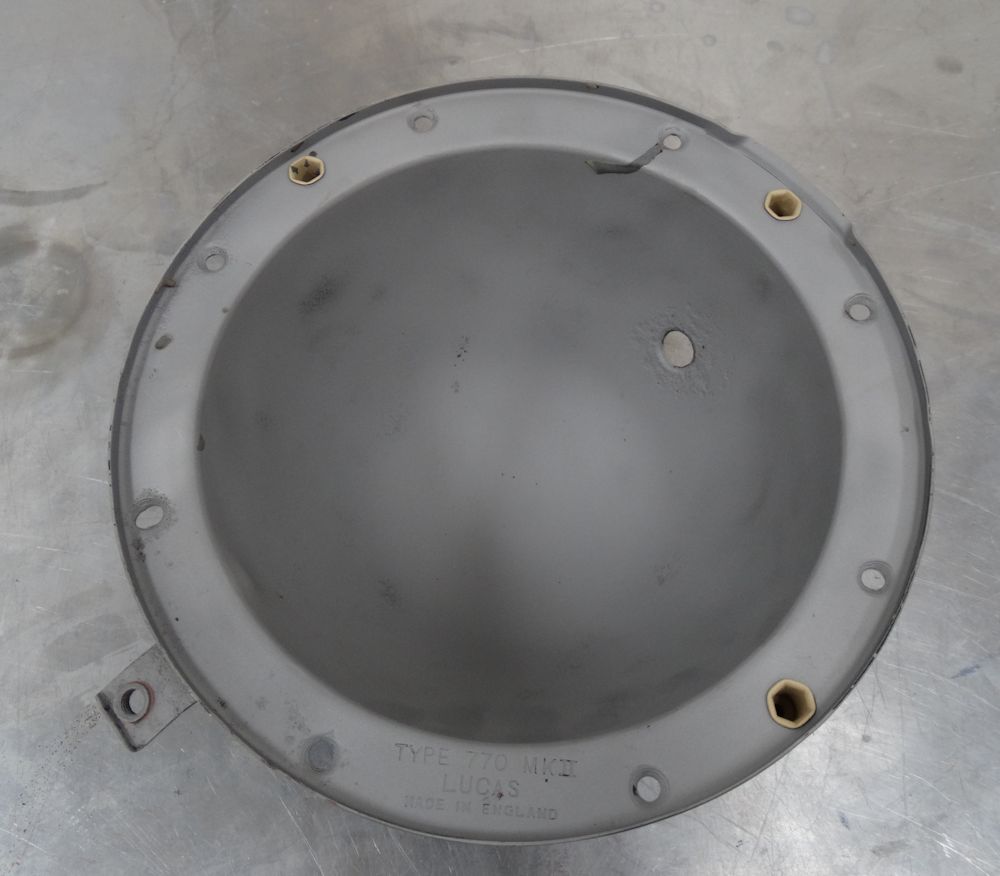
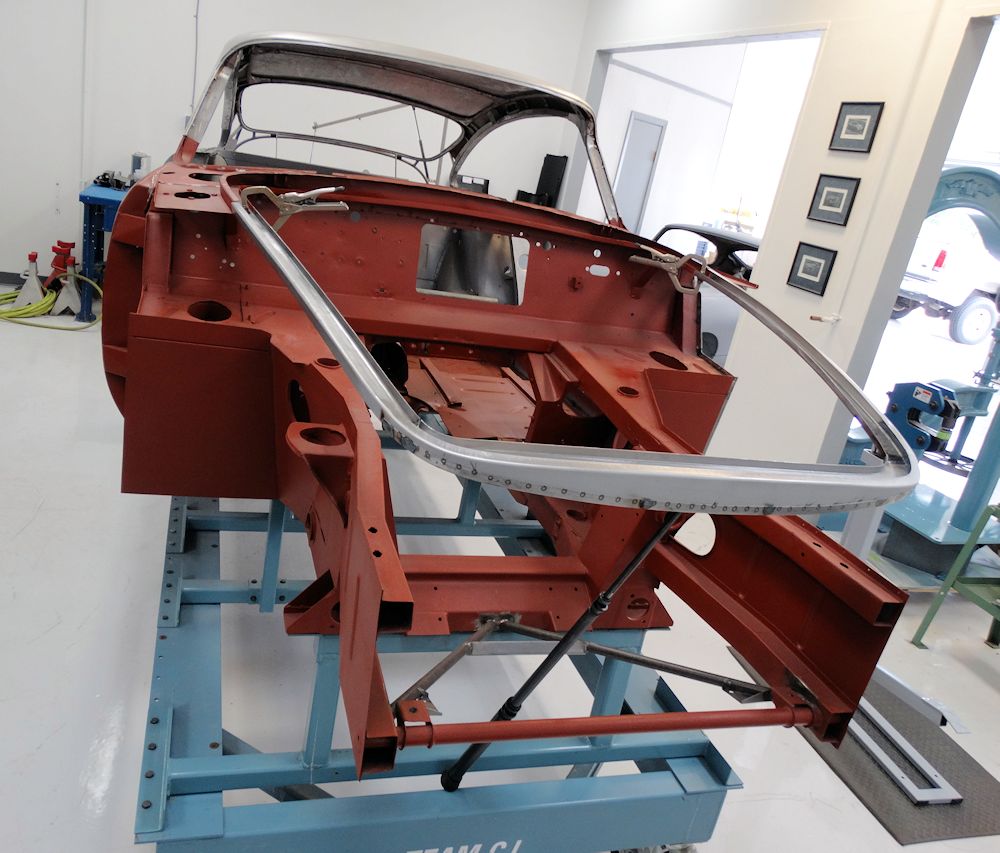
We have been busy installing the front and rear suspension, lights, restored grille, etc. Great to see the car back on its wheels for the first time in a couple of years.
 |
 |
| Compressing front coil springs and
installing new Koni shocks |
|
 |
 |
| Front shocks and springs, new rotors and splined hubs installed |
|
 |
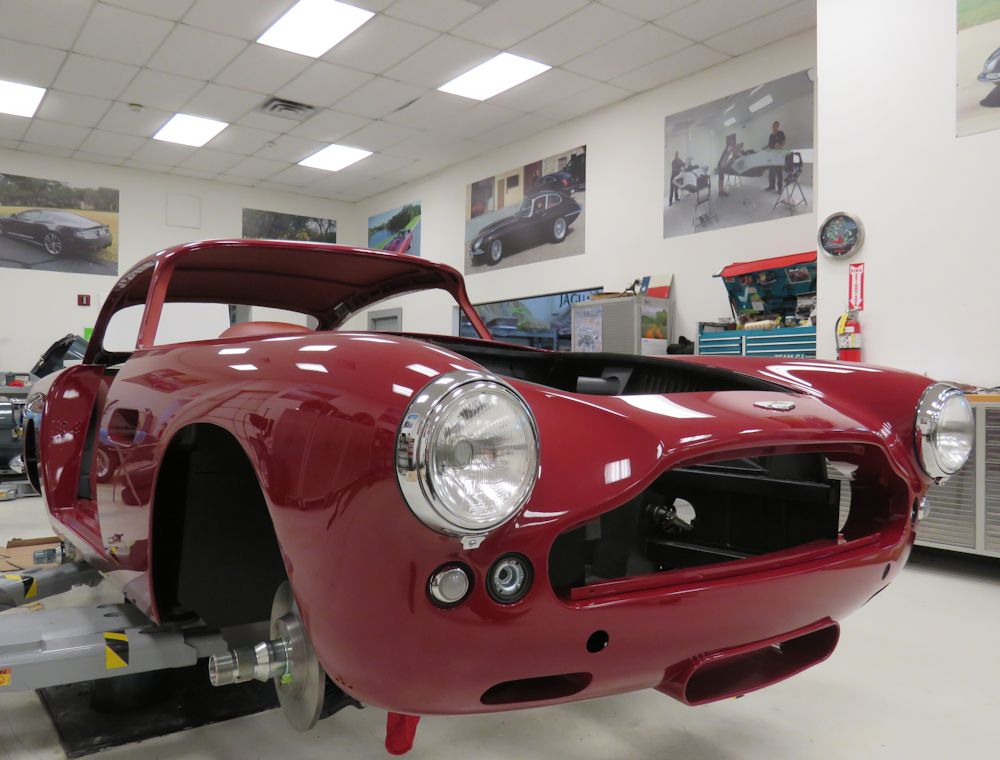 |
| Lucas Le Mans headlamps installed |
|
 |
 |
| Sitting on its wheels for the first time in a long time |
|
 |
 |
 |
 |
 |
 |
| Installing the restored grille |
|
 |
 |
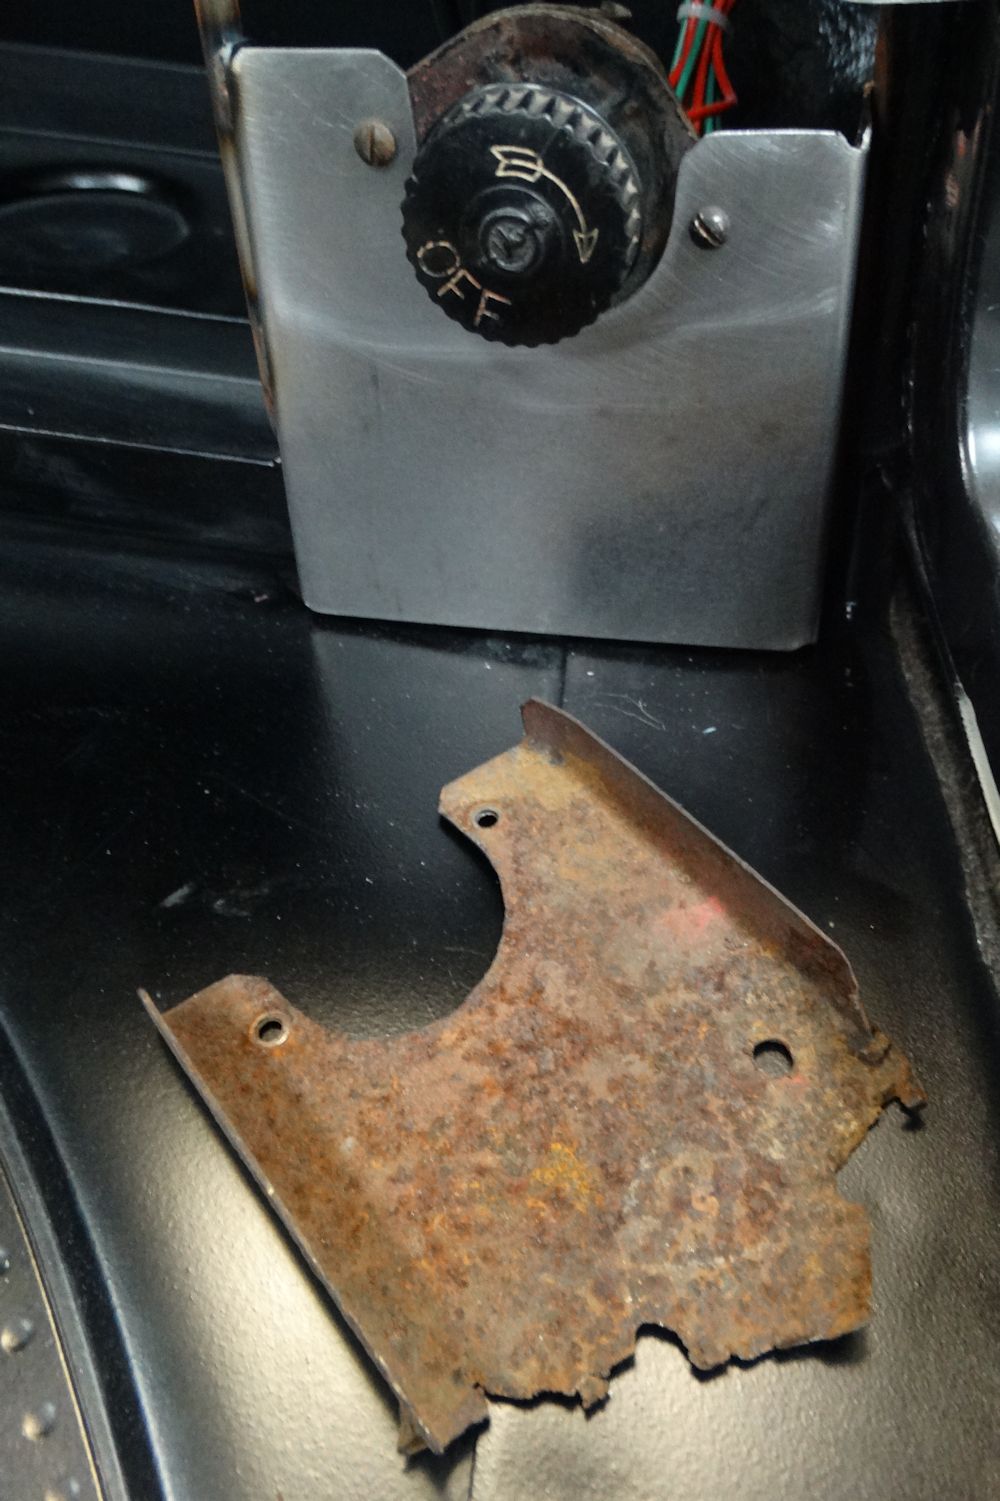
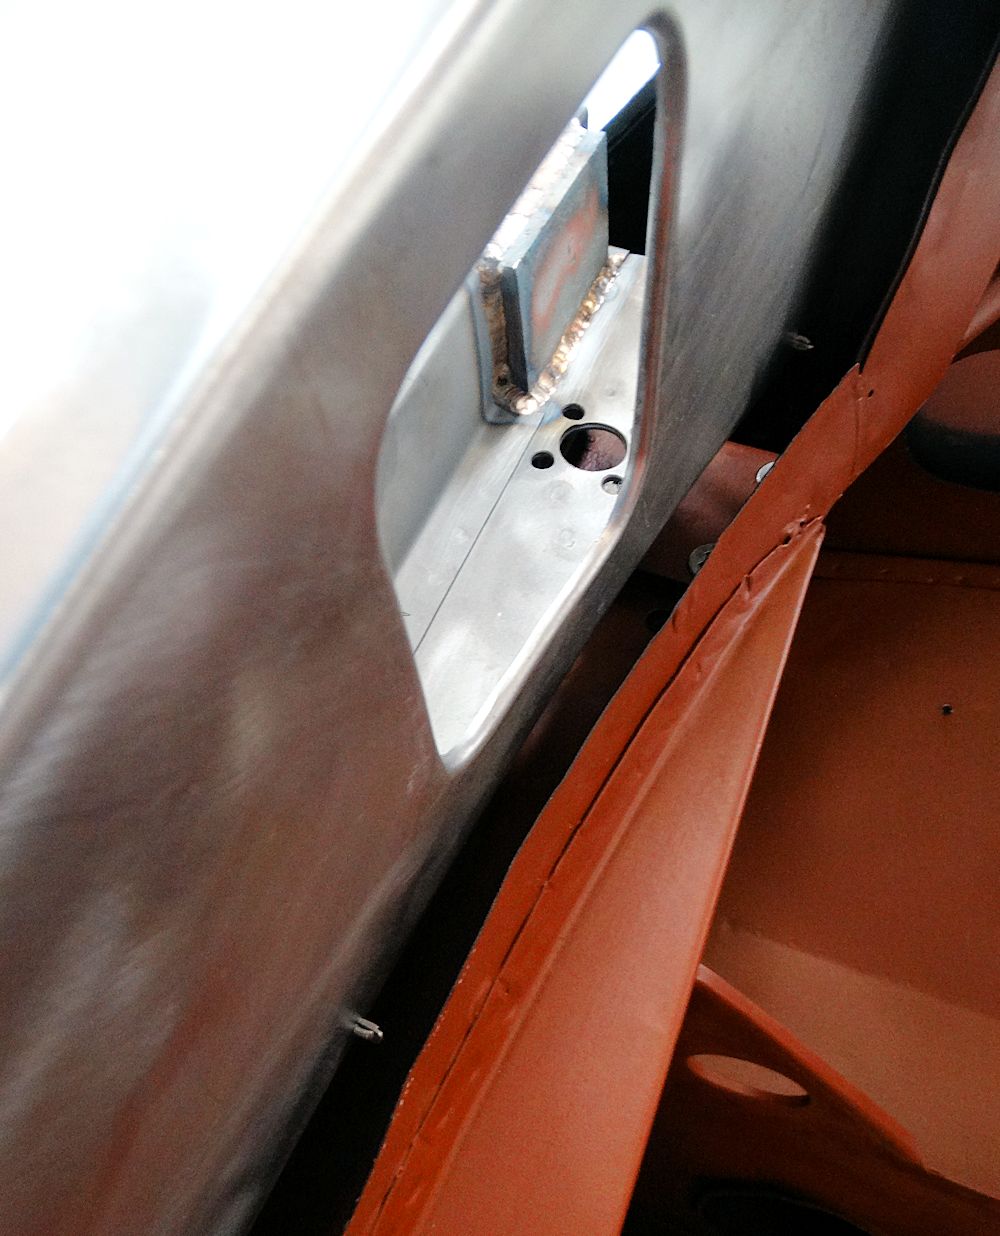
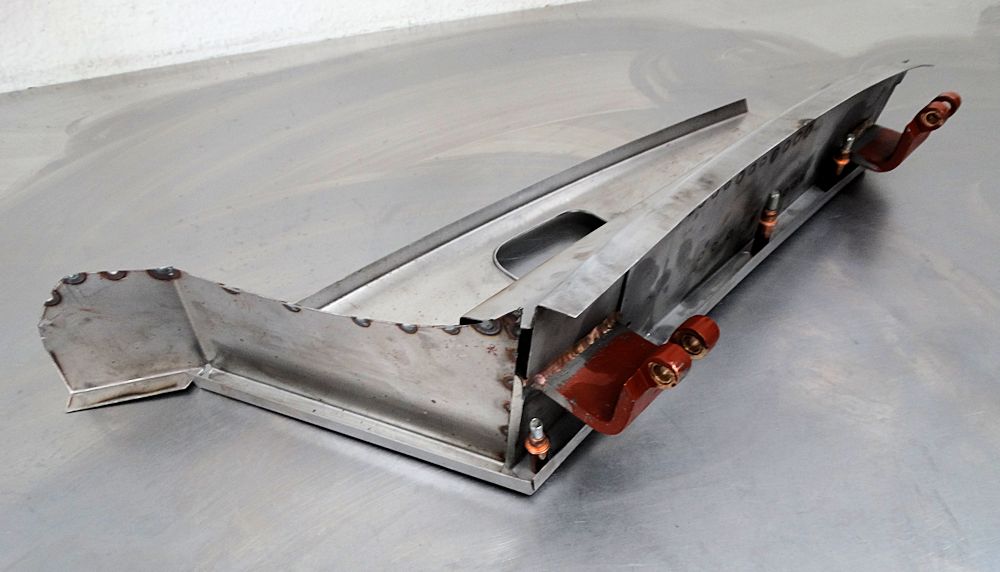
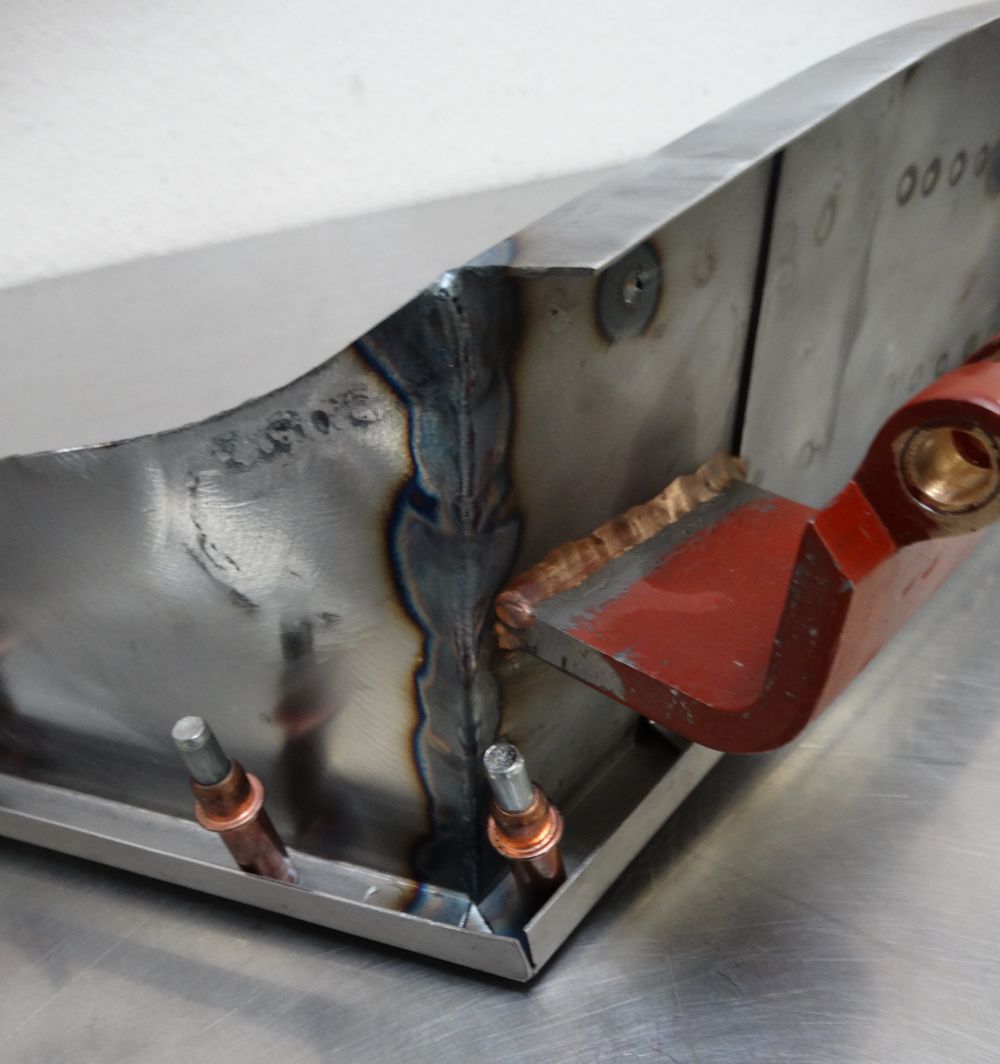
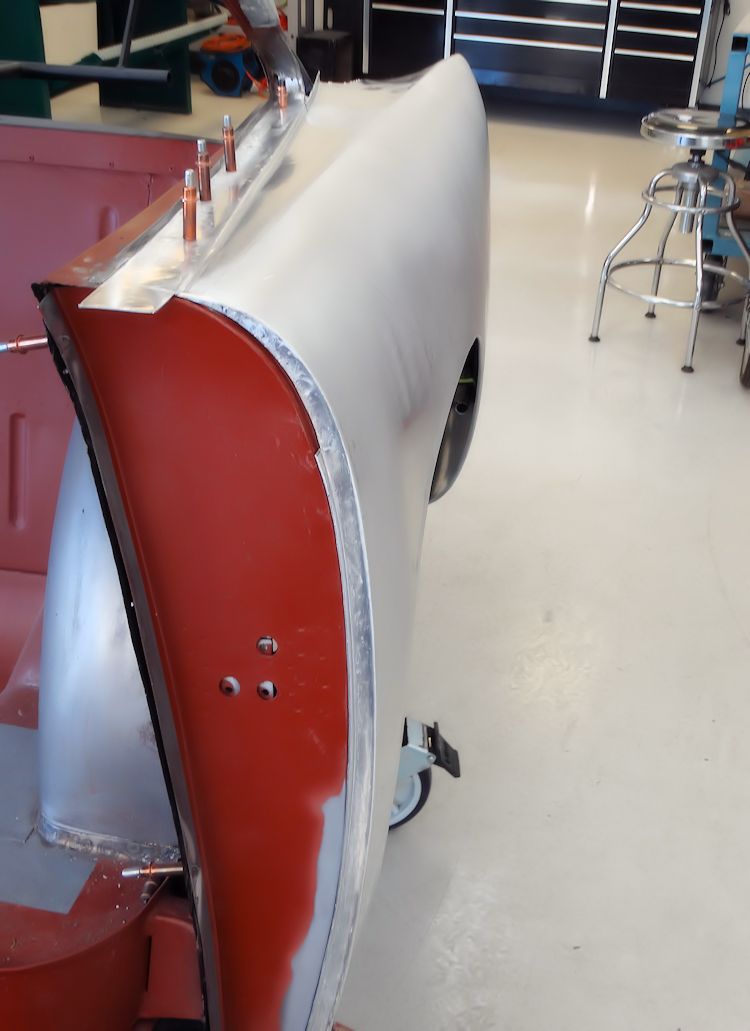
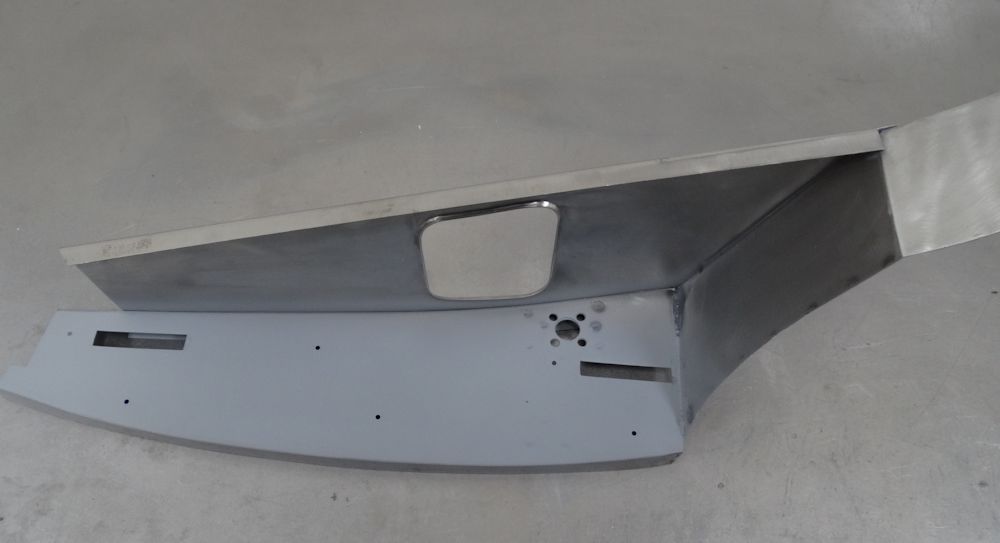
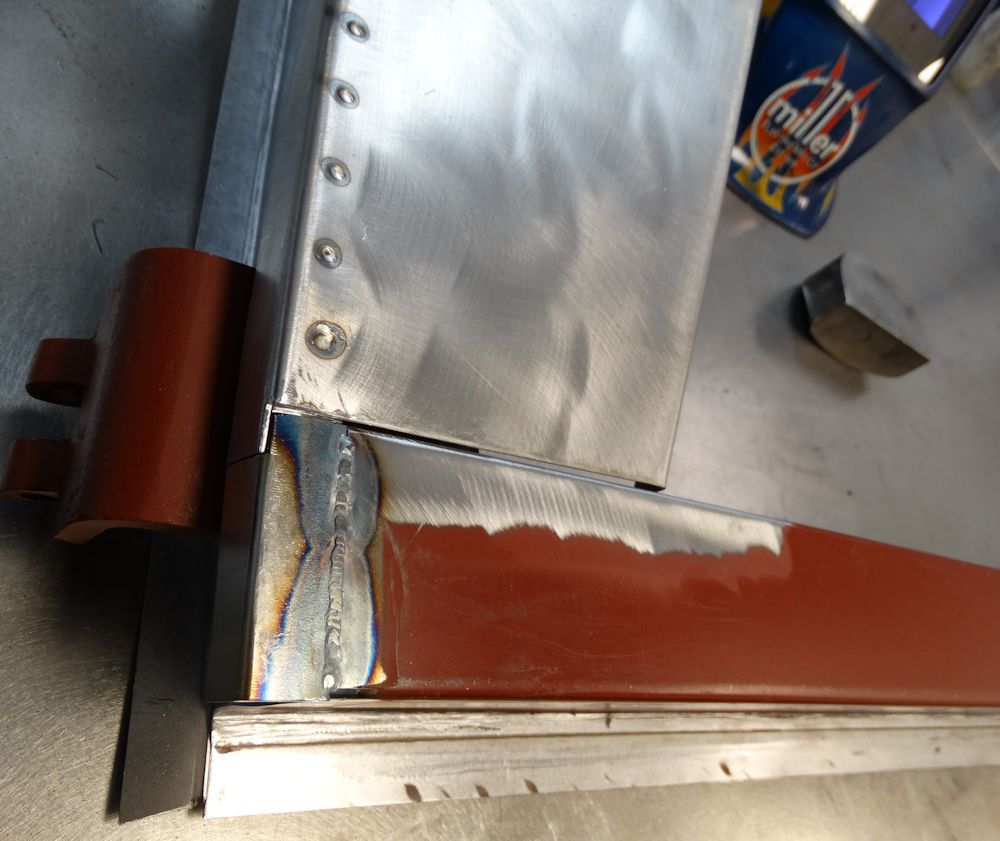
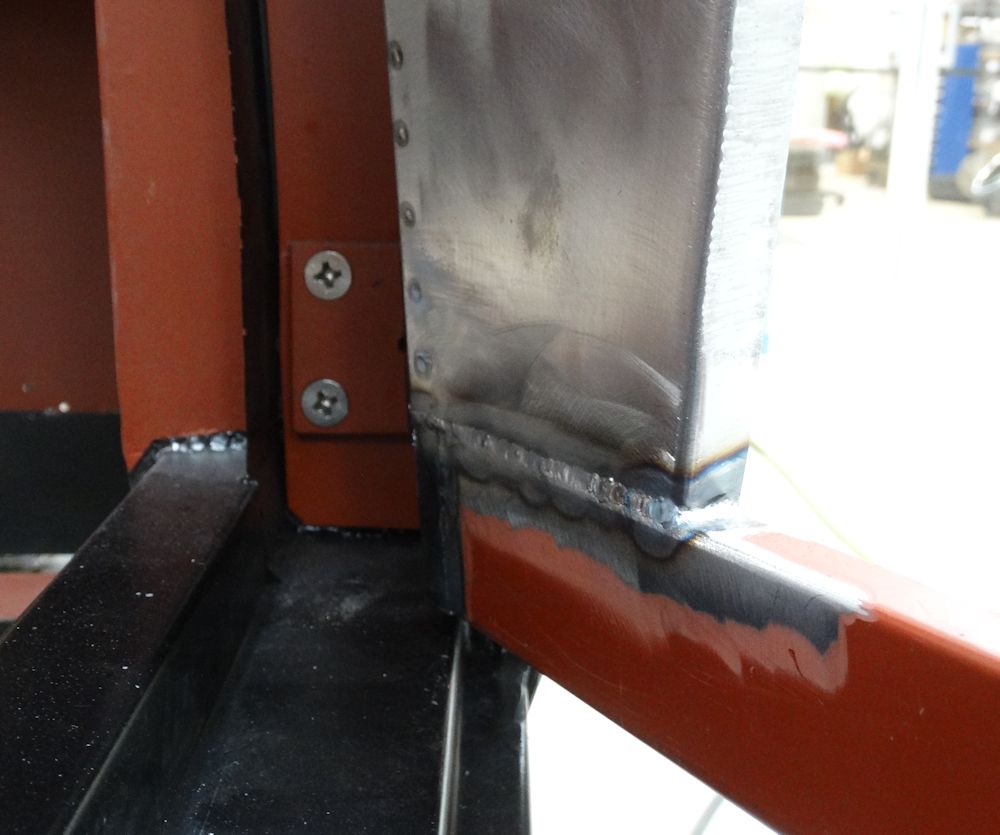
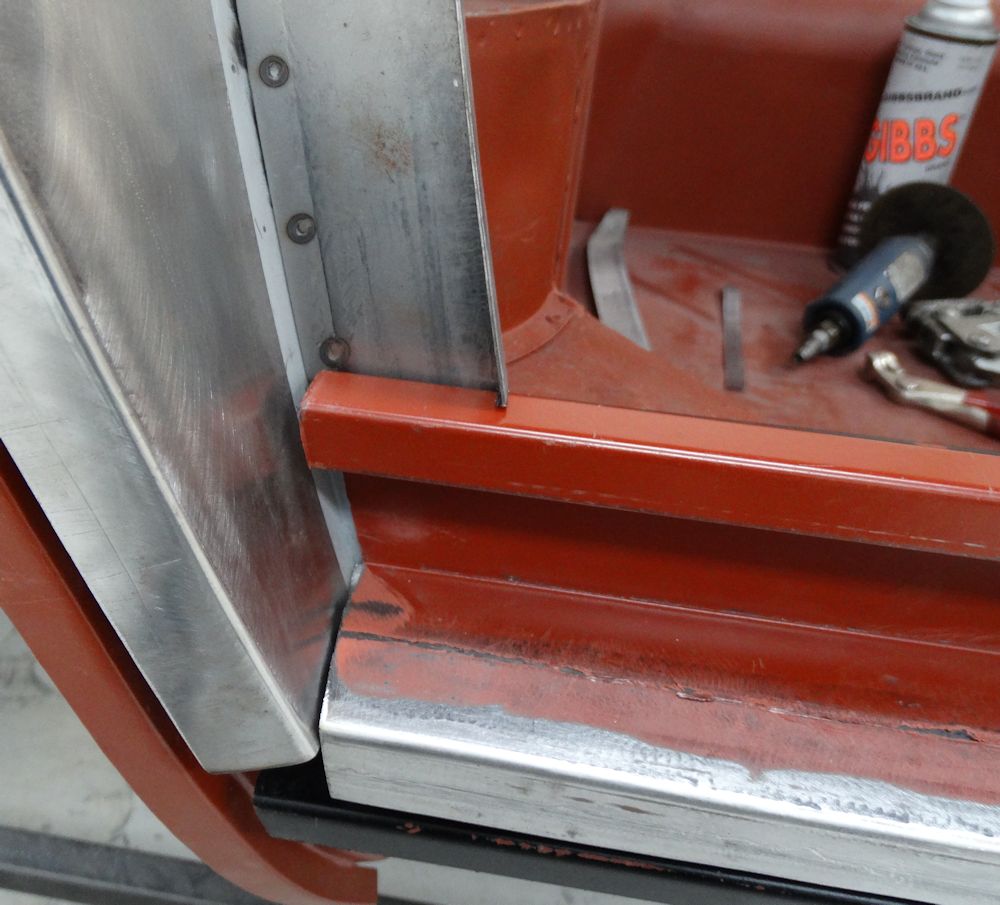
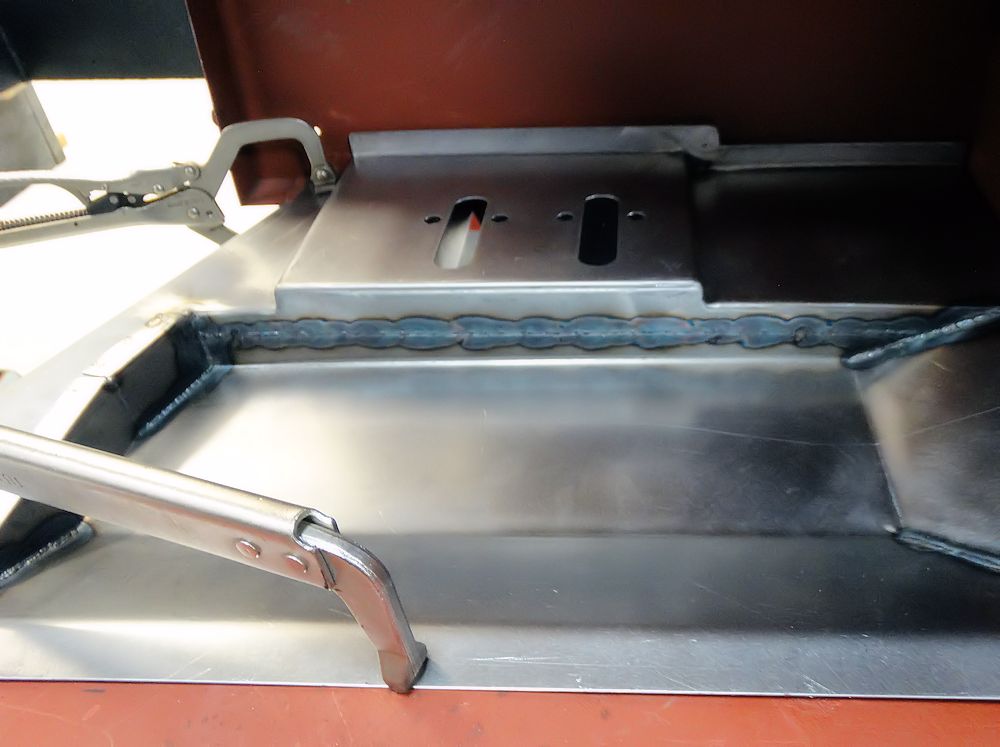
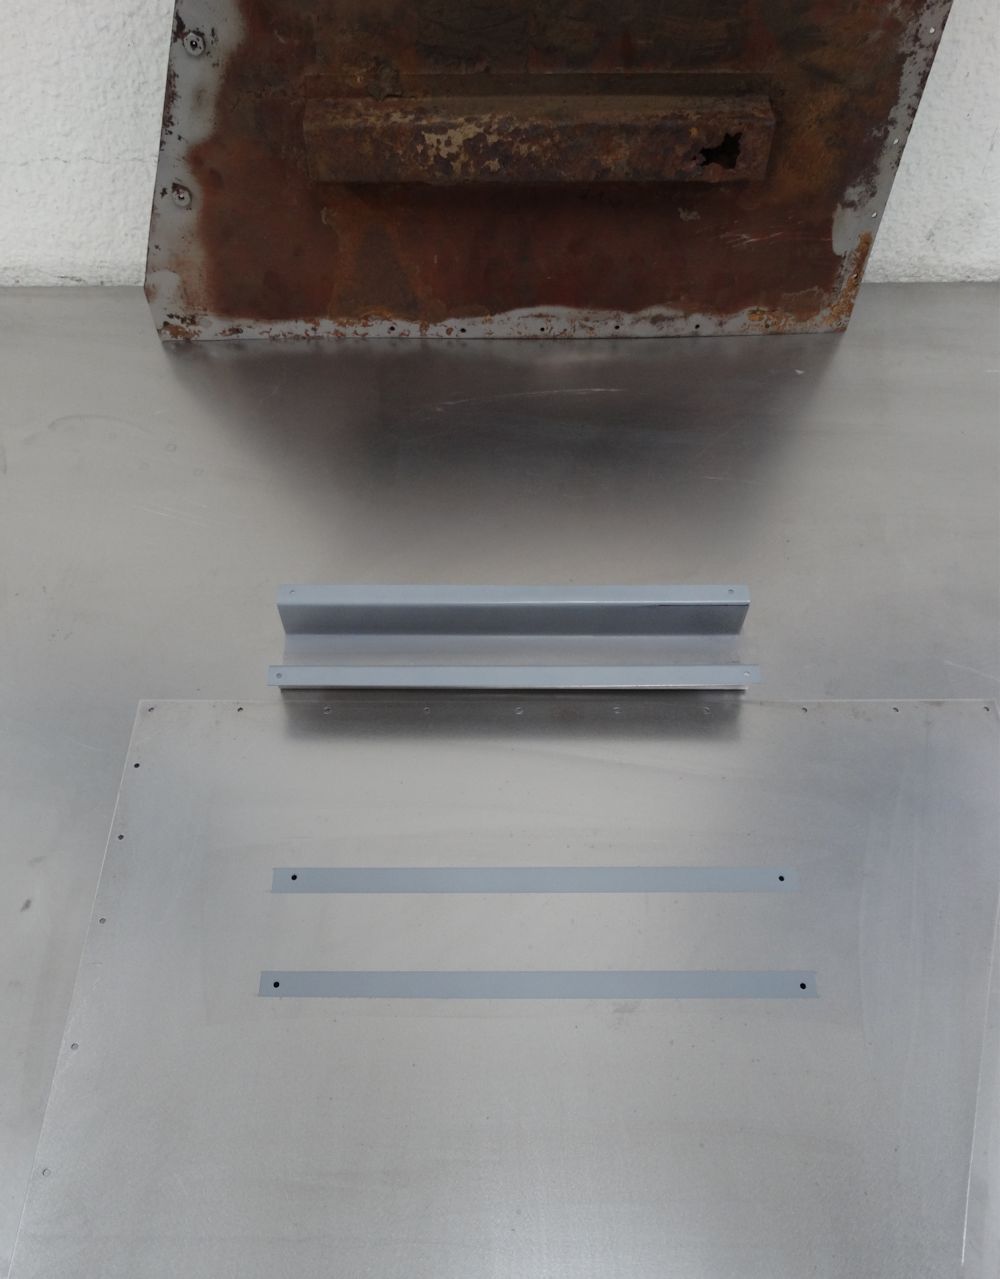
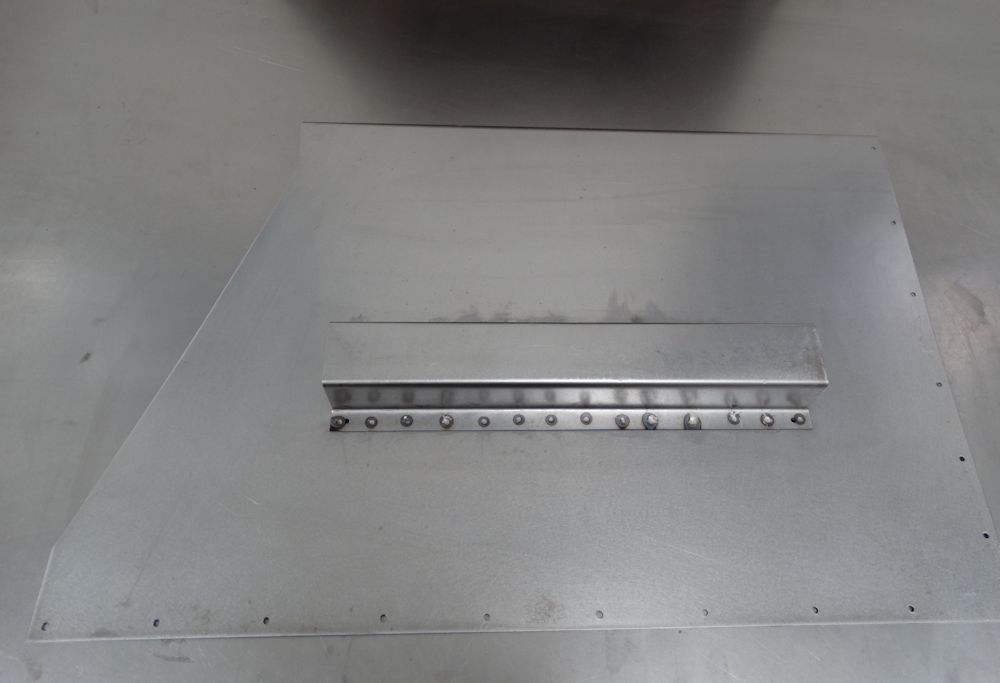
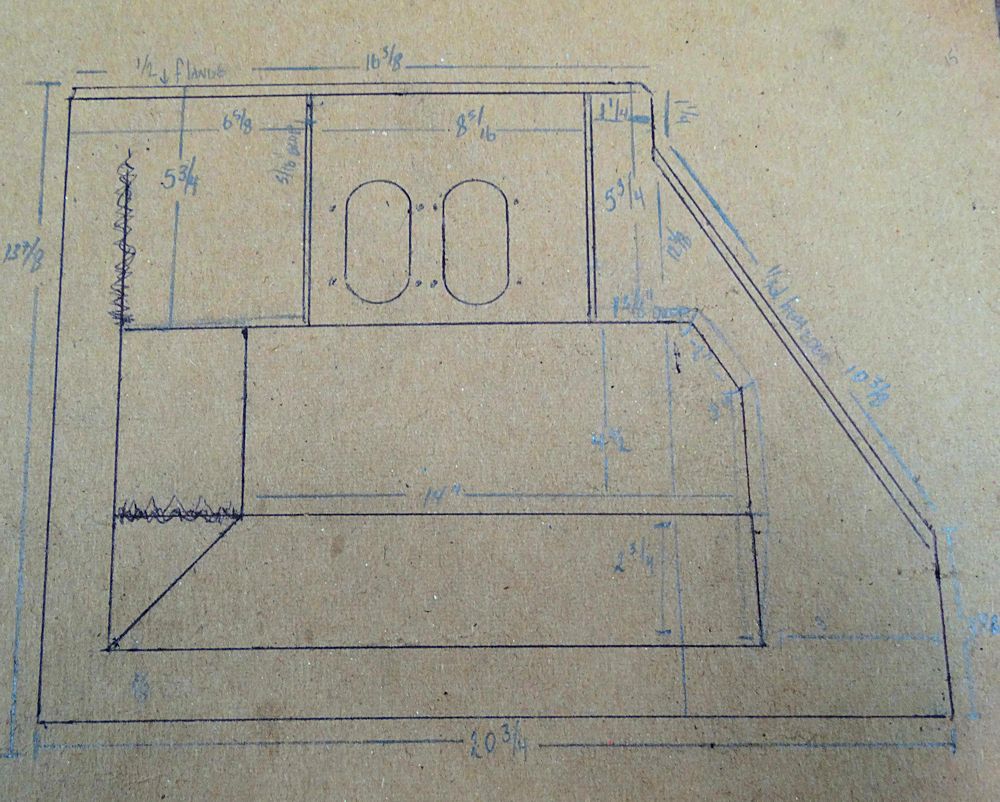
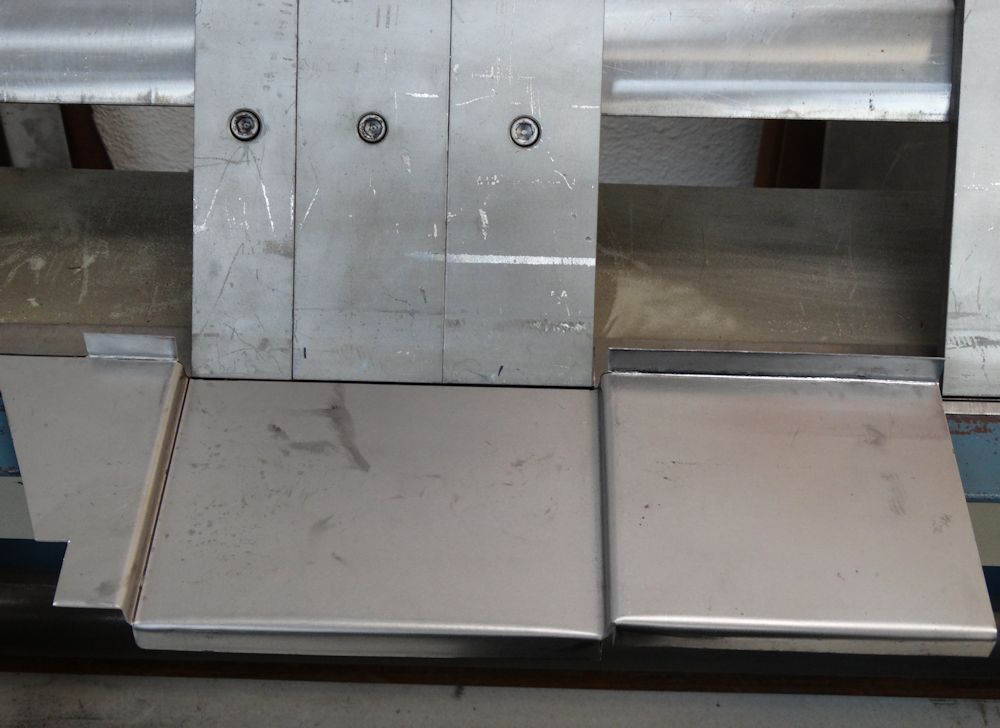
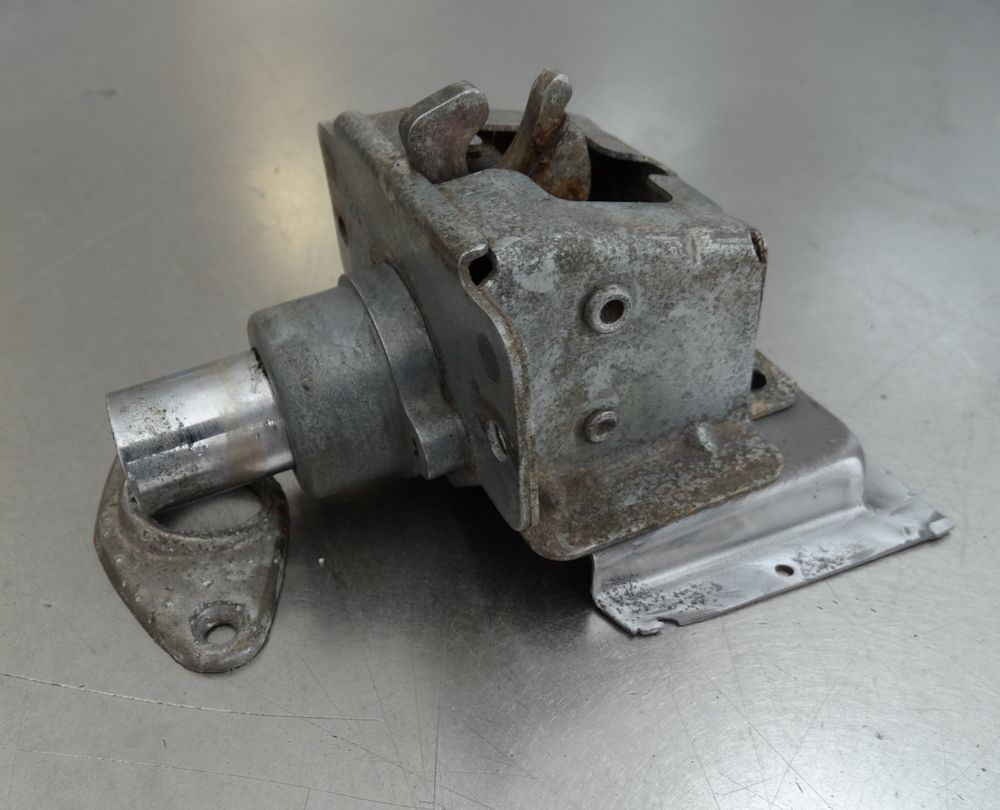
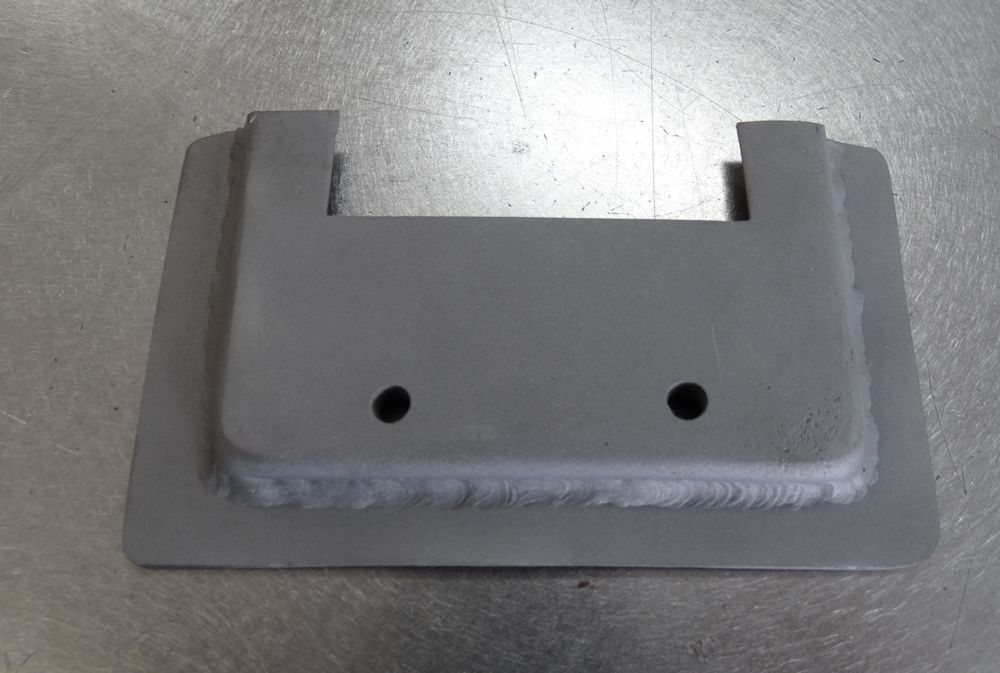
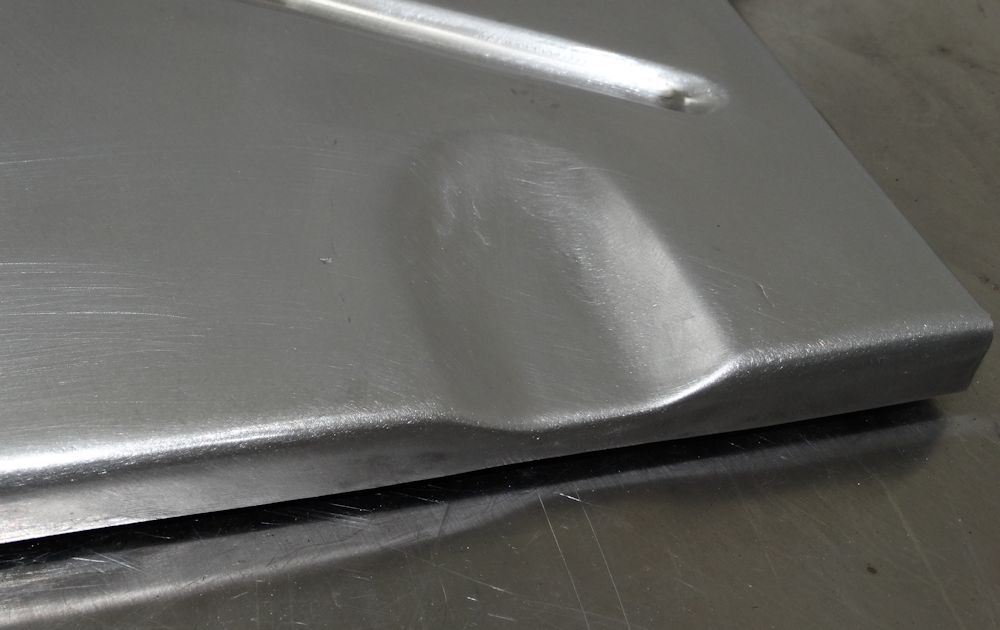
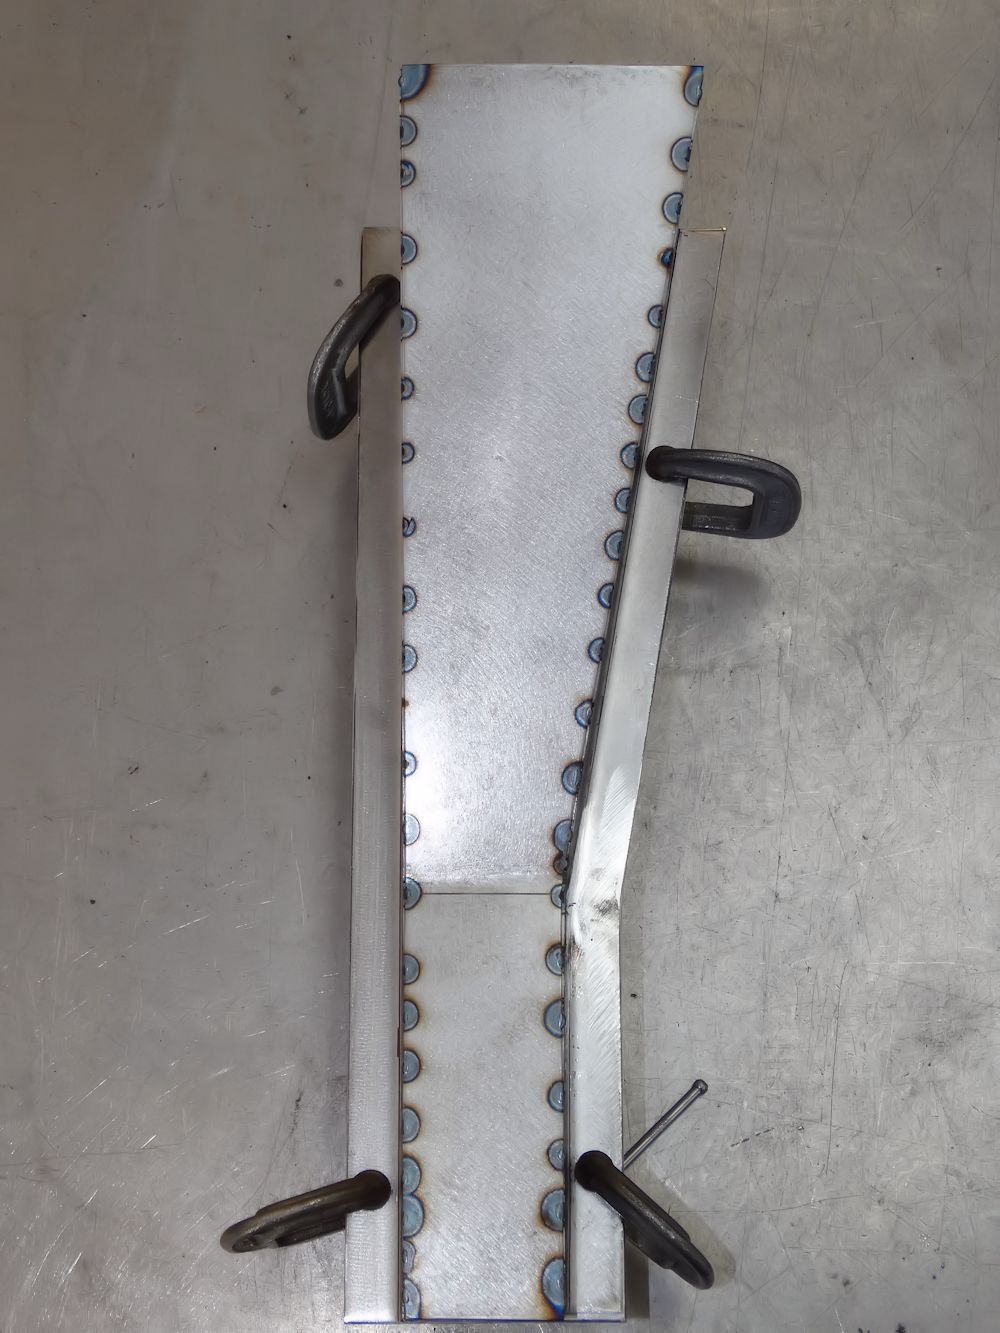
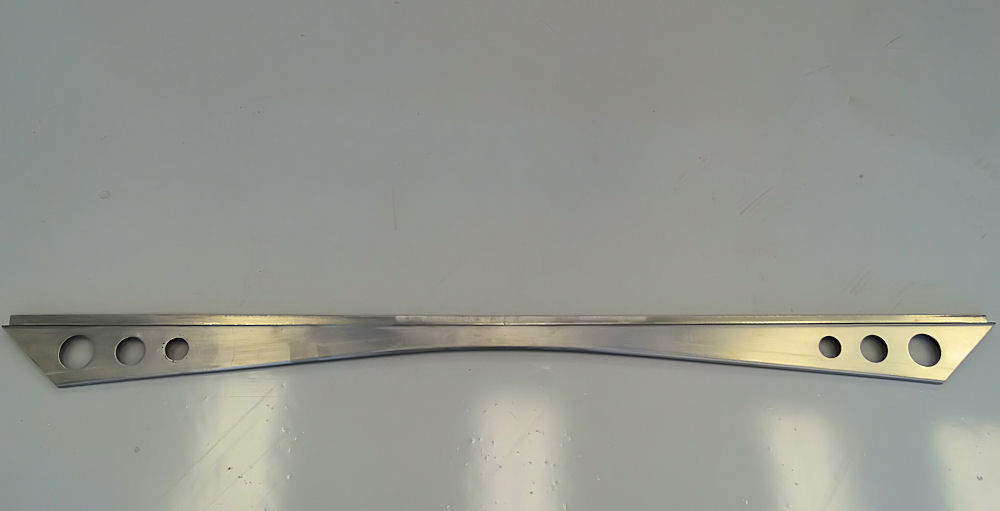
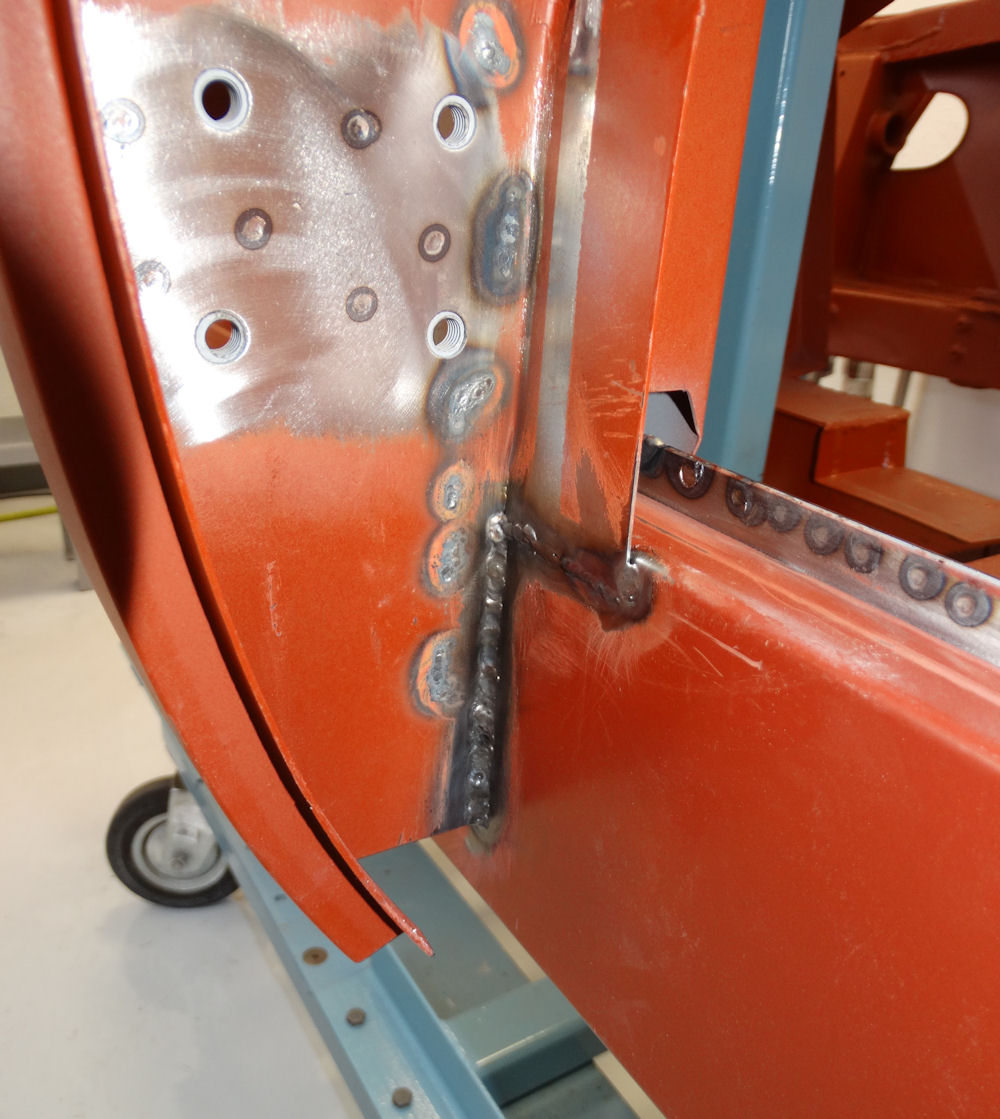
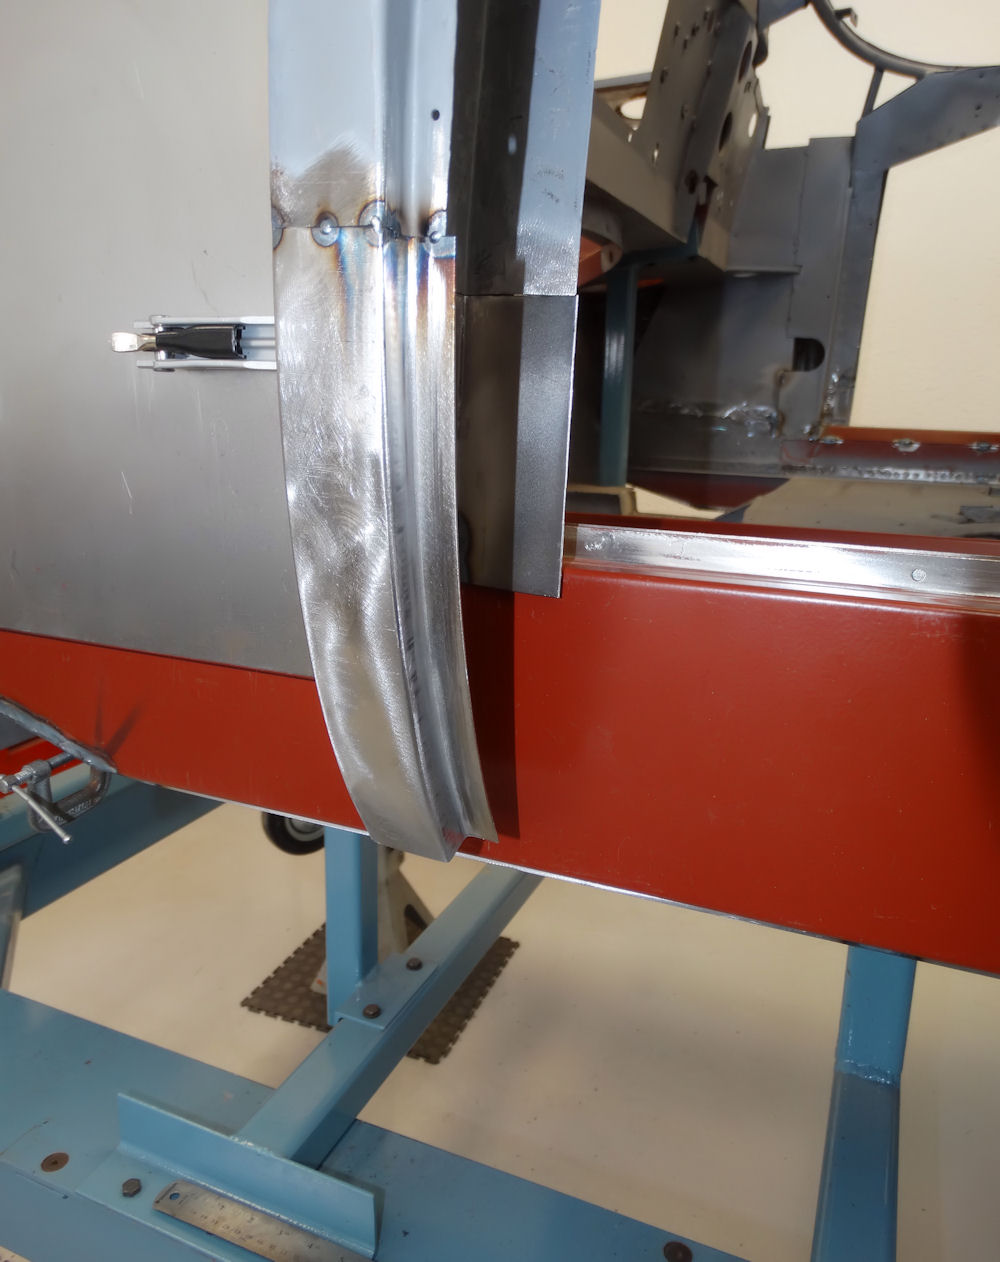
| Jake fabricated a new stainless steel bonnet latch plate |
|
 |
 |
 |
 |
| New rear springs are an Aston Martin
Heritage product |
|
 |
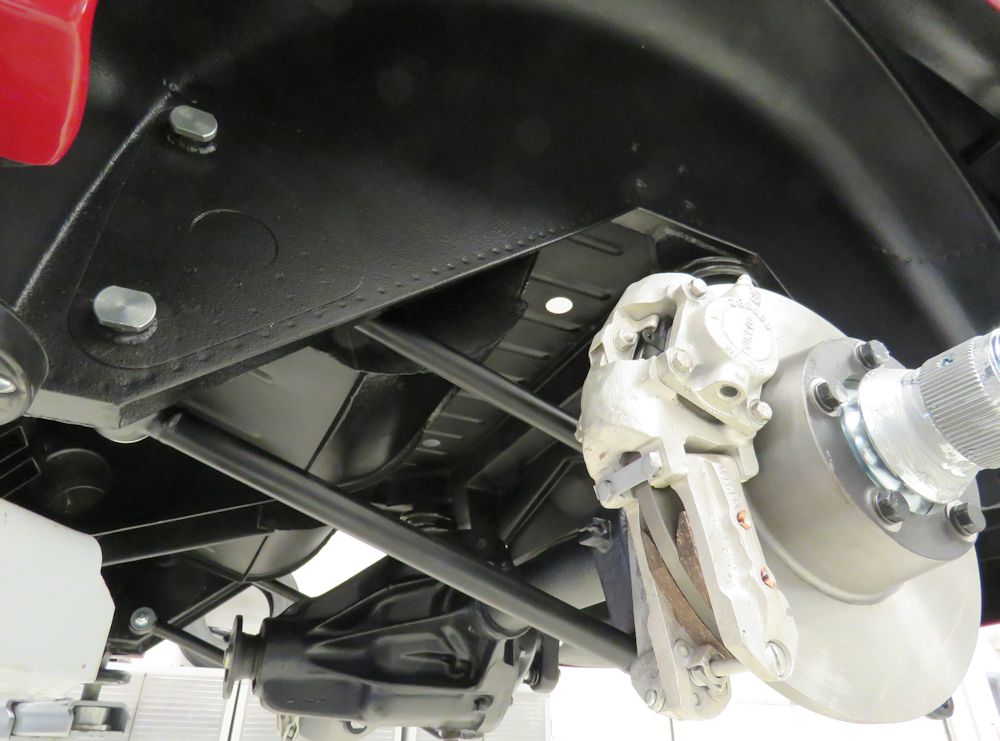 |
| Rebuilt and restored rear axle secured in
place |
|
 |
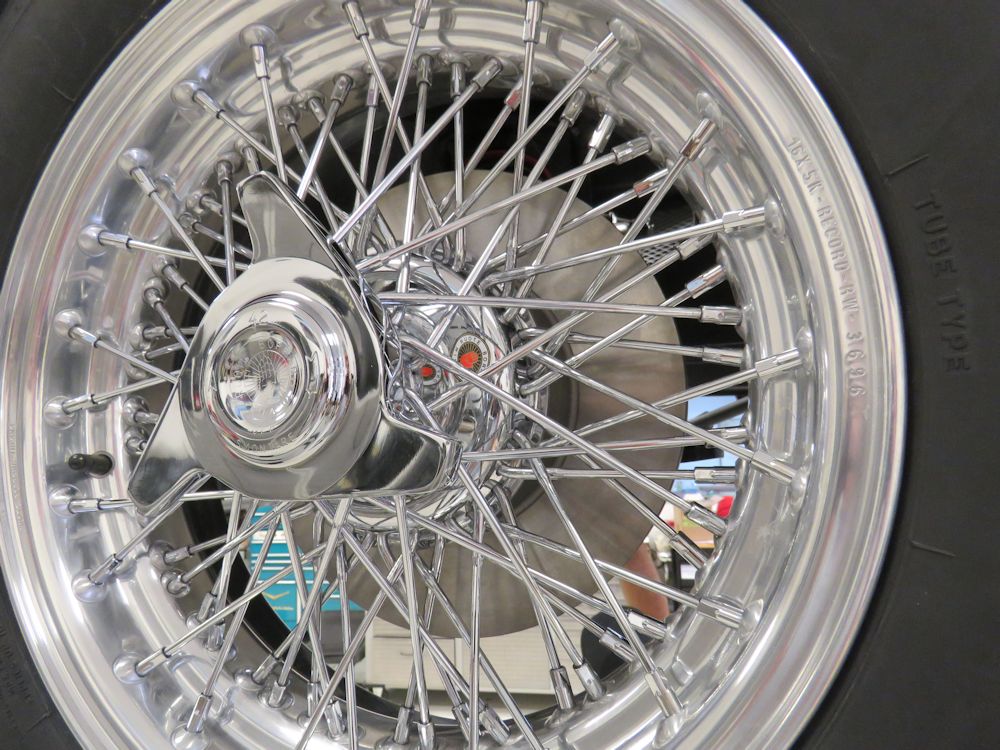 |
| Gorgeous Borrani wheels with OEM spec Avon tires |
 |
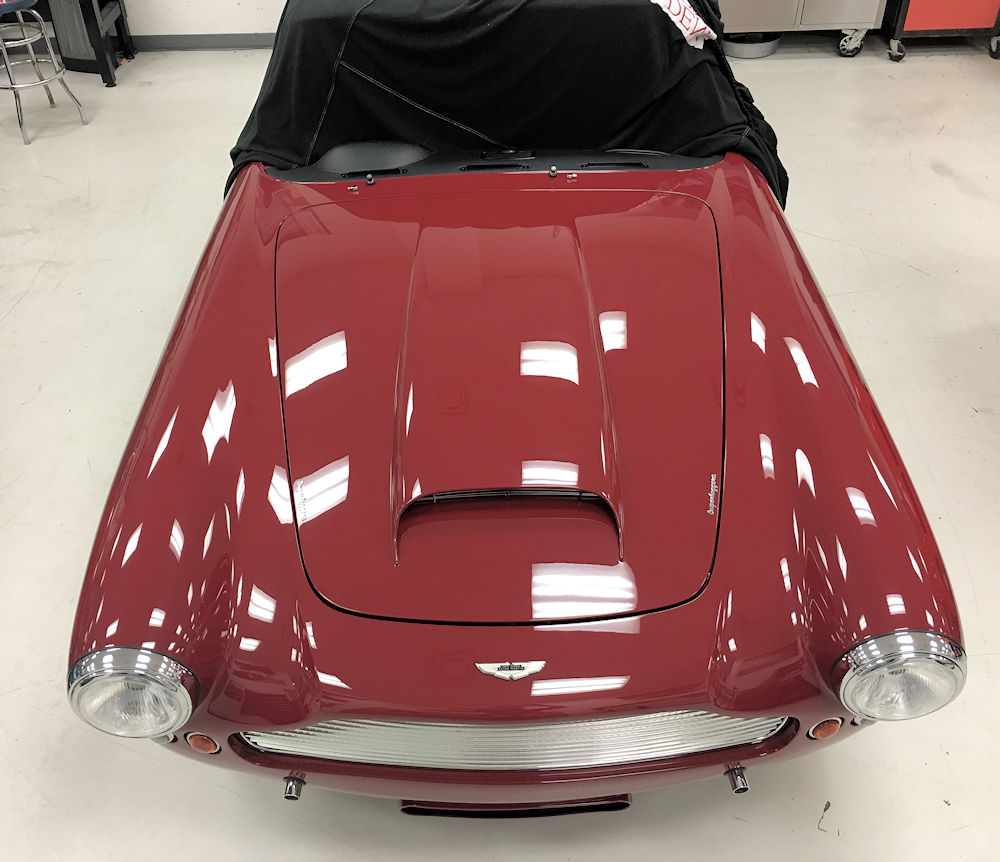
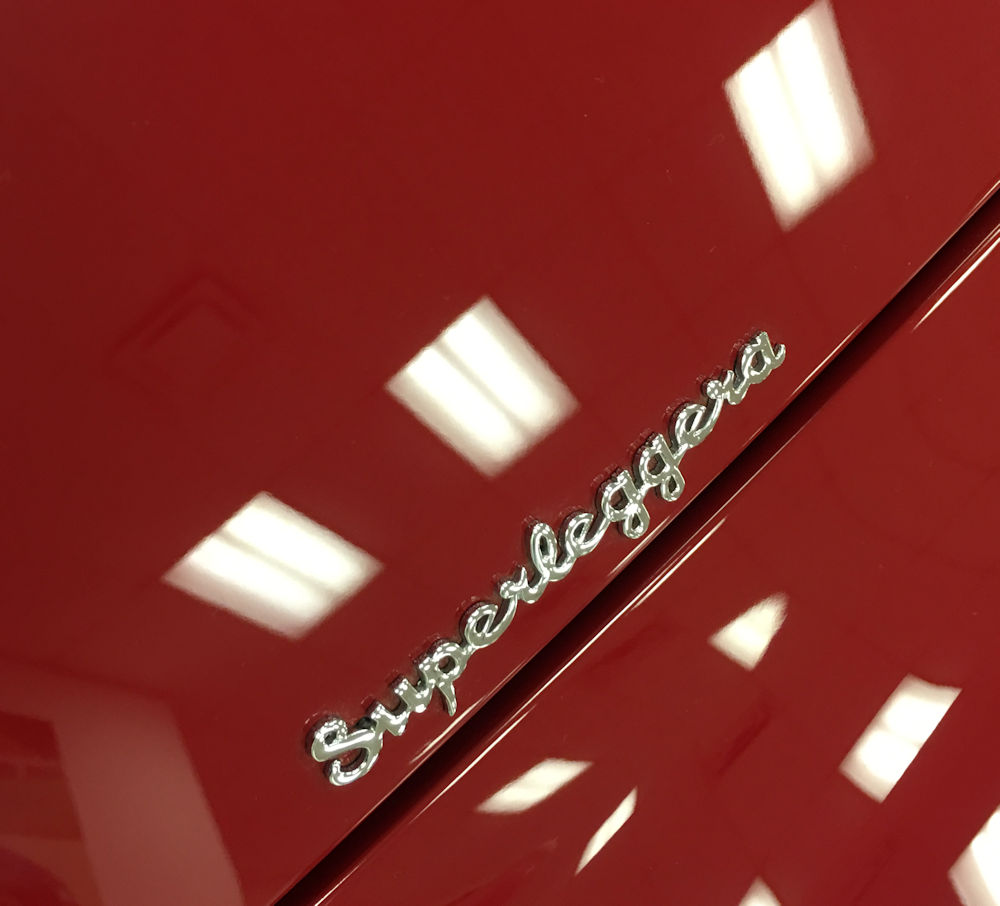
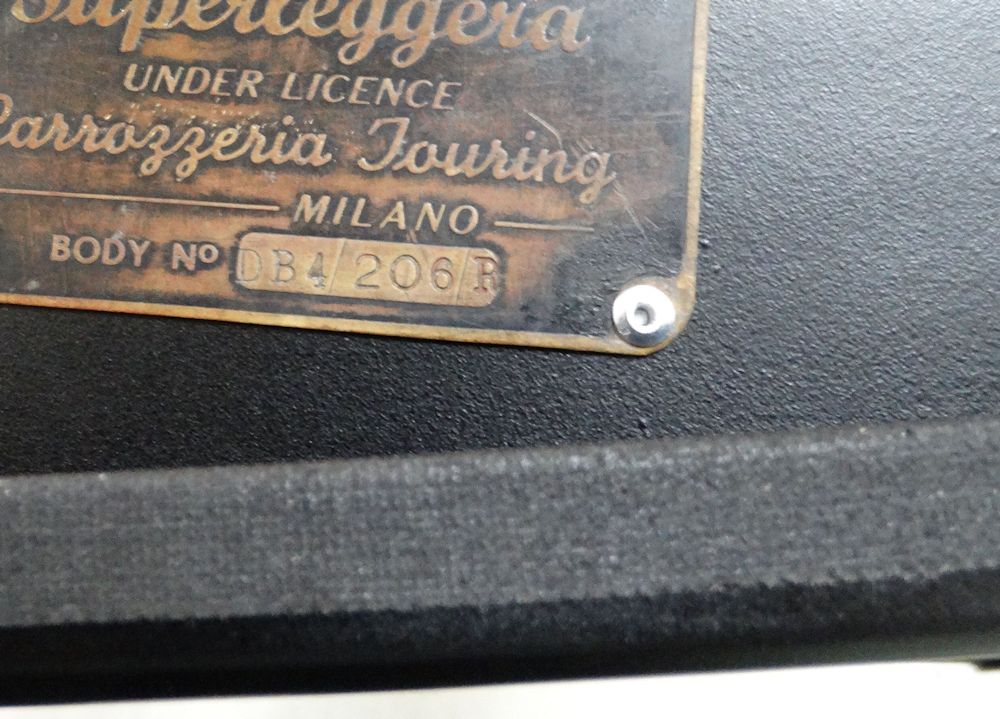
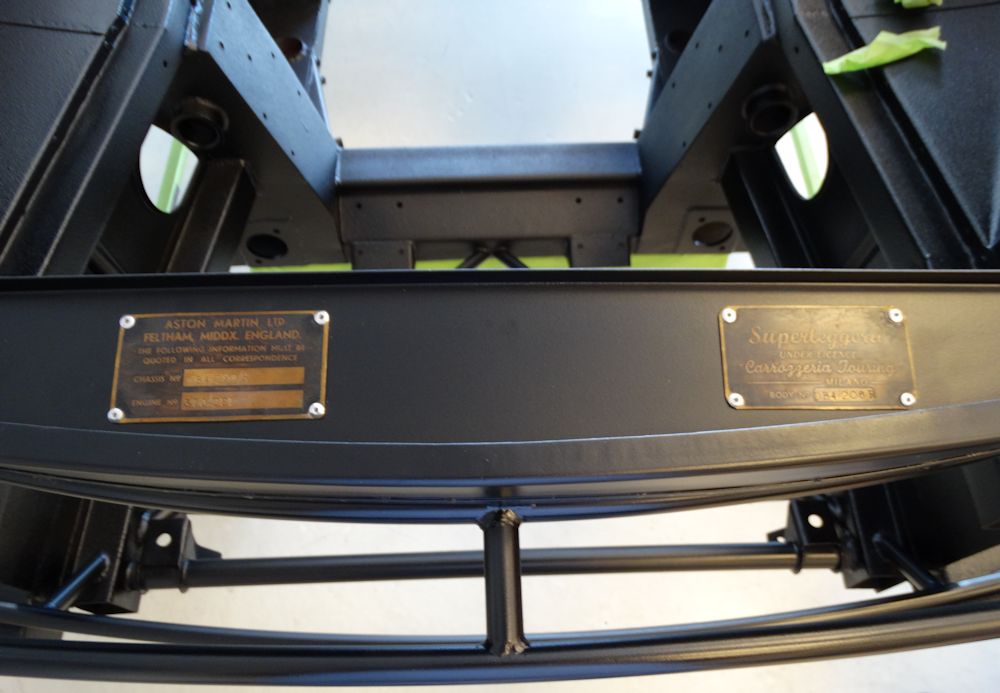
| Original chassis and Superleggera plates and
new emblem installed at the front of the car |
Assembly of the front suspension and brakes underway.
 |
 |
 |
 |
 |
 |
DB4 suspension components restored, painted, re-bushed and ready for assembly.
 |
 |
 |
 |
With thanks to The King of Trim in California who did a truly outstanding job restoring our original DB4 grille. The grille has been straightened, repaired, anodized and polished and the finished results are spectacular. I am very happy to recommend the services of The King of Trim for high quality aluminum trim repairs and restoration.
 |
 |
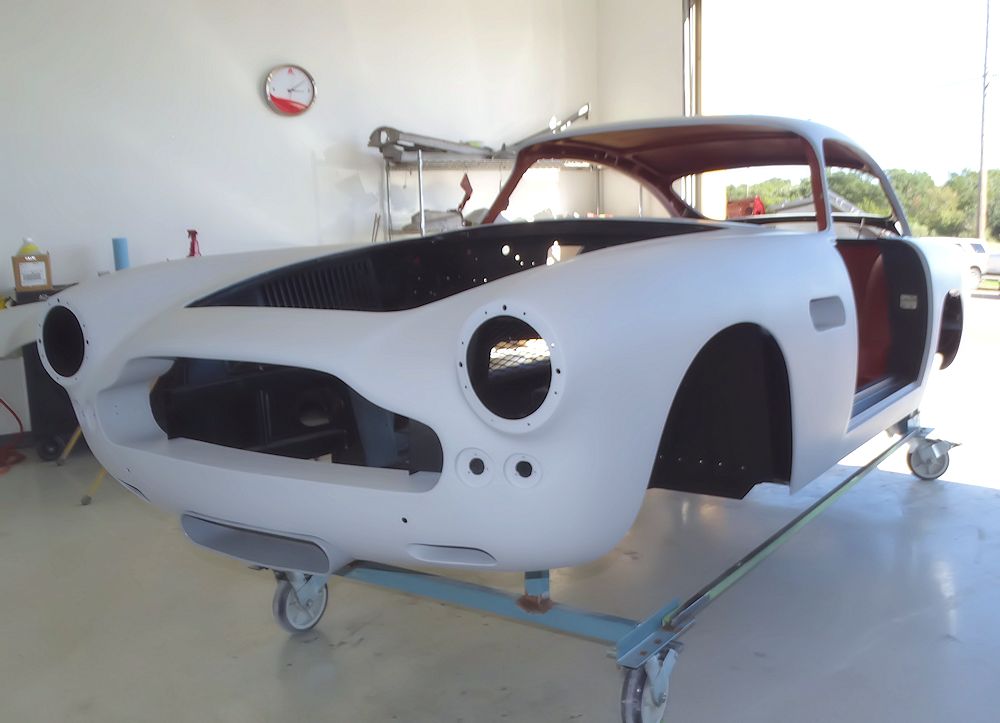
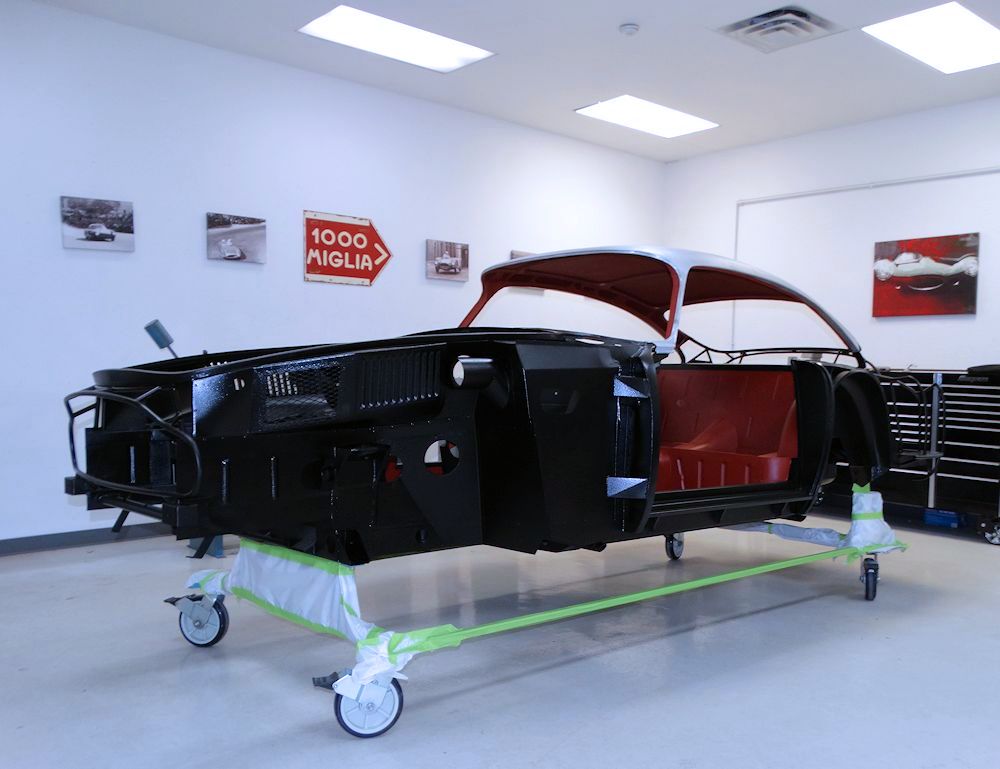
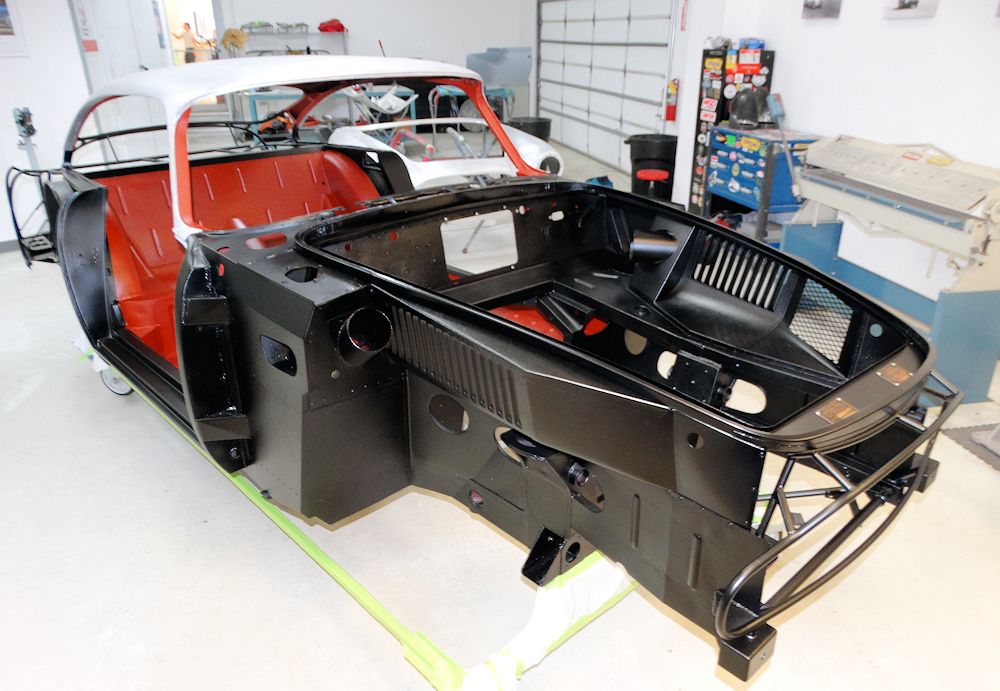
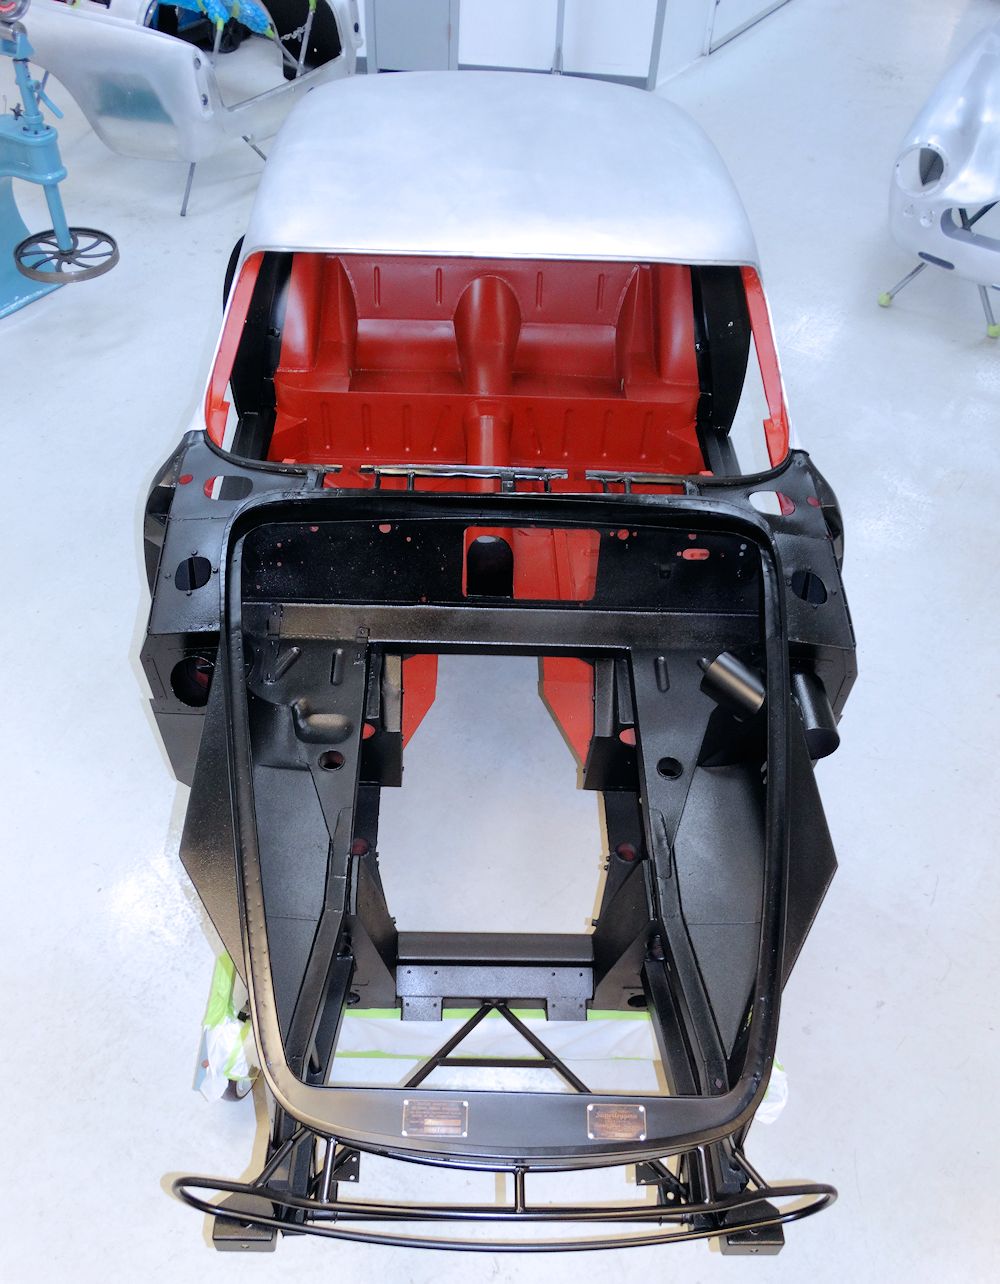
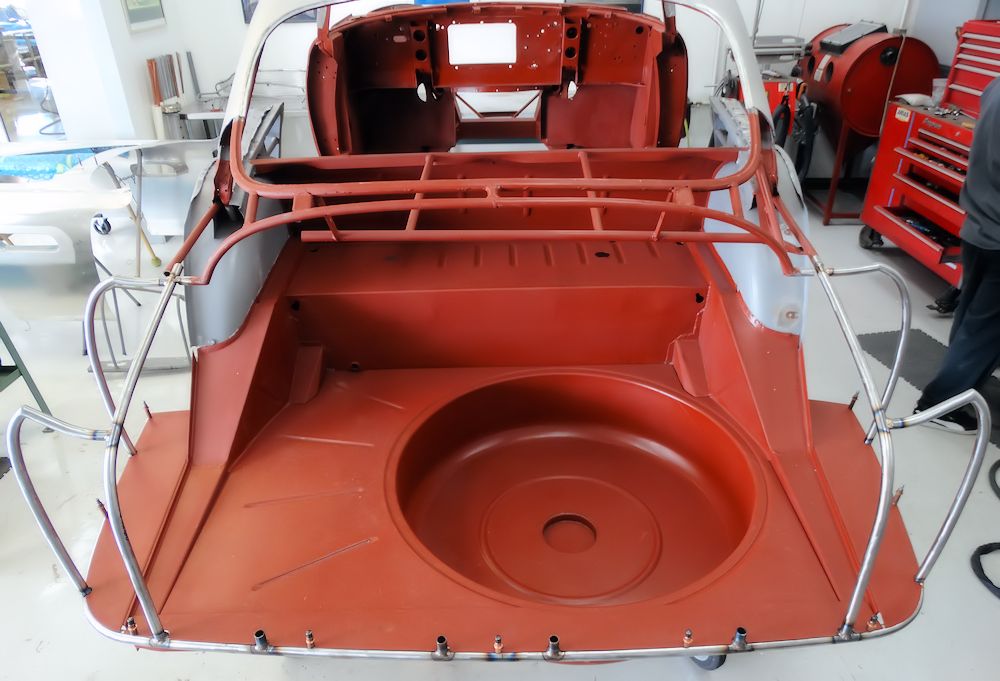
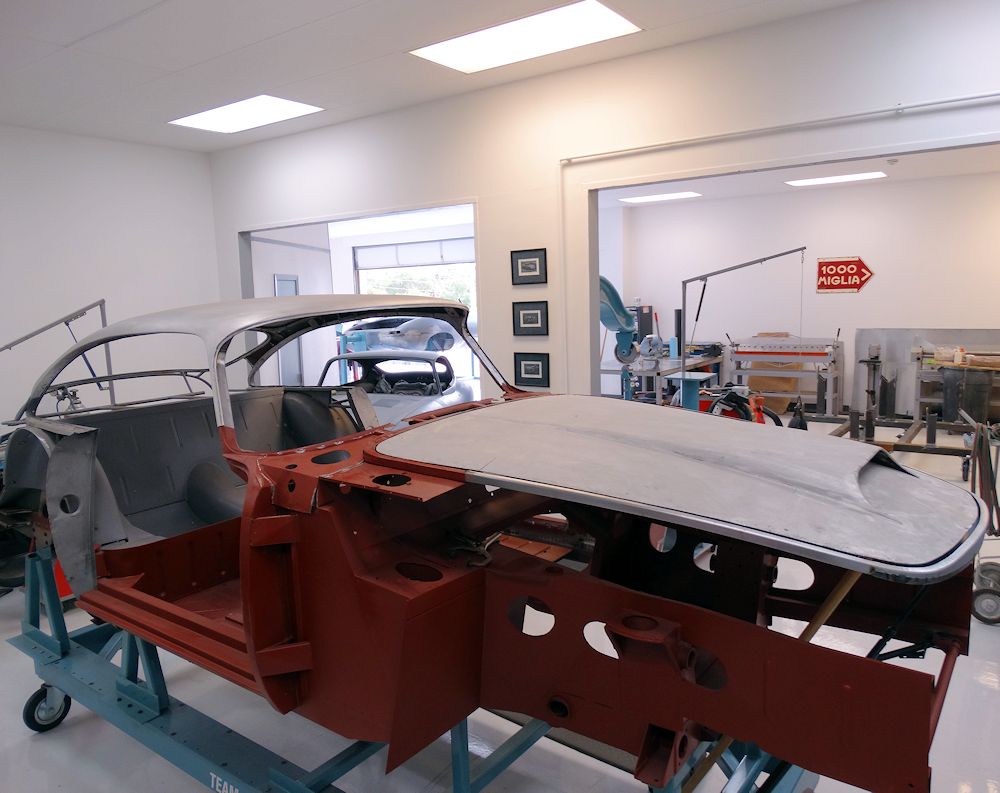
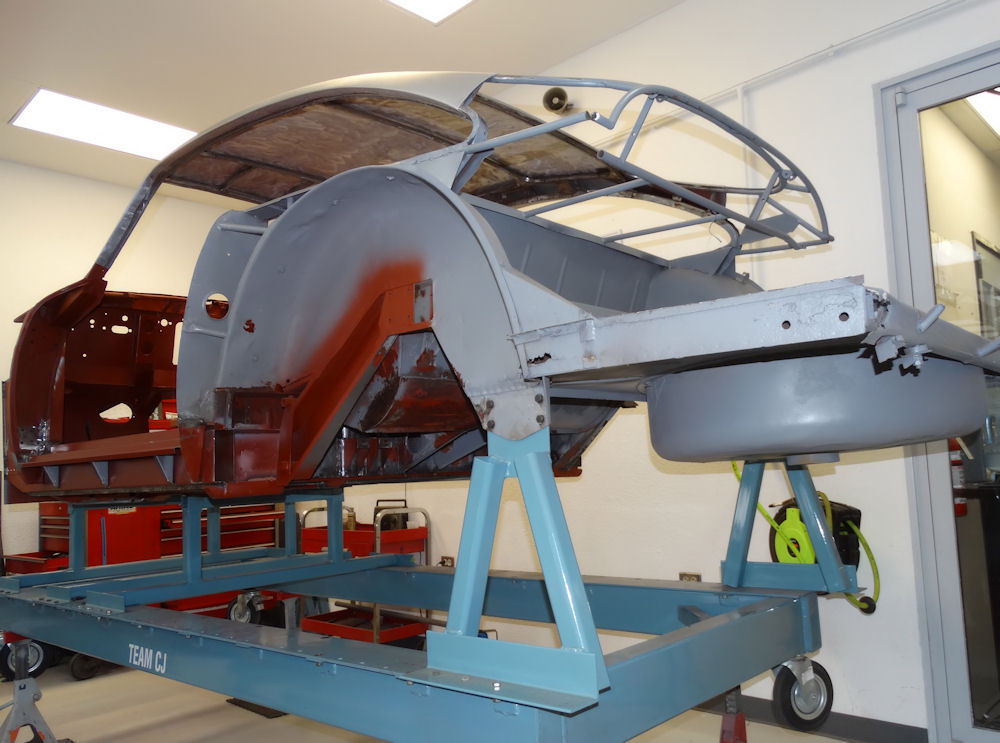
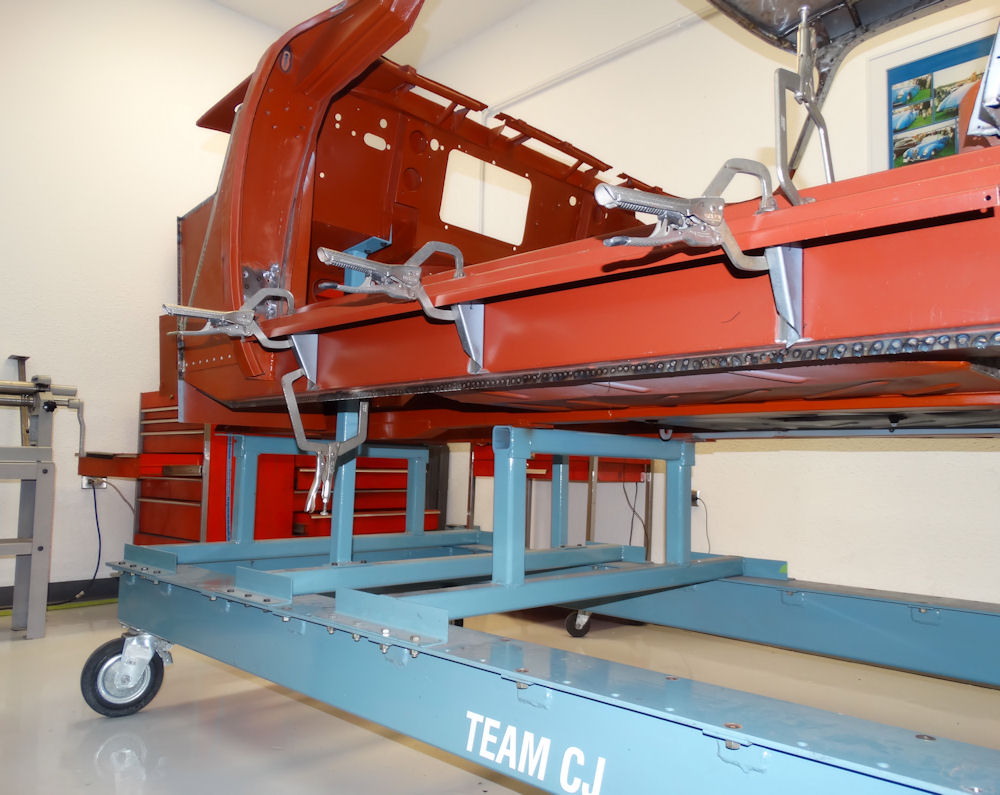
The restored body has now been moved to the mechanical assembly area.
 |
 |
 |
 |
 |
 |
 |
 |
 |
 |
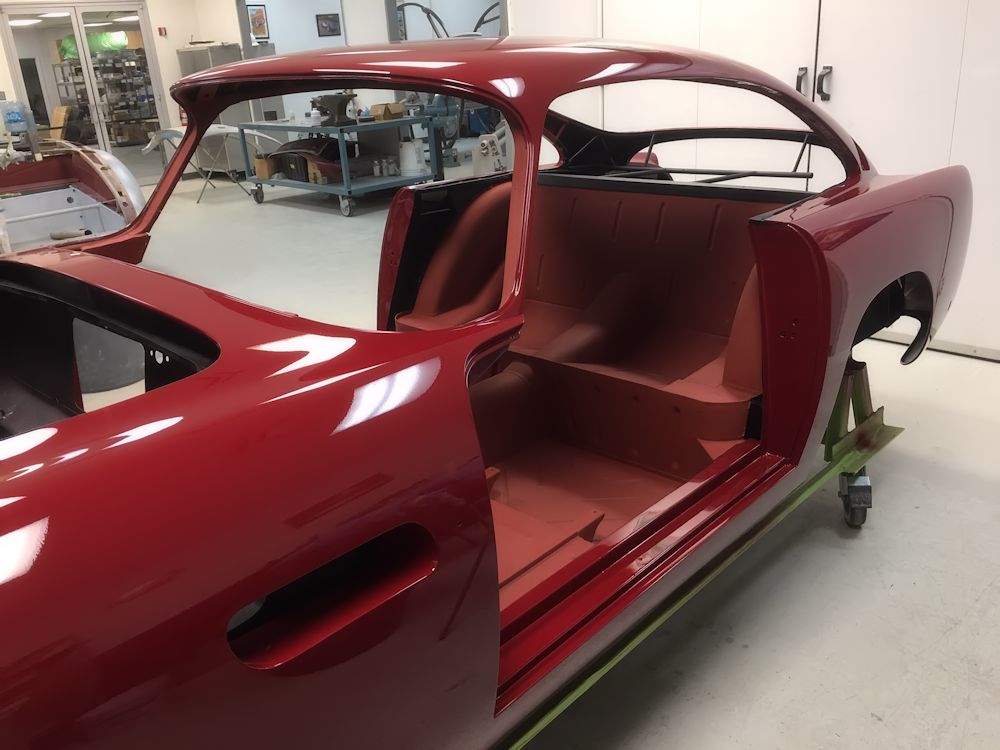
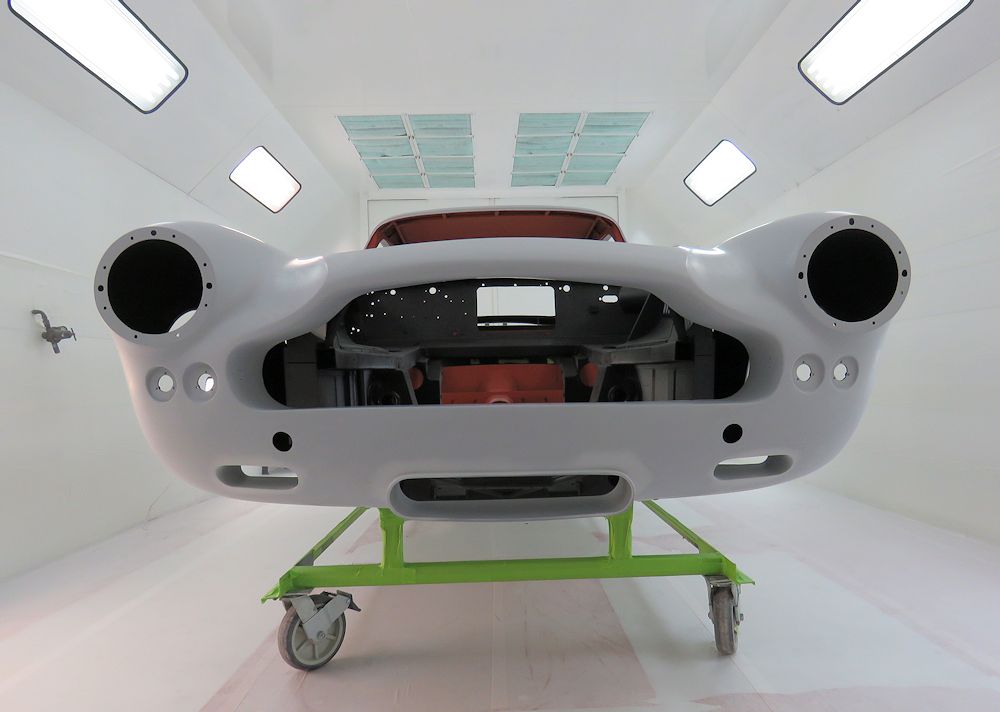
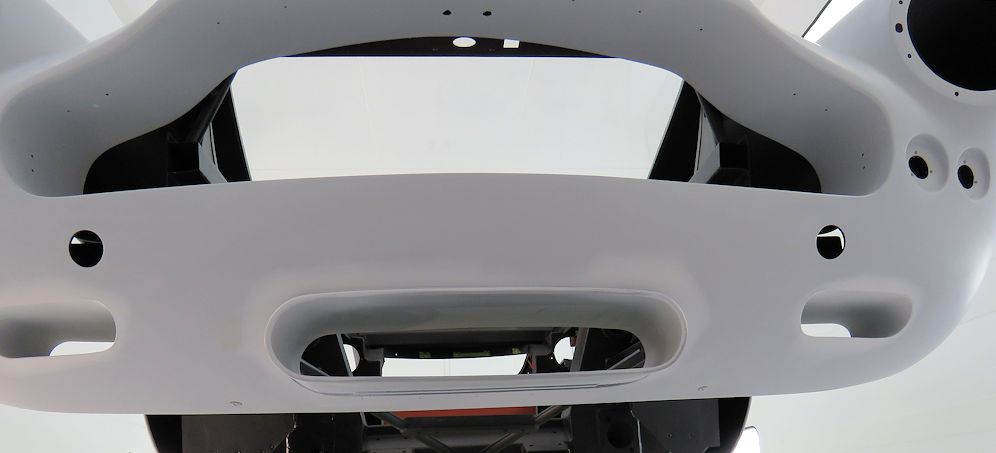
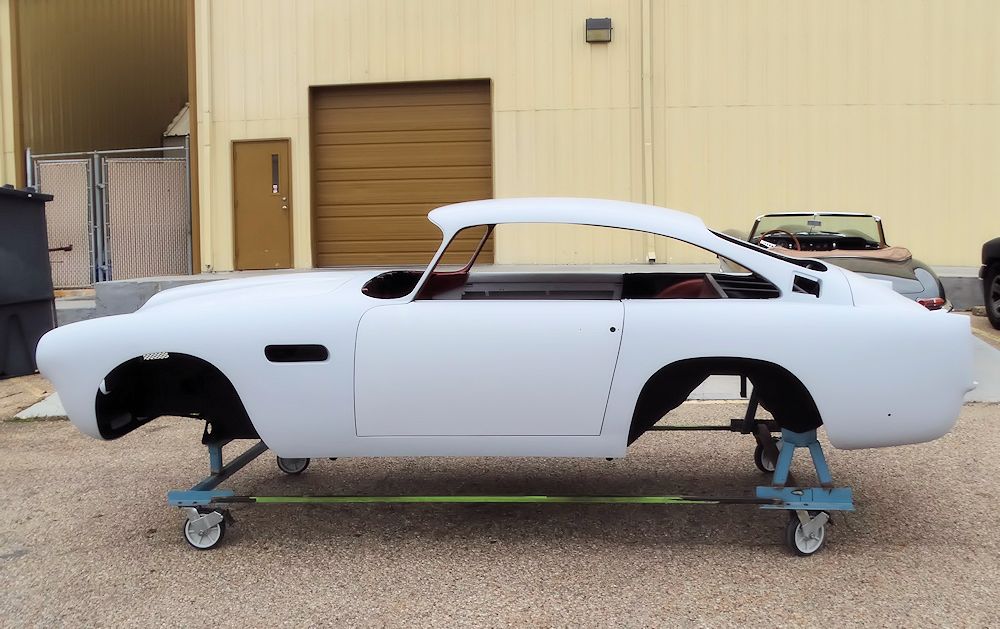
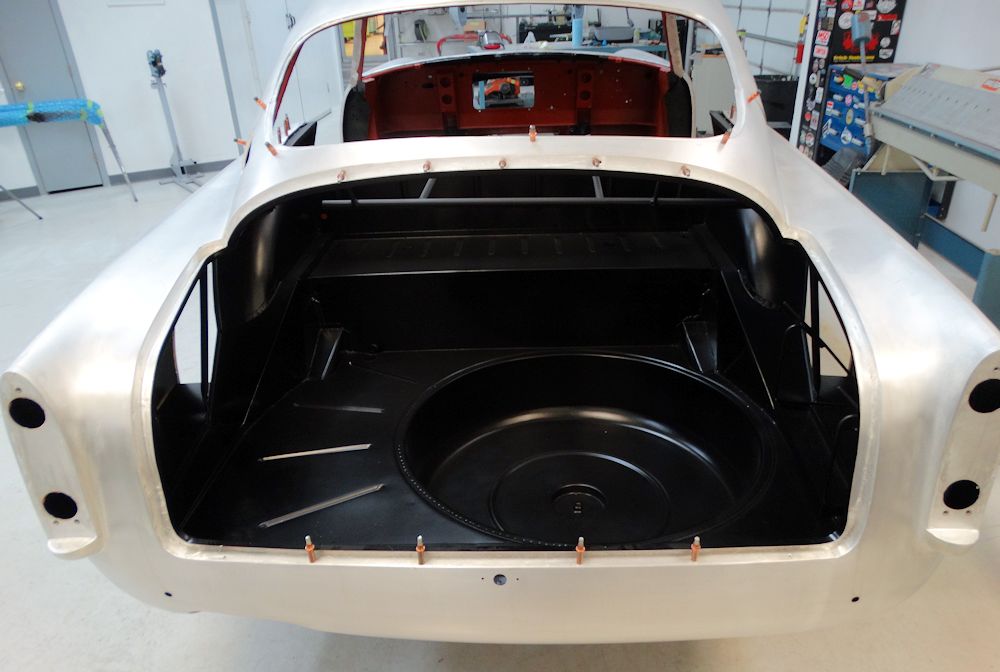
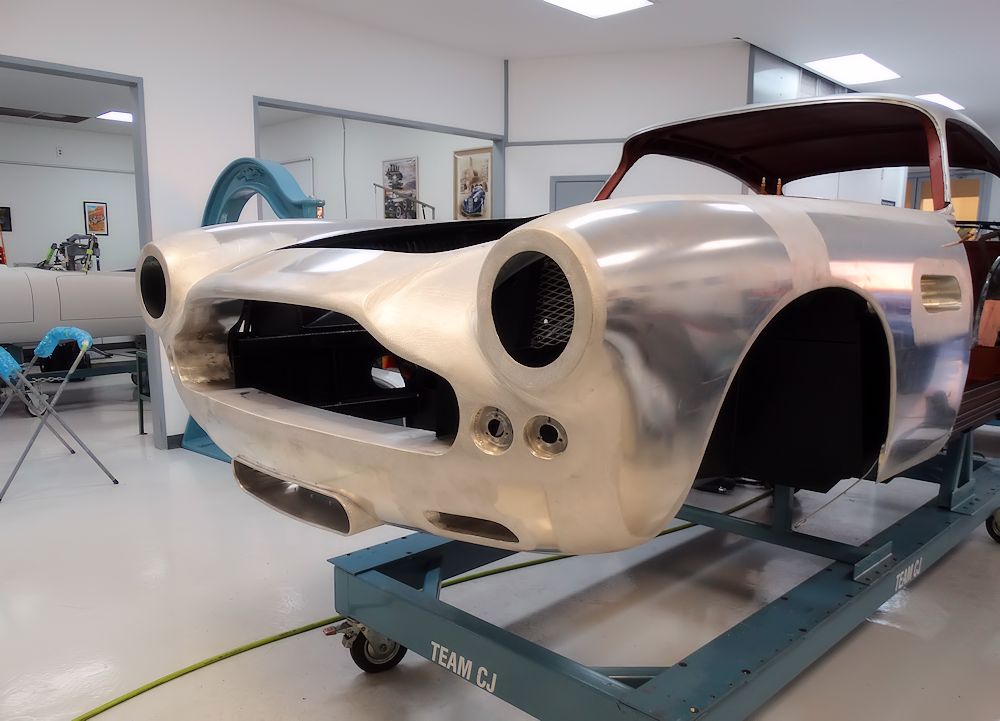
A freshly minted DB4 body shell.
 |
 |
 |
 |
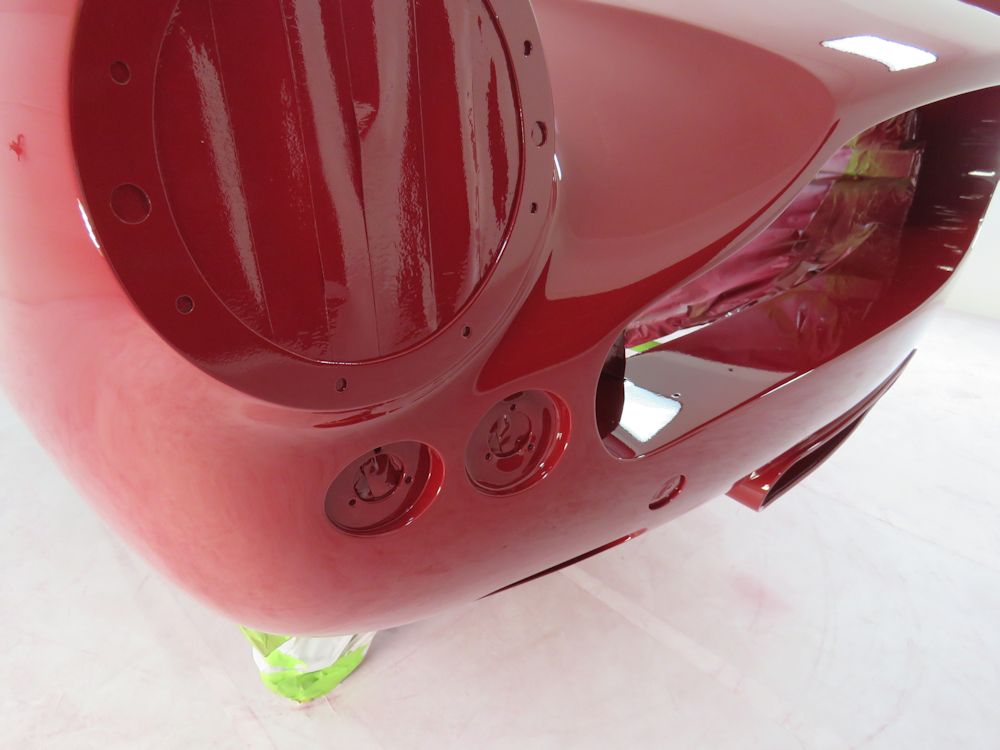
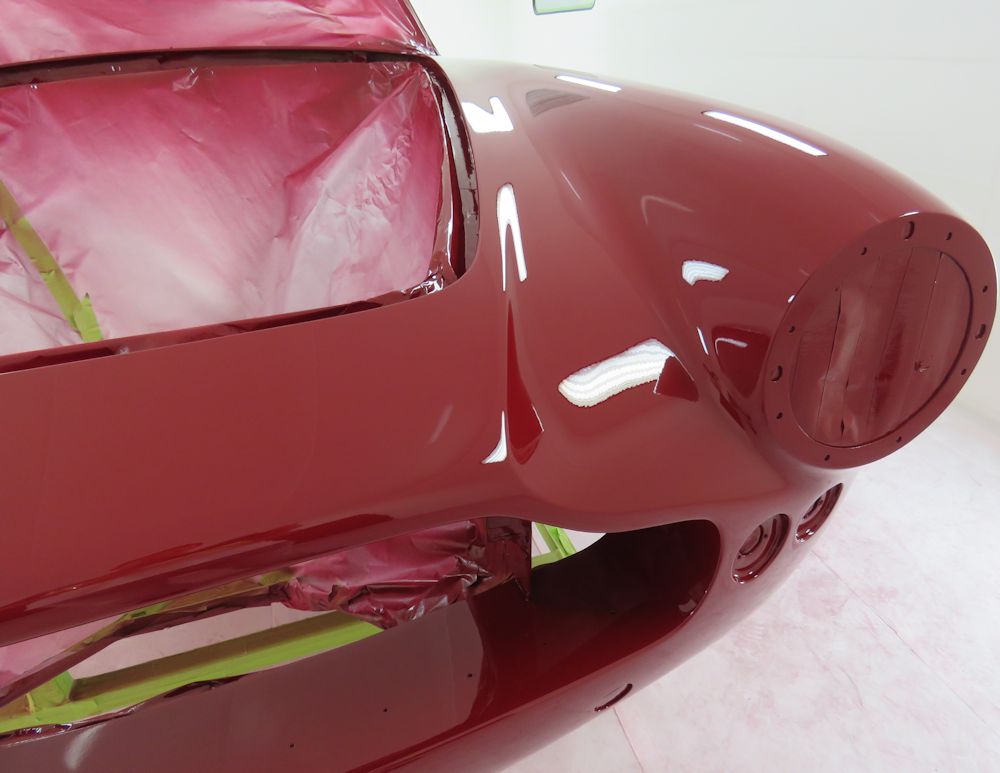
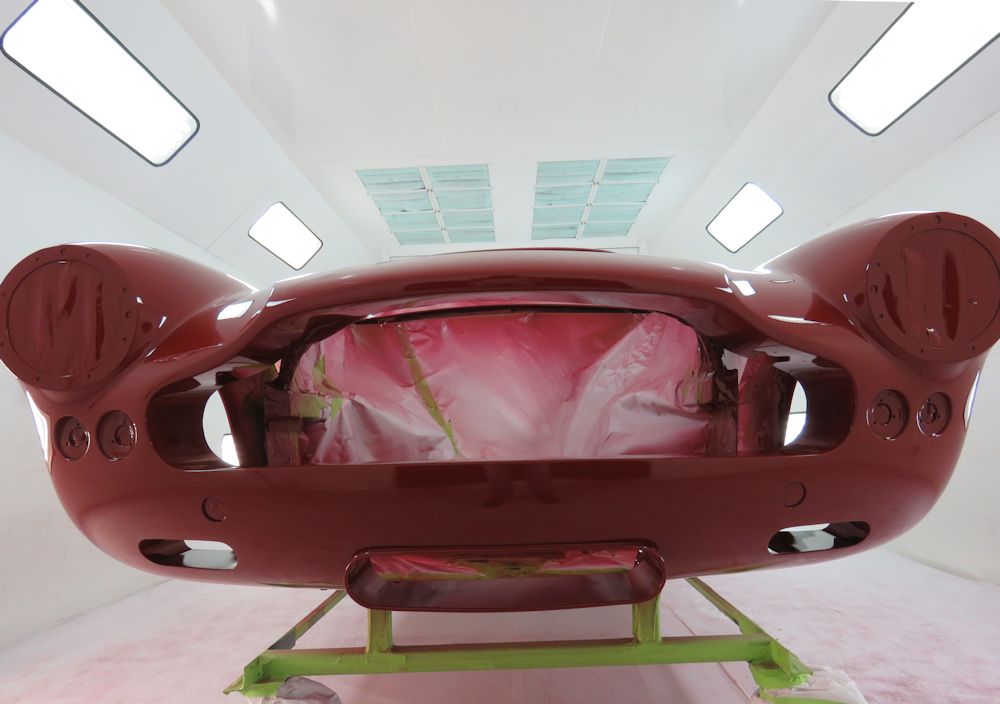
I am delighted to report that we have now painted the main bodyshell Peony Red. Gerardo did a magnificent job, ably assisted by his father, Guillermo. As a little background, Guillermo Lopez used to paint all our CJ restoration cars before he handed over the baton to Gerardo, several years ago. Guillermo is widely respected as one of the most technically gifted painters in the state, often referred to within the paint industry simply as 'Maestro'. He now works as a senior technical adviser to Finish Master, who supply CJ with our Spies Hecker paint and primer products.
After 8 years with Team CJ, Gerardo has now forged his own well deserved reputation as a master painter at the very top of his craft. Nonetheless, when we have the opportunity to have the old Maestro come in and assist, we are always glad to welcome him back!
Enzo Ferrari was often asked which was the best car he ever built. His reply was always that it would be the next car that he builds. The body and paintwork on this car is spectacular. It is, quite simply, the best we have done...so far.
 |
 |
| Guillermo Lopez wiping the car down one last
time before Gerardo applied the paint |
Two generations, two huge talents |
 |
 |
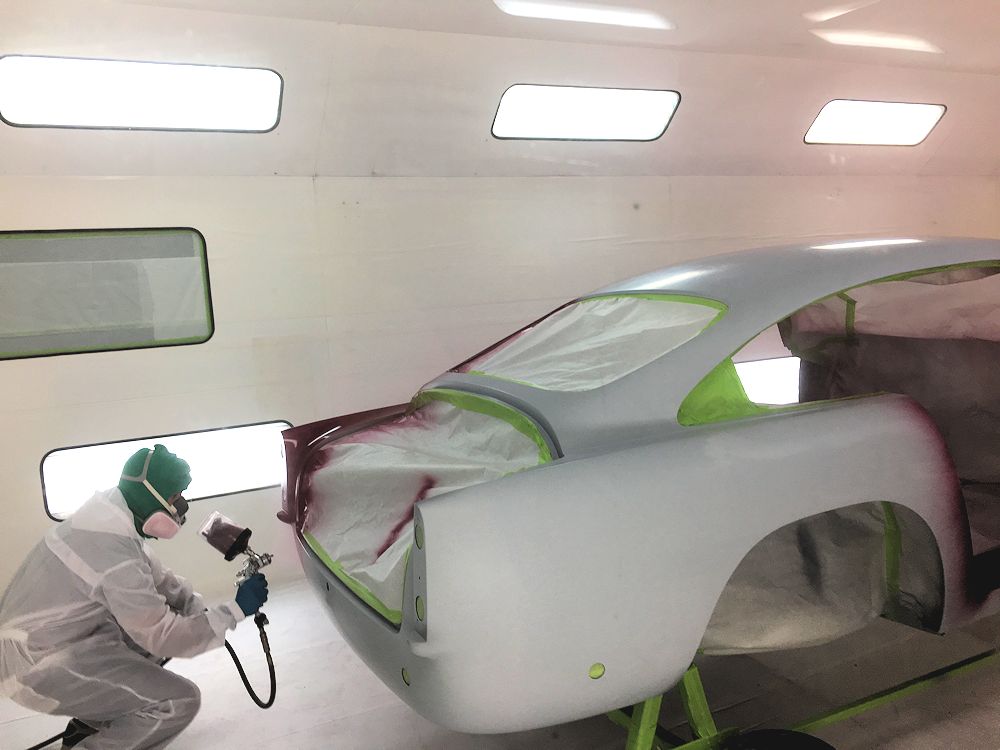
| View through the booth window - Gerardo
applying the first of the Peony Red |
|
 |
 |
| Several hours later, the car is done |
|
 |
 |
| 4 coats of Peony Red base and 3 coats of
clear |
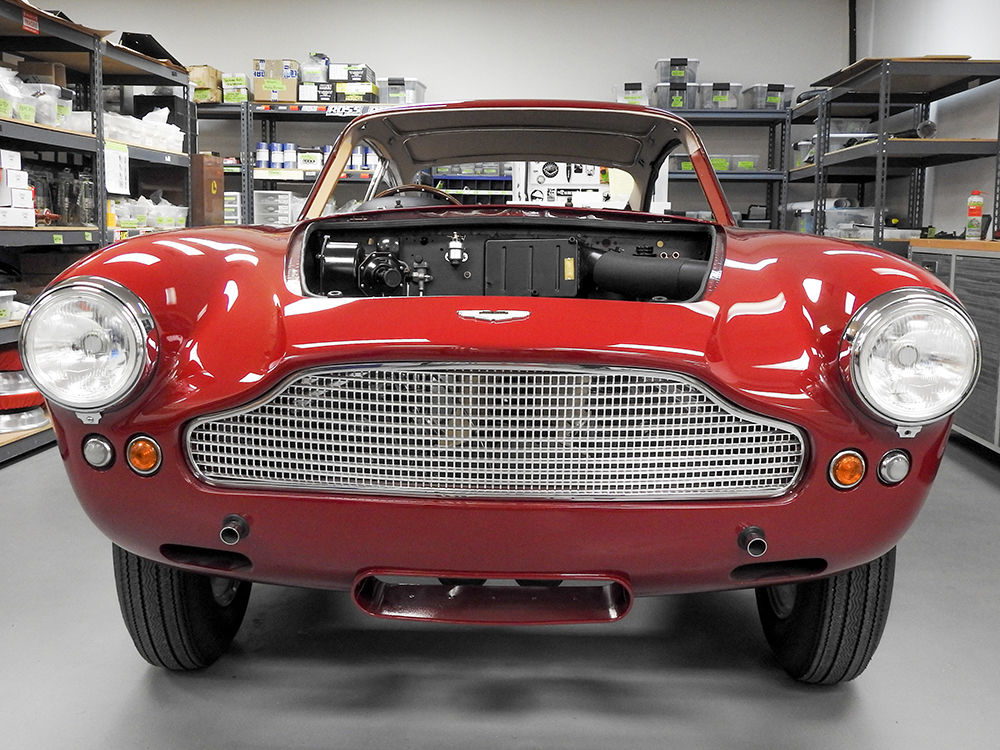
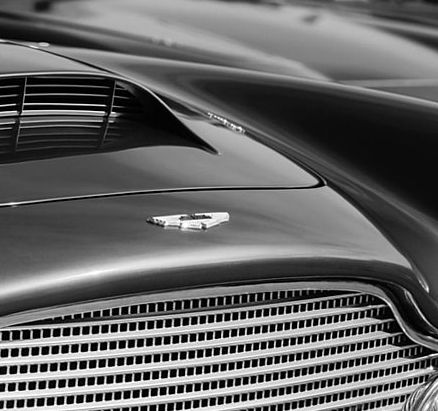
One of the most famous 'faces' in the automotive world |
 |
 |
| The body work beneath the paint is flawless |
|
 |
 |
 |
 |
 |
 |
 |
 |
 |
 |
 |
 |
| Time to paint the doors, bonnet and boot lid |
Your car has now been set up in the booth for final paint application!
 |
 |
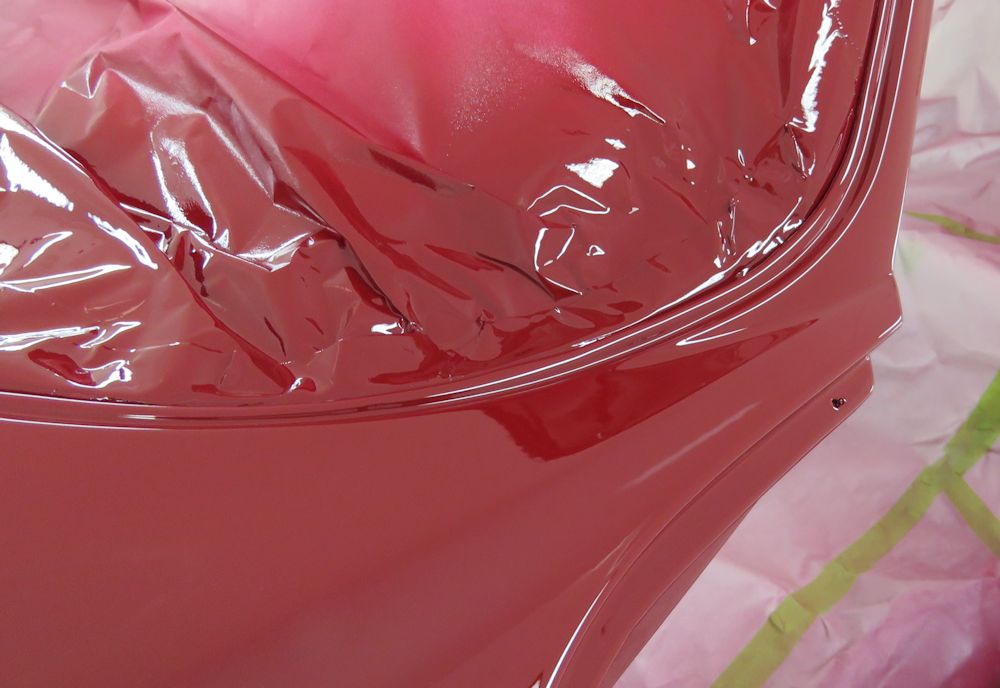
| Car now moved to the paint booth, about to be masked for final paintwork |
It has taken literally thousands of hours of
work to get to this paint |
 |
 |
 |
 |
 |
 |
 |
 |
| Watch this space! |
Last night I was delighted to receive this photograph from an enthusiast in Huddersfield, England. The photo shows our DB4 on display on the David Brown stand at the Poznan Trade Fair in June 1960. The story behind the car being on display at the Poznan Show is detailed beneath the photo.

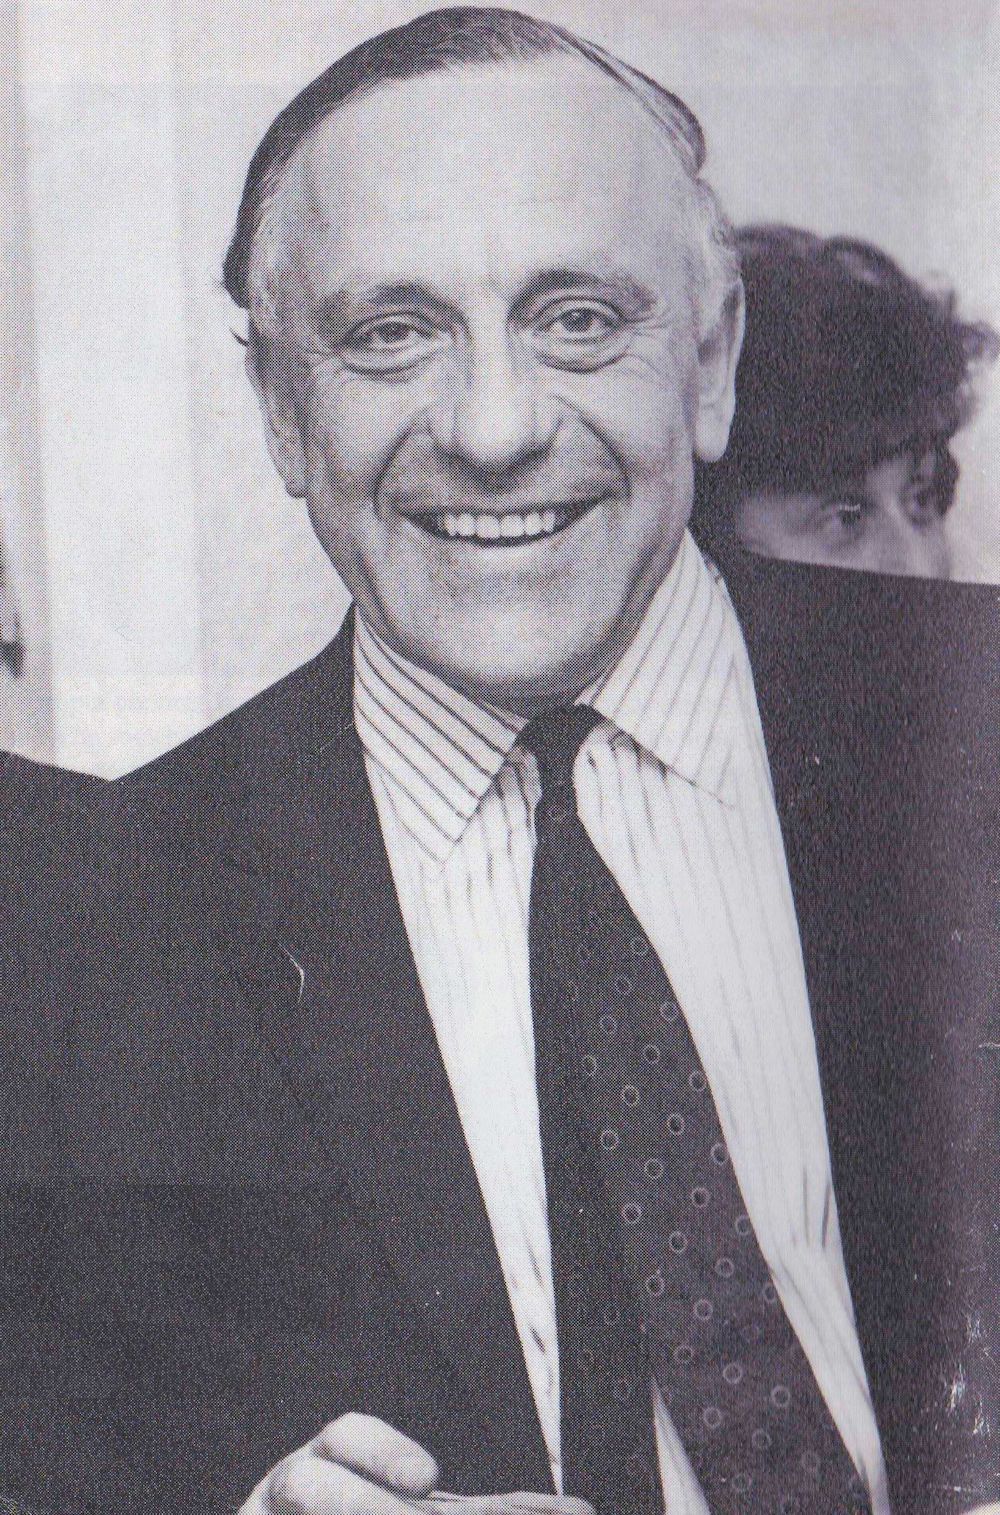
Several years ago I received the following letter from the first owner of the DB4, Helmut Mainz, after putting out an appeal in the Yorkshire Post newspaper.
Subject: Your letter to the Yorkshire PostRe your letter to the Yorkshire Post and the Telegraph & Argus asking for info about a DB4 Aston Martin car which was sold in 1960 by David Brown of Huddersfield to A Mainz & Son of Bradford, of which I was the owner:
Unfortunately the car did not perform to expectations and I did not keep it for long. On the suggestion of David Brown (the then owner of Aston Martin) I drove the car to Poznan in Poland where both David Brown and A Mainz & Son were exhibitors at a trade fair. The car was put on display on the David Brown stand, presumably as light relief from the heavy tractors they were famous for.
My return journey from Poland took me via Berlin, Hanover and Hook van Holland. Between Poznan and Berlin the roads were very poor at that time except for the last 20-30 miles into Berlin which had been the prewar AVVS car racing track. Probably to vent my frustration after miles of Polish cobblestones I put my foot down only to be engulfed after very few minutes in clouds of steam from a blown cylinder head gasket.
I had to nurse the car back to Berlin where I was unable to find a replacement and instead had to wait around for several days for the makers to fly out the part. My upset was the greater because David Brown sought to put the blame on me for my failure to fit an "oil cooler" which they recommended to prospective clients who intended to use their cars at high speeds for sustained periods.
I felt that this should have been a standard fitting on such an expensive car and as a result of their nonchalant attitude I sold the car shortly afterwards.
Helmut Mainz
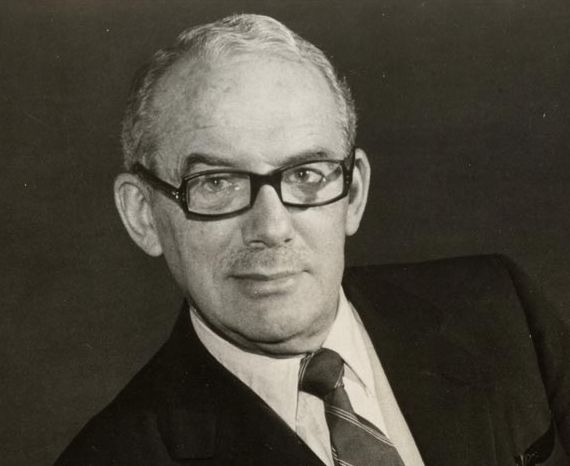
I subsequently spoke to Helmut Mainz at length on the telephone and he reiterated how disappointed he had been with the car, and in David Brown himself. It turned out that he knew David Brown personally and that it had been David Brown who persuaded him to allow his car to be displayed on the stand at the Poznan Trade Fair in June 1960. He was therefore somewhat annoyed when David Brown, in absolving himself of blame for the mechanical breakdown near Berlin, said that he (Mainz) should have specified the optional oil cooler when he ordered the car, if he was planning on using it for high speed continental cruising!
Apparently the unreliability of the Aston Martin put a strain on the relationship between these two titans of Yorkshire industry. Eventually, after numerous warranty issues, Mr Mainz traded the Aston against a Jaguar Mk II, which he remarked was a much better car...
 |
 |
| Helmut Mainz |
David Brown |
Cad plated brake components.
 |
 |
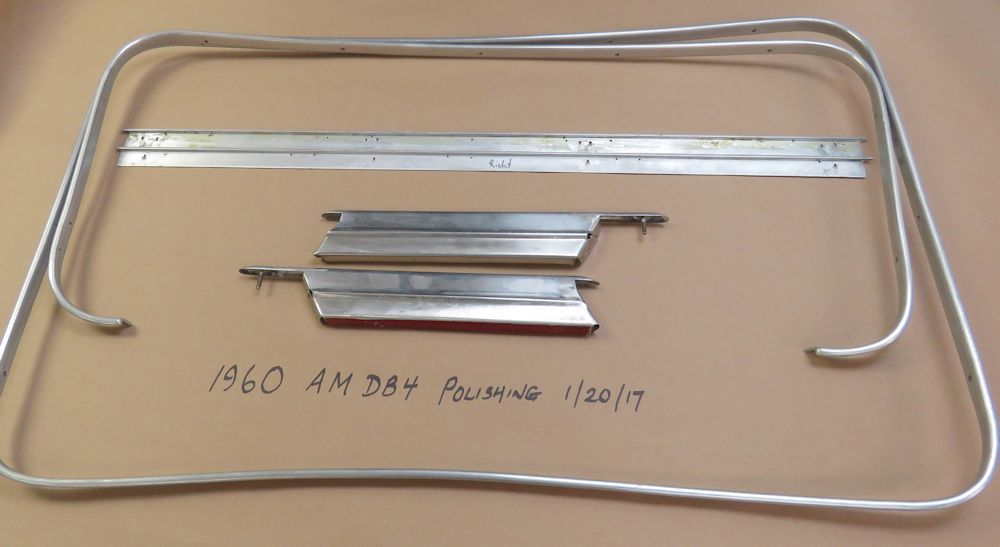
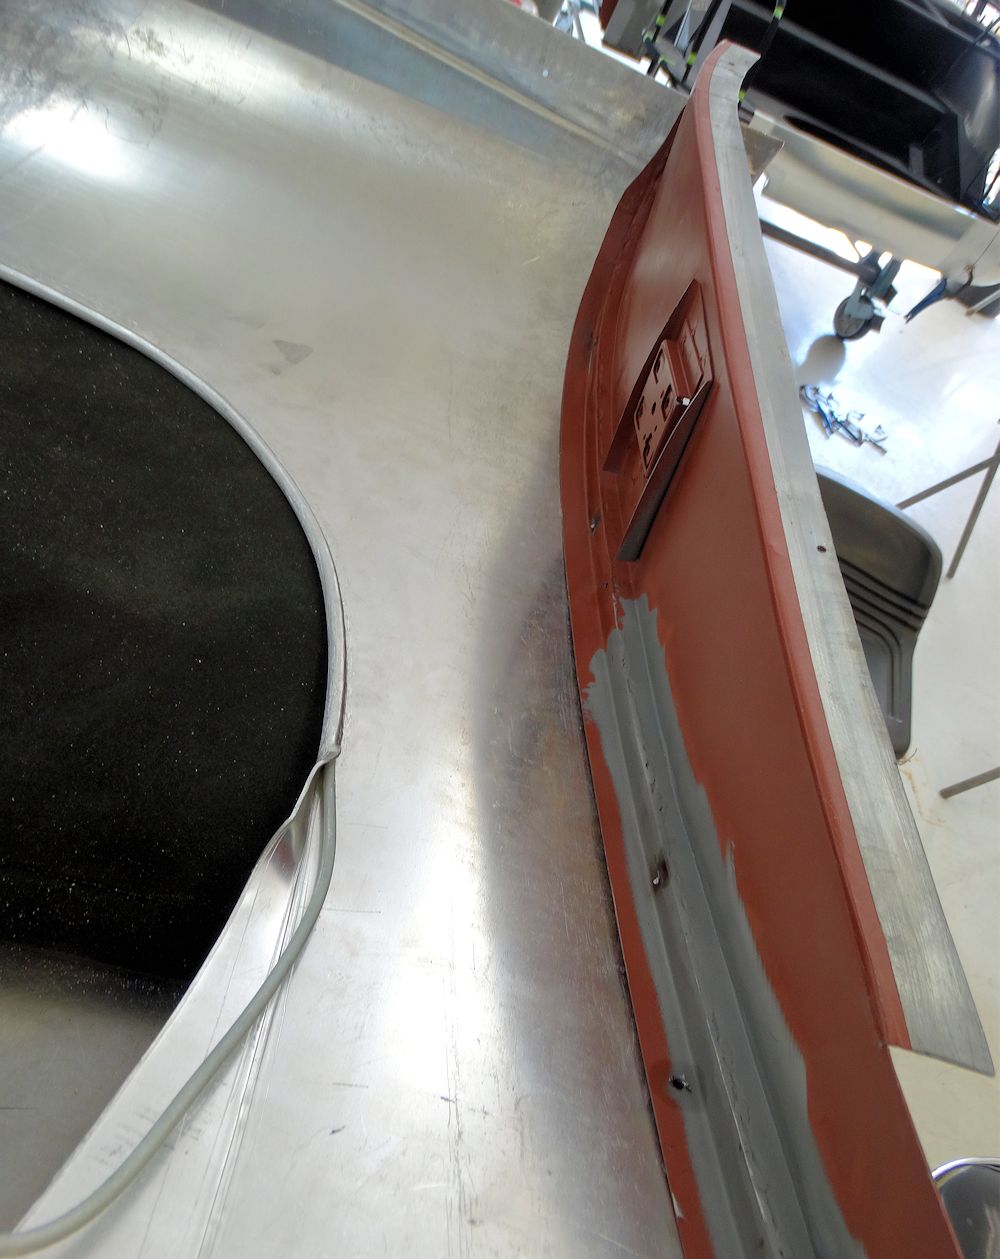
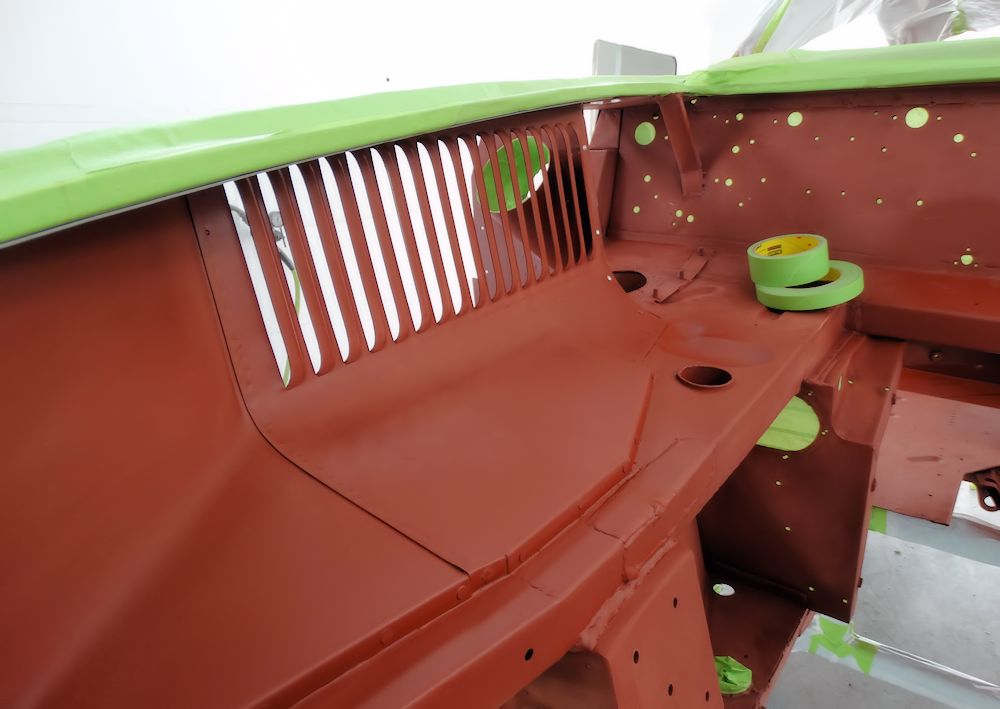
As we will be painting the DB4 Peony Red in the next few days, I have been busy comparing spray-outs against some original factory Peony Red paint. The only area of original factory applied Peony Red remaining on the car is on the underside of the fiberglass boot trim panel. The paint on this panel undoubtedly dates to 1959, when the car was first painted at the Newport Pagnell factory.
The third and fourth photos in the sequence below show the boot lid trim panel, and me holding a fresh Spies Hecker Peony Red spray-out against the panel. The second photograph below shows one of the front wing strakes wearing Peony Red over spray, almost certainly applied July 7, 1961, when the car was "re-cellulosed the same colour" at the factory following an accident.
 |
 |
| Aluminum roof panels and stainless steel
wing strakes about to be polished |
Peony Red over spray on wing strake can be
dated thanks to factory service records |
 |
 |
| Fiberglass boot lid trim panel still wears
Peony Red applied at Newport Pagnell in 1959 |
Comparing Spies Hecker Peony Red spray-out against original factory paint |
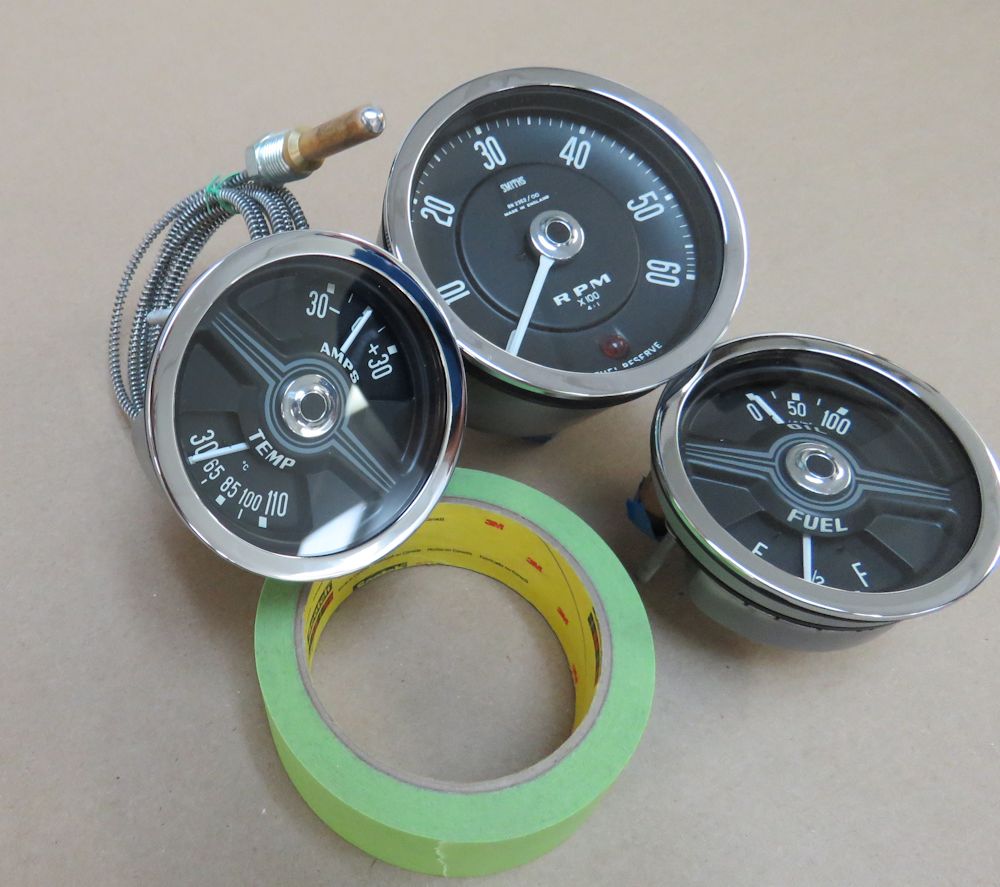
Rebuilt tachometer, fuel, temperature, amp and oil pressure gauges.
 |
 |
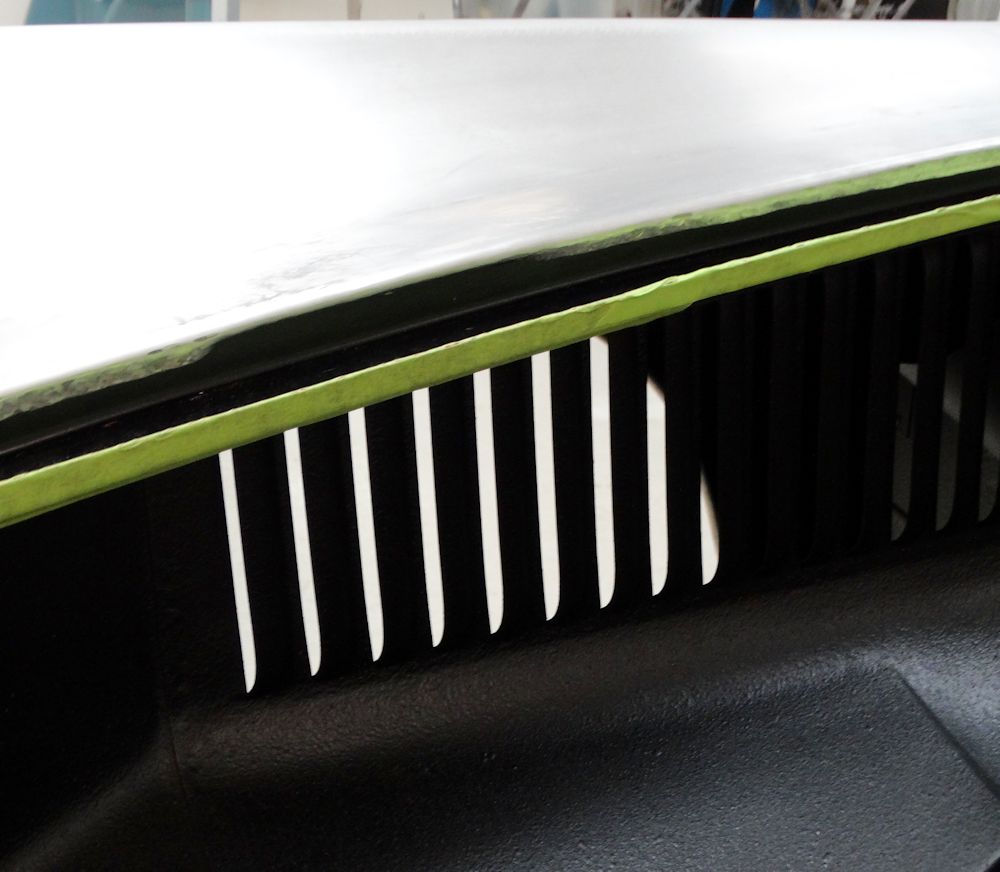
When this DB4 first came into my care, it was missing the chrome grille that sits inside the air intake on the top of the bonnet. Over the years I have seen two types of grille in the S1 DB4 bonnet - a perforated steel sheet and a slatted version. I wasn't sure which was correct for our car (chassis number 206), so I contacted James Forshaw at Aston Service Dorset. Not for the first time during this project, James came up trumps and gave me definitive information about which grille I should have. See excerpt from the DB4 build book, below.
 |
 |
| The first 99 cars had this perforated sheet
steel style of grille in the bonnet air intake |
From chassis 201 onwards this slatted style
grille was installed |
 |
 |
| Definitive proof that our car (# 206) should
have the slatted grille |
New grille supplied by Aston Service Dorset
will be adjusted for fit and chrome plated |
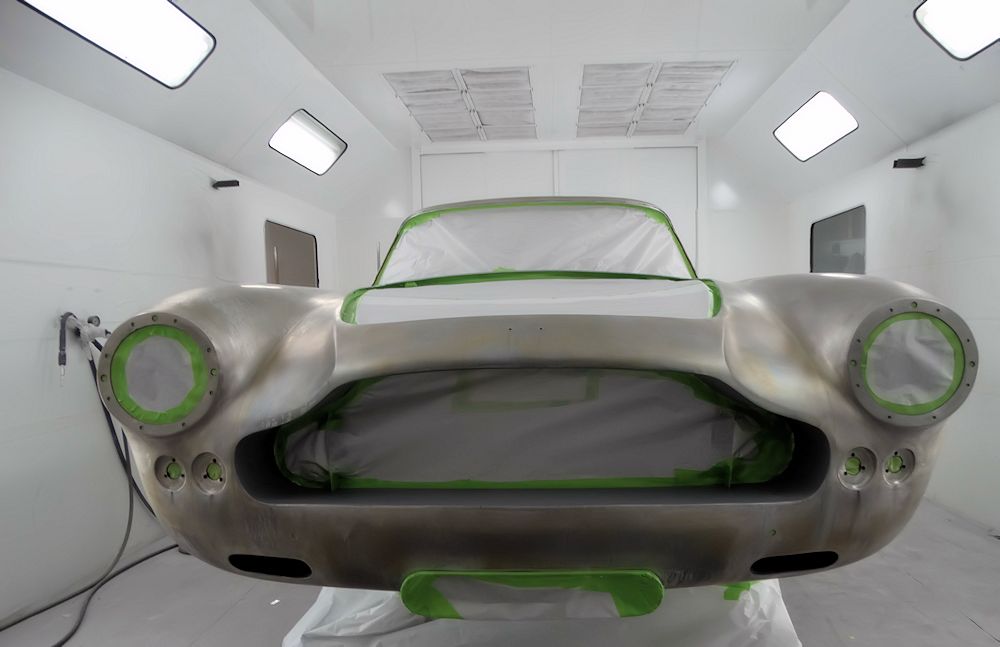
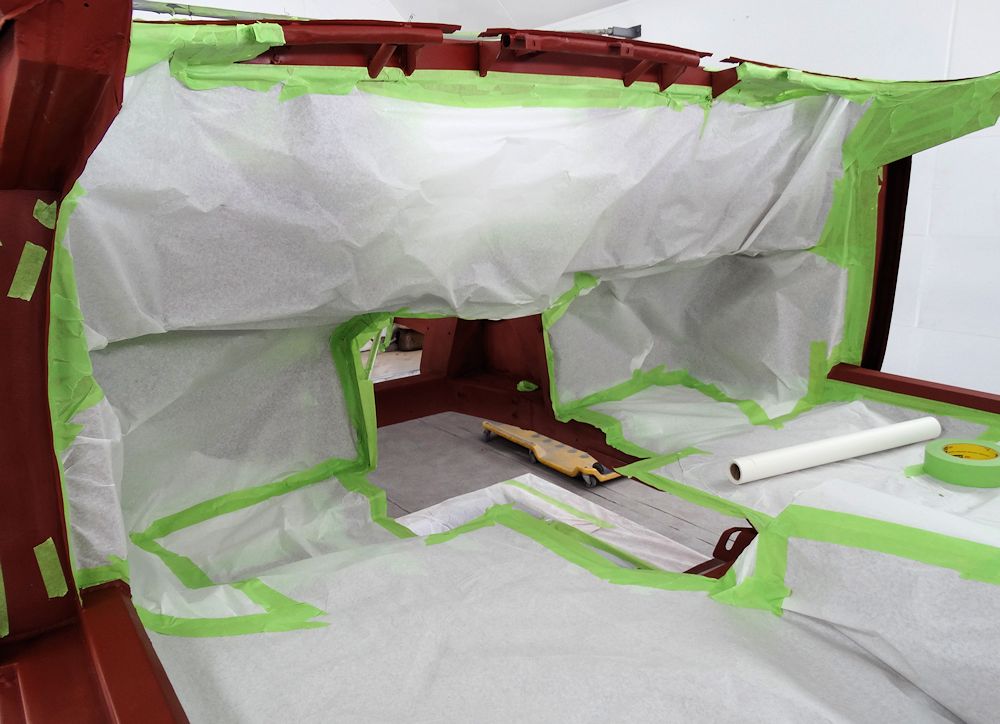
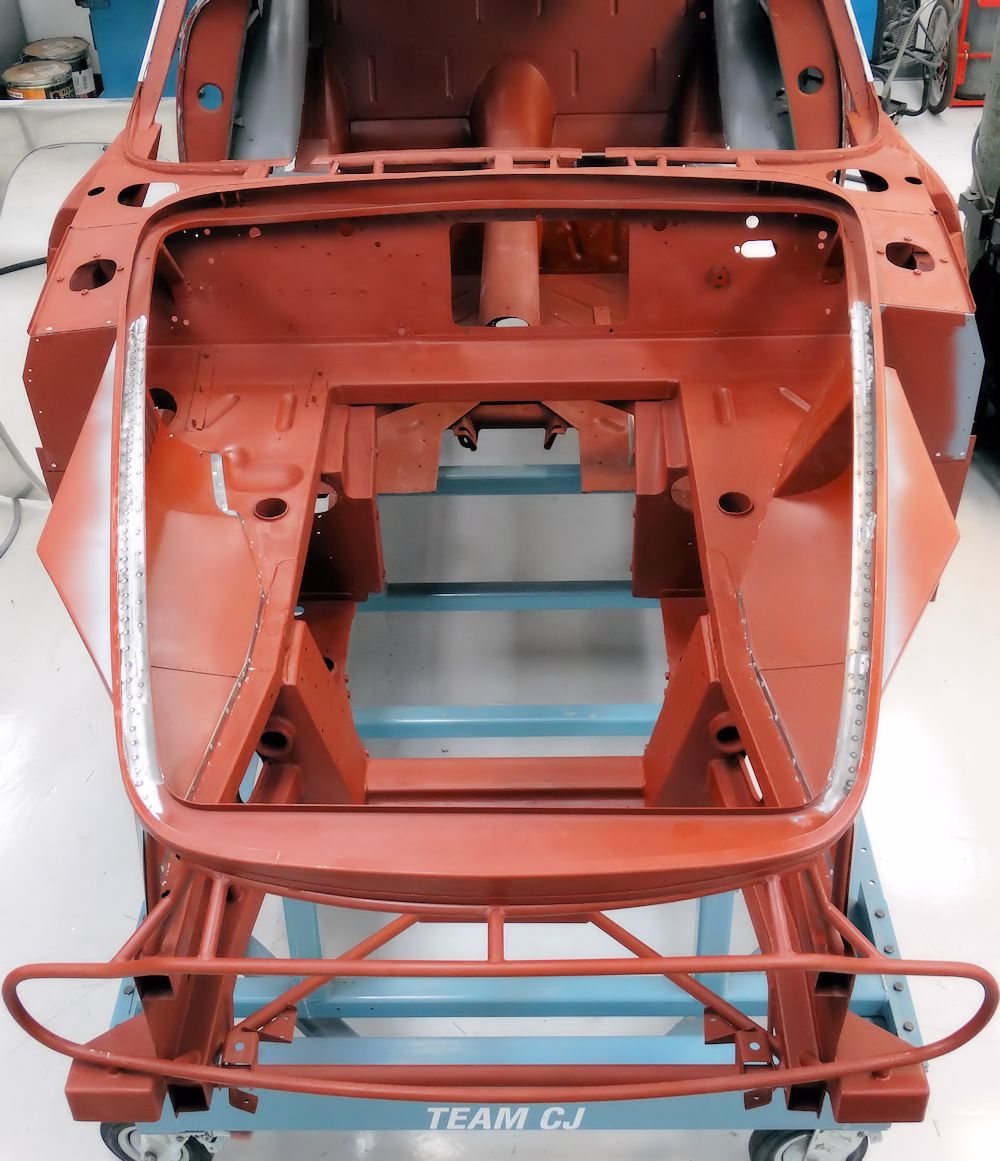
With all bodywork now complete, the Aston has been moved into the booth for priming.
 |
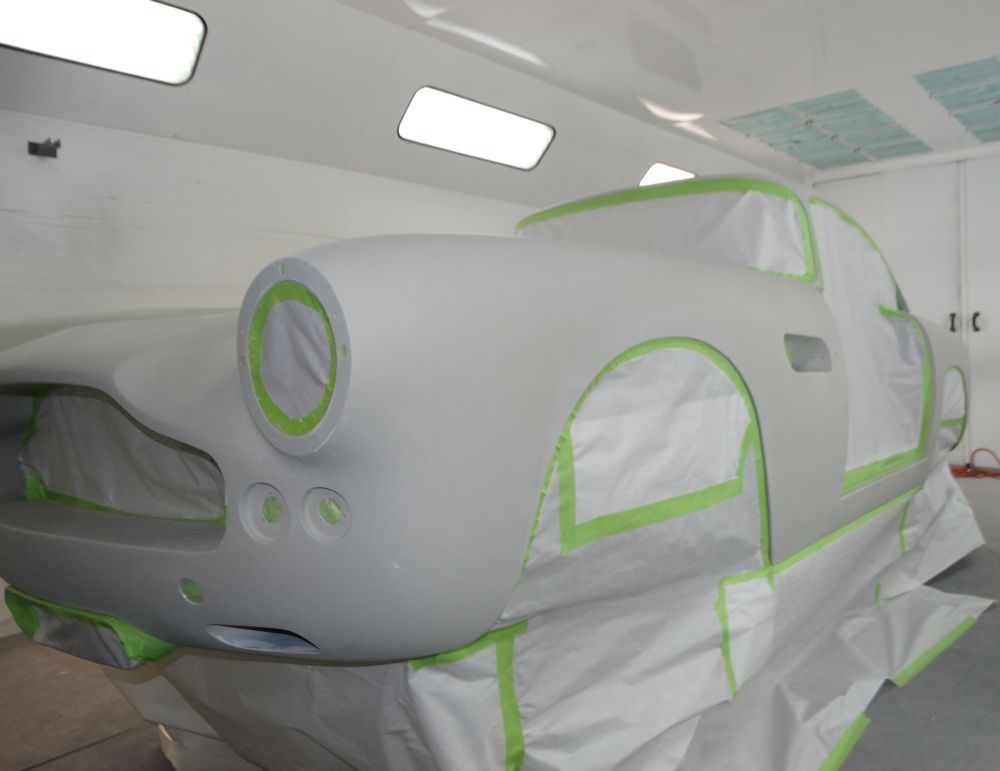 |
 |
 |
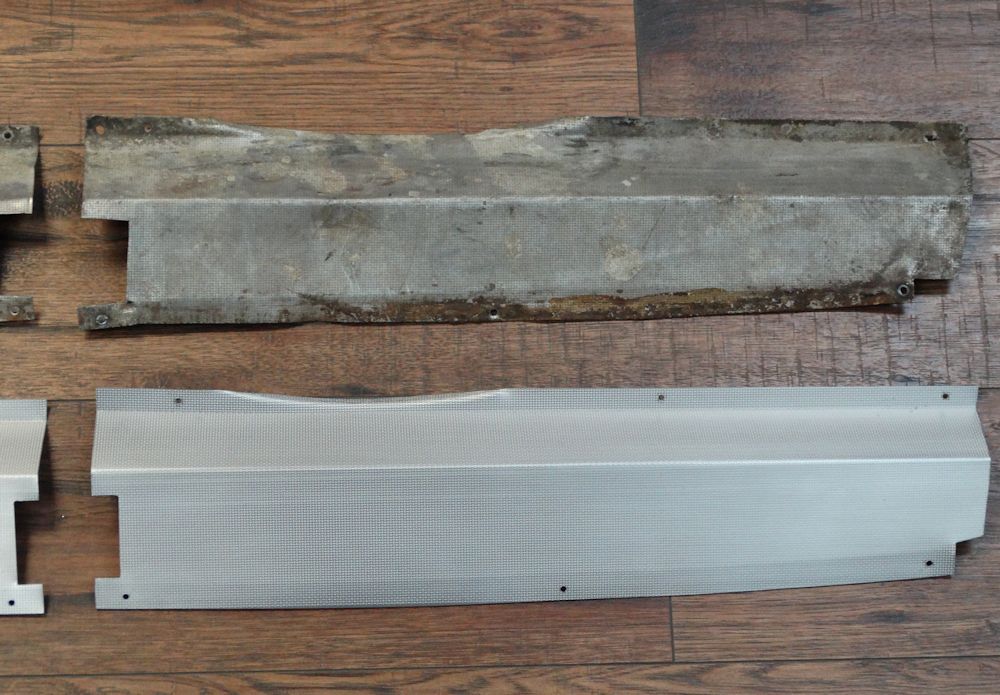
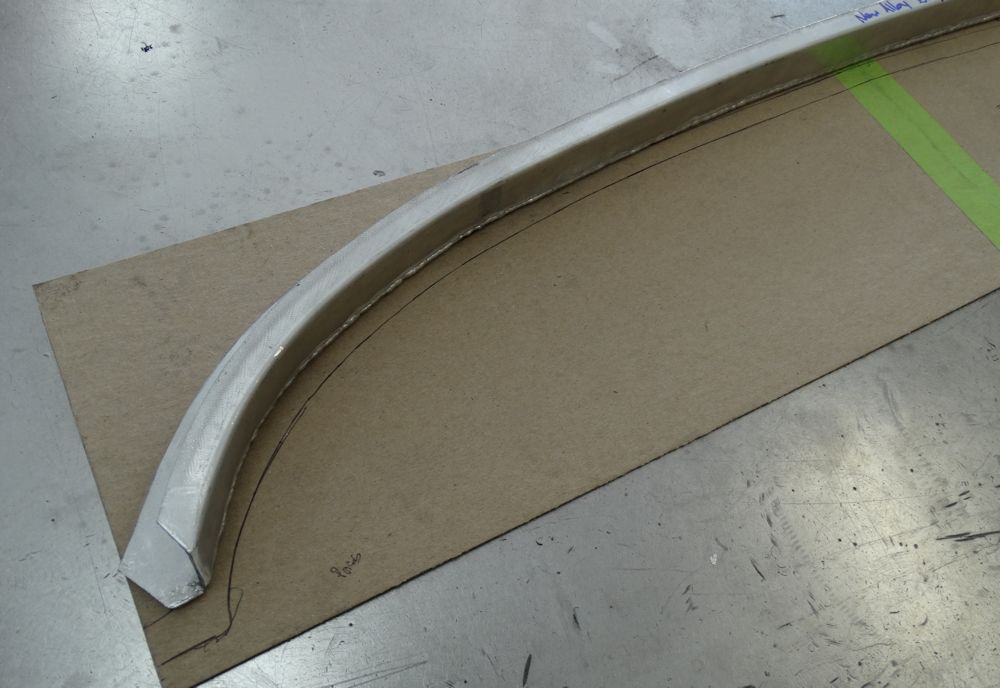
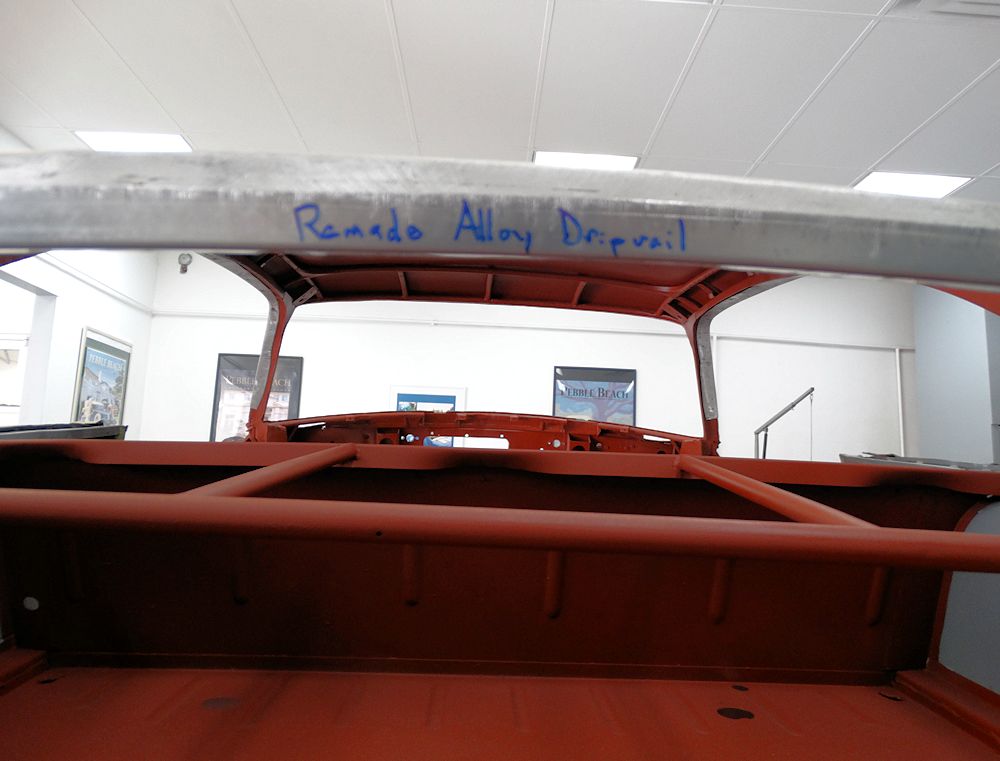
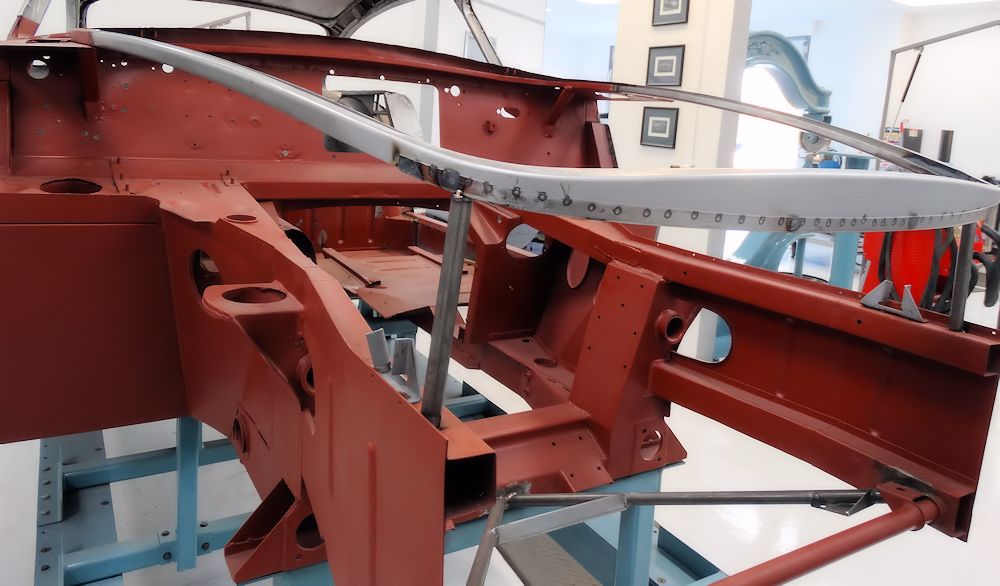
Several people have asked me how well the new alloy trim panels replicate the original cross-hatch pattern, and I am pleased to report that Aston Martin Heritage have done a fantastic job. The second photo below shows a comparison between old and new panels. Even under extreme scrutiny, you would be hard pressed to spot any significant difference. Once installed on the car, it would be impossible to identify new versus old trim.
 |
 |
| New Aston Martin Heritage panel is an
excellent facsimile of the original |
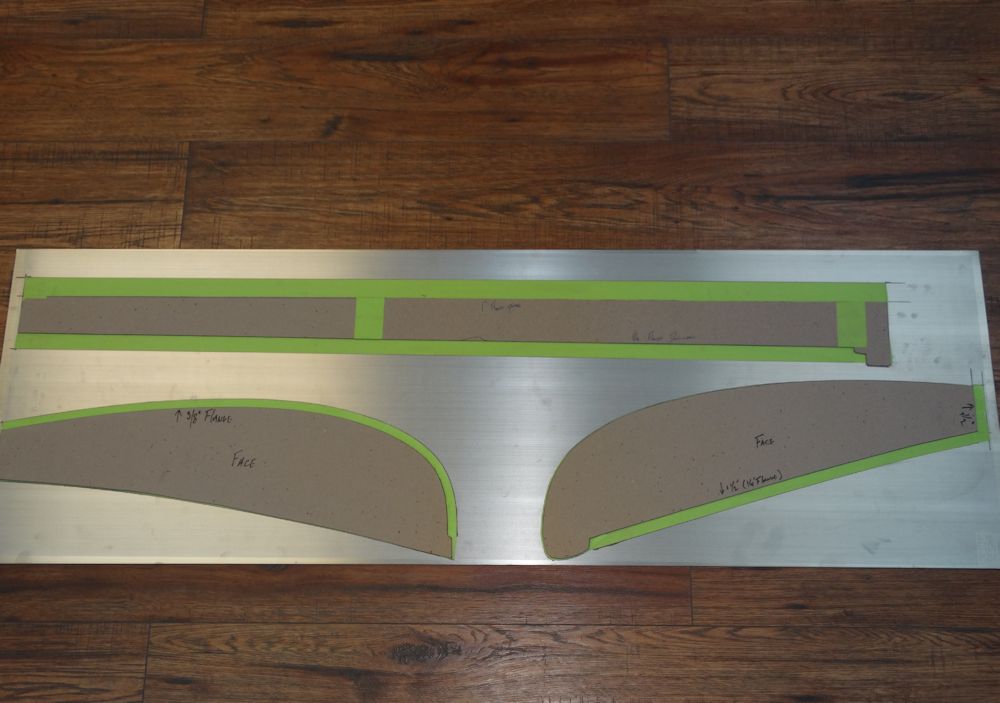
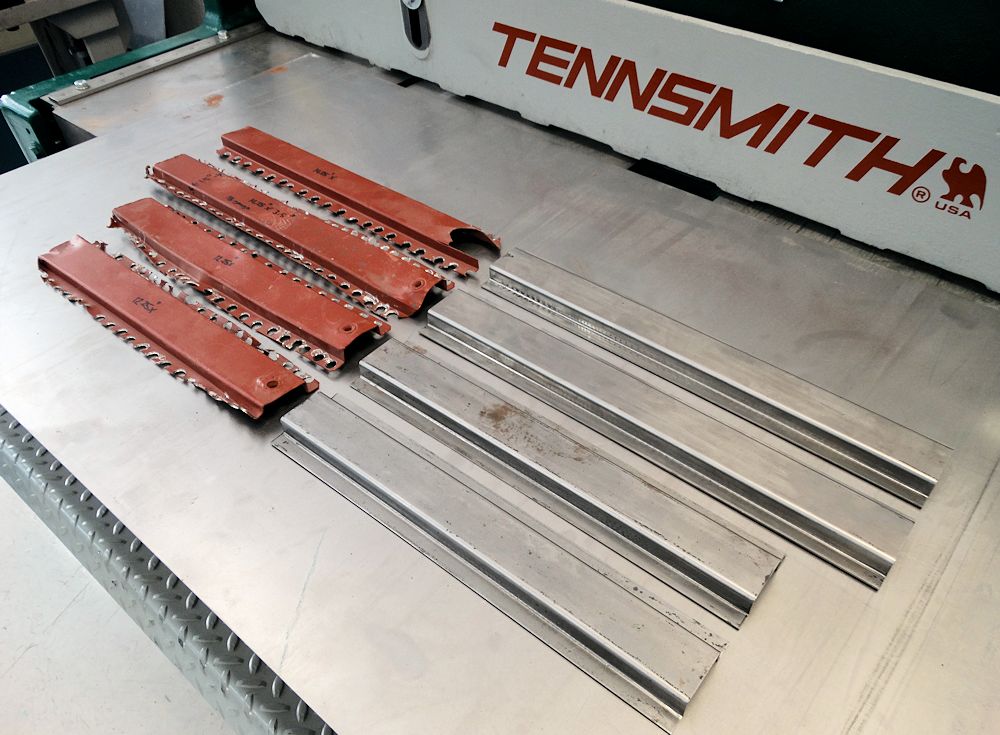
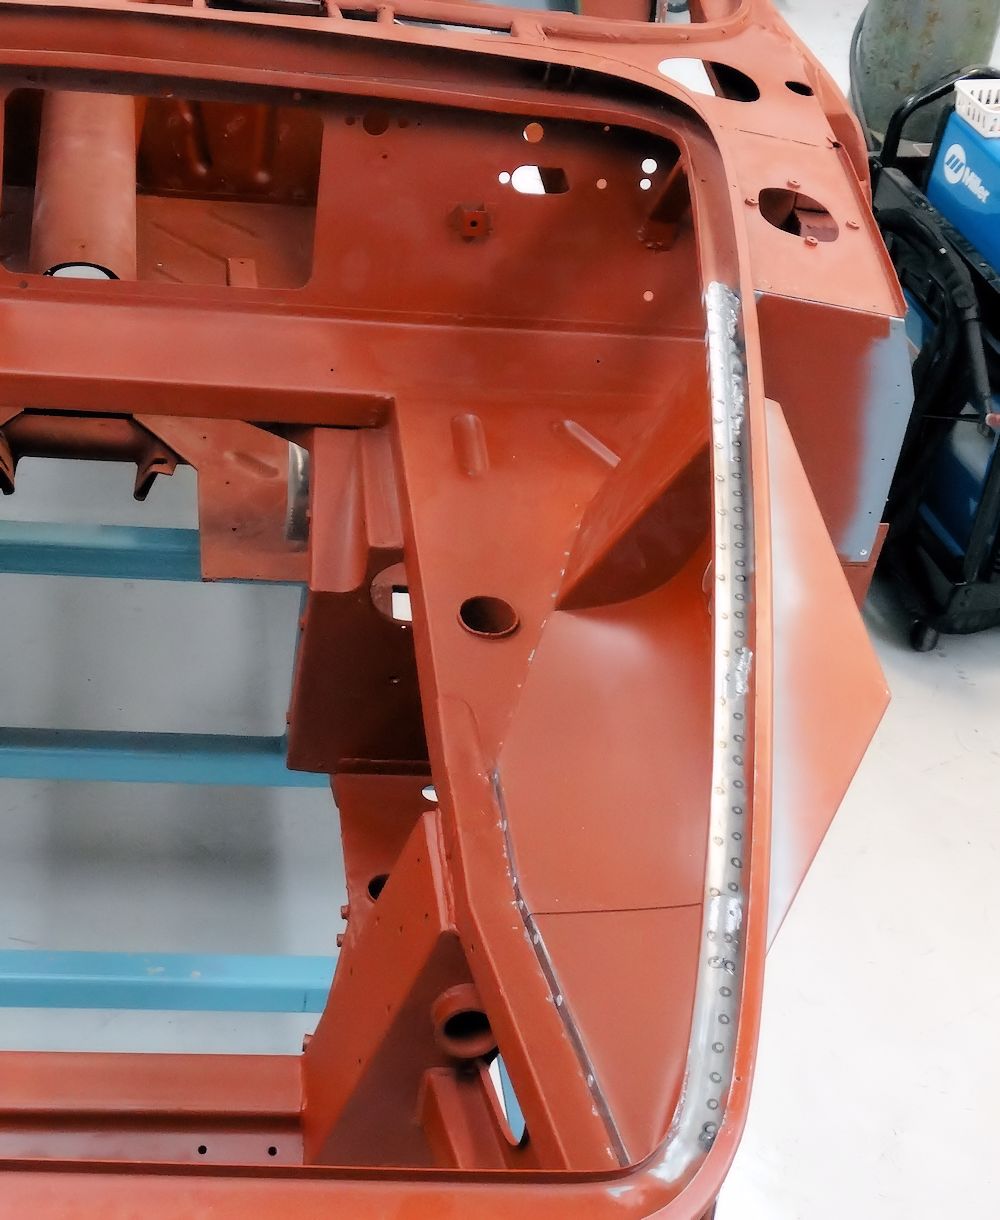
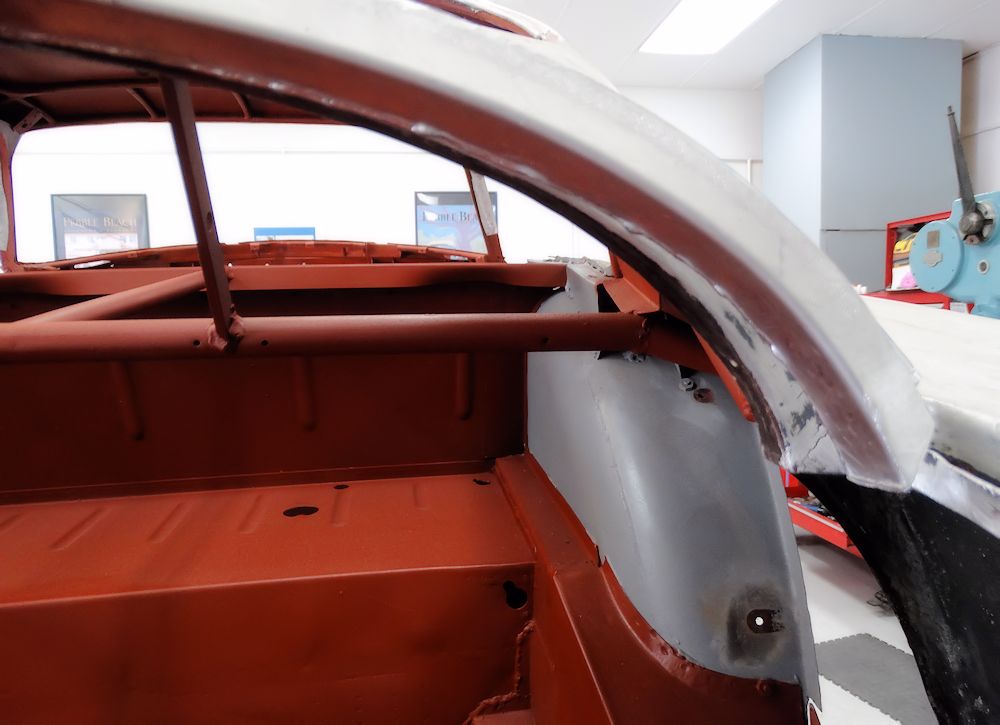
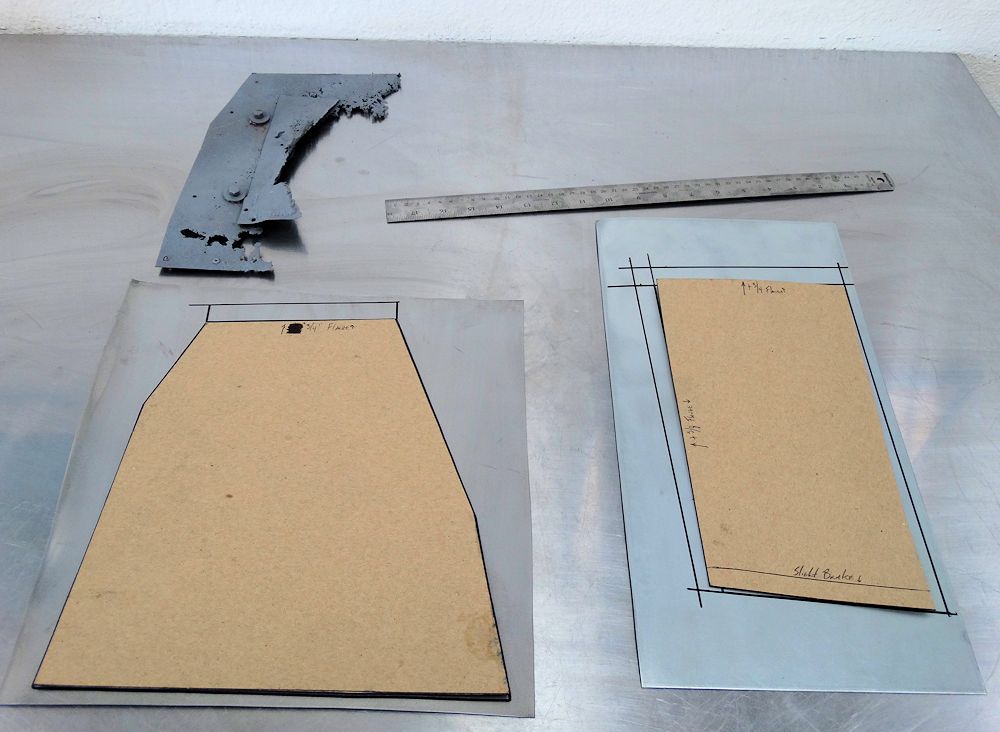
Fabricating new cross-hatch aluminum trim for the door shut panels and boot opening finisher panels. Thankfully the raw sheets are available from Aston Martin Heritage, and Jake has been fabricating and trial fitting the panels as one of his last jobs before handing the car off to Gerardo for painting.
|
 |
| AM Heritage are re-manufacturing the
cross-hatch aluminum trim |
Making templates from the originals |
 |
 |
 |
 |
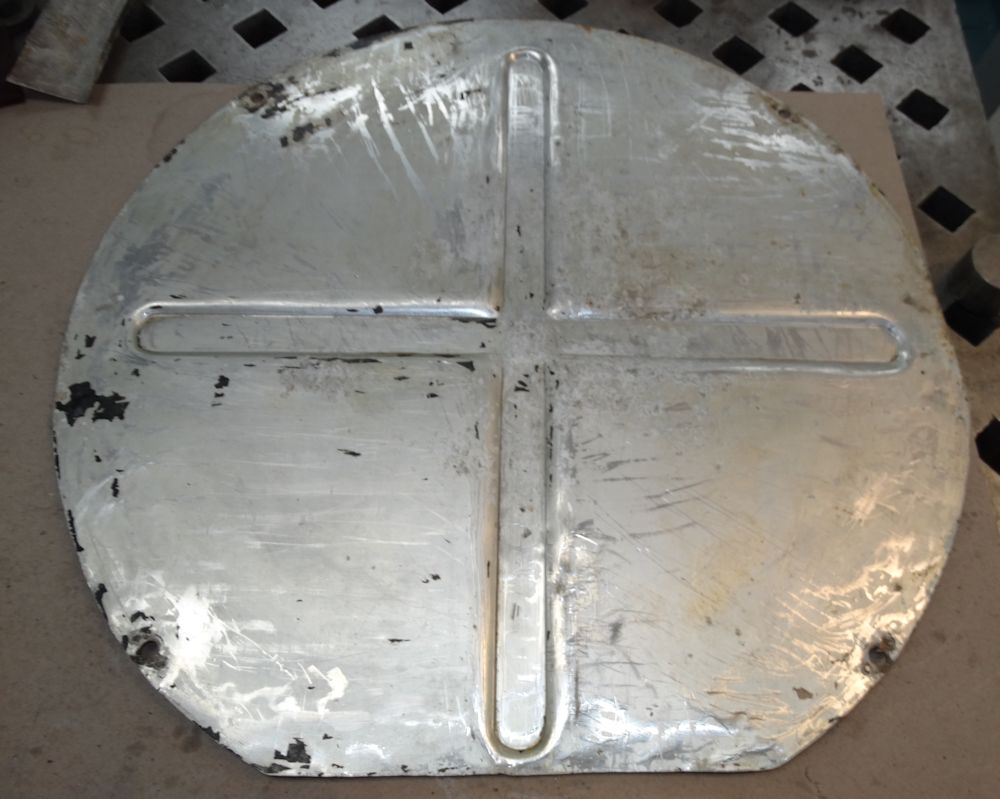
| Making the boot closing panels |
|
 |
 |
| Trial fitting newly made sill panels |
Making the door shut face trim panels |
 |
 |
 |
 |
Restoring the original spare wheel cover...
 |
 |
 |
 |
 |
 |
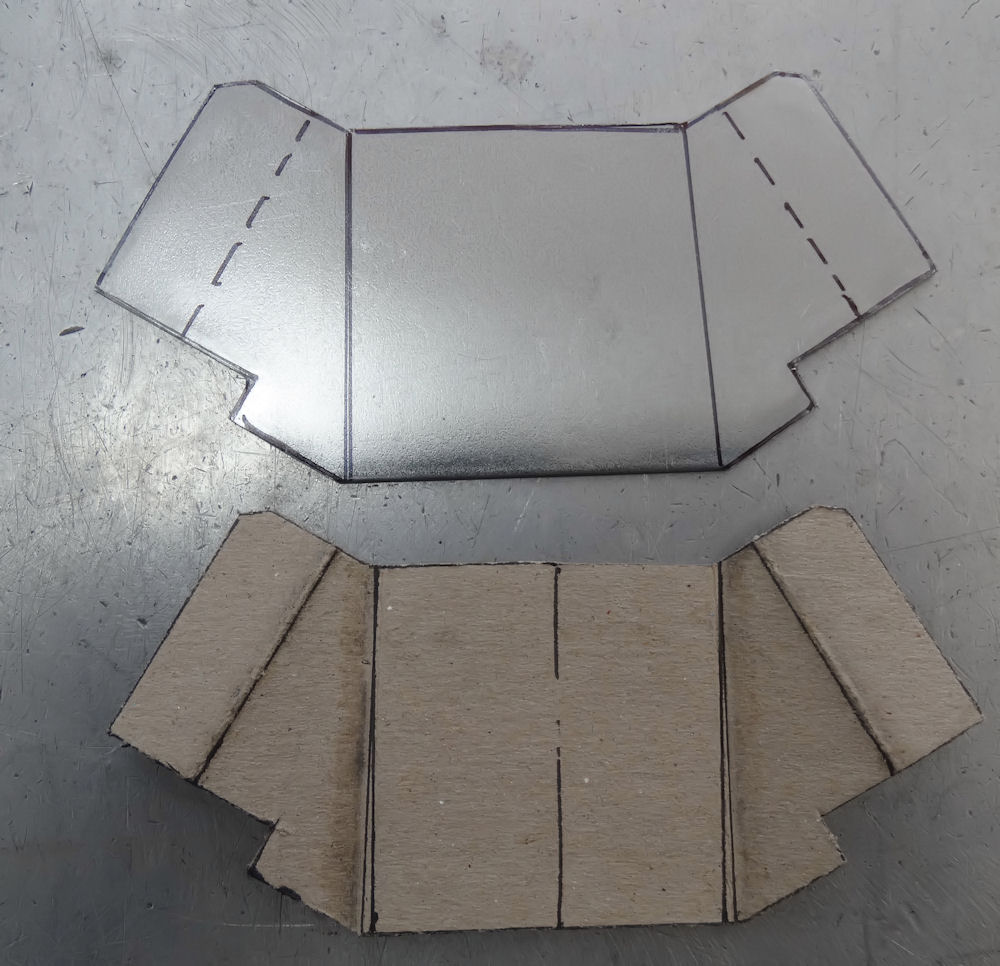
Restoring original door and rear quarter light glass, fabricating side filler panels for the boot compartment...
 |
 |
| Quarter light glass had several scratches
which thankfully sanded and polished out |
|
 |
 |
| We were careful to save the original date
coded Triplex etching |
Door glass had multiple scratches, but
responded beautifully to careful sanding and polishing |
 |
 |
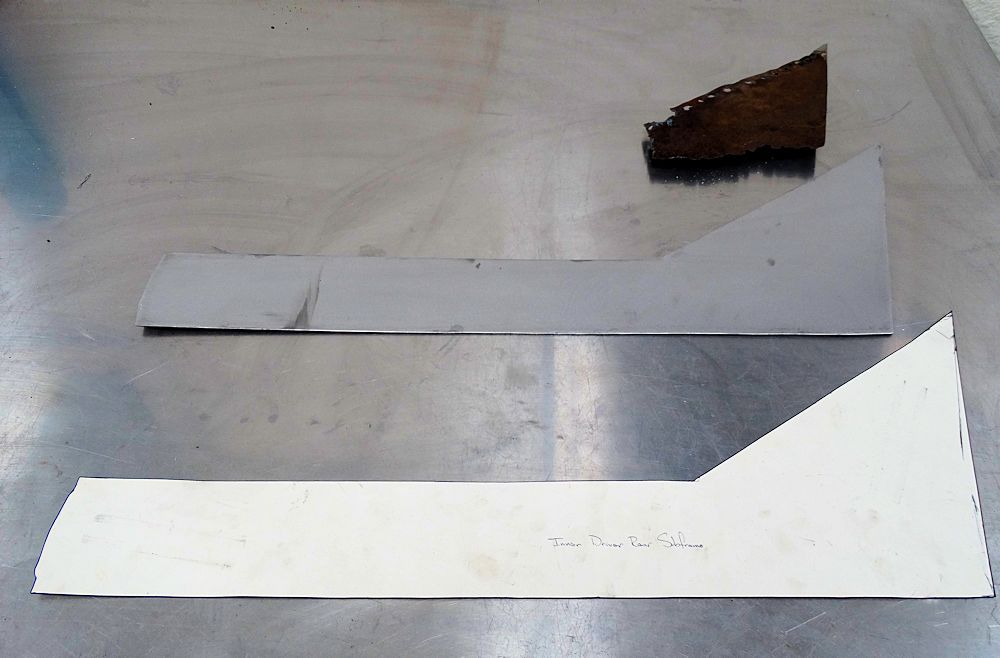
| Boot side filler panel will be replaced |
Making a card template from the original piece |
 |
 |
 |
 |
 |
 |
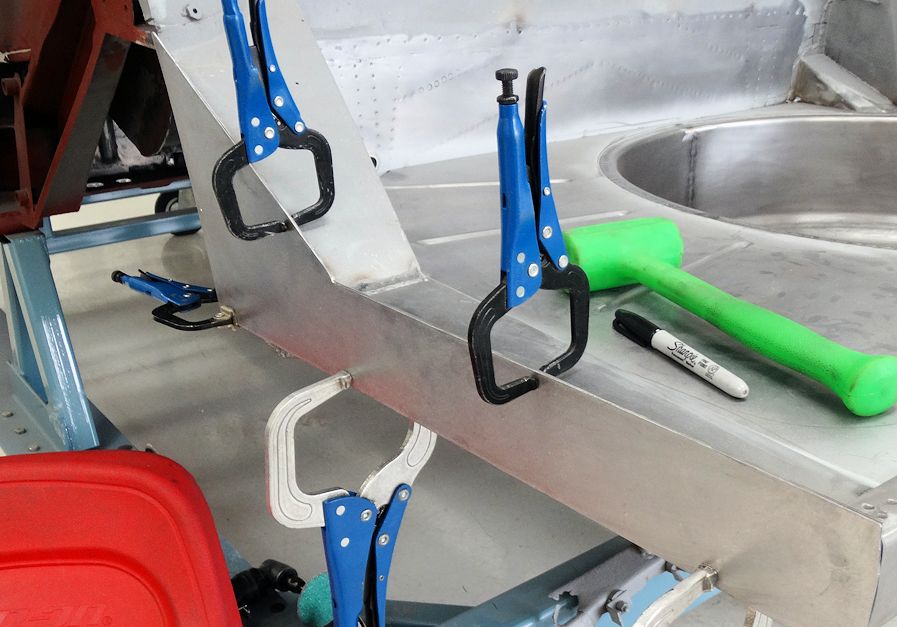
| Trial fitting the new panel |
|
 |
 |
| Beveling the holes to replicate the original panel perfectly |
|
 |
 |
| Dzus fasteners used to secure panel, per
original |
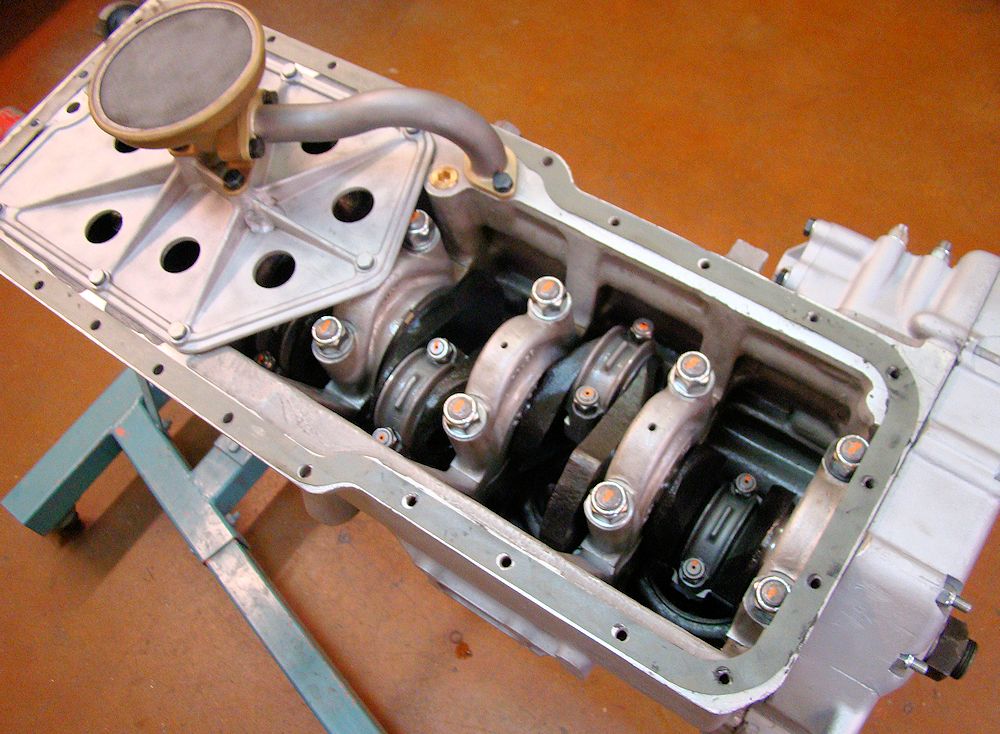
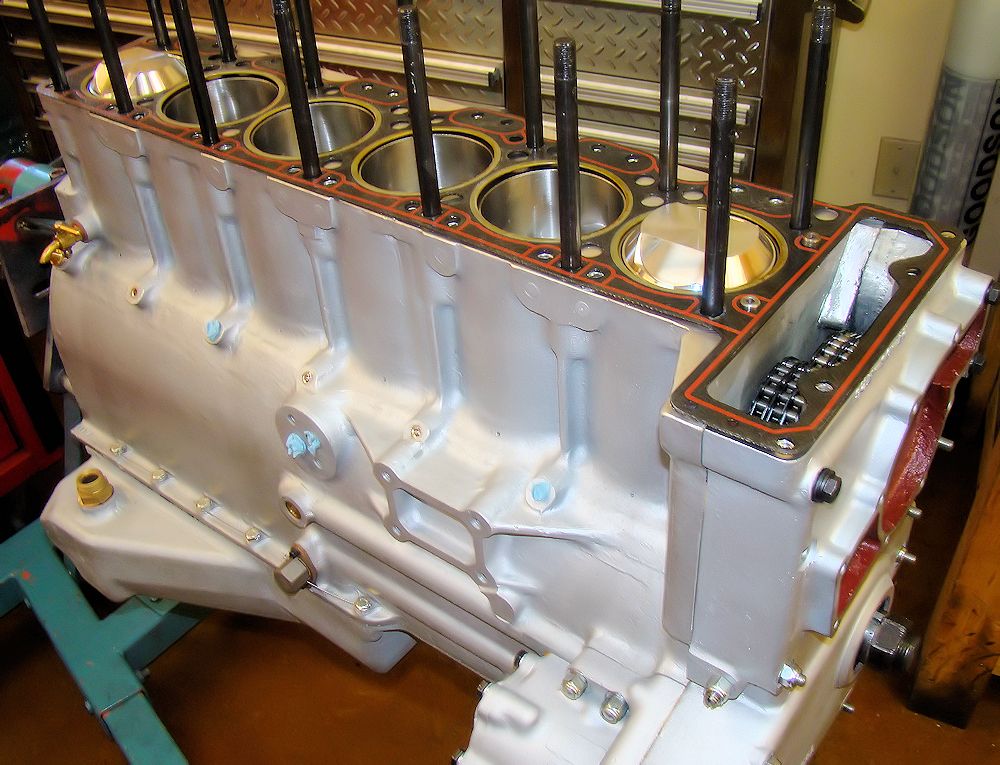
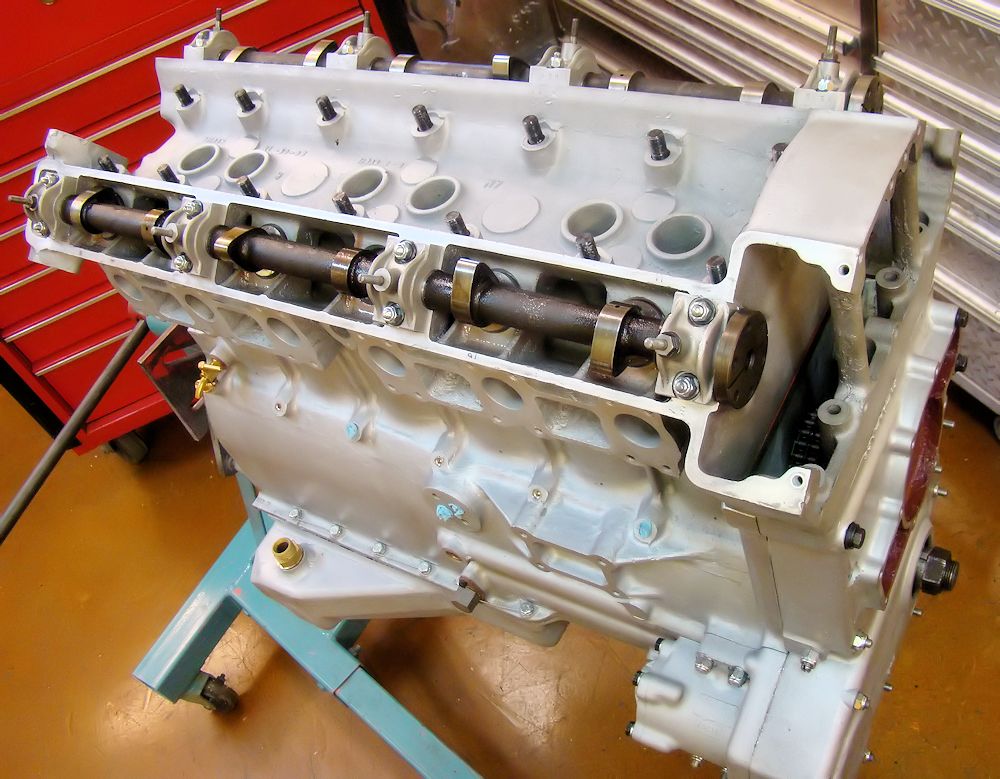
Wrapping up the engine rebuild for our DB4 project.
 |
 |
 |
 |
 |
 |
Final engine assembly underway in the CJ machine shop...
 |
 |
 |
 |
 |
 |
 |
 |
 |
 |
 |
 |
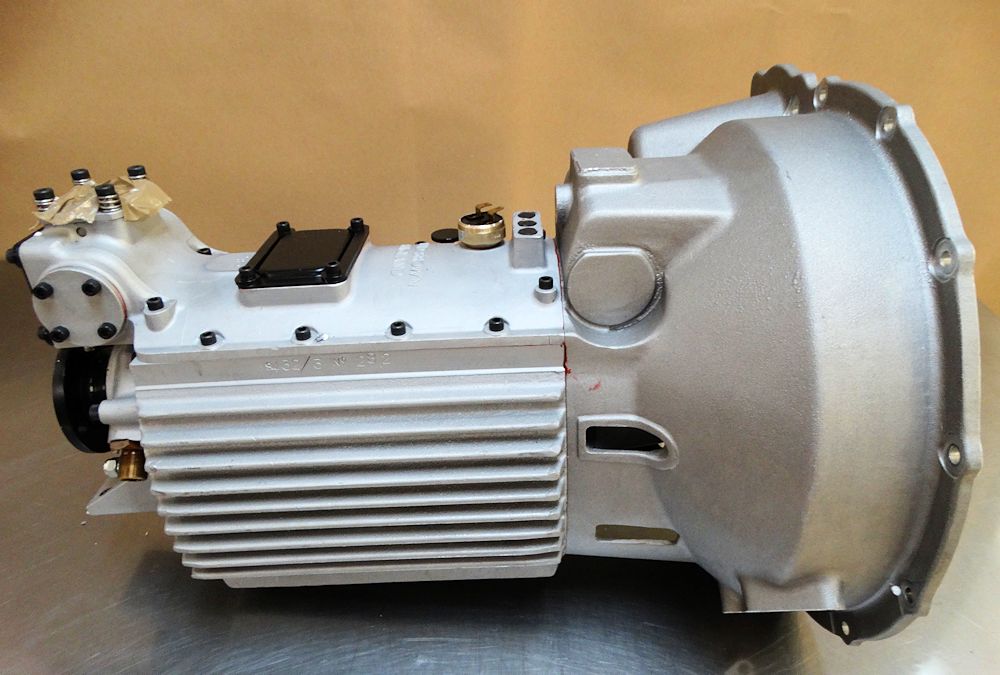
The original, matching number David Brown 4 speed transmission has been completely rebuilt and reconditioned. Thanks to Aston Service Dorset for their assistance with this part of the project.
 |
 |
 |
 |
With the bodywork completed, the car has now been primed with Spies Hecker Raderal sprayable polyester.
 |
 |
 |
 |
 |
 |
 |
 |
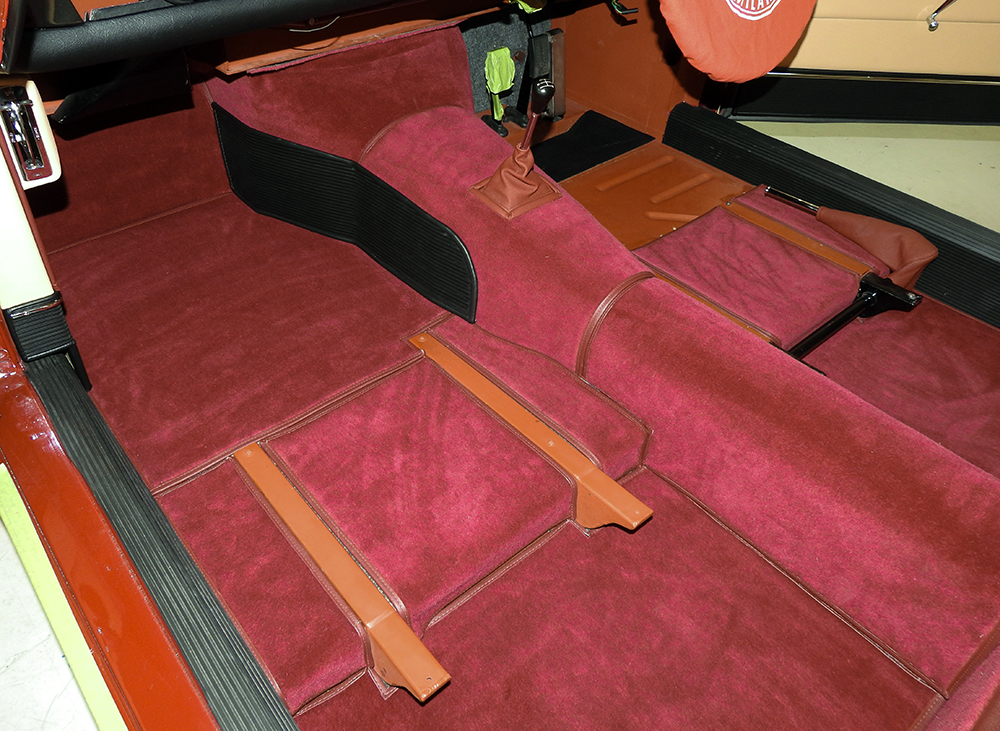
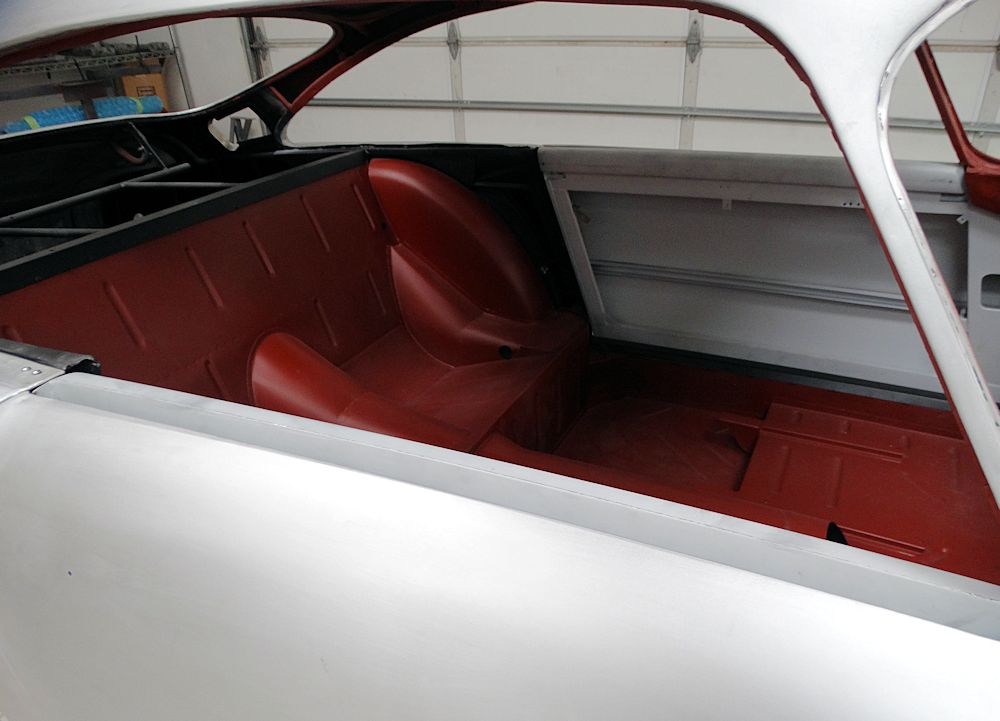
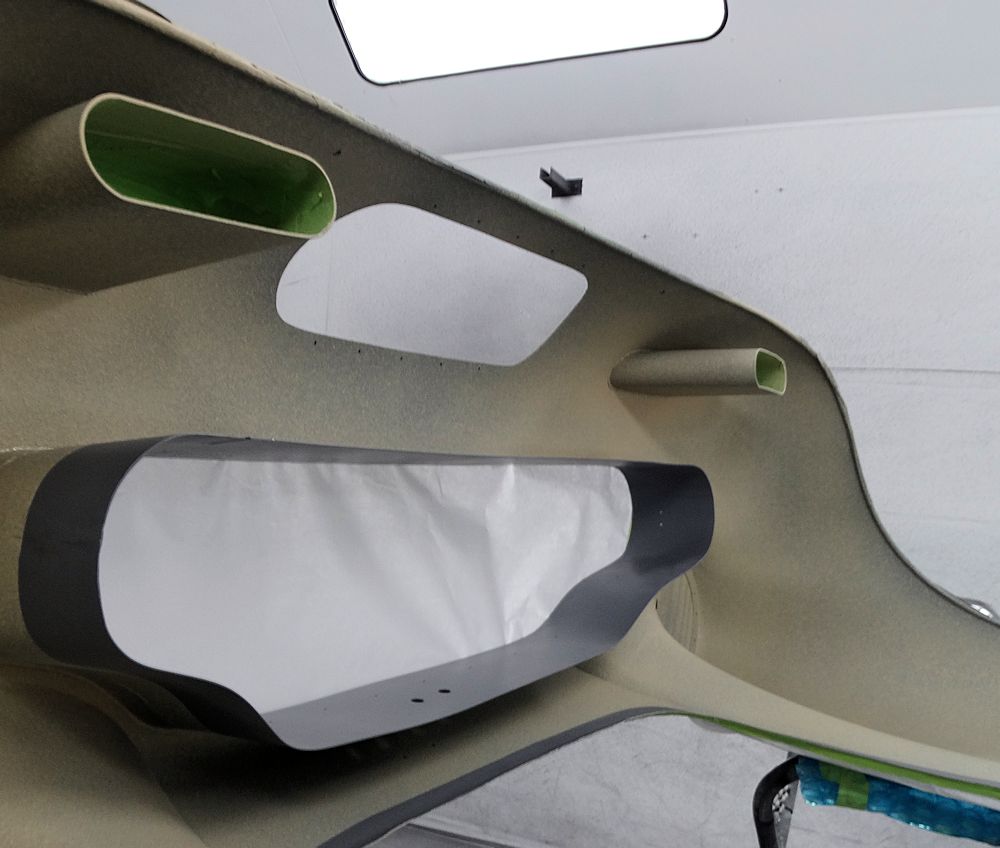
The following sequence of photographs show Carlos trimming the first of the rear passenger compartment side panels, taking great care to replicate precisely the way the panels were first trimmed and assembled at the factory almost 60 years ago. The original AM factory trimmers were highly skilled artisans at the peak of their powers, so it is fun to watch Carlos following in their footsteps, matching them stride for stride, demonstrating some truly spectacular workmanship.
 |
 |
| Time to restore and trim the rear passenger compartment side panels |
Top class craftsmanship is evident throughout our car's sumptuously trimmed interior |
 |
 |
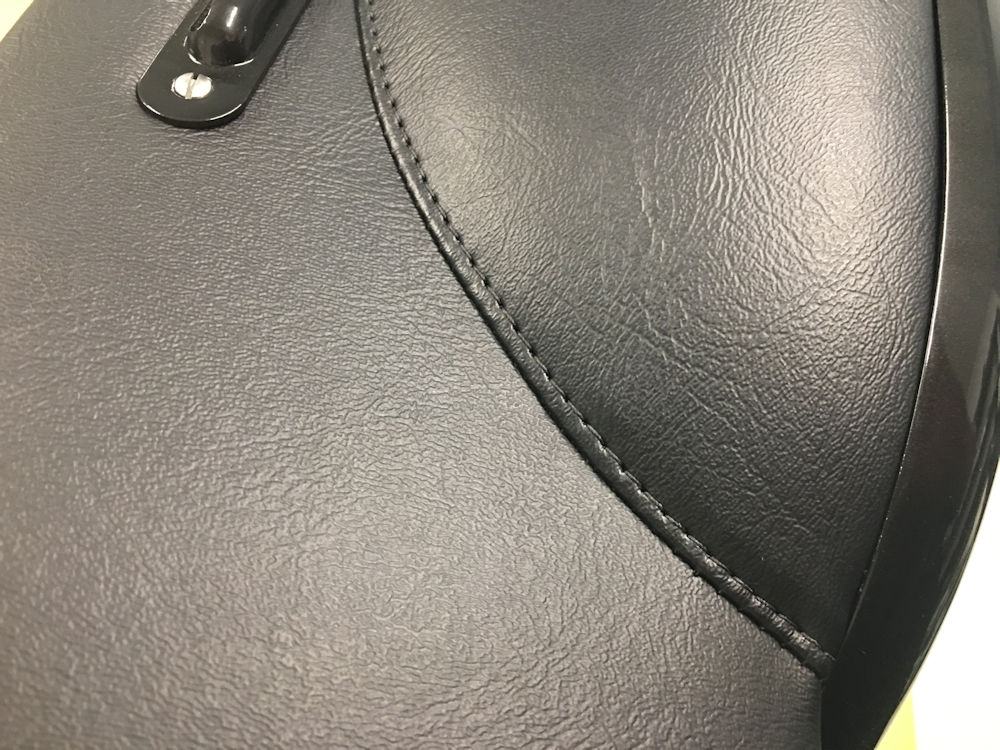
| View of underside of the double stitched
armrest seam |
New hide beading rests between the wheel arch
cover and the armrest |
 |
 |
| Armrest starting to take shape |
Constantly comparing to the original to ensure identical finished result |
 |
 |
 |
 |
| Right side panel almost finished |
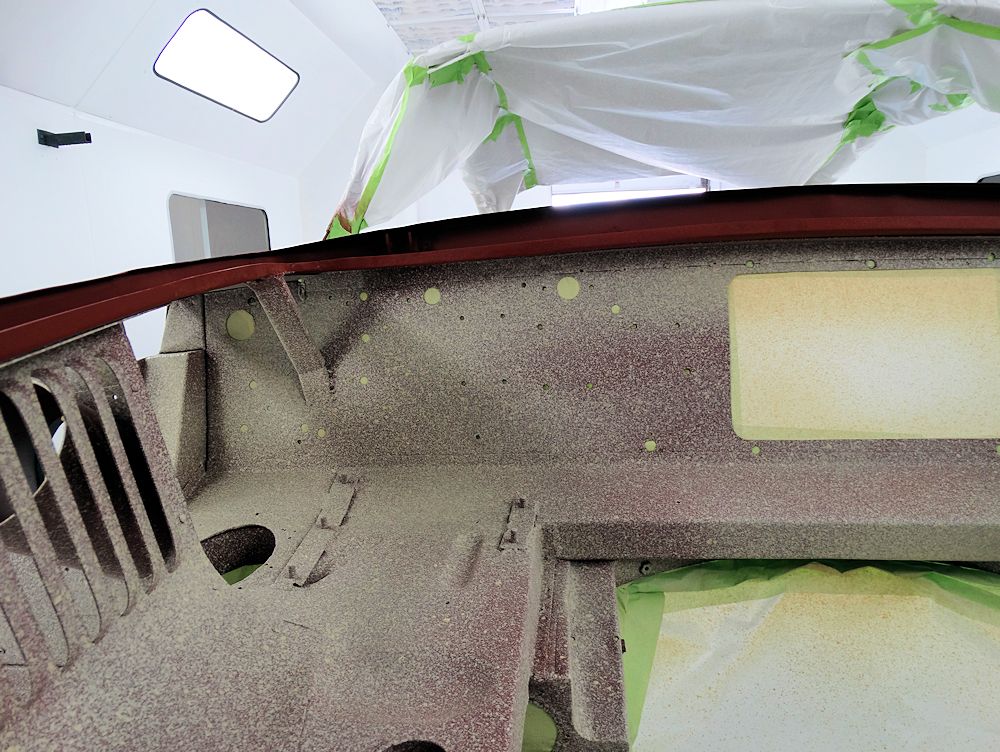
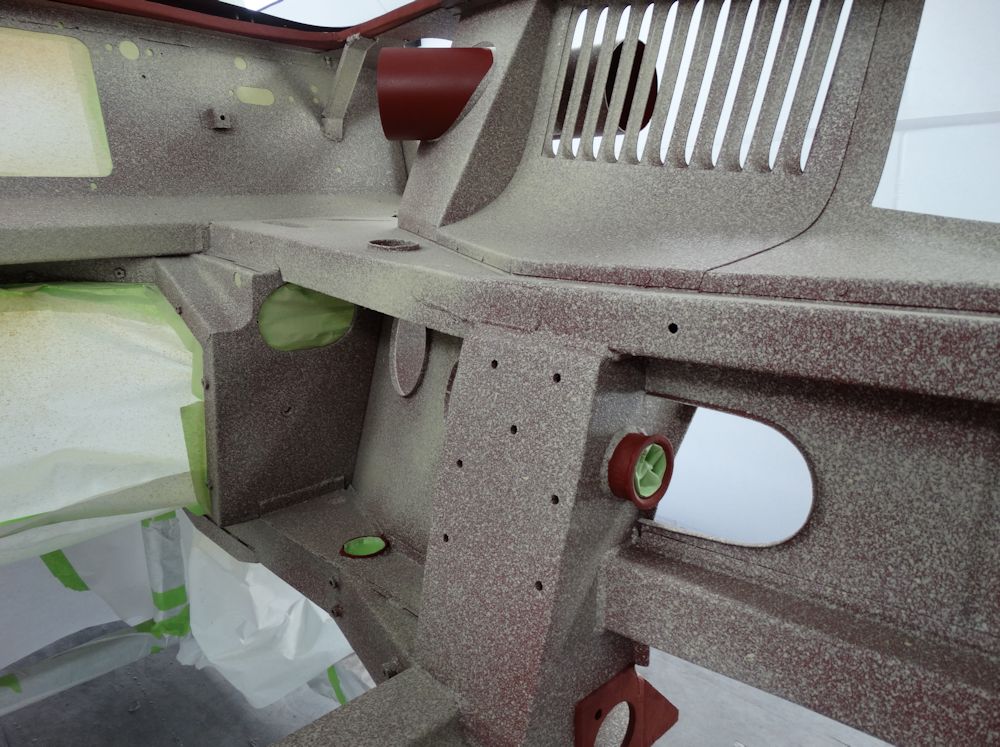
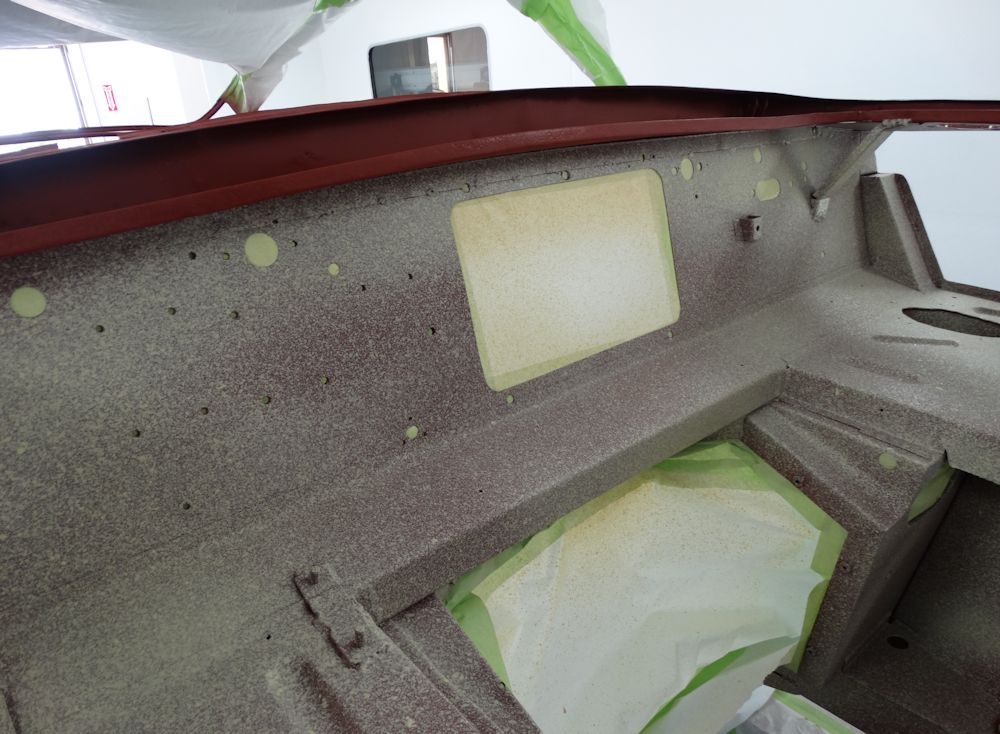
The following sequence of photographs show us priming the outer body panels after preparing the bare aluminum surface with Zinc chromate.
 |
 |
| Outer body is first washed down with a Zinc chromate solution |
|
 |
 |
| Car is now sealed in Spies Hecker Epoxy primer |
|
 |
 |
 |
 |
| Doors, bonnet and boot lid are installed prior to blocking |
|
 |
 |
| Next time we see the body outside it will be Peony Red! |
I am pleased to report that all the panel replacement has now been completed. In the next few days we will seal the restored body in epoxy primer and begin preparing the car for paint.
 |
 |
 |
 |
 |
 |
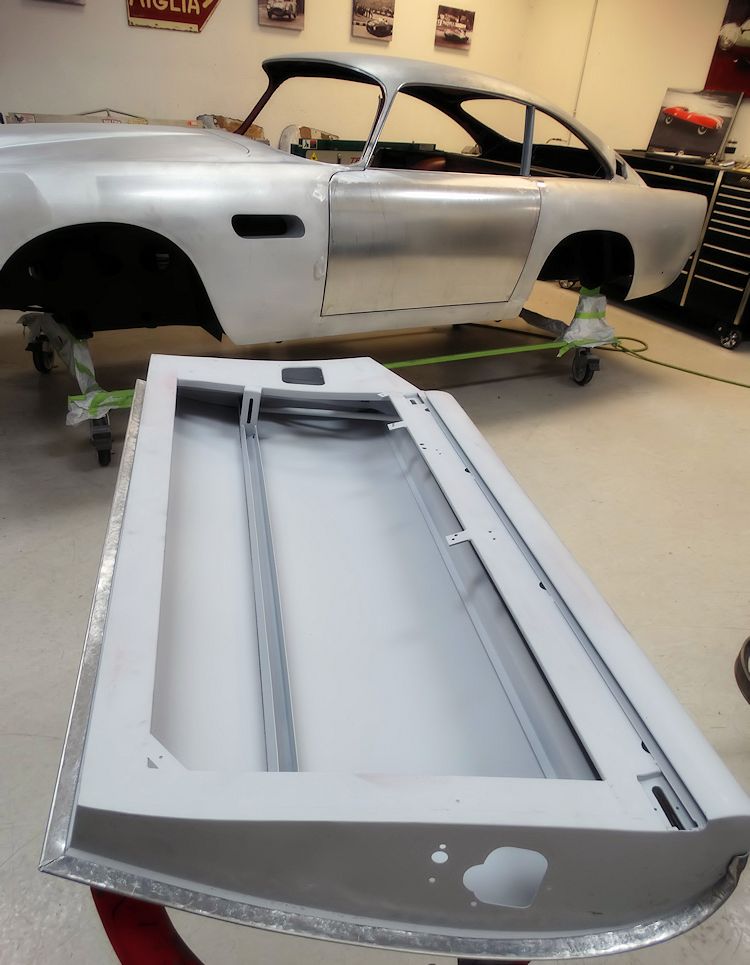
Both new doors have now been skinned and installed...
 |
 |
| Driver's door skin laid on top of the door
frame |
|
 |
 |
| Both new doors now installed |
|
 |
 |
| Handles installed |
Body restoration is now very close to
completion |
Jake has been busy fabricating both new doors...
 |
 |
 |
 |
 |
 |
 |
 |
 |
 |
 |
 |
 |
 |
 |
 |
 |
 |
 |
 |
 |
 |
 |
 |
 |
 |
 |
 |
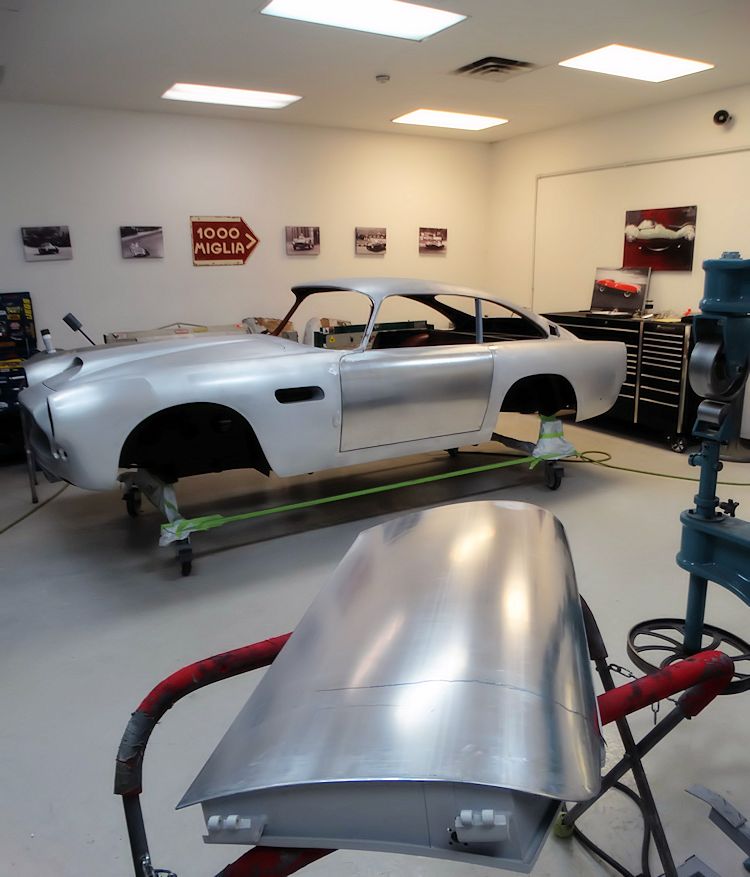
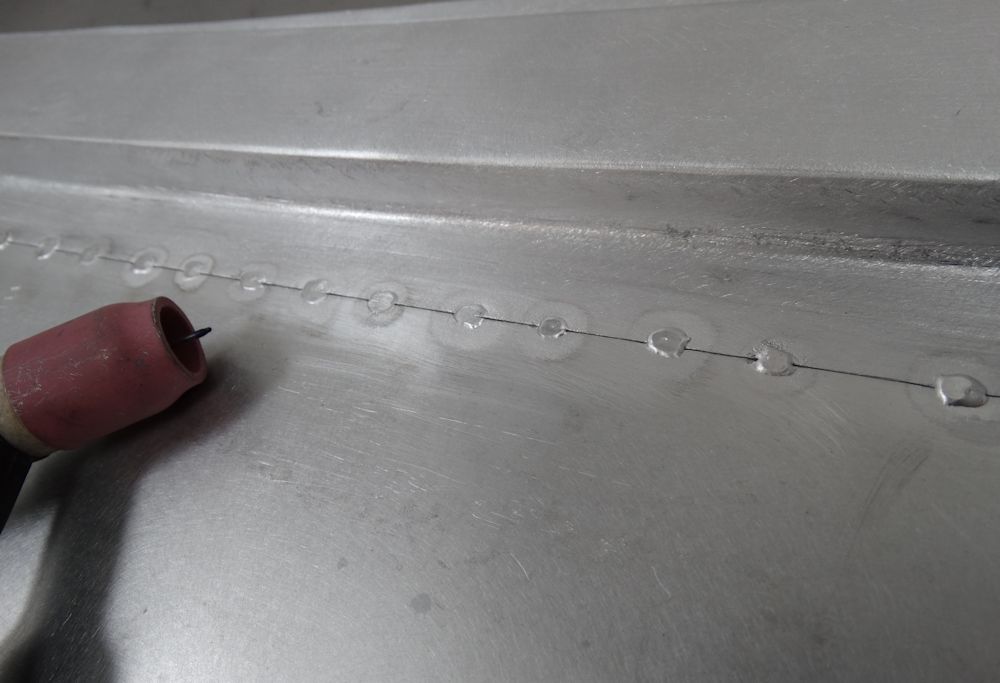
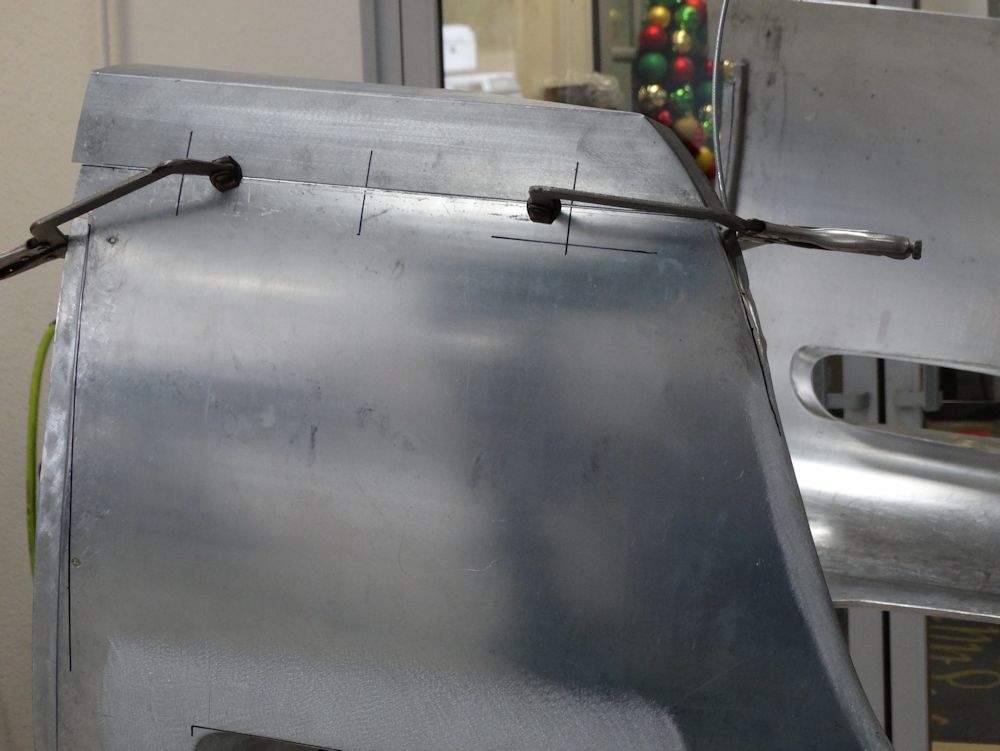
Jake has now restored and reassembled the bonnet. The following sequence of photos show him fine tuning the fit..
 |
 |
| Preparing to weld the upper skin to lower
frame |
|
 |
 |
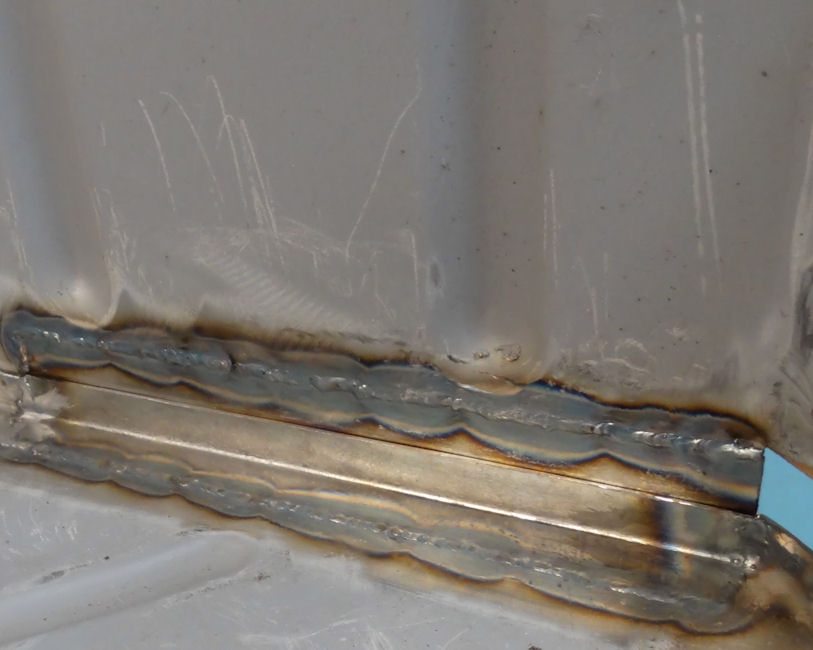
| The two panels are first tack welded together |
|
 |
 |
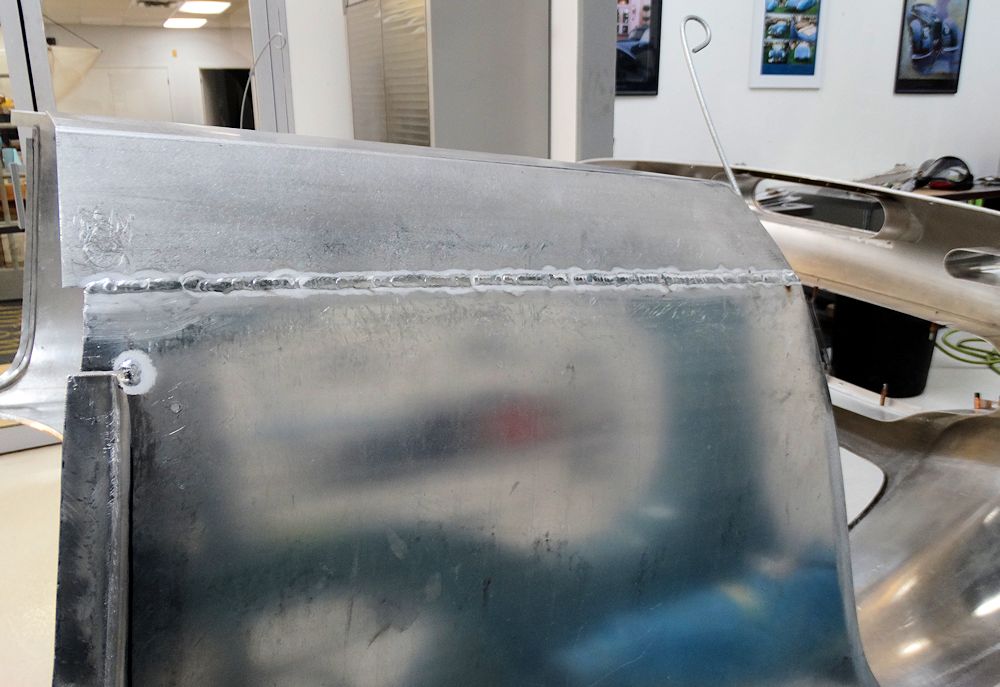
| A continuous bead is then applied around the
entire outer edge of the bonnet |
Adjusting the bonnet opening |
 |
 |
 |
 |
 |
 |
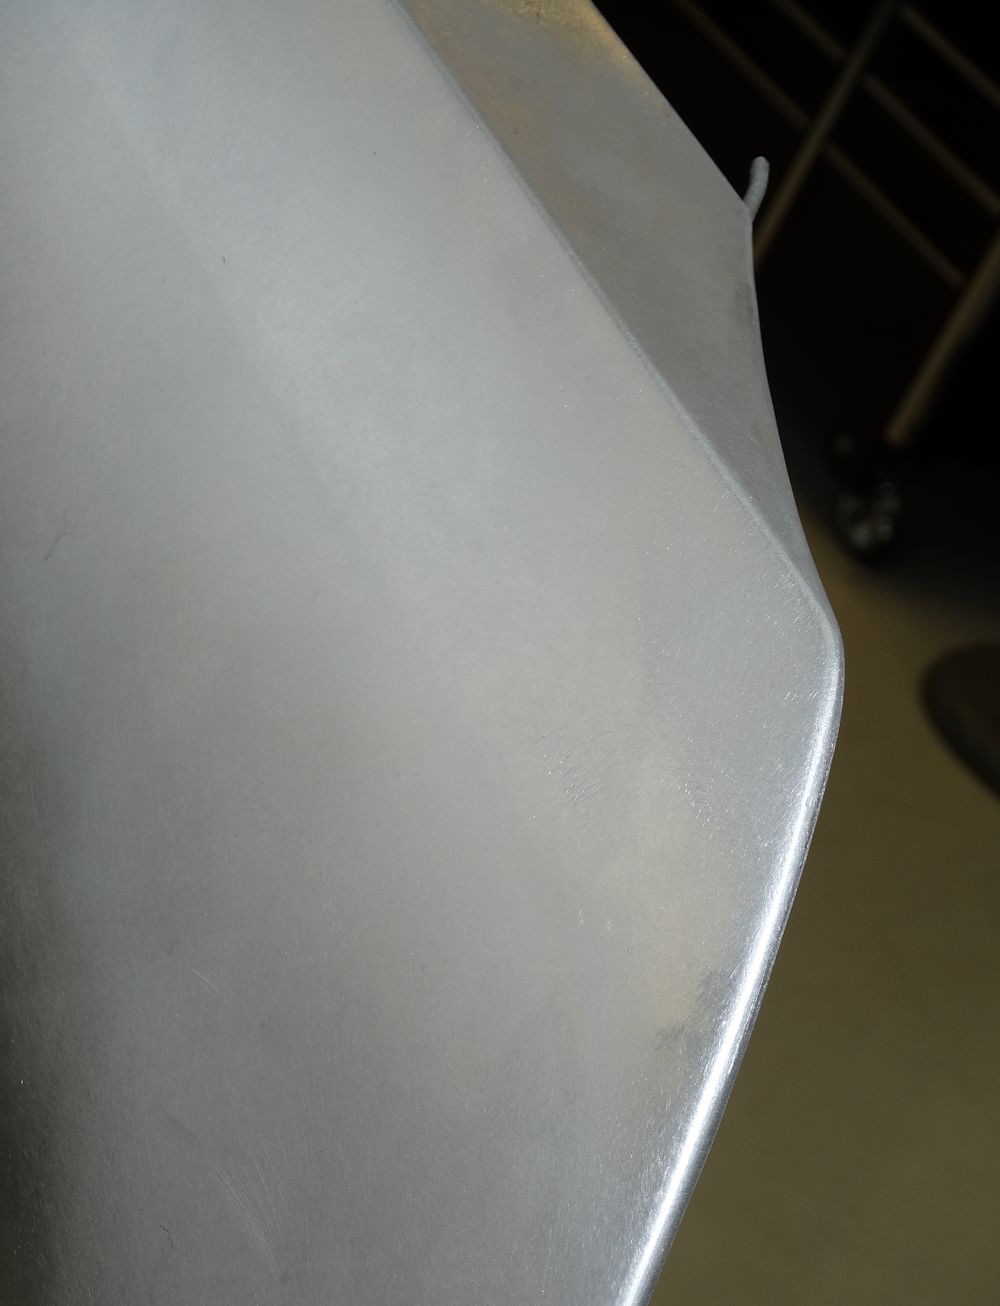
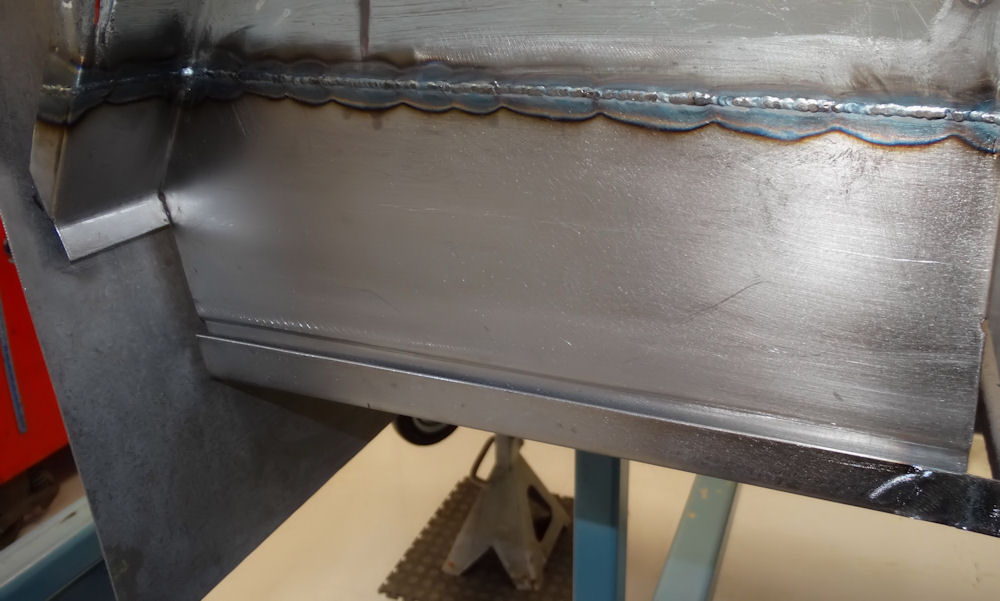
| After metal finishing, you would never know
that the bonnet is comprised of two separate panels |
|
 |
 |
| Bonnet now fits beautifully |
|
 |
 |
| Now time to tackle the door fit! |
Seat cover fabrication continued...
|
|
| Original specification Connolly Vaumol 3099 beige hides |
Original seats had each pleat stuffed with a roll of cotton batting |
 |
 |
| Bulk cotton batting |
Cotton muslin is used for backing, exactly
as original |
|
|
| Carlos sewing pleats |
The back side of the seat cover |
 |
 |
| Cotton batting is inserted into each pleat |
|
 |
 |
| The result is an extremely soft, luxurious
seating surface |
Constantly comparing new covers to the
originals throughout the fabrication process |
Carlos has started fabricating your new interior, beginning with the front seat covers.
 |
 |
| Laying out one of the 3 Connolly hides that
will go into the new interior |
|
|
 |
| Cutting strips to be used as beading |
|
 |
 |
| Plotting out the seat pleating |
|
 |
|
| Stitching a sample section of pleating to
compare against the original |
New covers will be an exact replica of the
originals |
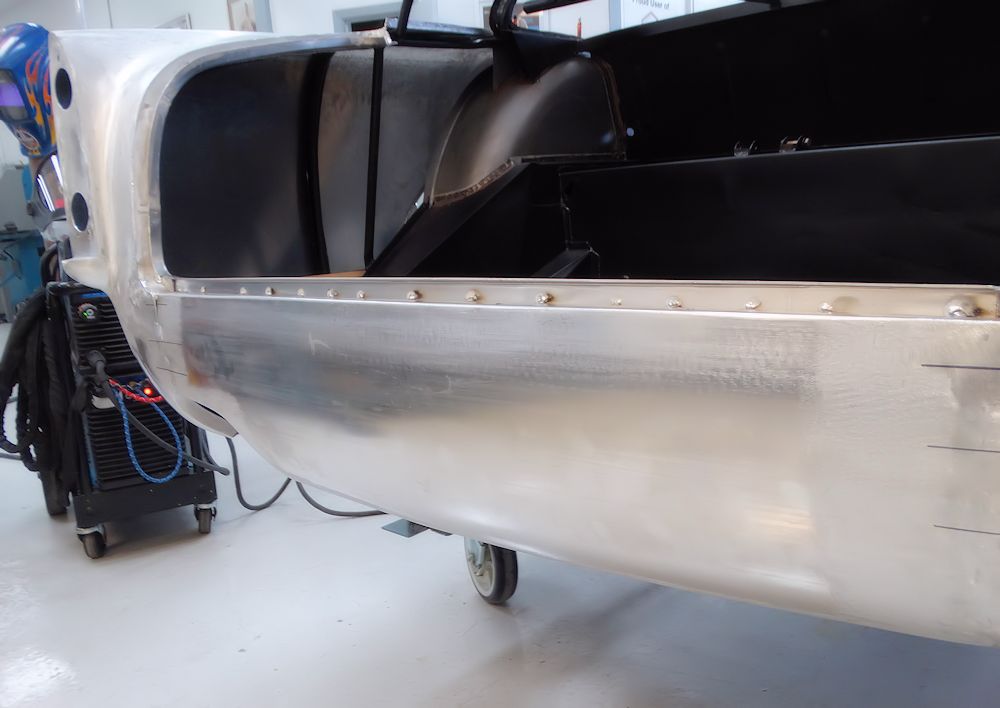
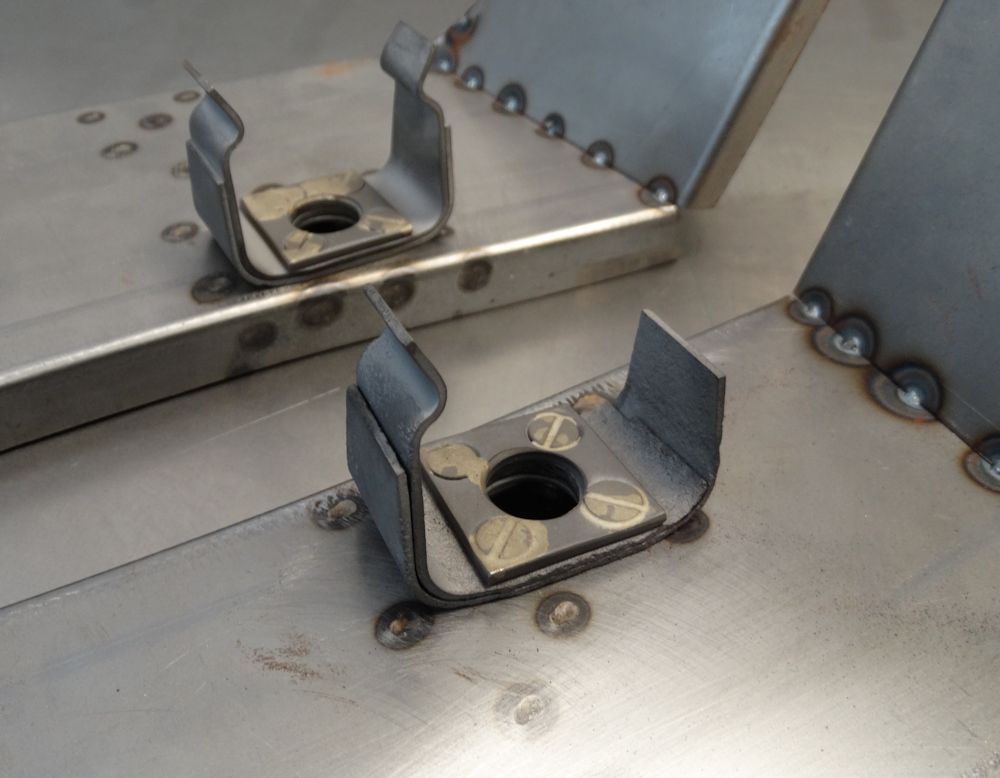
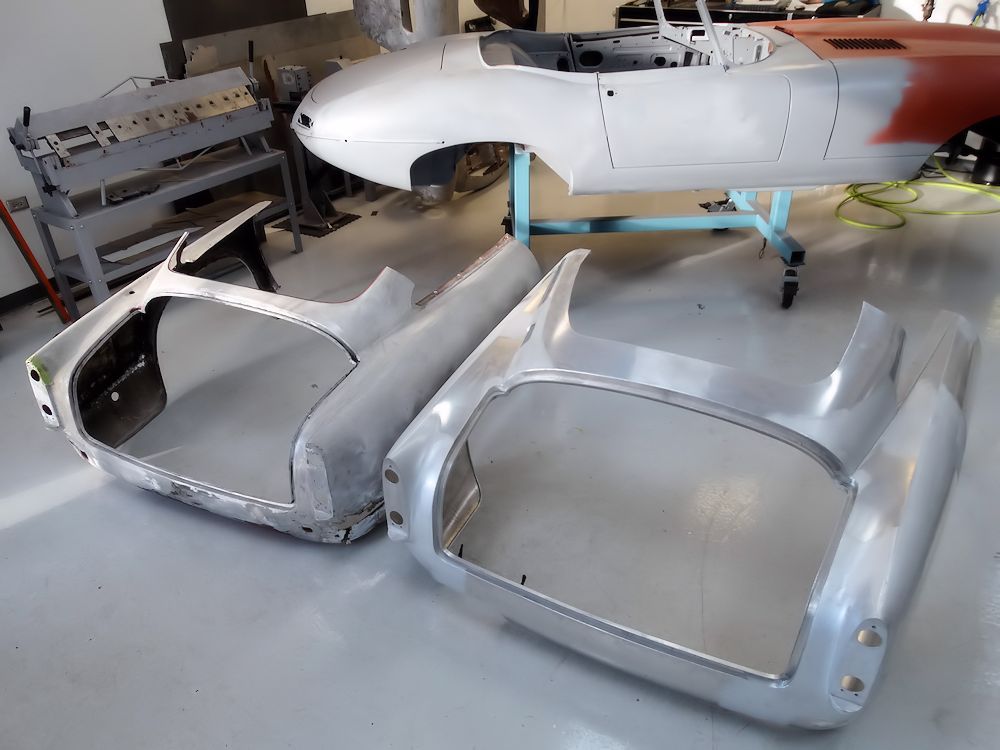
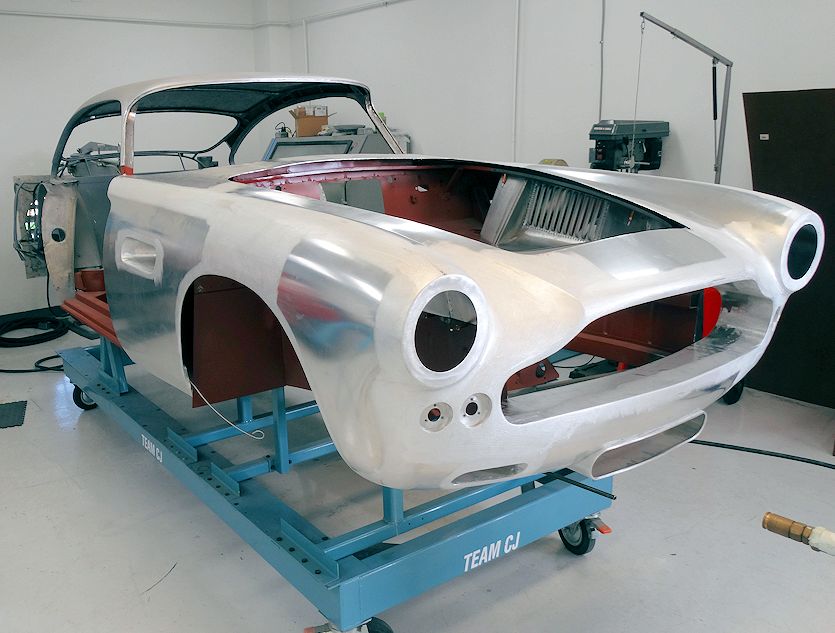
We have now permanently installed both front and rear clips.
 |
 |
| Engine bay alloy skin has now been wrapped |
|
 |
 |
| With the front end permanently installed, it
is time to turn our attention to the rear clip |
|
 |
 |
| Front wing edges are wrapped around hinge panel flanges |
Installing felt insulation to rear
Superleggera framework |
 |
 |
| Jake gluing the felt tape to SL tubing |
|
 |
 |
| Time to install the rear clip |
|
 |
 |
| Looking like a car again, with front and rear
clips now permanently installed |
|
 |
 |
 |
 |
| Note how outer panels fits against the
insulated Superleggera tubing (inside boot compartment) |
Jake welding up all the Kleco holes |
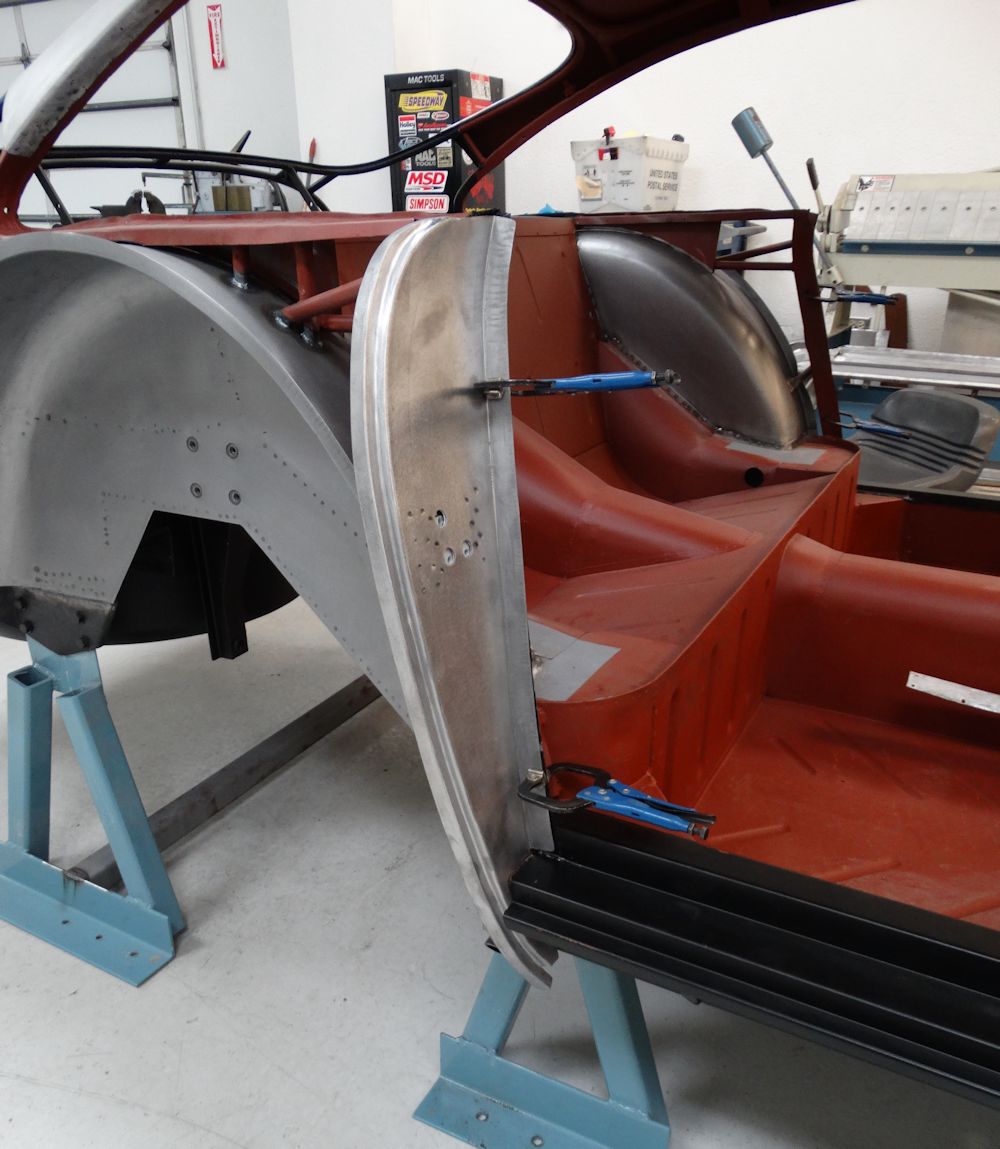
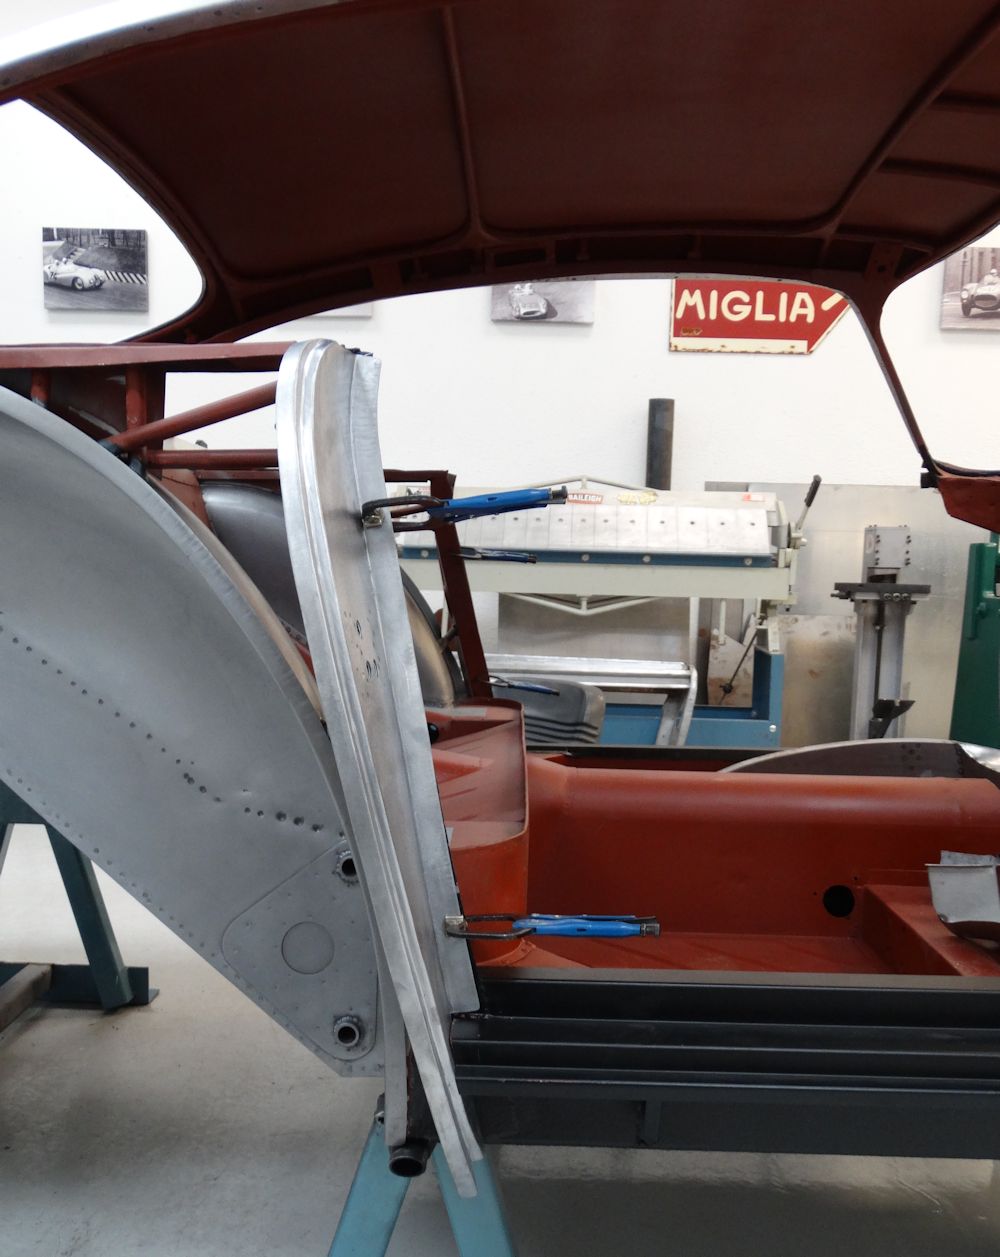
The following sequence of photographs show the front clip being installed for the final time. We have taken great care to isolate the alloy skin from the mild steel structure beneath using multiple layers of epoxy, urethane stone guard, and finally adhesive friction tape. As well as serving as an additional barrier between the alloy and steel panels, the friction tape also helps prevents rattles and squeaks on the road. A heavy duty (1/8" thick) felt tape is wrapped around the Superleggera tubing.
At the time of writing, Jake is currently 'wrapping' the alloy skin, which involves crimping and hammering the flanges flat and even.
 |
 |
| With the Superleggera structure now fully
restored, it is time to install the front and rear clips |
|
 |
 |
 |
 |
 |
 |
 |
 |
 |
 |
| We will use 1/8" thick felt tape round the Superleggera tubing |
Friction tape acts as an additional barrier
between mild steel sheet metal and aluminum skins |
 |
 |
| Felt and friction tape also helps eliminate
squeaks and rattles on the road |
Sliding the front clip into place for the
final time |
 |
 |
| Jake making sure everything is lining up
perfectly |
|
 |
 |
 |
 |
| Preparing to 'wrap' the alloy skin around
sheet metal structure |
Multiple layers of epoxy and the friction tape
ensure the alloy does not contact the steel |
 |
To be continued... |
| Engine bay is first area to be wrapped |
|
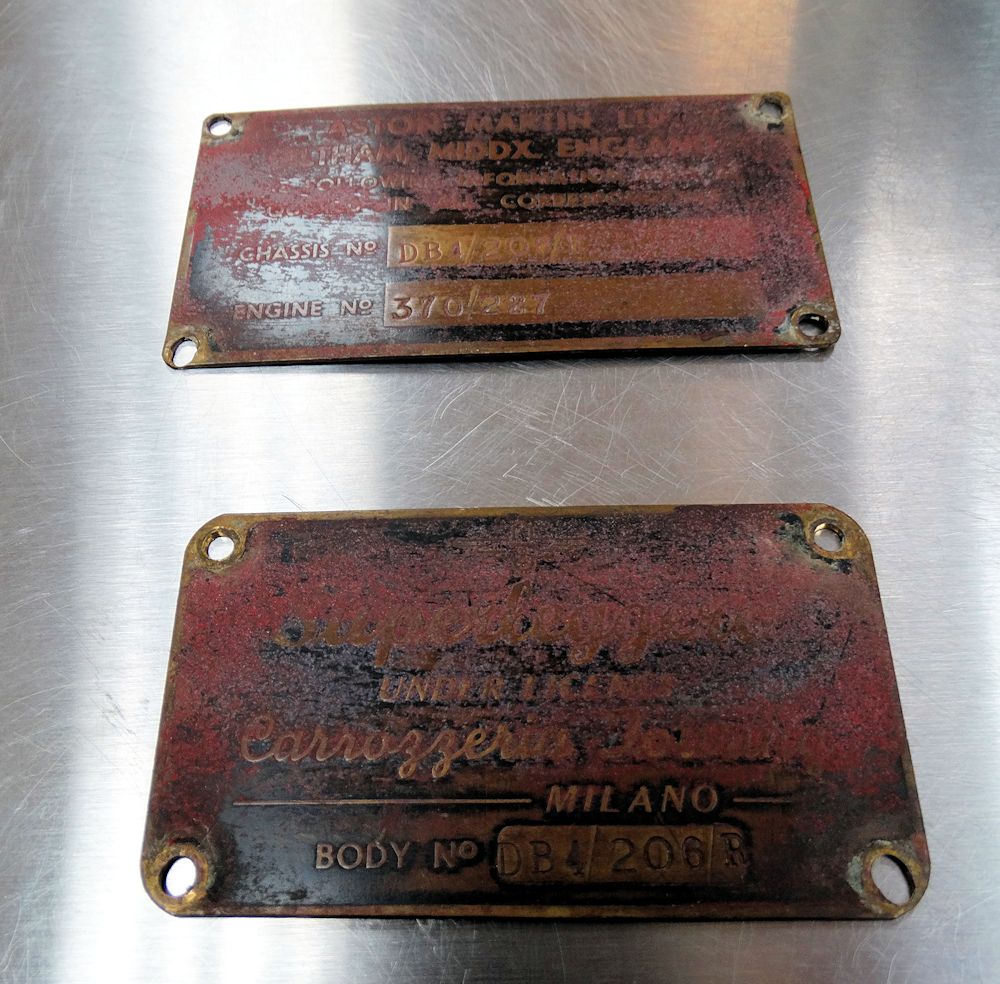
Although it is possible to buy new replica chassis plates, it is always nice to re-use the originals if they are still serviceable. In this case, both plates cleaned up very nicely and look fantastic sitting atop fresh new sheet metal. Jake and I went to great lengths to make sure they were in precisely the same locations as they had been when first installed in 1959.
 |
 |
| Chassis plates have been installed precisely
where they had been originally |
55 years of patina, but still in superb
condition |
The DB4 chassis repairs have now been completed and the structure now looks just as it would have done 55 years ago - literally as new in every respect. Thanks to advances in materials technology, and various rust proofing precautions we took throughout the restoration process, we like to think that it is actually somewhat better than new. Over the next several days we will be permanently installing the front and rear clips.
 |
 |
| 3M Rocker Guard being applied to the underside
of the chassis and rear wheel arches |
|
 |
 |
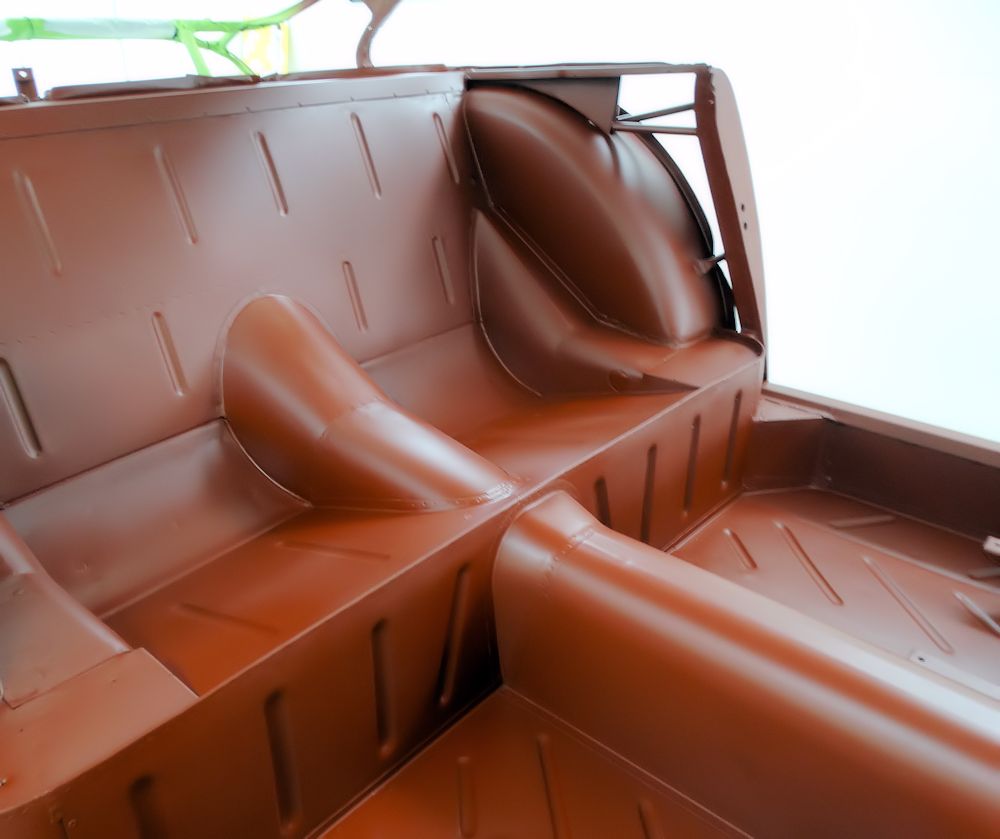
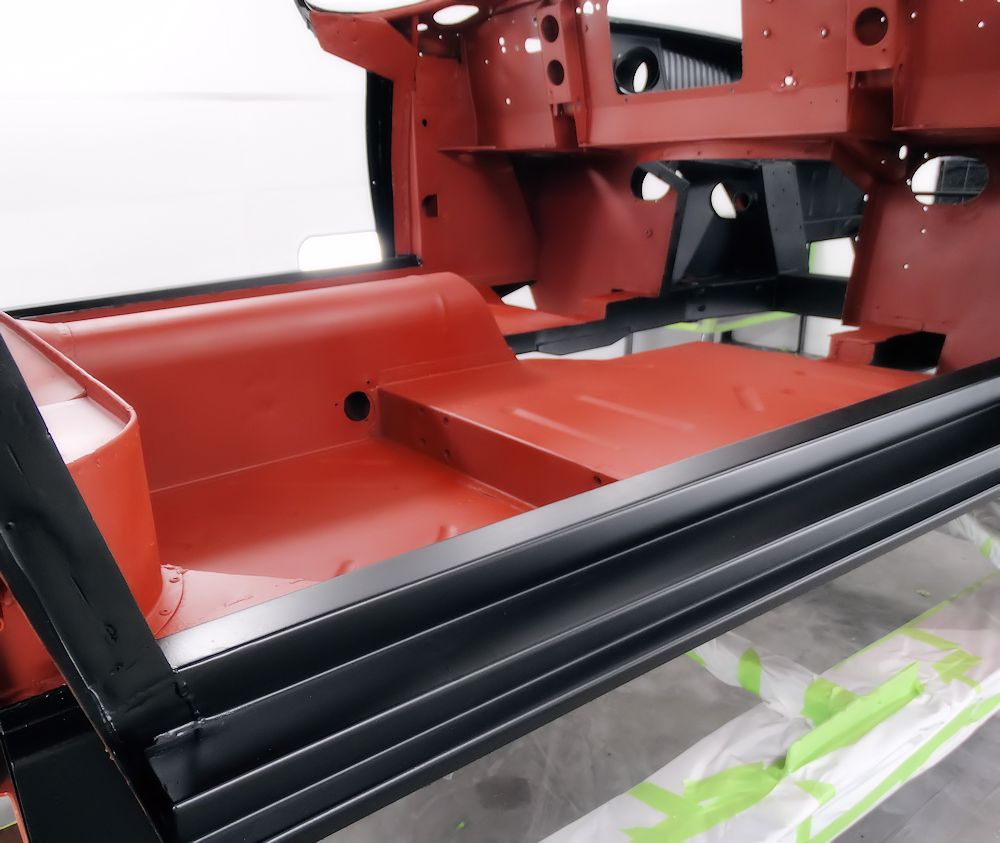
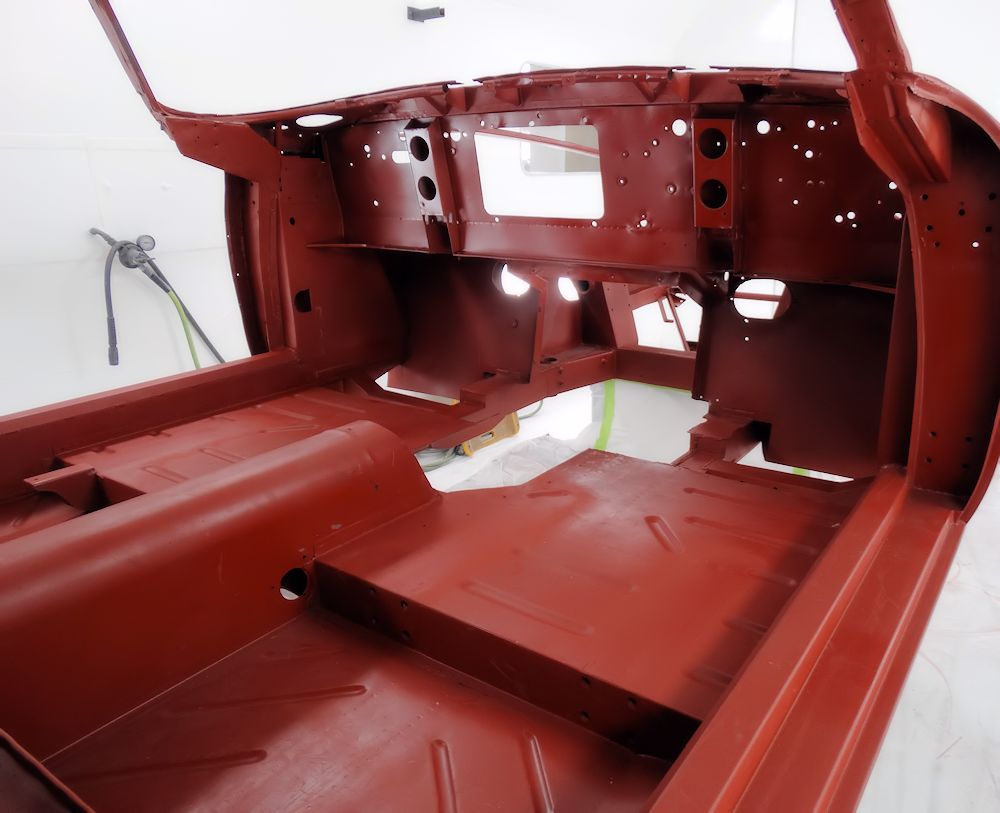
| Masking off the cabin floors, which will be
left in red oxide primer, per original |
Gerardo applying satin black finish to the
chassis |
 |
 |
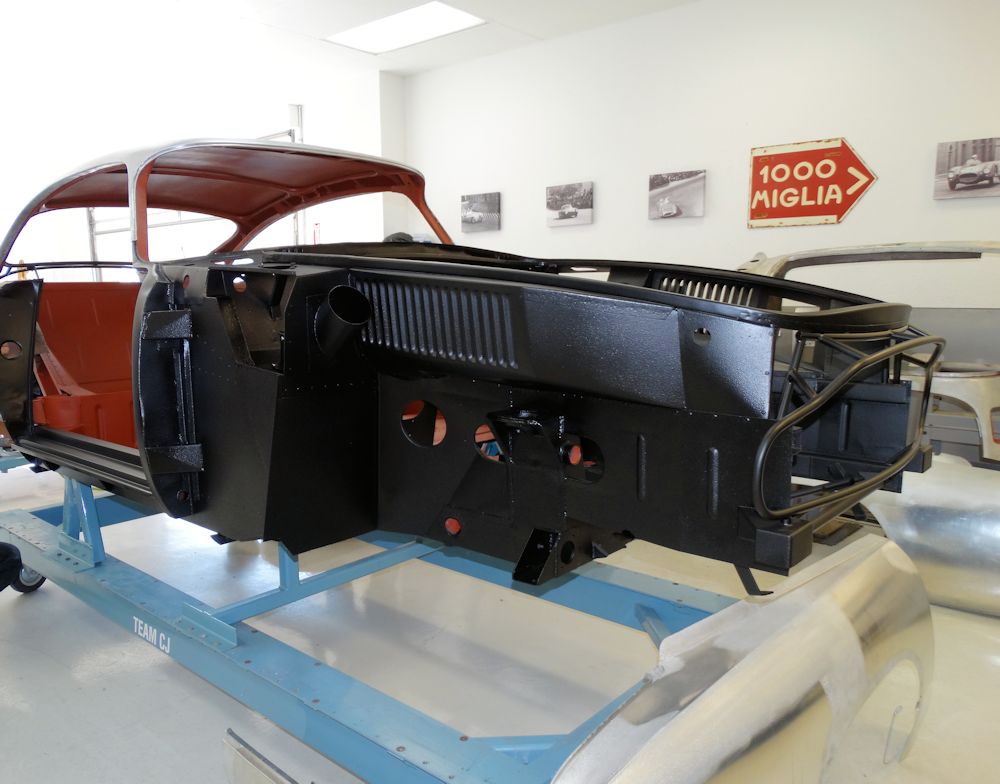
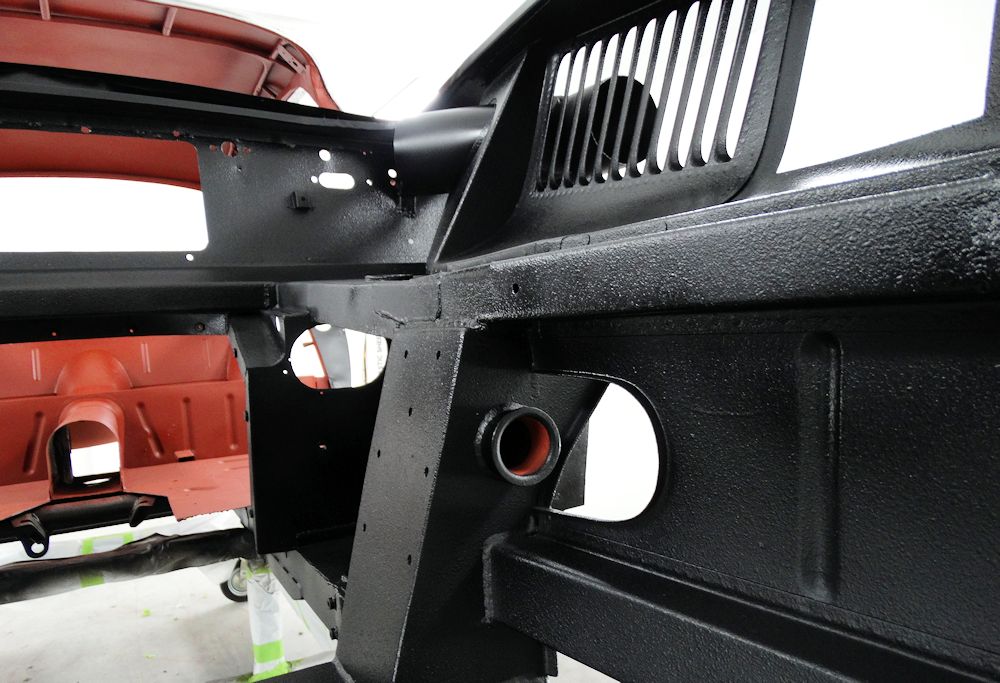
| Engine bay also has a textured finish, as it did when new |
|
 |
 |
| Perhaps as close as it is possible to get to a
new DB4 chassis |
|
 |
 |
| New front clip will be installed in the next
few days |
|
 |
 |
 |
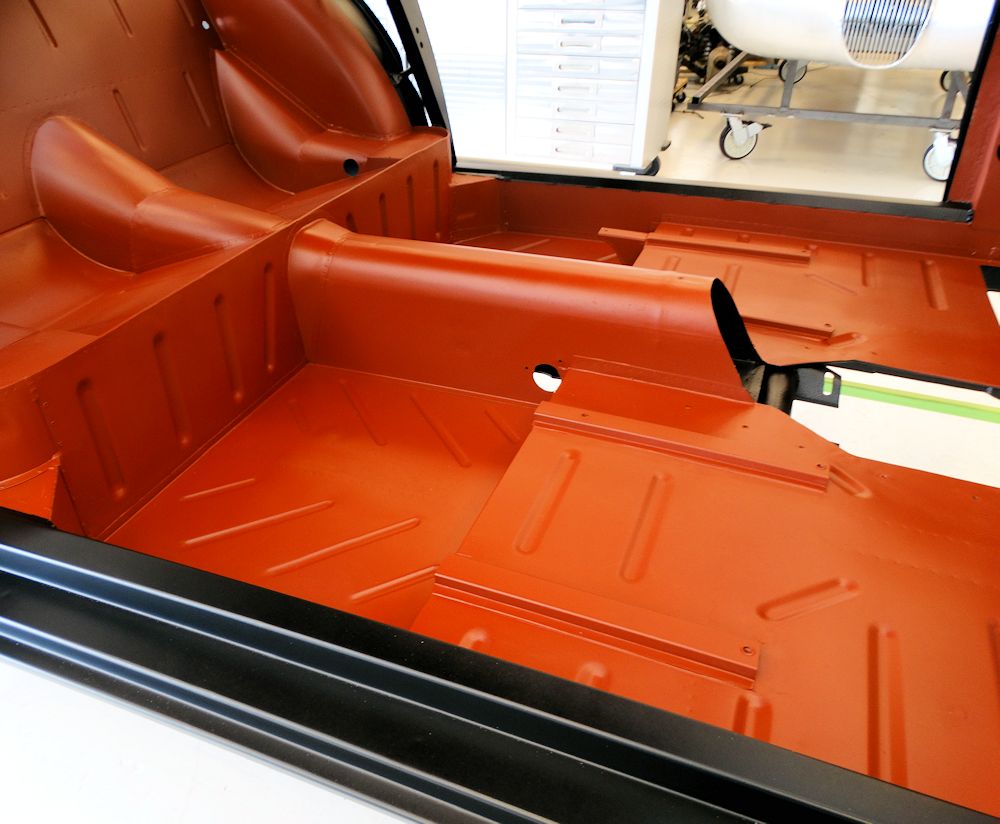 |
| Inner bulkheads, cabin floors and seat runners are literally as new |
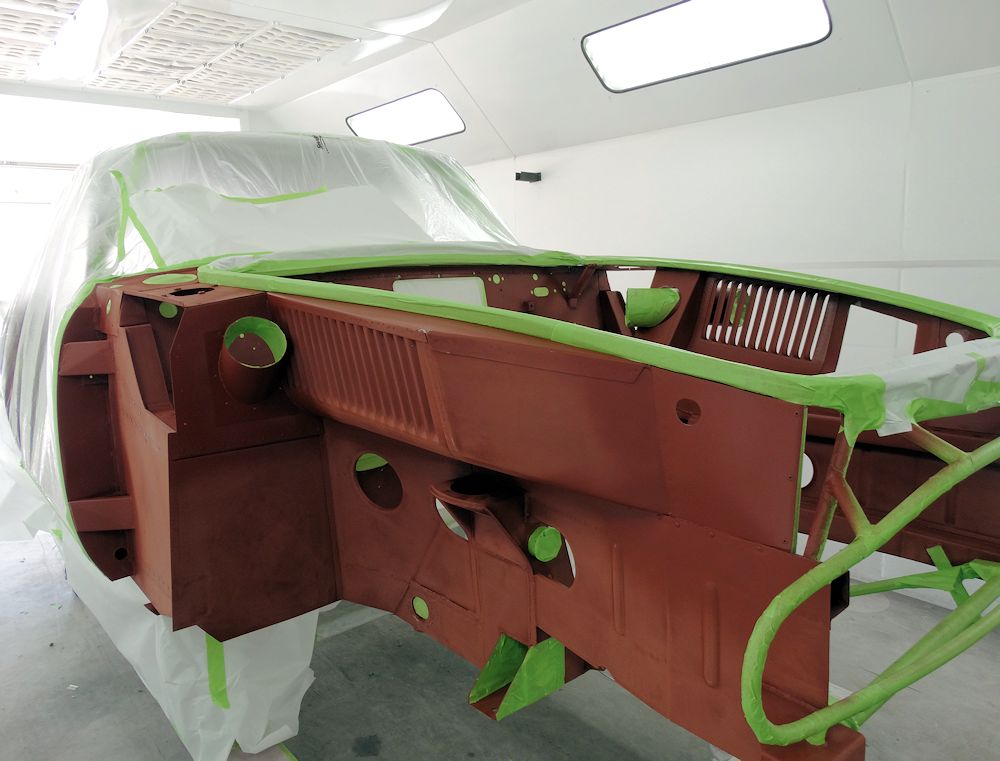
With the chassis repairs now complete, the Superleggera structure is moved to the paint booth for a final application of red oxide primer Inside (inside the cabin) and satin black, prior to the restored body panels being permanently installed.
 |
 |
| Paint booth prepped for refinishing the Superleggera chassis |
|
 |
 |
| Joints are sealed prior to applying Red Oxide primer |
|
 |
 |
| Masking off areas that will be satin black |
|
 |
 |
| Floors, sills and inner bulkheads are now literally as new |
|
 |
Priming in progress.. |
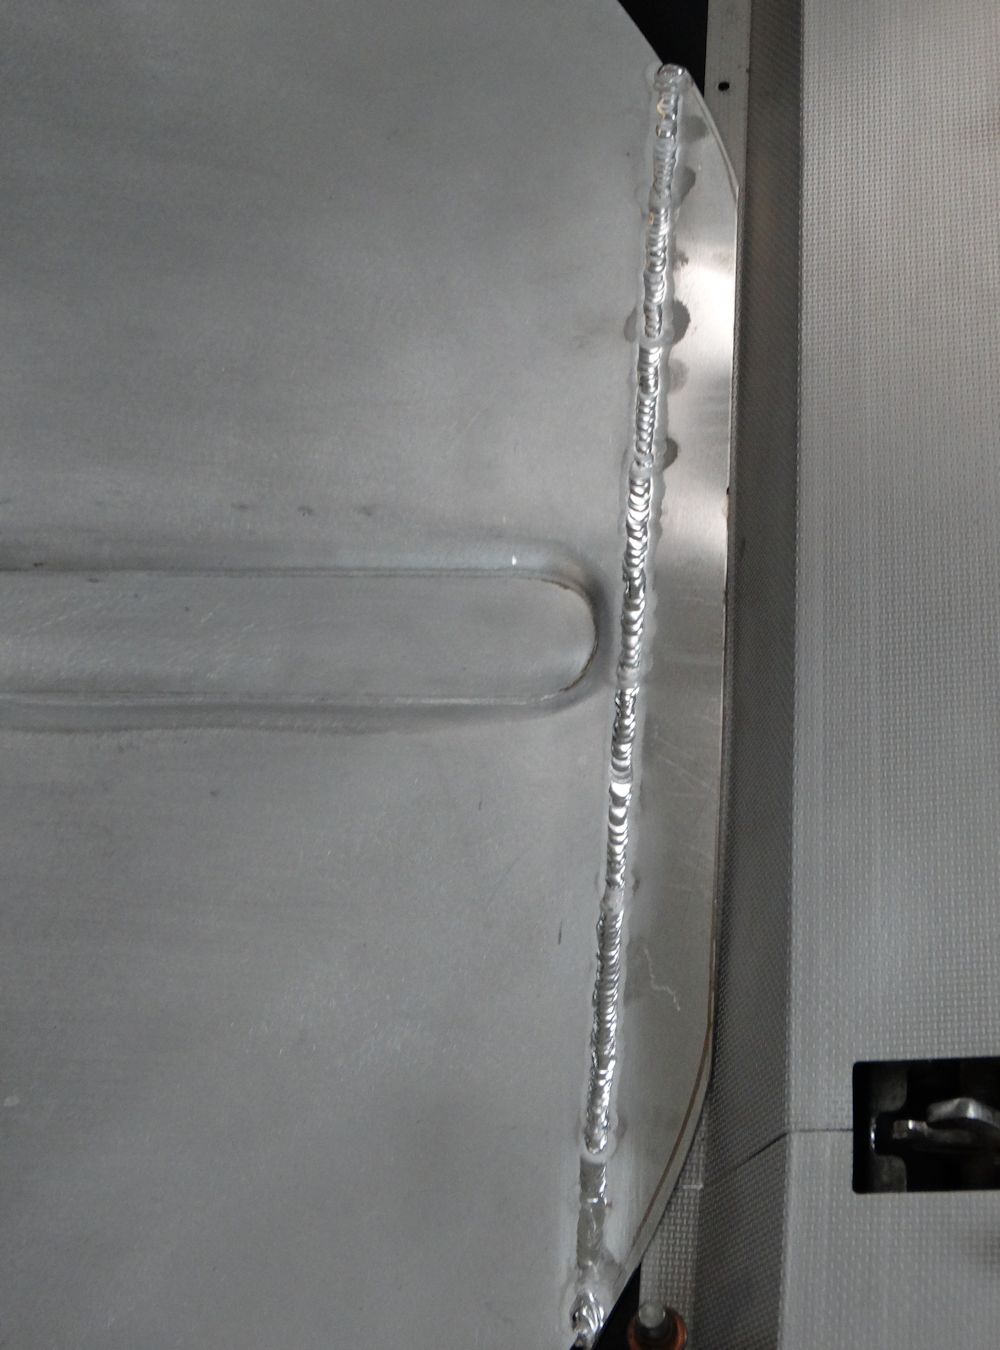
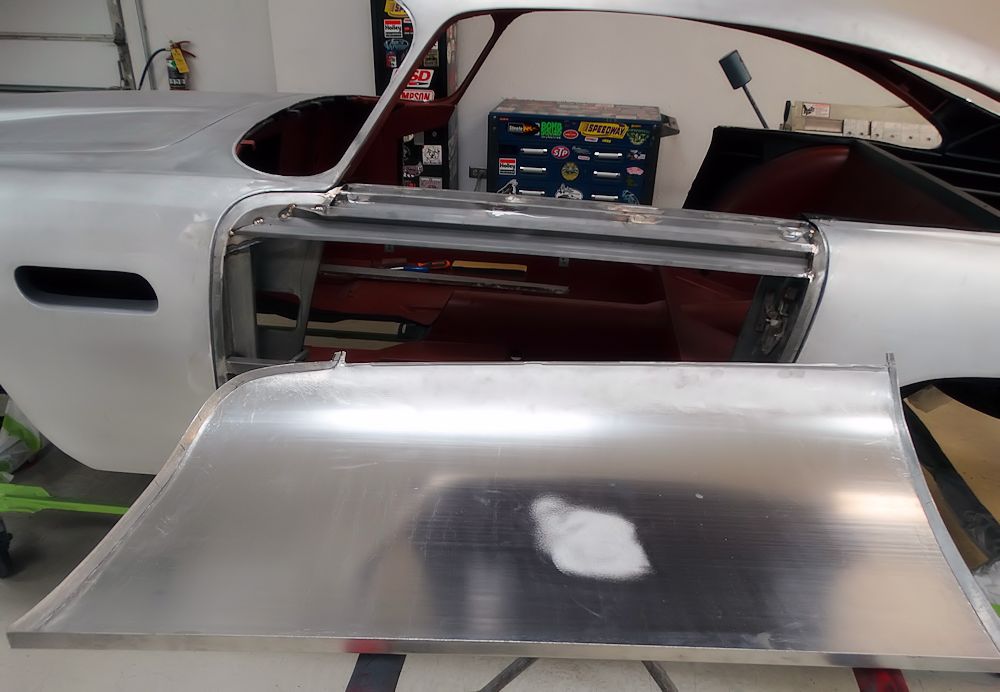
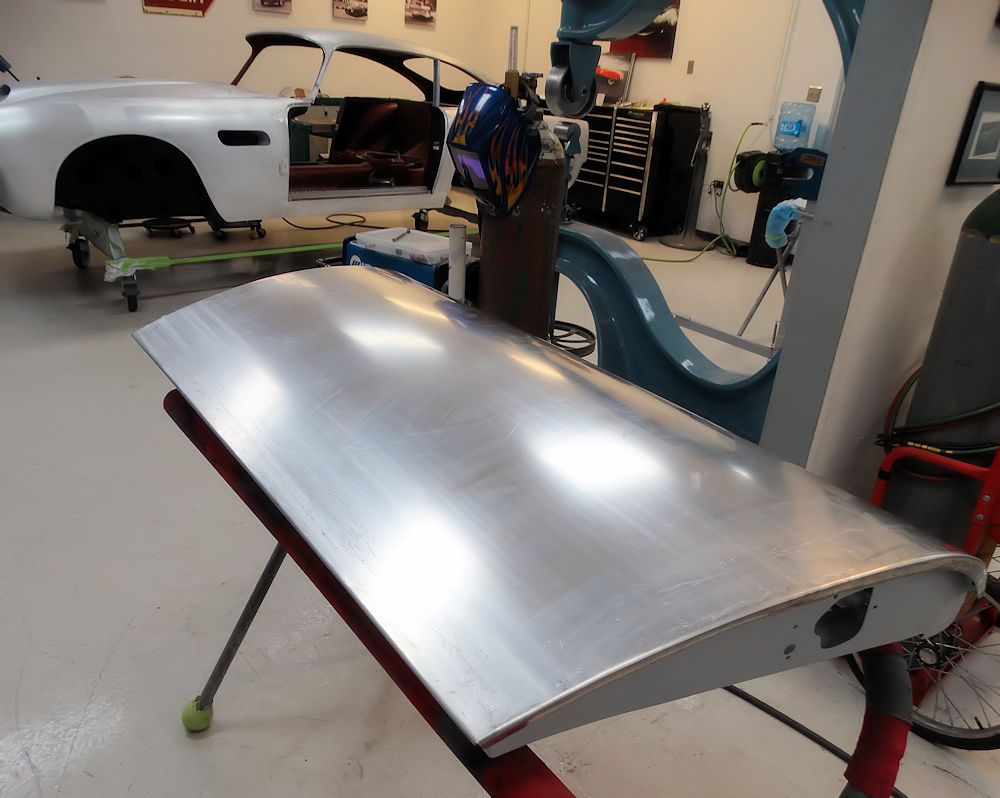
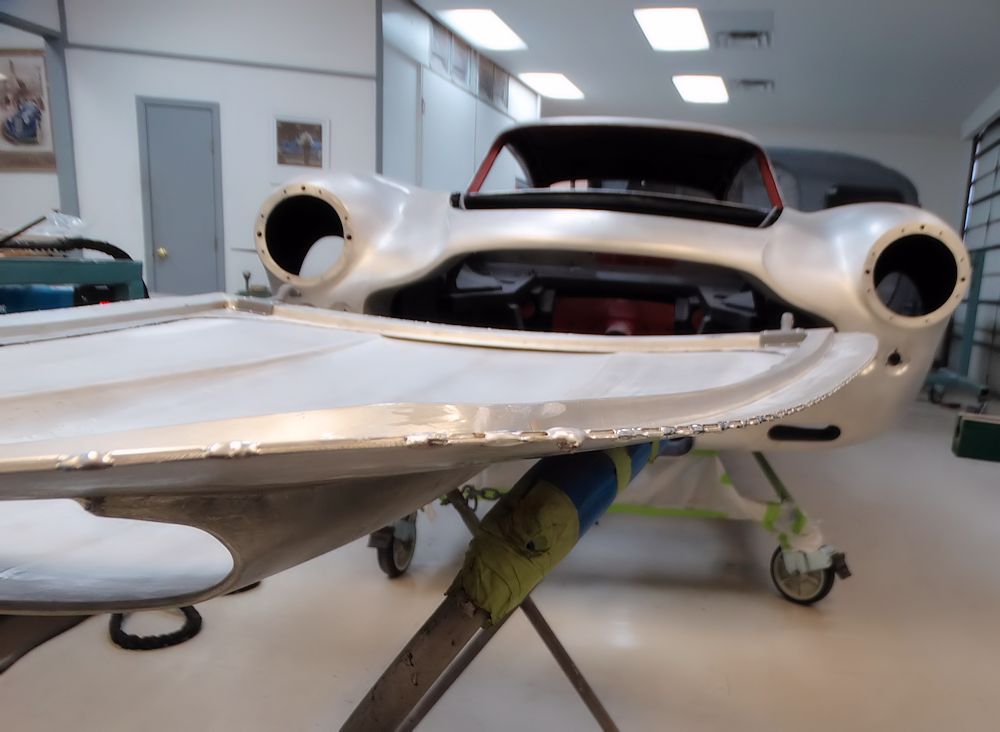
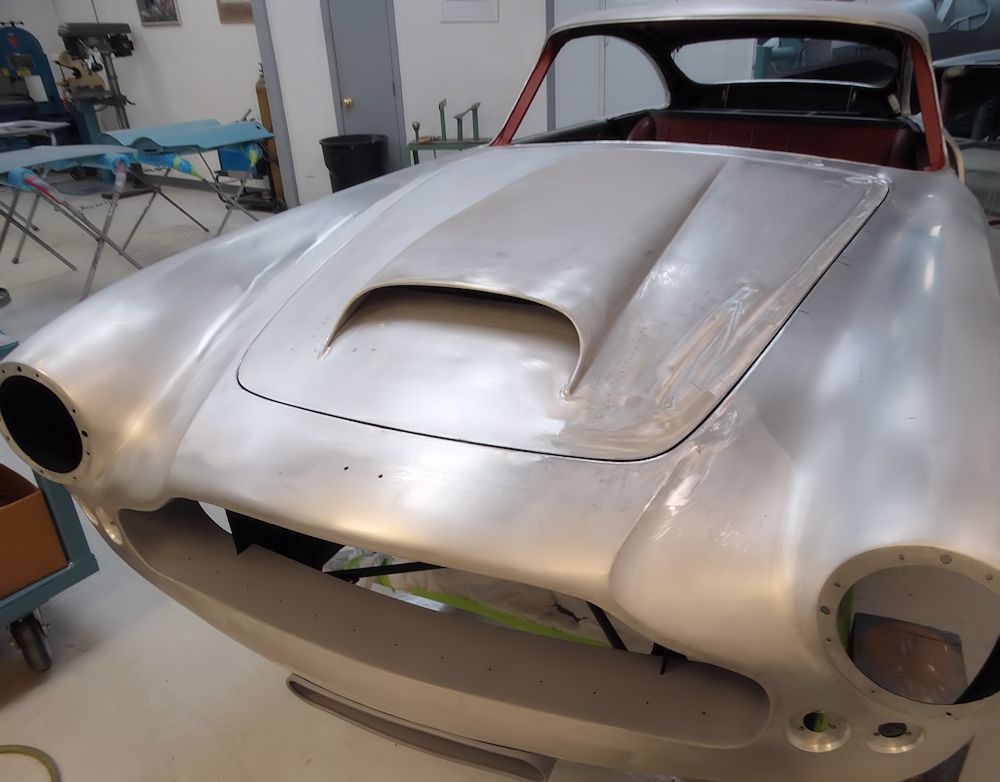
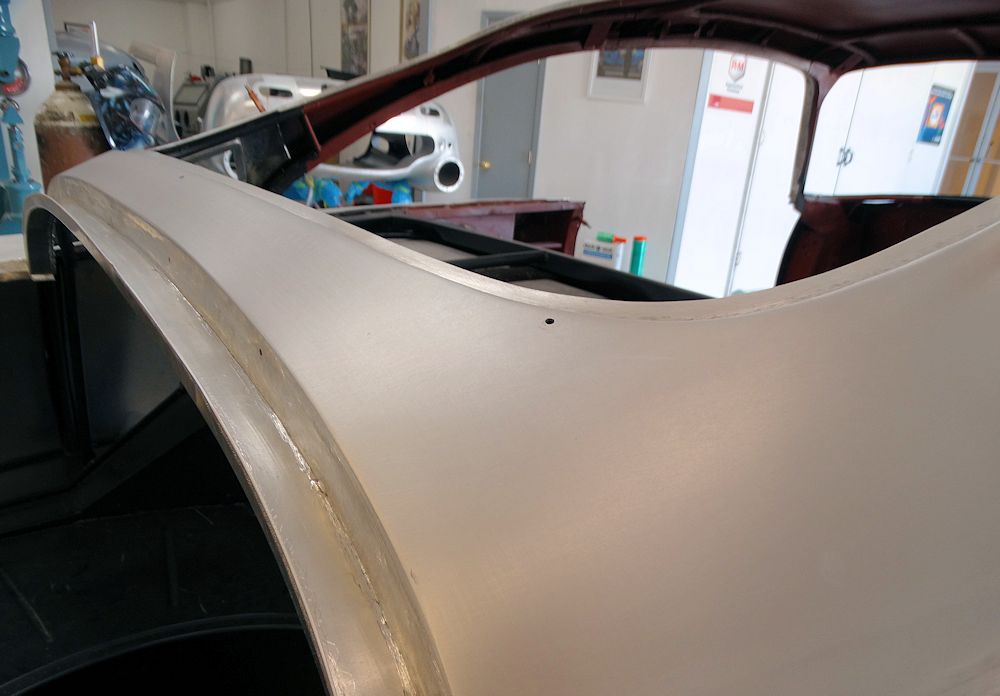
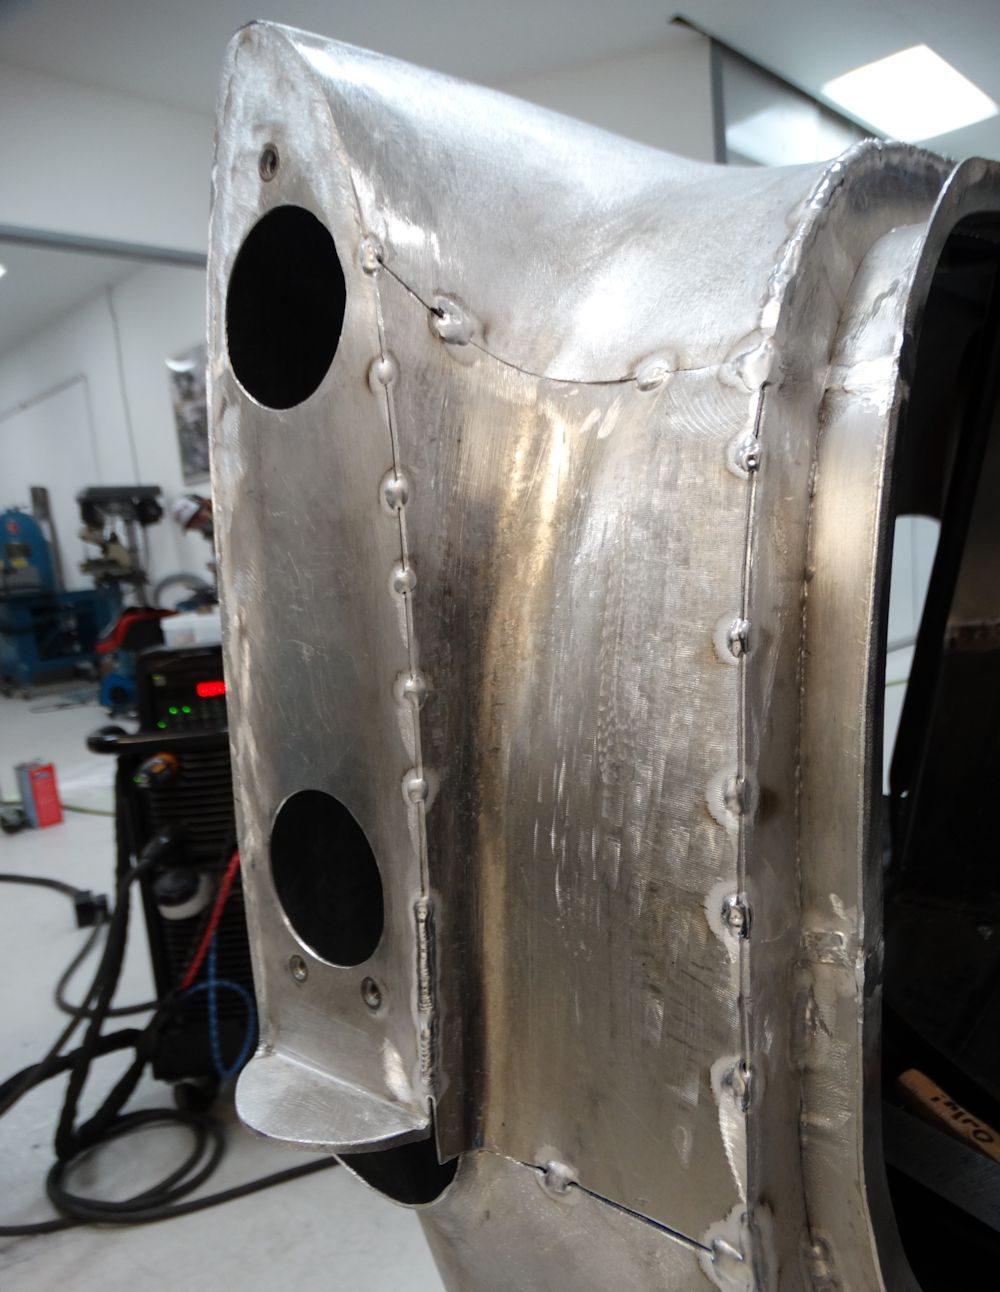
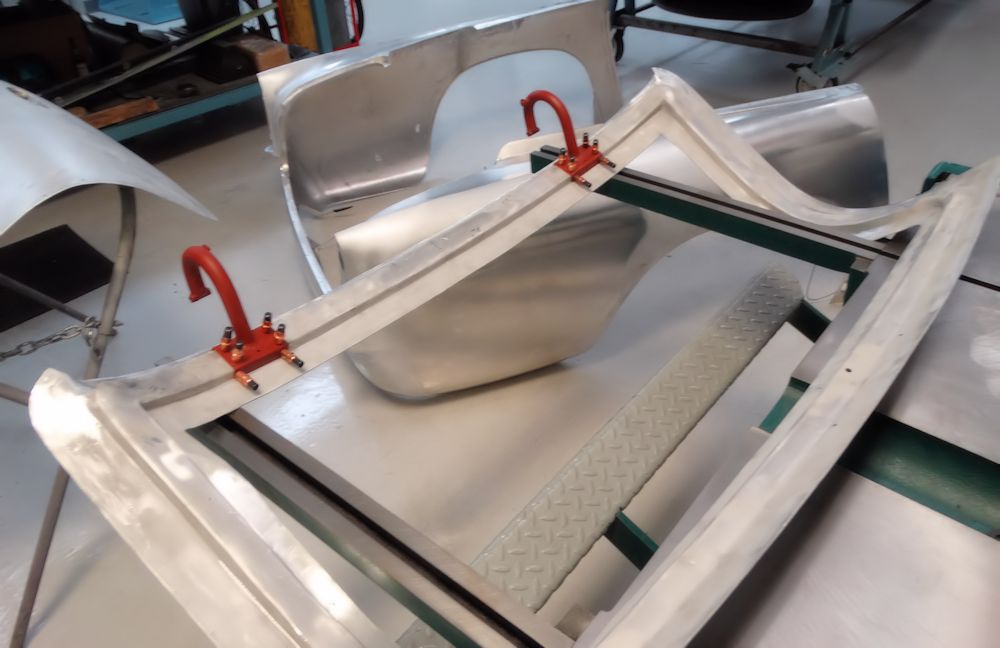
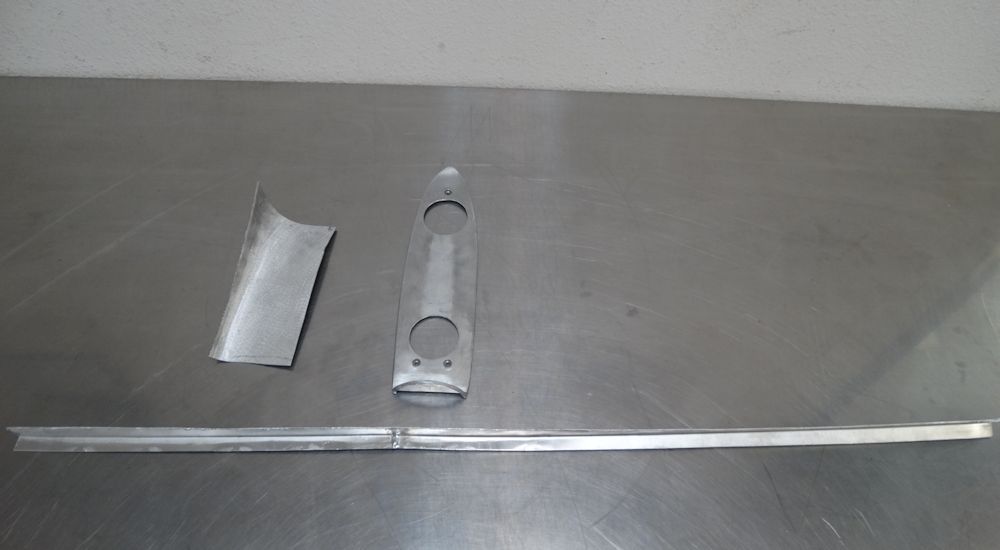
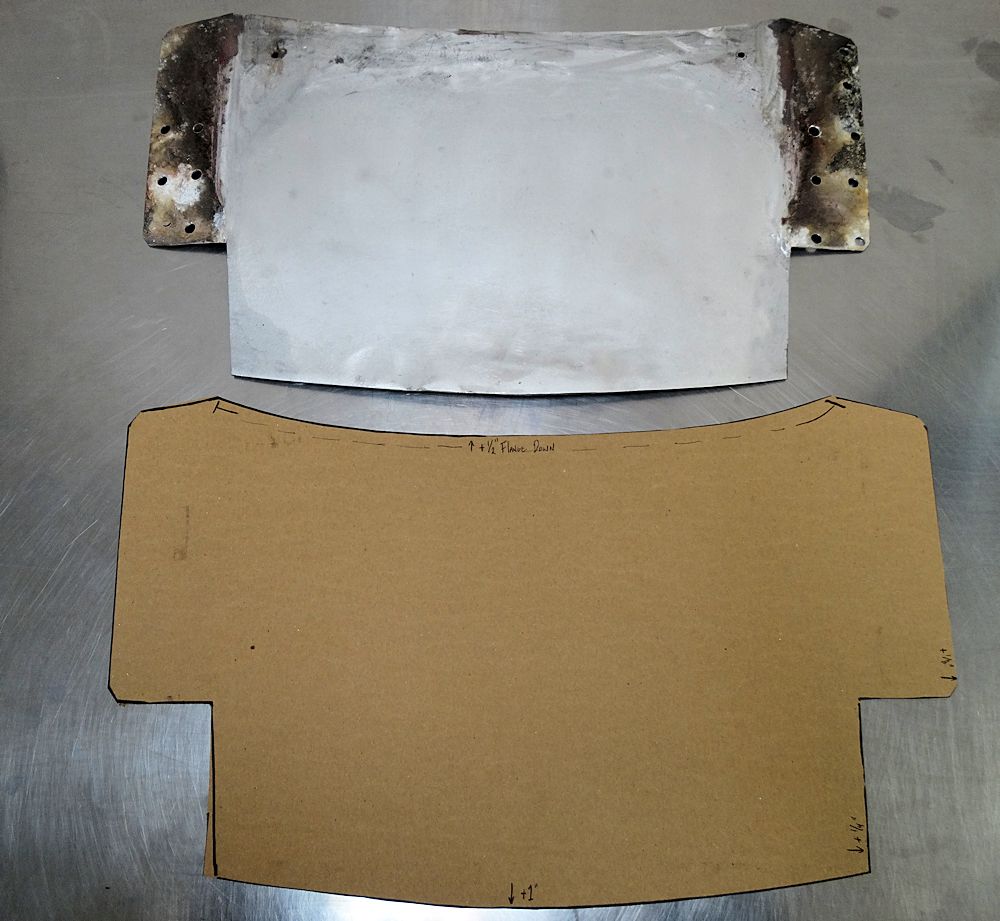
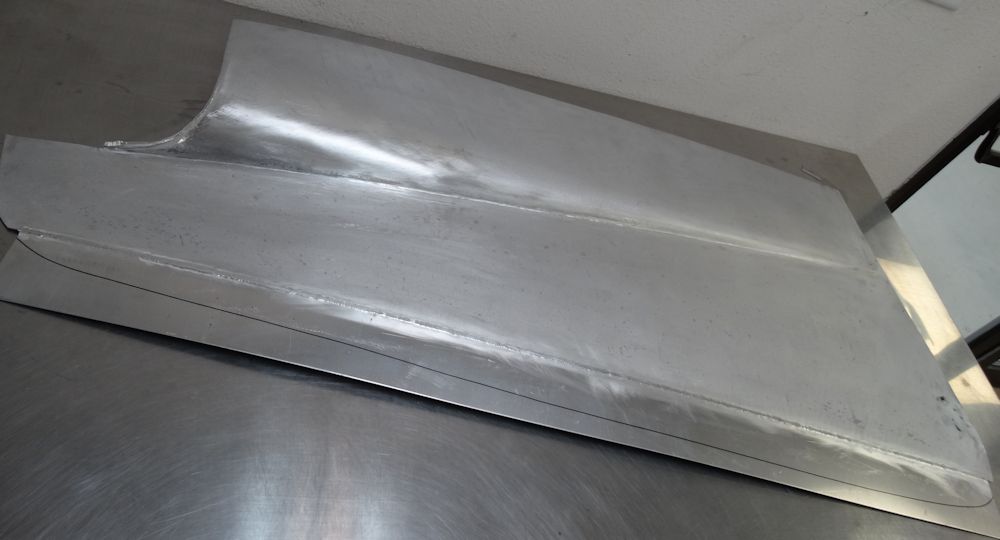
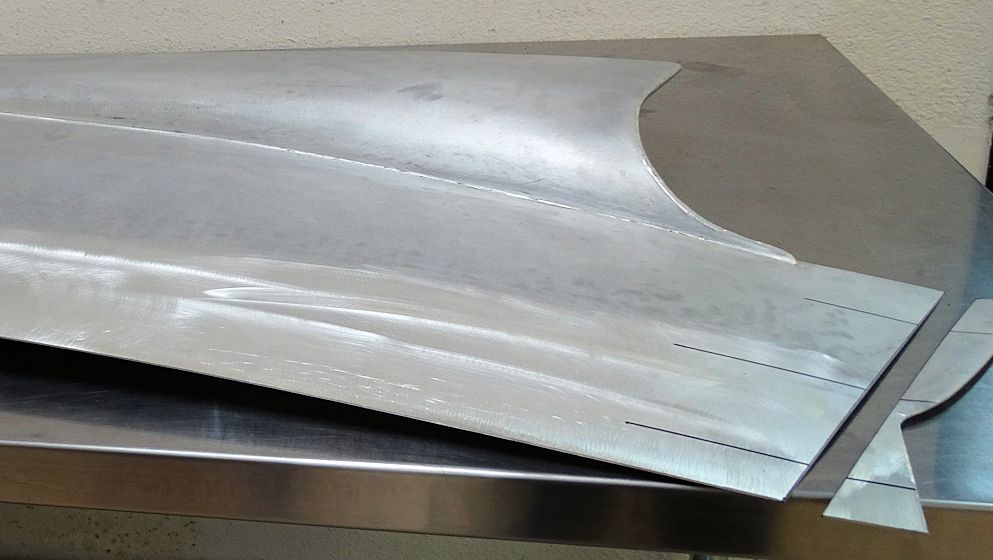
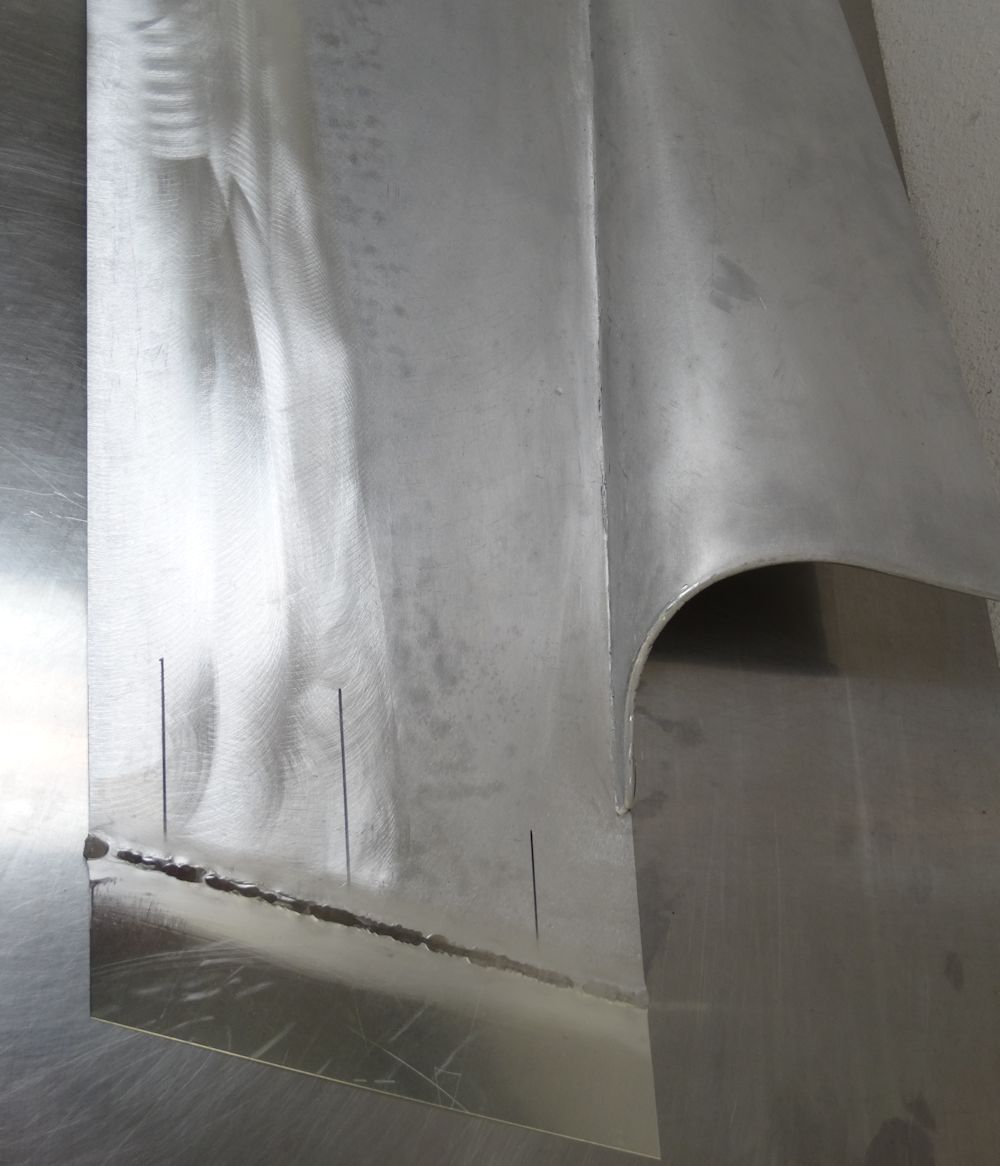
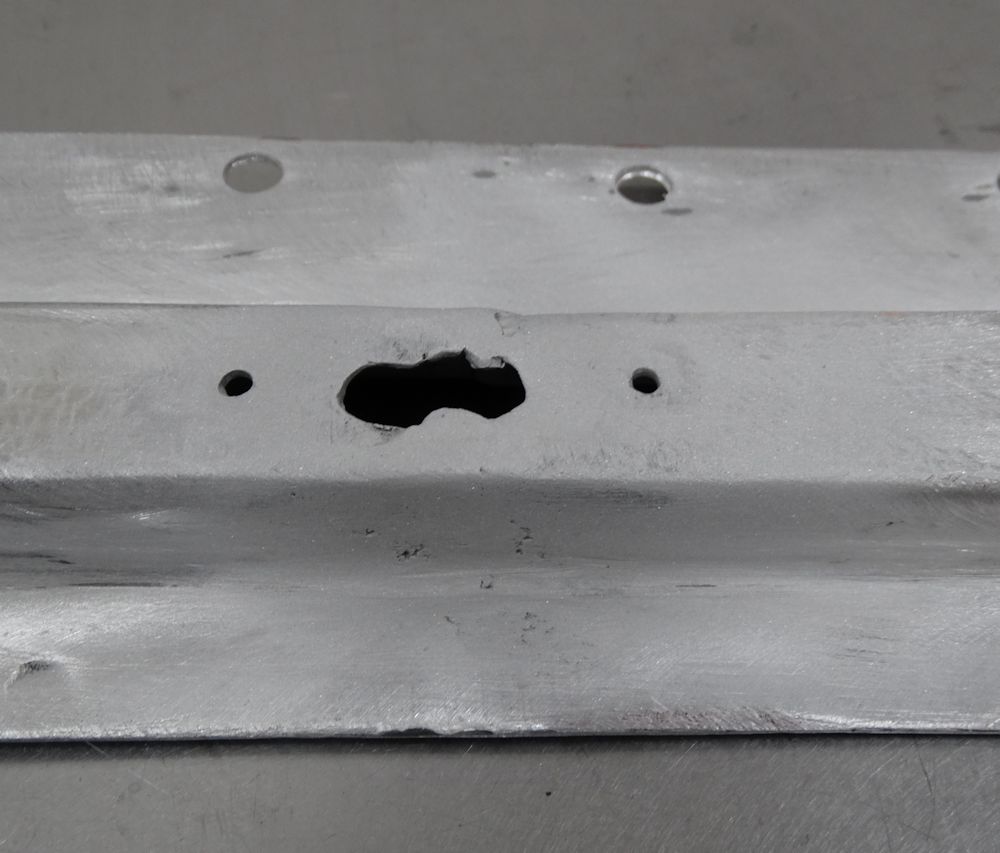
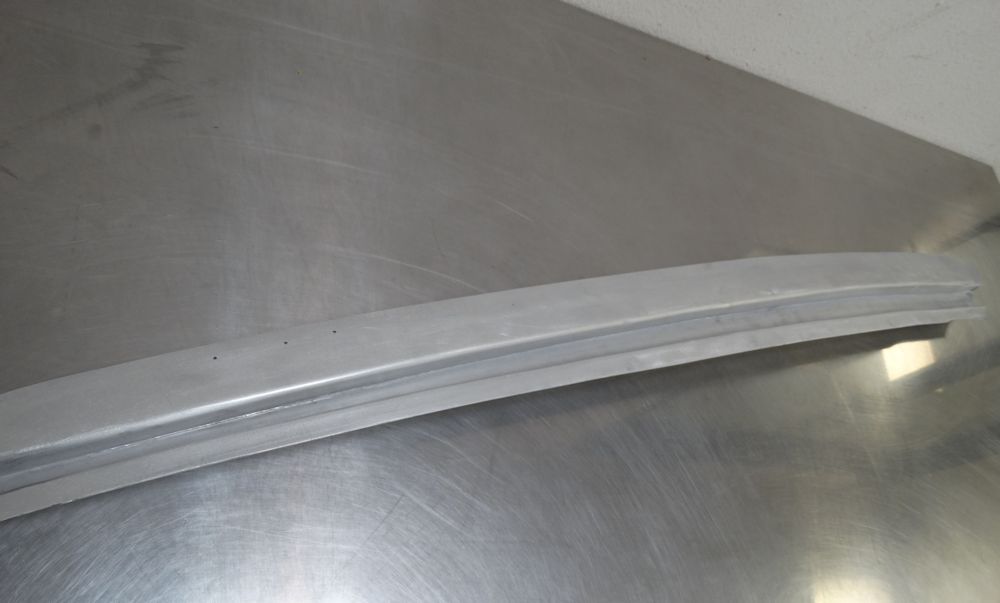
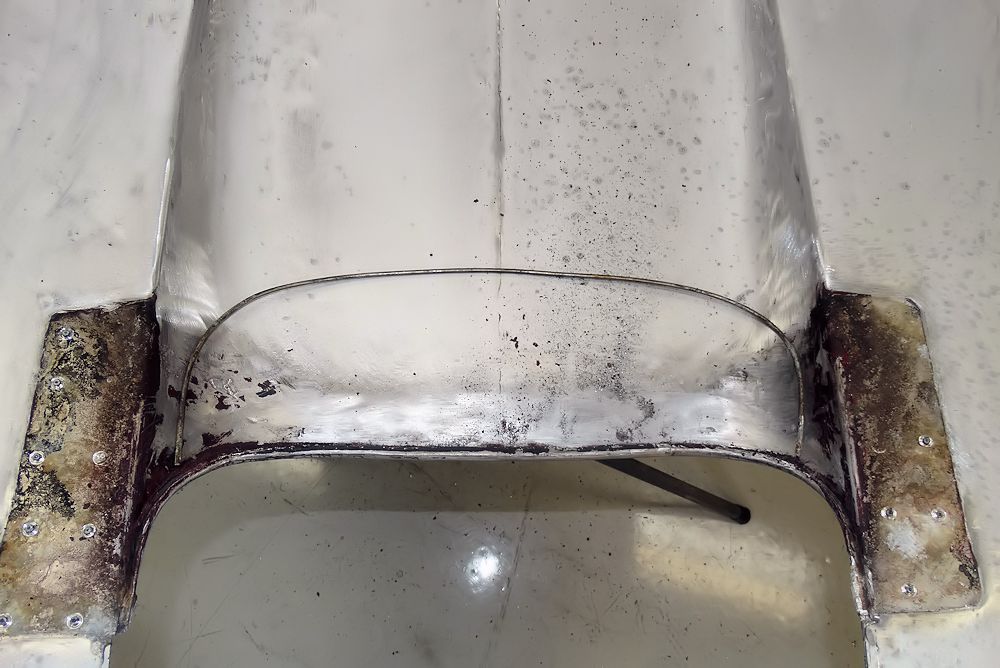
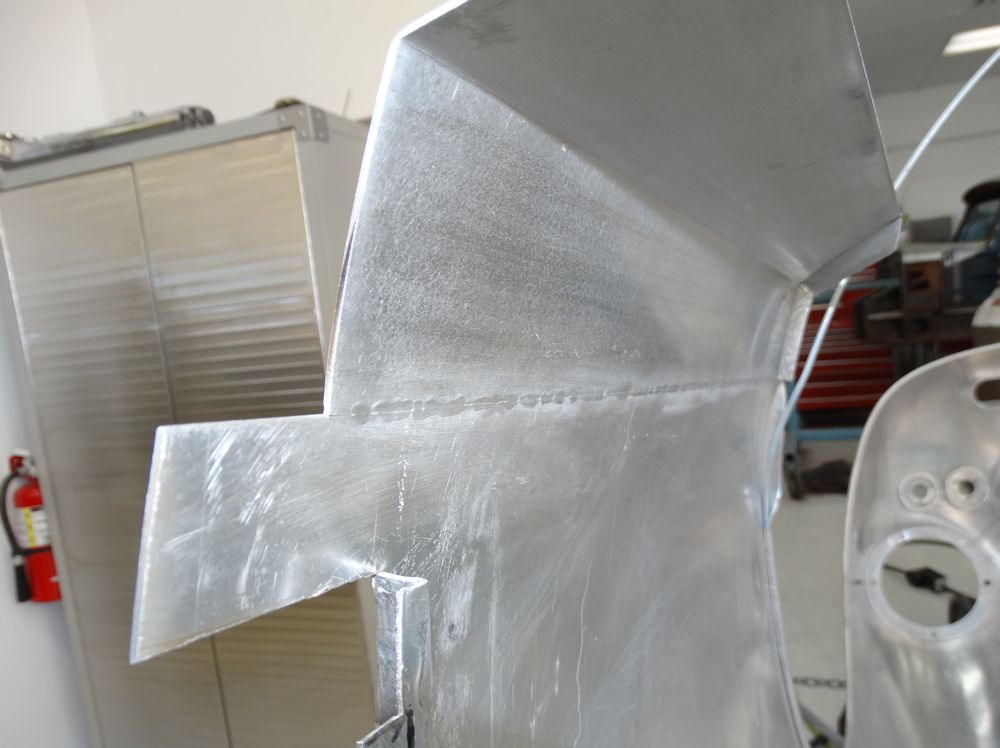
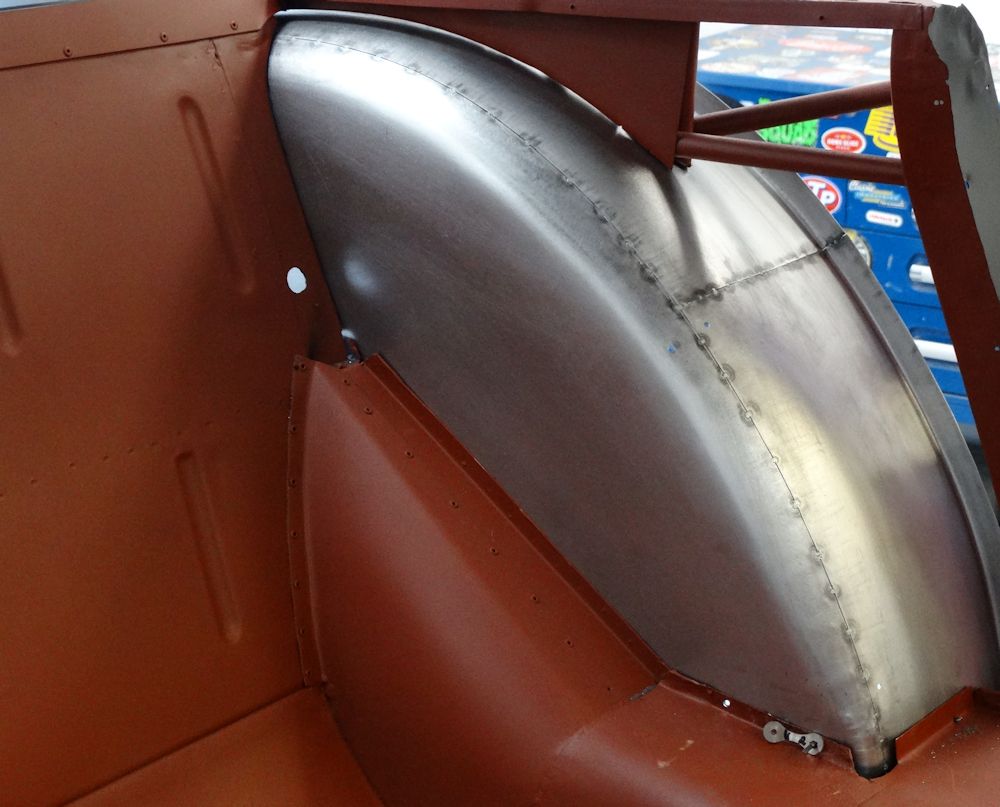
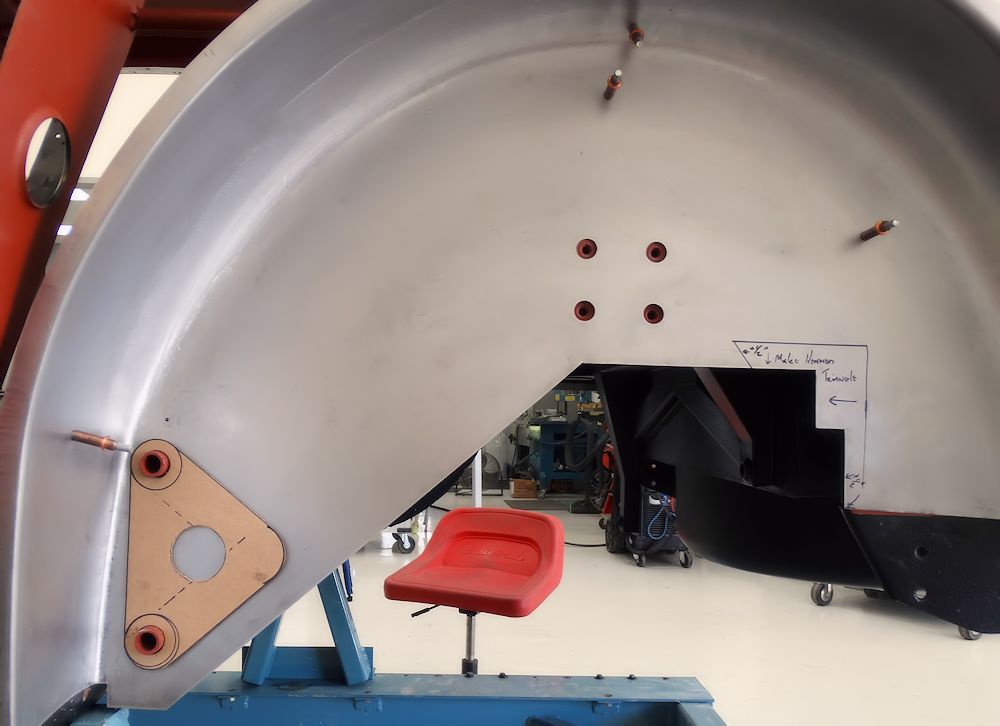
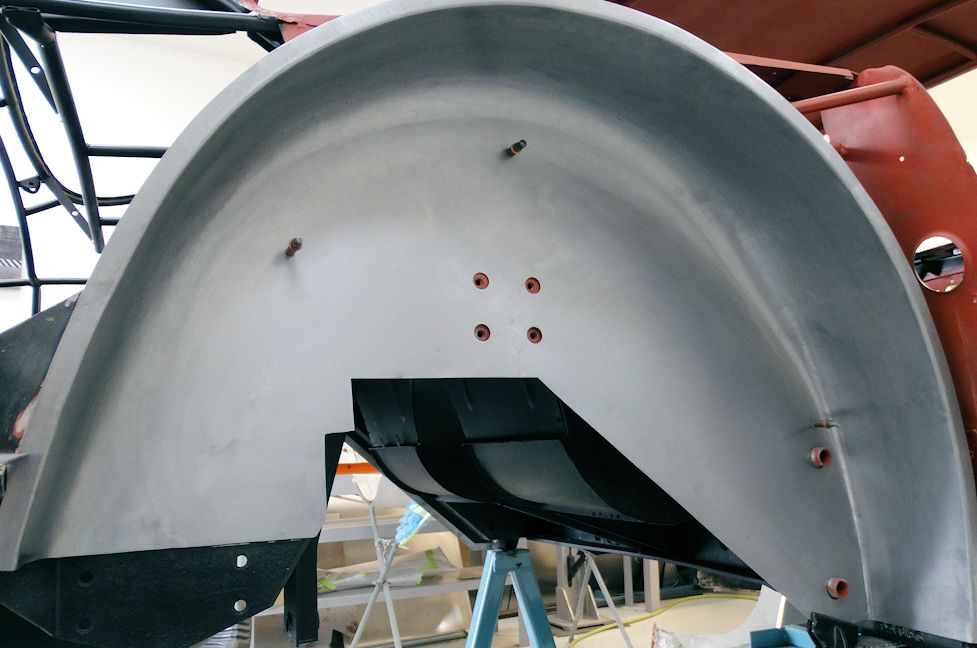
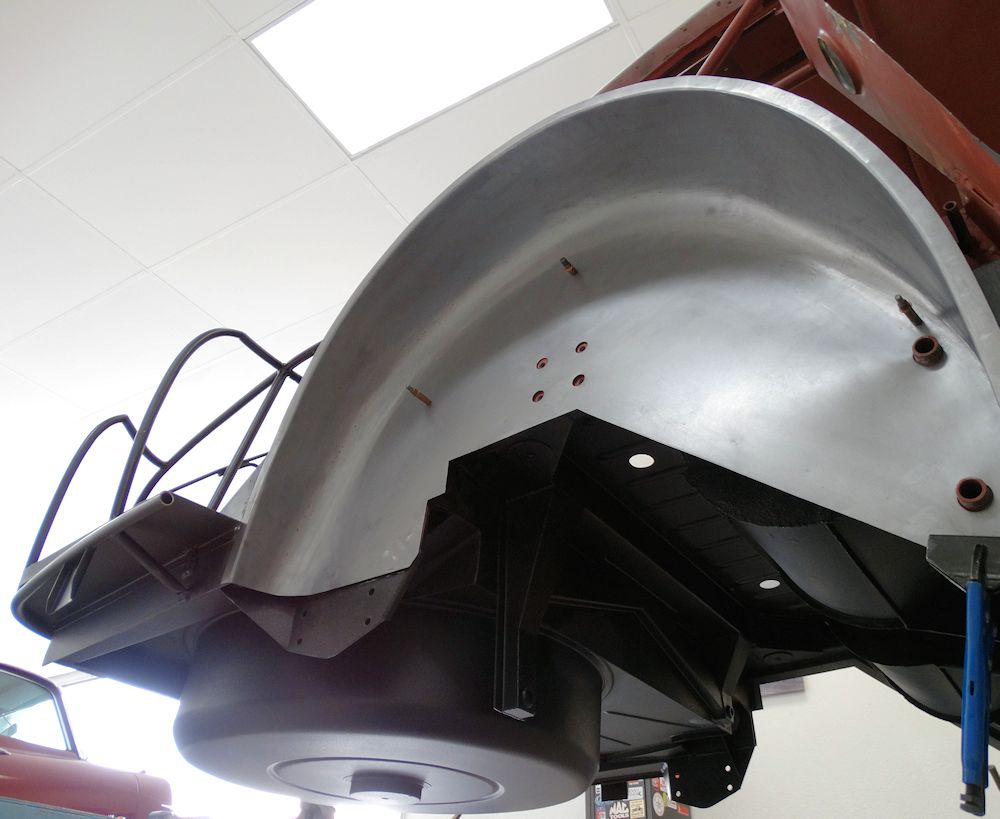
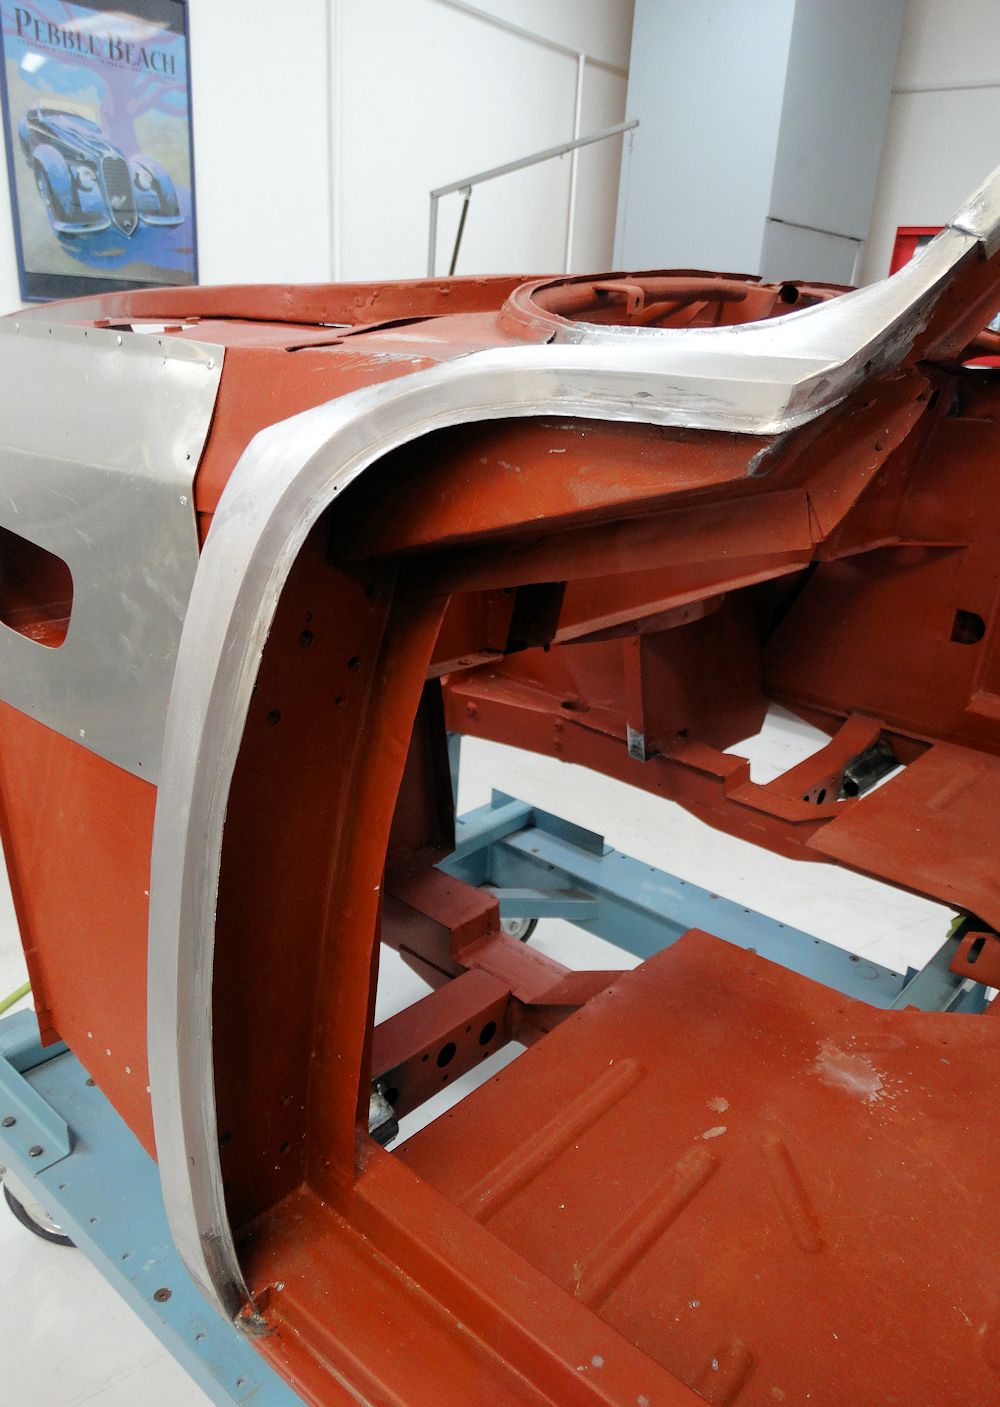
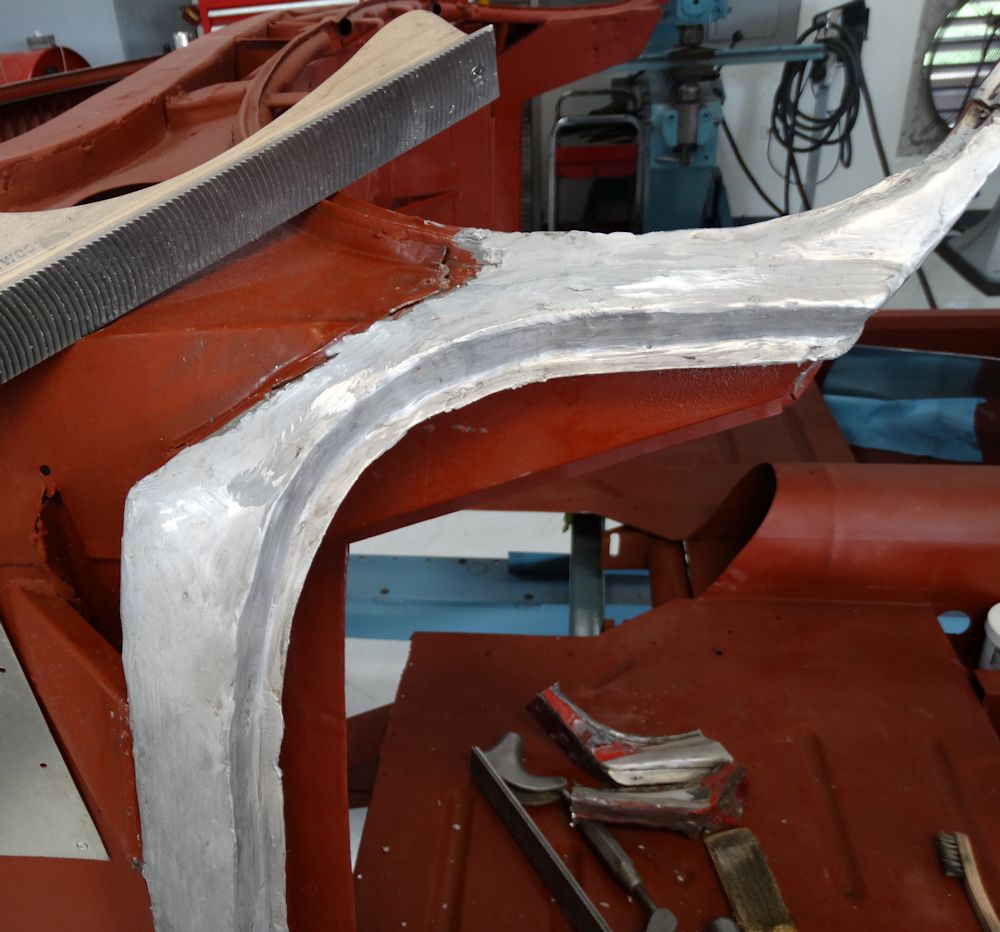
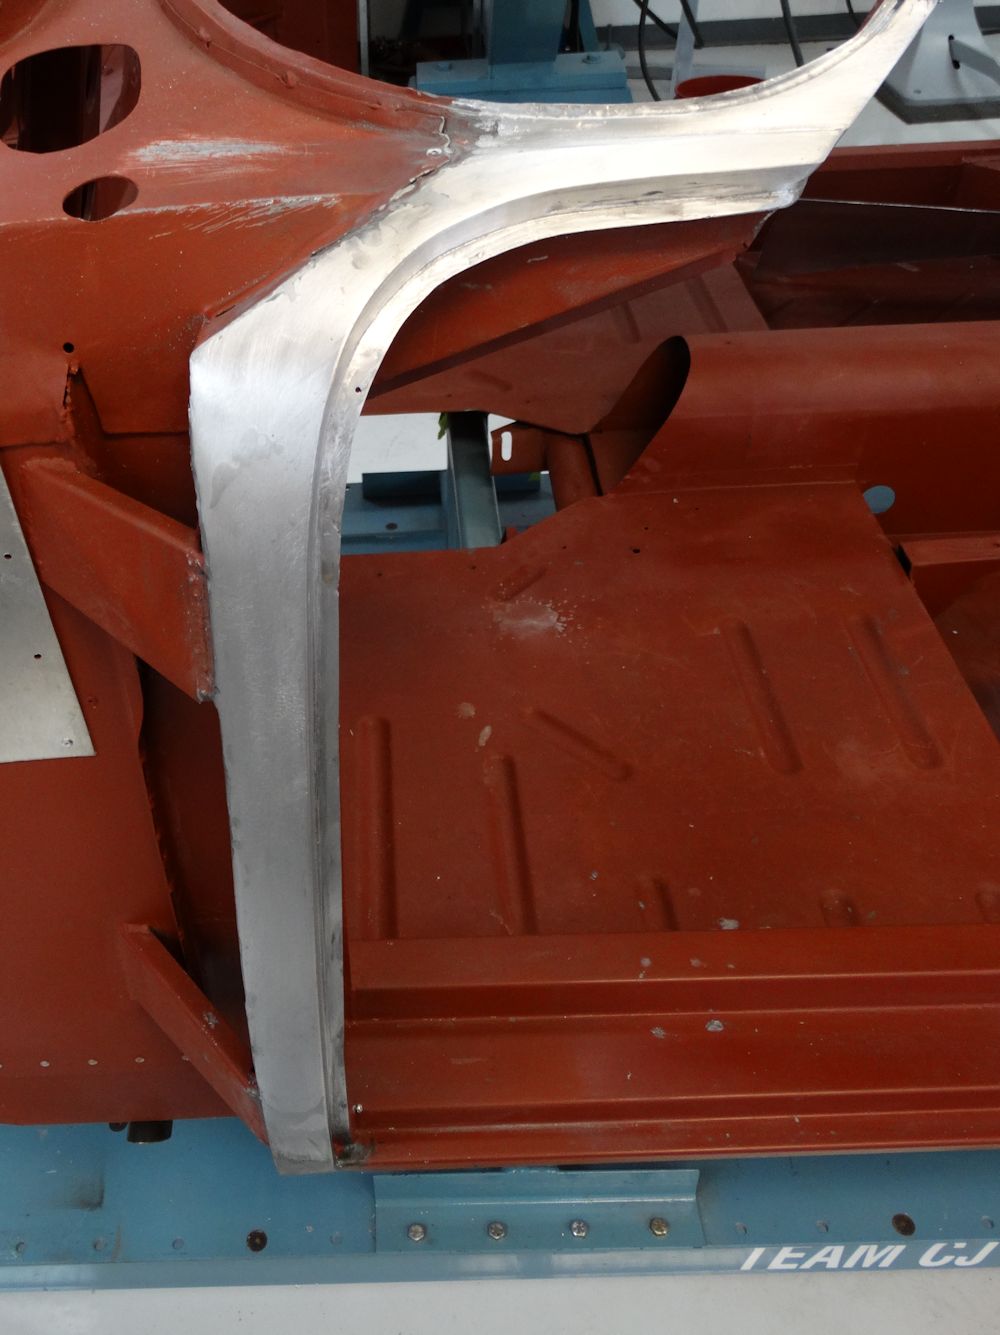
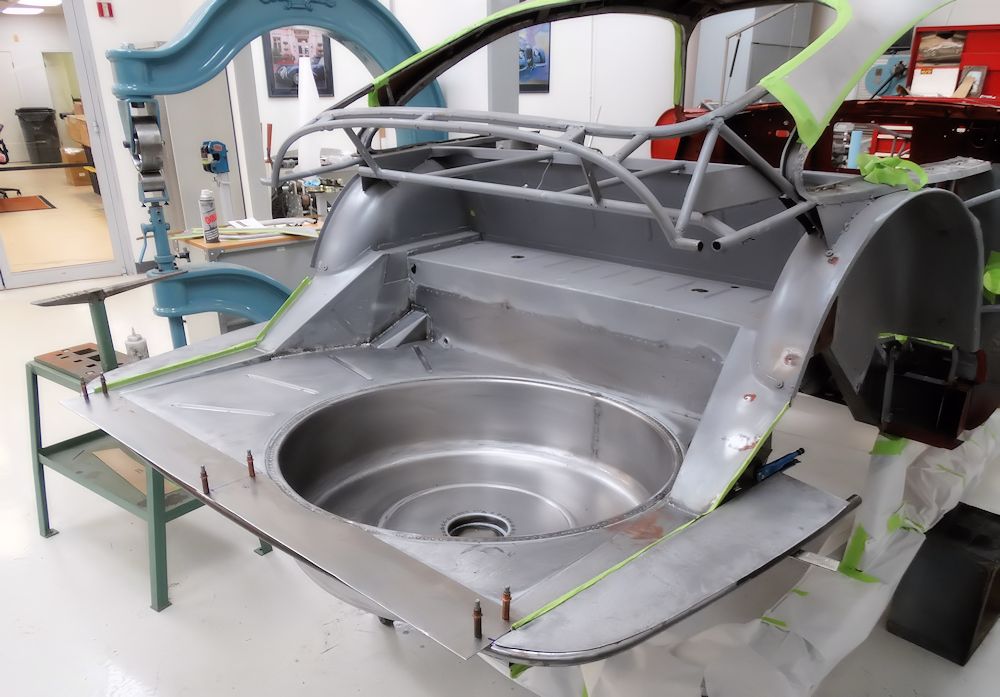
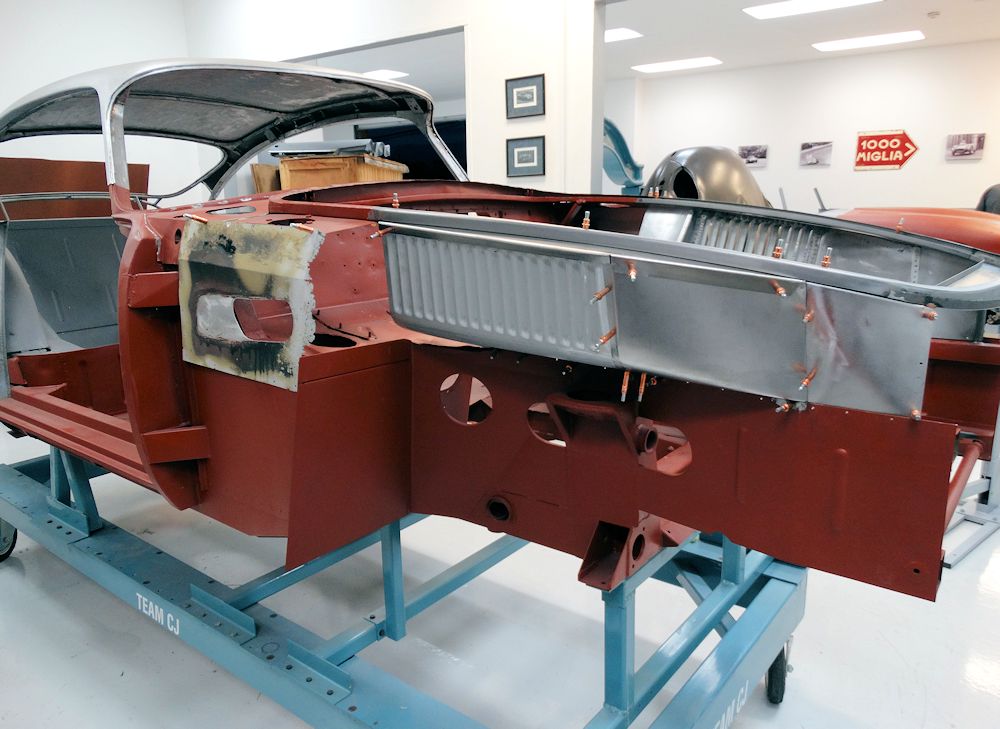
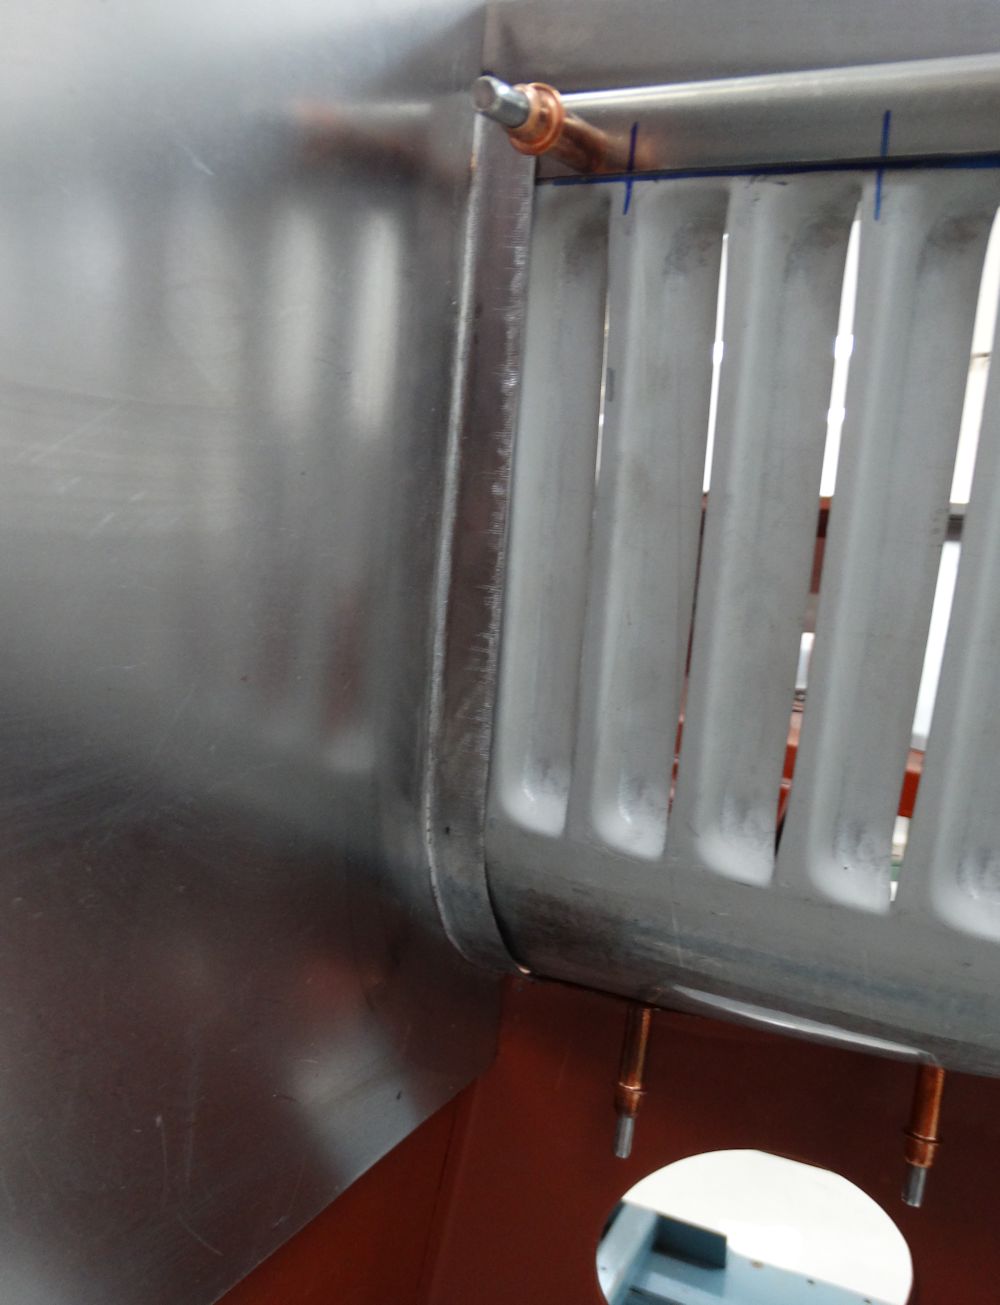
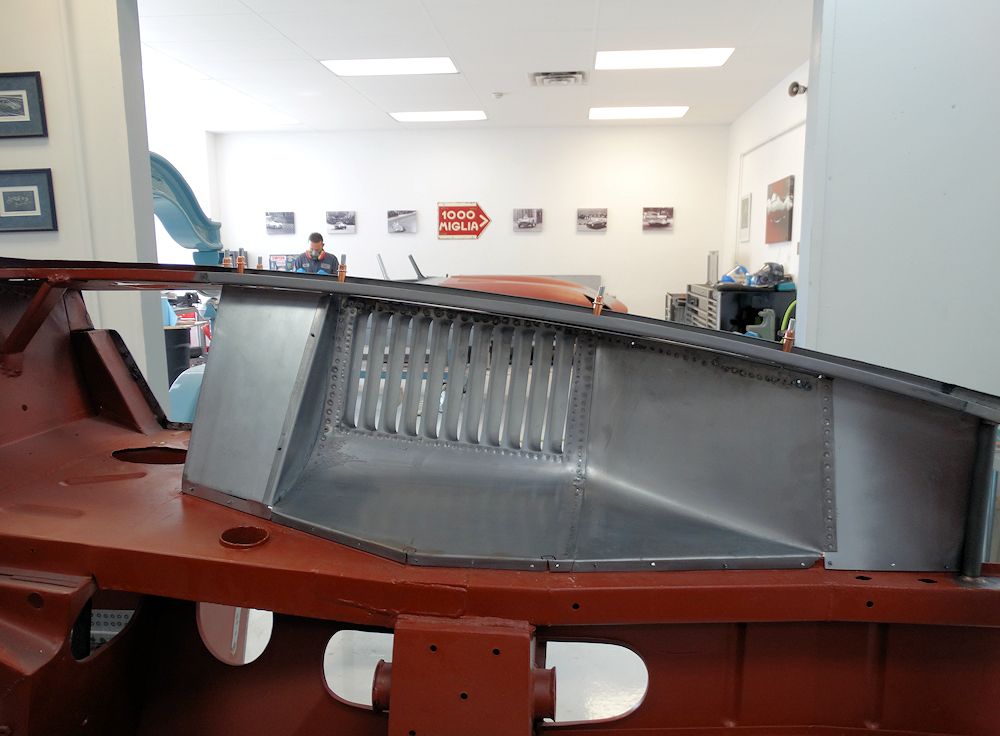
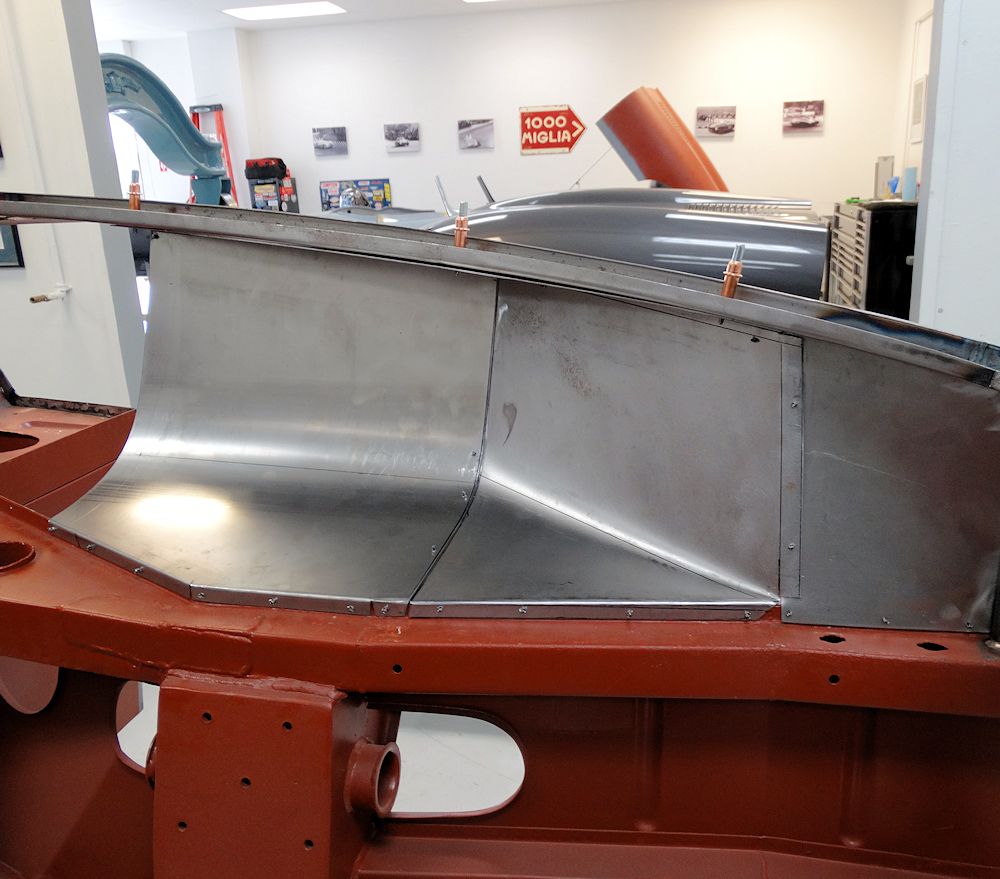
Jake has now completed his fabrication of the rear cowl panel...
 |
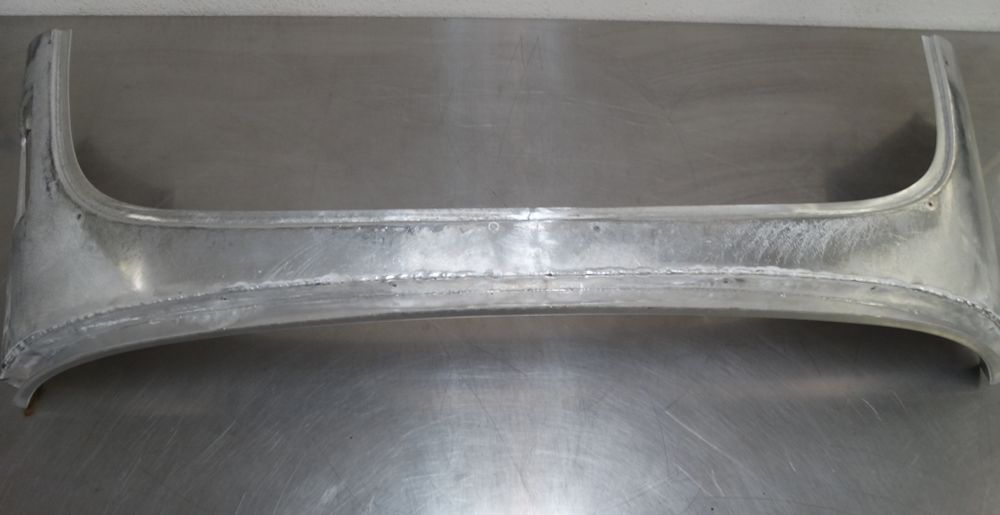 |
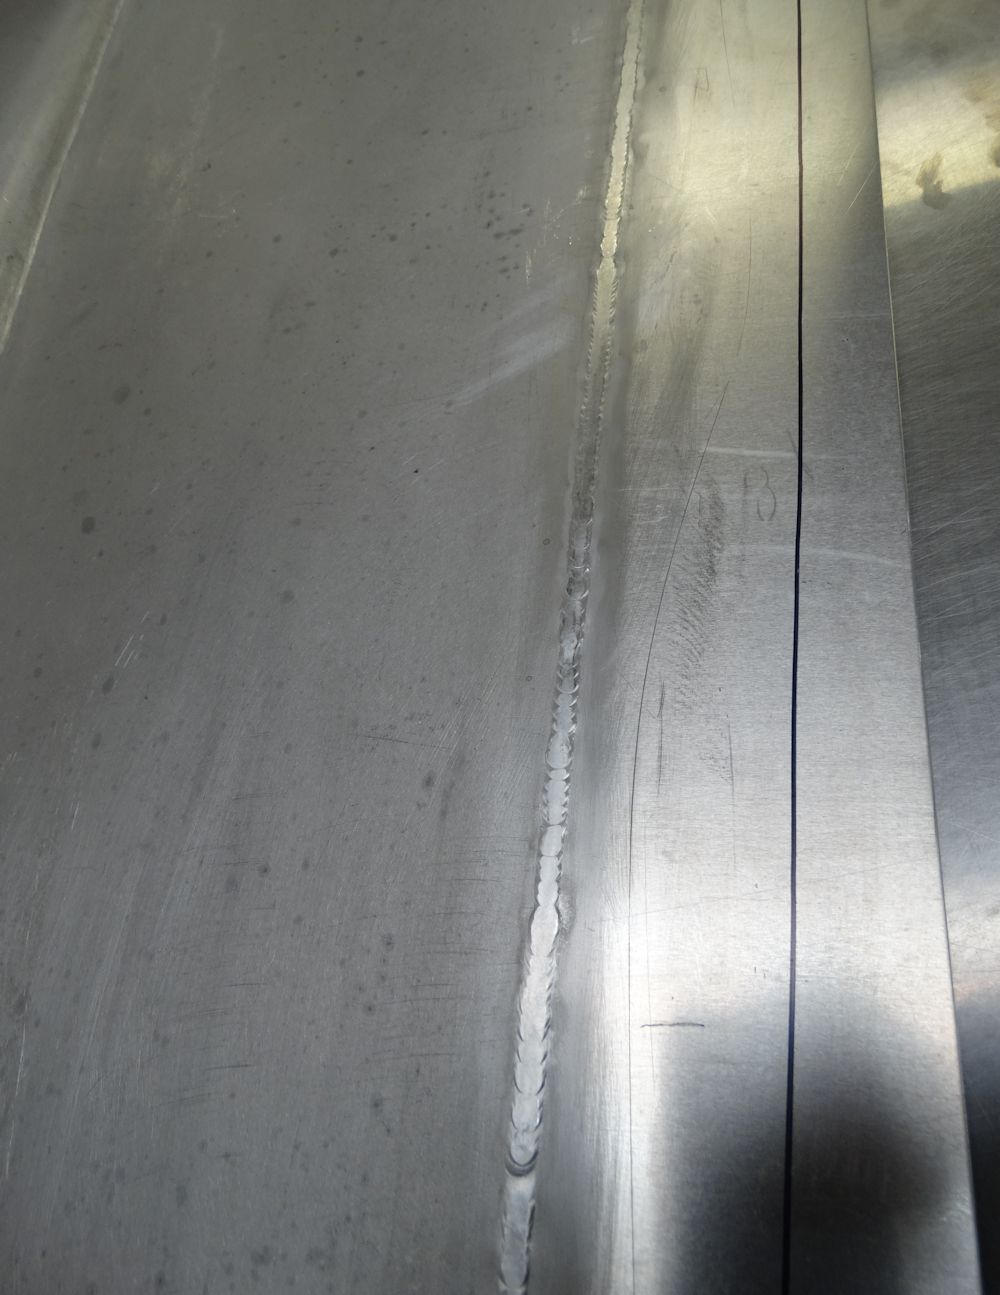
| Welding the two halves of the panel together down the center line |
|
 |
 |
| Planishing the weld |
New panel now virtually complete |
 |
 |
| One last trial fit |
 |
 |
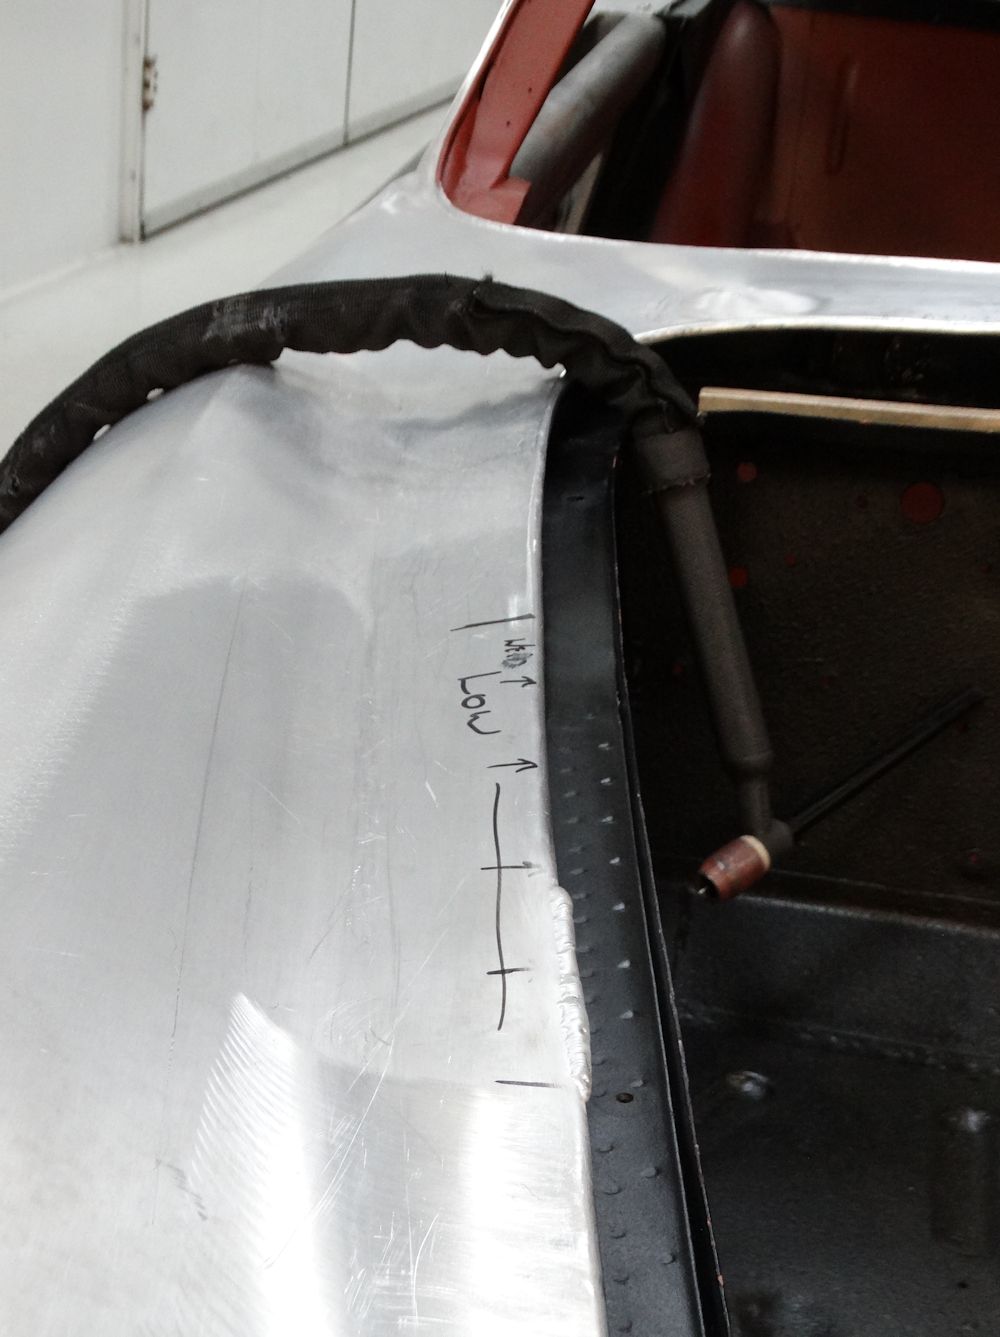
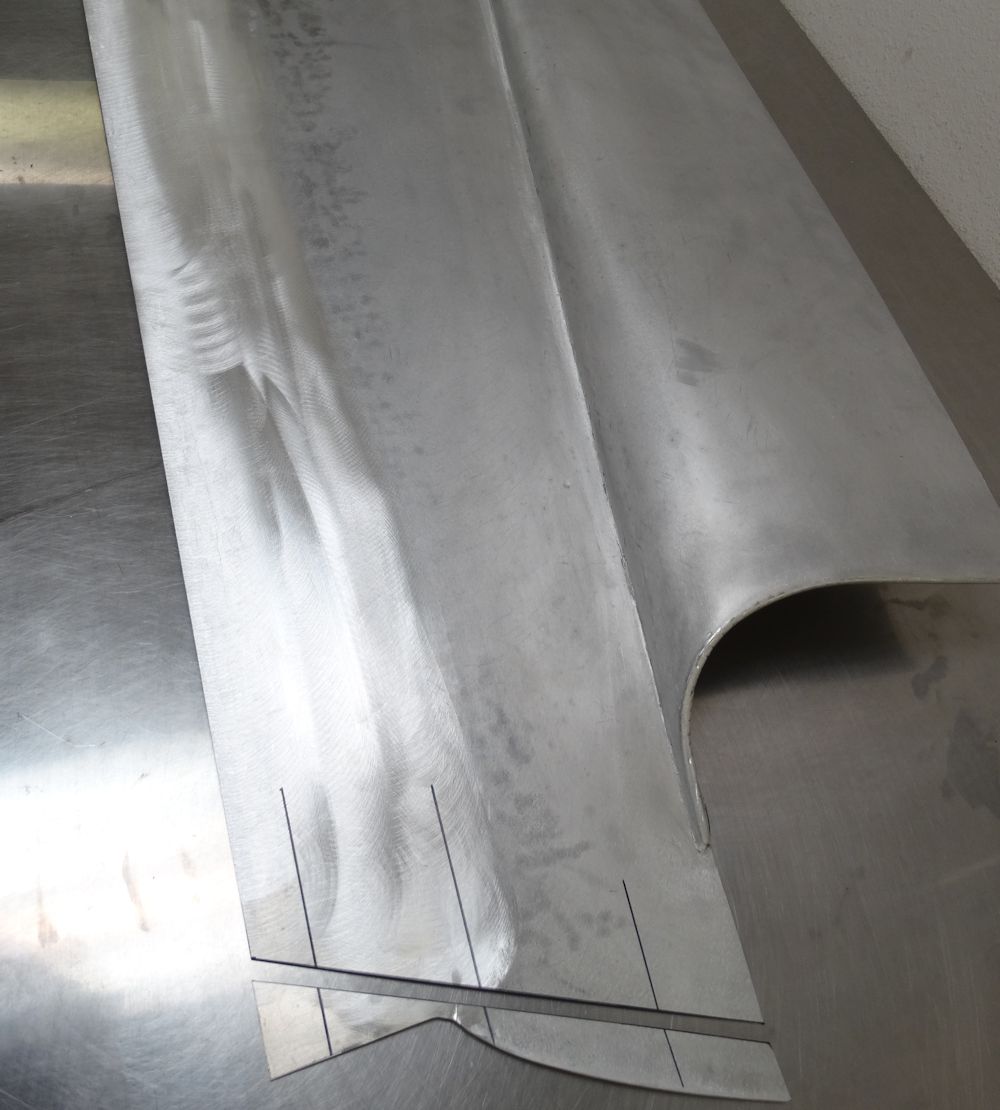
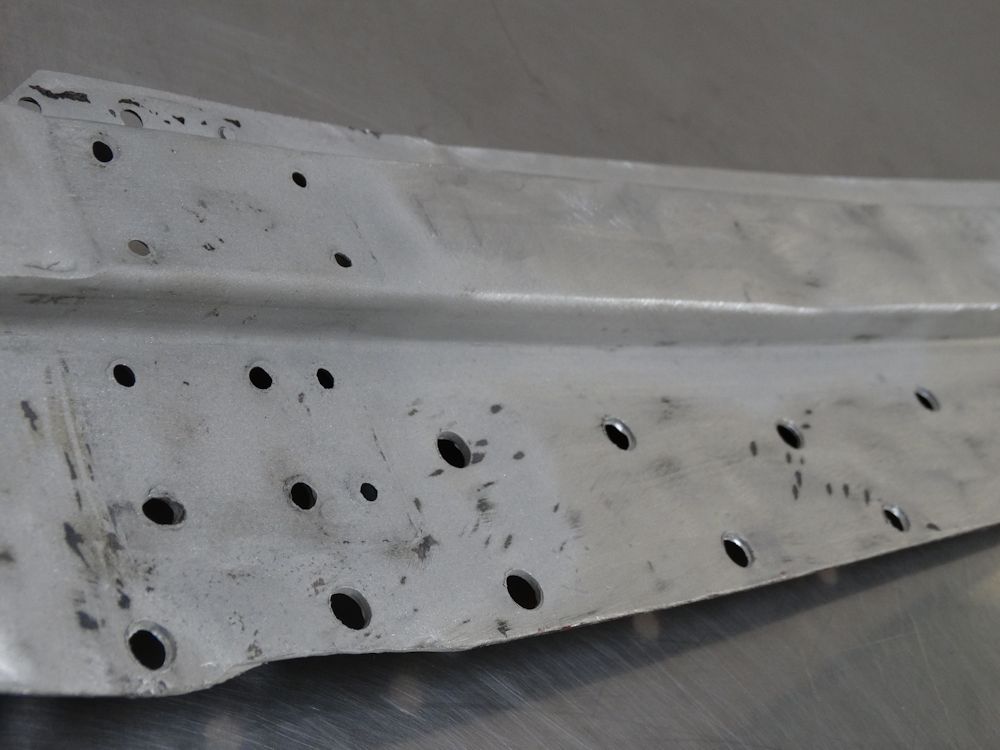
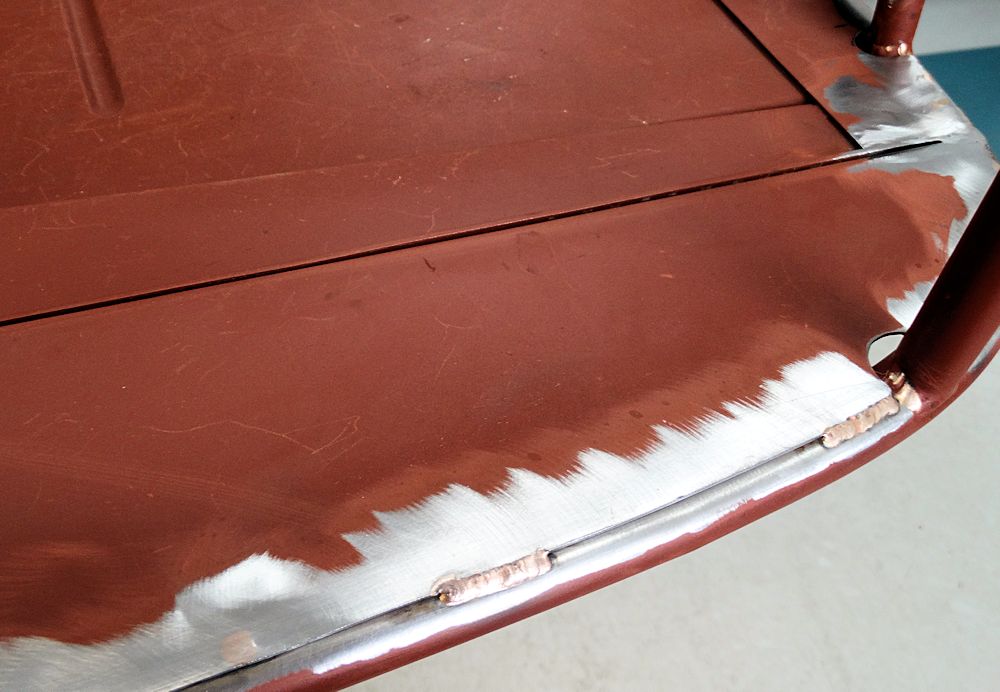
| Finalizing shape at rear edge of rocker panels |
Rocker panels now welded to front clip |
 |
 |
 |
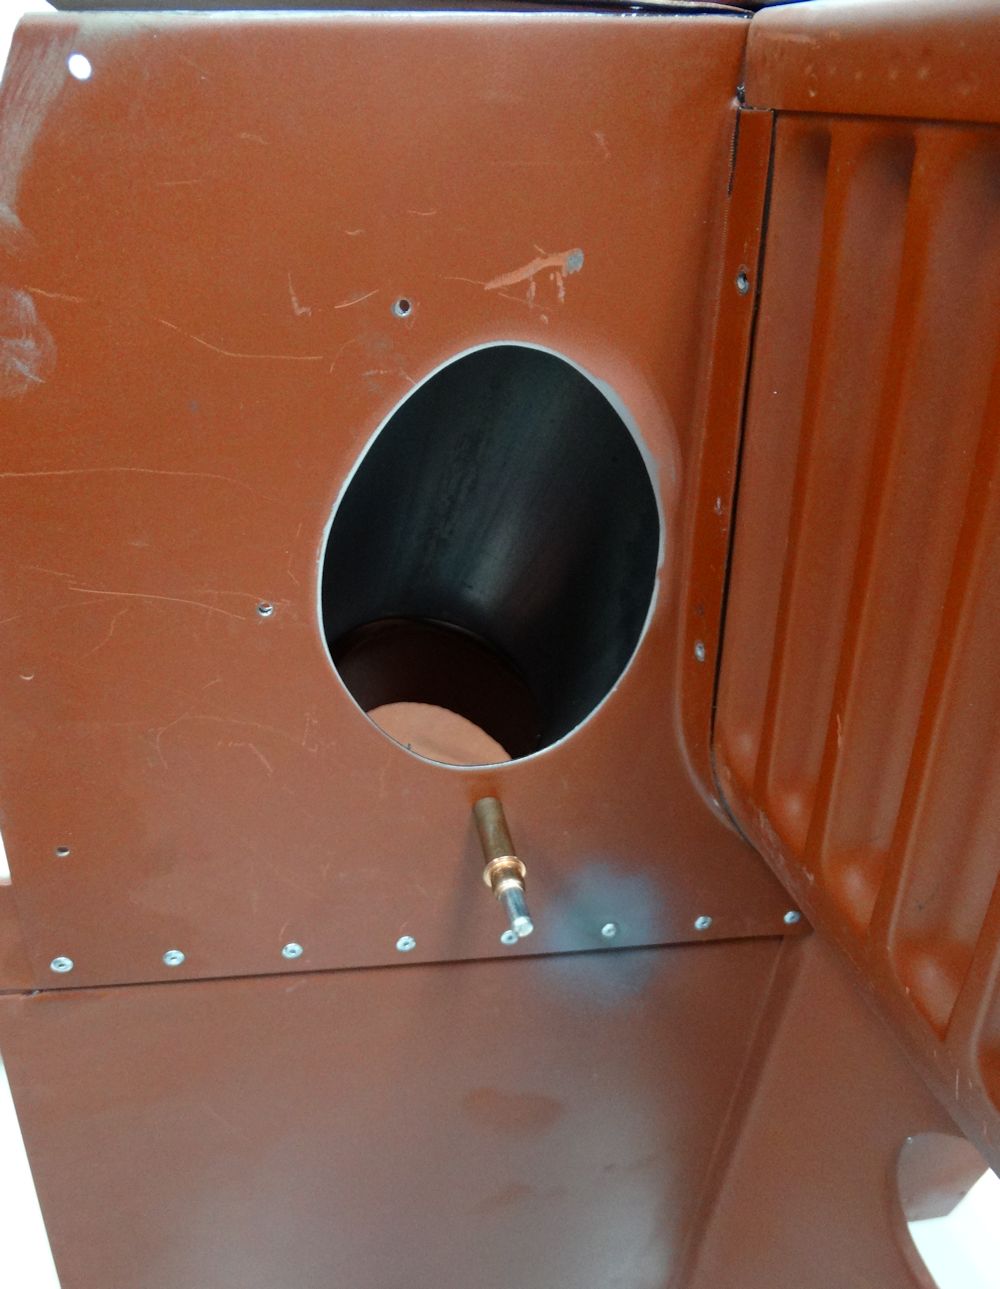
 |
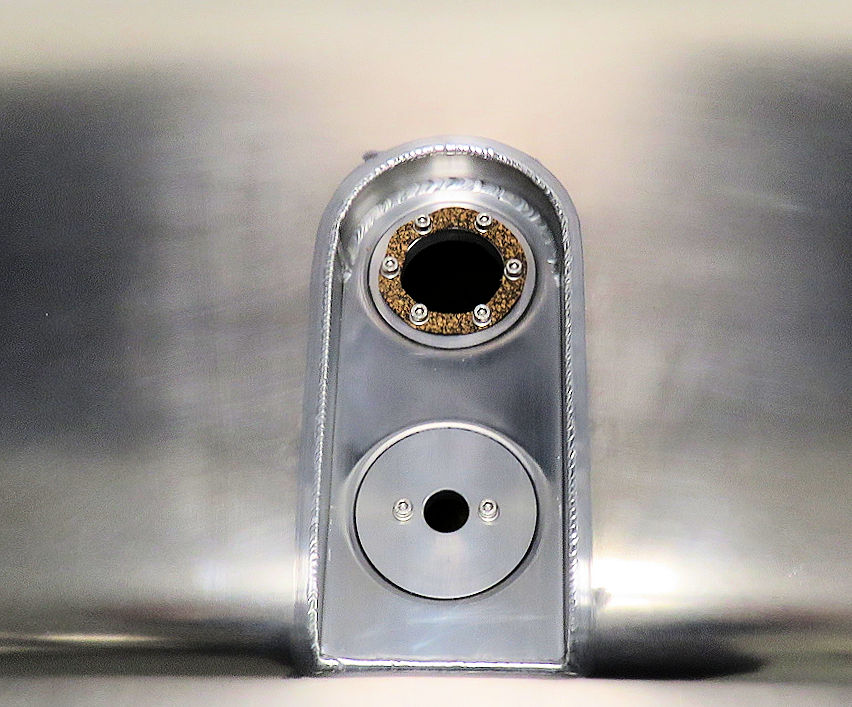
| Trial fitting gas tank to ensure filler neck
matches up with filler door in LH quarter panel |
|
 |
 |
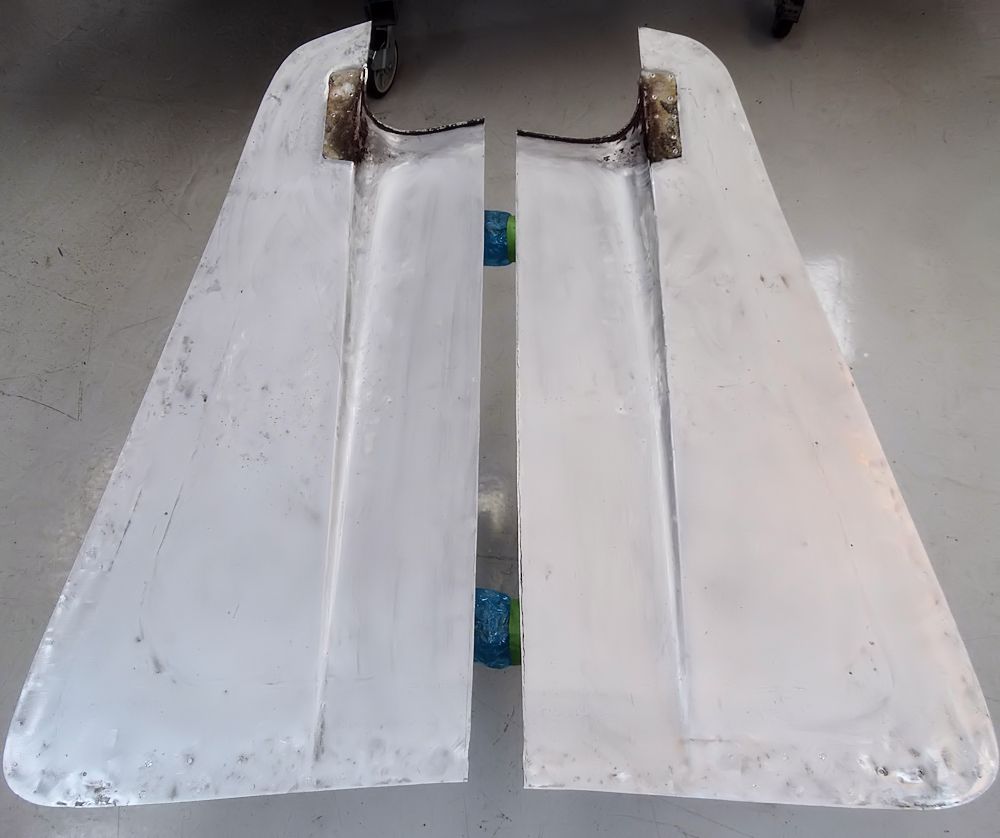
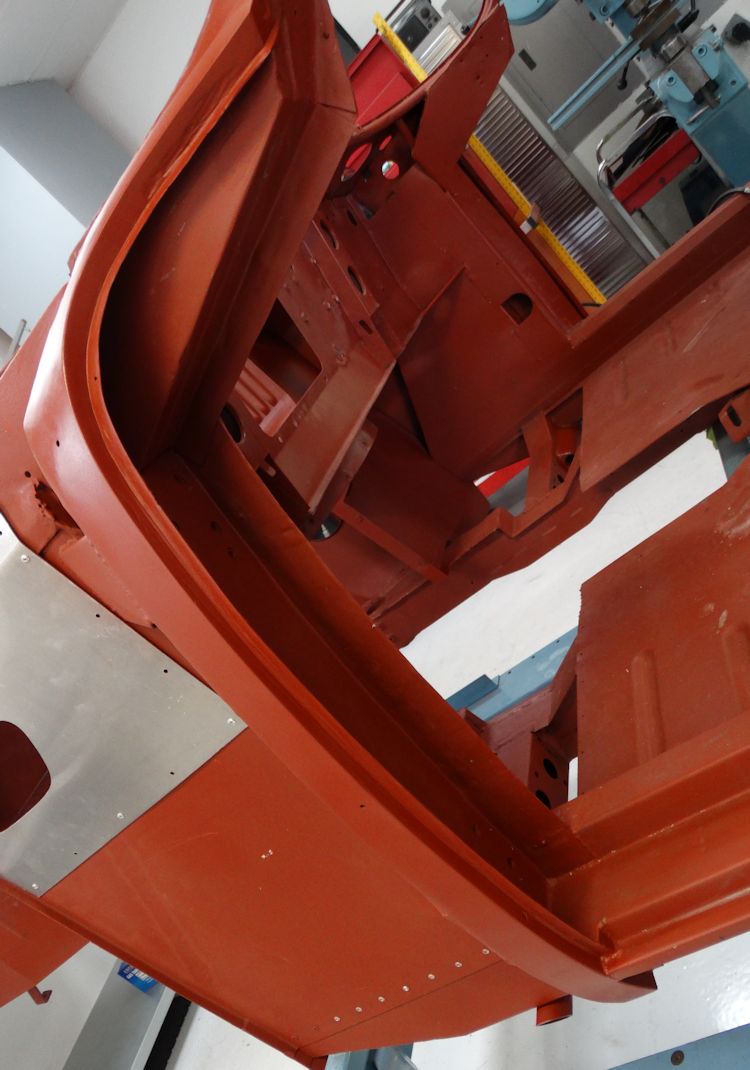
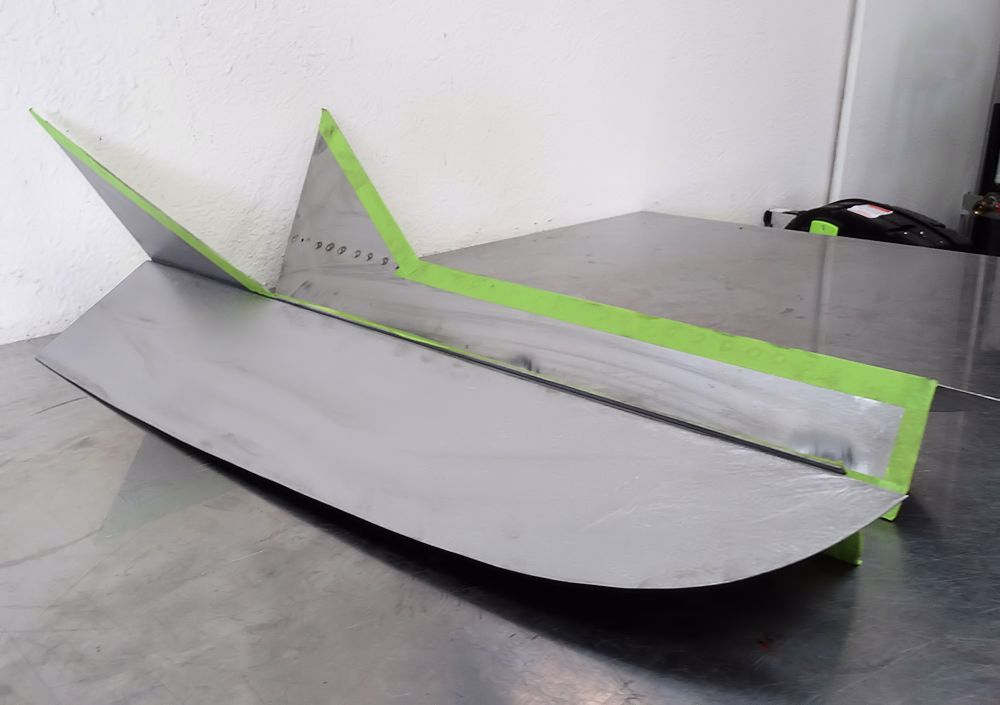
| Fabricating rear cowl panels |
|
 |
 |
| Shaping the right side cowl panel |
|
 |
 |
| Trial fitting the new panel |
|
 |
 |
| Applying a phosphoric acid based cleaner,
followed by a chromic acid based conditioner |
The conditioner creates a gold coating that
becomes part of the alloy skin and promotes primer adhesion |
 |
 |
| Applying texture to the inner surface of the
front clip |
|
 |
 |
| Inner surface has now been painted satin black |
Not long before front clip is permanently
installed |
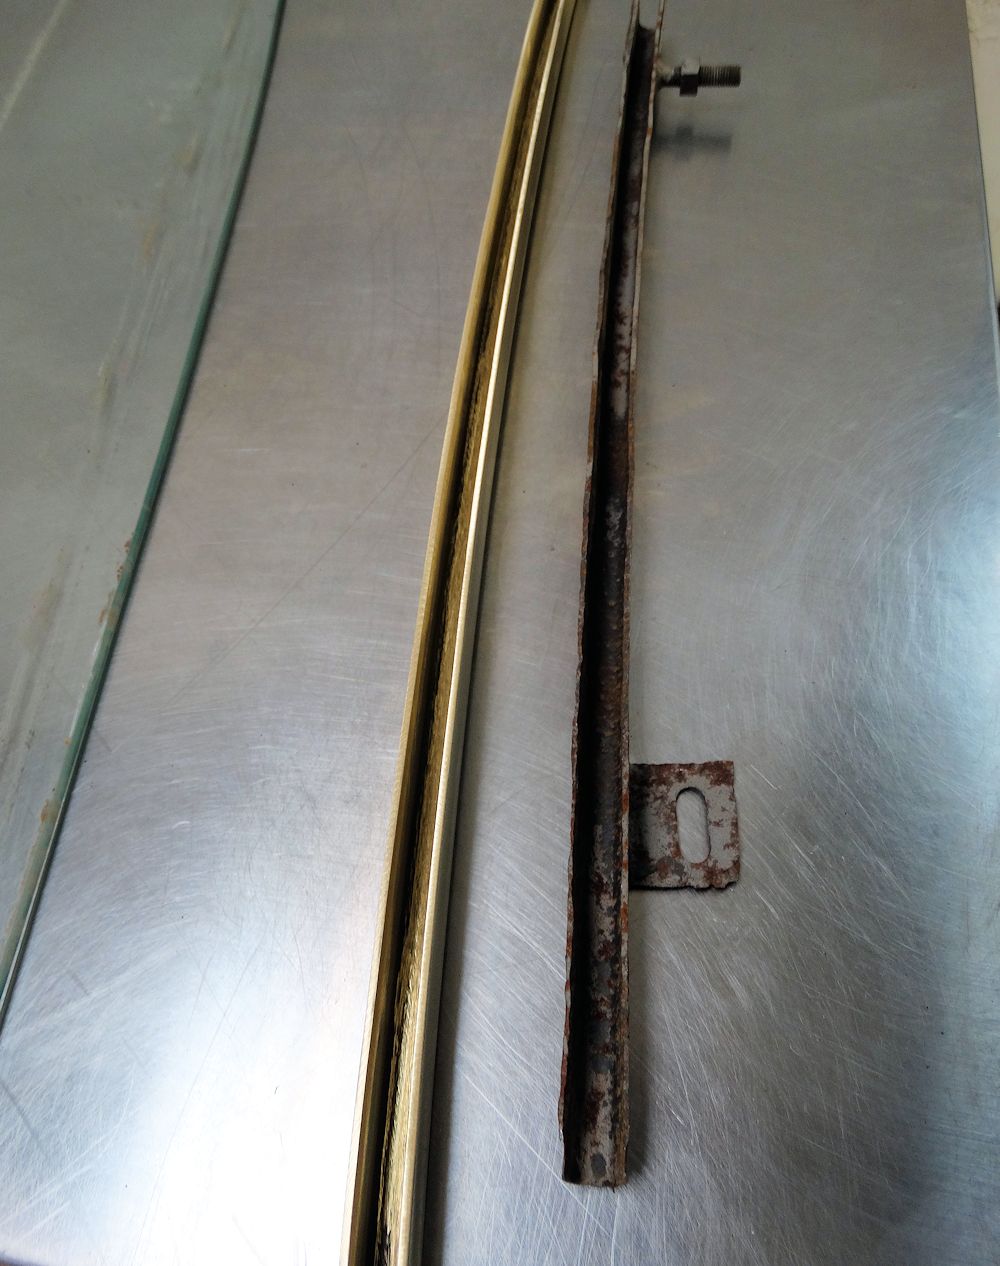
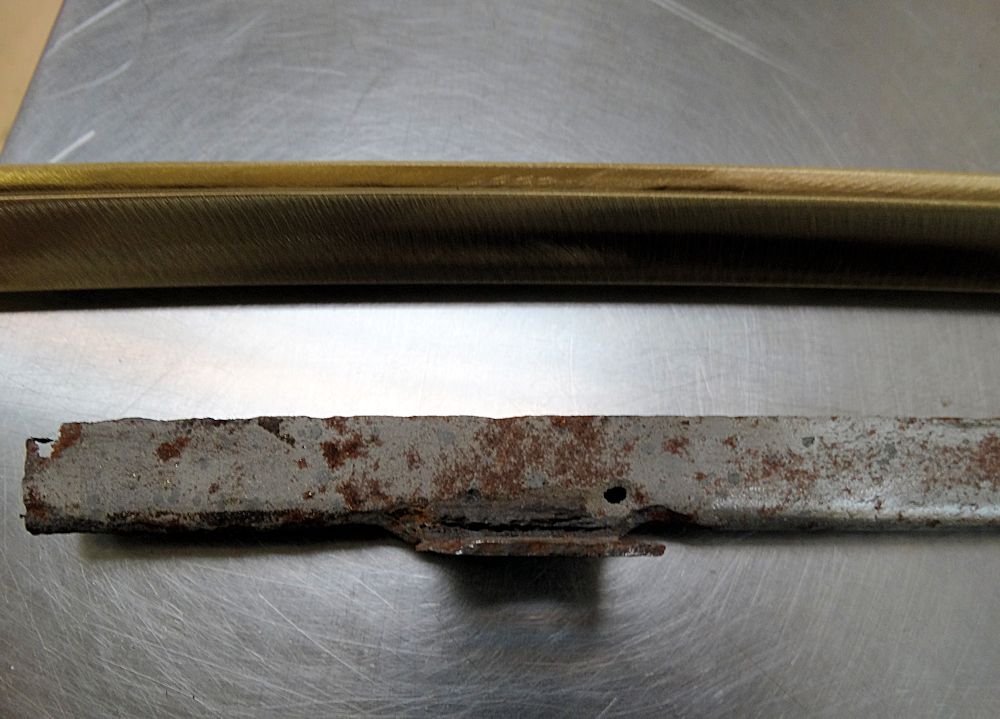
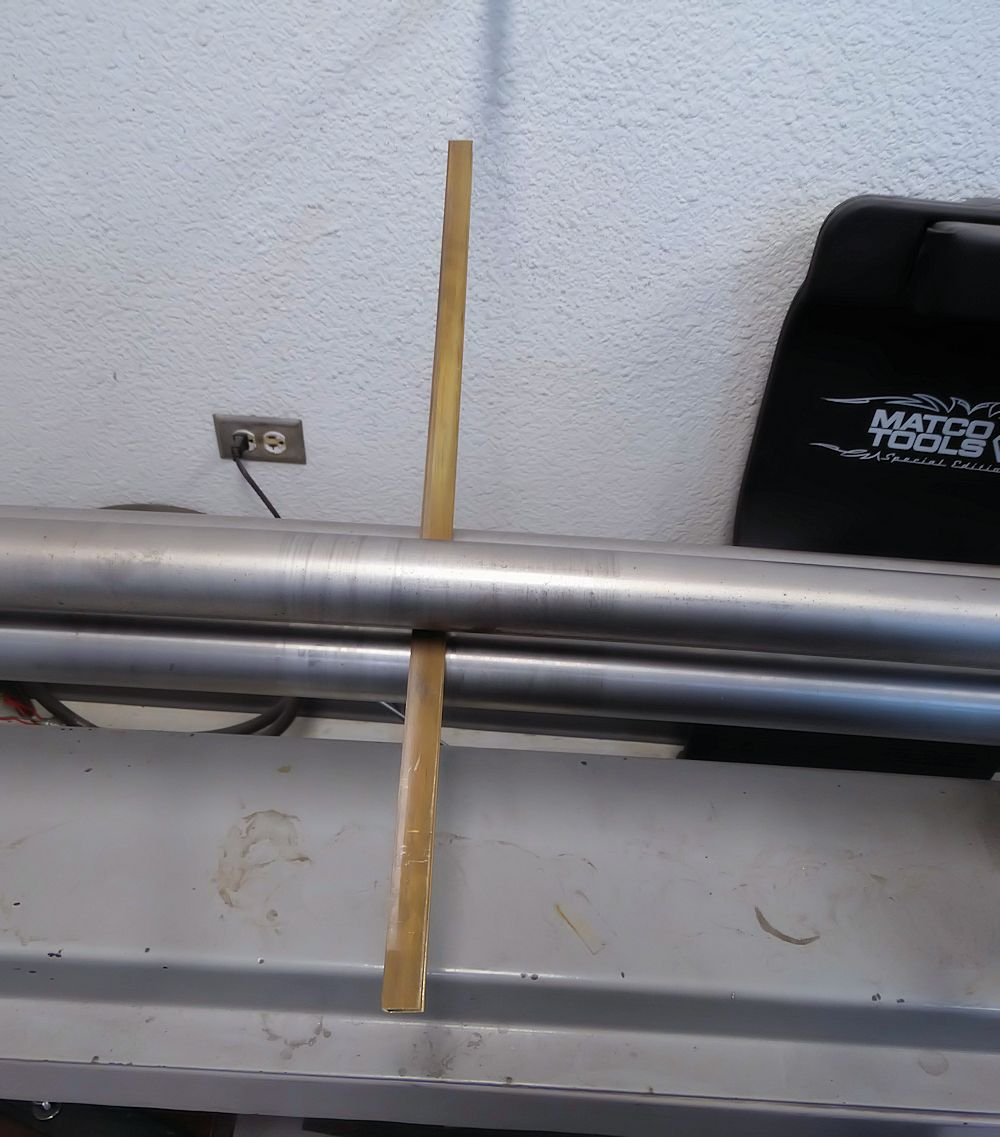
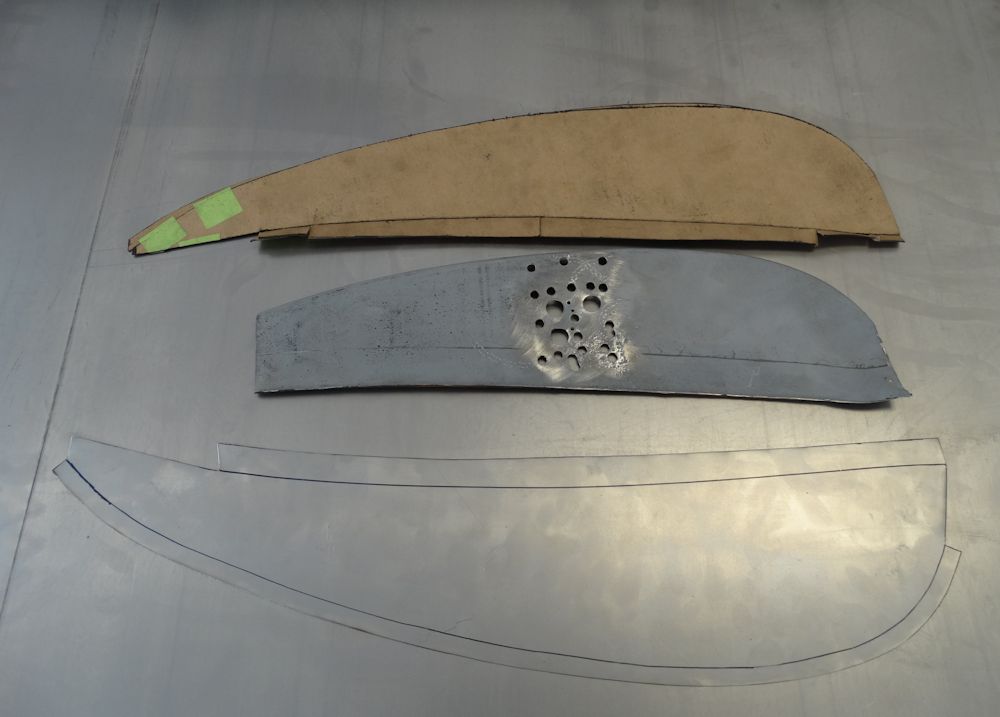
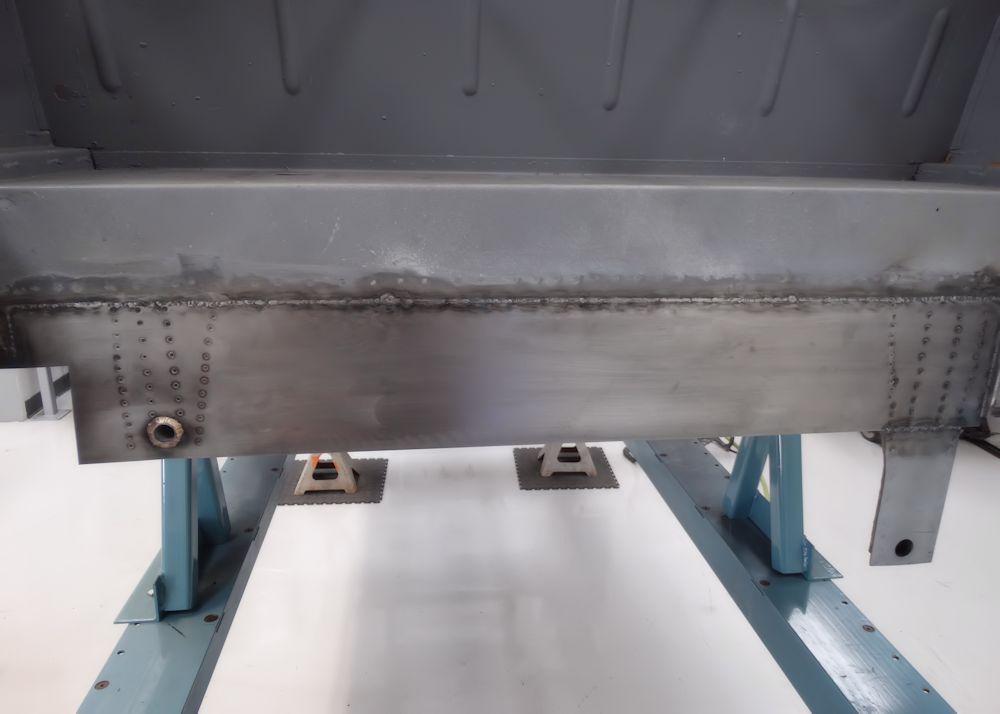
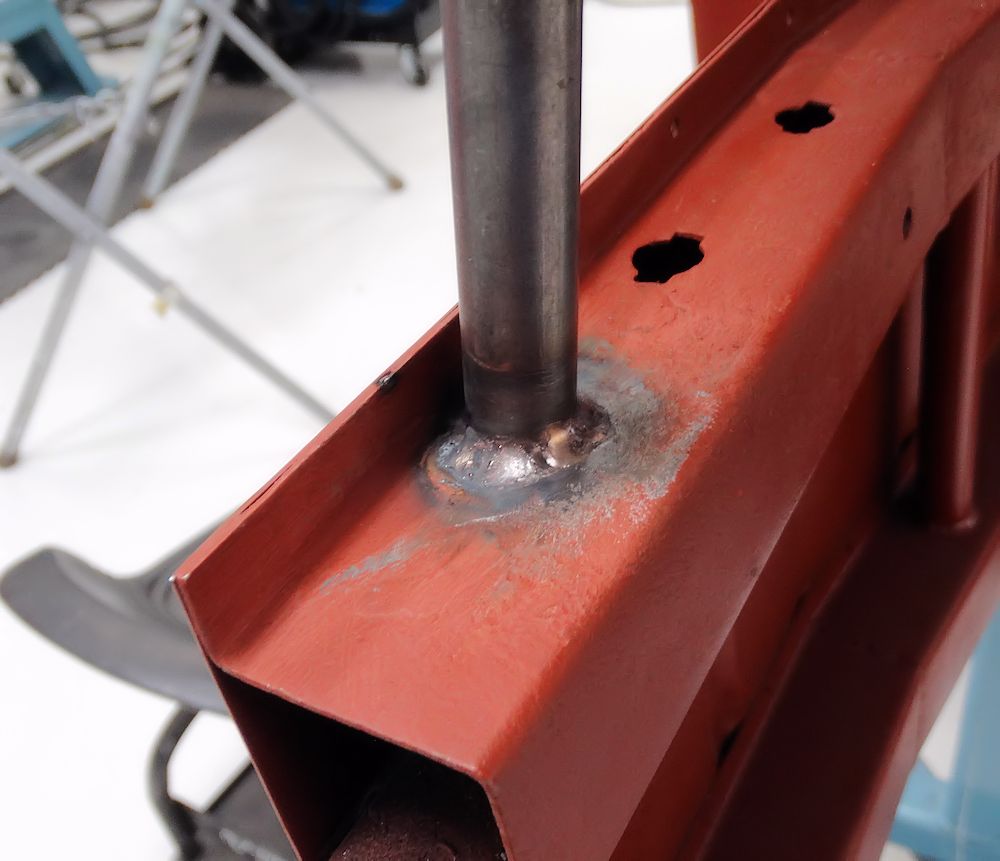
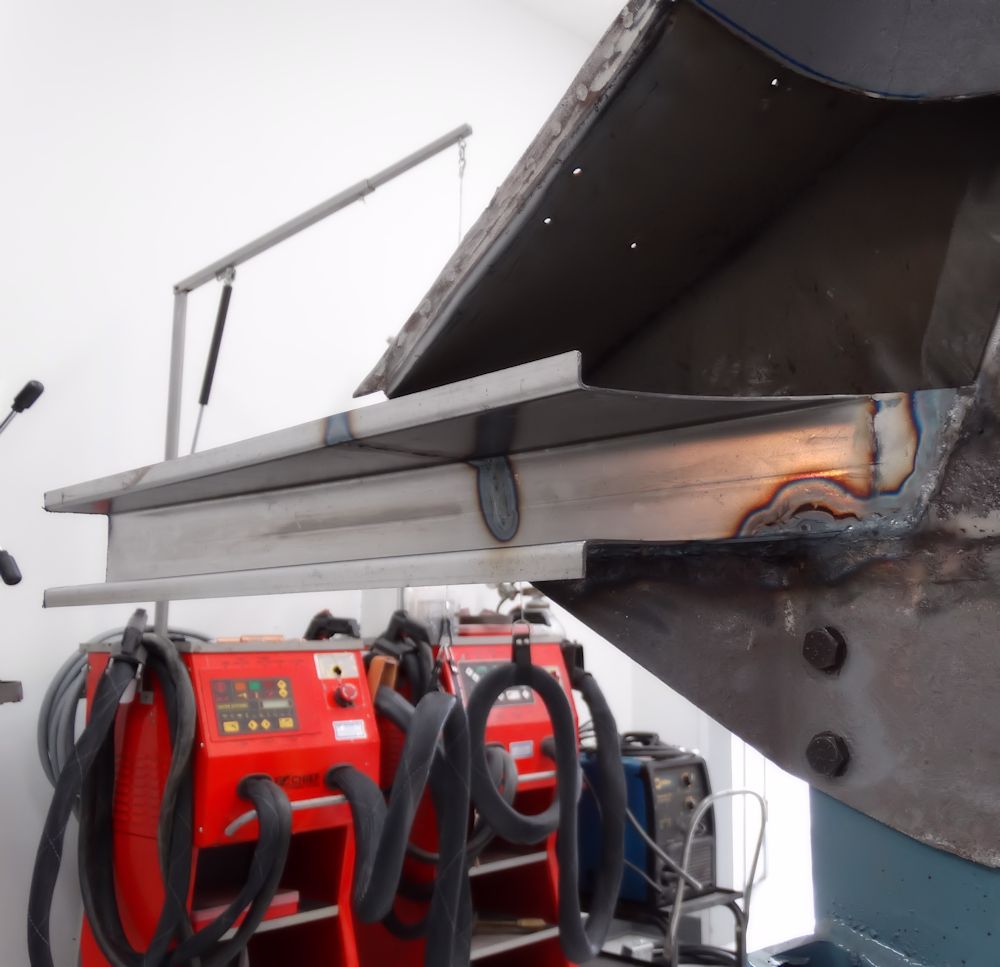
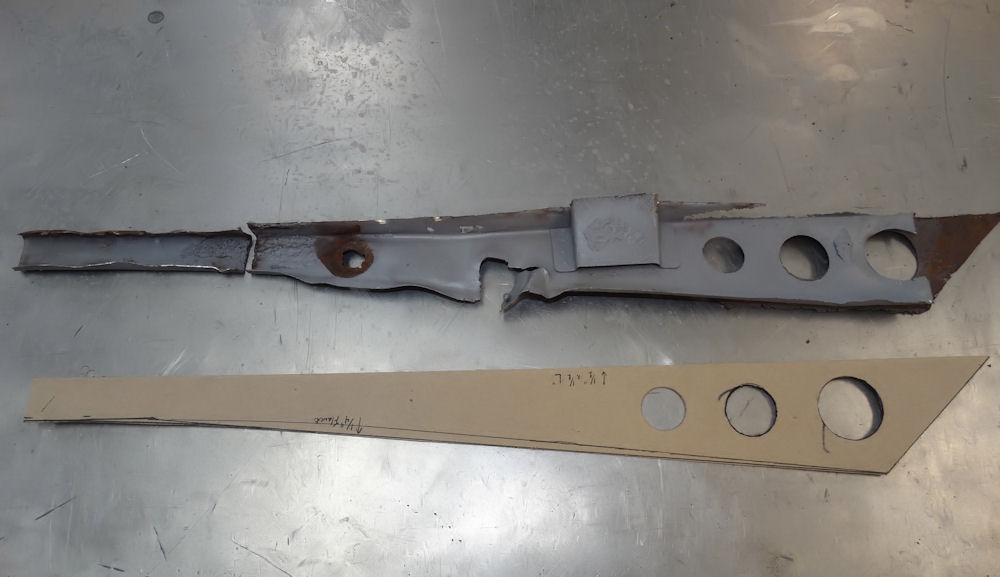
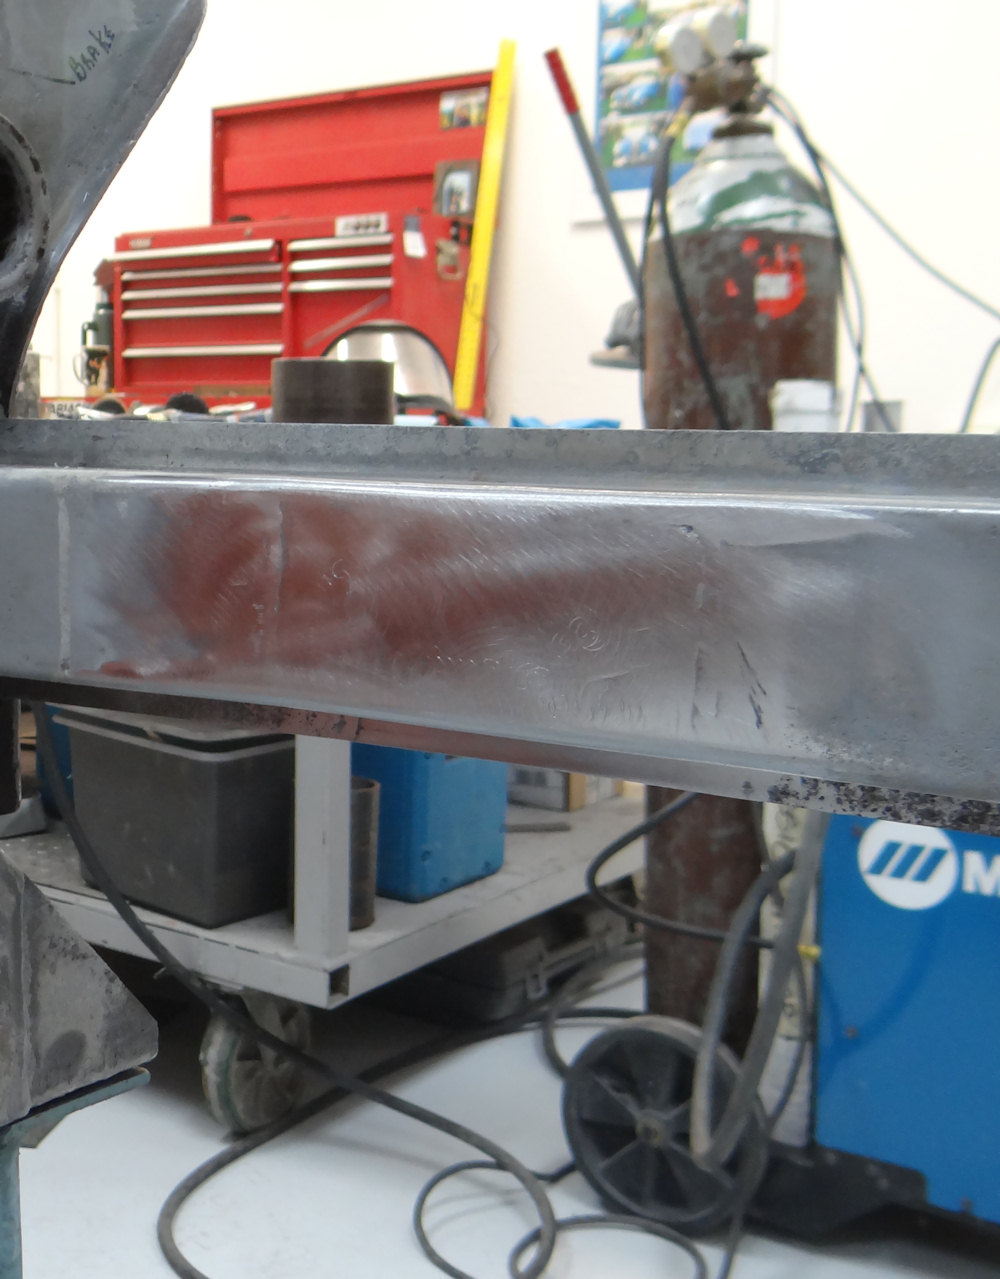
Fabricating and installing a new lower gutter rail for boot opening, fabricating and trial fitting driver's outer rocker panel..
 |
 |
 |
 |
 |
 |
 |
 |
 |
|
Fabricating and trial fitting a new passenger side outer sill (rocker) panel..
 |
 |
 |
 |
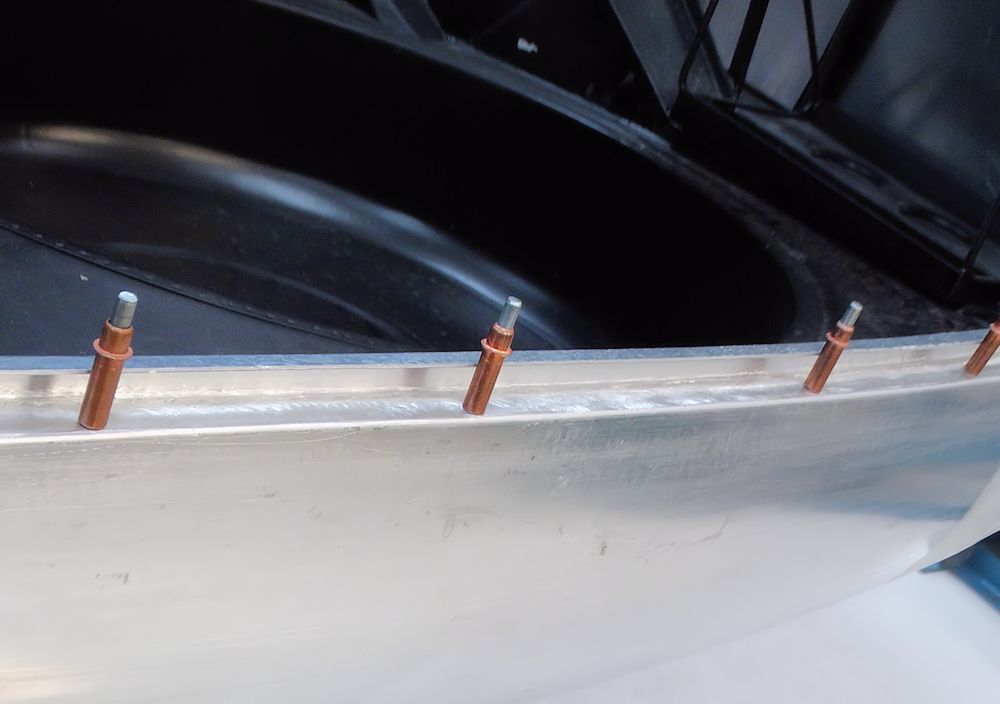
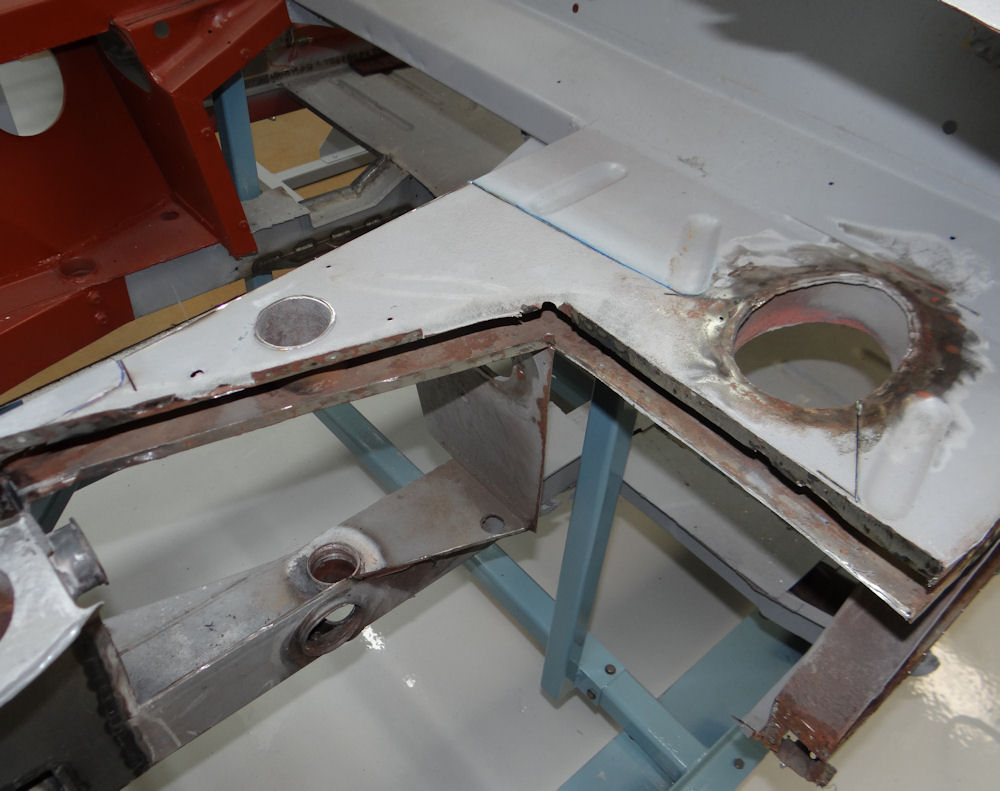
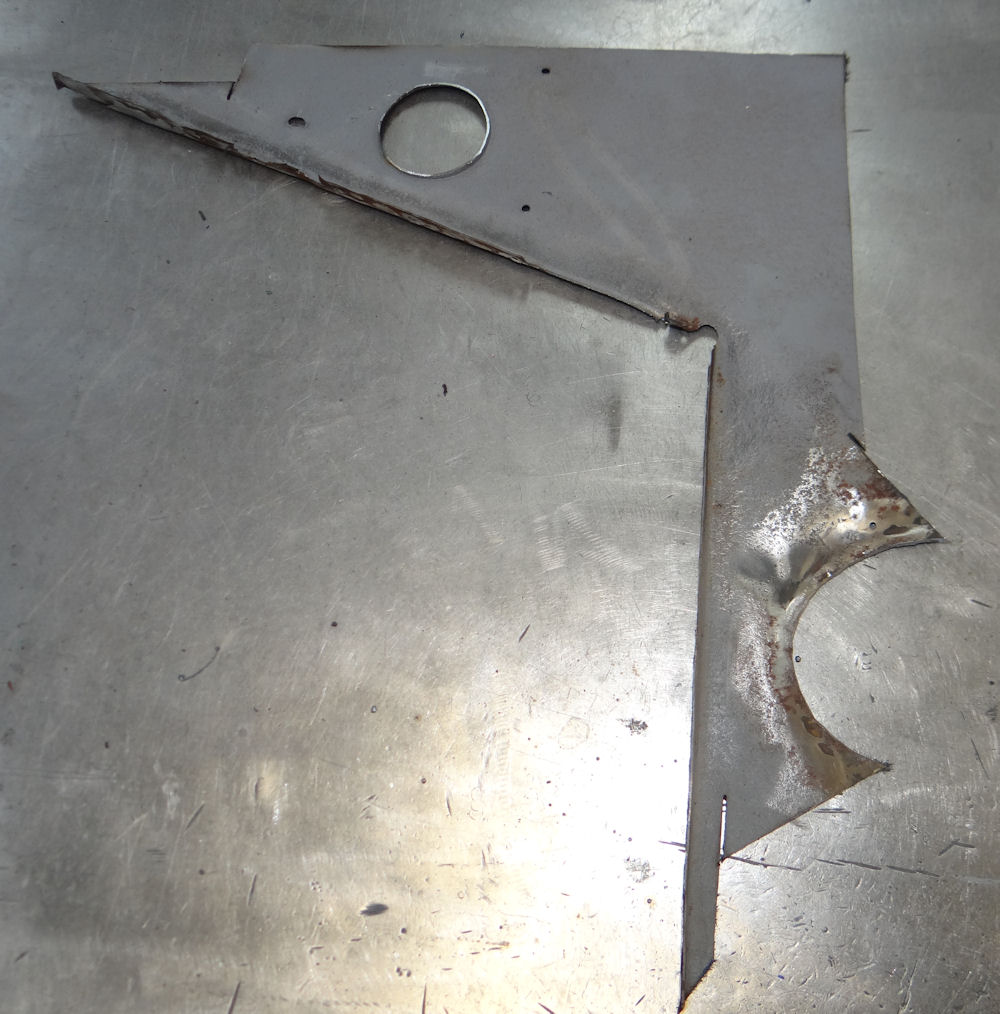
We have had to reconstruct and effectively reposition the rear lamp plinths to make the rear of the car symmetrical, and in order to place the lamps in an evenly spaced, vertical position. It has been a lot of work, but the finished results will be worth the extra effort.
 |
 |
| The rear lamp plinths have both been cut out and will be repositioned |
|
 |
 |
| Jake demonstrating how the RH plinth is more than an inch proud of the LH plinth |
|
 |
 |
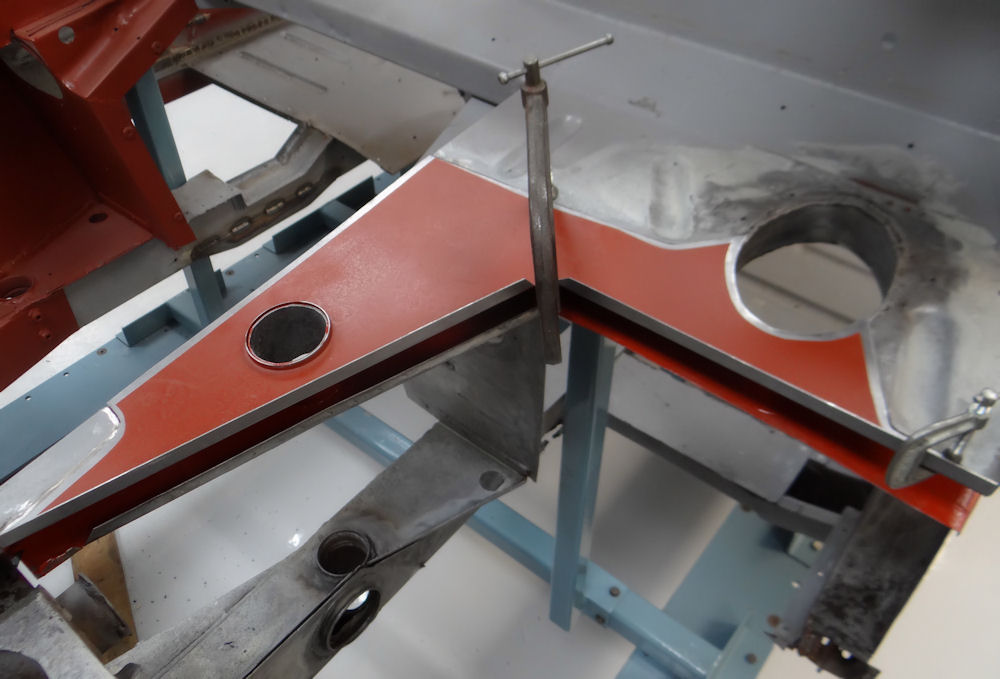
| Tack welding the RH plinth back in place |
|
 |
 |
| Both plinths now evenly positioned |
|
 |
 |
| TIG welded seam around RH plinth now metal finished |
|
 |
 |
| LH plinth welded in place |
|
 |
 |
| Fabricating new filler panel between LH plinth and left side of boot opening |
Tack welding new filler panel in place |
 |
 |
| Welded seams viewed from inside the LH rear wing |
|
 |
 |
| Time to assemble the boot lid |
Trial fitting boot lid hinges |
Steady progress with the DB4 this week..
 |
 |
| Trial fitting newly fabricated base panel with hinge panel |
Welding the two panels together |
 |
 |
| New passenger door frame taking shape | #13 E Type coupe being welded in background! |
 |
 |
| Jake re-attaching boot opening gutter rail after modifying left rear wing |
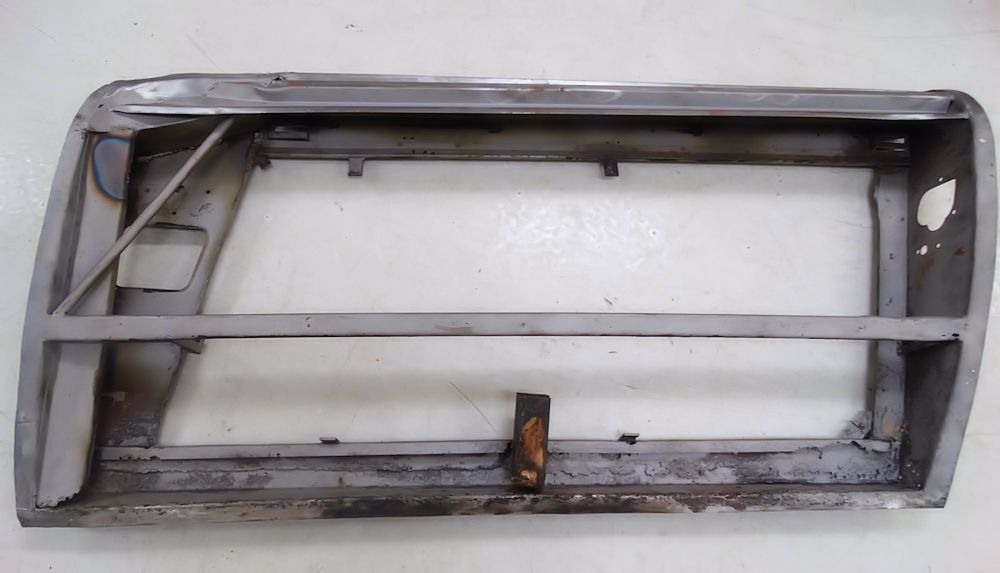
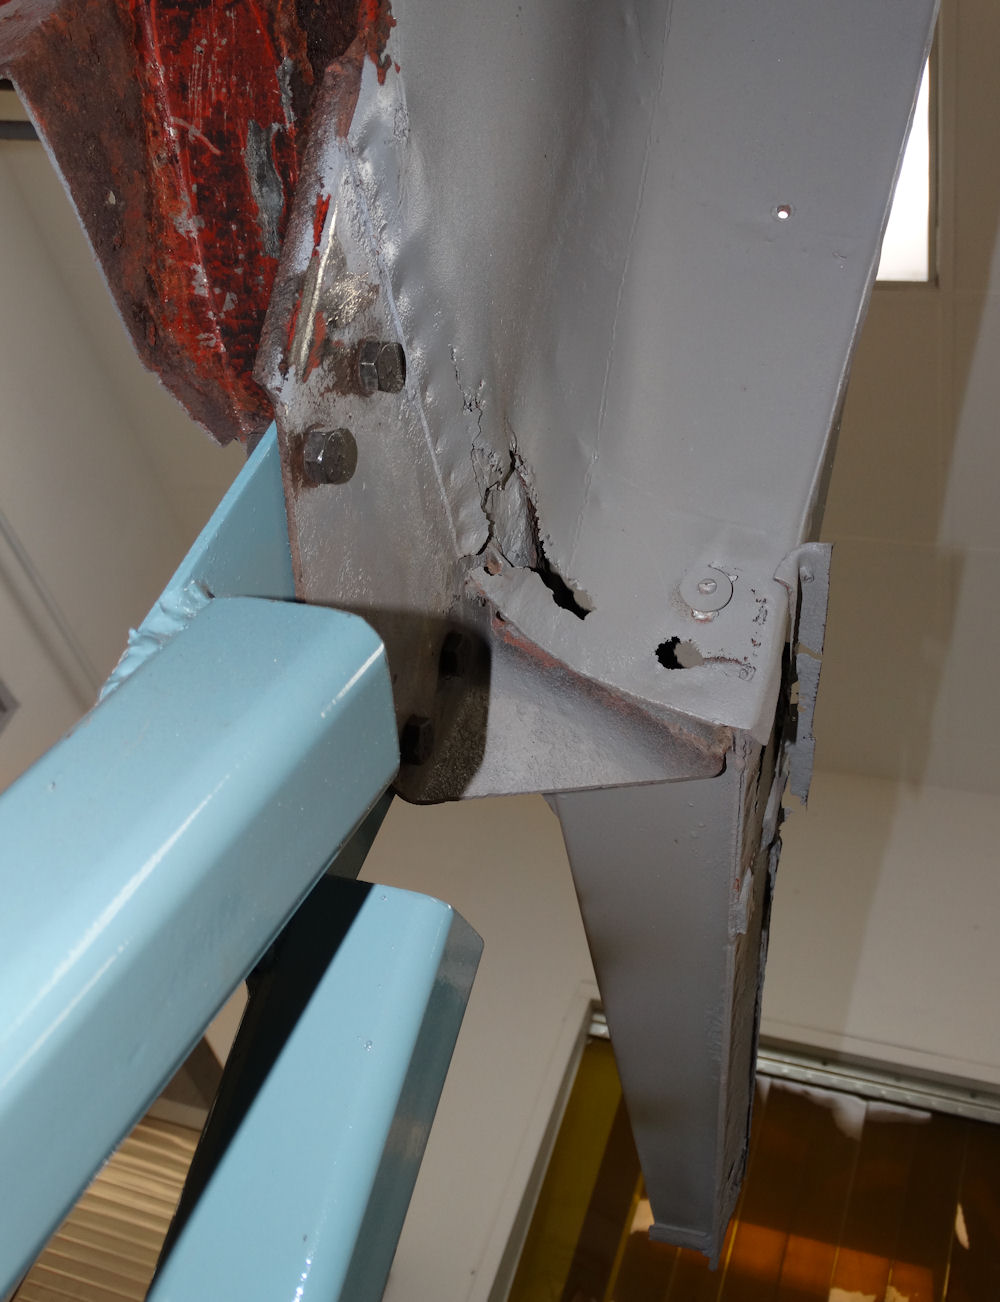
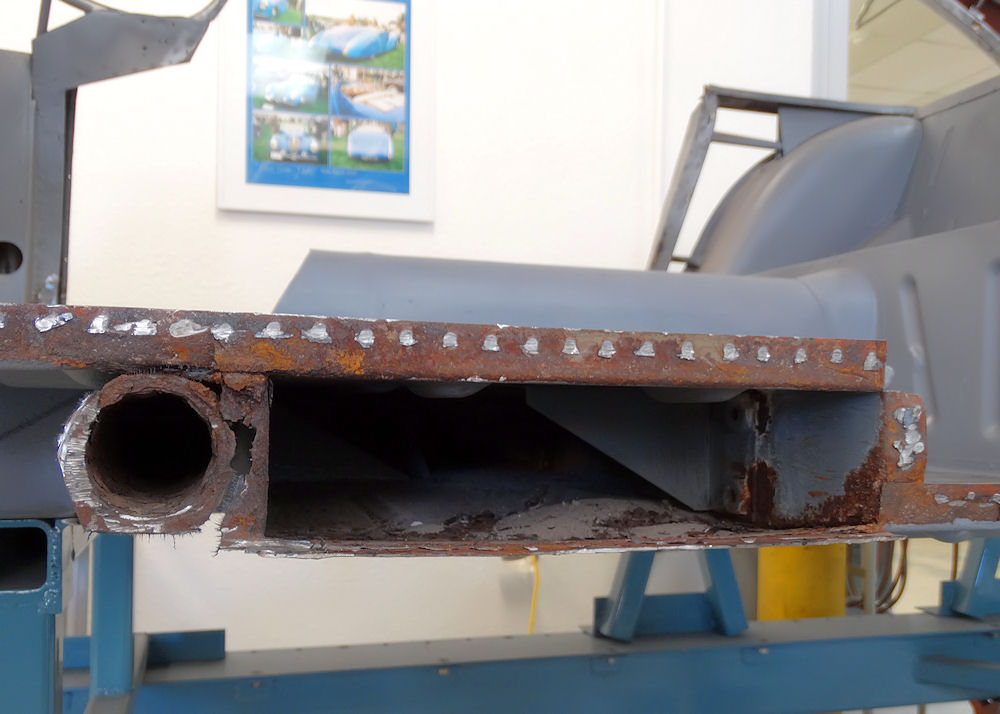
The following sequence of photographs shows the painstaking process of fabricating a new passenger door from scratch. Obviously the old door (shown in the first few photos) is badly corroded and has to be replaced. As there is effectively no adjustment available once installed, it is crucial that the new door is built in conjunction with the A and B pillars and shut face panels, which in turn must fit perfectly in relation to the front and rear wings, respectively. The process is obviously very involved, and calls for an extremely skilled pair of hands.
 |
 |
| Old door badly corroded and will be replaced |
|
 |
 |
| Top beam had actually separated from the main
frame at the rear edge |
|
 |
 |
 |
 |
| Crucial that the hinges are attached to the
new door frame in precisely the correct location |
Card template for forward section of door
where hinges attach (note slots for hinges) |
 |
 |
| Forward panel fabricated first |
|
 |
 |
| Hinges welded in place, sheet metal that will
be enclosed sealed with primer |
Trial fitting the loosely assembled forward section |
 |
 |
| This image shows the upper hinge welded in
place (seen from inside car with panel in closed position) |
And with forward panel in open position |
 |
 |
| This forward panel must fit perfectly with
rear edge of front wing |
|
 |
 |
| Preparing to weld forward hinge panel together |
|
 |
 |
 |
 |
| Double checking the fit |
|
 |
 |
| Now time to finalize the position and shape of
the newly fabricated rear shut face panel |
|
 |
 |
 |
 |
| Light plinth and strip of aluminum removed
from top of left rear wing |
|
 |
 |
| Lower valance will also be reshaped |
|
 |
 |
| Marking out adjustments needed beneath rear quarter light window |
|
 |
 |
| Shaping rear wing on the wheel |
Reworking the lower rear valance |
 |
 |
| Position of rear shut face panel has a bearing
on entire rear clip, especially LH rear wing |
Modifying and repositioning LH rear
wing, tail lamp plinth and boot opening gutter rail |

 |
 |
 |
 |
The following sequence of photos show Jake fabricating a new driver's door frame..
 |
 |
| Dash panels have been stripped and sealed in Red Oxide primer |
Making new A post shut face panels |
 |
 |
 |
 |
| Construction of new door frame starting from
the A post back |
|
 |
 |
|
 |
 |
 |
 |
 |
| Forward section of driver's door frame taking
shape |
|
 |
 |
| Lower door frame rail welded to forward
section |
|
 |
 |
| To be continued... |
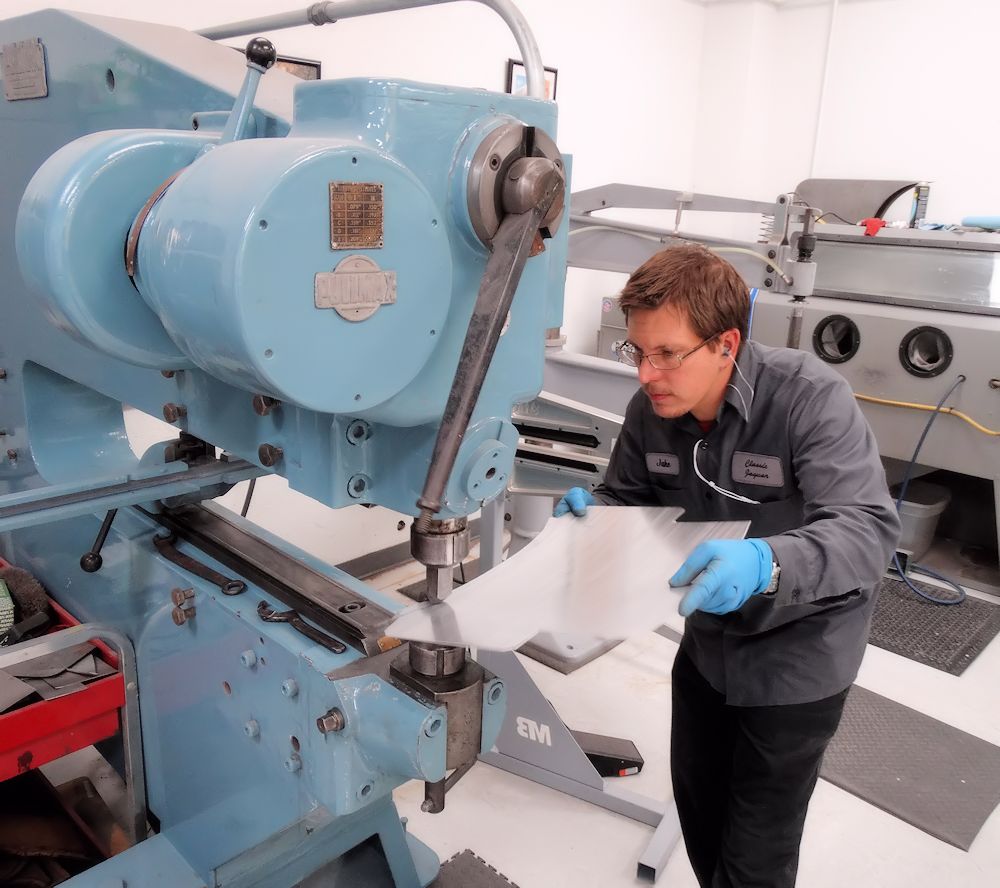
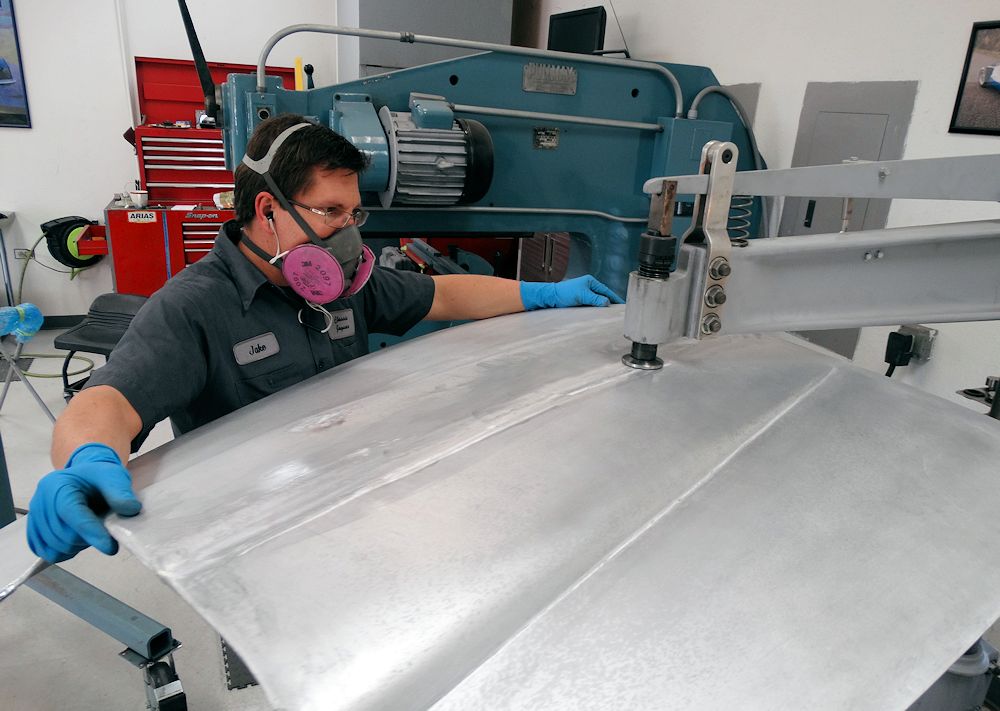
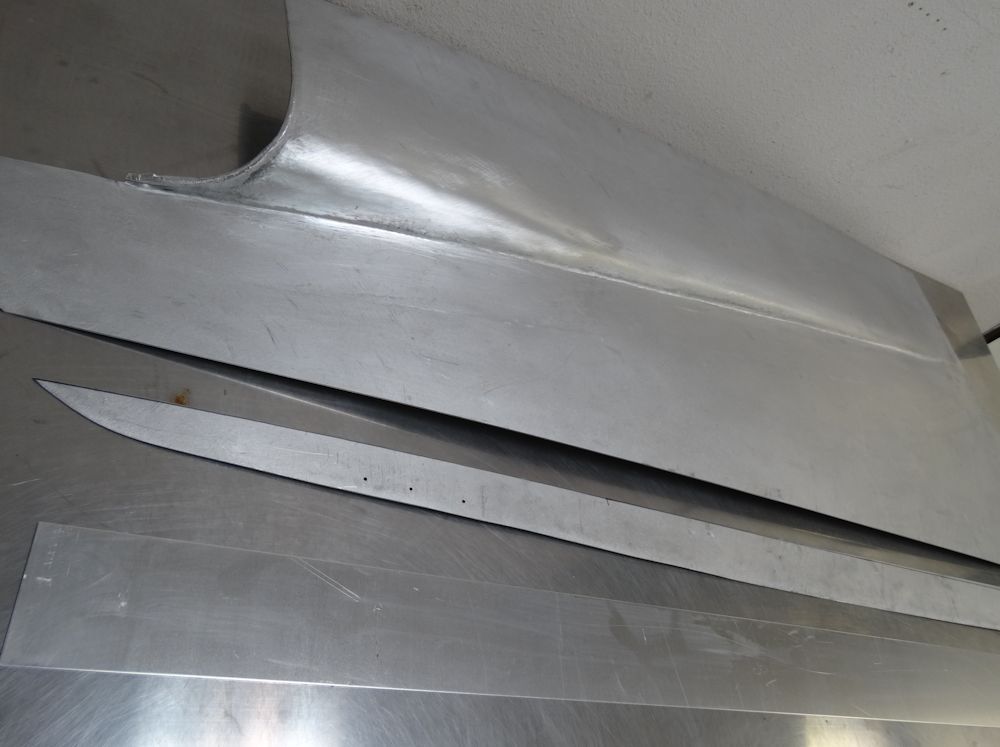
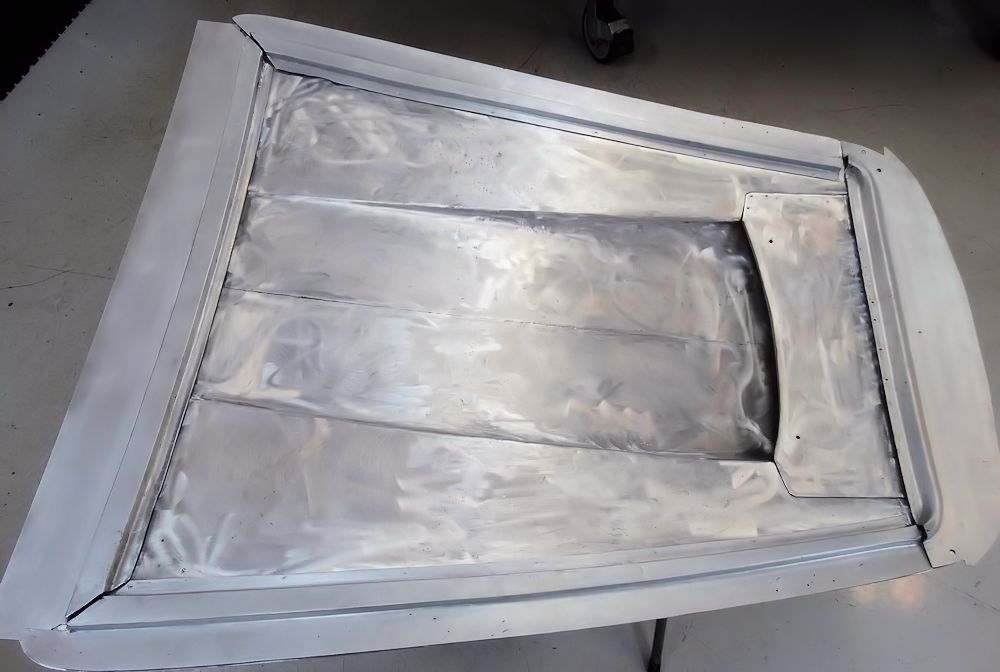
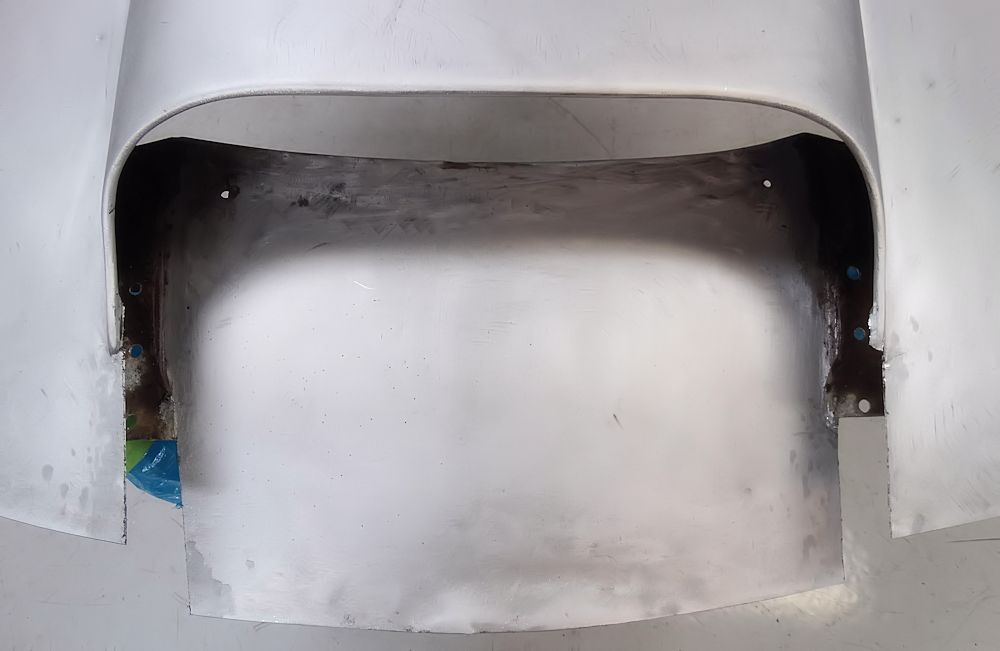
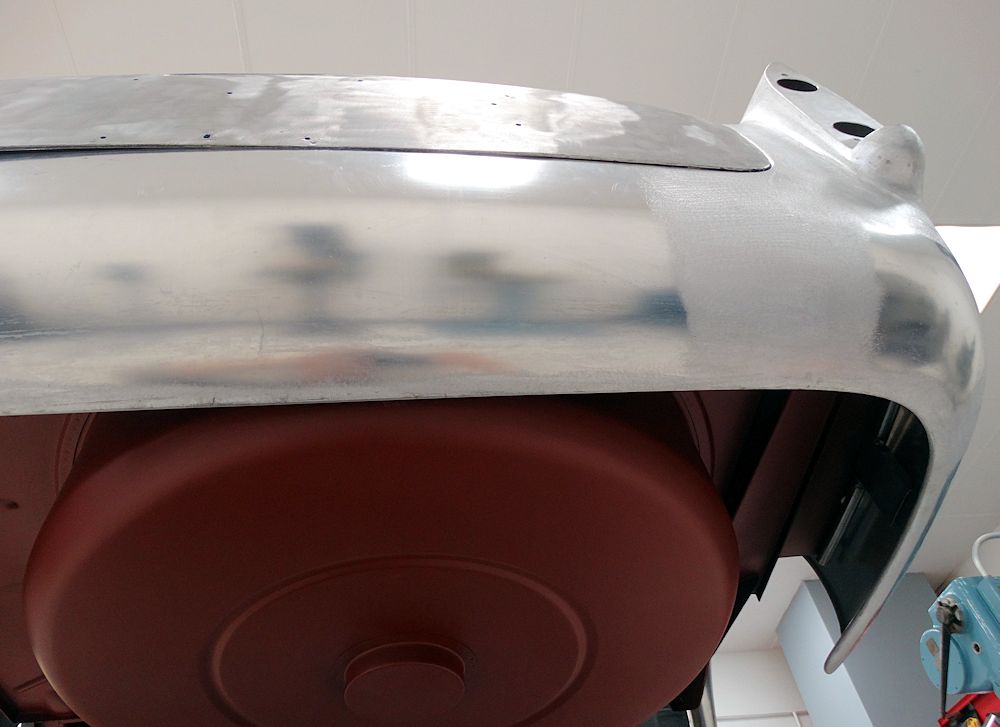
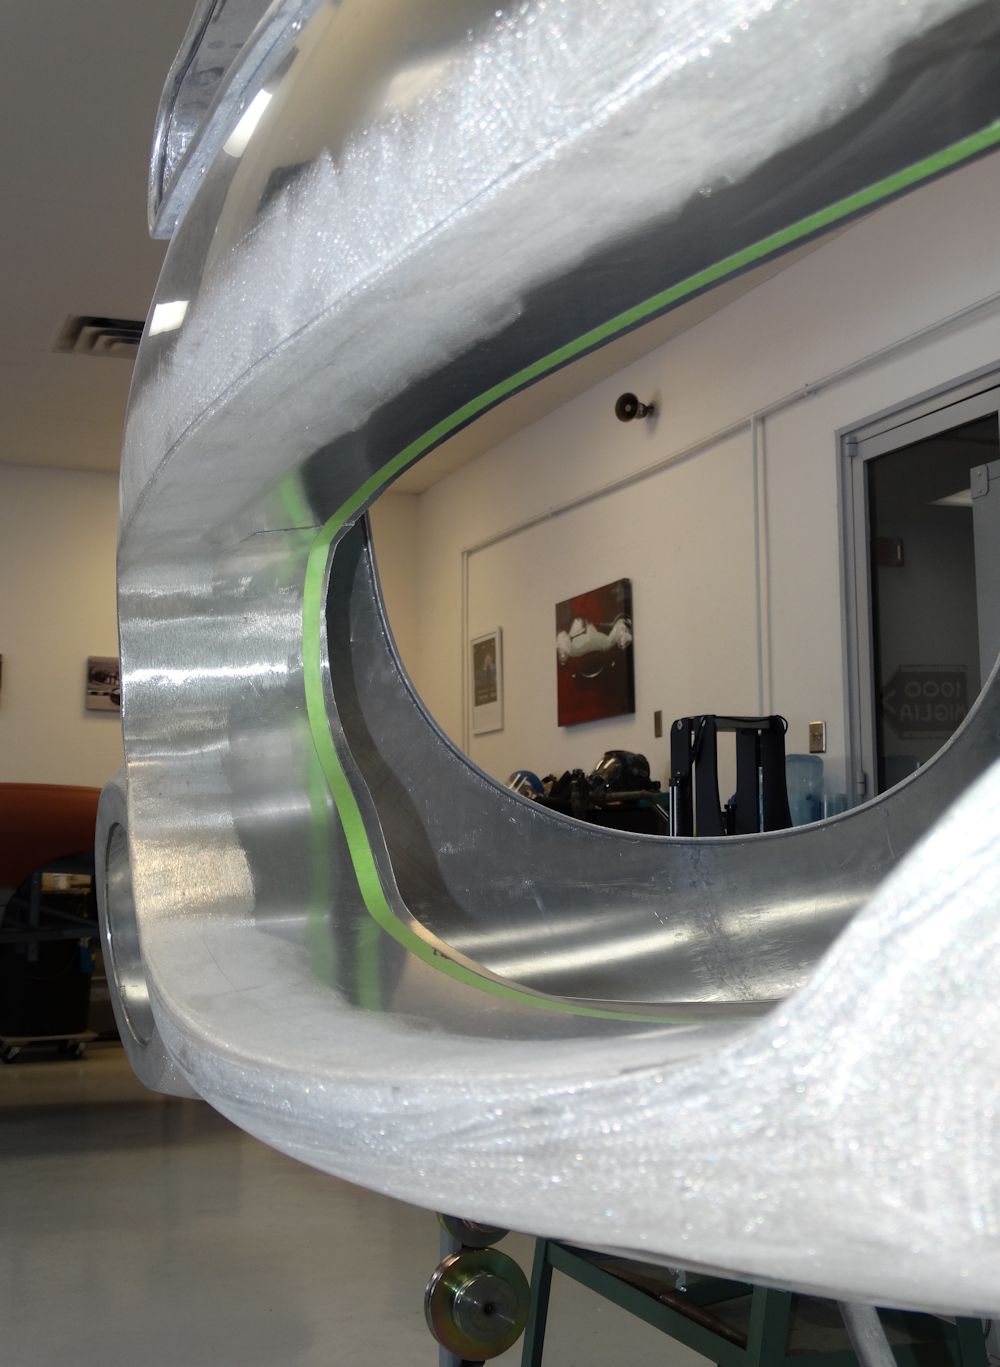
Jake has been busy reconstructing the top skin of the bonnet, including the air intake...
 |
 |
| Fabricating the lower part of the bonnet air
intake |
|
 |
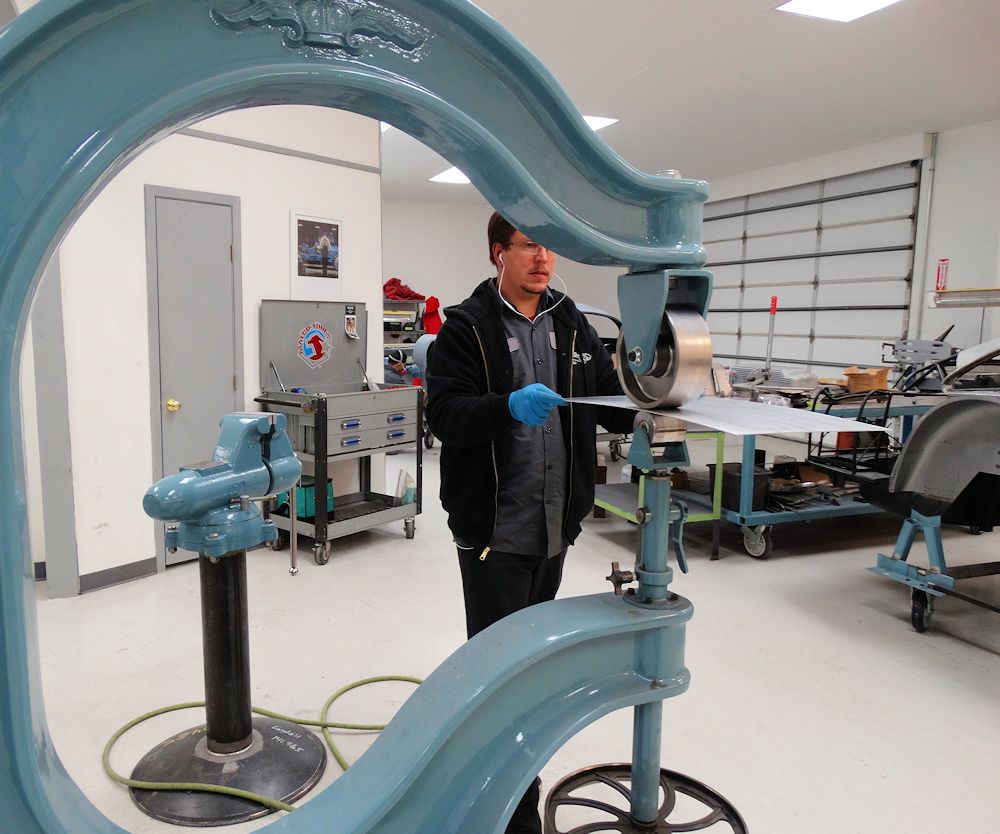 |
| Massaging the aluminum on the English wheel |
|
 |
 |
| Using the Pullmax machine to create grooves in air intake lower panel |
|
 |
 |
 |
 |
 |
 |
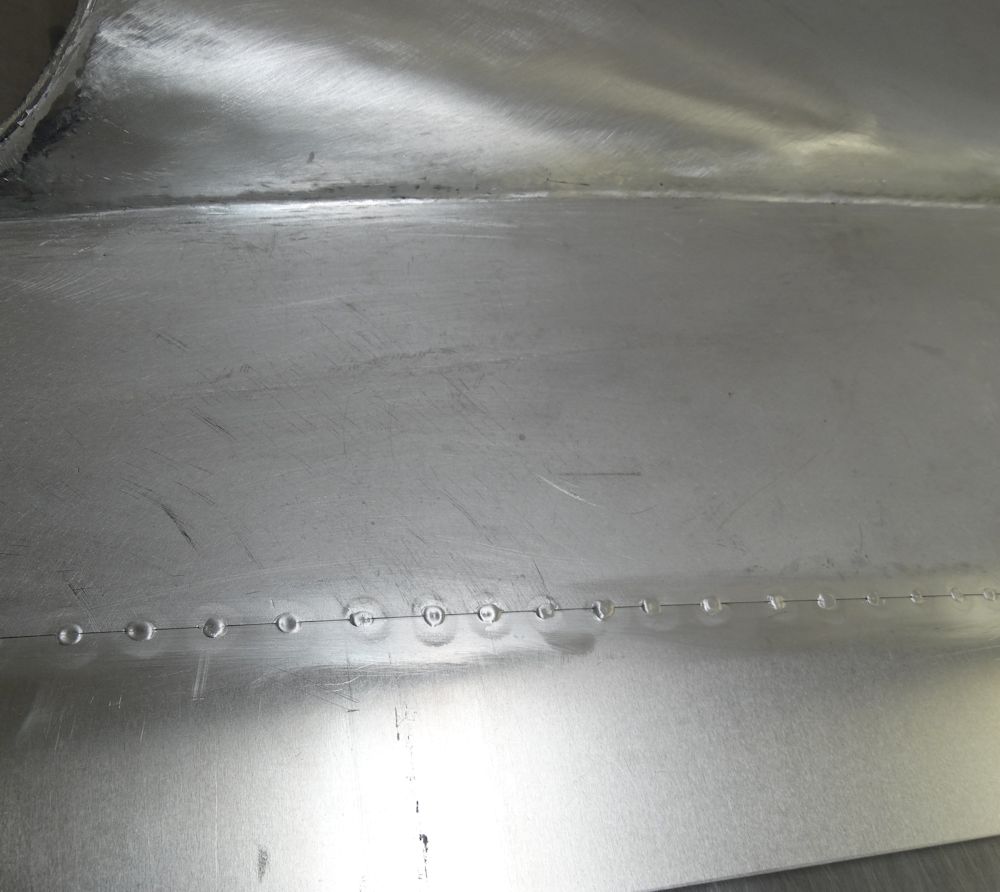
| Welding the two halves together |
|
 |
 |
| Planishing the welded seam |
|
 |
 |
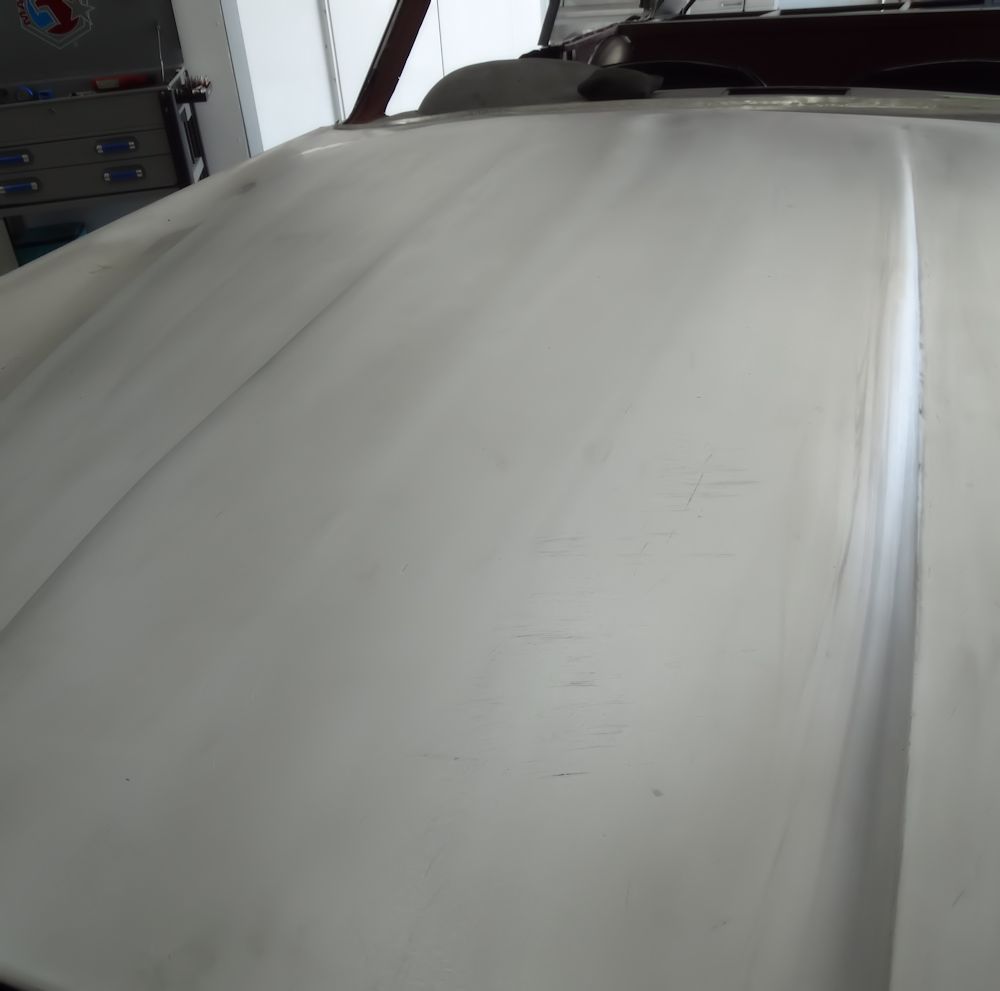
| Impossible to tell that this was once two
panels, welded down the center line |
Jake has been busy fabricating and installing new outer panels for the bonnet skin...
 |
 |
 |
 |
 |
 |
 |
 |
 |
 |
 |
 |
 |
 |
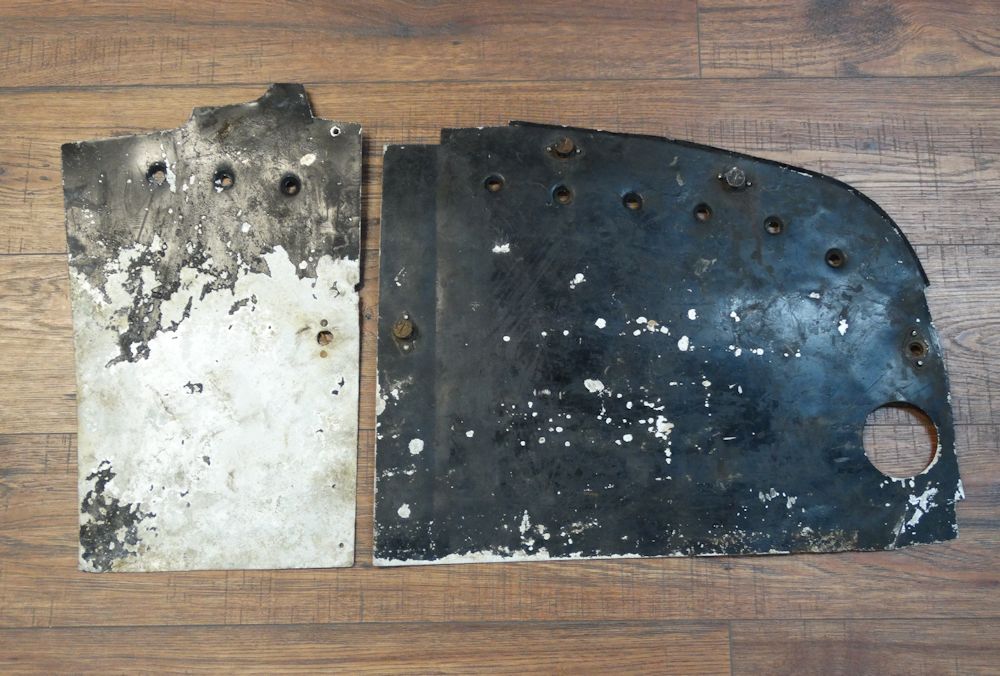
Unfortunately, the bonnet on our DB4 project was in very poor shape and needs extensive repairs. The following photographs show just how involved the repair process is...
 |
 |
| First the support braces were all removed |
Damage and holes from old spot welds will be welded up and refinished |
 |
 |
| Plugging spot weld holes |
|
 |
 |
 |
 |
 |
 |
 |
 |
| Extending the rear brace |
|
 |
 |
 |
 |
 |
 |
| Trial fitting bonnet hardware to forward brace |
|
 |
 |
| Early S1 hinges |
Main skin will also need extensive repairs |
 |
 |
| Air intake is not symmetrical |
Bonnet skin fits poorly in new front end |
 |
 |
| Rear edge is especially bad |
|
 |
 |
 |
 |
| Measuring contour of the right side of the intake | Left side of intake does not match right side |
 |
 |
| Disassembling skin |
|
 |
 |
| Removing beading wire from air intake |
Beading wire badly corroded |
 |
 |
| Skin cut in half along factory welded seam |
|
 |
 |
 |
 |
 |
 |
| Almost ready to weld two halves back together |
New driver's footwell completed, modifying new pedal bracket...
 |
 |
| Trial fitting new footwell panel |
|
 |
 |
| Trial fit of footwell viewed from beneath |
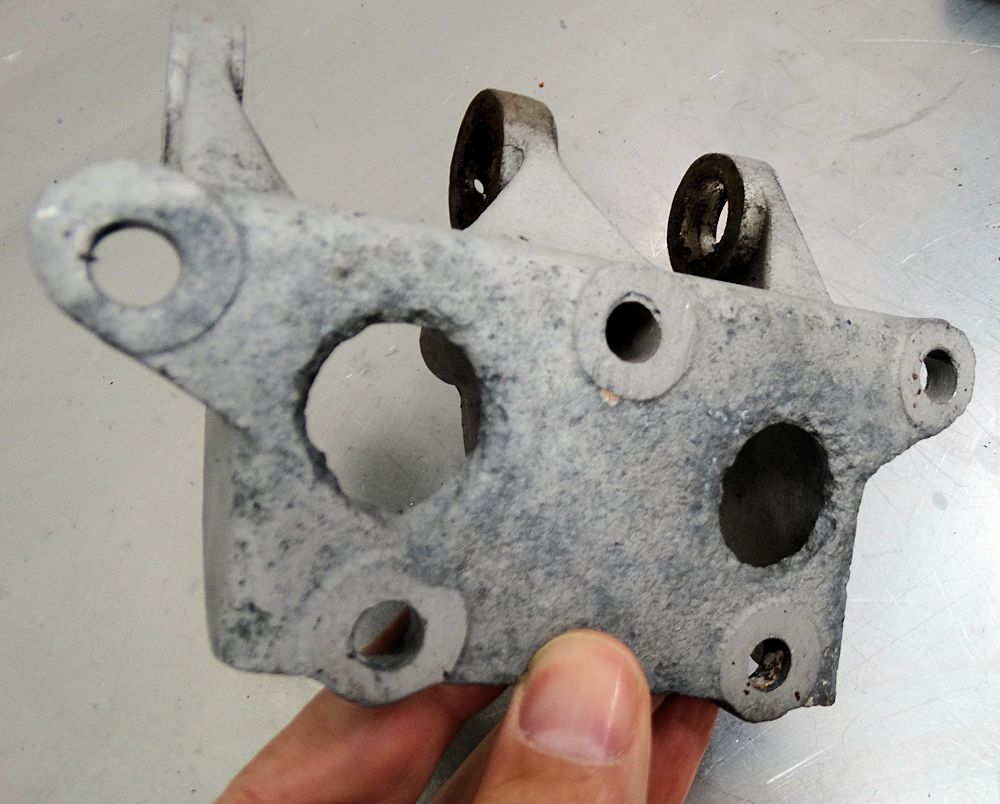
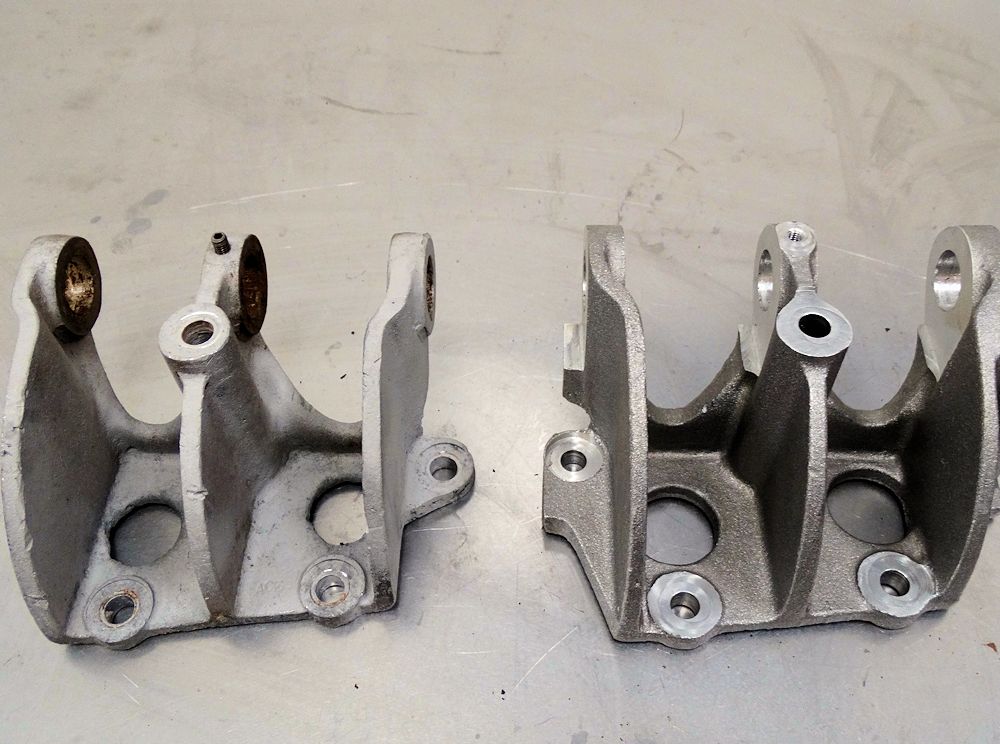
Original pedal bracket is badly corroded and will be replaced |
 |
 |
| Old and new pedal brackets are very slightly different |
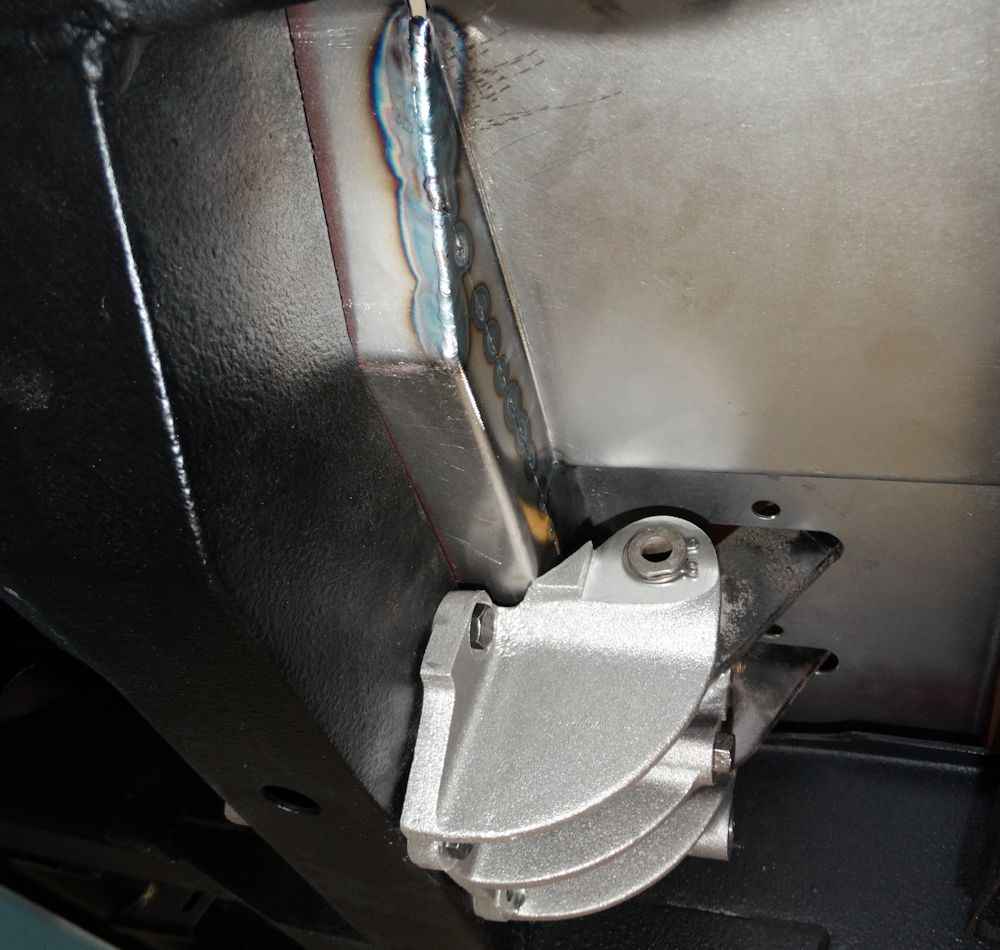
Trial fitting new pedal bracket revealed a slight clearance issue with floor pan |
 |
 |
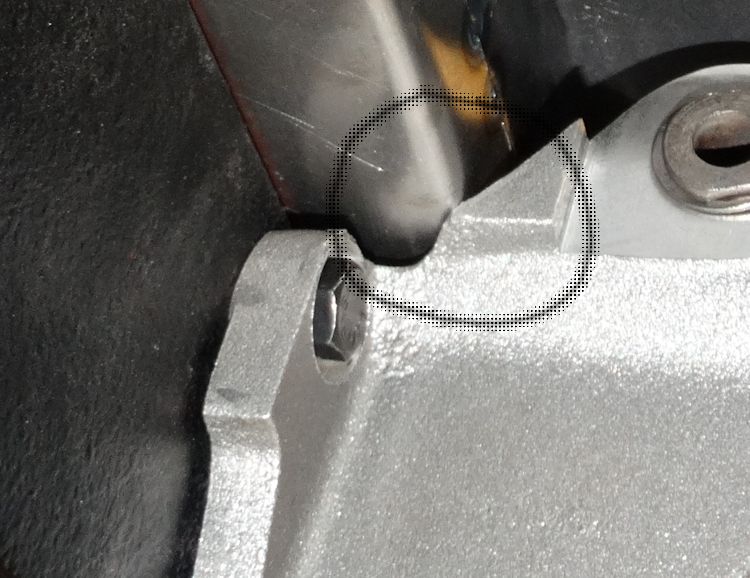
| Close up of the clearance issue between new
pedal bracket and footwell |
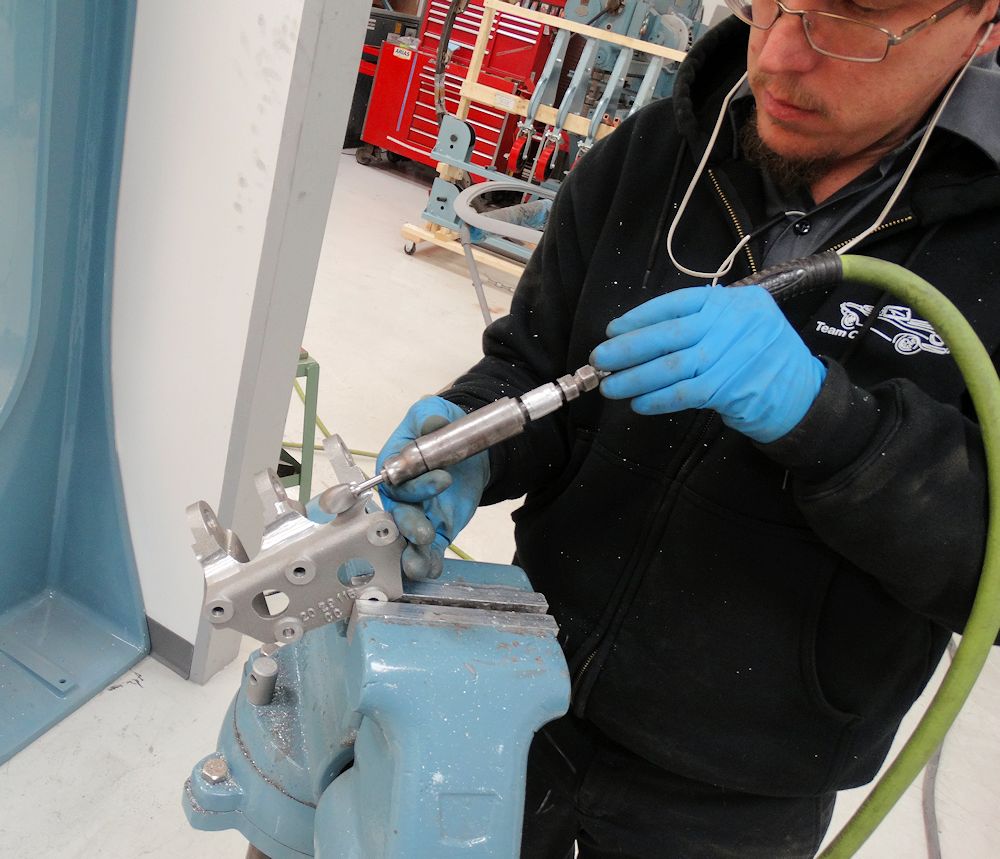
Jake modifying the new bracket to provide desired clearance |
 |
 |
| Contour of modified pedal bracket now closely resembles the original |
New bracket now clears driver's footwell |
 |
 |
| TIG welding new footwell together |
|
 |
 |
| One last trial fit |
New driver's footwell now an exact replica of
the original panel |
The following sequence of photos show Jake fabricating new footwell panels. As you can see, the driver's side is a fairly complex affair...
 |
 |
| The passenger side footwell is a simple
panel to make |
This brace is spot welded to the underside of the panel |
 |
 |
| Weld thru primer being applied to the weld
zones |
|
 |
 |
| Brace welded in place |
Panel fits beautifully in passenger footwell |
 |
 |
| The driver's side footwell is much more
complex |
|
 |
 |
 |
 |
| Plan of driver's footwell looks like
something Leonardo da Vinci drew up! |
|
 |
 |
| Jake is fabricating the driver's footwell in several pieces |
|
 |
 |
 |
|
| Trial fitting the forward (pedal) section |
Comparing the new panel with the original |
 |
 |
| To be continued... |
Another example of when new parts are unavailable, they must be made from scratch. The curved contour of the quarter light windows added a degree of difficulty to the fabrication of new B post structures, although Matt has done an outstanding job replicating the original (corroded) items.
 |
 |
| Rear quarter light window glass is curved |
|
 |
 |
 |
 |
| Using the originals as a templates, Matt set about fabricating new B posts |
|
 |
 |
 |
 |
 |
 |
 |
 |
| Plotting the position of the new posts |
|
 |
 |
| New item a perfect replica of the original |
|
 |
 |
| The new B post secured to the roof and quarter panel |
|
 |
 |
| Time to repeat the process on the right side of the car |
|
 |
 |
| Job done |
Cleaning the original data plate and Superleggera plaque, repairing, installing and testing seat runners, trying driver's seat for size...
 |
 |
| Original plaques were covered in over spray |
Plotting the location of the plaques on the original front cowl |
 |
 |
| A thorough cleaning of both plaques worked
wonders |
Driver's seat was difficult to slide back and
forth because of damage to runners |
 |
 |
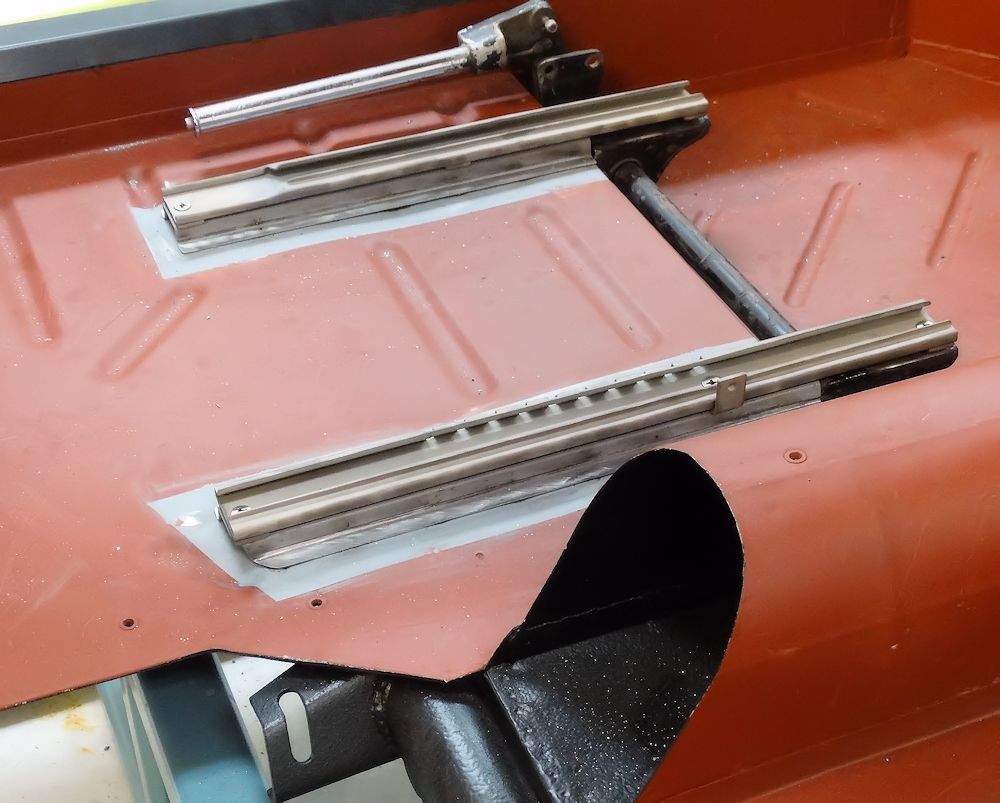
| Seat tracks now perfectly straight |
|
 |
 |
| Repaired seat tracks installed |
|
 |
 |
| Driver's seat now adjusts beautifully |
|
 |
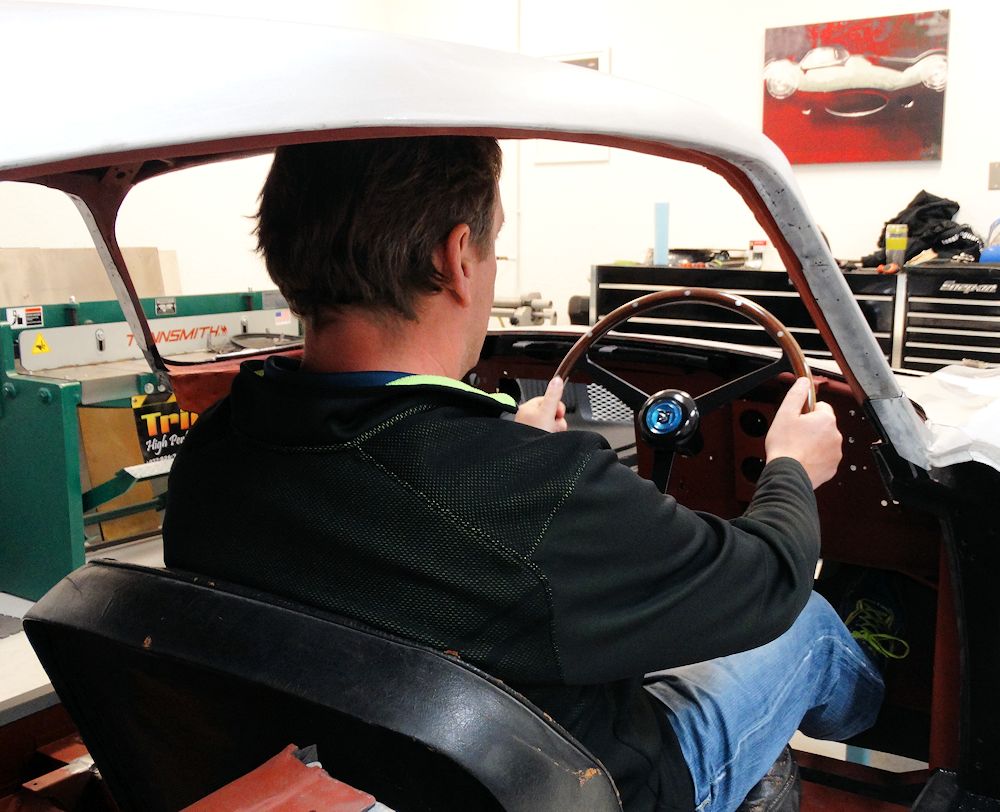 |
| I couldn't resist trying the driver's seat for
size |
We have now received three beautiful bull hides from Connolly in England, dyed precisely to match the original color code VM 3099, per the the original Aston Martin build sheet. We have hung the hides on the rail in the trim room where they will be allowed to relax (eliminating any creases or wrinkles) for a couple of months before we start fabricating the new interior.
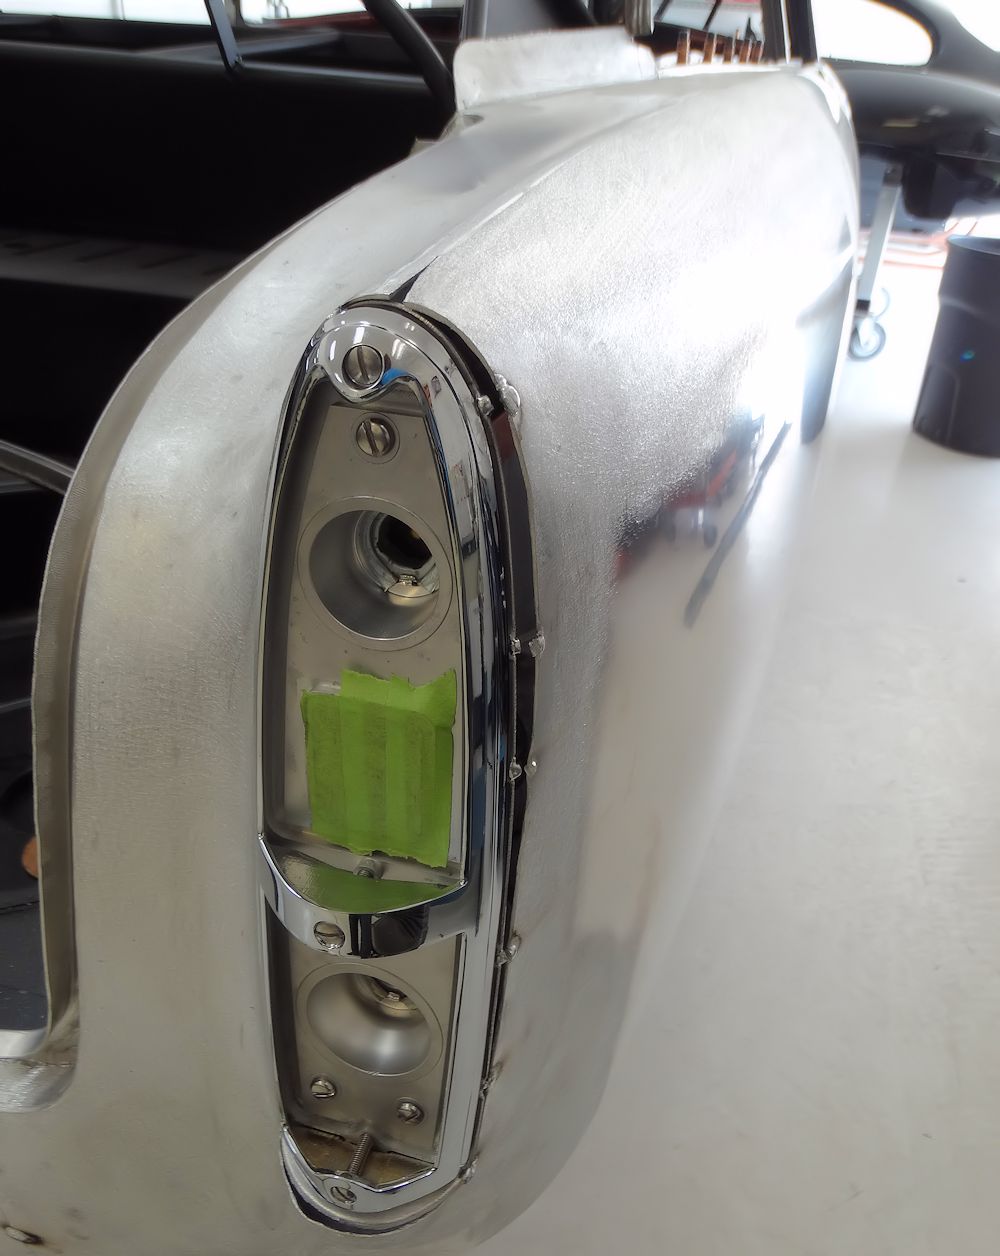
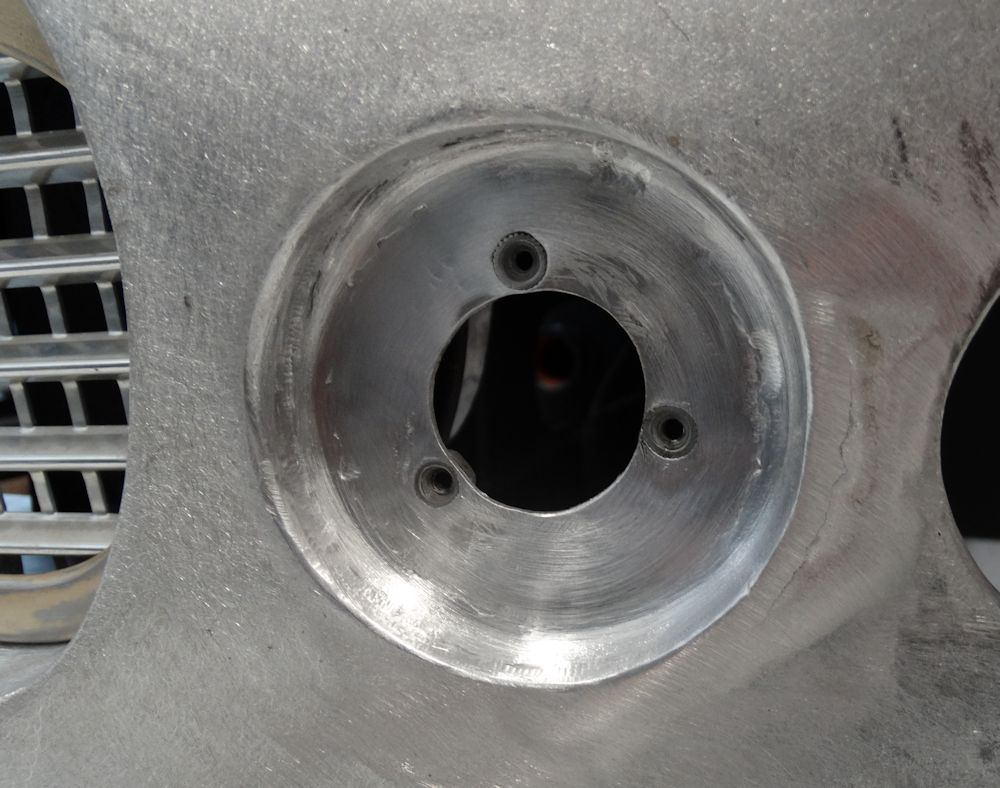
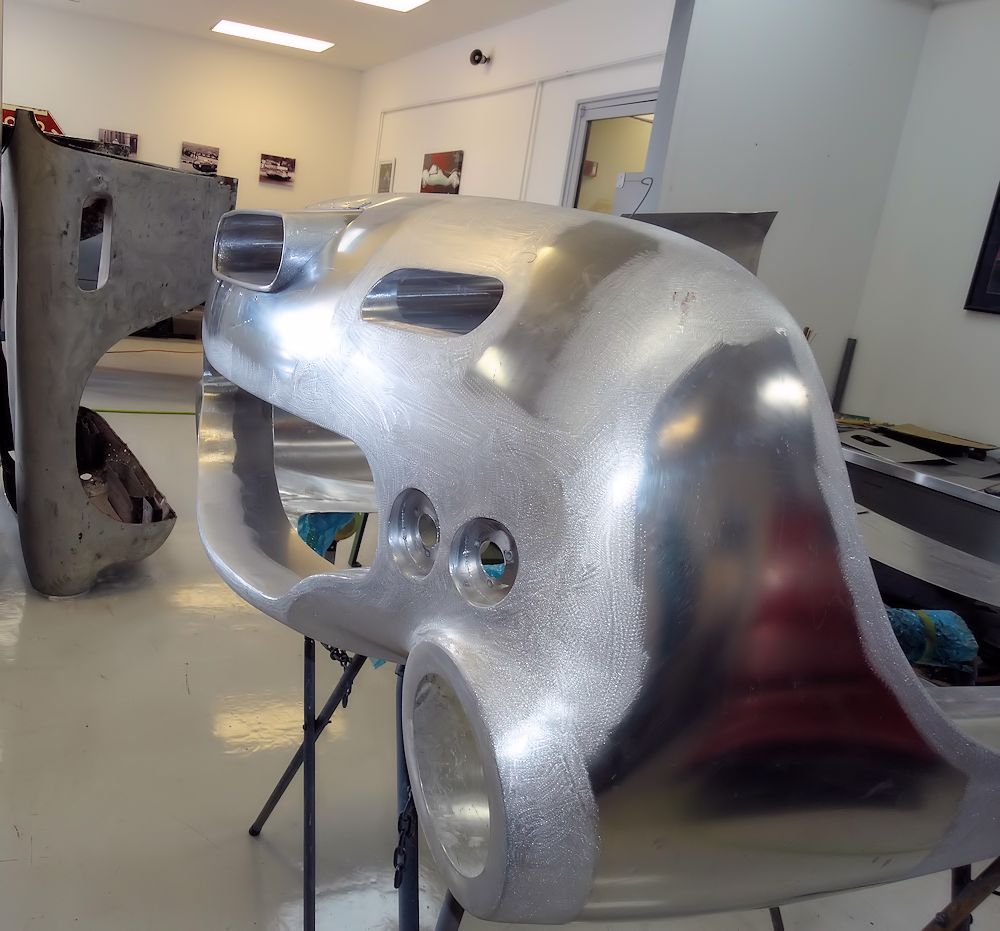
The new front clip has required a fair amount of modification to make it perfect. Unfortunately the headlamp and marker light openings were not quite right, and the upper surface of the right hand front wing curved a little too aggressively down toward the right hand headlamp, causing the headlamp chrome rim to sit slightly proud above the front wing.
The depth of the sockets for the side and indicator lamps varied by approximately 1/4" from side to side. Left uncorrected, this would have meant the right side marker and indicator lamps would have protruded 1/4" more than their counterparts on the left side. Additionally, the lamps were not centered in the holes pre-cut in the new panel. These things were all relatively minor issues, but in our quest for perfection, they could not be ignored.
Although it was a little difficult to capture the subtle modifications photographically, hopefully you will be able to see what Jake has achieved in the following sequence of images.
 |
 |
| VM 3099 known variously as Beige (by Aston
Martin) and Champagne by Connolly |
If only 'scratch and sniff' was a possibility
with this photo - the trim room smells absolutely divine |
 |
 |
| Note how initially the RH headlamp chrome sat slightly proud (above) the front wing line |
Upper bucket mounting plinth was cut away |
 |
 |
| Jake reshaping the upper/forward contour of
the right hand front wing |
|
 |
 |
| Before... |
After... |
 |
 |
| From one side of the car to the other, there
was almost 1/4" difference in depth of lamp sockets |
Sockets on left side of the car significantly deeper than those on the right side |
 |
 |
 |
 |
| Lamp assemblies are also not centered in holes set in the new front clip |
Using the original as a guide, we set about
making all lamp sockets the same (correct) depth |
 |
 |
| We also centered all lamp assemblies |
|
 |
 |
| Time to correct the right side.. |
Fabricating, repairing and trial fitting seat runners, seat rail 'rollers', etc.
 |
 |
| Trial fit of bright work, lighting,
continued.. |
|
 |
 |
| Passenger seat runner was broken and replacements are not available new |
Interesting stamping on the bottom of one of
the seat rails |
 |
 |
| Broken pieces TIG welded together |
|
 |
 |
| Preparing to install the new seat rail mounts |
|
 |
 |
| Note roller at 'A' - there should also be one
at 'B' |
|
 |
 |
| Matt machined a new roller from bronze |
Duly installed |
 |
 |
| Testing the operation of Dena's seat |
Seat glides forward and back smooth as silk |
All sorts of progress in the CJ Coachworks this week!
 |
 |
| Tack welding new transition panel to RH wing |
Seam then TIG welded |
 |
 |
| Welds invisible after metal finishing |
|
 |
 |
| Installing new fender beading |
Finished RH wing transition panel from beneath |
 |
 |
| Fabricating new seat track runners |
|
 |
 |
 |
 |
| Driver's seat rail mounting plinths in need of
repair |
|
 |
 |
 |
 |
| After fabricating new grill support brackets,
trial fitting the old grill |
Looking more like a car every day |
 |
 |
| Trial fitting new Le Mans headlamp assemblies |
|
 |
 |
| Front end of car coming together nicely |
|
 |
 |
| Right hand headlamp now fully assembled |
Trial fitting hand brake frame with repaired driver's seat rail mounting plinths |
Fabricating new transition panels for the bottom of the front wings where they extend beneath the car.
 |
 |
| Making a template based on the original front
wing |
|
 |
 |
 |
 |
| Tack welding the new panel in place |
|
 |
 |
| The seam is then TIG welded |
|
 |
 |
| Welded seam invisible after metal finishing |
Beading installed along edge of new panel |
 |
 |
| Welding the corners up after wrapping the
fender beading |
Transition, weld and beading wrap are now completely invisible |
 |
 |
| Time to repeat process for the RH wing |
Matt has been busy fabricating new A and B shut face panels..
 |
 |
 |
 |
 |
 |
 |
 |
 |
 |
 |
 |
 |
 |
 |
 |
 |
 |
 |
 |
 |
 |
 |
 |
 |
 |
 |
 |
 |
 |
Trial fitting front grill surround, plotting the position of the headlamp buckets..
 |
 |
 |
 |
 |
 |
 |
 |
 |
 |
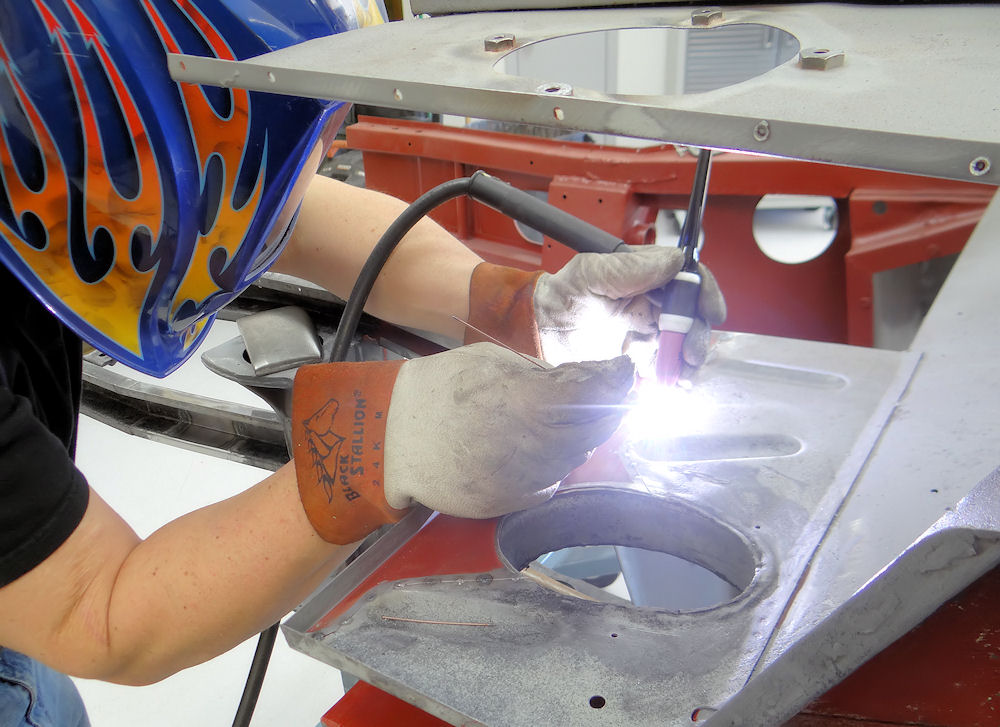
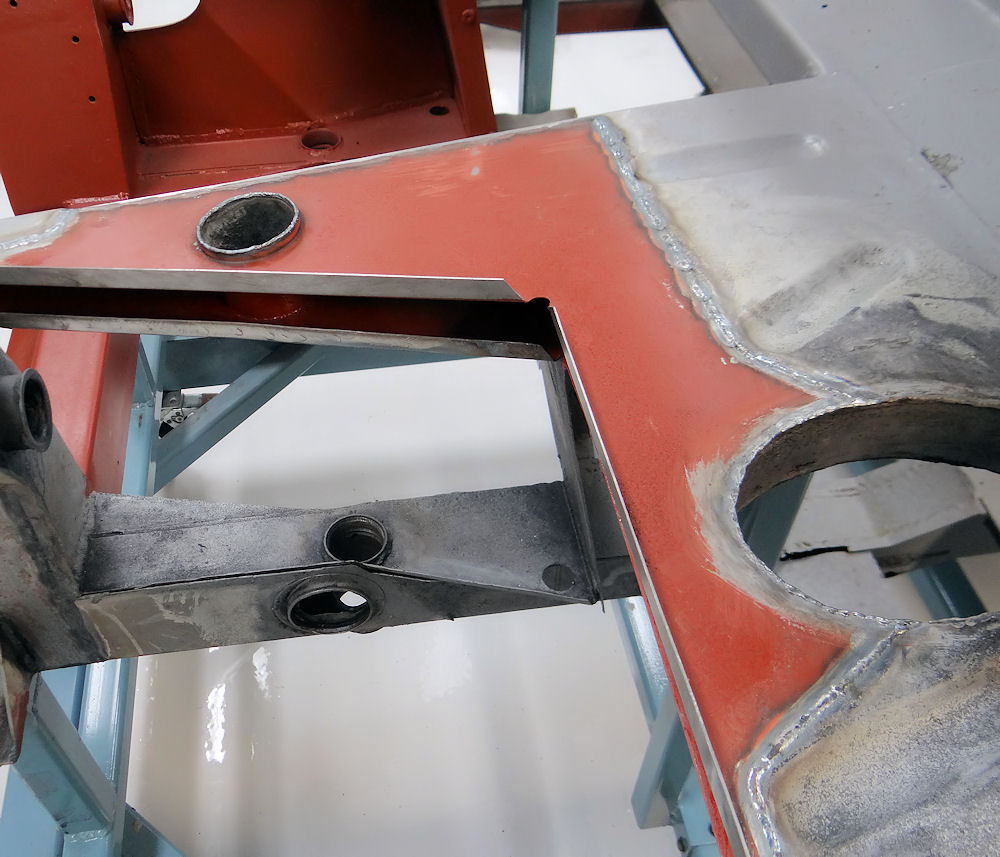
Jake and Matt have been working on a wheel well each over the last few days. I am pleased to report that both rear wells have now been fabricated and welded in place.
 |
 |
| Trial fitting and tack welding RR wheel well |
|
 |
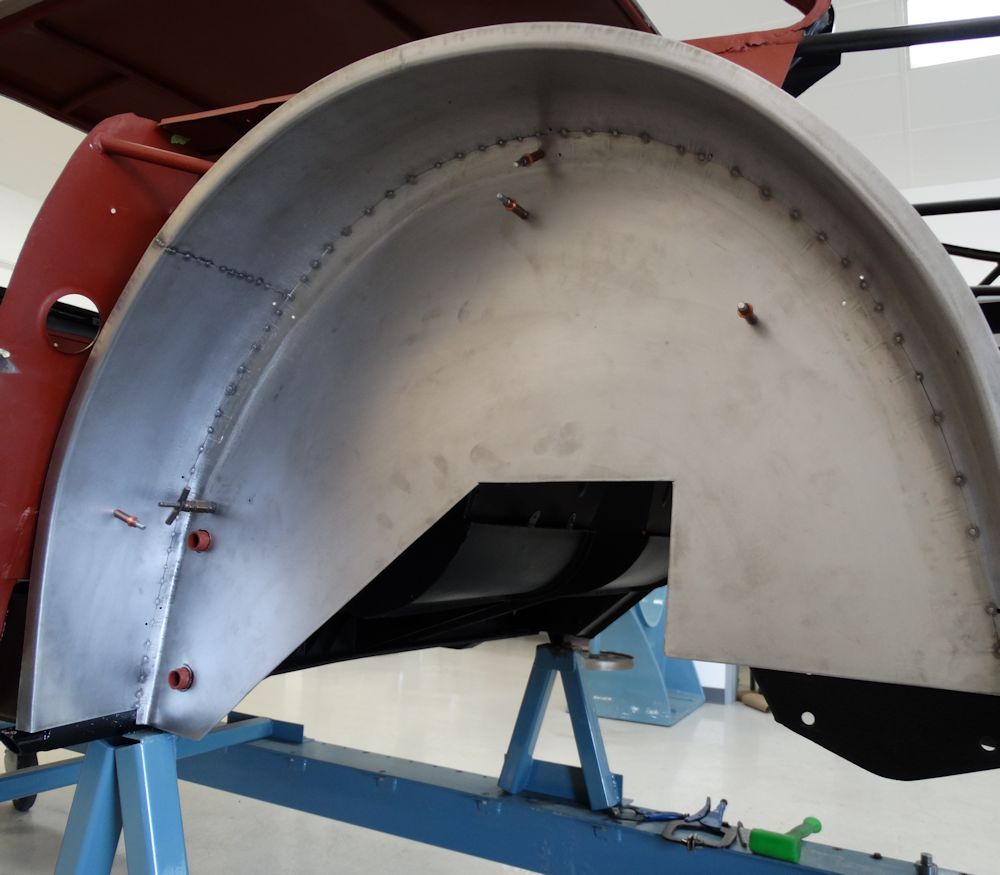 |
| Trial fitting LR wheel well |
|
 |
 |
 |
 |
| TIG welding previously tack welded seamss |
|
 |
 |
| Finalizing fit after TIG welding and
planishing |
|
 |
 |
| Fabricating LR suspension anchor point brace |
|
 |
 |
 |
 |
| RR wheel well virtually completed |
|
 |
 |
| Trial fitting RR wheel well |
|
 |
 |
| New suspension anchor point brace spot welded into position |
Wurth Body Wax applied to inner sections that
will be enclosed by the new wheel well |
 |
 |
| Bending and forming lower edges of well |
|
 |
 |
| Weld thru primer applied to weld zones on inner surface of wells |
|
 |
 |
| Jake spot welding LR well in place |
Matt spot welding RR well in position |
 |
 |
 |
 |
 |
 |
 |
 |
 |
 |
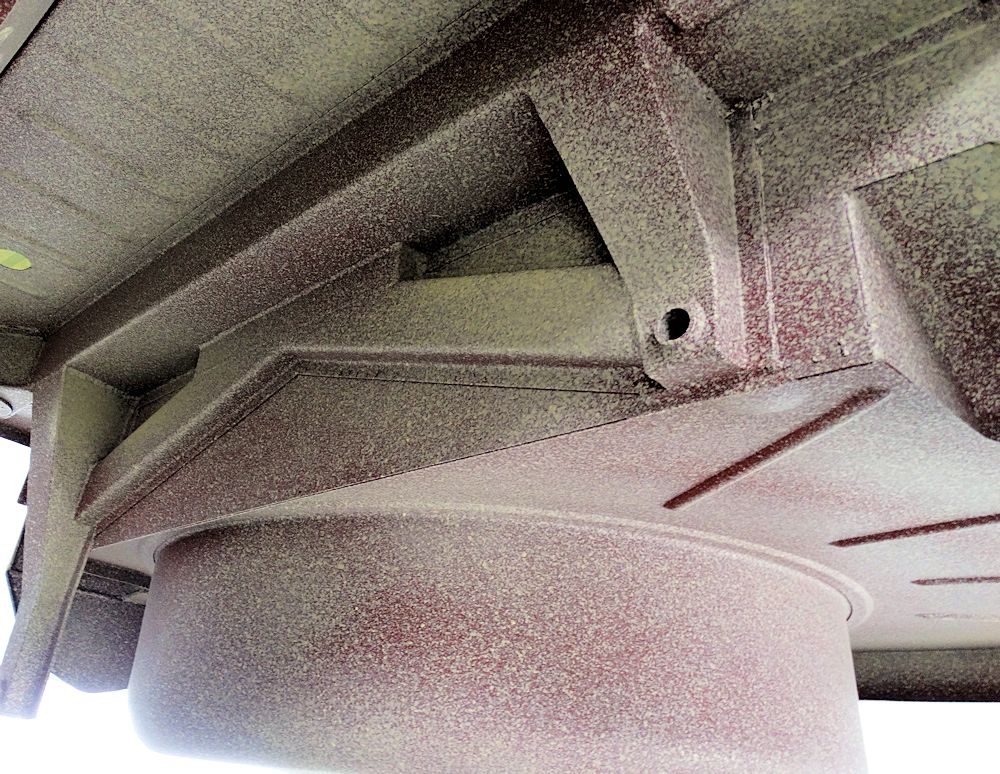
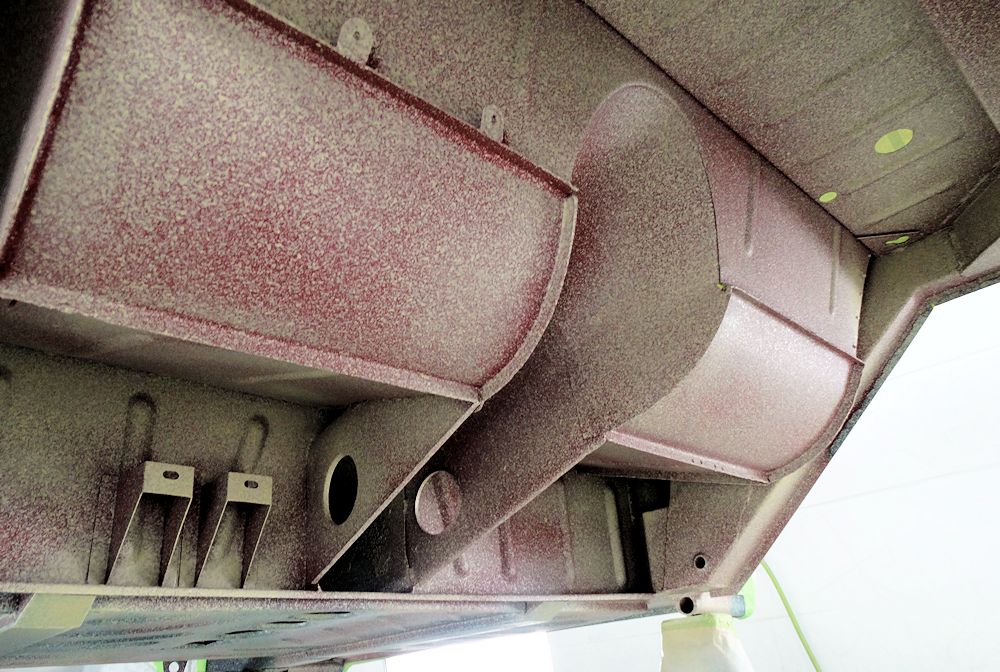
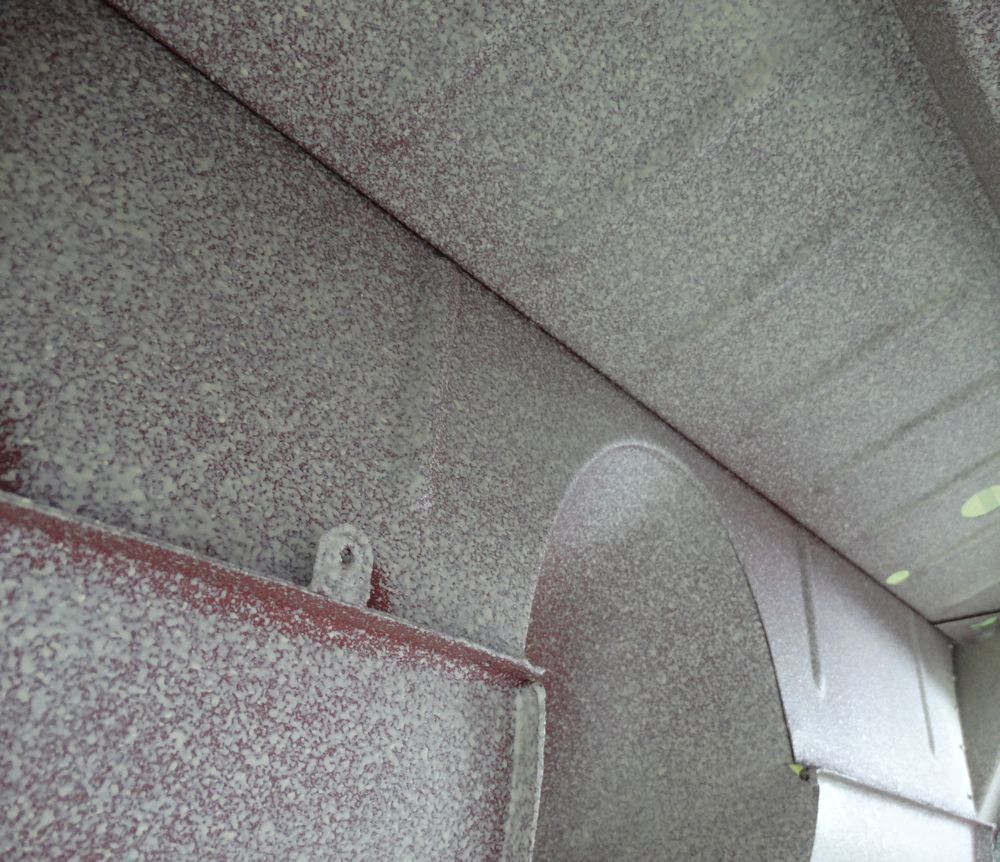
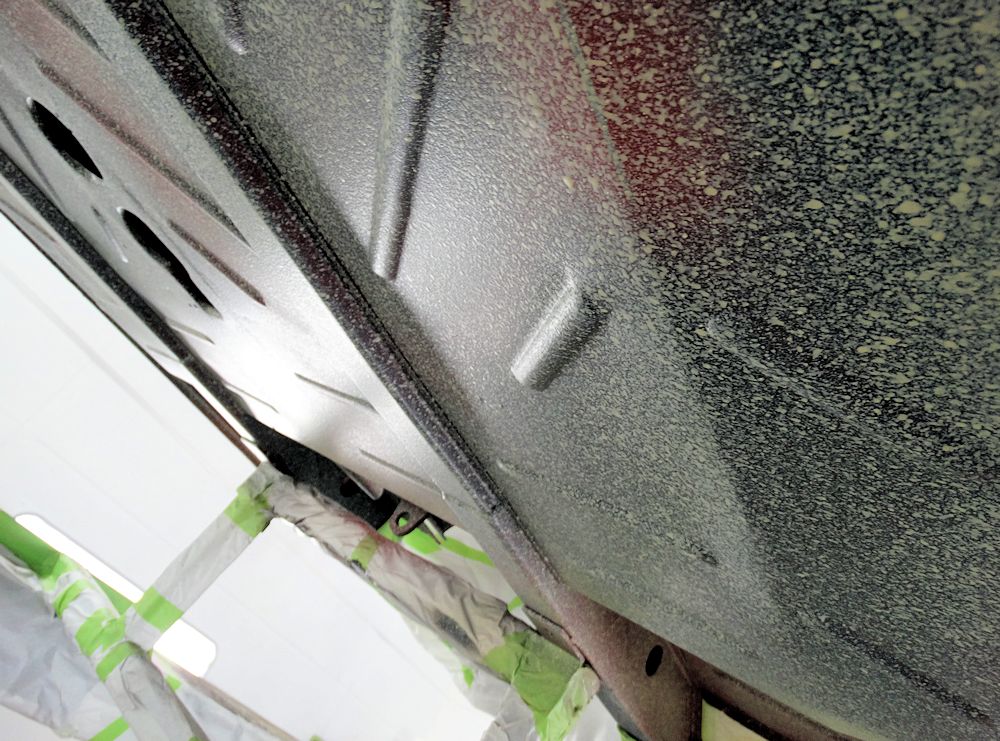
Applying texture and painting the underside of the chassis and floors..
 |
 |
 |
 |
 |
 |
 |
 |
 |
 |
 |
 |
With our sheet meal repairs now almost complete, we are ready to start painting the chassis. Our goal is to have the chassis appear as close in appearance to 'brand new original' as humanly possible. The cabin, including the floors and the front and rear bulkheads, were left in bare red oxide primer at the Newport Pagnell factory. The engine bay and underside of the chassis were originally sprayed with a textured black 'rubberized' undercoating.
Although we have gone to great lengths to restore this chassis to look precisely as it would have when new, we used a modern textured protective coating (3M rocker guard, part # 3M8949) in place of the original rubberized undercoating. We then painted the rocker guard with a satin black single stage urethane paint. We achieved the desired 'satin' look by mixing the paint with an 80% ratio of flatting agent. We believe the finished result perfectly replicates the way the chassis would have looked at the factory, fifty five years ago.
 |
 |
 |
 |
 |
 |
 |
 |
 |
 |
 |
 |
 |
 |
 |
 |
 |
 |
 |
 |
 |
 |
| Welding the newly fabricated battery tray in
place |
|
 |
 |
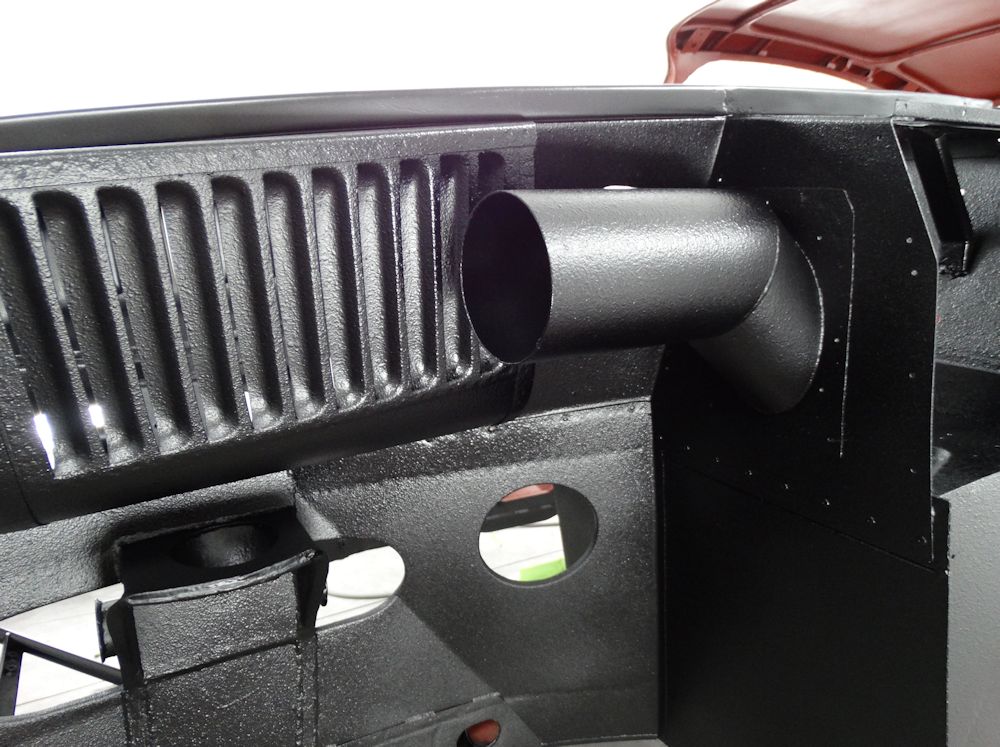
| Trial fitting newly fabricated air intake
tubes |
Inner wheel wells have been removed and new
ones will be fabricated from scratch |
 |
 |
| All inner (previously boxed in) surfaces have
been cleaned back to bare metal and primed |
|
 |
 |
| Final trial fit of LH air intakes |
|
 |
 |
 |
 |
| Air intake tube now welded in position |
Planishing RH quarter light panel |
 |
 |
| Fabricating new rear inner wheel wells |
|
 |
 |
 |
 |
 |
 |
 |
 |
 |
 |
| Interior cabin was left in red oxide primer at
the factory |
|
 |
 |
 |
 |
 |
 |
| Preparing to texture and paint the engine bay |
|
 |
 |
| Open (non-welded) joints are seam sealed prior to painting |
|
 |
 |
 |
 |
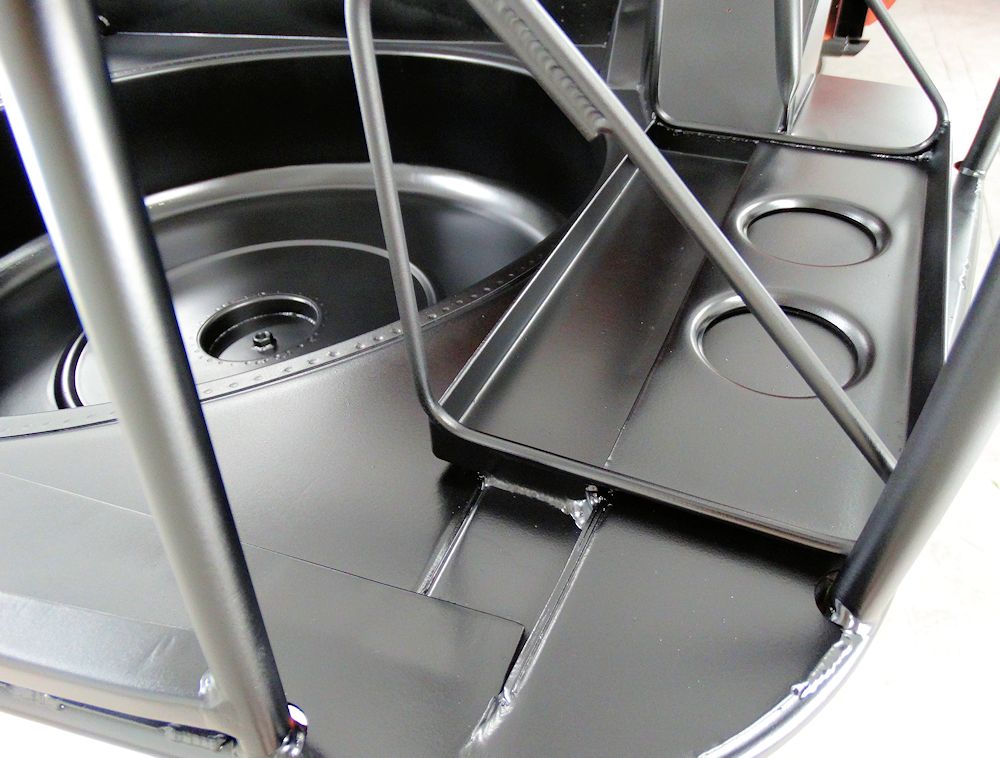
| Spare wheel hold-down captive nut welded in
place |
|
 |
 |
| Spare wheel captive nut viewed from beneath |
Masking off cabin prior to applying satin
black finish to rest of chassis |
 |
 |
| Masking off superleggera tubing and areas
where textured finish is not wanted |
|
 |
 |
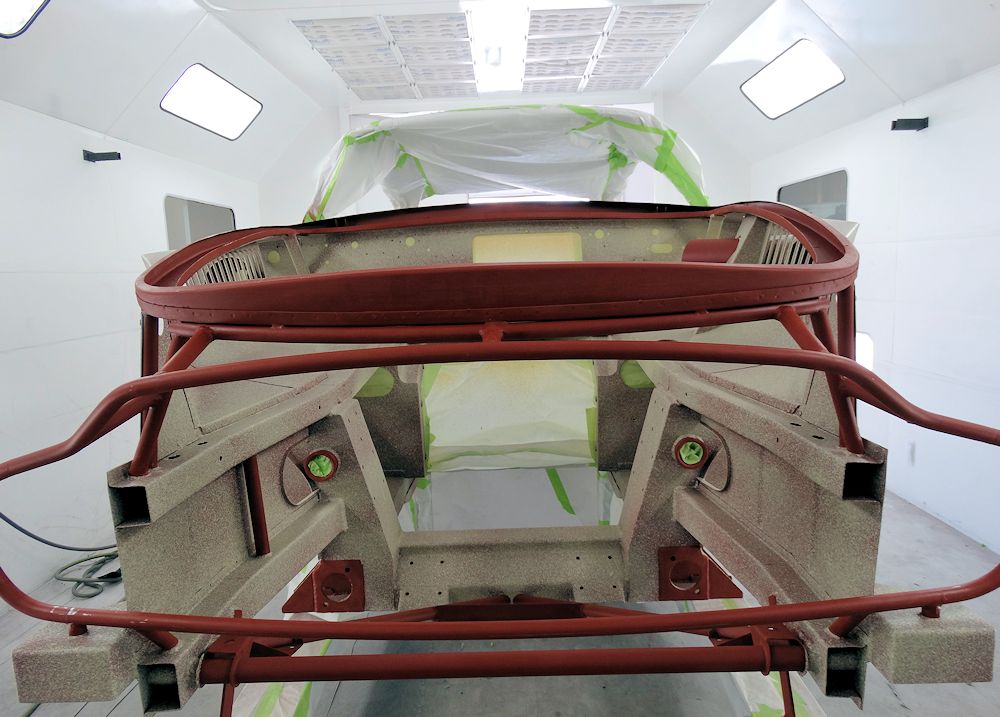
| Applying the textured finish |
|
 |
 |
| New stainless steel mesh will be installed after painting |
|
 |
 |
| Note how superleggera tubing is not textured |
|
 |
 |
 |
 |
 |
 |
| Engine bay now every bit as good as new - if not a little better |
|
 |
 |
 |
 |
| Now ready for the satin black finish |
Firewall absolutely as new |
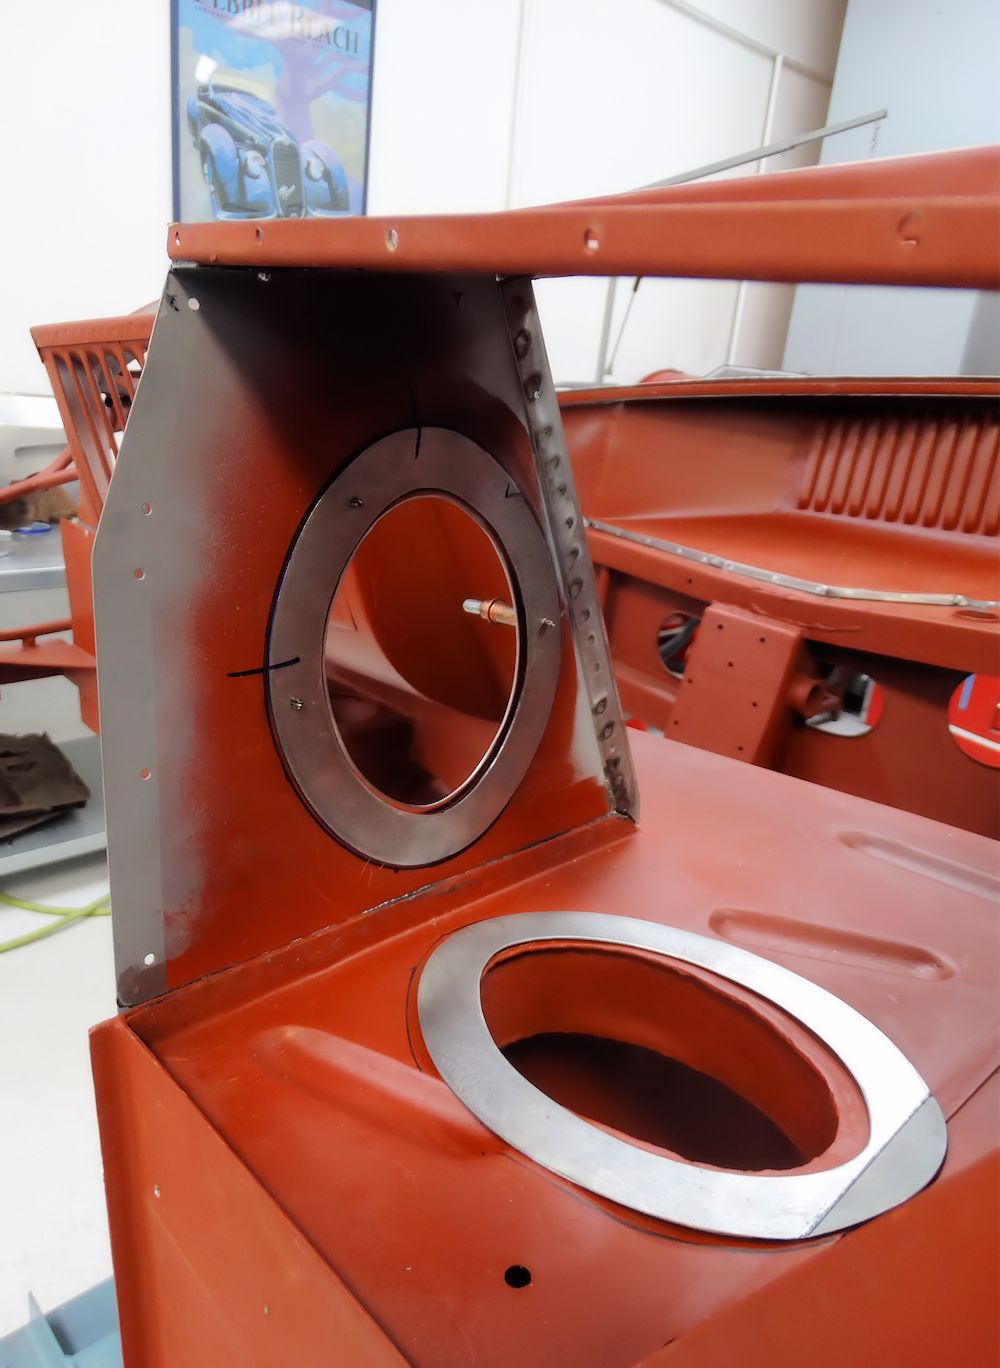
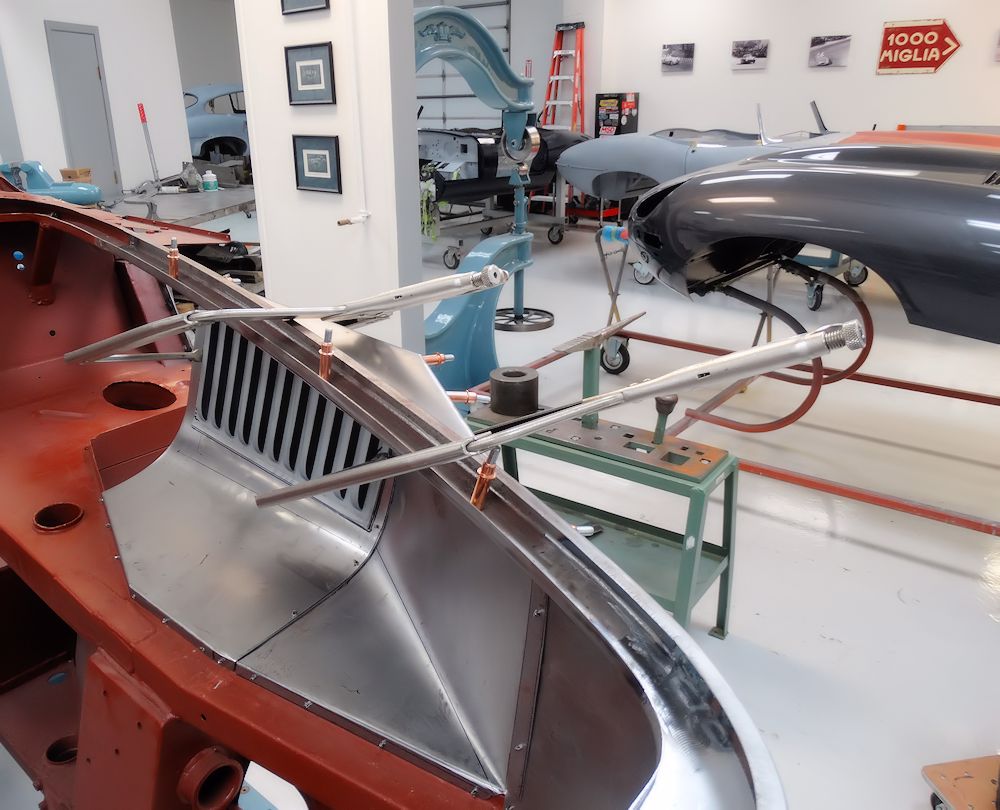
Fabricating new air intake tubing and butterfly valves..
 |
 |
 |
 |
 |
 |
 |
 |
 |
 |
 |
 |
| Welding the side panels to the boot floor |
|
 |
 |
| Lead loaded A pillar sealed with red oxide
primer |
|
 |
 |
| Starting to hammer the new alloy skin over the top of the lead loaded A pillar |
|
 |
 |
| Rear edge of front left wing starting to take
shape |
Lots of progress in the Team CJ Coachworks this week, plus a shiny new tool kit..
 |
 |
| Trial fitting rear superleggera tubing |
Note rear edge now welded in place |
 |
 |
| Central boot lid latch now has to be trial
fitted |
|
 |
 |
 |
 |
| Original panel in rough shape |
Outer edge of boot latch plinth needs to be re-made |
 |
 |
| Trial fitting boot latch |
|
 |
 |
| Plotting the location of the latch |
|
 |
 |
| Hole cut in rear flange for boot lid release
button |
|
 |
 |
| Ready to weld boot lid plinth in place |
|
 |
 |
| A pillar requires cleaning up and lead loading before new front skin can be installed |
|
 |
 |
| Lead body solder applied |
|
 |
 |
| Lead filed to desired shape |
|
 |
|
| Shaped to form perfect base for new alloy skin |
|
 |
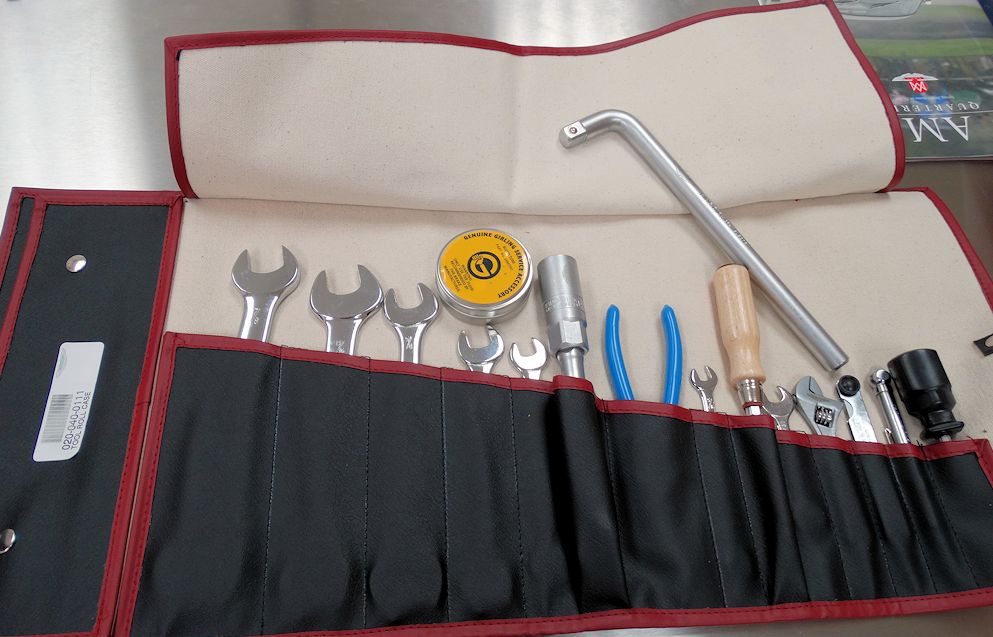 |
| New tool kit ready for the show ground |
Unfortunately we are having to rework the new alloy rear clip fairly extensively, including fabricating a new drip rail, reshaping the contour at the peak of the left rear wing, remaking the C-pillars and relocating the gas filler opening. Matt has been busy assembling and trial fitting the new superleggera tubing for the rear of the car, and Jake has been wrapping up the engine bay side panels and installing the new front jacking points.
 |
 |
| Old boot lid does not fit the new rear clip
very well |
|
 |
 |
| Engine bay side panels now spot welded and riveted in place |
|
 |
 |
| We need to fabricate a new drip rail for the new rear clip |
|
 |
 |
 |
 |
| Trial fitting the new drip rail to the old
rear clip |
|
 |
 |
| Almost ready to weld the new superleggera tubing in place |
|
 |
 |
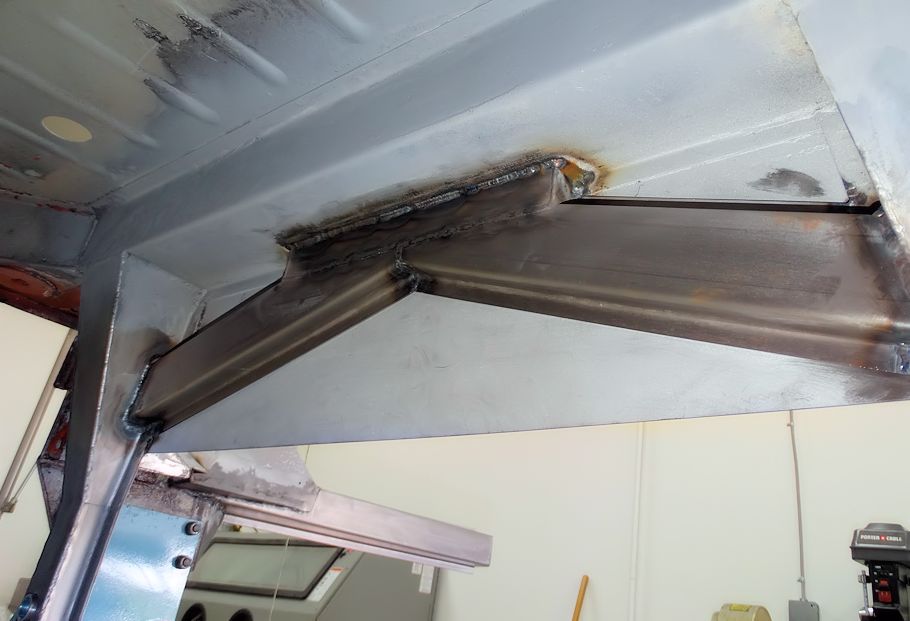
| Forward jacking points now welded in place |
Lots of progress in the Coachworks this week. We did run into a slight dimensional problem with the new rear clip, although with the hand built nature of these cars, such things are to be expected.
 |
 |
| Matt spot welding the new rear chassis legs in
place |
|
 |
 |
| Trial fitting the new rear edge superleggera
tubing |
Notice how the tubing precisely follows the
contour of the new boot floor |
 |
 |
| Preparing to weld short sections of chome-moly
tubing to new rear edge superleggera tubing |
|
 |
 |
 |
 |
| Comparing the original rear edge to the newly fabricated section |
|
 |
 |
| Comparing the new and original rear clips revealed a slight dimensional issue |
Demonstrating the differences between the old
and new rear clips |
 |
 |
 |
 |
 |
 |
| Marking the new rear clip where it needs to be
cut |
|
 |
 |
| With the C pillars removed, the lower section is then trial fitted |
Checking fit between boot floor and inner
walls of new rear clip |
 |
 |
| This photo shows where new aluminum will be let in and welded |
Rear bumper brackets now welded to rear edge superleggera tubing |
 |
 |
 |
 |
| Steel platform chassis now almost ready to receive the forward bodywork |
|
 |
 |
 |
 |
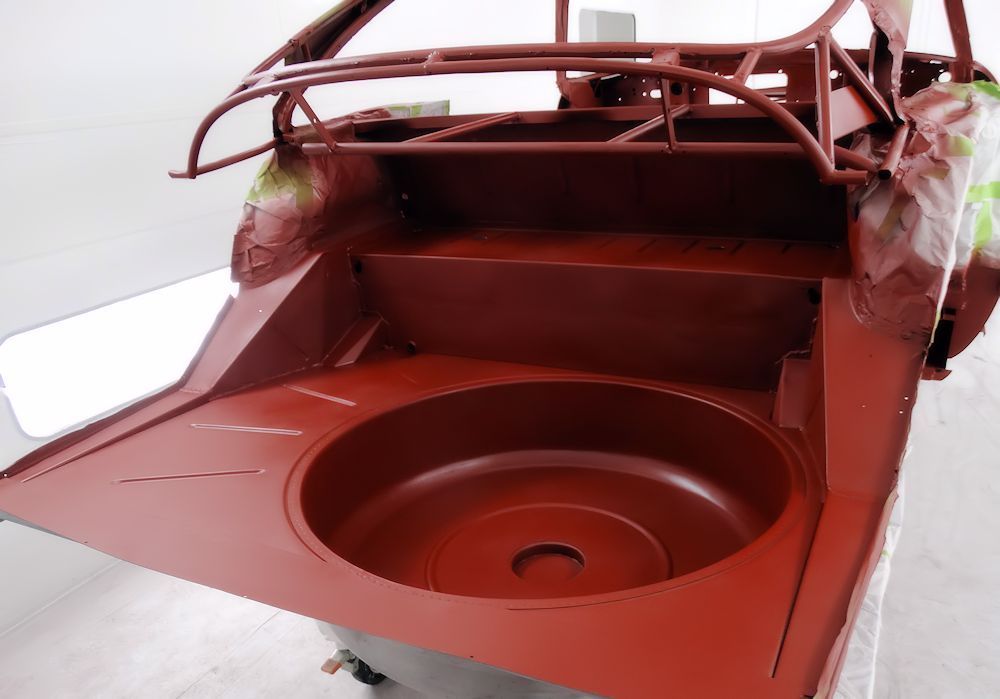
| Underside of boot floor and spare wheel well now sealed with red oxide primer |
|
 |
 |
 |
 |
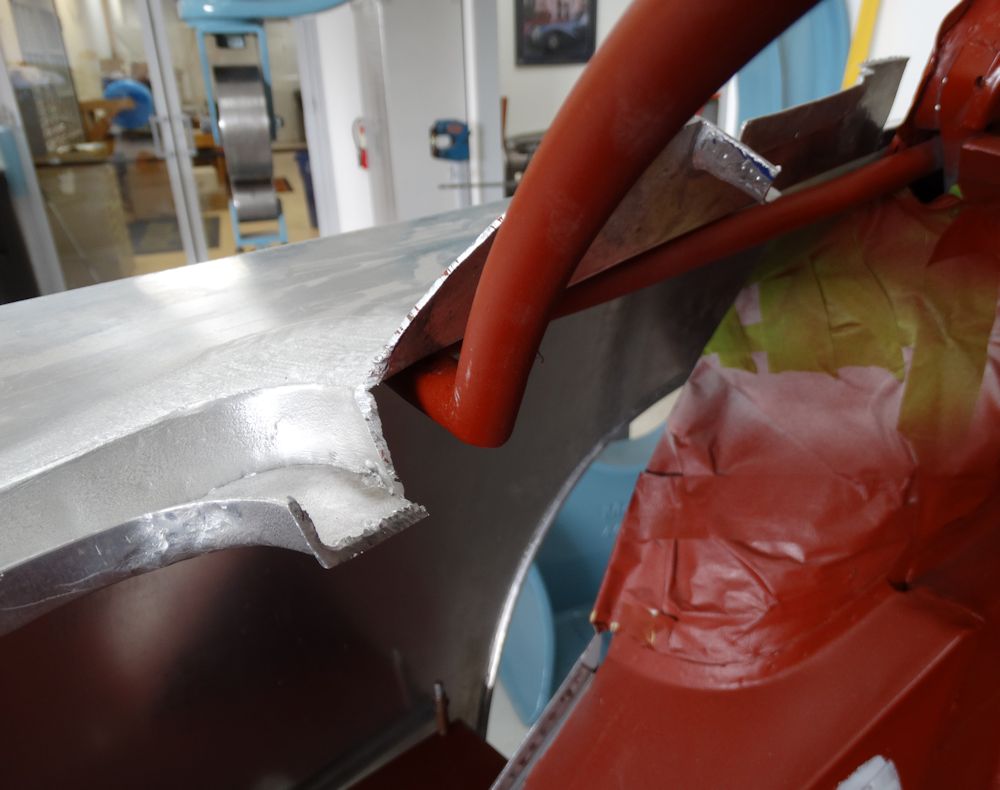
| Trial fitting the original boot lid
highlighted more dimensional issues with the rear clip |
Boot opening does not correspond very well
with the shape of the boot lid |
 |
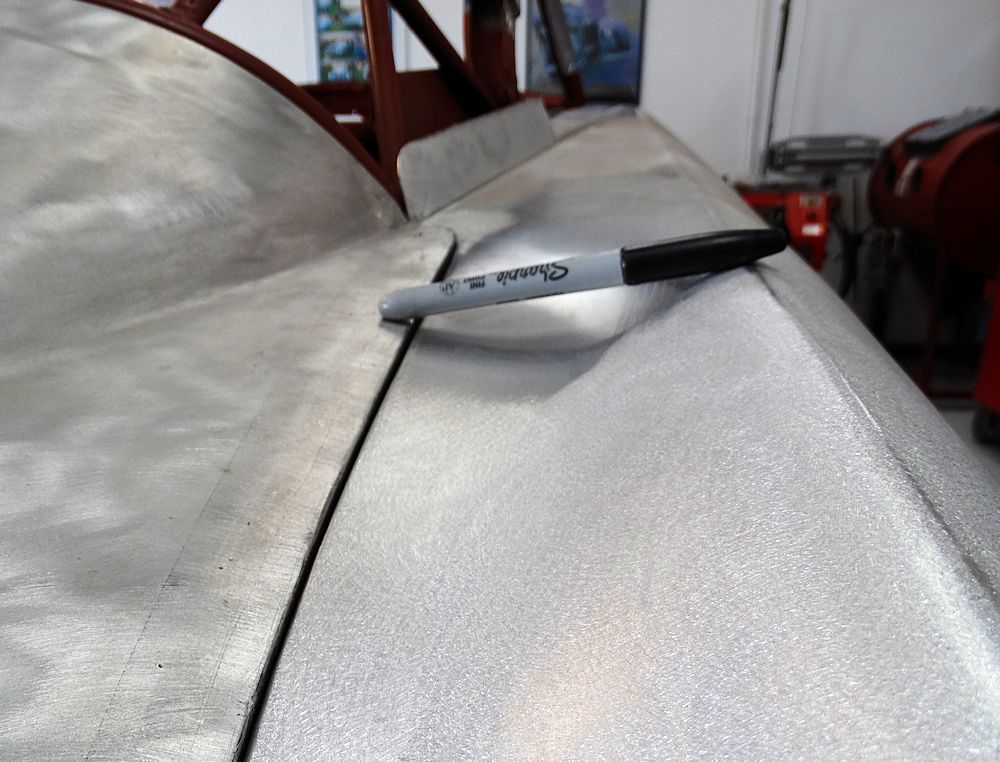 |
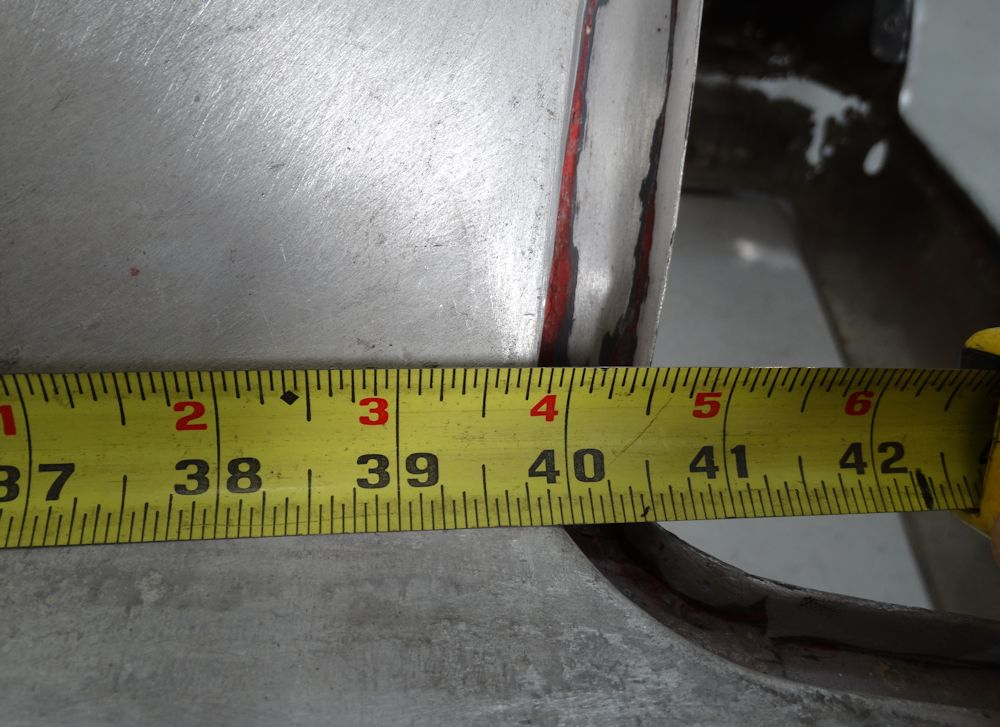
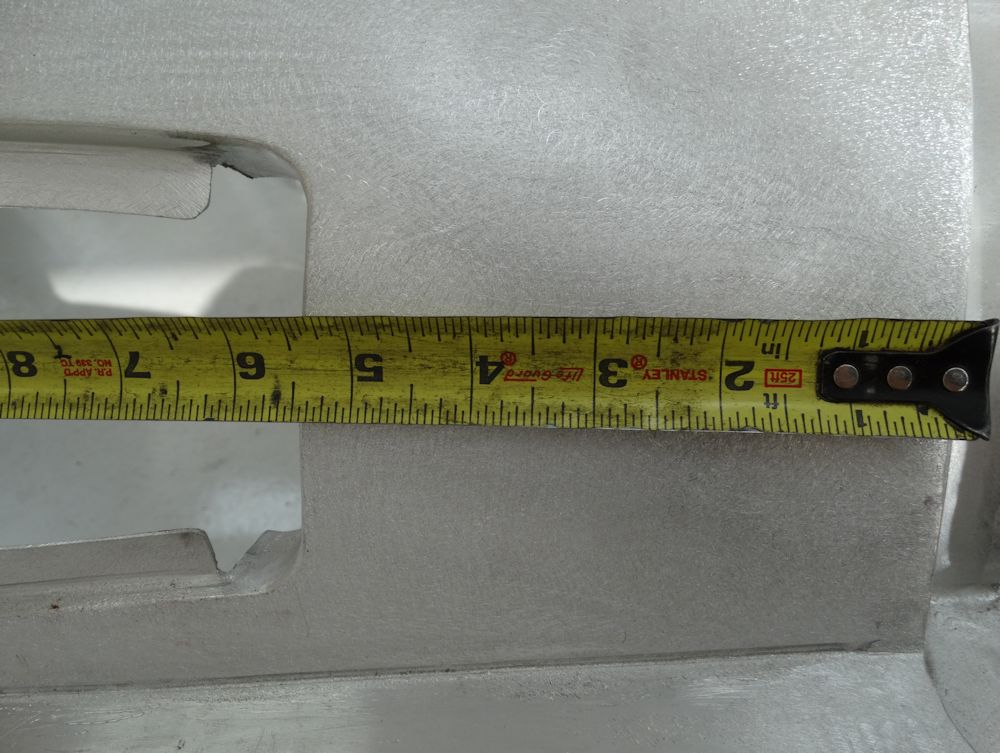
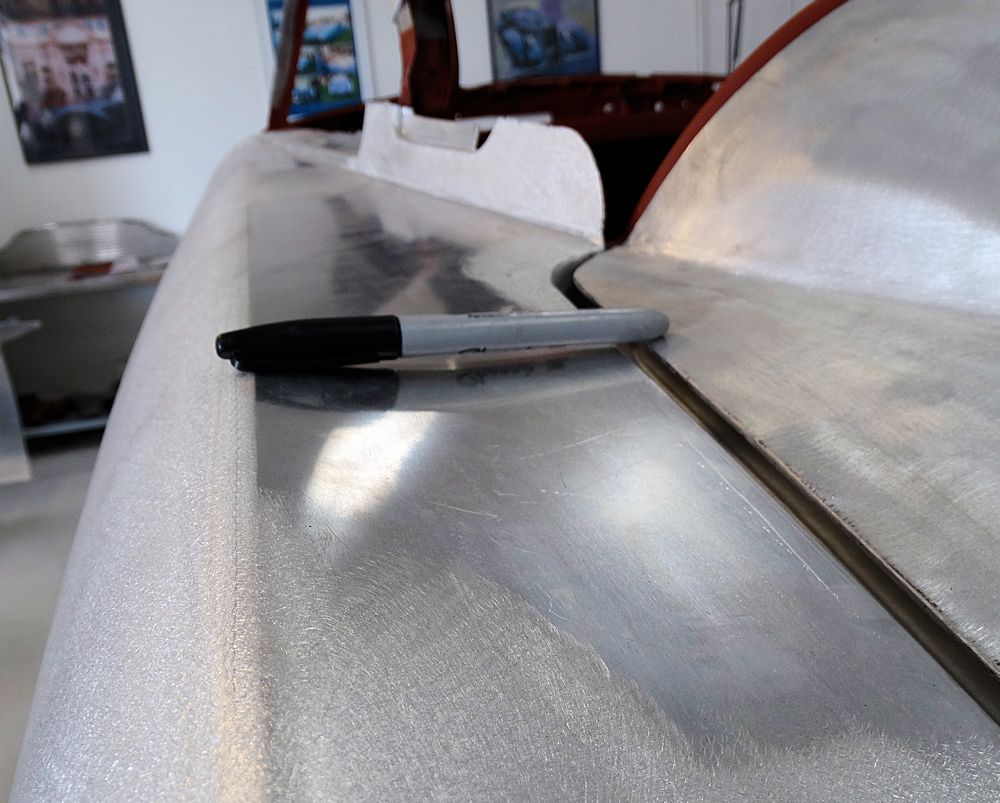
| Left rear fender is too flat on top surface -
see gap beneath pen and compare to image on the right |
Right rear fender has correct (more
pronounced) high point - note greater gap beneath Sharpie |
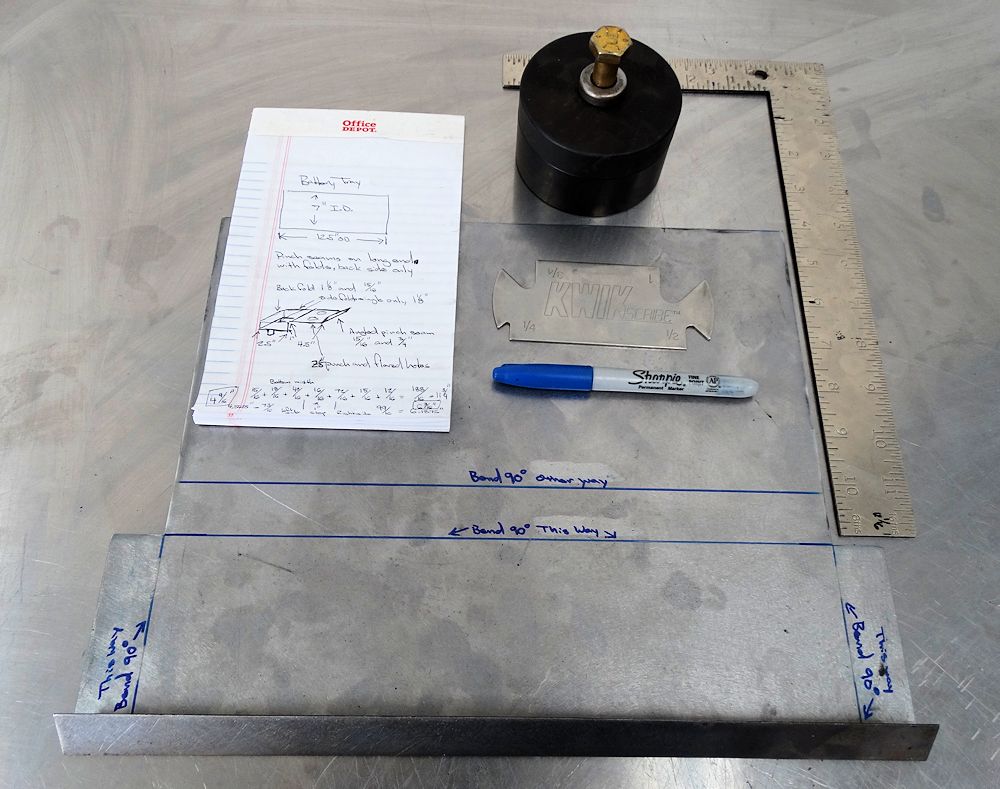
Fabricating a new battery tray (Matt) and sealing the repaired sections of the platform chassis with red oxide primer...
 |
 |
| Preparing to fabricate a new battery tray |
Not much of the original left! |
 |
 |
 |
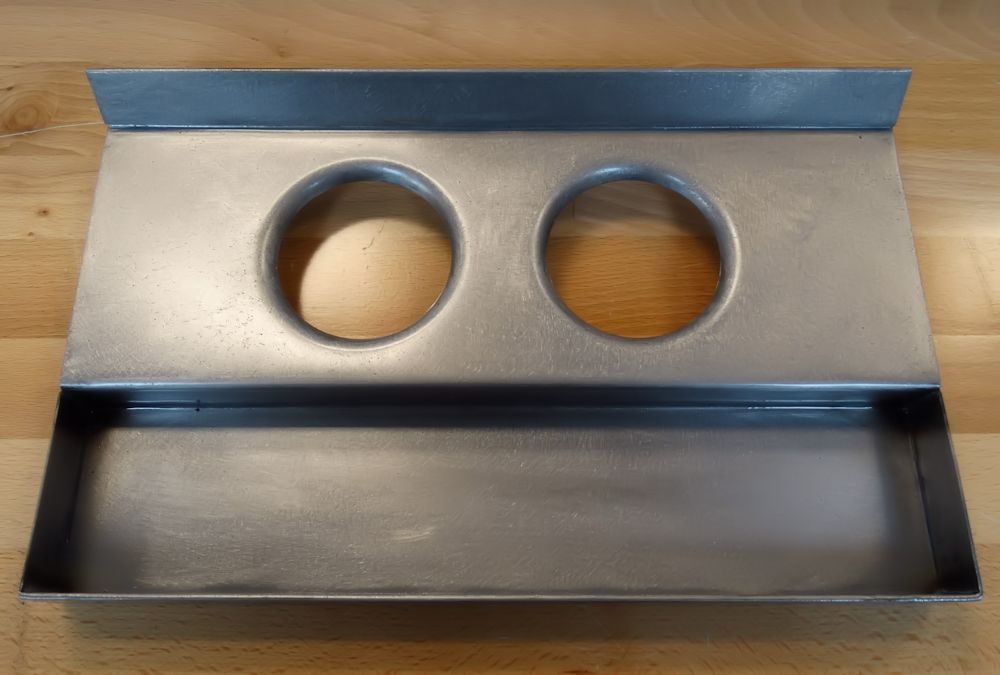 |
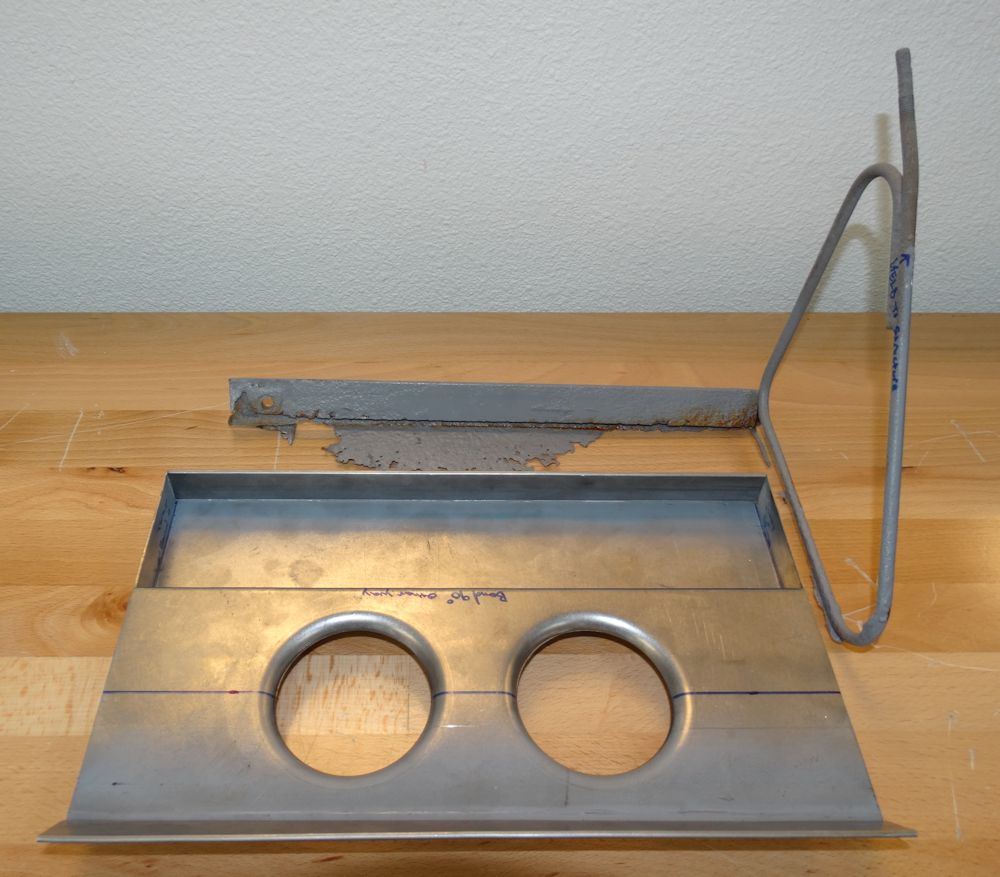
| New tray now almost complete |
|
 |
 |
| Sealing repaired sections of the chassis with
red oxide primer |
|
 |
 |
| Seat runner shave been removed and will be replaced |
|
 |
 |
| Red oxide primer applied to all inner box
sections |
|
 |
 |
| New engine bay side panels also primed before being welded in place |
|
 |
 |
| Weld through primer applied to weld zones of rear chassis legs |
Trial fitting new boot floor side platforms |
 |
 |
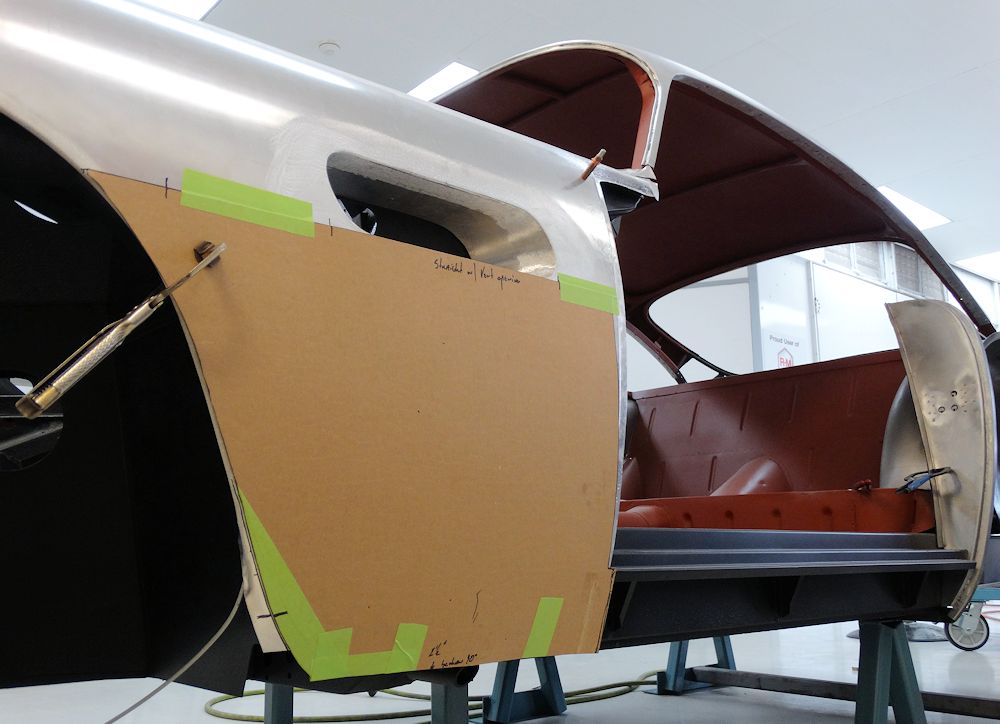
| Jake (assisted by Lance) trimming the bonnet opening to the desired size |
The following photos show Matt fabricating the superleggera structure for the rear wings and boot floor surrounds, as well as the rear bumper mounting brackets and the side and rear platforms that form the foundation for the inner rear wing superleggera framework...
 |
 |
| Fabricating new rear chassis leg side panels |
|
 |
 |
| Trial fitting the new chassis leg side panels |
|
 |
 |
| Forming the largest of the rear superleggera
tubes |
|
 |
 |
| Forming the side tubes which support the inner surface of the rear wings |
|
 |
 |
 |
 |
 |
 |
| Inner rear wing superleggera frames now completed |
|
 |
 |
 |
 |
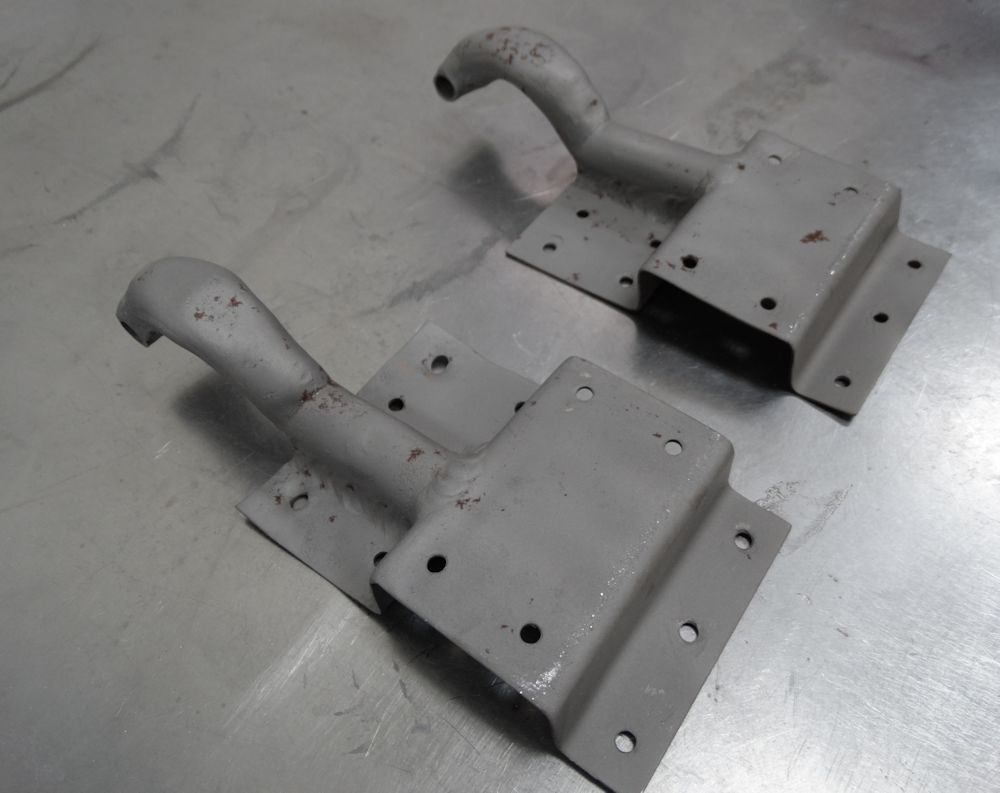
| Rear bumper brackets were rusty and no longer serviceable |
Fabricating new rear bumper brackets |
 |
 |
 |
 |
| Demonstrating how the original bracket was attached to the old superleggera tubing |
|
 |
 |
 |
 |
| Trial fitting the new outer superleggera
tubing |
|
 |
 |
| New side platform panels now constructed |
Trial fitting new side platform panels |
 |
 |
| Almost ready to weld everything together |
|
 |
 |
| View of new structure from beneath the car |
The following sequence shows how Matt fabricated new lower bonnet mouth support brackets to replace the corroded originals...
 |
 |
| Original support brackets were corroded |
|
 |
 |
| Origami, Aston style |
|
 |
 |
| Newly formed brackets are first tack welded |
|
 |
 |
| Seams are then TIG welded |
|
 |
 |
 |
 |
| This is where the new brackets mount |
|
 |
 |
| Trial fitting brackets |
|
 |
 |
| New brackets now TIG welded into place |
|
 |
 |
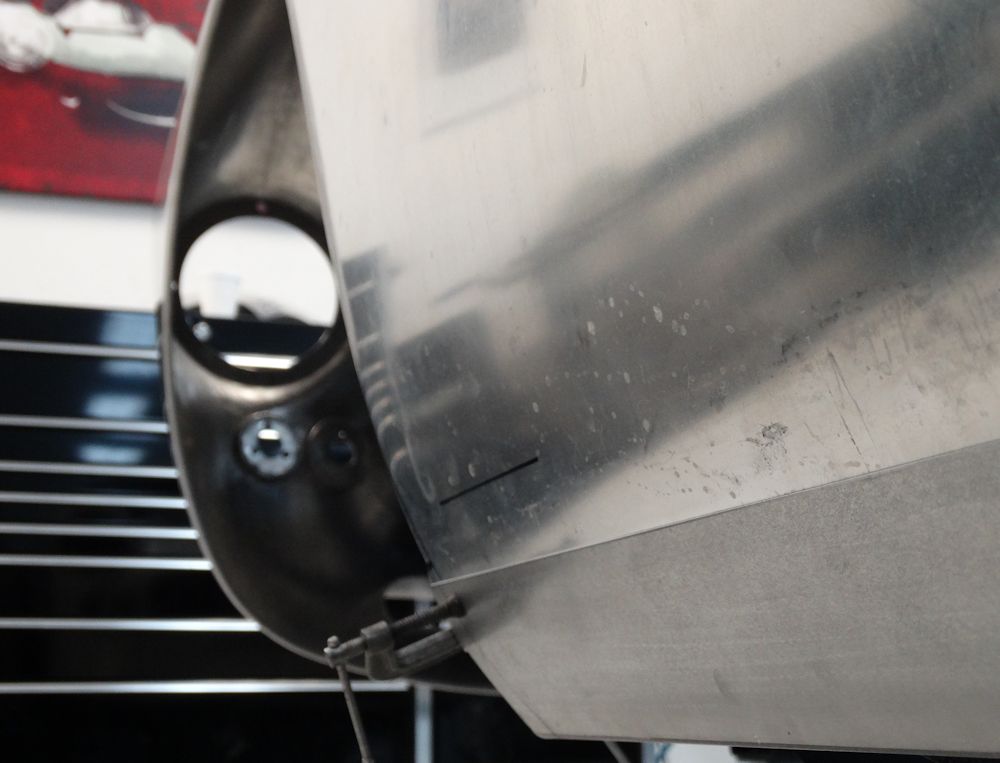
| Trial fitting alloy front end shows the
function of the new brackets |
The following photos show Jake fabricating the superleggera tubing for the bonnet mouth as well as trimming, adjusting and trial fitting the new front end.
 |
 |
 |
 |
 |
 |
 |
 |
 |
 |
 |
 |
 |
 |
 |
 |
 |
 |
 |
 |
 |
 |
 |
 |
 |
 |
 |
 |
Time to begin fabricating and installing the new Chome-Moly superleggera tubing..
 |
 |
 |
 |
| Bending new chrome-moly superleggera tubing |
|
 |
 |
| Trial fitting the front end |
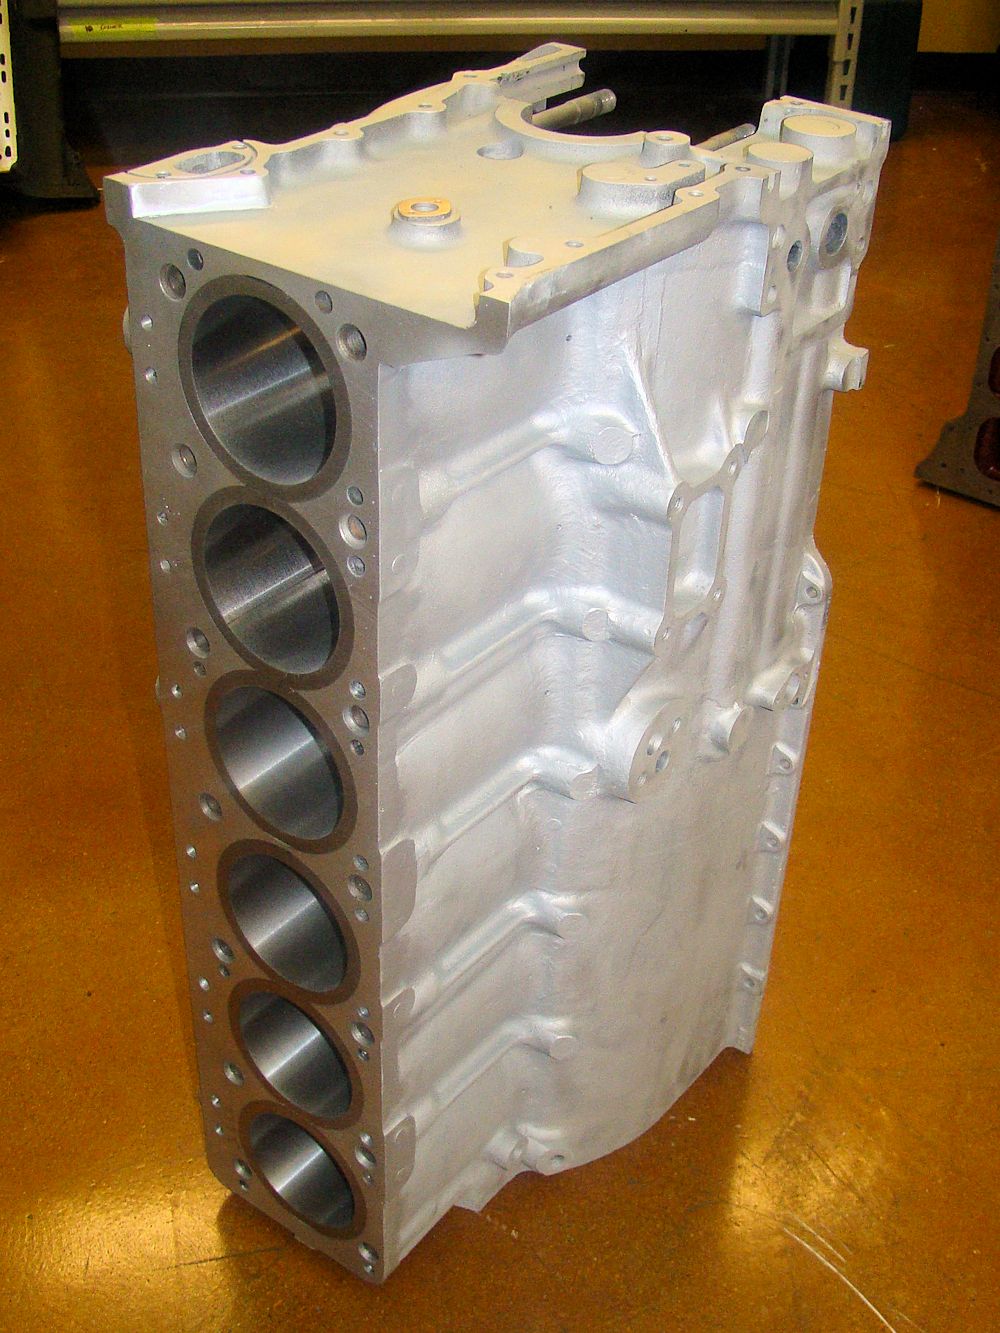
The engine block has now been welded, straightened, align honed, machined and restored to 'as new' condition..
 |
 |
| Before.. |
After.. |
 |
 |
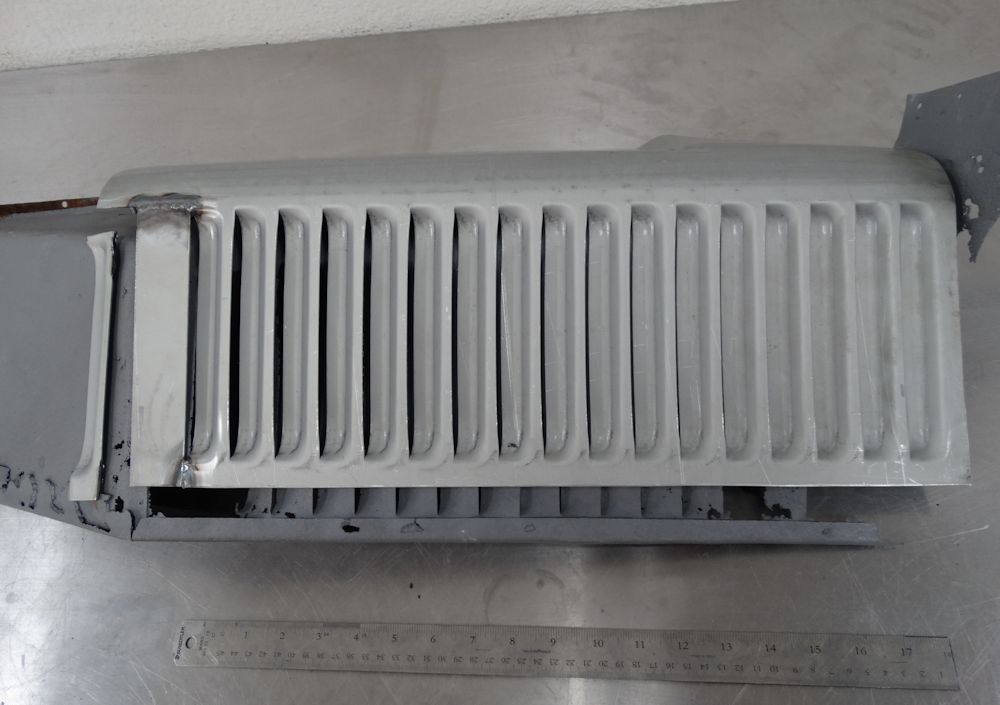
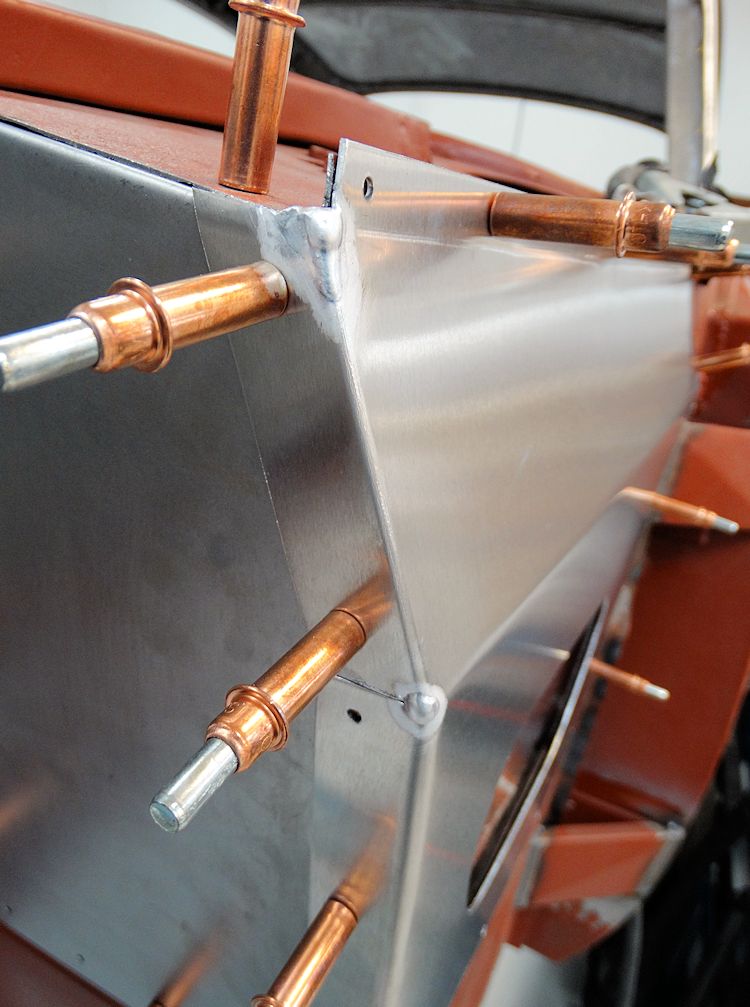
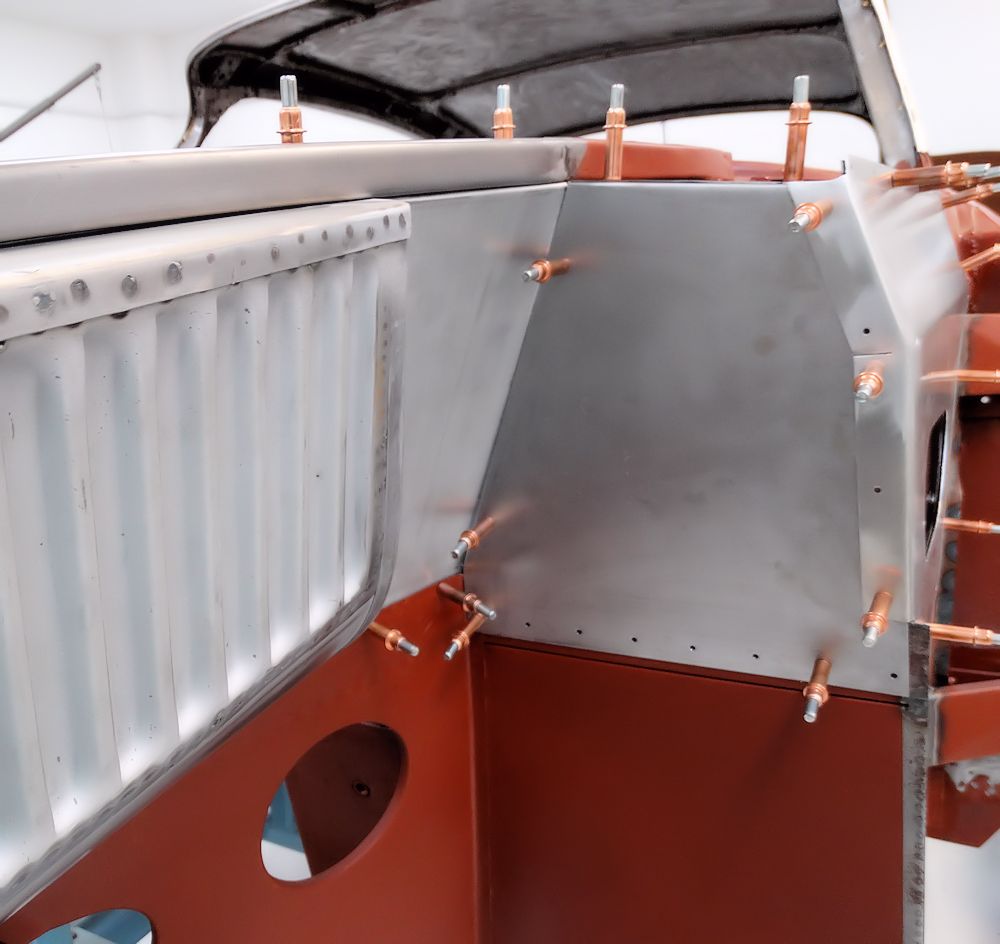
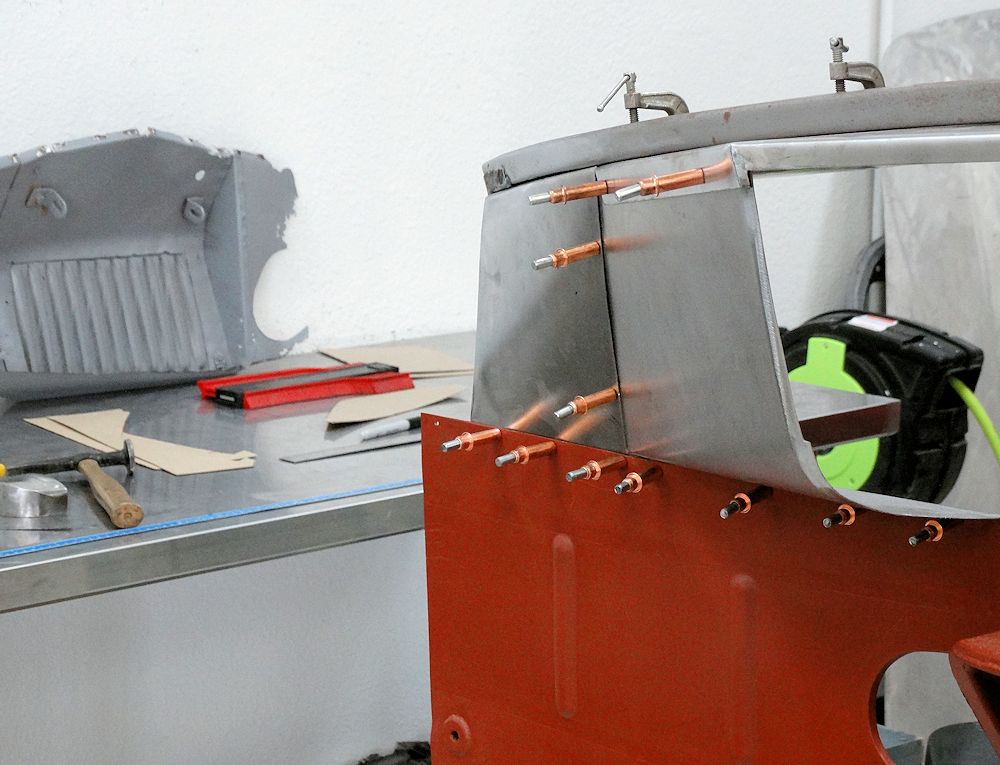
Fabricating and trial fitting the right hand engine bay side panels and louvers...
 |
 |
| With the left side completed, Jake has turned
his attention to the right side |
|
 |
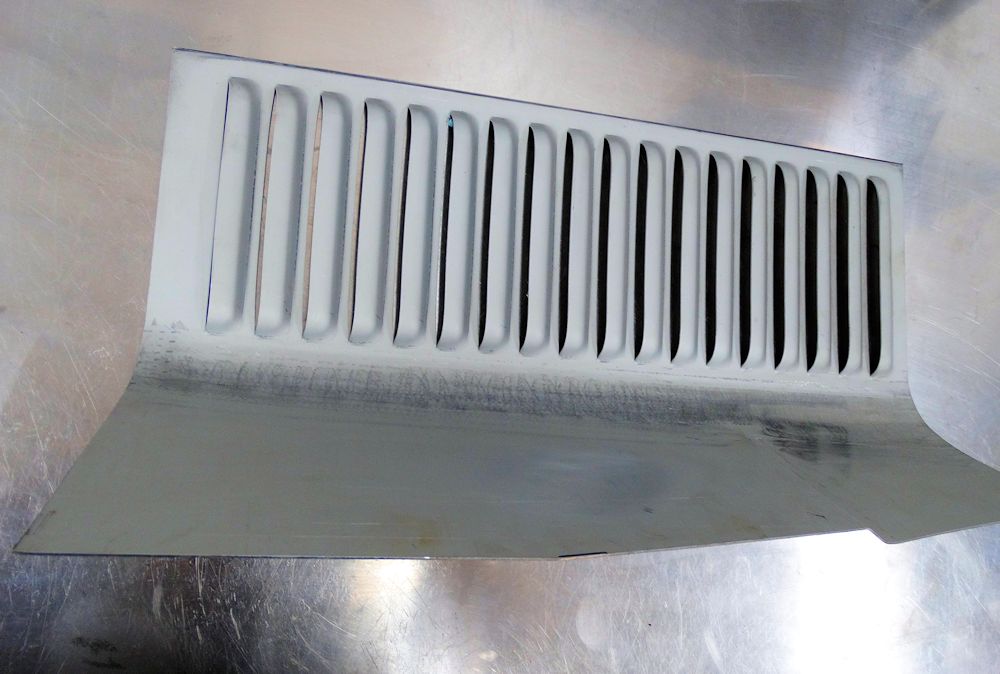 |
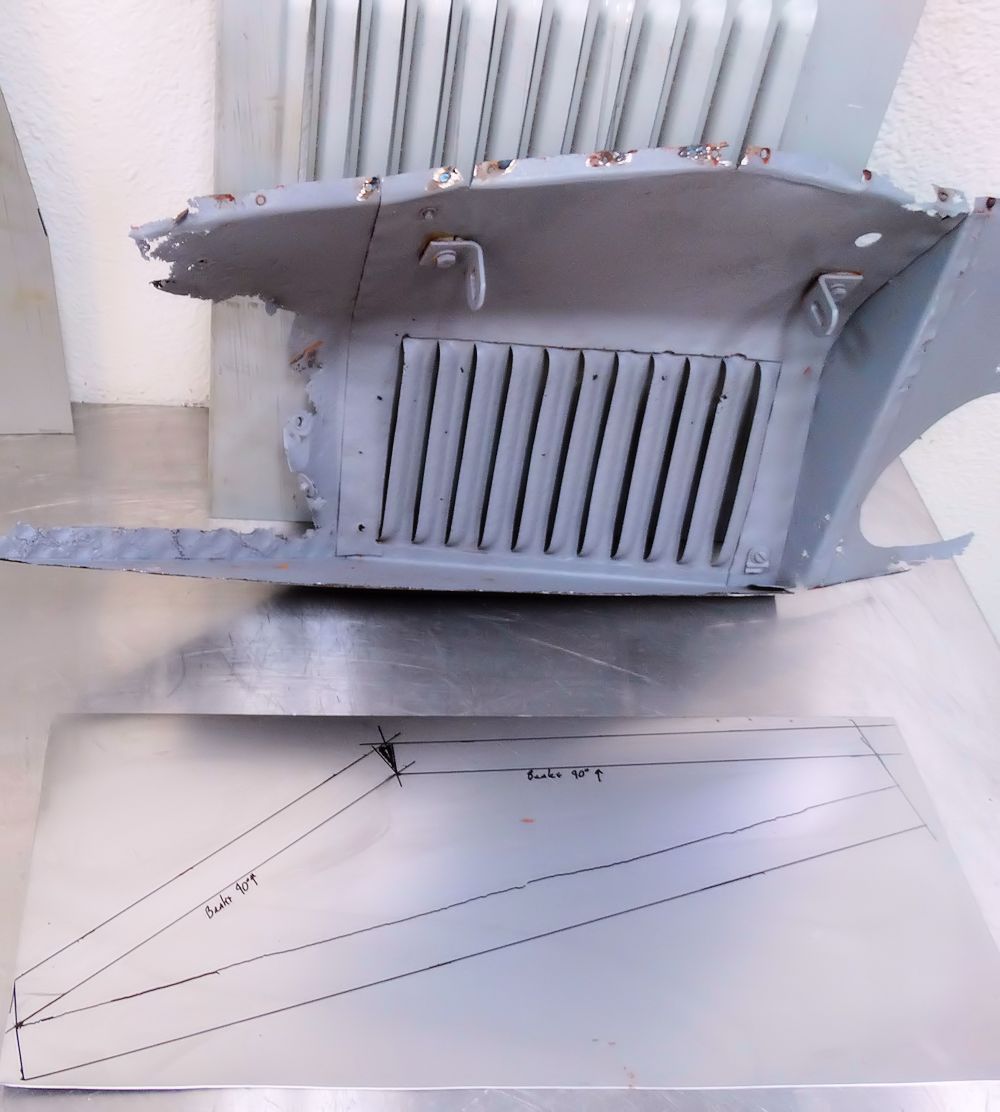
| The new RH louver panel supplied was a little
too long |
|
 |
 |
| Trimming the length to match the original |
|
 |
 |
| Trial fitting new louver panel |
|
 |
 |
 |
 |
| Fabricating closing section for RH louver
panel |
|
 |
 |
 |
 |
| Trial fitting the new closing panel |
Almost ready to start welding everything
together |
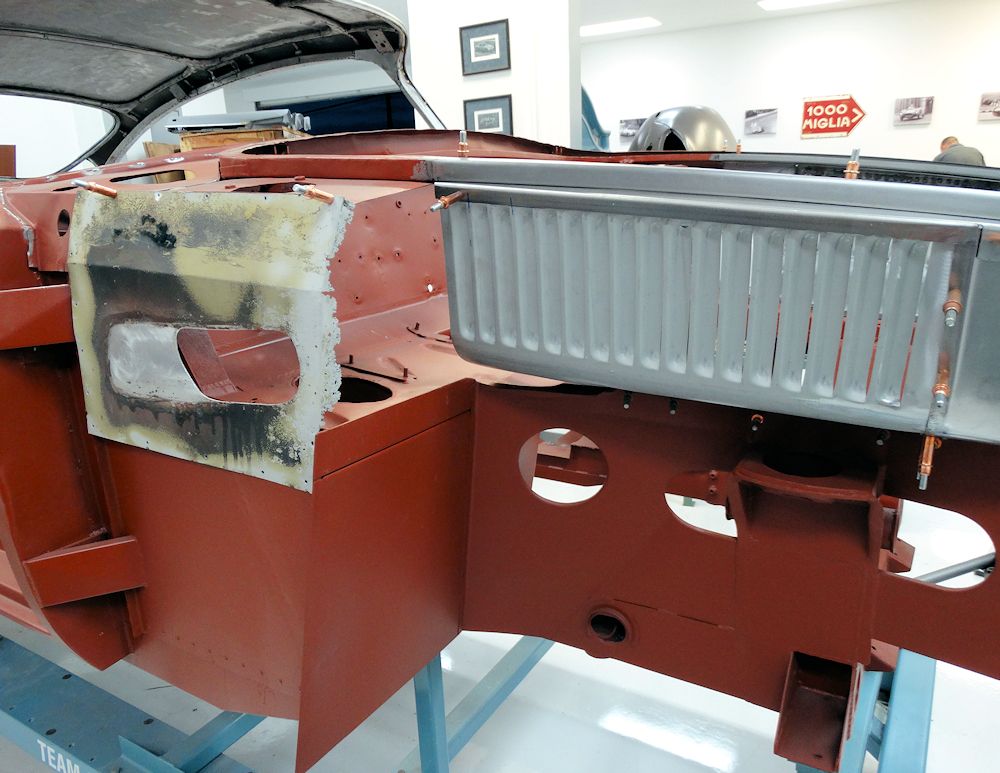
Fabrication and installation of engine bay side panels, continued...
 |
 |
| Louvers now spot welded to new LH side panel |
|
 |
 |
| Looking at new panels through what will be the front grill opening |
|
 |
 |
| Rear/side panel will be fabricated from
scratch |
|
 |
 |
| Making the new rear/side panels |
Trial fitting new panels |
 |
 |
 |
 |
| Upper left side of engine bay now completely reconstructed |
|
 |
 |
Stunning art deco DB horn button adds the finishing touch to your steering wheel restoration..
 |
 |
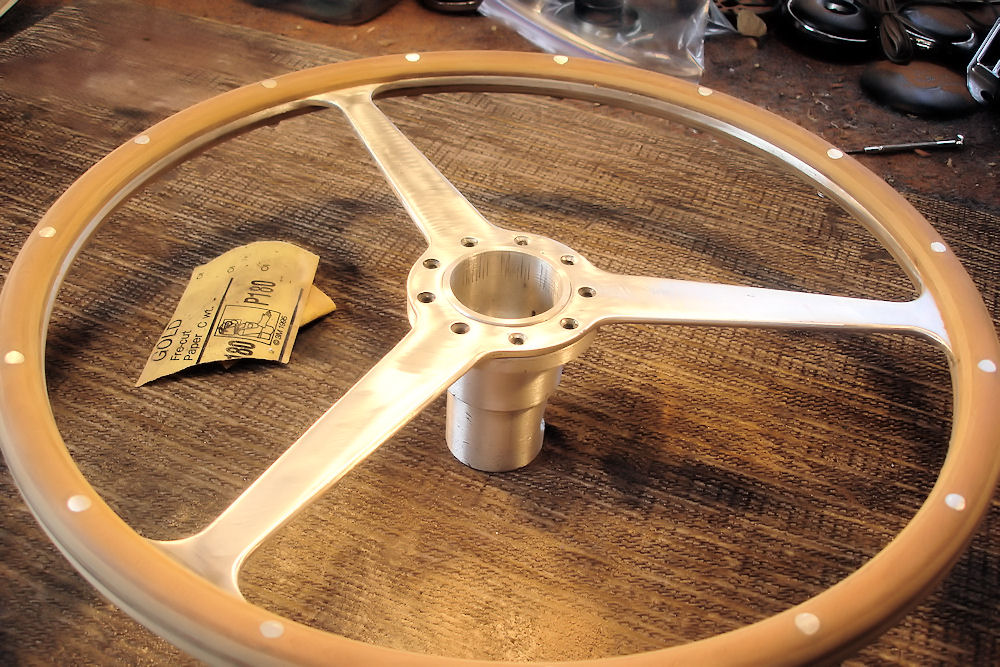
| Finished steering wheel is absolutely
beautiful |
Stunning art deco DB horn push |
Fabricating and installing the new engine bay side panels, complete with ventilation louvers...
 |
 |
| Original side panels and louvers were pretty badly corroded |
We begin with card templates |
 |
 |
 |
 |
| Side panel is a series of contoured panels
welded together |
|
 |
 |
 |
 |
 |
 |
| Trial fitting louvers |
Left side starting to take shape |
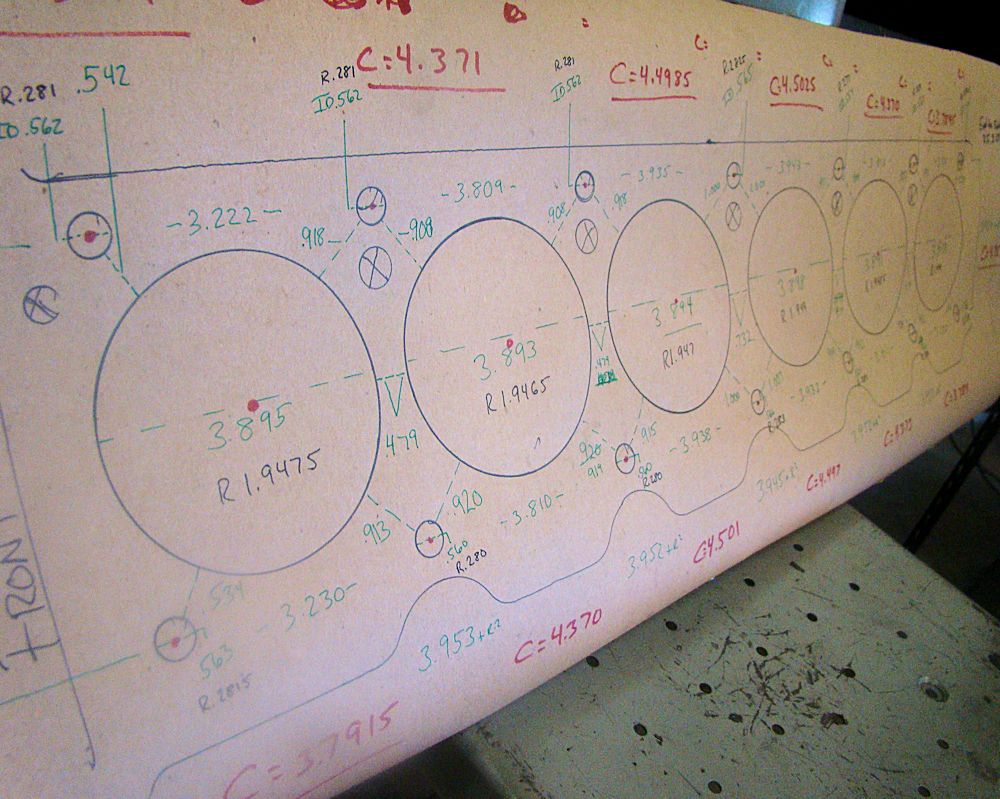
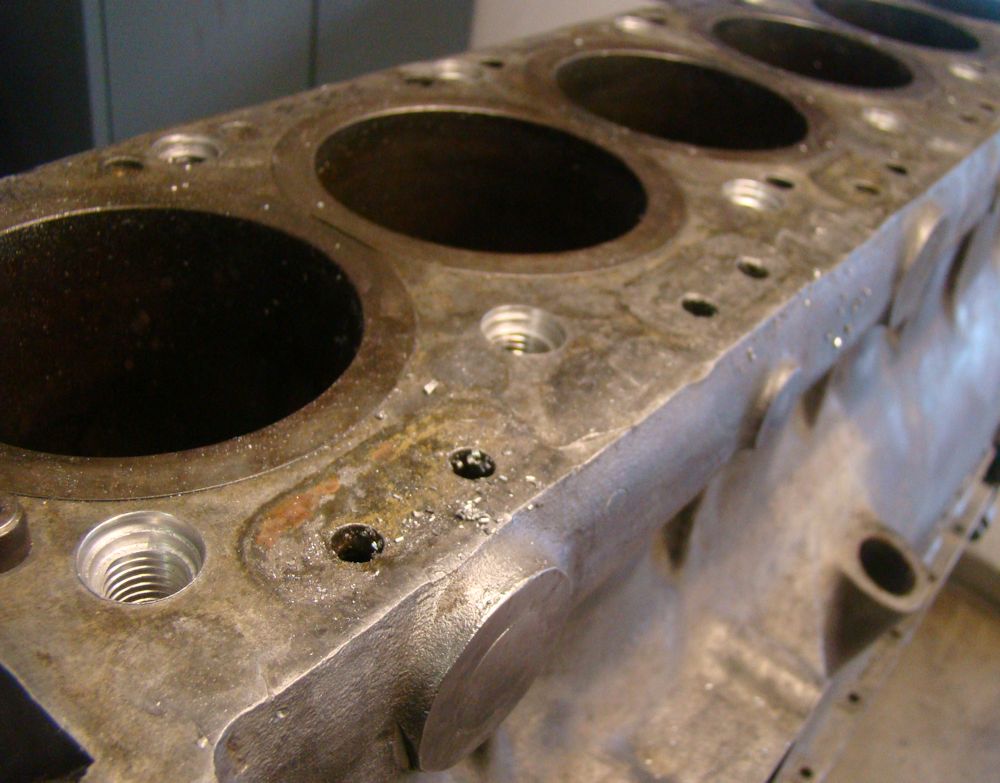
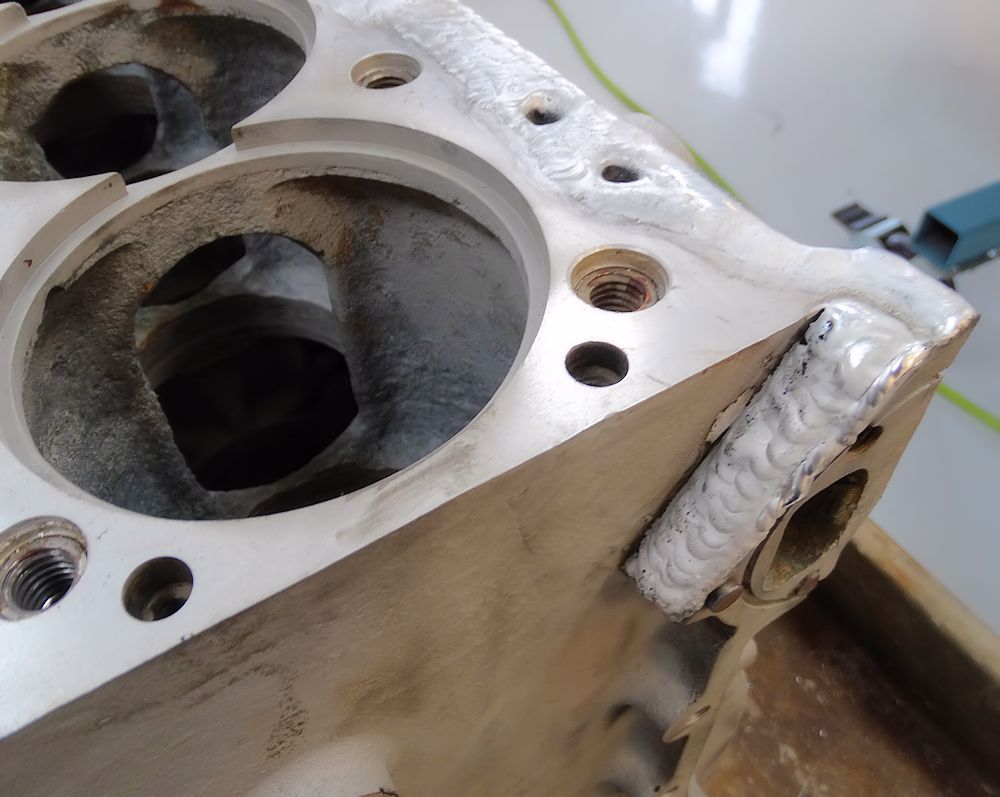
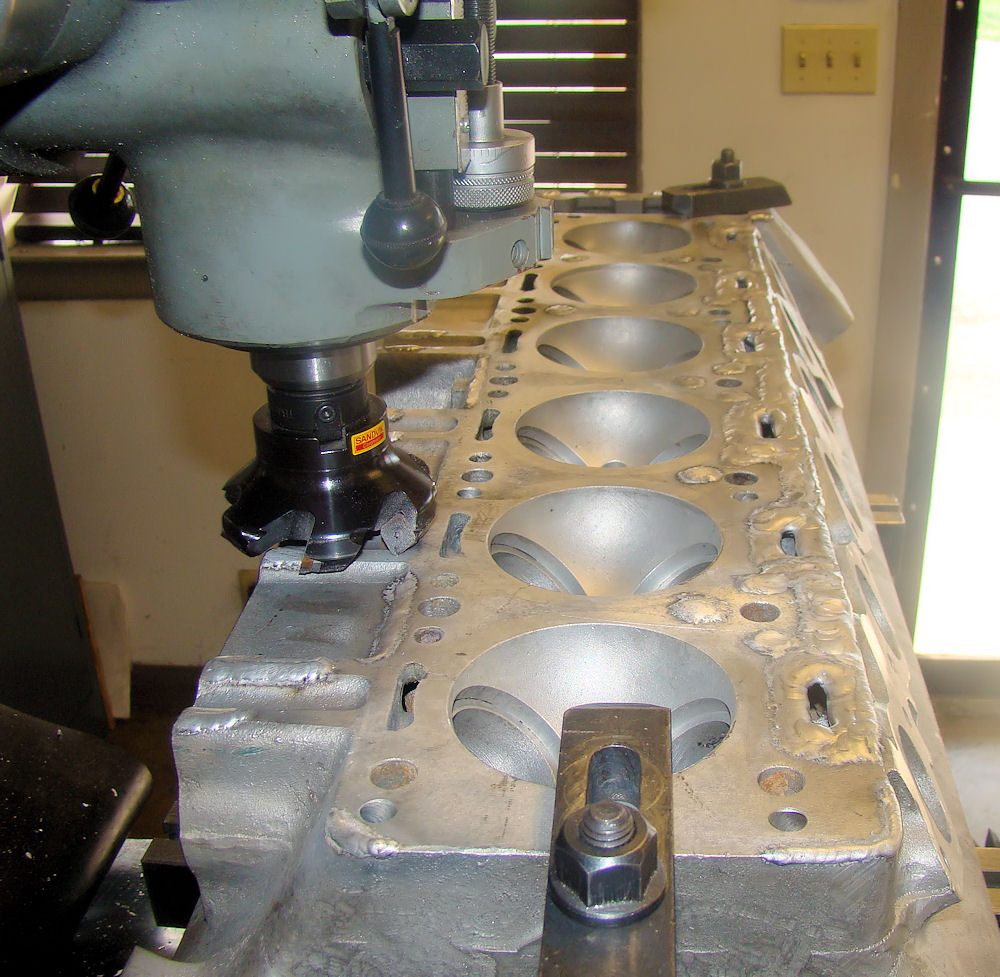
The following sequence of photos show some of the work we are doing to rescue your engine block, which was obviously in very poor shape. Most of the head studs had to be machined out, so we decided to install a complete set of threaded steel inserts to receive the new head studs. It took an immense amount of force to press out the corroded and seized liners, but we eventually managed to separate them from the block. The deck surface of the bock had also been unavoidably damaged separating the once seized cylinder head, so that is being welded up and milled back to a perfectly smooth finish.
The next (engine) update will hopefully show the finished block, as pristine and perfect as new.
 |
 |
| Chris had to chart the precise position of all
cyl head stud holes |
Steel inserts being installed in deck of block to receive new head studs |
 |
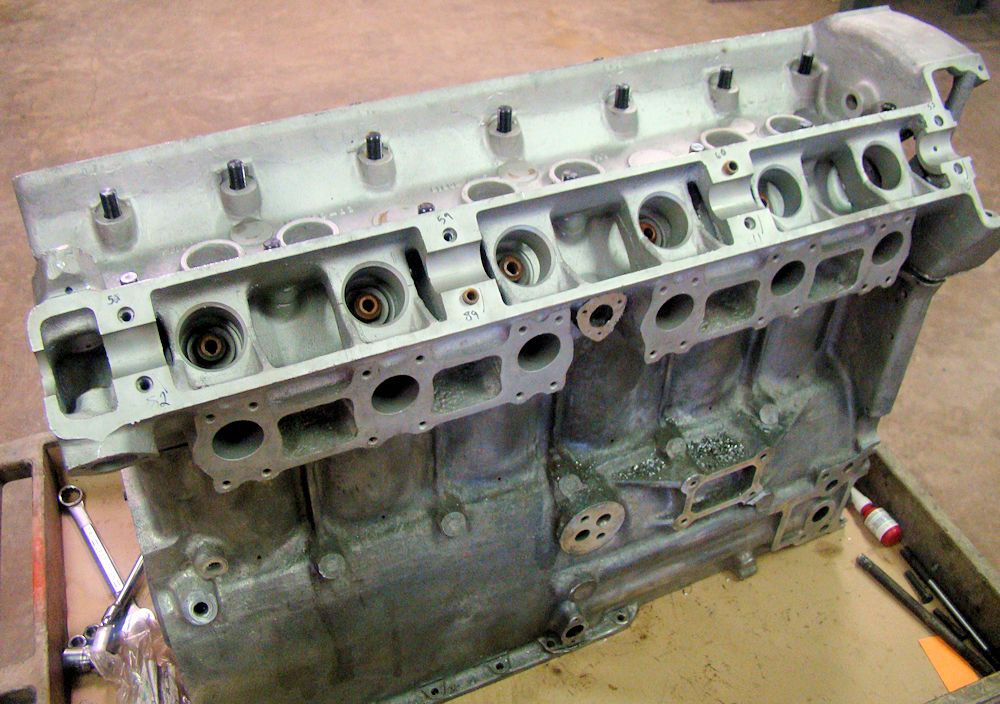 |
| Trial fitting the head - which thankfully
slipped straight into place over the new studs |
|
 |
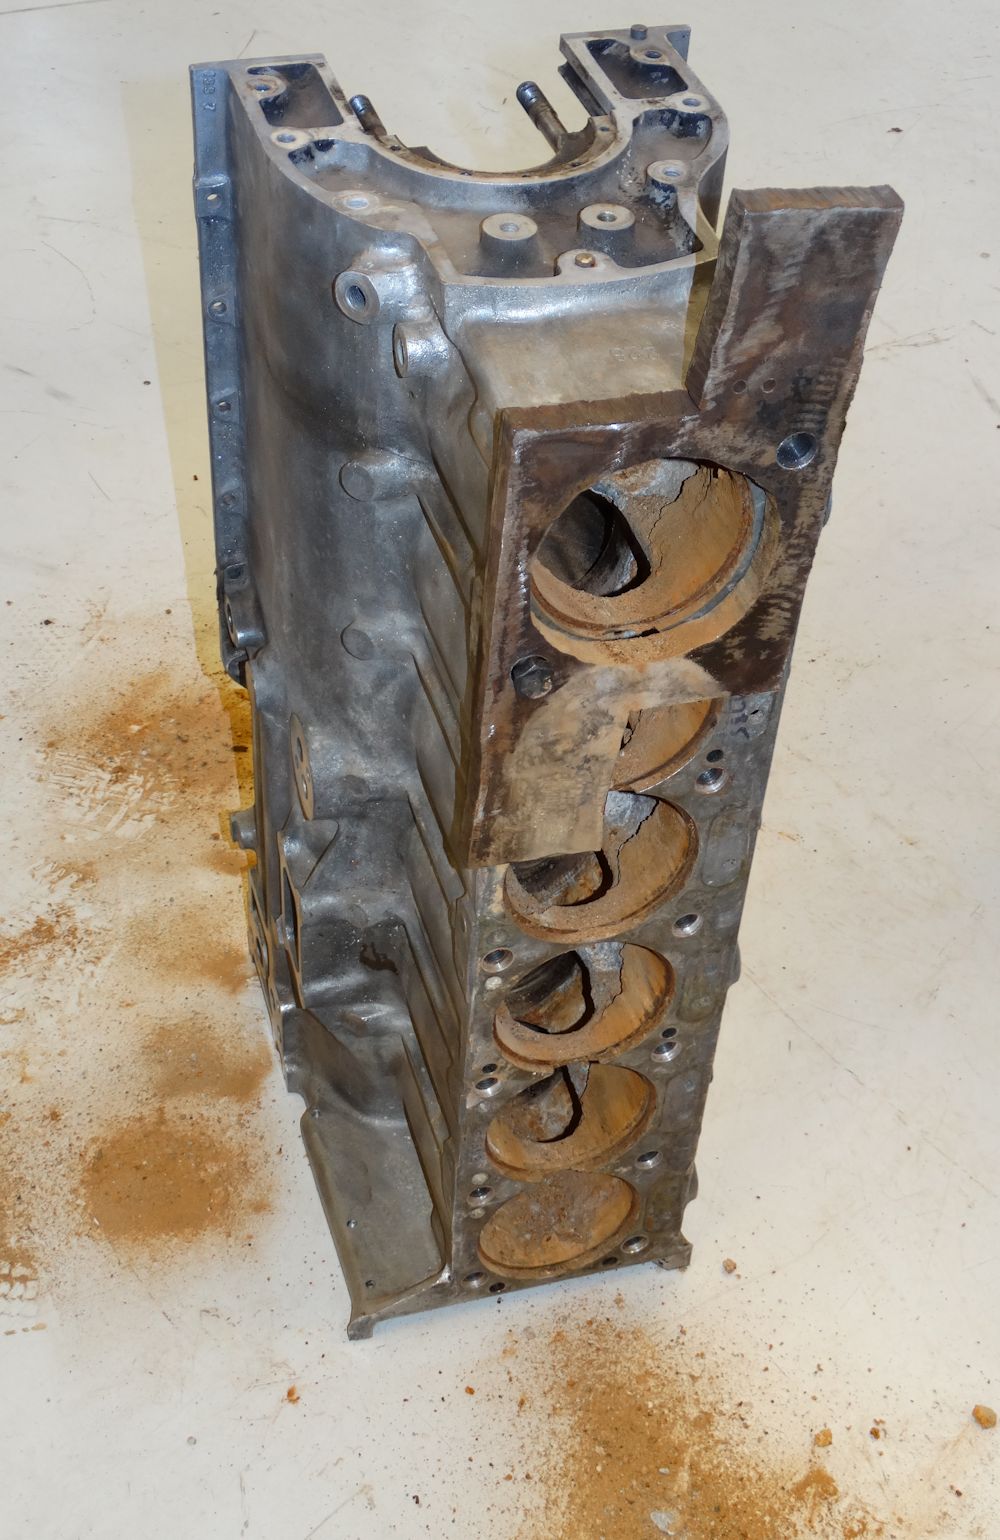 |
| Removing the sleeves was a major undertaking |
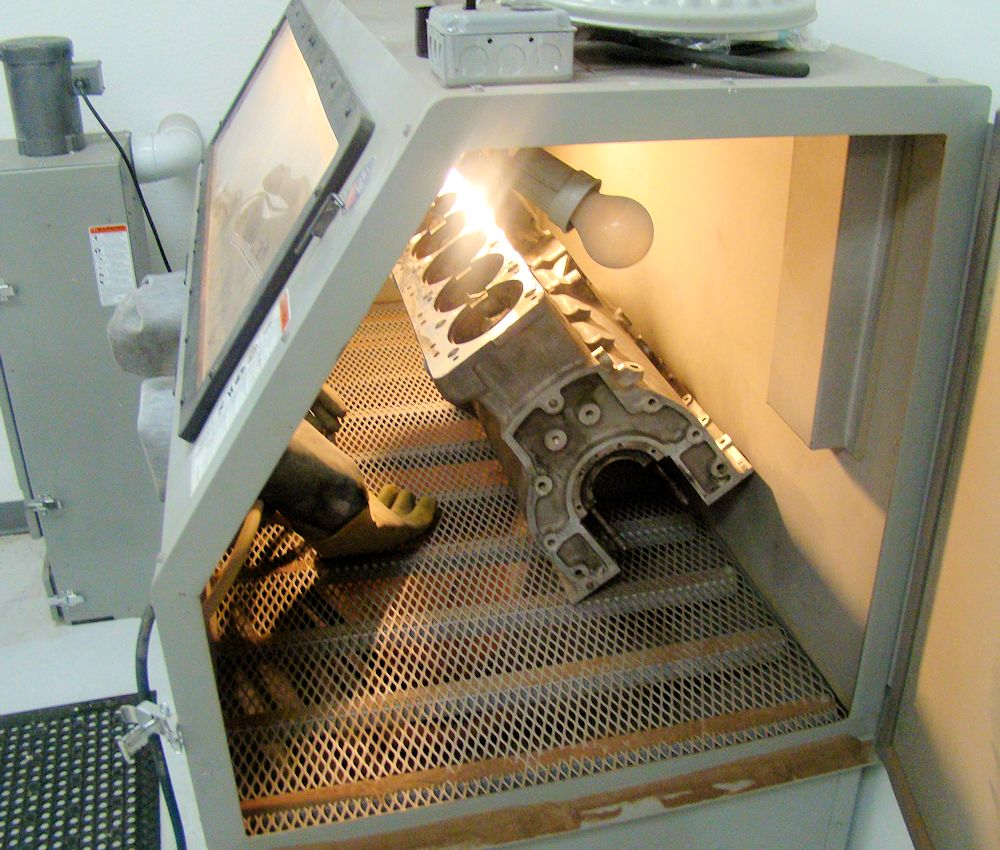
Block will now be media blasted and welded |
|
 |
 |
 |
 |
 |
| Block cleaned up nicely in the blasting cabint |
This area was damaged during the removal of the seized cylinder head |
 |
 |
| Matt building up the block deck with the TIG |
Mid-way through the block welding process |
 |
To be continued.. |
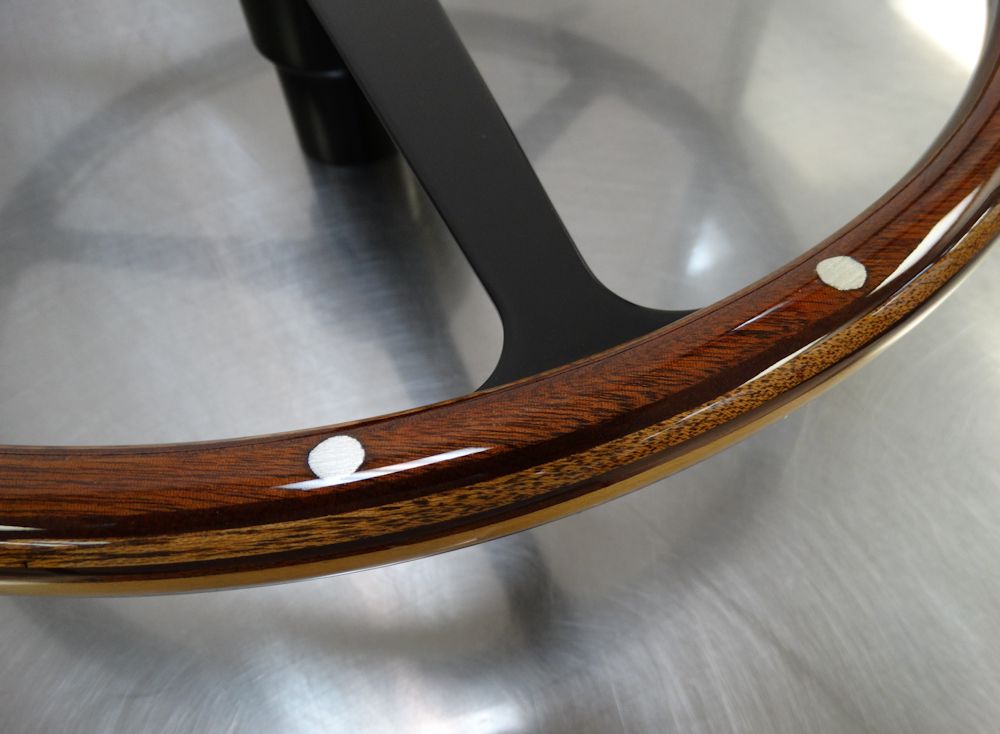
Stunning quality steering wheel restoration by Bruce Crawford of hardwoodclassicsltd.com
 |
 |
| Original steering wheel beautifully restored |
|
 |
 |
| Wood is absolutely gorgeous |
Stunning workmanship by Bruce Crawford |
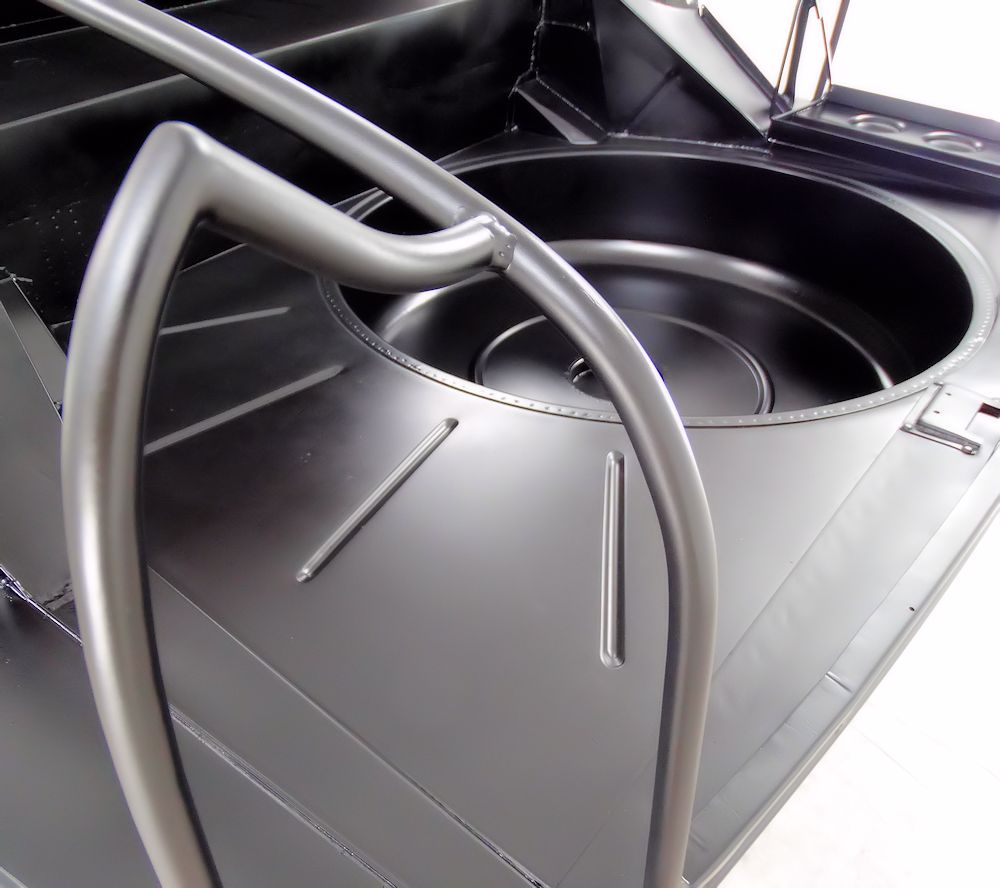
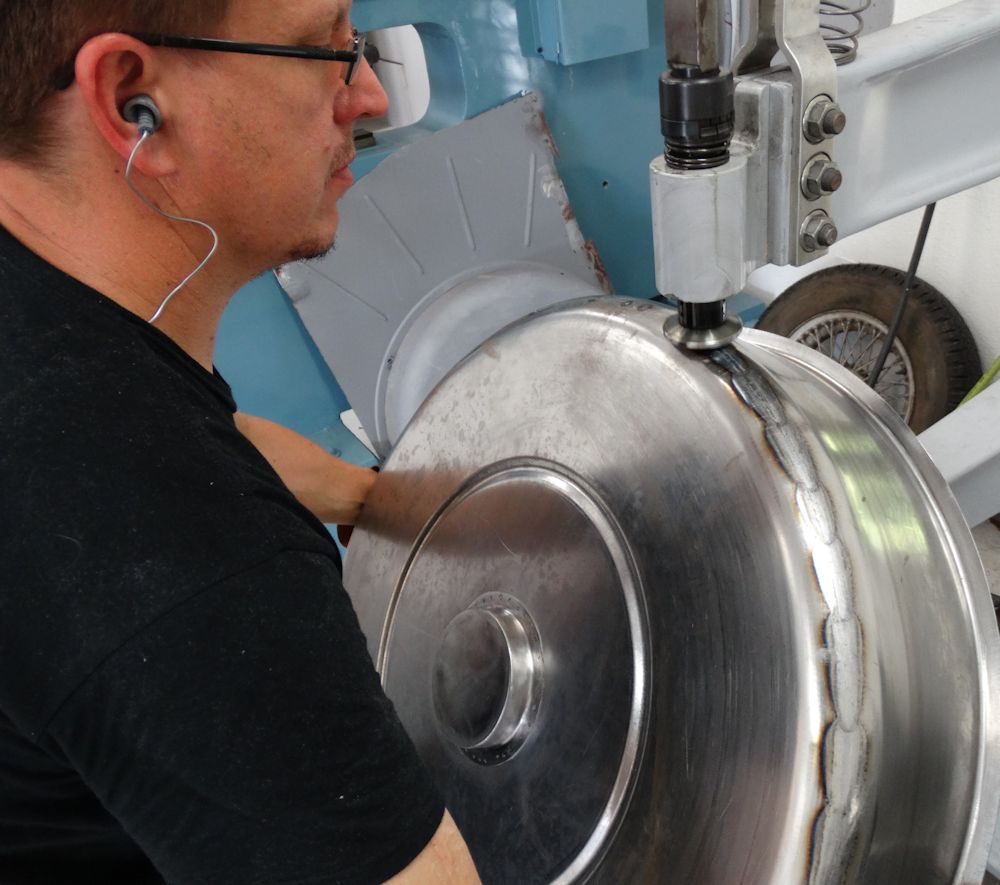
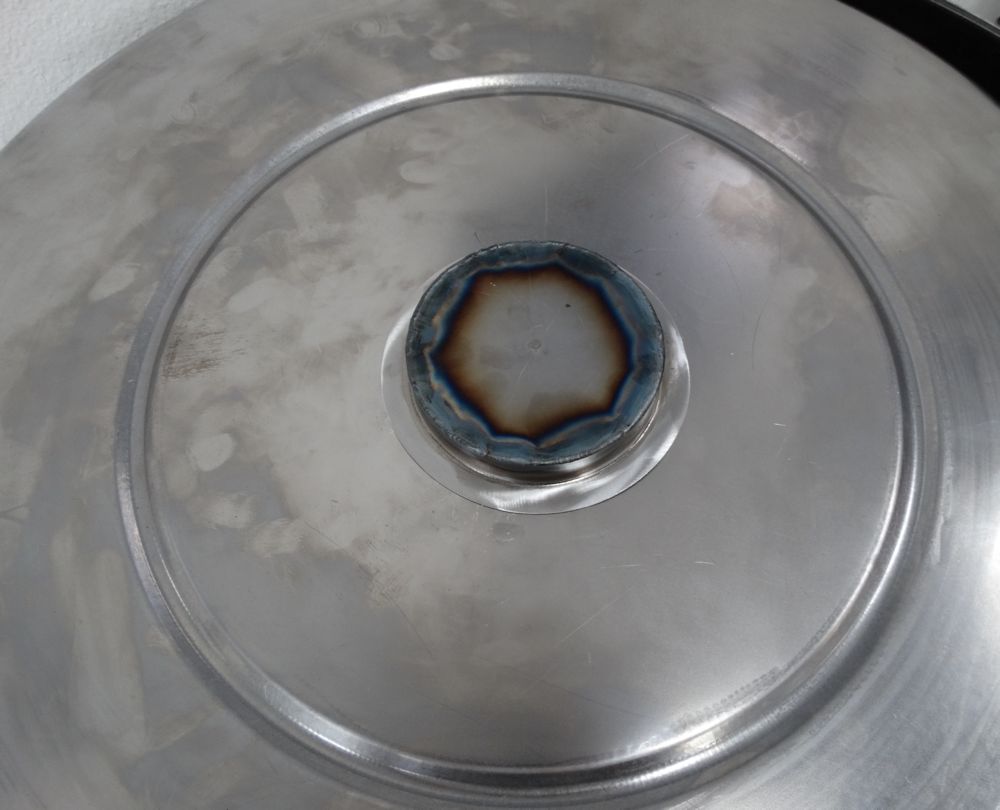
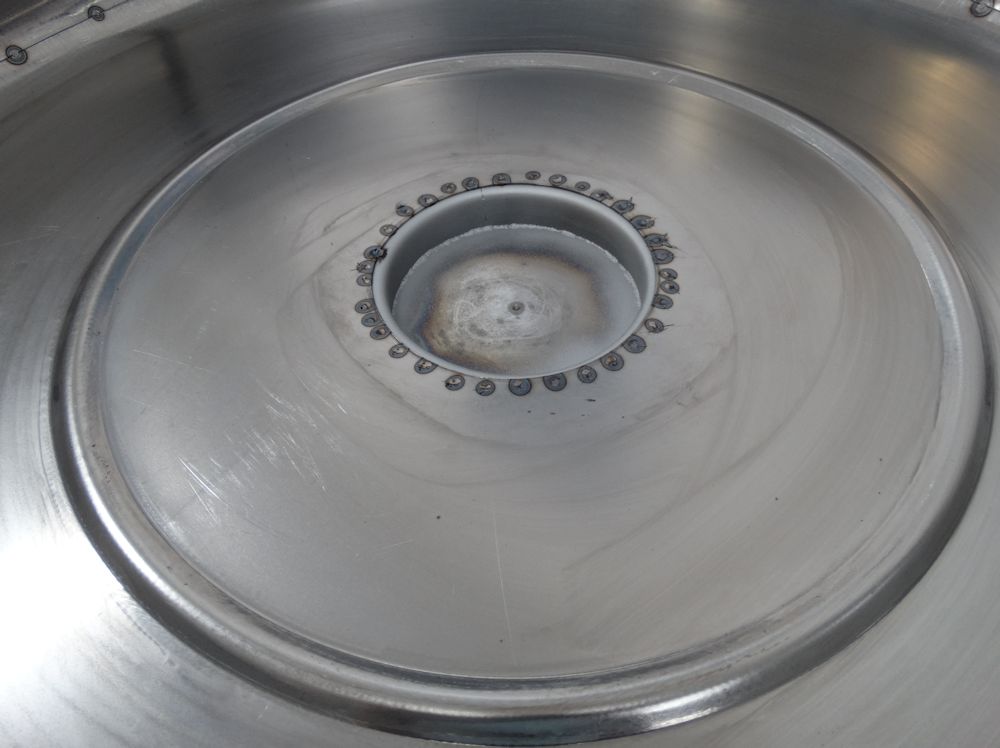
Spot welding the new wheel well to the new boot floor..
 |
 |
| Boot floor and spare wheel fitted together
using Cleco fasteners |
Worm's eye view of the new spare wheel well and boot floor |
 |
 |
| Spot welding wheel well and boot floor
together |
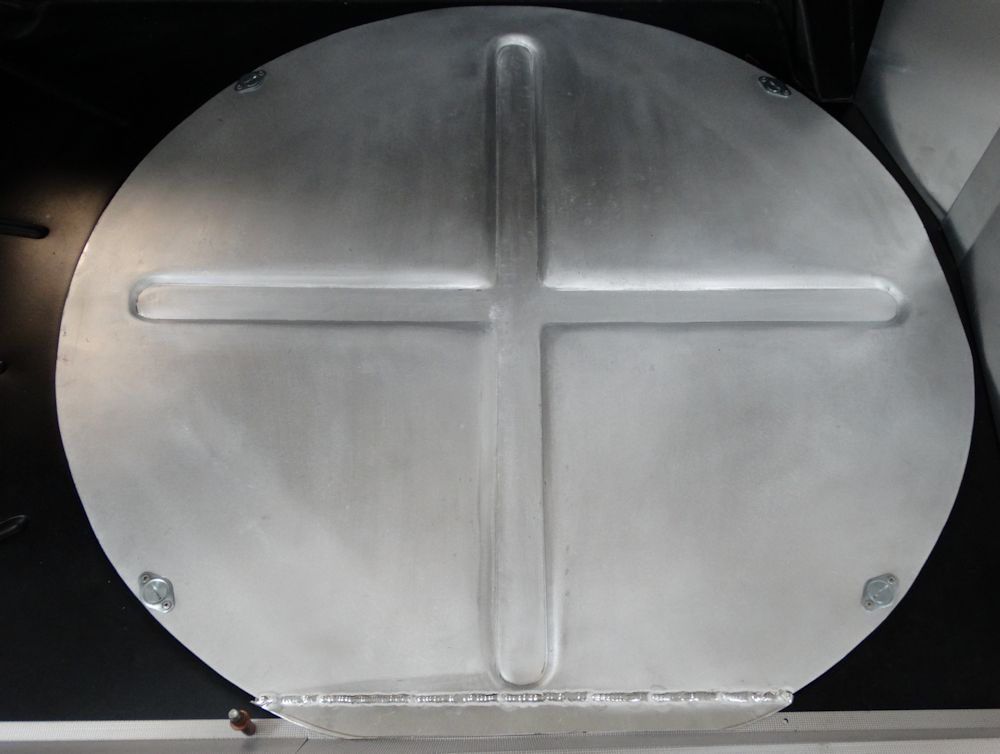
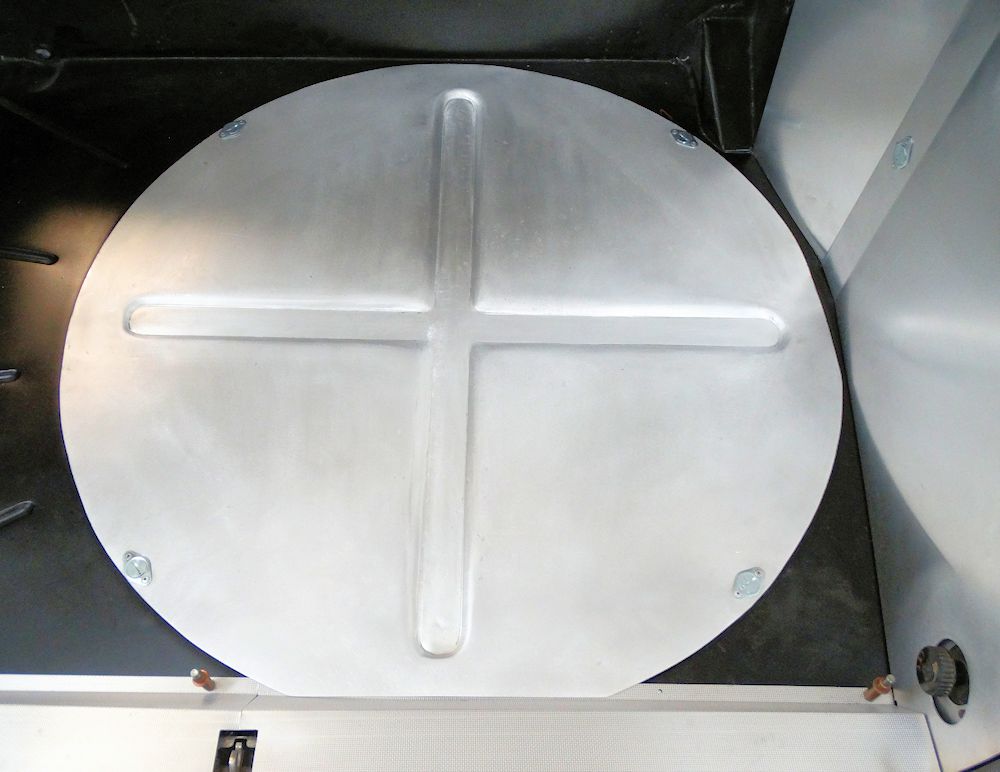
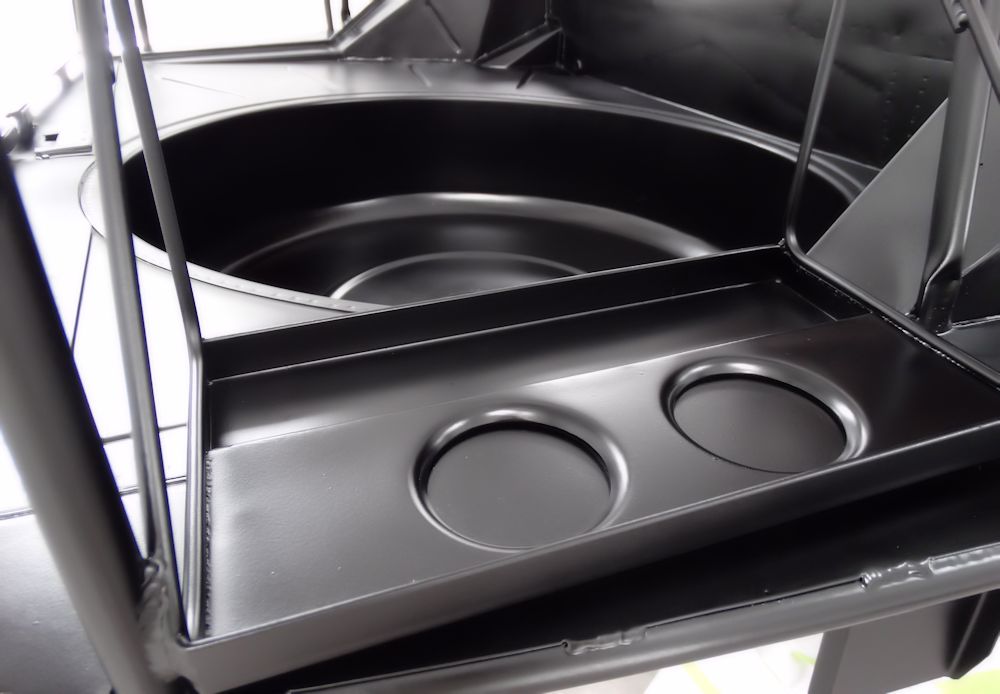
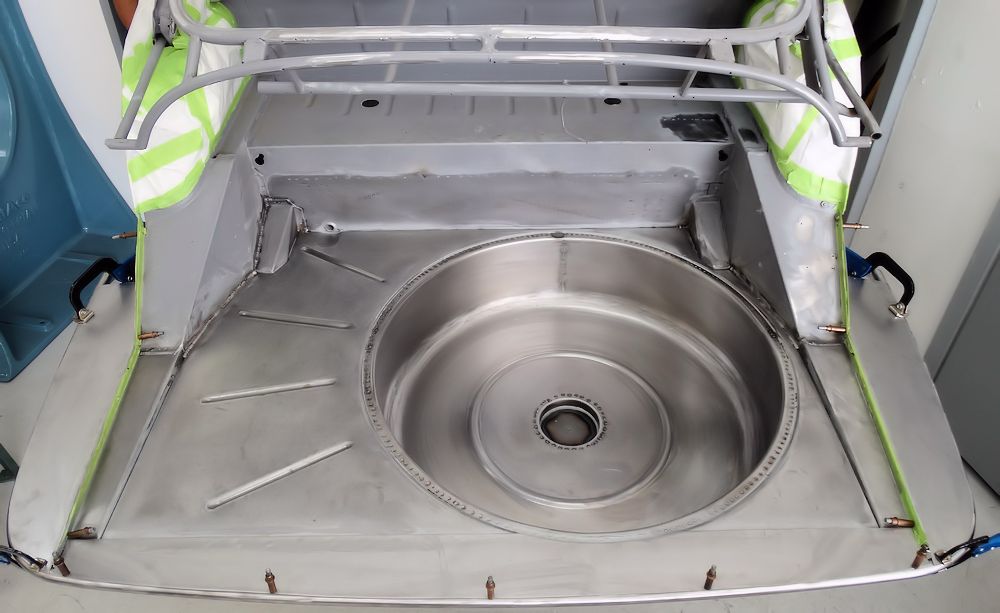
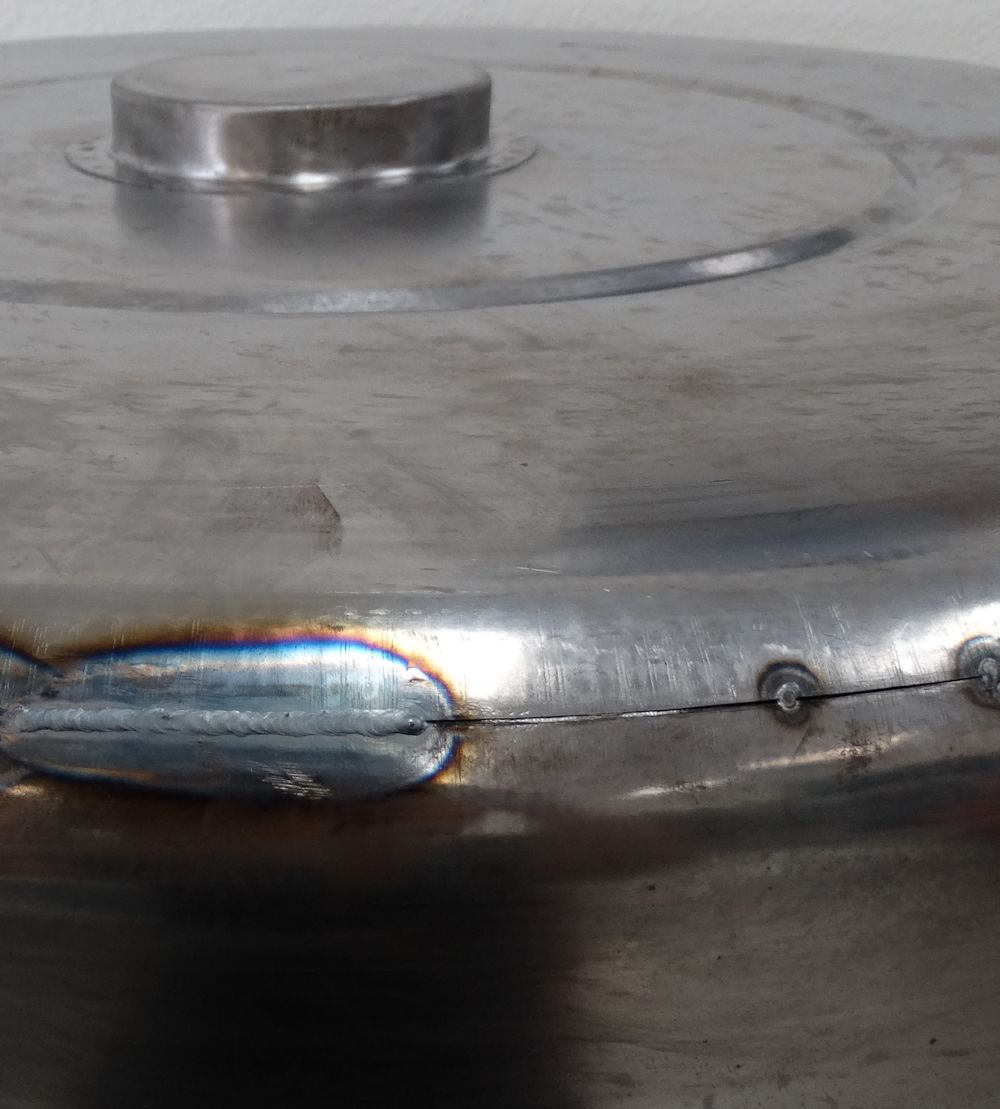
Jake has now finished planishing the TIG welds around seams of the spare wheel well, and the finished result is a thing of beauty..
 |
 |
 |
 |
The following sequence of photos show Jake TIG welding the seams of the new spare wheel well, then planishing the beads of weld until they are virtually invisible.
 |
 |
 |
 |
 |
 |
| Planishing weld beads |
Welded seam is now virtually invisible |
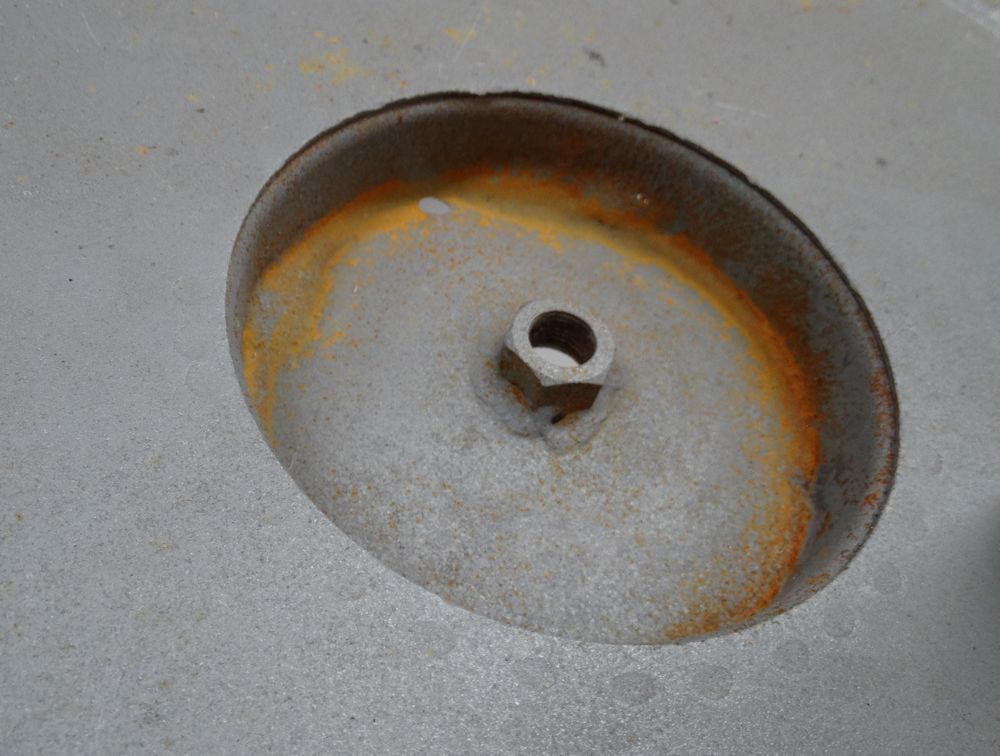
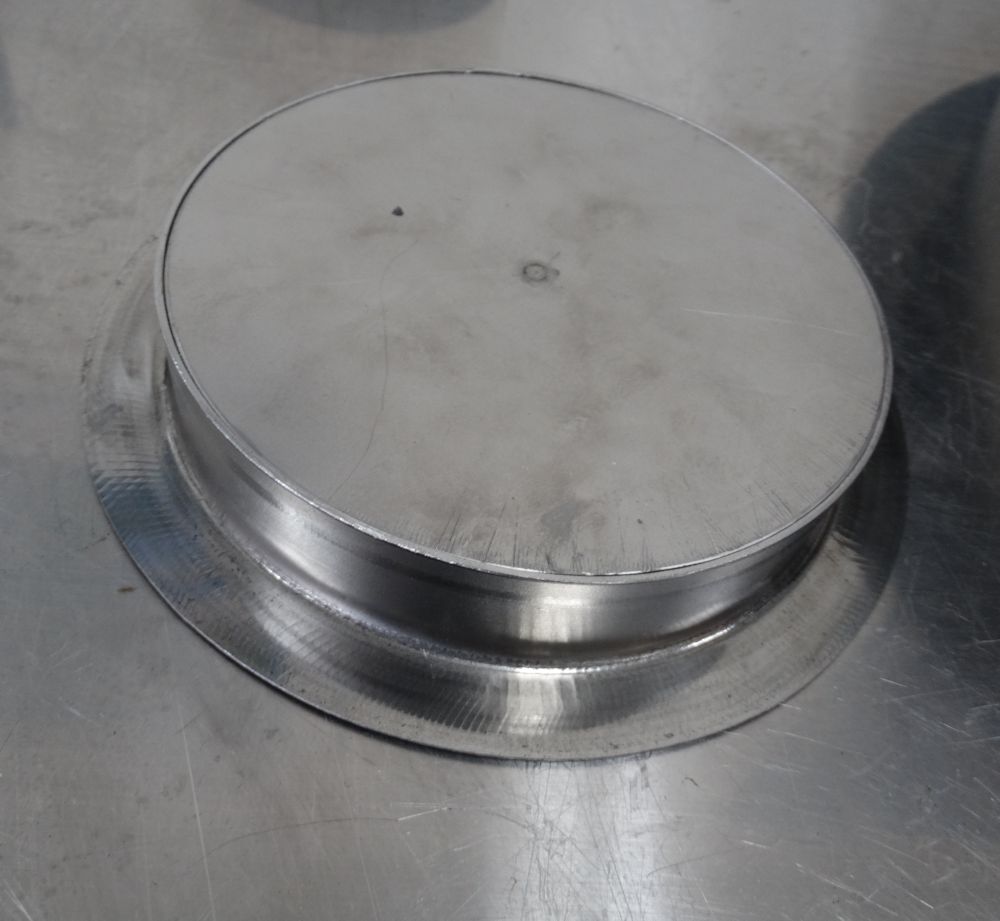
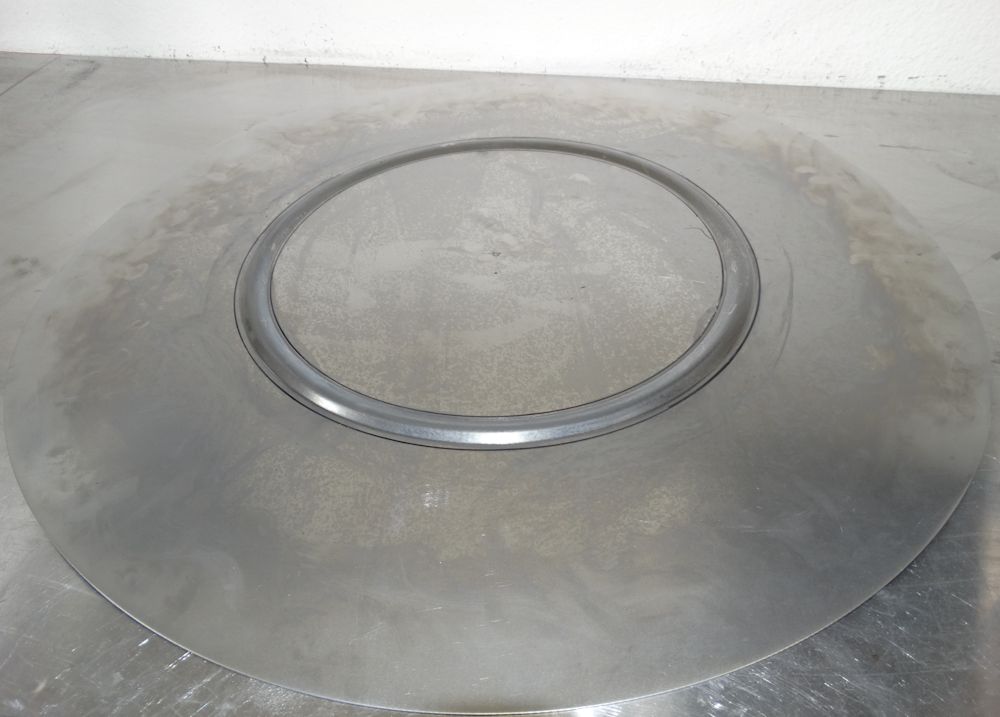
It has been fun to watch Jake fabricating the spare wheel well..
 |
 |
| Using the English wheel on the new base panel |
Trial fitting base to well |
 |
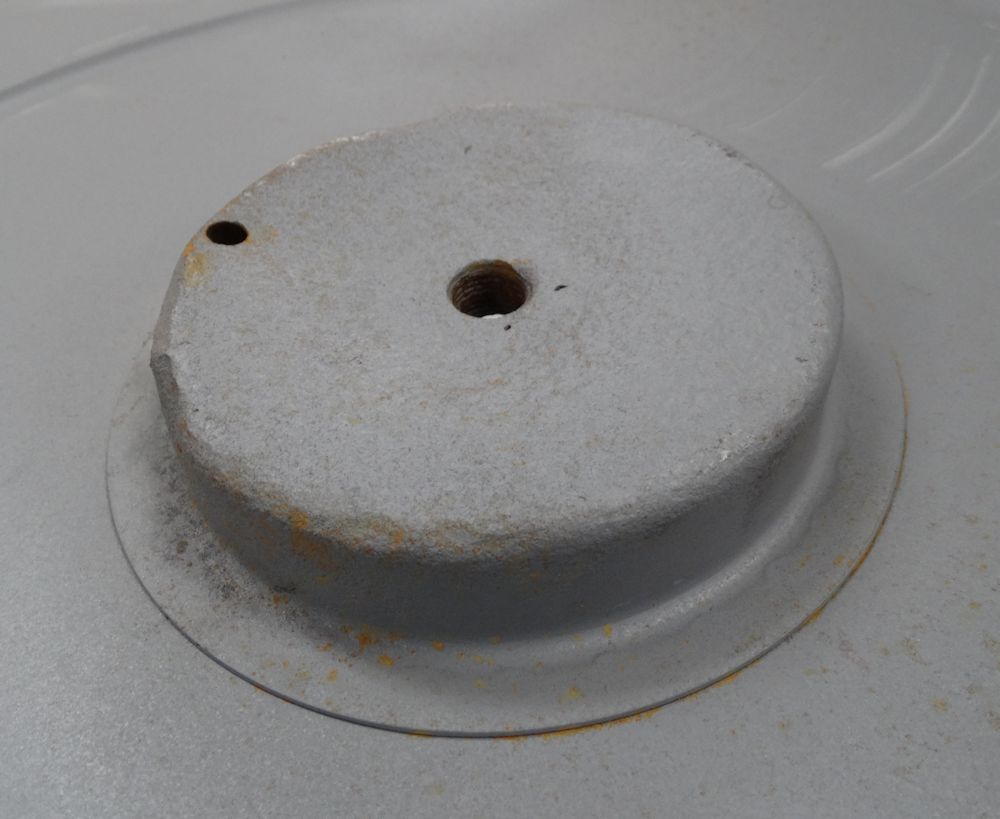 |
| The original center spare lock dish in the
center of the base |
Spare wheel lock dish viewed from beneath |
 |
 |
| Starting to fabricate the new spare lock dish |
|
 |
 |
 |
 |
 |
 |
 |
 |
| New spare lock dish spot welded to well base |
|
 |
 |
| Assembly is first tack welded together |
|
 |
 |
| Seams will eventually be TIG welded |
|
 |
|
| Start of a long TIG session |
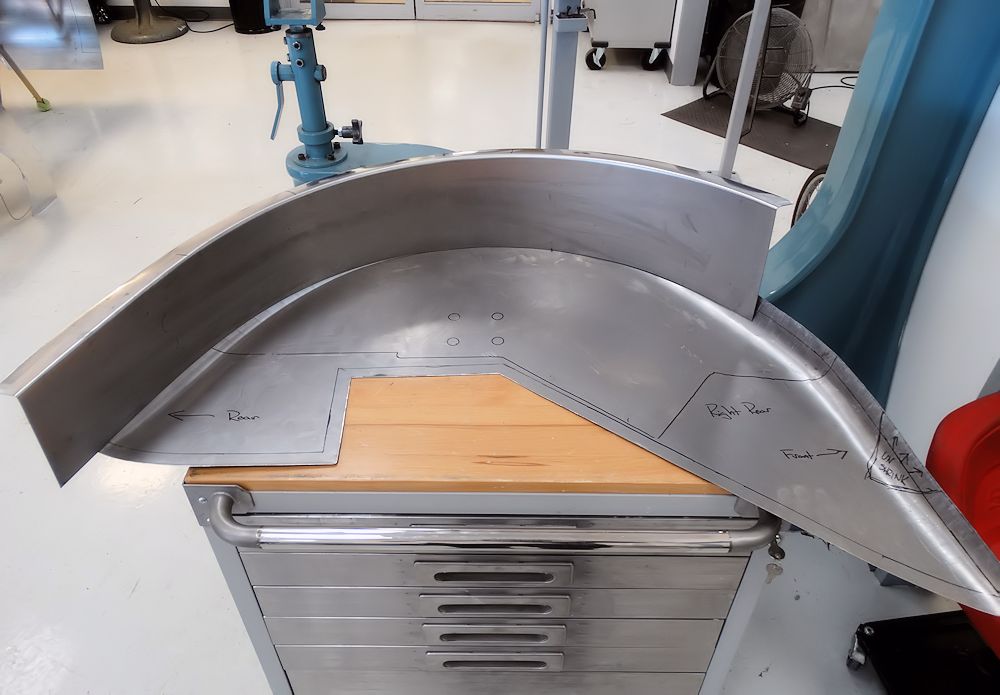
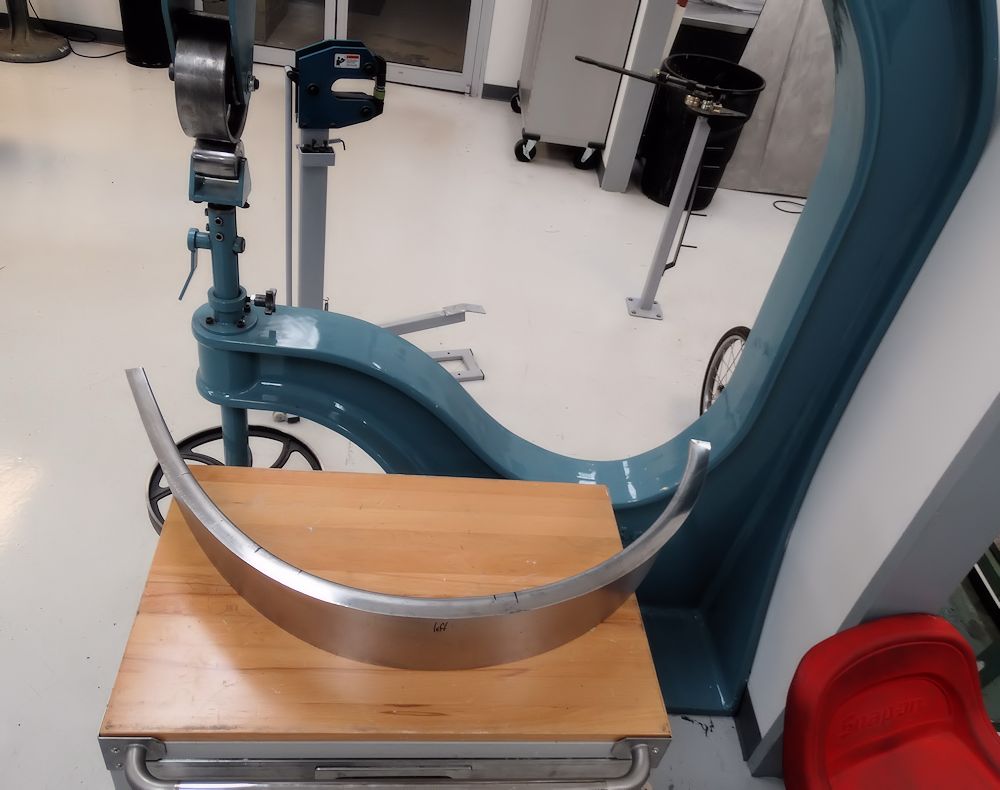
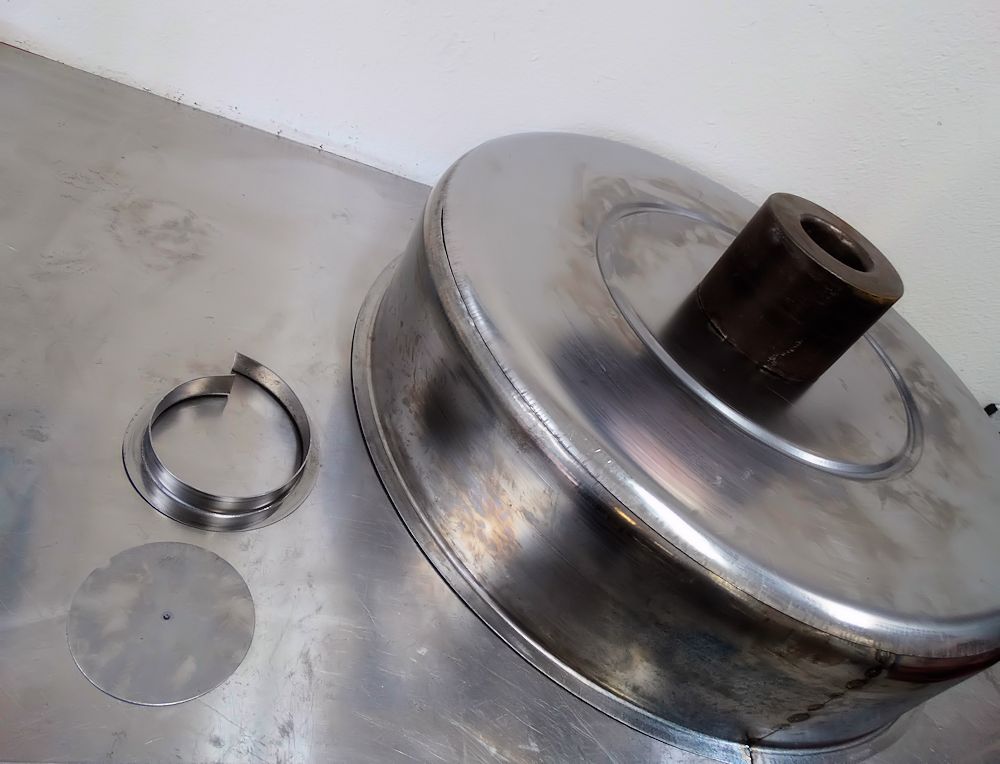
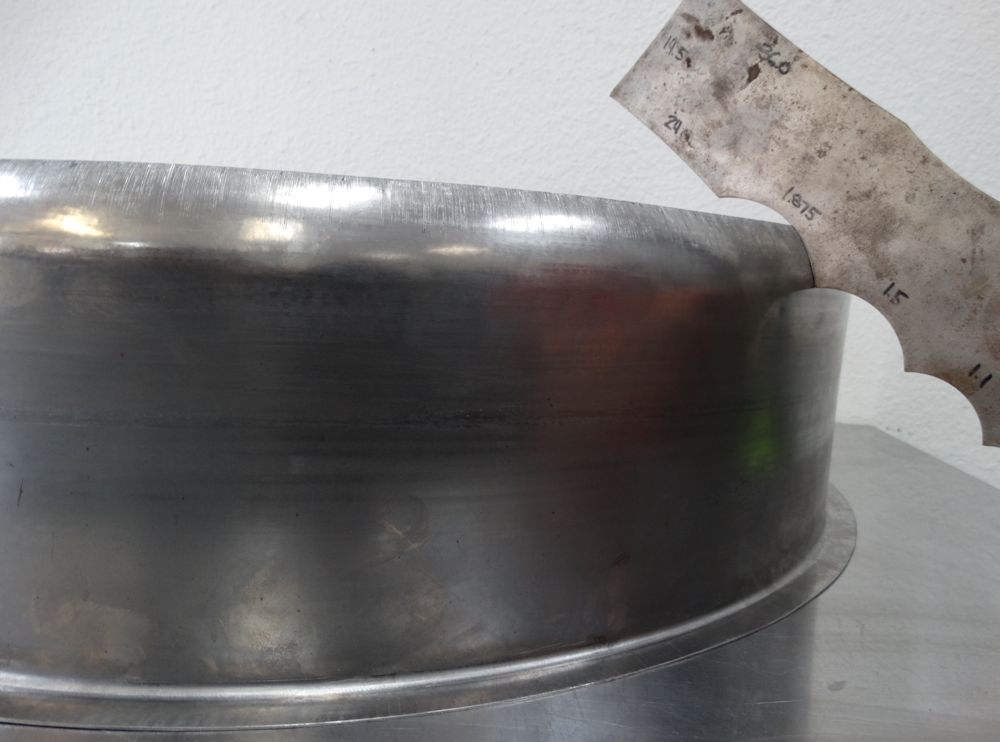
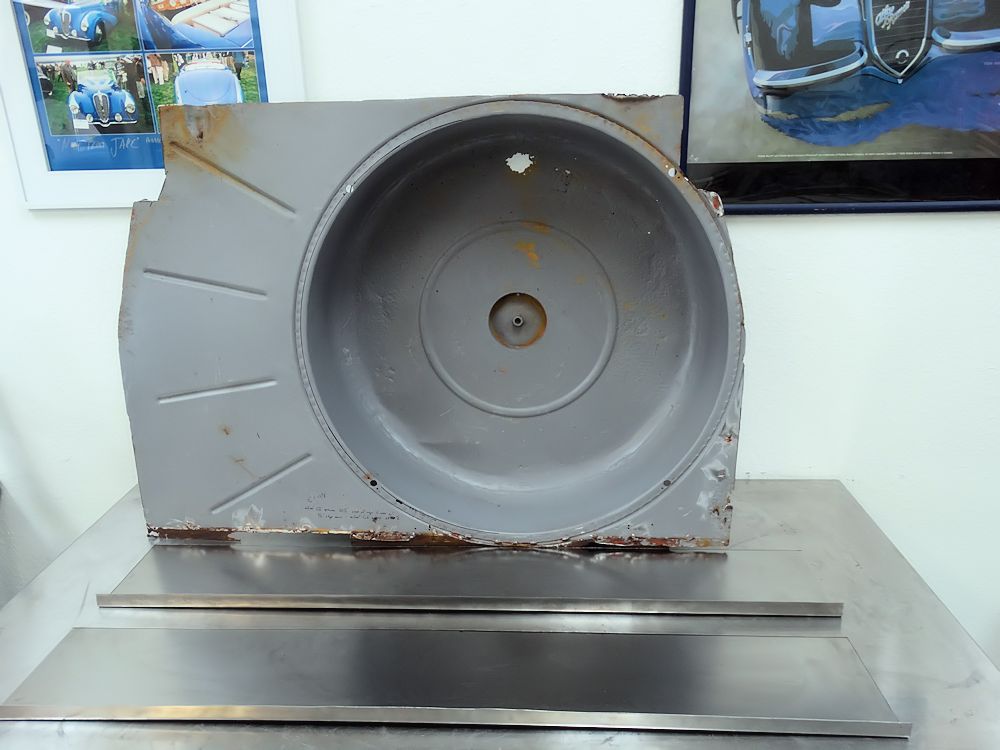
Spare wheel fabrication, continued..
 |
 |
| Beginning to form the curved bottom lip of the
new wheel well |
|
 |
 |
| Using a radius gauge to set desired radius |
|
 |
 |
 |
 |
| Using the Pullmax to create stiffening bead precisely as the original |
|
 |
 |
 |
 |
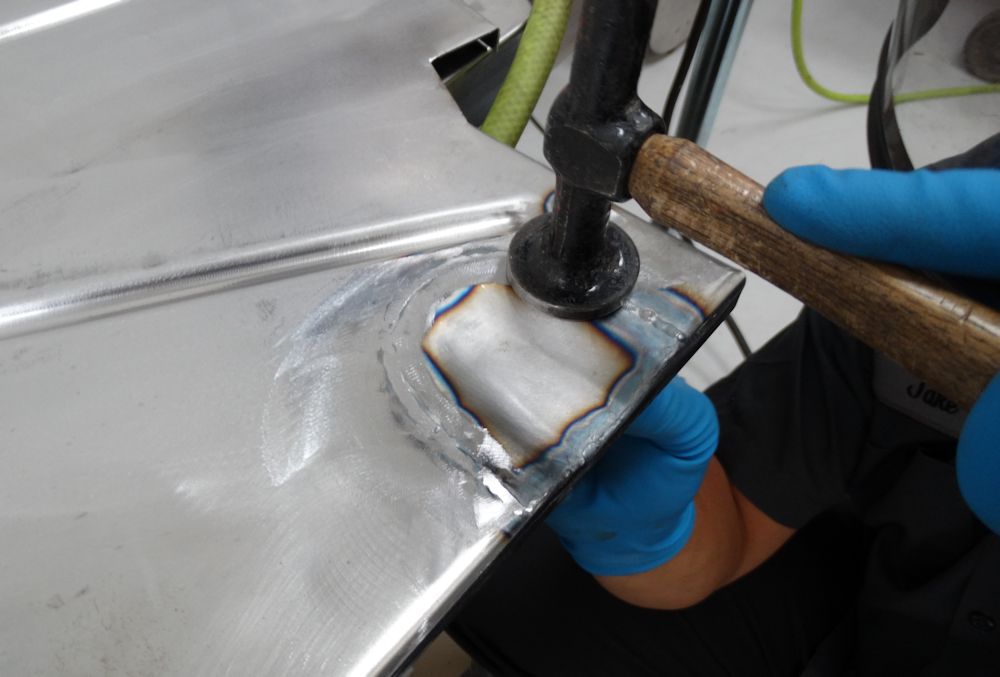
| Preparing to weld the seams and the base to the wheel well wall |
|
 |
 |
| TIG welding the join in the wheel well wall |
|
 |
 |
| Planishing the TIG weld bead |
TIG welded seam is virtually invisible on
inner wall of wheel well after metal finishing |
 |
Update in progress.. |
| Likewise the outer wall of the wheel well,
where Jake's weld is barely perceptible |
|
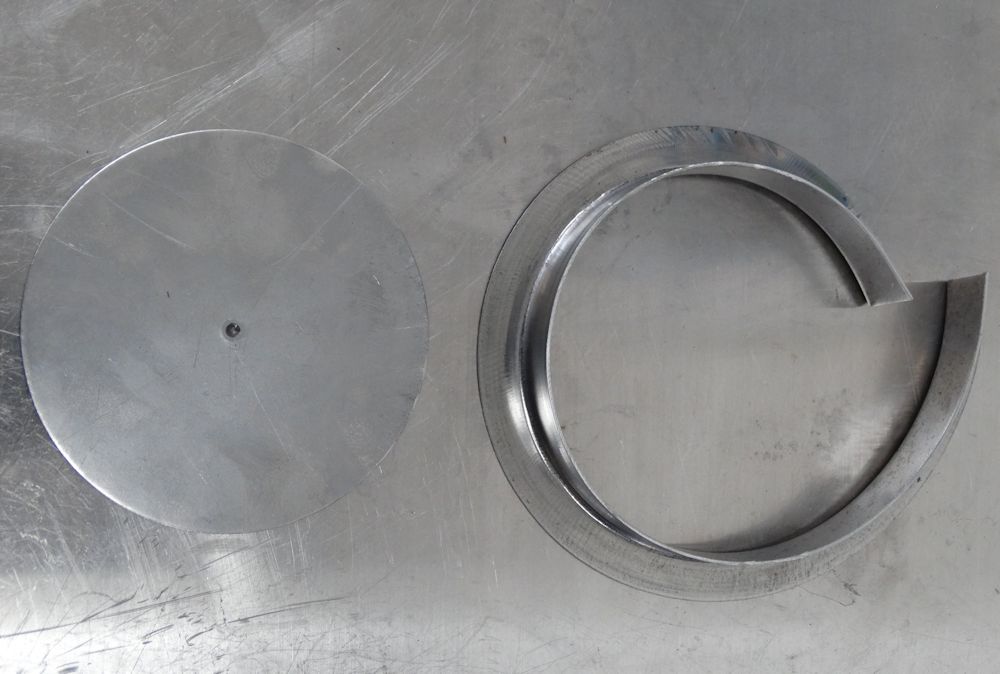
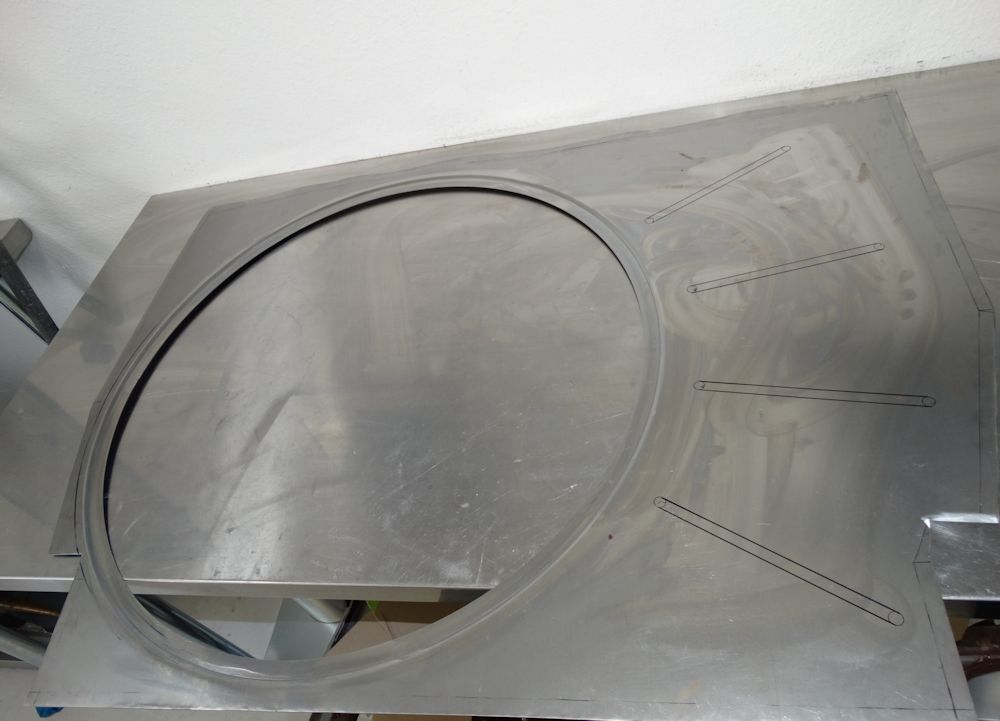
Fabricating the spare wheel well from scratch..
 |
 |
| Flat sheet metal in foreground will be shaped into circular wall of wheel well |
|
 |
 |
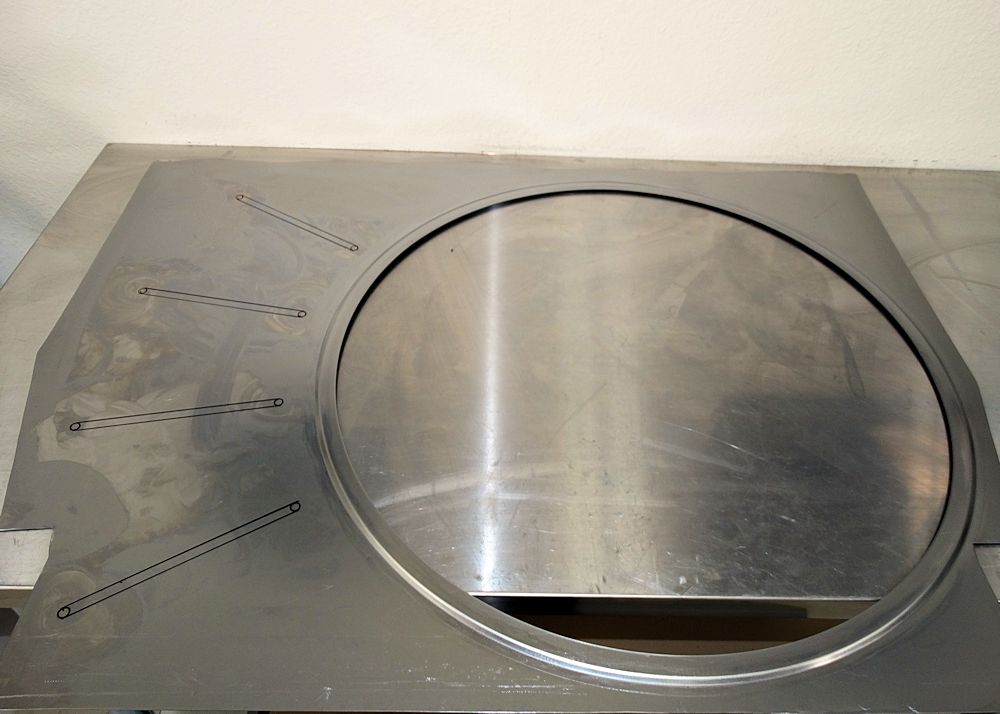
| Wall section is fabricated in 2 pieces |
|
 |
 |
| Trimming the second wall section to size |
Matching the 2 halves to create a perfect
circle |
 |
 |
| Trial fitting the 2 wall sections together |
|
 |
 |
| Trial fitting the spare in the new wheel well |
Fabricating the new boot floor and spare wheel well..
 |
 |
| New boot floor and wheel well will be
fabricated in exactly the same way the original was made |
Card templates made from the original |
 |
 |
| Transferring templates to new sheet metal |
Jake and Matt working the new panel on the Pullmax machine |
 |
 |
| Groove at outer edge of spare wheel well starting to take shape |
|
 |
 |
| This photo shows the contour created by Jake using the Pullmax |
|
 |
 |
| Transferring position of panel stiffening
beads from template to sheet metal |
|
 |
 |
| Forming the stiffening beads on the Pullmax |
|
 |
 |
 |
 |
| Trial fitting the new boot floor |
|
 |
 |
| Beads have been reproduced precisely as the originals |
|
 |
 |
| This relief panel is required for the left
rear suspension mounting bushing |
|
 |
 |
 |
 |
| Relief panel first tack welded into position |
TIG welding the seam |
 |
 |
| After metal finishing |
|
 |
Watch this space! |
| More trial fitting.. |
We are almost finished reconstructing the rear bulkhead. Jake has been very careful to reproduce the new structure precisely how it was done at Newport Pagnell 55 years ago...
 |
 |
| Rust proofing the inner surfaces of the rear bulkhead support brace |
|
 |
 |
| New bushings were machined in the CJ machine shop |
|
 |
 |
 |
 |
| We replicated precisely the combination of
factory TIG and spot welds throughout |
|
 |
 |
 |
 |
 |
 |
| Next task is to fabricate the new boot floor and spare wheel well |
Jake has been busy with the complicated process of reconstructing the rear chassis legs and the rear bulkhead..
 |
 |
 |
 |
 |
 |
 |
 |
 |
 |
 |
 |
 |
 |
 |
 |
 |
 |
 |
 |
 |
 |
 |
 |
Newly fabricated bonnet opening and gutter channels starting to take shape..
 |
 |
| New engine bay surround clamped in position |
|
 |
 |
| New bonnet opening starting to take shape |
More progress in the Coachworks...
 |
 |
| Clamping together the various sections |
|
 |
|
| Trial fitting and adjusting prior to welding |
More fabrication work with the forward bonnet latch panel...
 |
 |
 |
 |
 |
 |
 |
 |
 |
 |
Jake has been incredibly noisy this morning, working on the forward bonnet latch panel..
 |
 |
| Using the planishing hammer to work the flange |
|
 |
 |
| Followed by lots more hammering |
Back to the Pullmax to form the second flange |
 |
 |
| Followed by lots more hammering... |
Panel now starting to take shape |
Jake fabricating the front bonnet latching panel..
 |
 |
| Bonnet aperture side channel panels are now complete |
Next job is to fabricate the new forward
bonnet latching panel |
 |
 |
| A card template is drawn, then transferred
onto new sheet metal |
|
 |
 |
| Basic panel shape is then cut out |
Creating the flanges on the Pullmax machine |
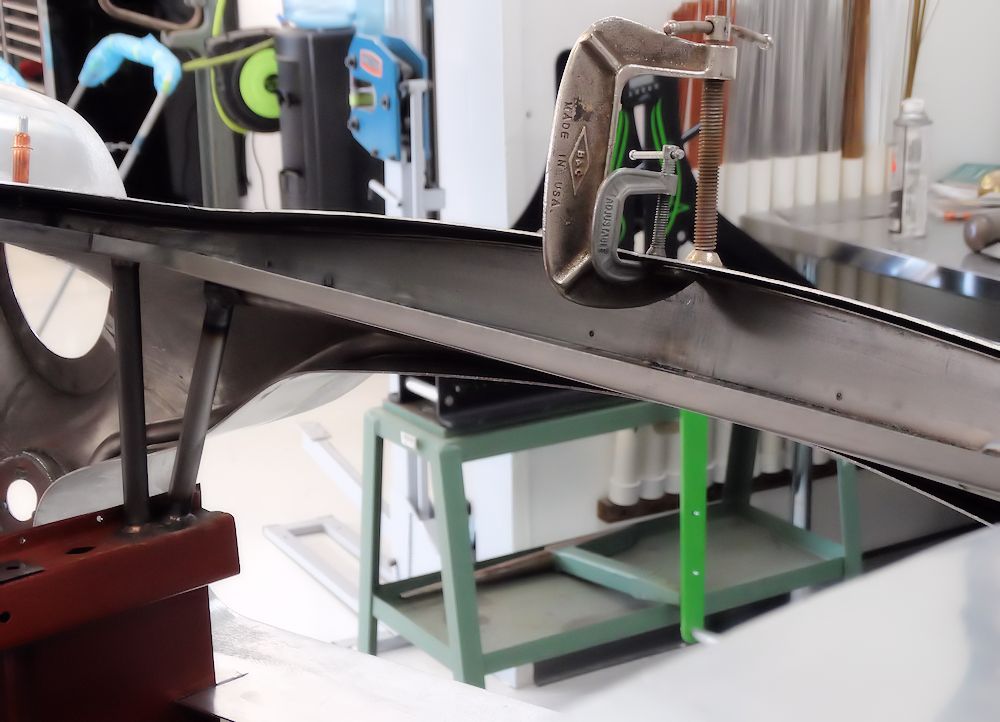
The following sequence of photographs show Jake starting to fabricate the U shaped channel that forms the bonnet opening. Starting with a flat sheet of steel, he then used a variety of machines to form the slightly curved channel that will eventually be the right hand side of the bonnet aperture.
 |
 |
| First the new steel is worked on the wheel |
Next Jake moved to the planishing hammer |
 |
 |
| This machine is LOUD! |
The flanges were then stretched to form the
requisite curve |
 |
 |
| Slight curve is evident in this shot |
|
 |
 |
| Checking that the curve of the new panel
matches the contour of the bonnet |
The following sequence of photos show Jake fabricating and welding new chrome-moly Superleggera tubing for the lower engine bay..
 |
 |
| Chrome-moly tubing is strong and lightweight,
making it an ideal material for the Superleggera framework |
|
 |
 |
 |
 |
| Jake TIG welding the new chrome-moly framework
in place |
The following sequence of photos show Jake beginning to reconstruct the rear bulkhead area..
 |
 |
| Complicated looking diagram! |
|
 |
 |
| Several panels will be fabricated to
reconstruct the rear section of the chassis |
|
 |
 |
| Left hand rear side rail will also be
fabricated from scratch |
|
 |
 |
| Card template is transferred onto new sheet
metal |
|
 |
 |
| Repair panel starting to take shape |
|
 |
 |
| Sections are first tack welded together |
|
 |
 |
| Structure then TIG welded along seams |
|
 |
 |
| Trial fitting the new panel at rear of car |
The new panel will support the vertical
section of the rear bulkhead |
It is now time for Jake to tackle the last remaining rusty area of the chassis - the rear bulkhead and boot compartment...
 |
 |
|
of the steering wheel restoration getting underway |
|
| |
|
 |
 |
|
|
|
| |
|
 |
 |
|
|
|
| |
|
 |
 |
|
|
|
| |
|
 |
 |
|
|
|
| |
|
 |
 |
|
|
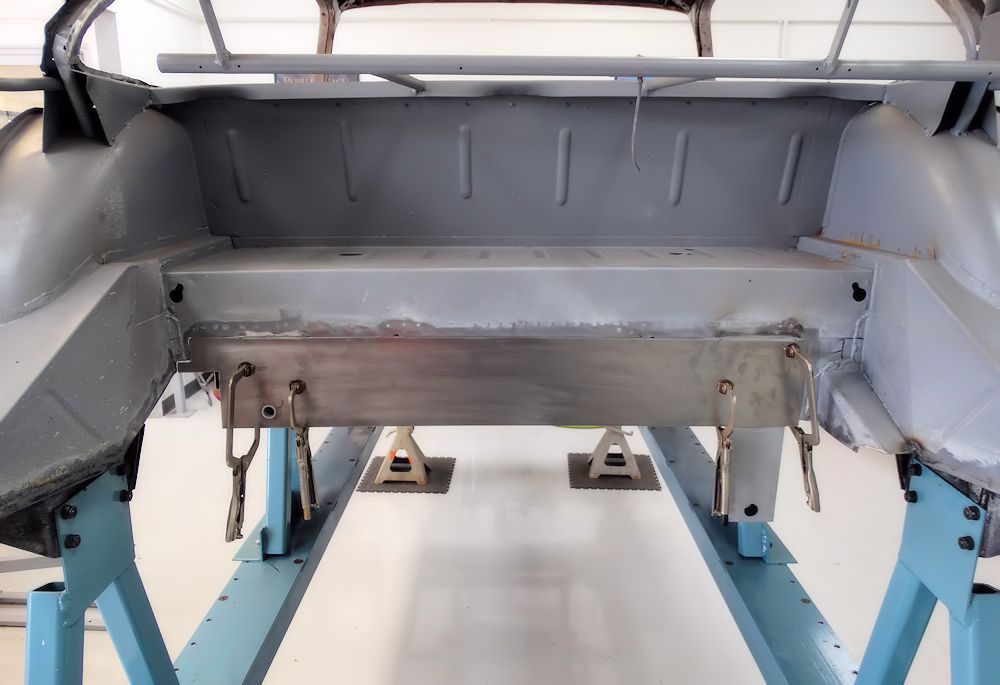
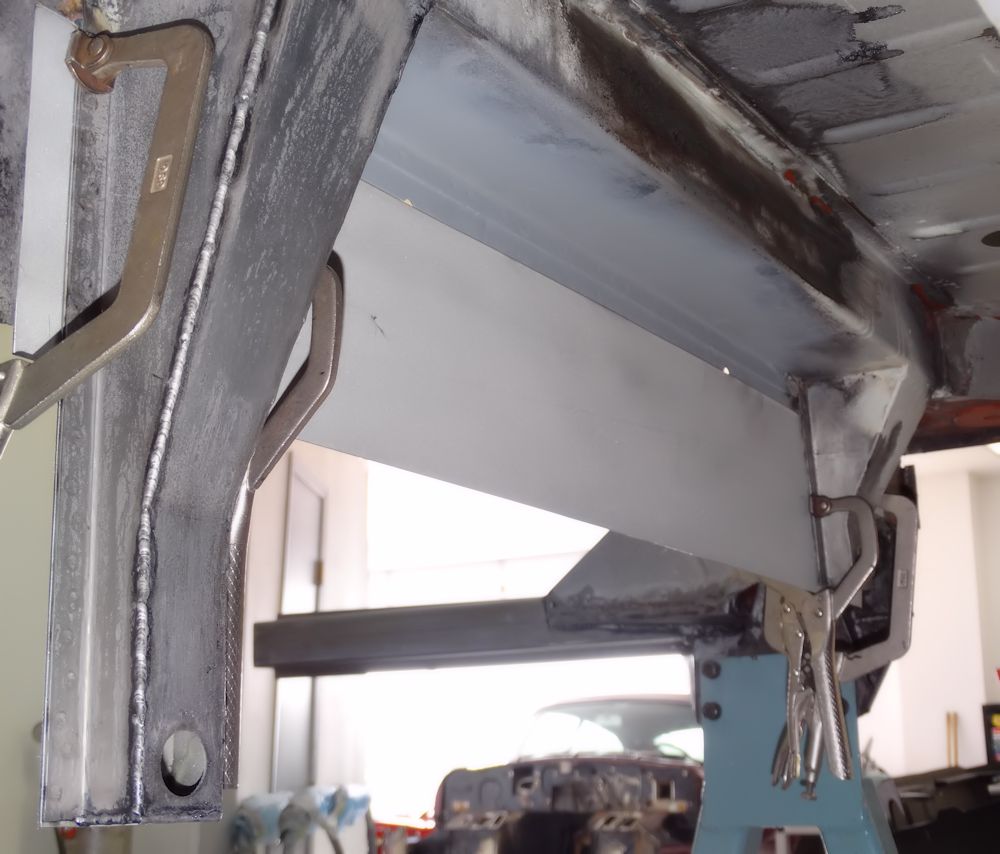
Putting the finishing touches to the rear floor brace..
 |
 |
|
|
|
|
|
|
 |
 |
|
|
|
|
|
|
 |
 |
|
old 1930's planishing hammer |
|
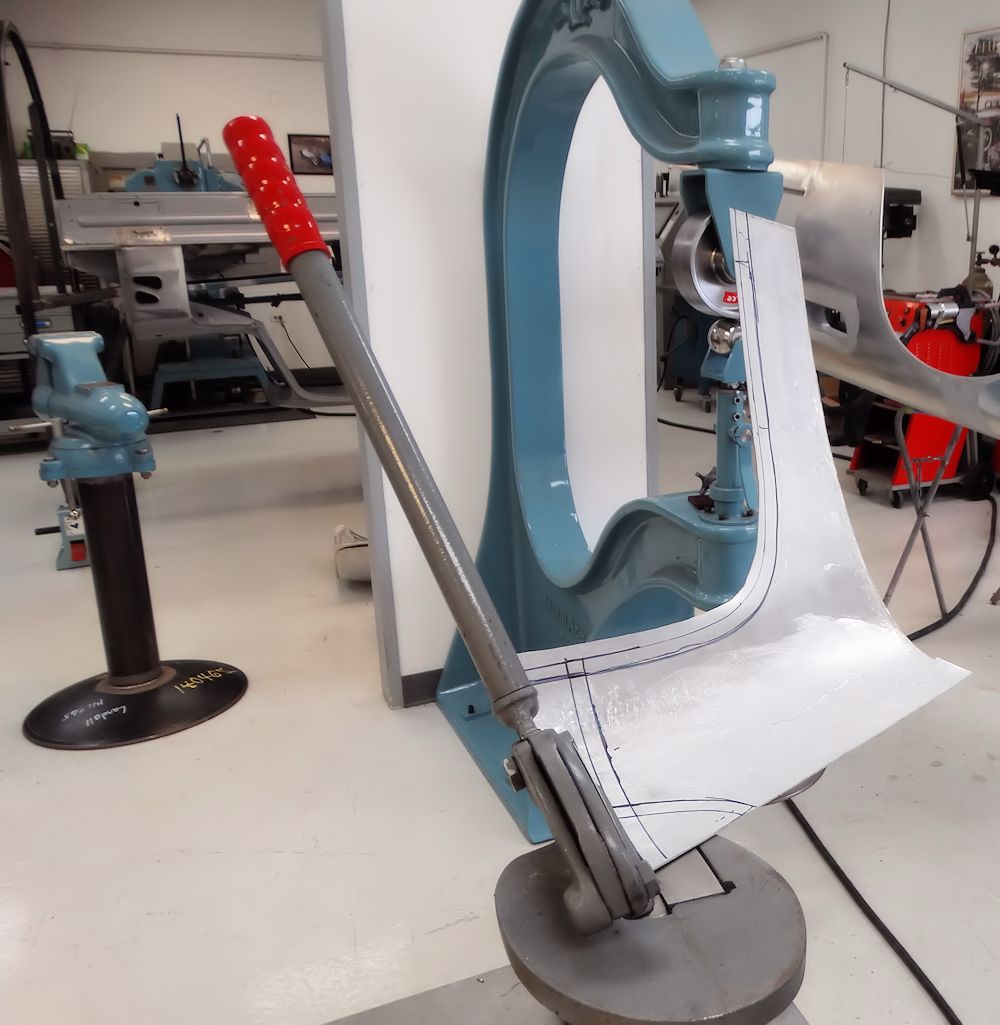
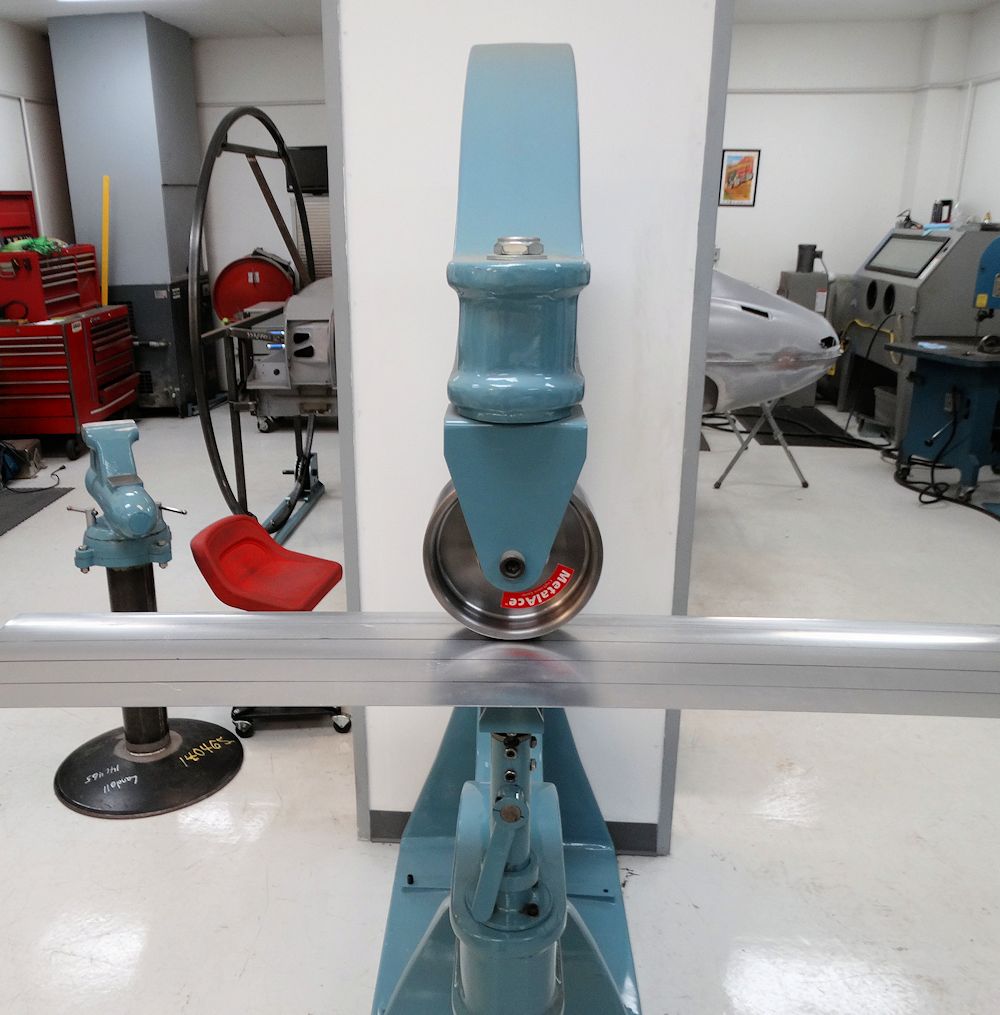
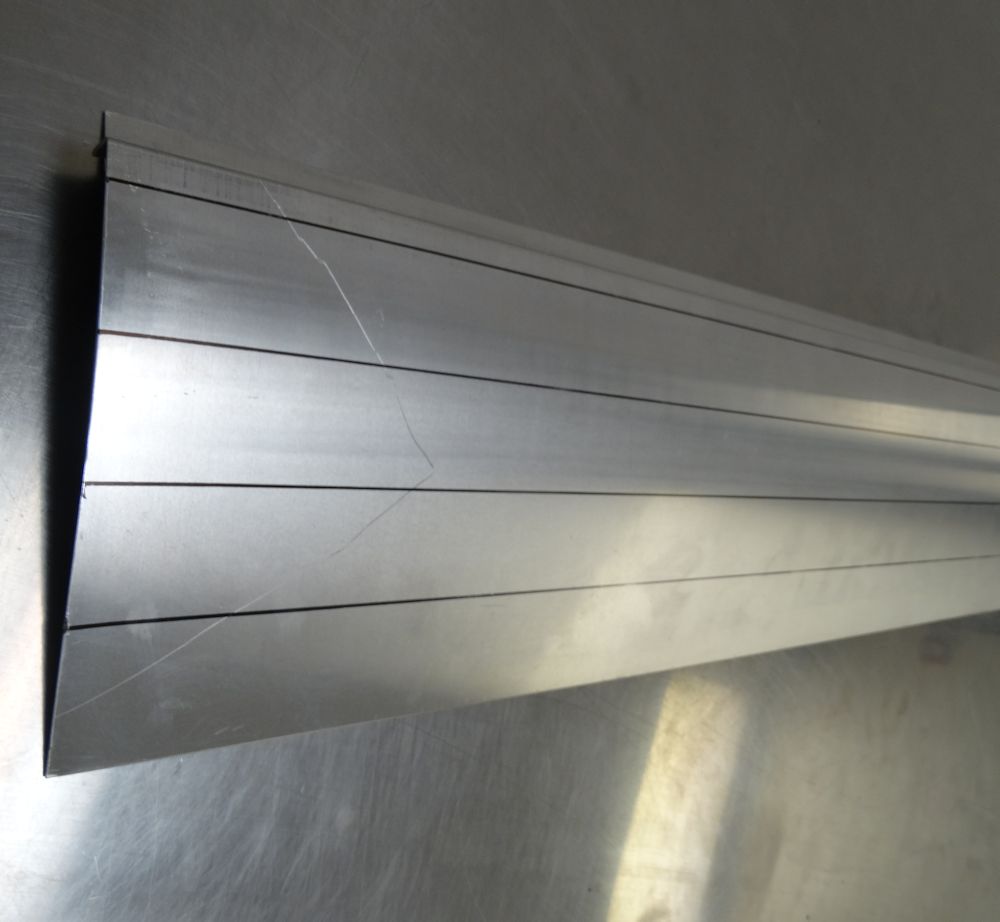
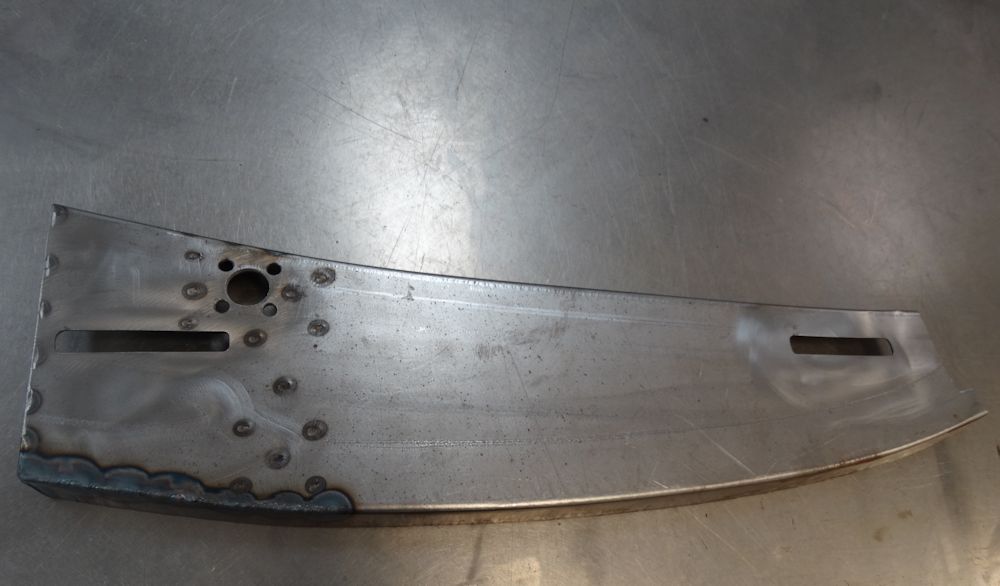
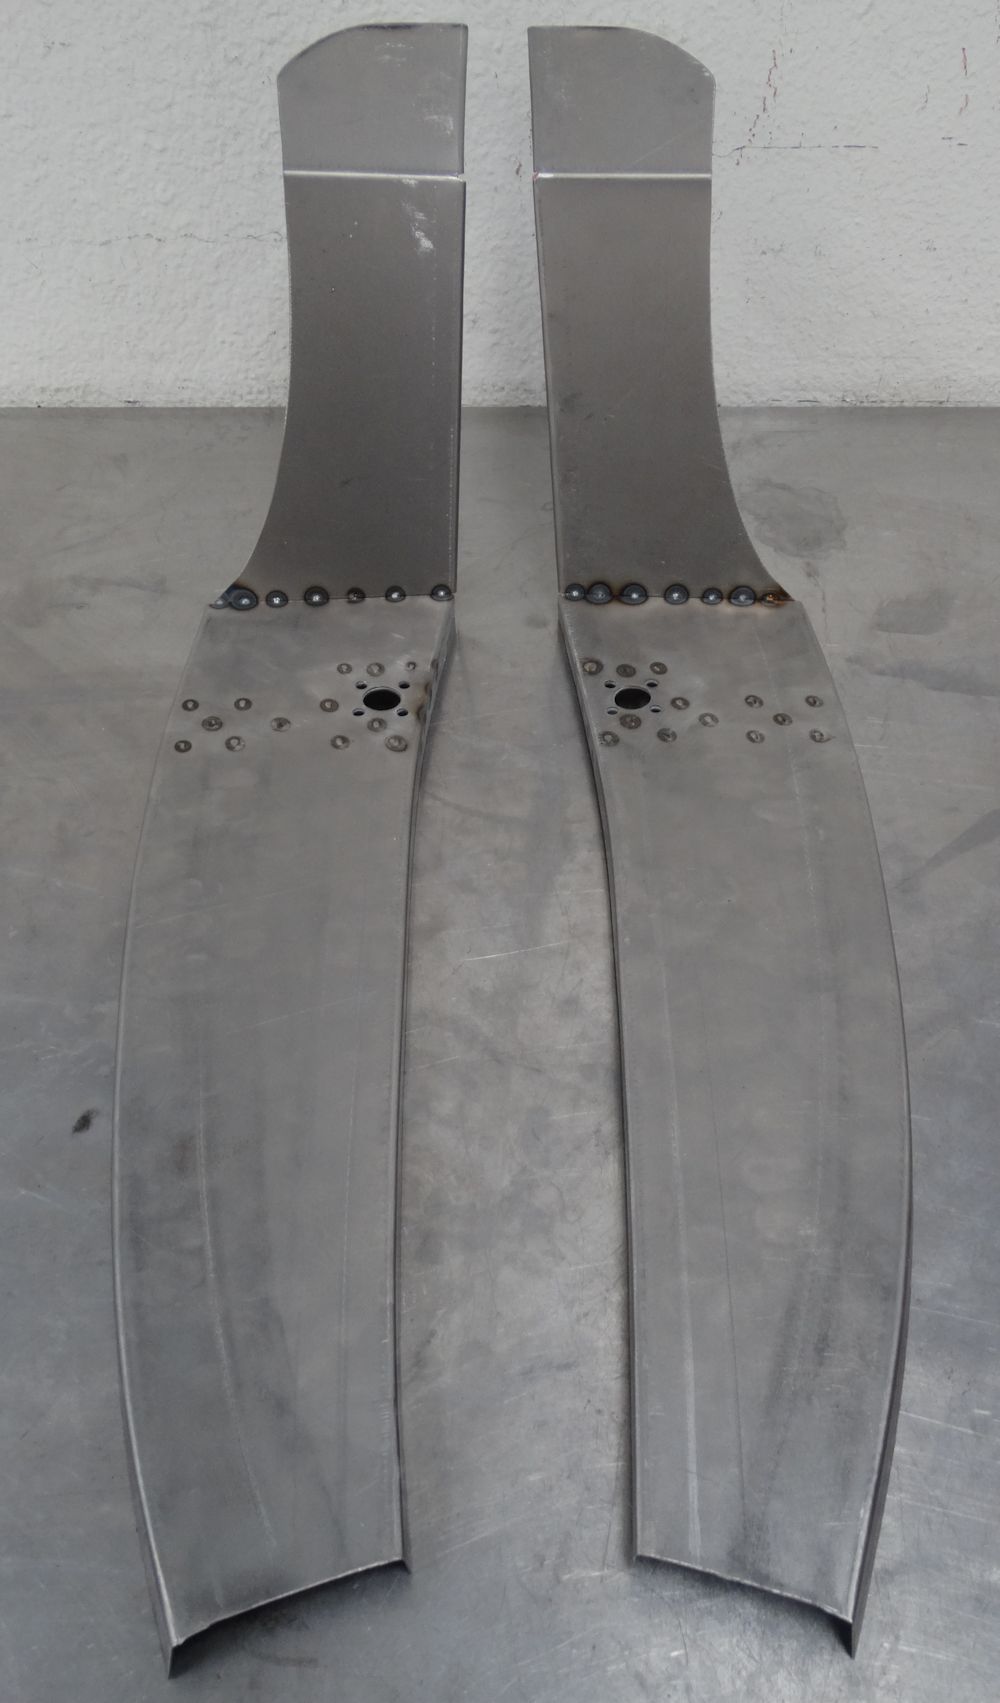
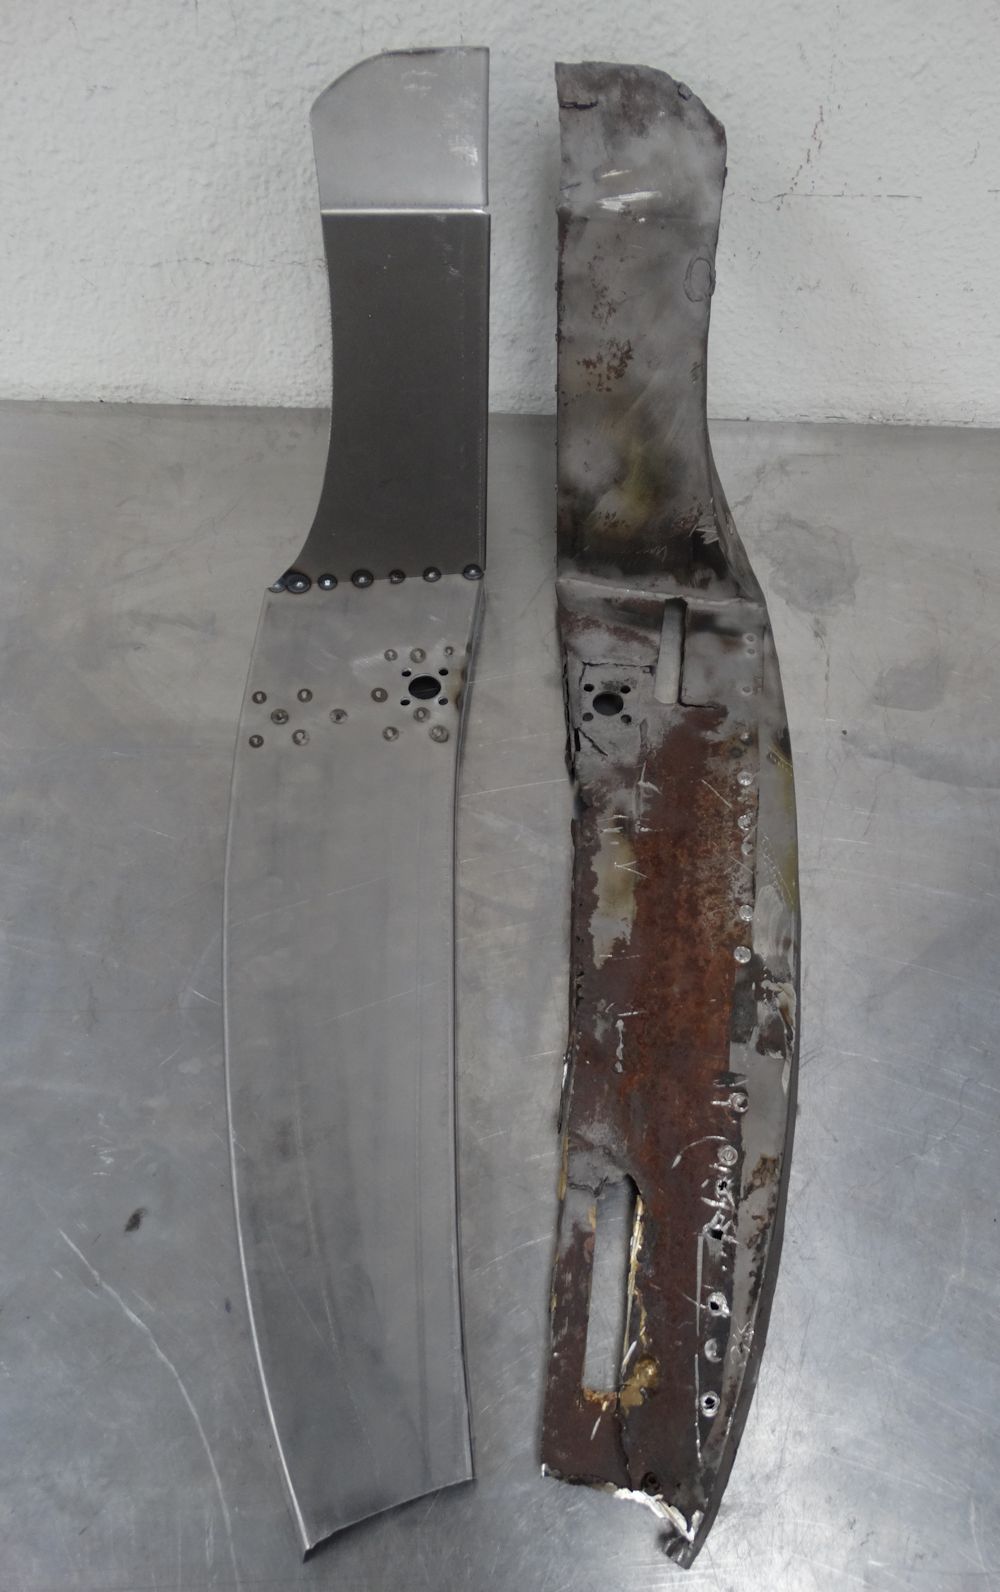
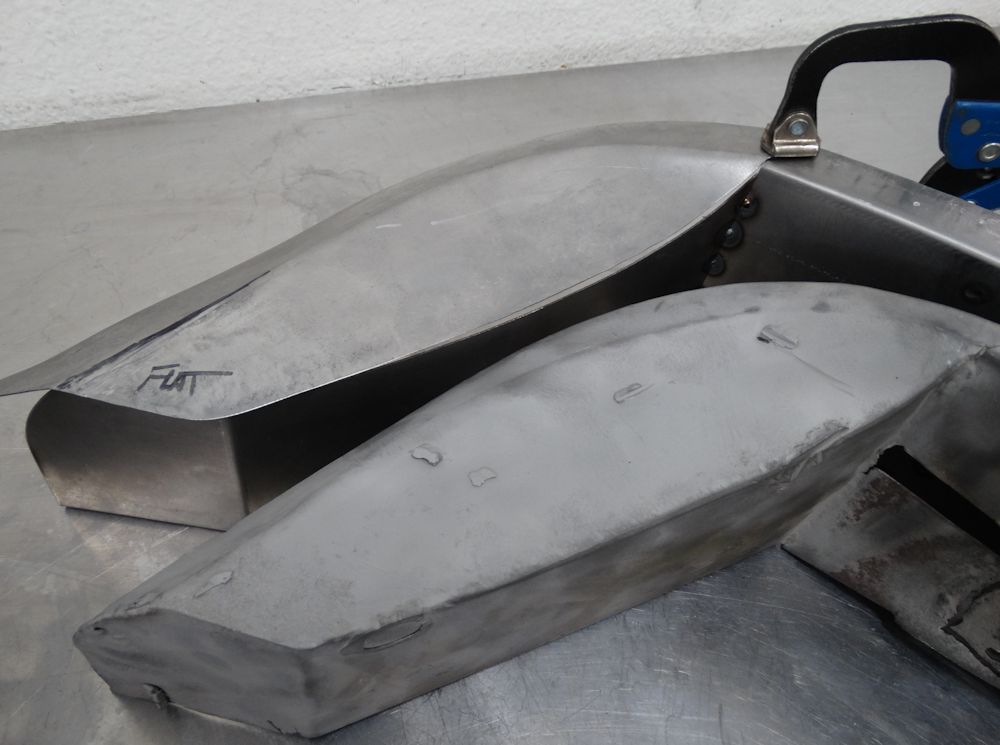
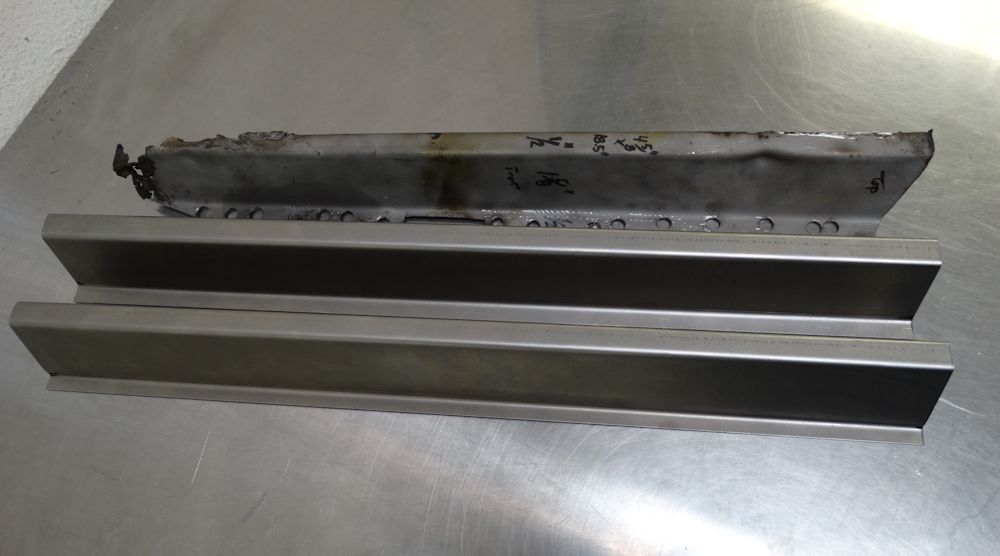
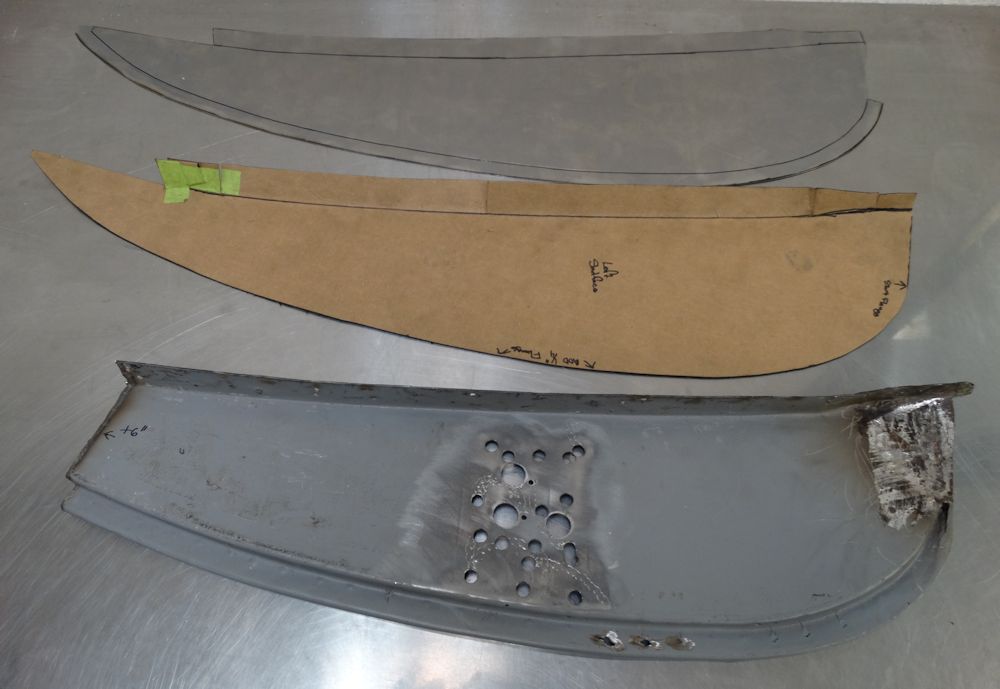
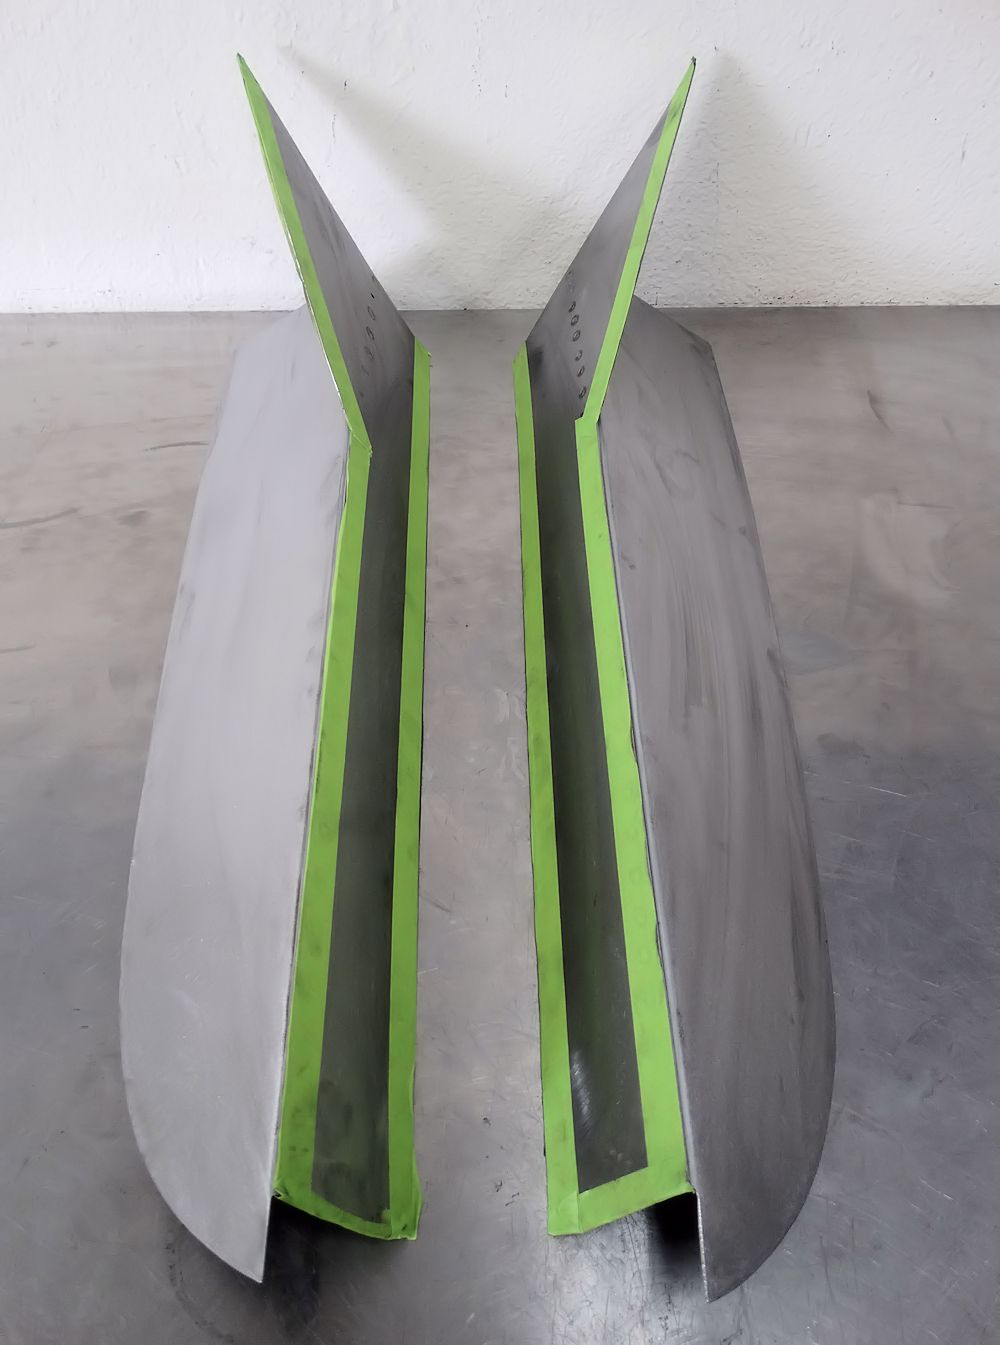
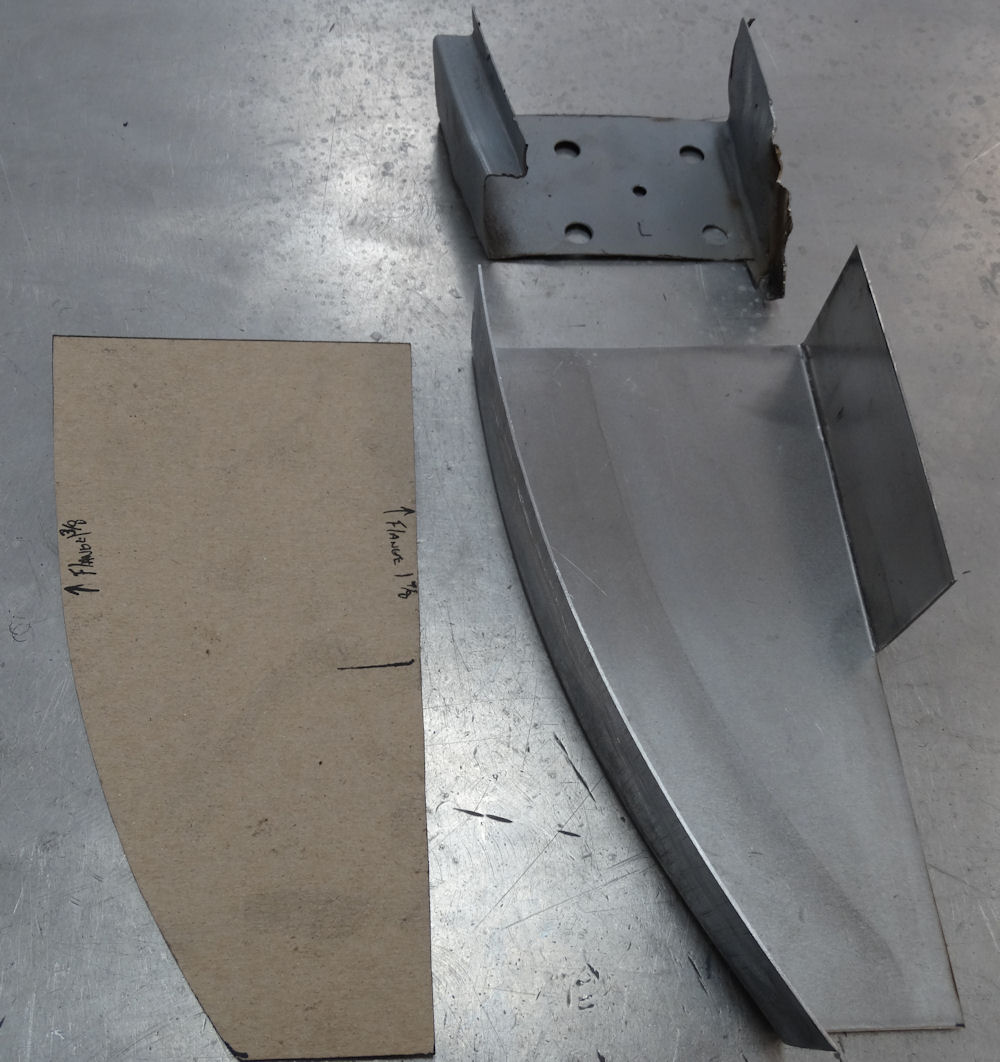
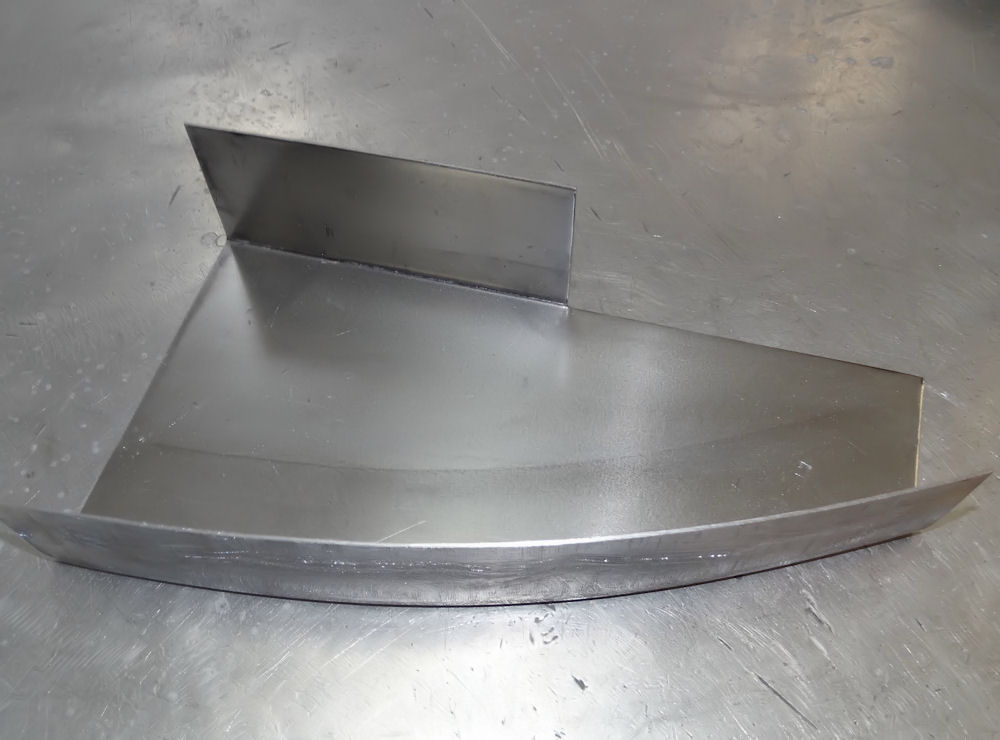
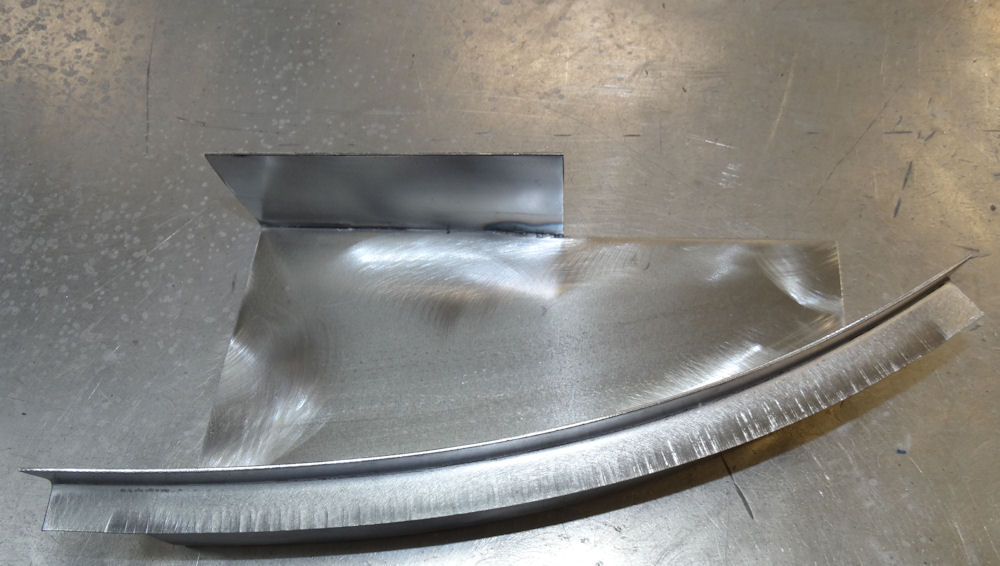
The following sequence of photos show Jake fabricating two curved, reverse flanged panels, using the Pullmax machine. Panels like this are tricky to make because of the flanged 'sabre' shape, although the Pullmax machine makes the task look much easier than it really is.
 |
 |
|
|
|
|
|
|
 |
 |
|
|
|
|
|
|
 |
 |
|
|
original to pristine newly fabricated panels |
|
|
|
|
|
|
|
|
|
Progress with the chassis repairs in the Coachworks...
 |
 |
|
|
side close out panel in position |
|
|
|
 |
 |
|
|
|
|
|
|
 |
 |
|
|
|
|
|
|
 |
 |
Engine machine work in progress..
 |
 |
|
|
|
|
|
|
 |
 |
|
of weld repairs |
|
|
|
|
 |
 |
|
|
|
|
|
|
 |
 |
|
|
|
 |
 |
|
to the head being surfaced |
|
|
|
|
 |
|
Installing the new left hand outer sill and left side engine bulkhead..
 |
 |
|
|
|
|
|
|
 |
 |
|
|
|
|
|
|
 |
 |
|
by engine side bulkhead panel |
|
|
|
|
 |
 |
|
and ready for spot welding |
A little red oxide primer to close out the week..
 |
 |
|
|
repairs required |
|
|
|
 |
 |
|
|
|
|
|
|
 |
 |
|
be covered when inner sill is installed |
|
|
|
|
 |
 |
|
|
Fabricating another jacking point, finishing up left side of engine bay, installing left hand sill panels...
 |
 |
|
|
|
|
|
|
 |
 |
|
|
|
|
|
|
 |
 |
|
|
|
|
|
|
 |
 |
|
fabricate LH engine bay side panel |
|
|
|
|
 |
 |
|
|
|
|
|
|
 |
 |
|
|
LH A post repair panel |
|
|
|
 |
 |
|
|
|
|
|
|
 |
 |
|
|
|
|
|
|
 |
 |
|
trial fit |
|
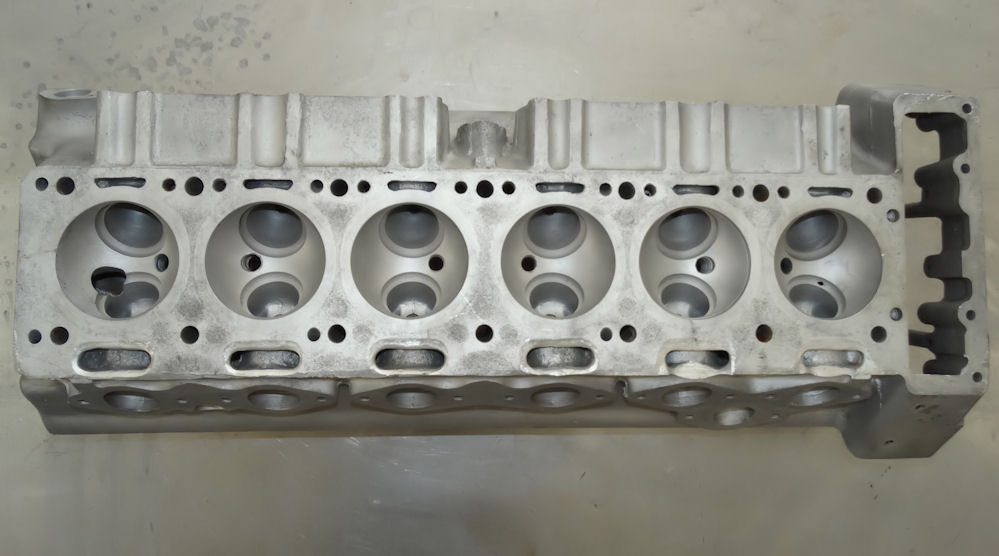
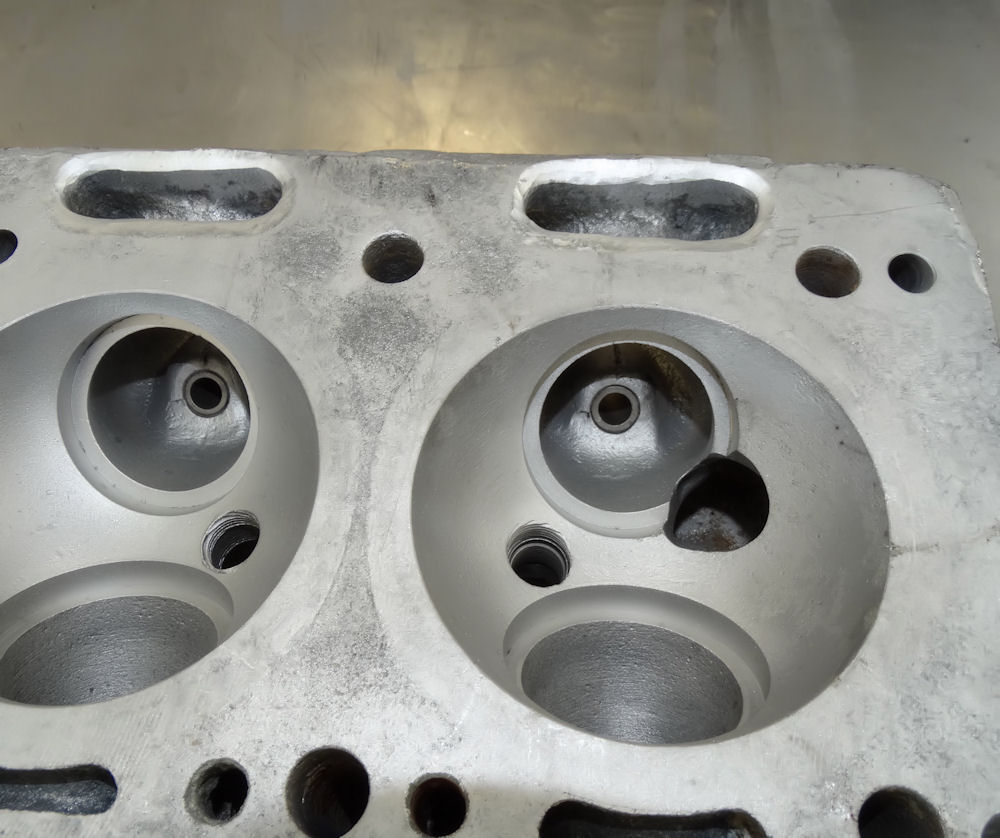
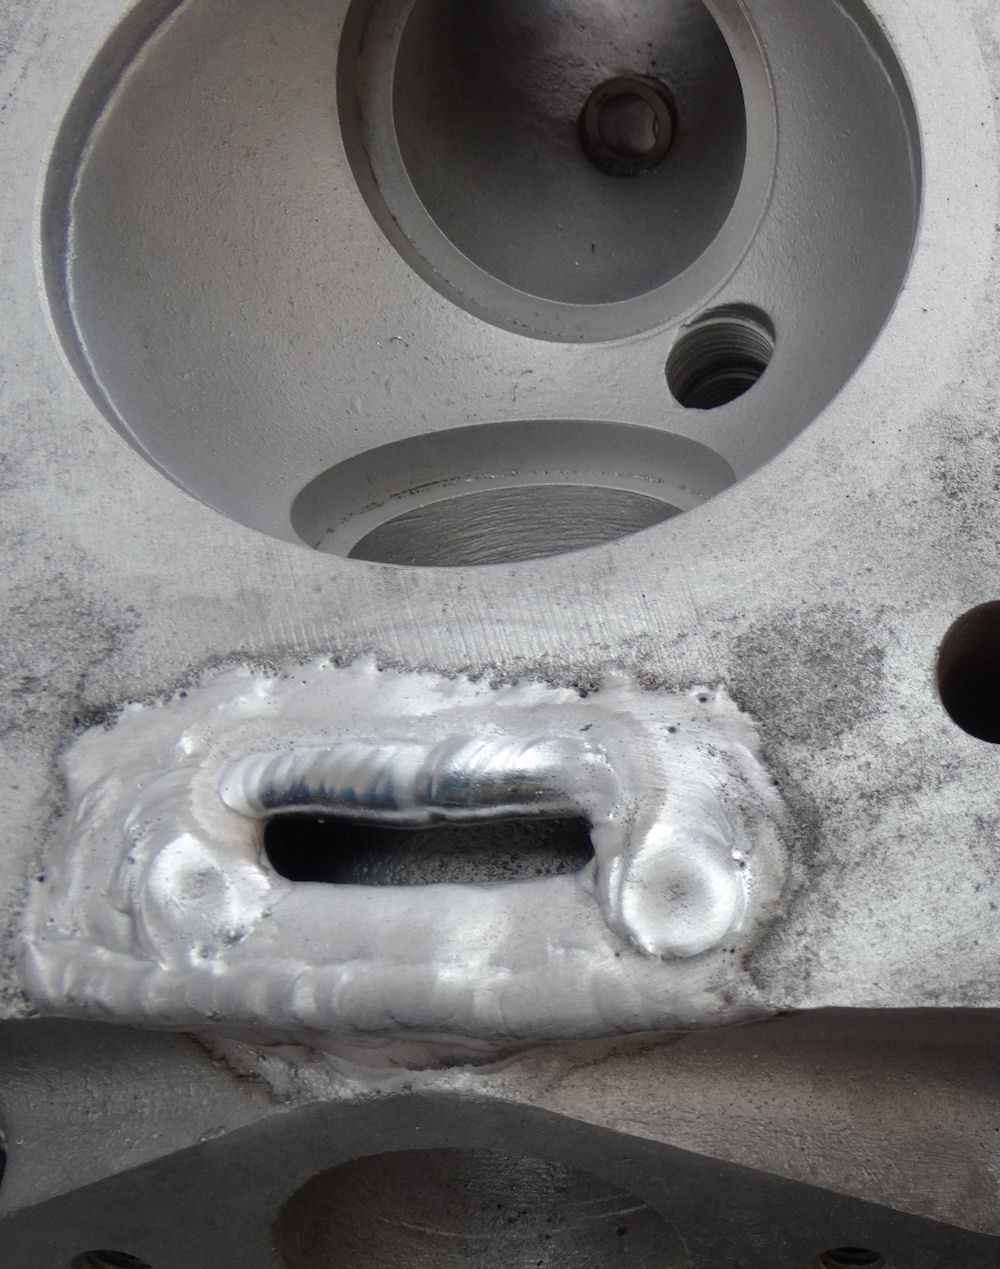
Rescuing your badly corroded and damaged cylinder head tested the skills of both the CJ machine shop and the CJ Coachworks, although in the end the repairs really didn't present too many problems.
 |
 |
|
|
|
|
|
|
 |
 |
|
|
during the removal of the cylinder head |
|
|
|
 |
 |
|
look so much better |
delivered to Jake in the Coachworks for weld repairs |
|
|
|
 |
 |
|
to sound alloy prior to welding |
|
|
|
|
 |
 |
|
|
|
|
|
|
 |
 |
|
|
so the bowl could be re-shaped |
|
|
|
 |
 |
|
|
on the mill at a later date |
|
|
|
 |
 |
|
|
|
Finishing up the left side of the engine bay, repairing rear inner wheel well and rear edge of left hand side floor. Jake is working his way to the rear of the car..
 |
 |
|
|
|
|
|
|
 |
 |
|
|
|
|
|
|
 |
 |
|
|
|
|
|
|
 |
 |
|
|
|
|
|
|
 |
 |
|
|
|
|
|
|
 |
 |
|
|
|
|
|
|
 |
 |
|
|
|
|
|
|
 |
 |
|
|
|
|
|
|
 |
 |
|
|
|
|
|
|
 |
 |
|
|
|
|
|
|
 |
 |
|
|
|
This week Jake has been busy with chassis and firewall repairs on the left side of the car...
 |
 |
|
|
|
 |
 |
|
|
|
 |
 |
|
for the chassis |
|
|
|
|
 |
 |
|
|
|
|
|
|
 |
 |
|
all new panels |
|
|
|
|
 |
 |
|
|
|
 |
 |
|
|
|
 |
 |
|
|
|
 |
 |
|
look really nice.. |
Jake has been working his way down the left hand side of the chassis this week..
 |
 |
|
|
|
 |
 |
|
|
|
 |
 |
|
|
|
 |
 |
|
|
|
 |
 |
|
|
|
 |
 |
Using the plasma cutter to remove the old left hand rocker panel..
 |
 |
 |
 |
Fabricating and trial fitting new left side engine rails and engine bay finisher panel..
 |
 |
 |
 |
 |
 |
 |
 |
Jake has been busy reconstructing the upper left side of the engine bay..
 |
 |
|
|
|
 |
 |
|
|
|
 |
 |
|
|
|
 |
 |
|
|
|
 |
 |
|
|
|
 |
 |
|
|
|
 |
 |
|
|
|
 |
 |
|
|
|
 |
 |
|
|
|
 |
 |
|
|
|
 |
 |
|
|
|
 |
 |
|
|
|
 |
 |
 |
 |
Lots of progress since our last update, including the replacement of the right hand door shut face panel, which appeared to be in excellent condition. As the sequence of photos below show, there is method to our madness...
 |
 |
|
|
|
|
|
|
 |
 |
|
|
together, and the inner surfaces are prone to rusting |
|
|
|
 |
 |
|
perfectly sound |
|
|
|
|
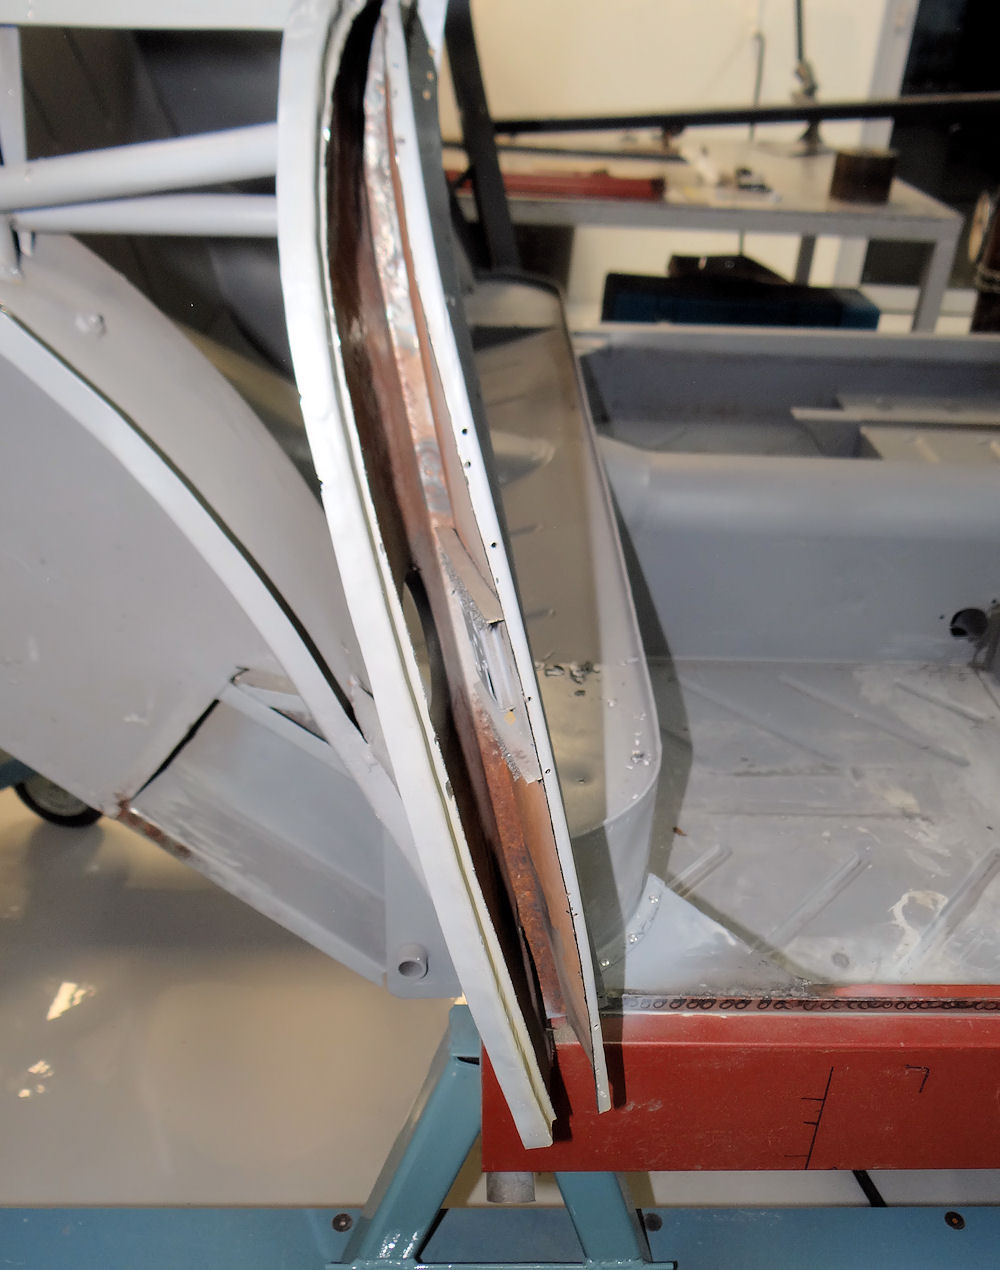 |
 |
|
|
|
|
|
|
 |
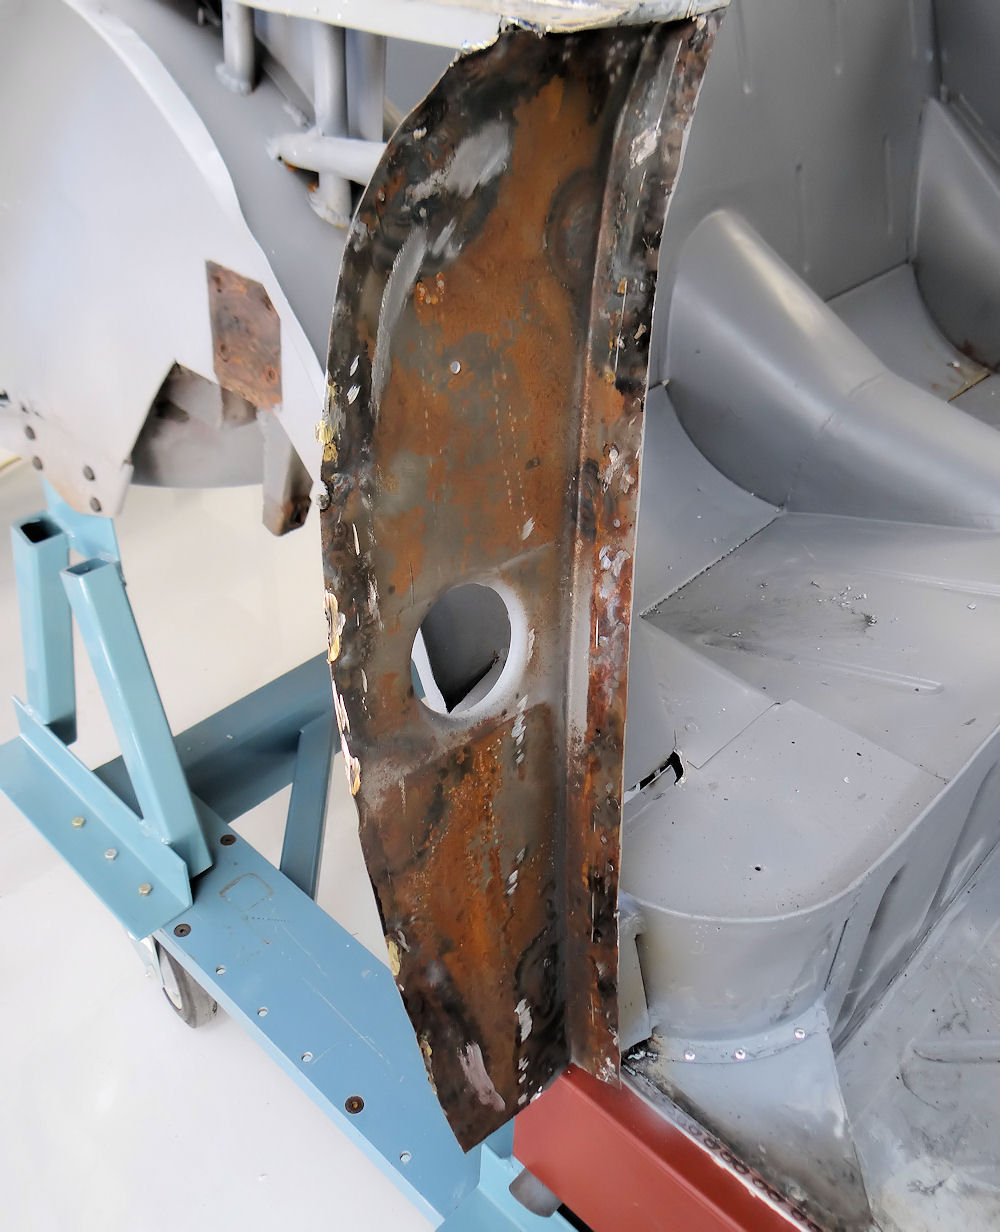 |
|
|
|
|
|
|
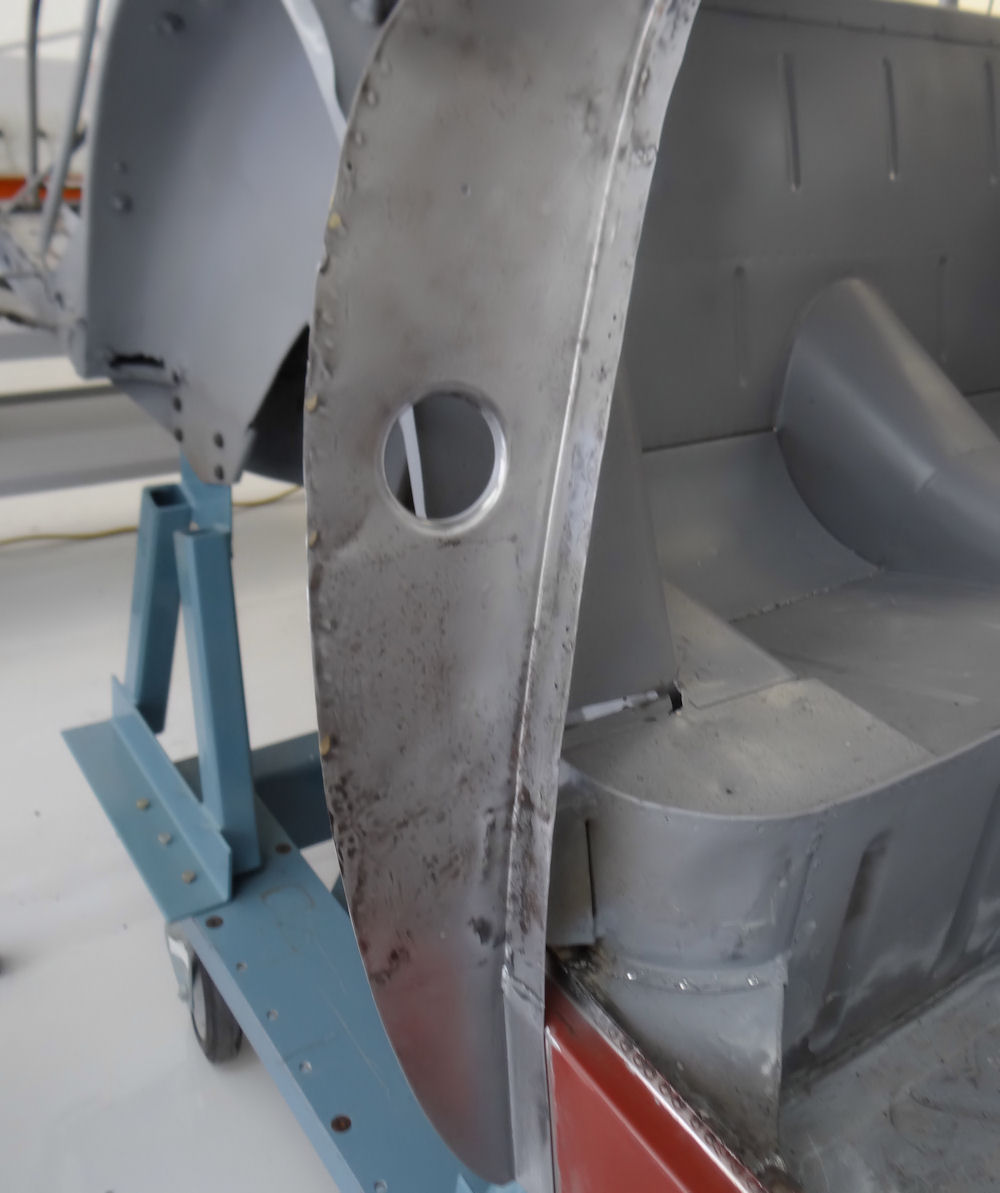 |
 |
|
|
|
|
|
|
 |
 |
|
|
|
|
|
|
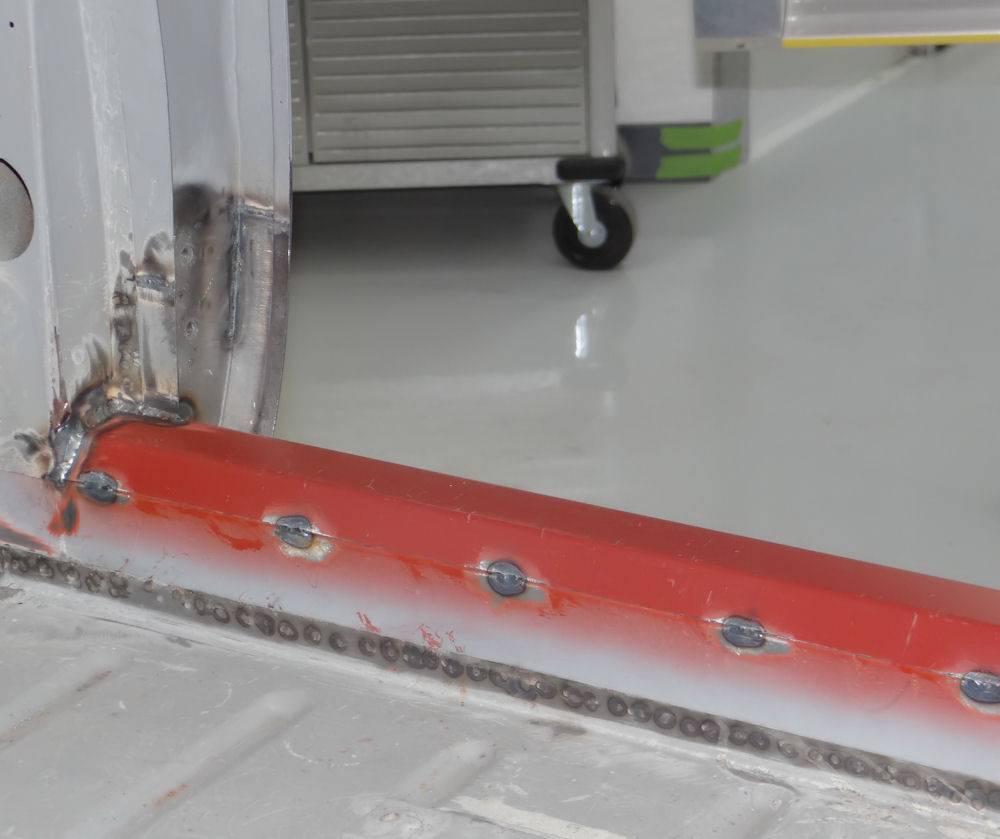 |
 |
|
|
|
|
|
|
|
|
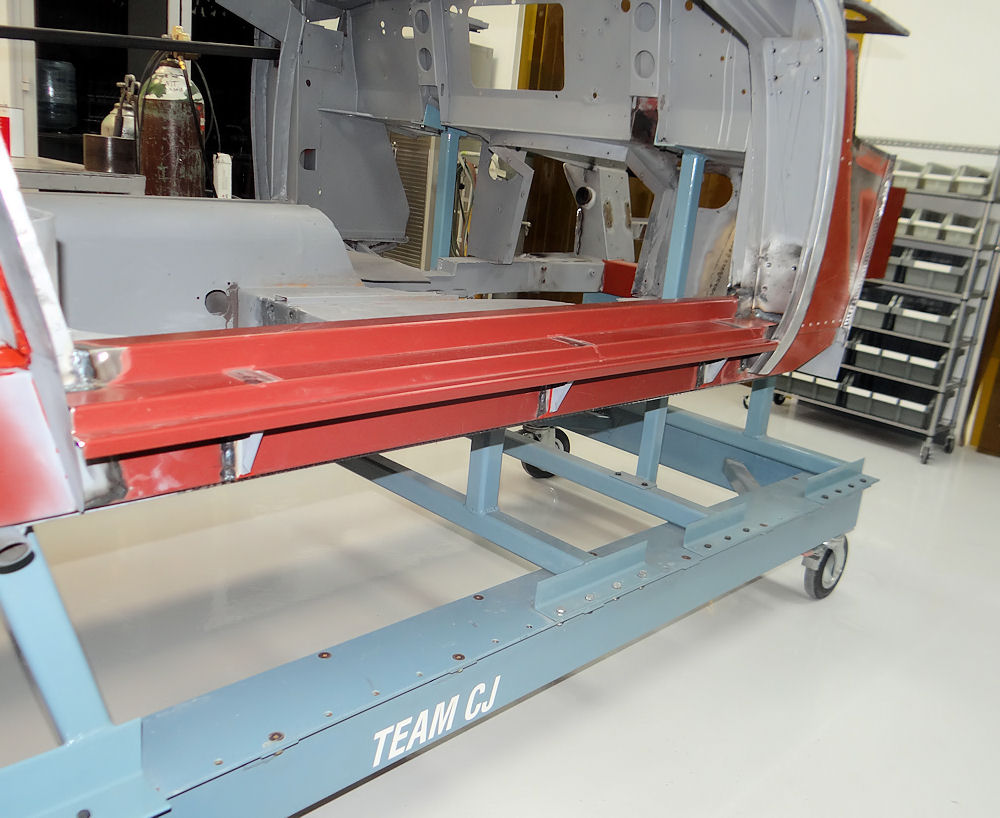 |
|
|
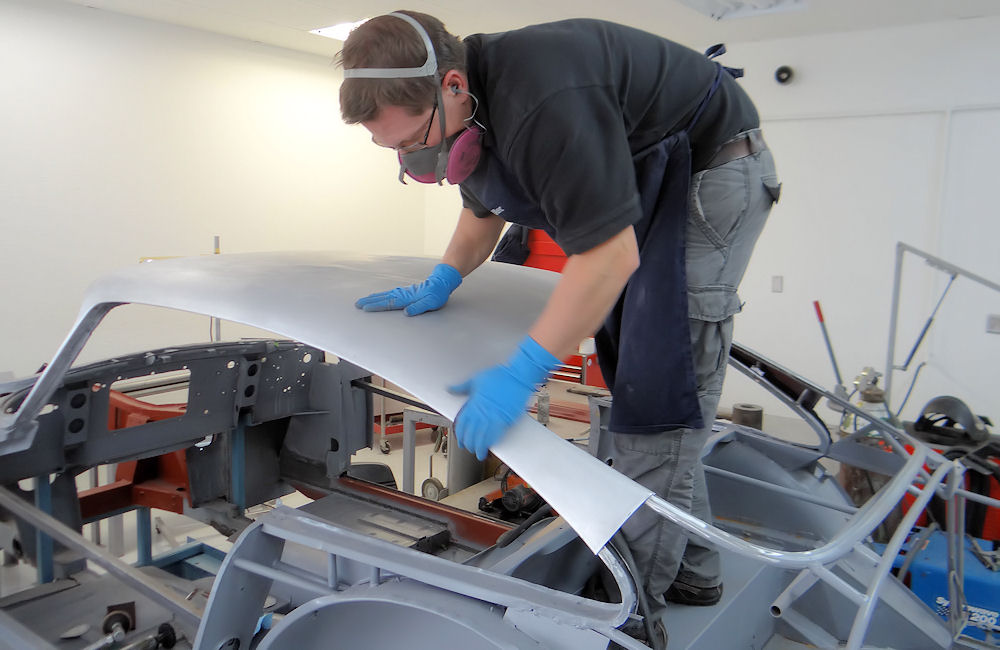 |
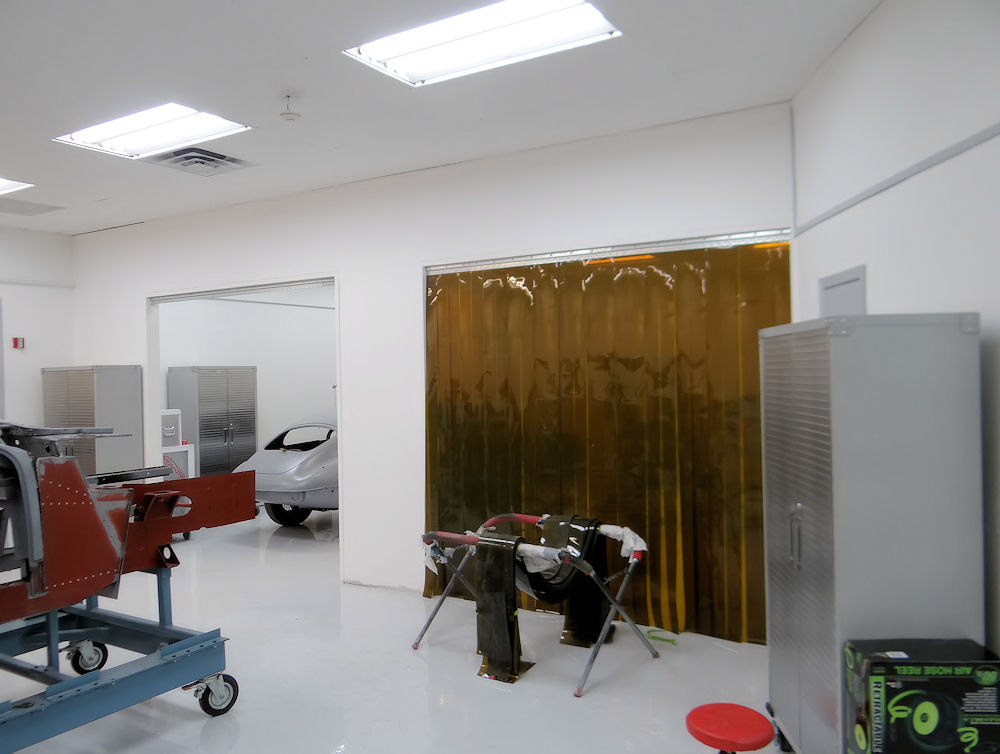 |
|
|
|
|
|
|
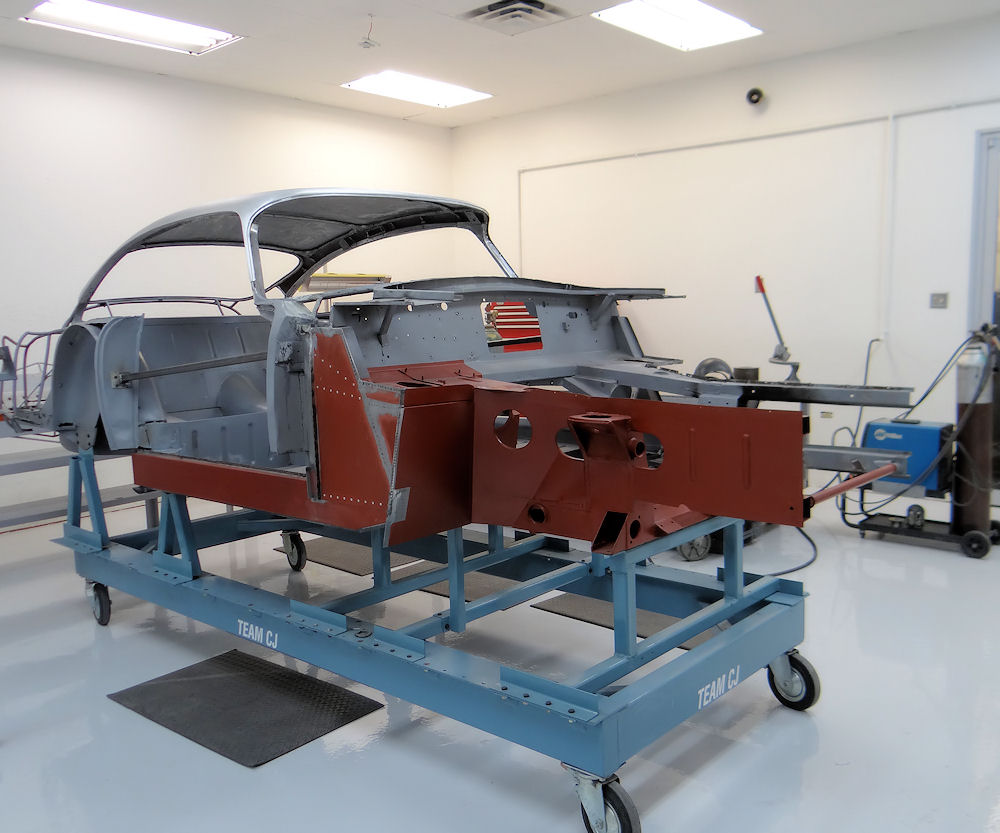 |
 |
|
|
|
|
|
|
 |
 |
|
|
|
|
|
|
 |
 |
|
|
|
|
|
|
 |
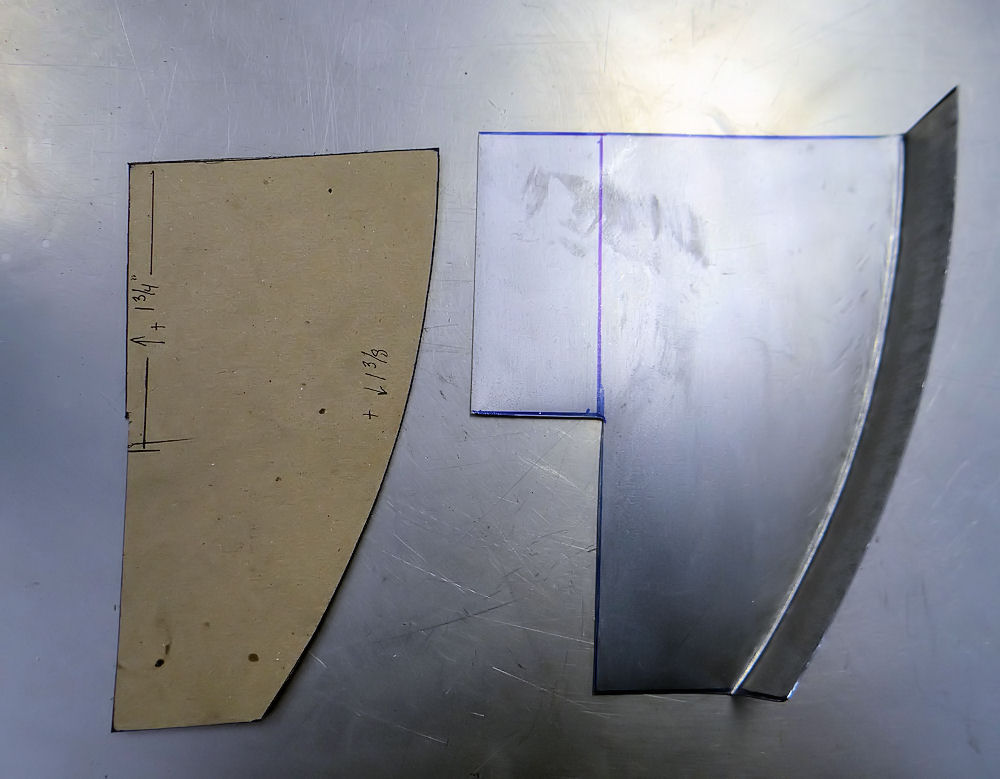 |
|
|
|
|
|
|
 |
 |
|
|
|
|
|
|
 |
 |
|
|
|
|
|
|
 |
 |
|
|
|
|
|
|
 |
 |
|
|
|
|
|
|
 |
 |
|
|
|
|
|
|
 |
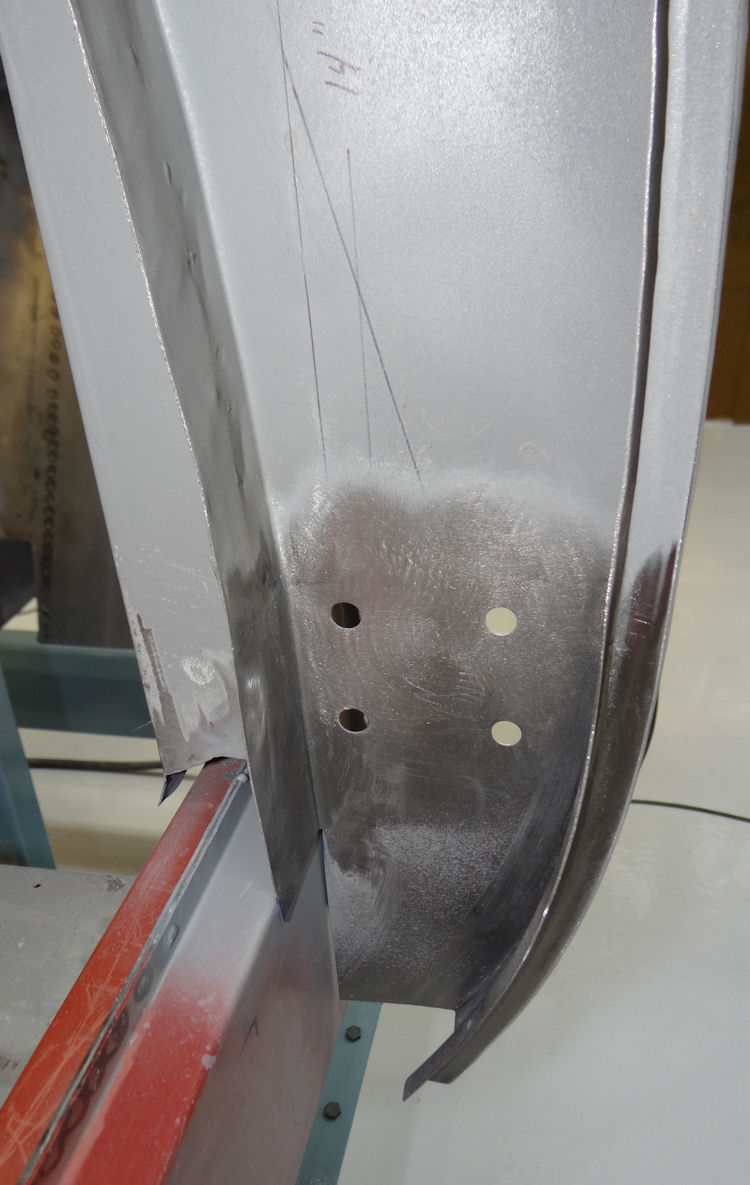 |
|
|
|
|
|
|
 |
 |
|
|
|
A little inspiration..

Love the look of the S1 DB4 with 16 inch wheels..
Installing new right hand outer sill, inner wing closing panel...
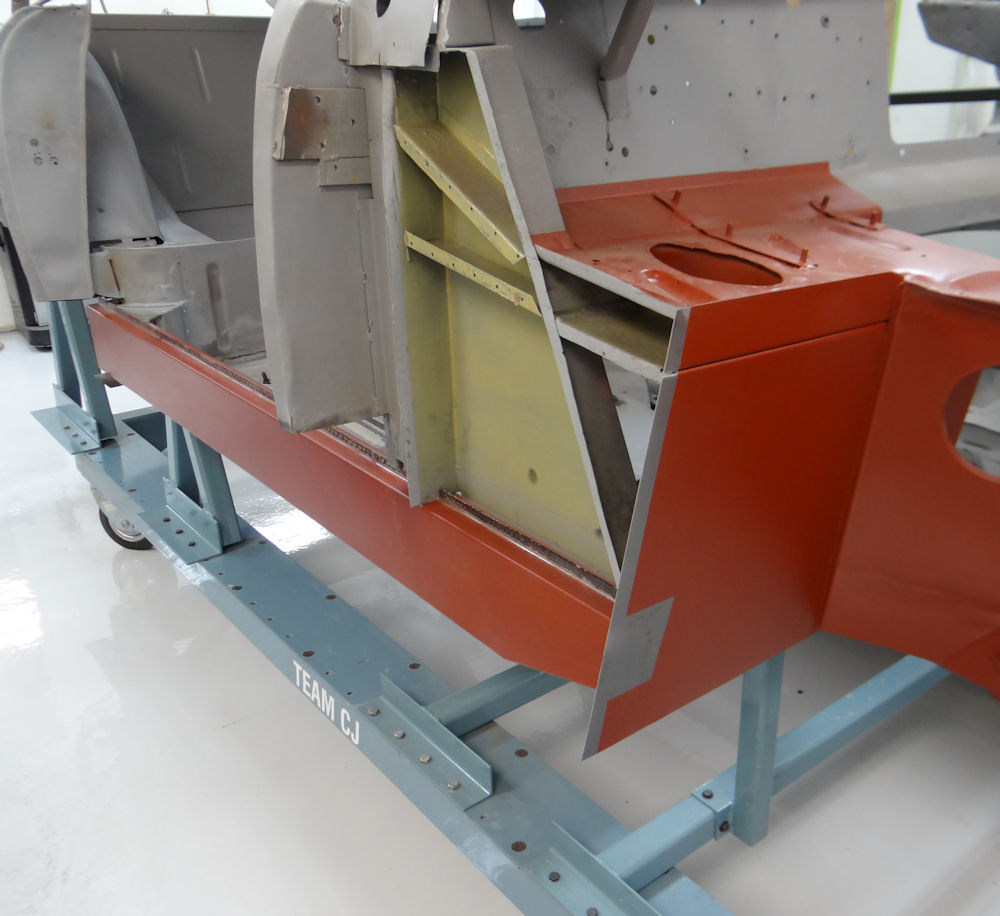 |
 |
|
|
|
 |
 |
|
|
|
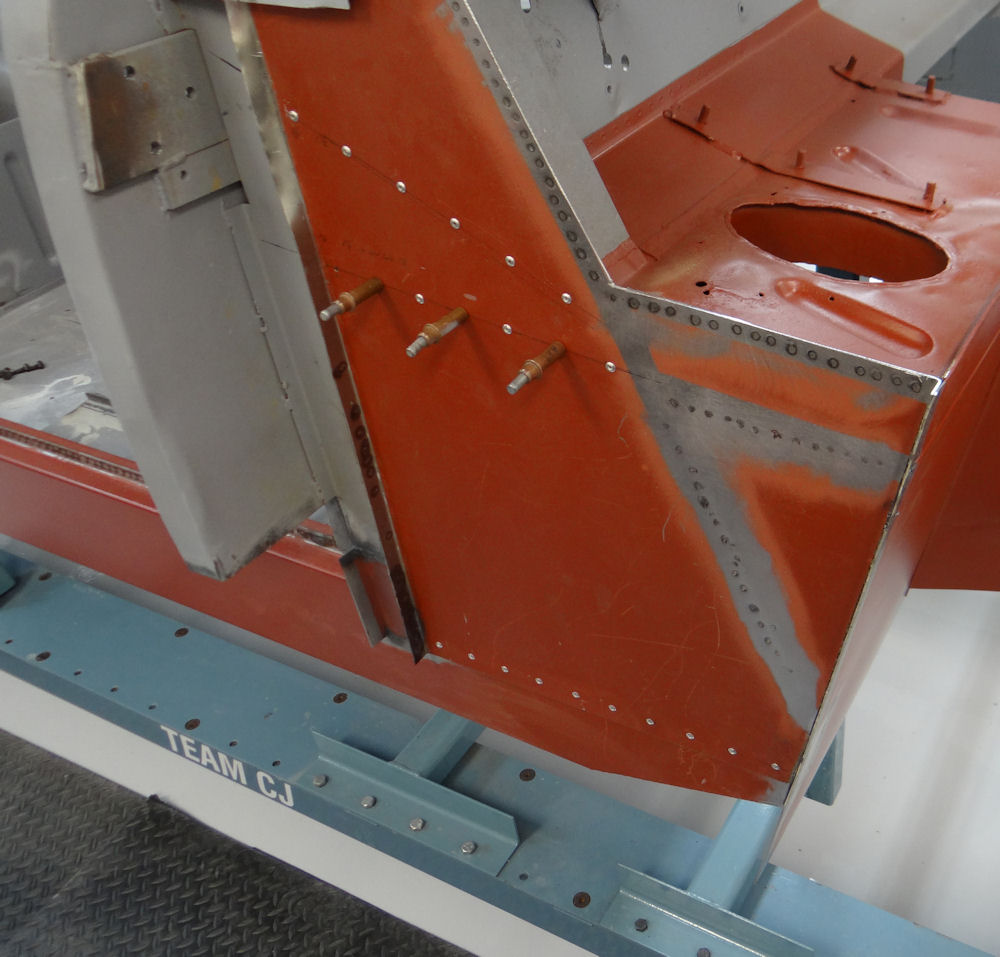 |
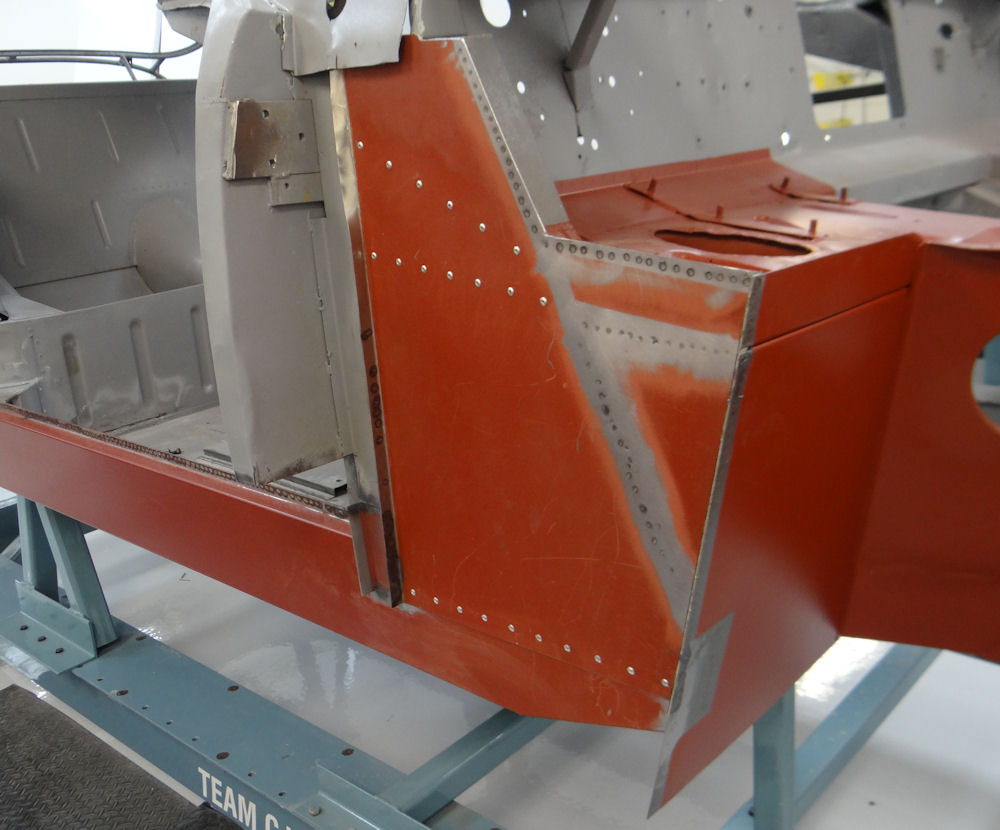 |
 |
 |
|
the full treatment |
|
|
|
|
 |
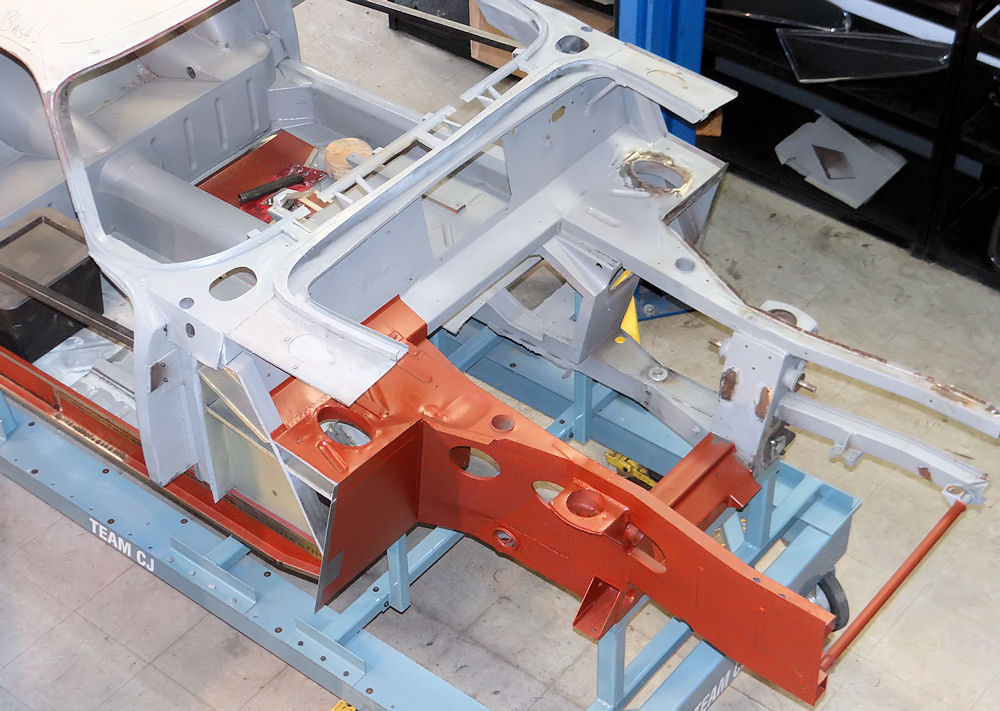 |
|
what we still have ahead of us |
Prior to welding the new right hand inner sill in place, we primed and rust proofed the box sections that were about to be enclosed by the installation of the sill panel.
 |
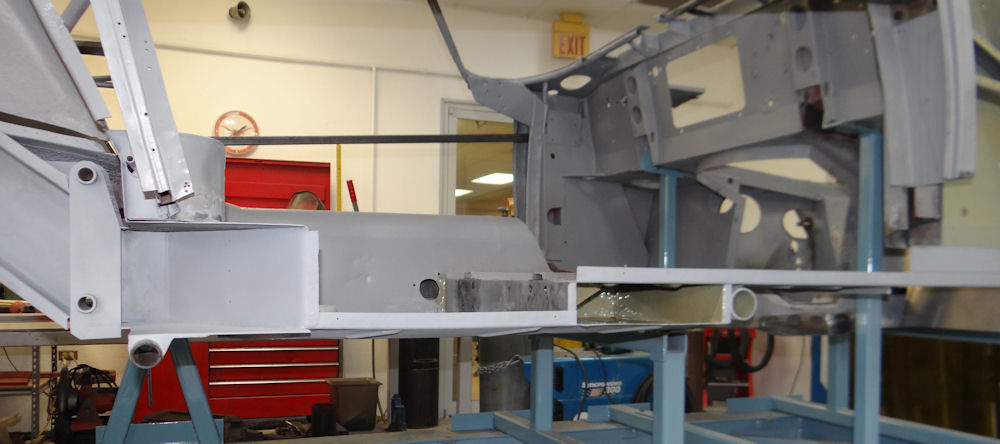 |
|
|
|
|
|
|
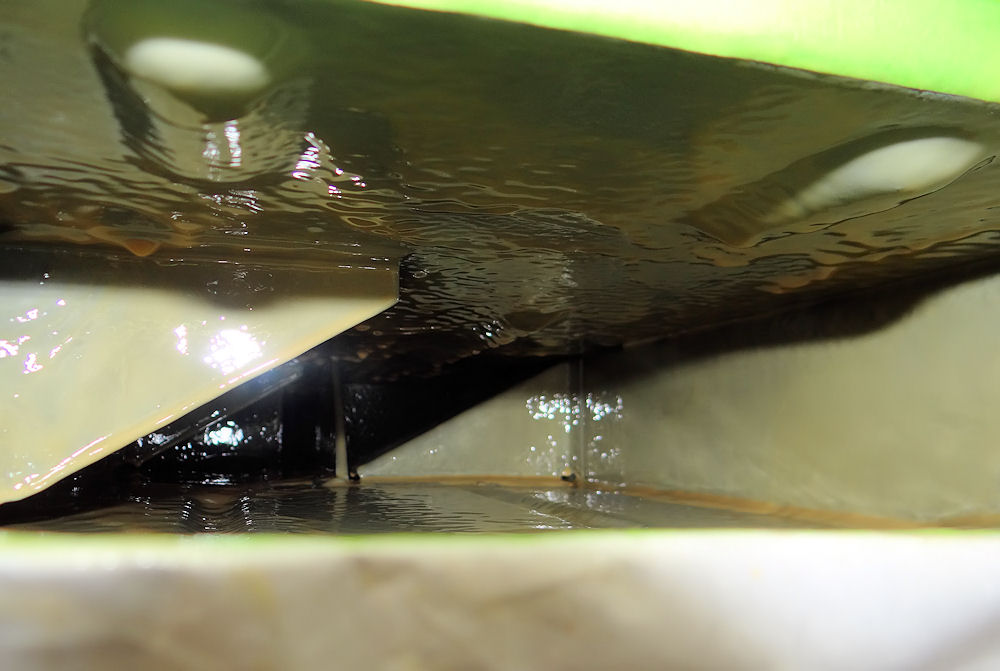 |
 |
|
|
|
|
|
|
 |
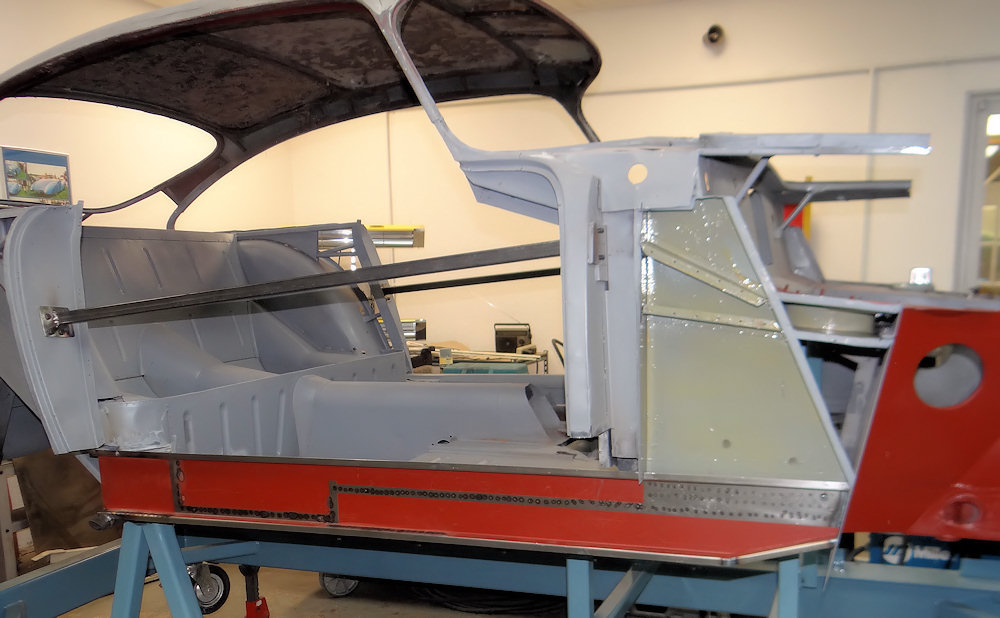 |
|
|
|
Anatomy of an Aston Martin DB4 seatWe are currently investigating the feasibility of saving the original hide seat covers...
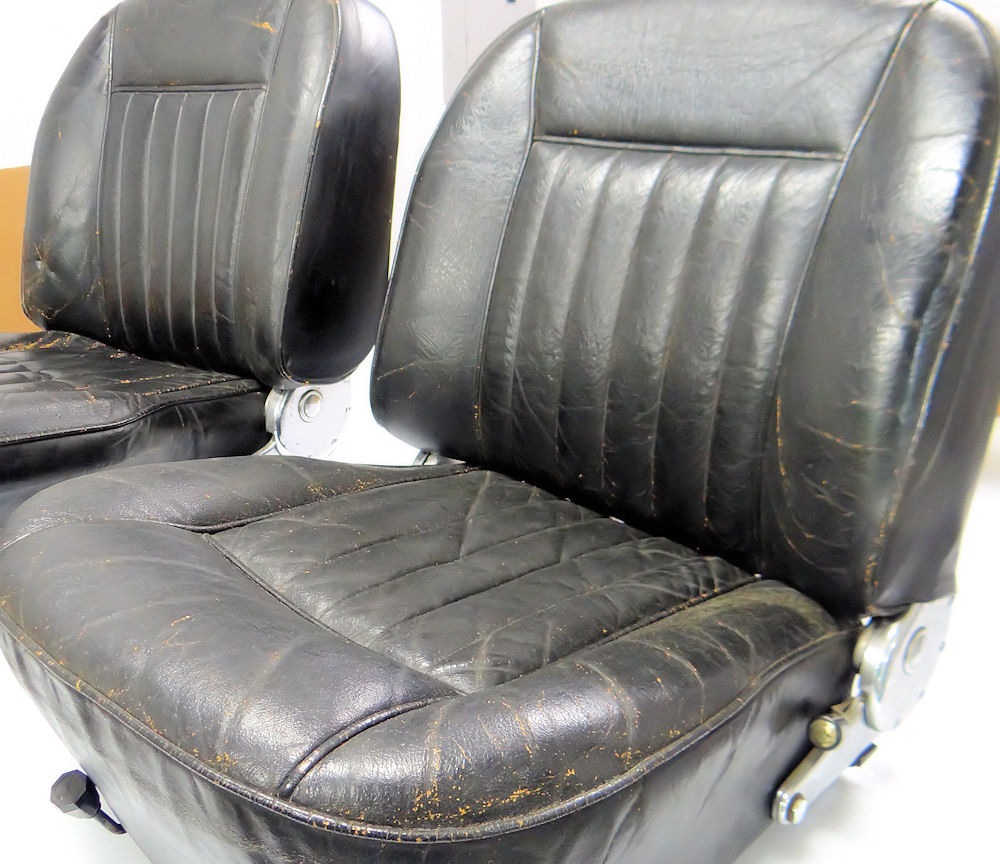 |
 |
|
|
family purchased the car in the early 70's |
|
|
|
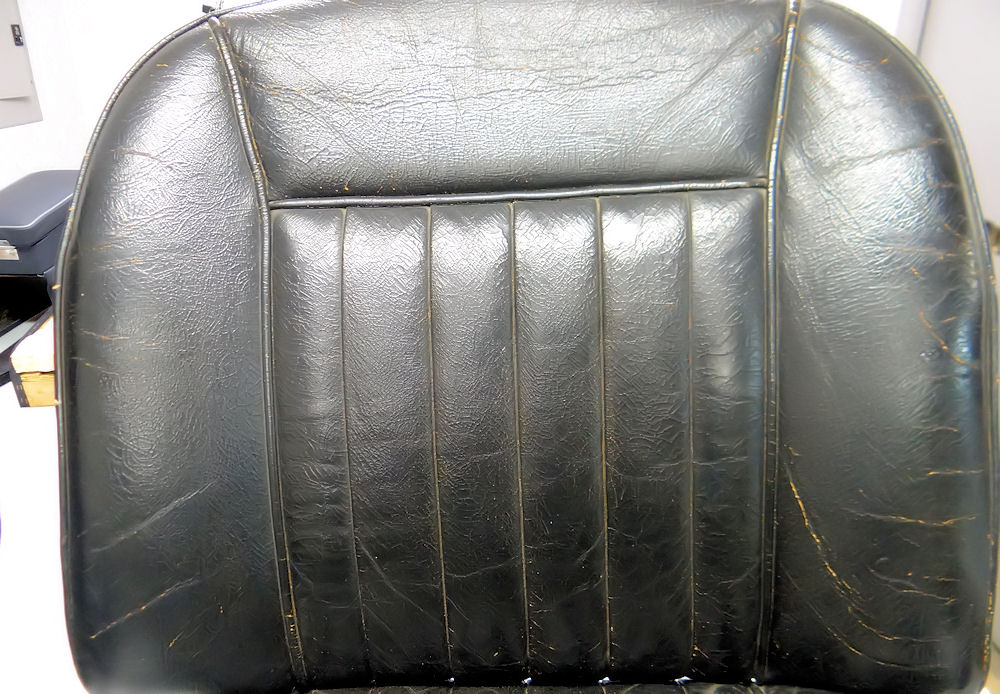 |
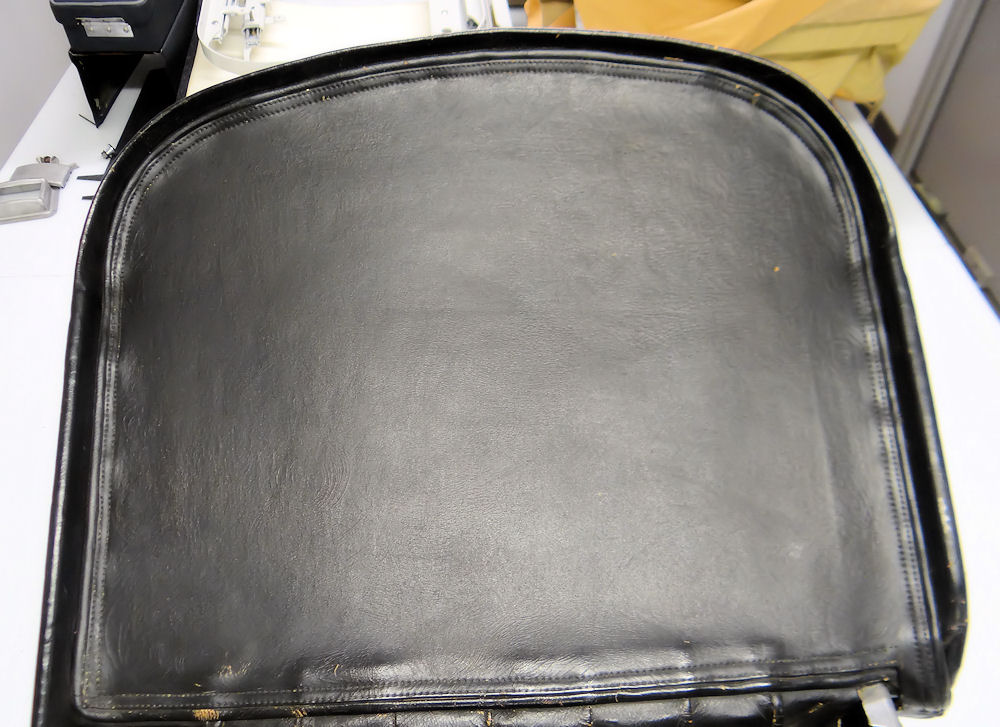 |
|
|
|
|
|
|
 |
 |
|
|
|
|
|
|
 |
 |
|
|
|
 |
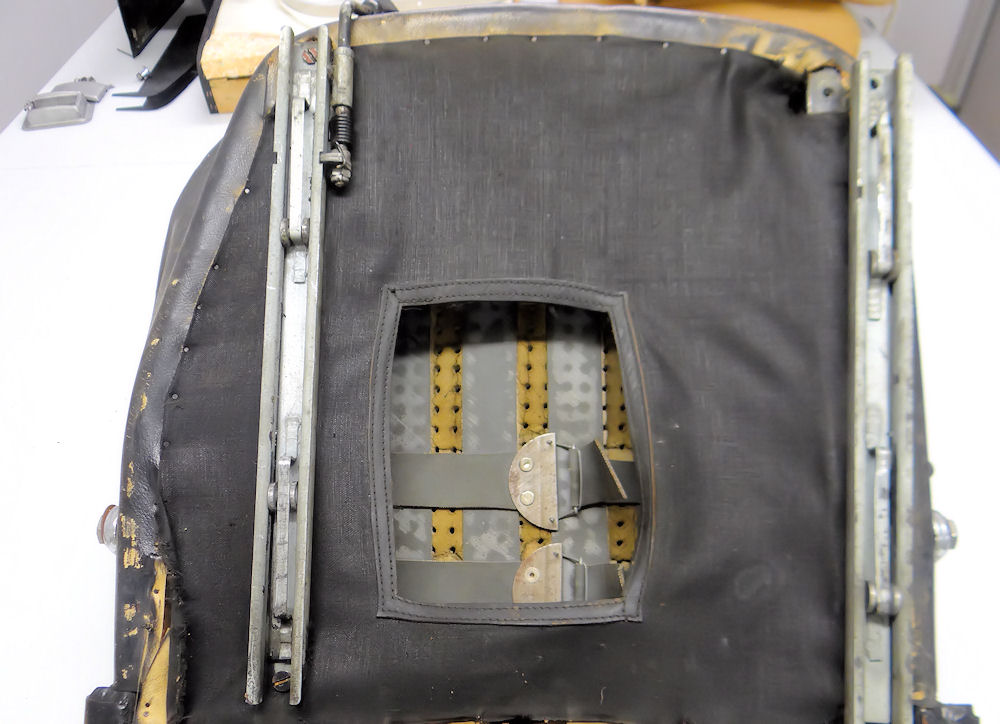 |
|
|
|
|
|
|
 |
 |
|
adjusting straps |
|
|
|
|
 |
 |
|
|
|
|
|
|
 |
 |
|
|
|
|
|
|
 |
 |
|
seat covers and re-dye them back to the original Beige |
|
Jacking point reconstruction, continued...One of the reasons the jacking points are so prone to rust is the gap left by the factory between the jacking tube and the plate to which it is welded (see image 1 below). This gap acts as a perfect trap and receptacle for moisture and road grime. In image 2 you will see how we have improved this sitaution by sealing up the the gap with a solid bead of weld. We then injected Body Wax down inside the gap (image 3) before it was also sealed at the front side, where it emerges from beneath the sill (image 4). The jacking points should now provide many decades of rust free service.
 |
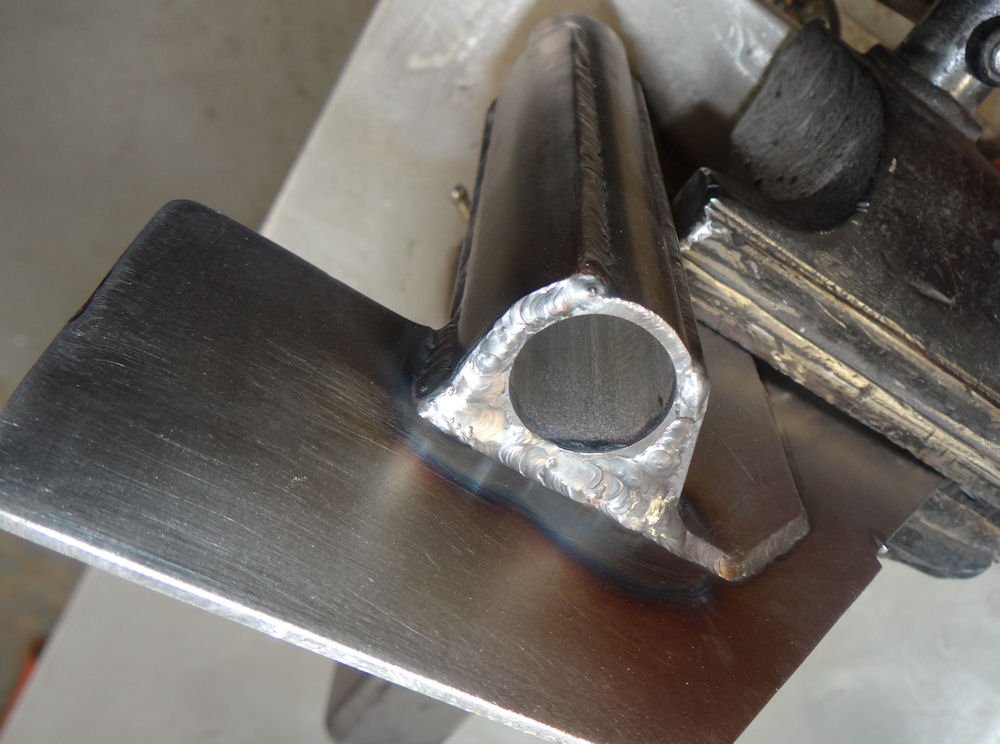 |
|
and the plate to which it is welded |
of the DB4 jacking point |
|
|
|
 |
 |
|
|
|
|
|
|
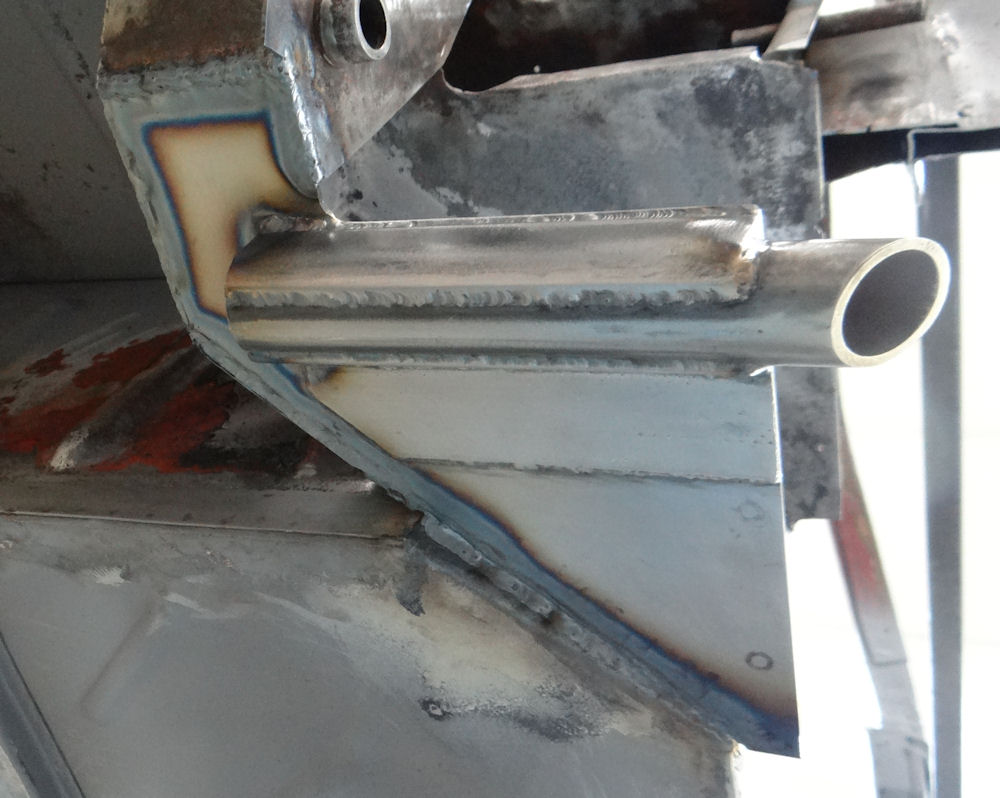 |
 |
|
|
the effort we put into this simple jacking point! |
Jacking point reconstruction, continued..
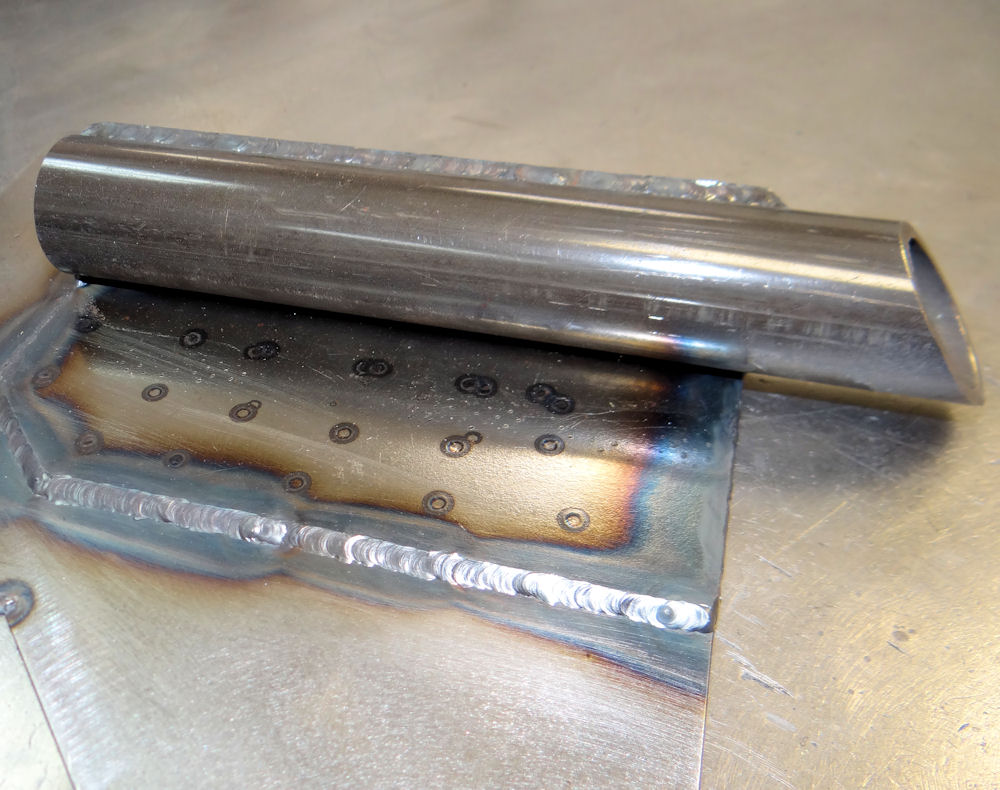 |
 |
|
|
|
 |
 |
|
same way as the original (in background) |
|
|
|
|
 |
 |
|
|
|
 |
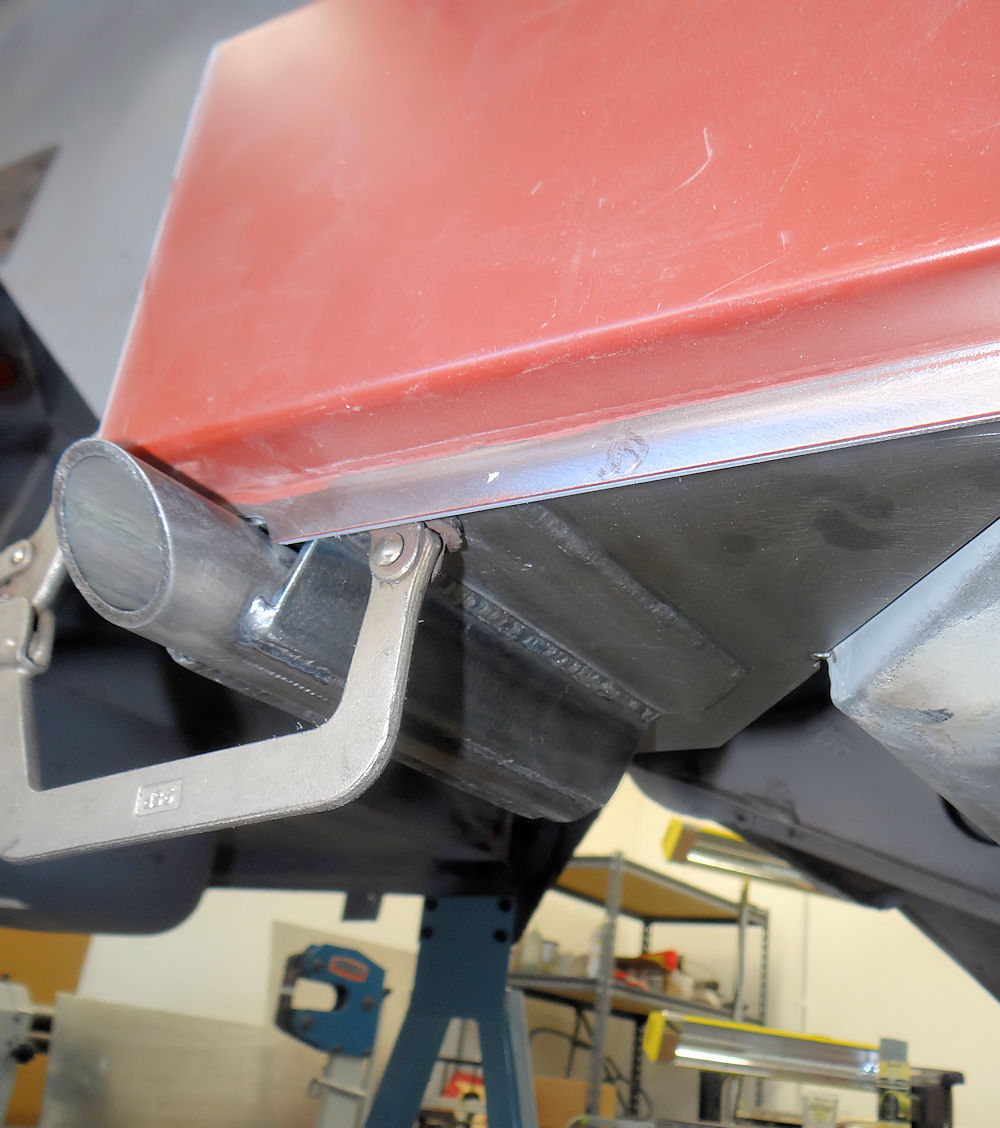 |
Reconstructing the right hand rear jacking point...
 |
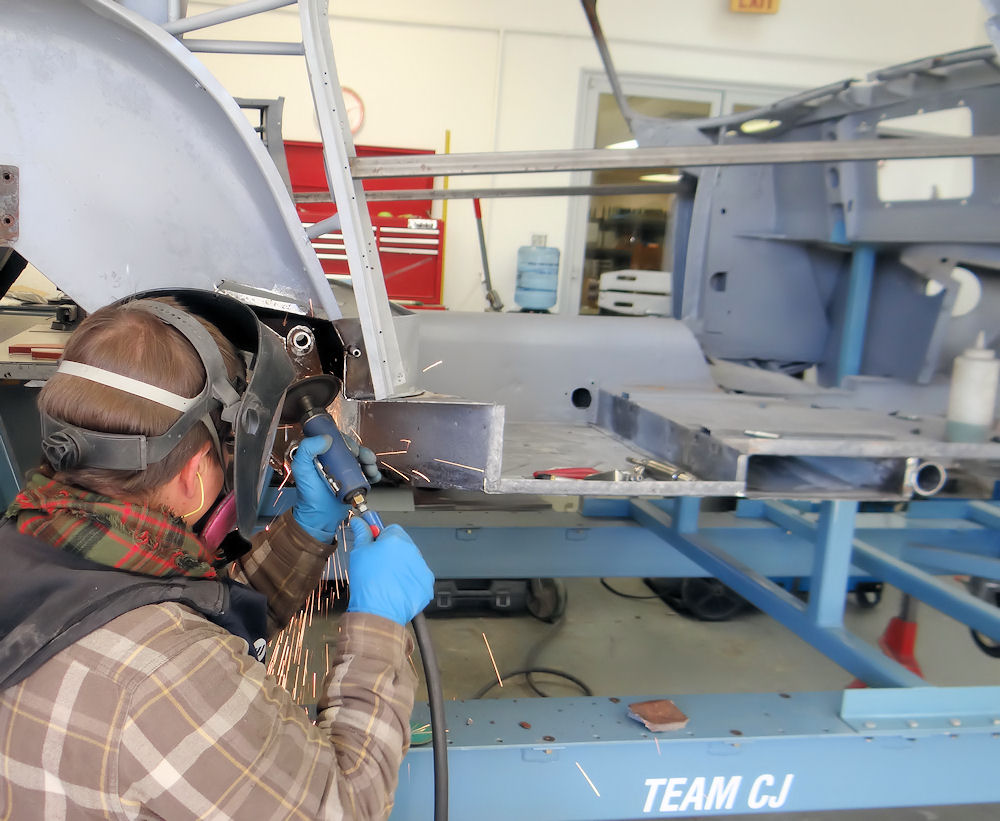 |
|
|
|
 |
 |
|
|
|
 |
 |
|
|
|
 |
 |
|
|
|
 |
 |
|
|
|
 |
 |
|
|
|
 |
 |
|
|
|
 |
 |
Speaking to a longtime previous ownerEarlier today (12/17/13) I had the great pleasure of speaking on the telephone with a lady called Joanie Waldman in Indiana. Mrs Waldman and her late husband Michael owned our DB4 for almost 30 years, before eventually selling it in November 2003.
In the early seventies, the Waldmans had been driving in Indianapolis when they spotted the Aston parked by the side of the road with a For Sale sign in the window. Initially they drove on by, but then Michael, who was apparently a huge James Bond and Aston Martin fan, told his wife they had to go back and check the car out. Mrs Waldman recalled how they both fell in love with the Aston, buying it on the spot! She told me how their daughter, now in her forties but just an infant at the time, used to love being driven around in the 'red car with the right hand steering'.
Sadly, Michael Waldman passed away in July 2013, otherwise his wife says he would have been thrilled to follow the restoration of his car on the Internet. Mrs Waldman has kindly offered to look for any documentation or photographs she might still have of the car from the time it was in their ownership. It was truly a joy for me to speak to someone who had so many happy memories of the old Aston, before it came into my hands.
As a sidebar to the above, the way I found Mrs Waldman is something of a story in itself. While searching on-line for Michael Waldman, who's name I had on several invoices dating back to the mid seventies, I was sad to come across an obituary in an Indianapolis newspaper that looked as if it might be the person I was looking for. I called the funeral home mentioned in the obituary and told the lady on the other end of the telephone that I was researching the history of a very special car that I believed may have belonged to the late Michael Waldman, who's funeral service had been held at the venue in July 2013. I told the lady I was hoping to contact relatives of Mr. Waldman, to see if he had indeed been the owner of my car. Somewhat amazingly, the lady said "You need to speak to Joanie Waldman, Michael's wife. She works here, let me get her for you!" A few moments later, Mrs Waldman came to the phone and said "Is this about the Aston Martin?"
This is the type of thing that makes owning these old cars very special for me..
In considering possible paint colors for my car, I am inclined to choose a color that was available when the car was new. From my research, it appears there were 10 paint color options for the S1 DB4, as follows:Originally my car was Peony Red with Beige hides. Although a final decision is still some way off, I think I have narrowed it down to Peony Red, Snow Shadow Grey or Deep Carriage Green.
- Desert White
- Peony Red
- Deep Carriage Green
- Wedgewood Blue
- Black
- Pale Primrose
- Satin Bronze
- Sea Green
- Snow Shadow Grey
- Elusive Blue
 |
 |
 |
|
|
|
|
With the welding almost wrapped up at the front right corner of the chassis, we sealed everything up in red oxide primer before turning our attention to the other side of the engine bay.
 |
 |
Series 1 specification mystery solved?
As with the any restoration project, the countless hours of research is all part of the fun! In that vein, I have read several sources outlining the differences in specification between early and late Series 1 cars, changes introduced at S2, and so on and so forth. One of the things I have seen most often is that of the 150 S1 cars built, the first fifty cars featured frameless door windows, curved quarter light glass and rear hinged bonnets. This oft cited information confused me, as my car is chassis number 206, presumably making it the 106th DB4 produced, and it has all the early features apparently only attributable to the first 50 cars.As I always try to do in such circumstances, for clarification I went to what I consider to be the ultimate source of reliable archival information relating to vintage Aston Martins, namely Aston Service Dorset. James Forshaw of Aston Service and I discussed the apparent anomaly and James told me that it has always been his belief that all S1 DB4s had frameless door windows, rear hinged bonnets and curved quarter light glass. James was able to reference the original "factory build book", which clearly states that changes to these three aspects of the design occurred at chassis number 251, or the first of the S2 cars.
I suspect that perhaps some previous researcher, many years ago, mistakenly recorded (chassis number) 151 rather than 251 as the point at which these changes were made, and that error has simply been accepted and repeated over the years, appearing in several subsequent publications.
I would be very interested to hear from my fellow S1 DB4 owners on this topic. Until someone shows me evidence to the contrary, I am going to consider this particular mystery solved, thanks to my friend James Forshaw at Aston Service Dorset.
Now, back to the chassis restoration..
 |
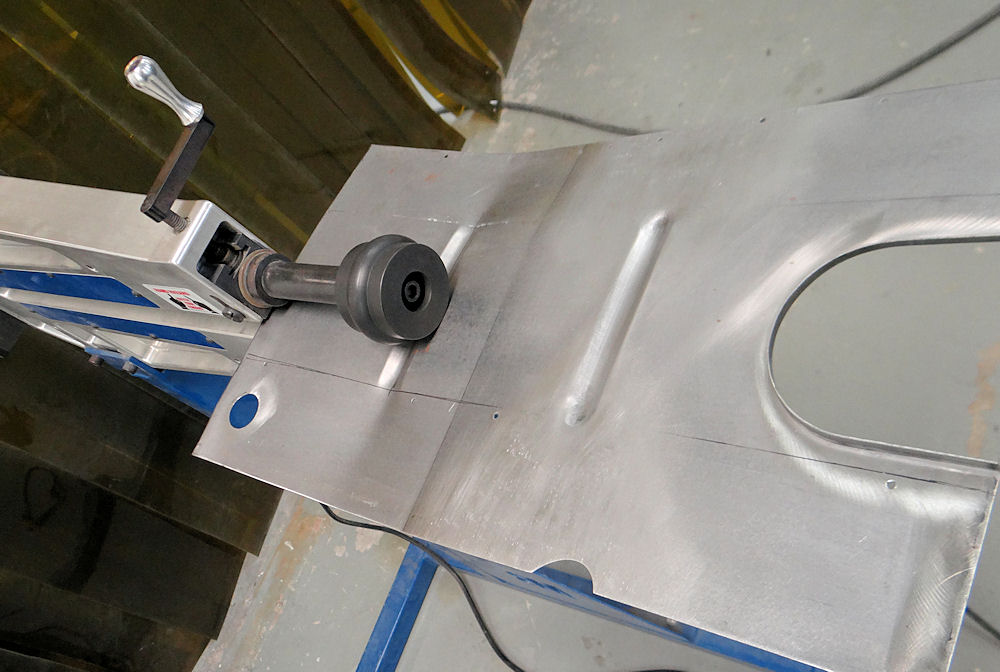 |
|
with new chrome moly tubing |
|
|
|
|
 |
 |
|
reproduced precisely per the original panel |
|
|
|
|
 |
 |
|
|
on weld zones |
|
|
|
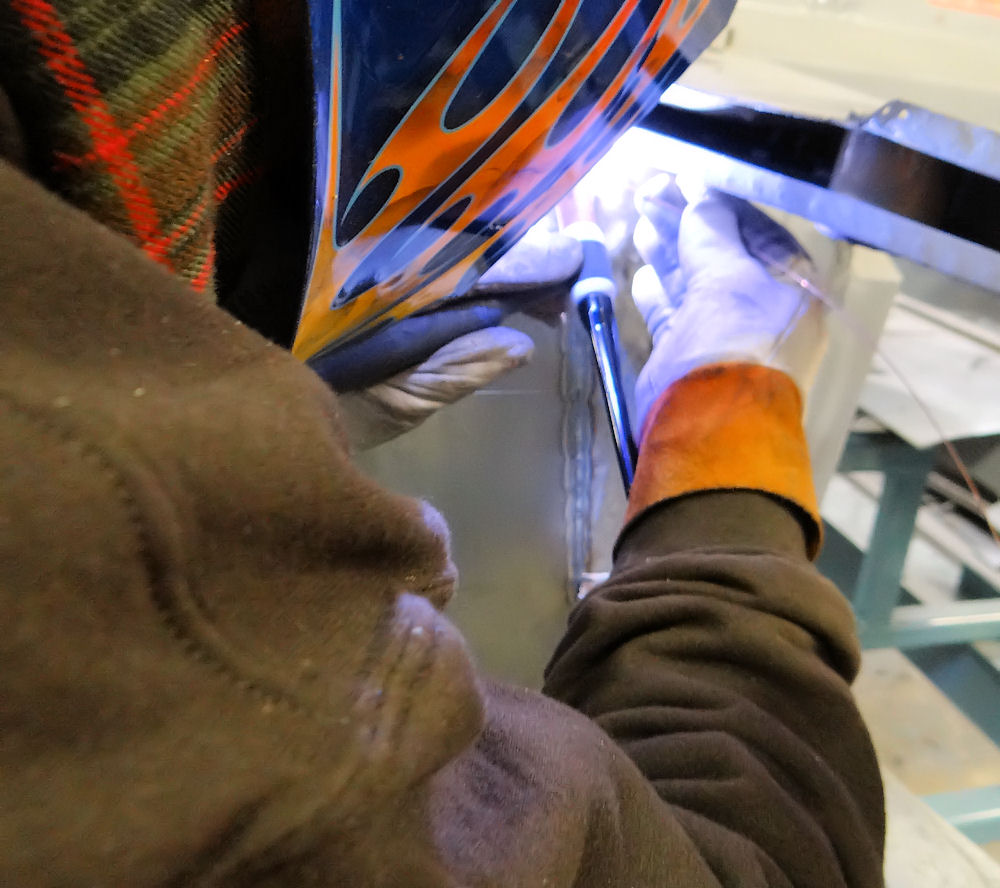 |
 |
|
|
|
|
|
|
 |
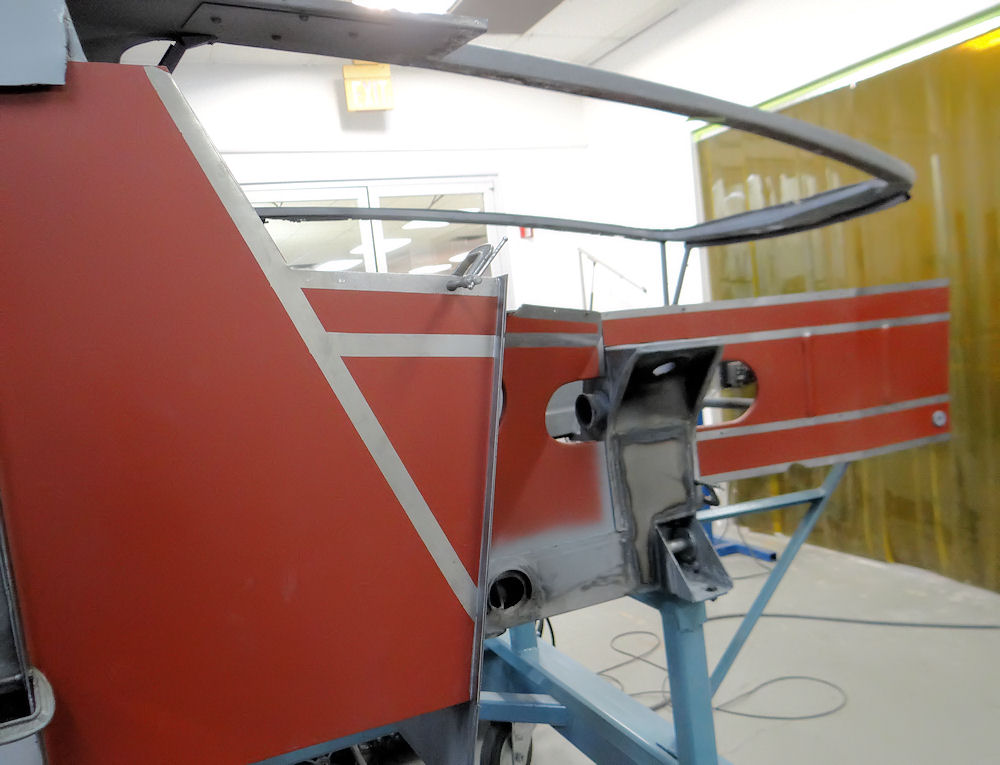 |
|
|
|
After literally years of deliberation, I have finally decided that I am going to convert my car to left hand drive. I will carefully preserve all the RHD components in case some future owner wishes to revert to right hand drive.
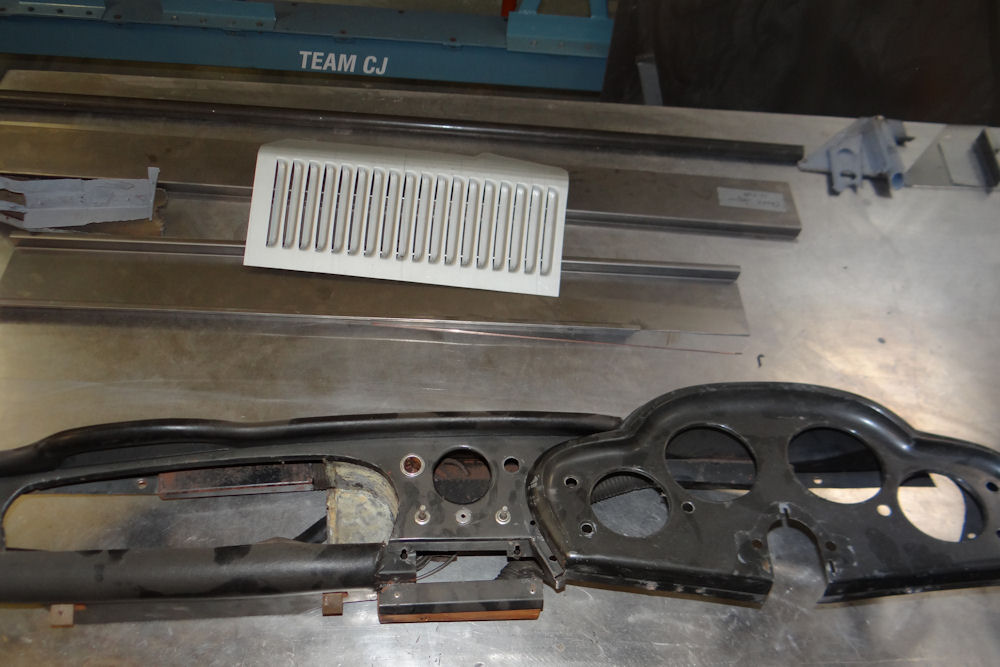 |
 |
|
|
retained for future generations |
|
|
|
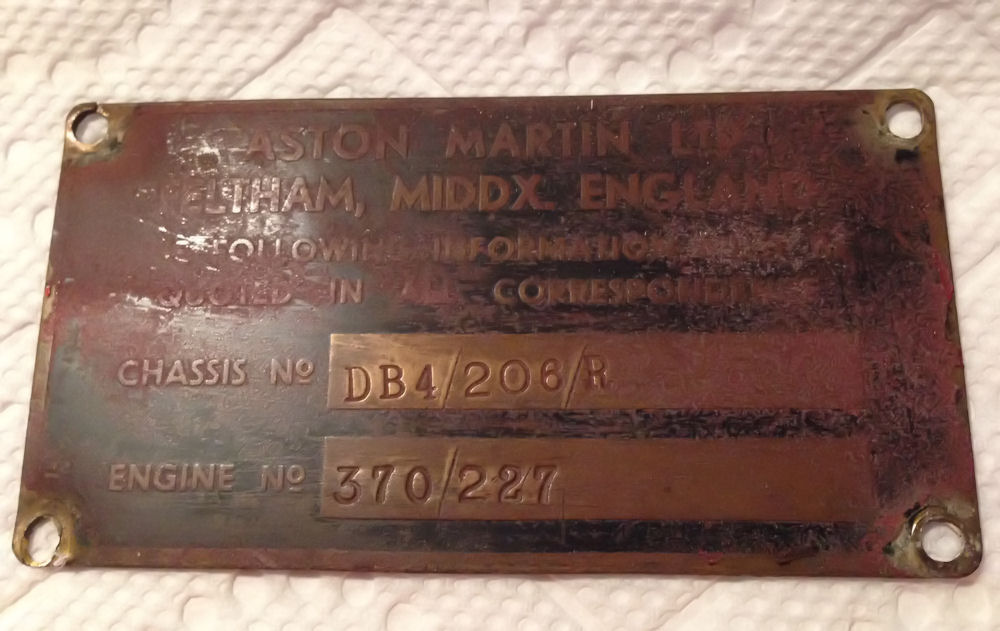 |
 |
|
to see how nice we can make the original.. |
More shiny new sheet metal and aluminium...
 |
 |
|
|
|
|
|
|
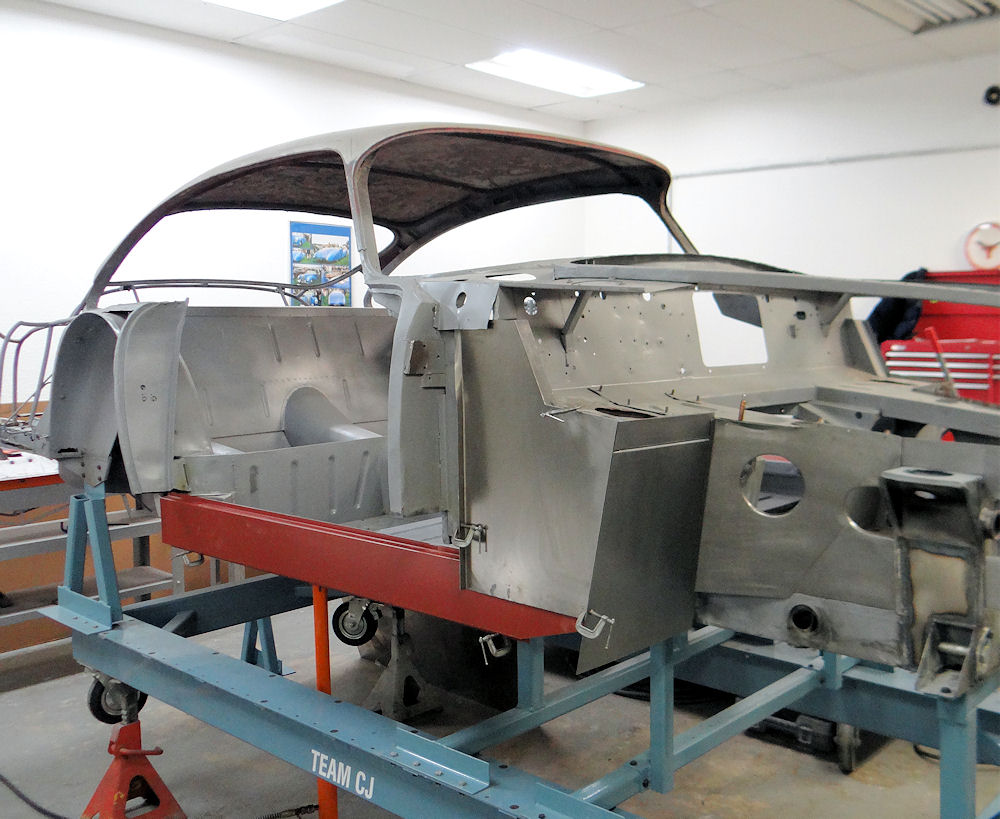 |
 |
|
I walk past Aston! |
|
|
|
|
 |
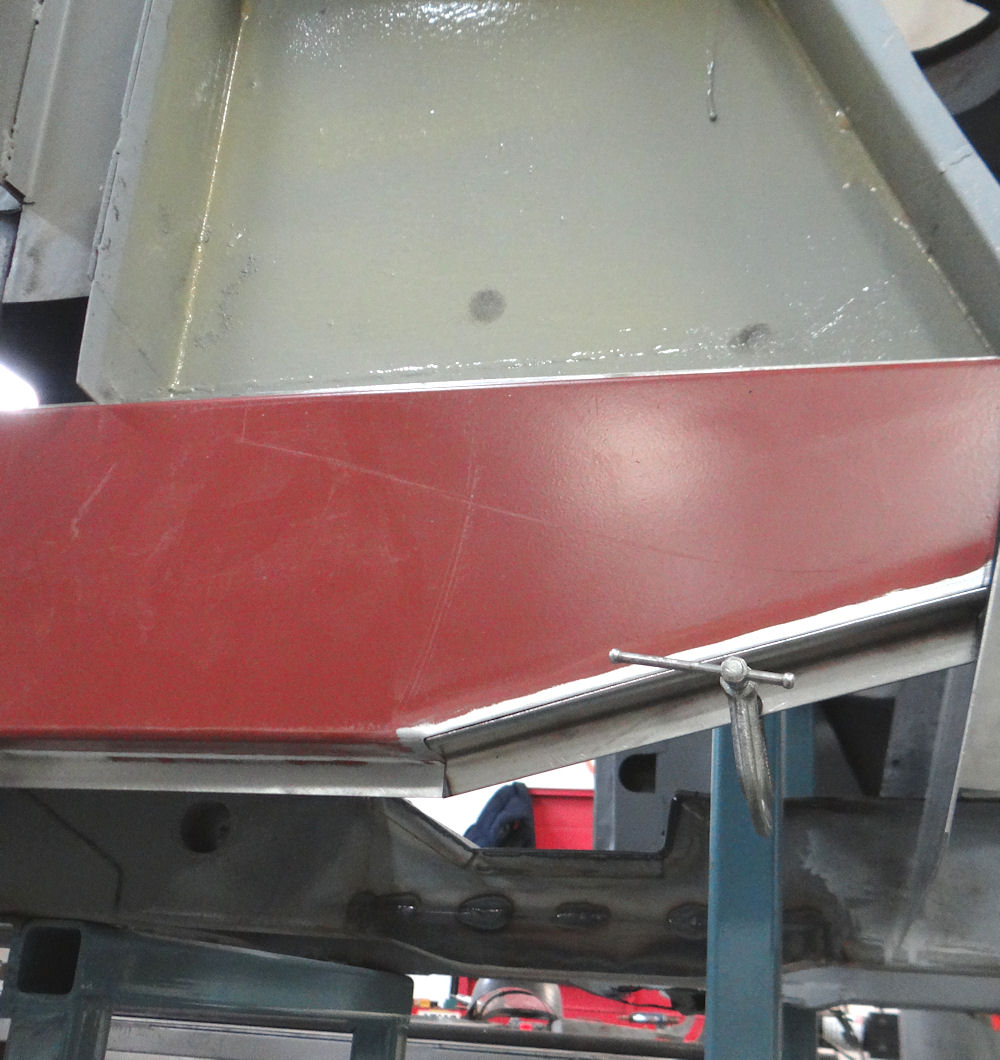 |
|
|
|
|
|
|
 |
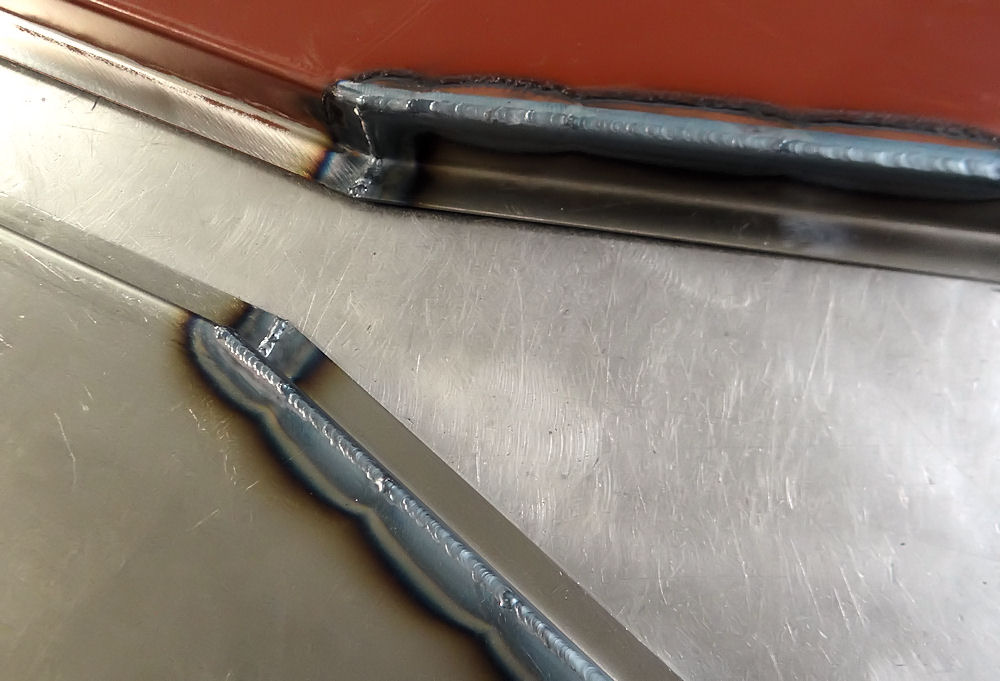 |
|
|
|
|
|
|
 |
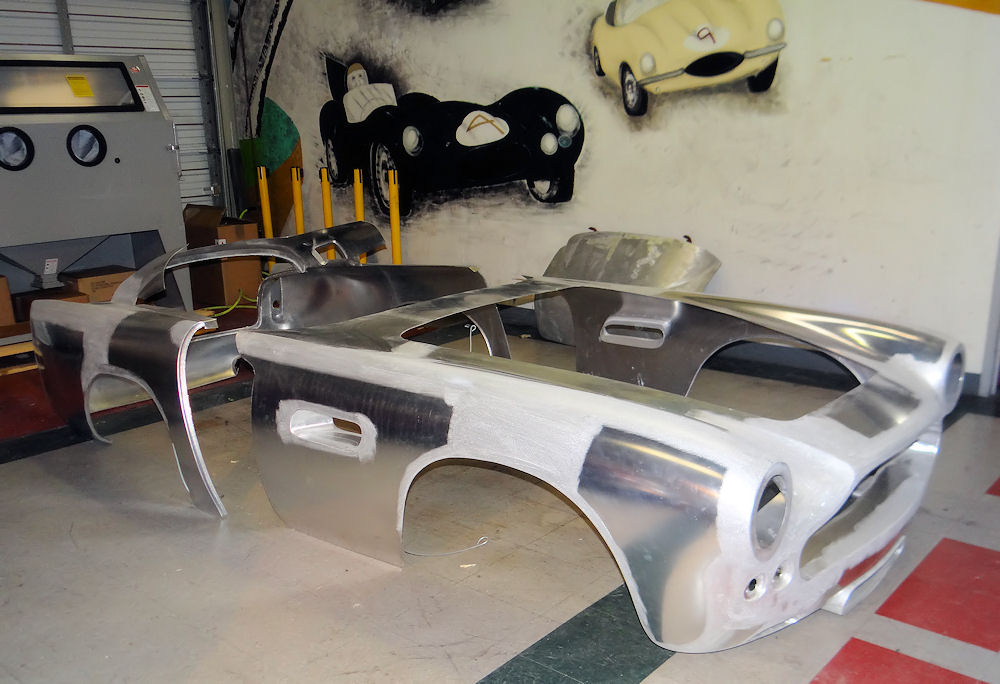 |
|
|
|
Lots of progress with the chassis restoration...
 |
 |
|
|
|
 |
 |
|
|
|
 |
 |
|
|
|
 |
 |
|
|
|
 |
 |
At first glance, the rear jacking point on the right side of the car looked to be pretty solid. Upon closer examination, however, the inner surfaces of the structure were found to be corroded, so a new jacking point is being fabricated and installed.
 |
 |
|
|
|
|
|
|
 |
 |
|
|
|
|
|
|
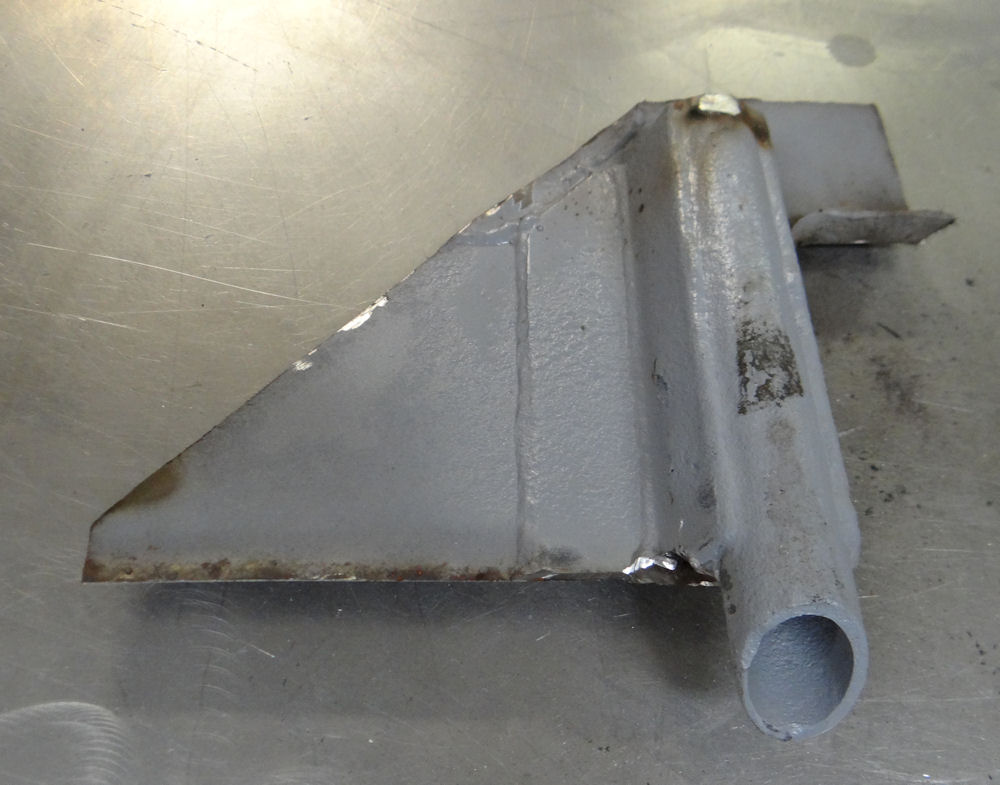 |
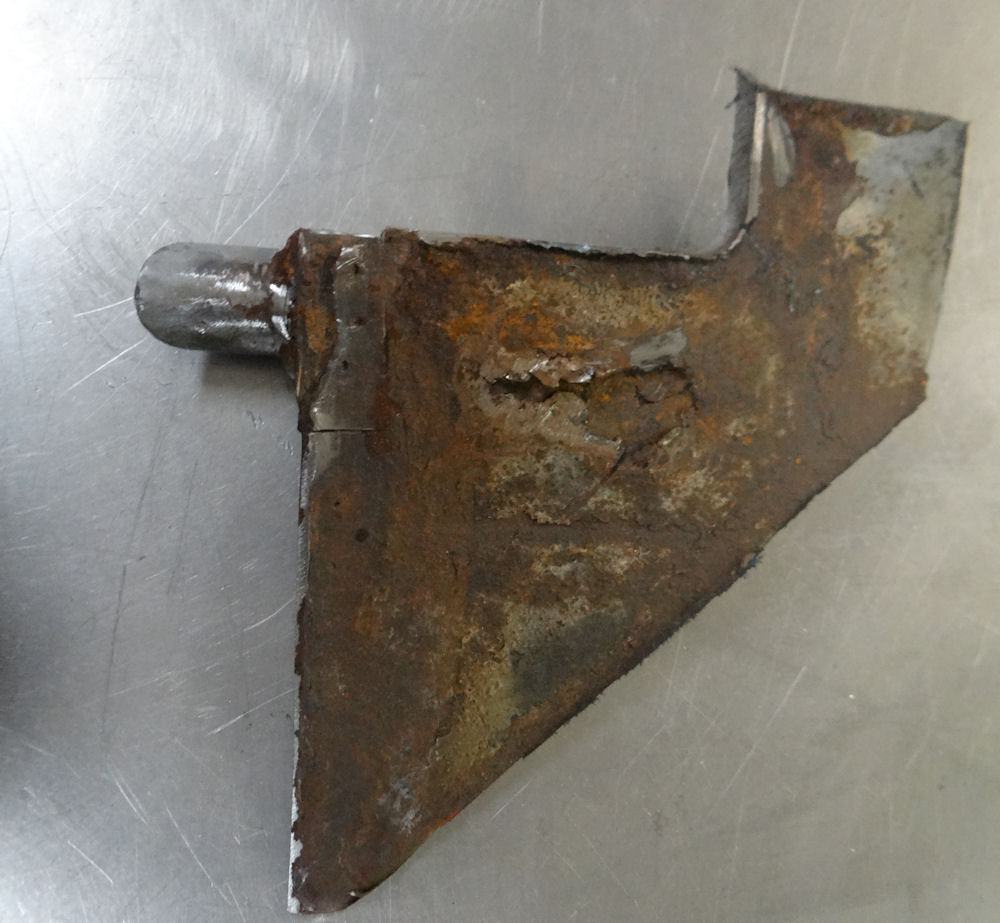 |
|
|
|
|
|
|
 |
 |
|
|
|
|
|
|
 |
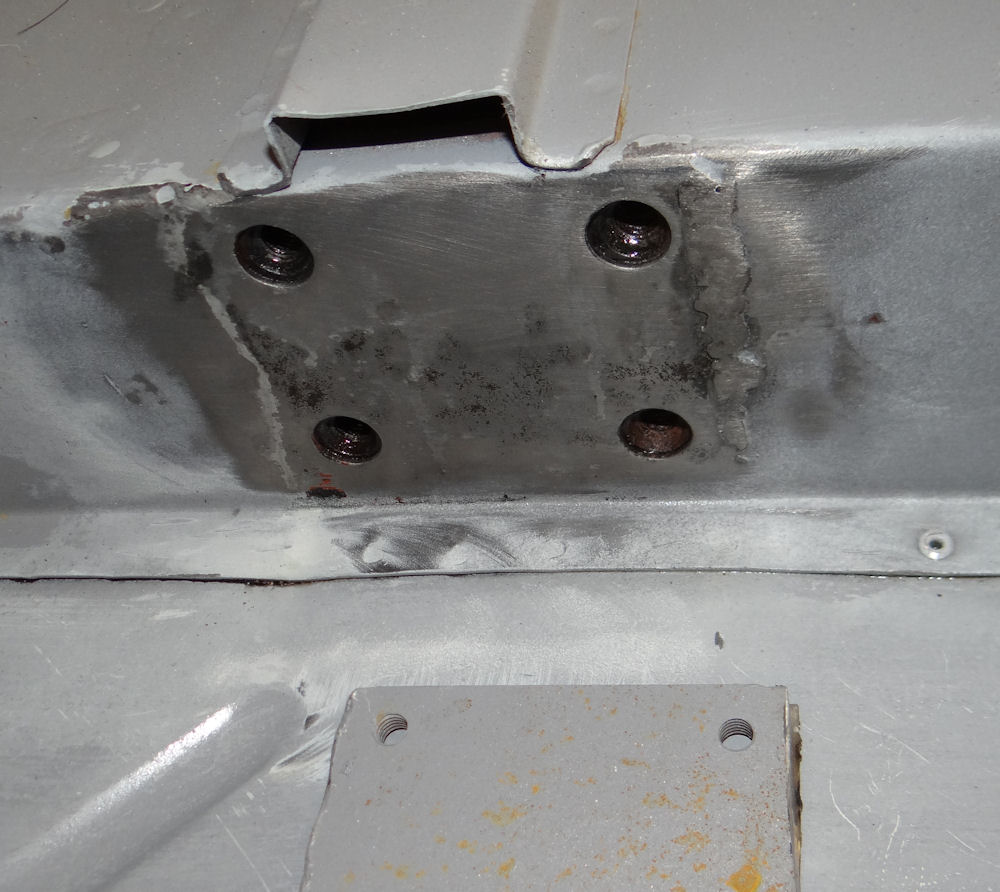 |
|
|
|
|
|
|
 |
 |
|
|
|
Chassis rust repairs, continued..
 |
 |
|
perfectly when offered into place |
|
|
|
|
 |
 |
|
|
|
|
|
|
 |
 |
|
|
|
 |
 |
|
|
|
|
|
|
 |
 |
|
gauge steel than the original |
|
|
|
|
 |
 |
|
|
|
More rust repairs in the platform chassis....
 |
 |
|
|
|
|
|
|
 |
 |
|
|
|
|
|
|
 |
 |
|
|
|
|
|
|
 |
 |
|
|
|
|
|
|
 |
 |
|
|
|
|
|
|
 |
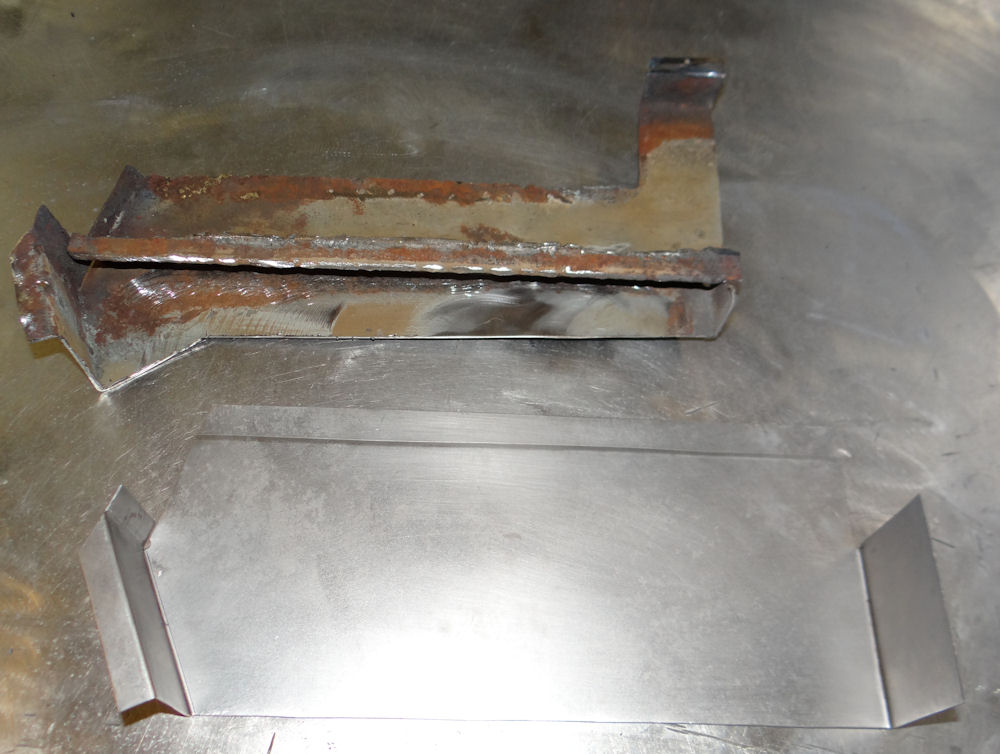 |
|
|
|
|
|
|
 |
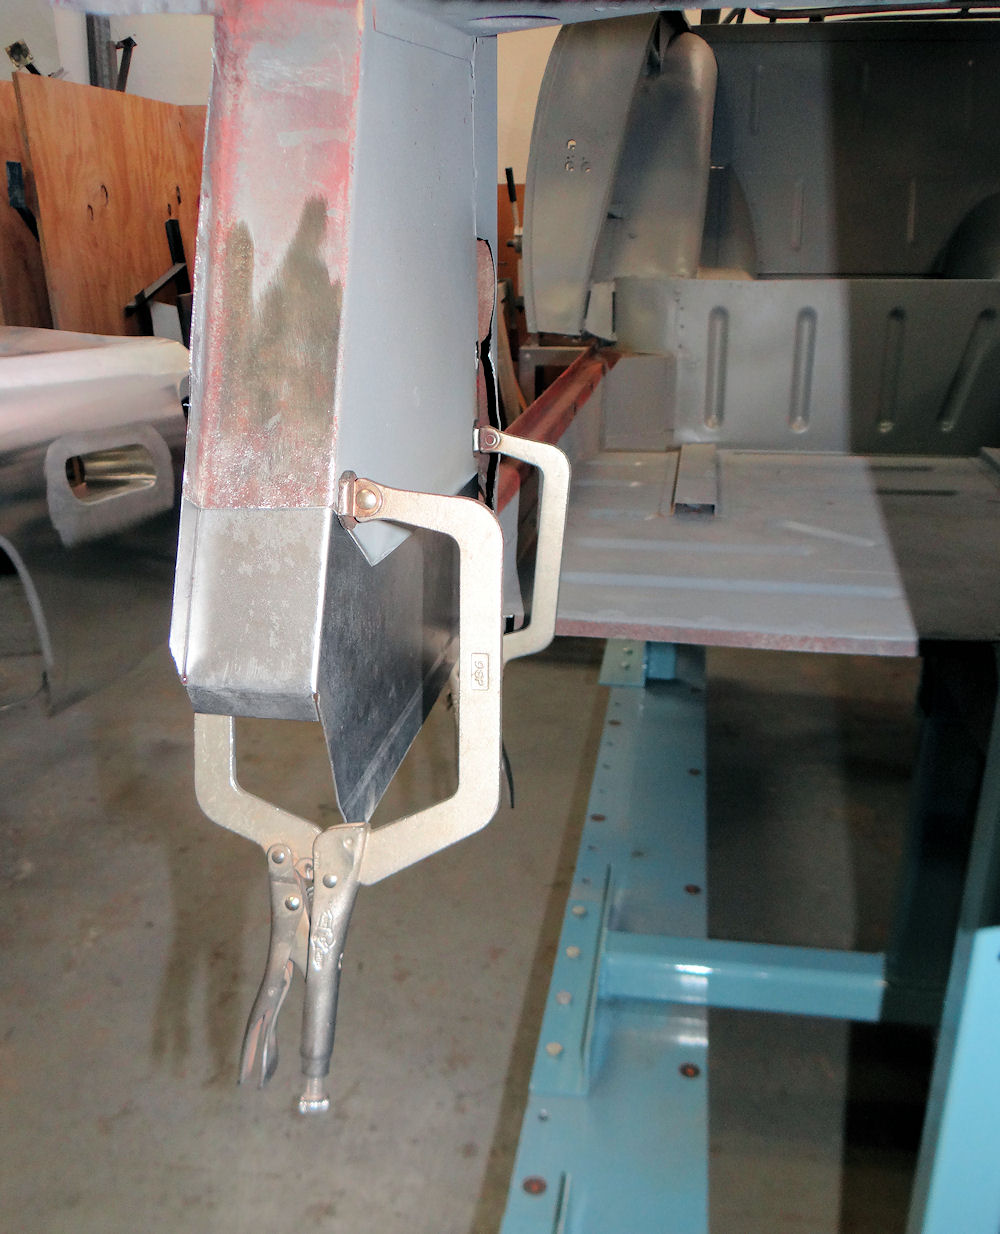 |
|
|
|
|
|
|
 |
 |
|
|
|
|
|
|
 |
 |
|
|
|
|
|
|
 |
 |
|
|
|
|
|
|
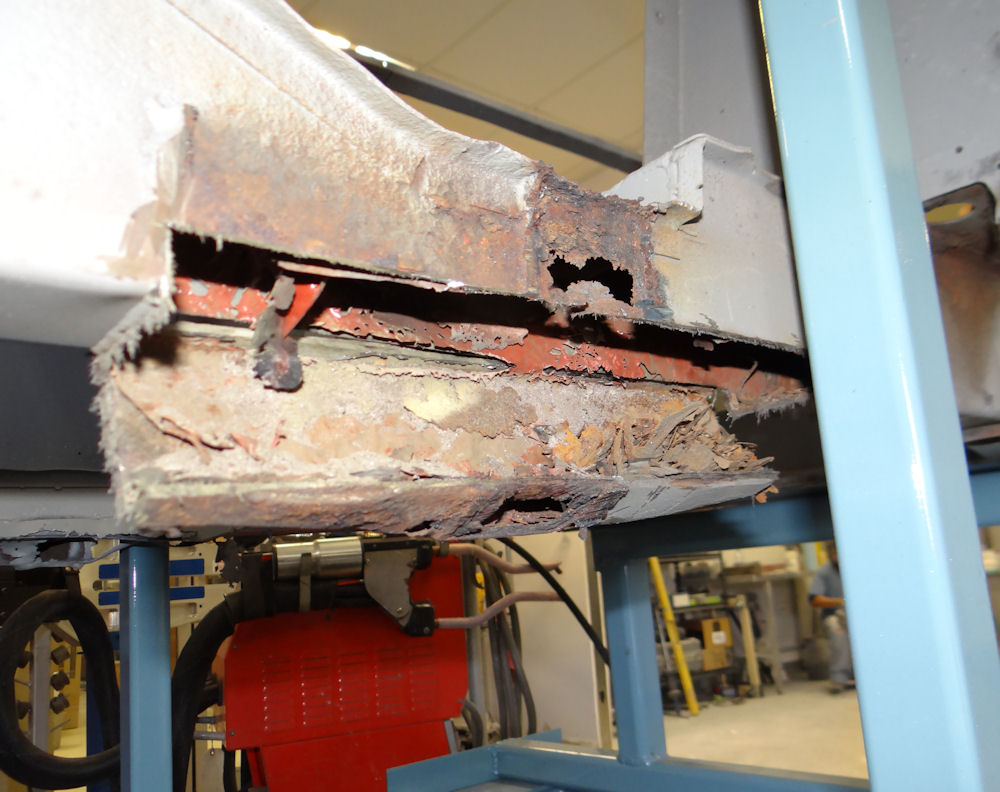 |
 |
|
|
|
|
|
|
 |
 |
|
|
|
|
|
|
 |
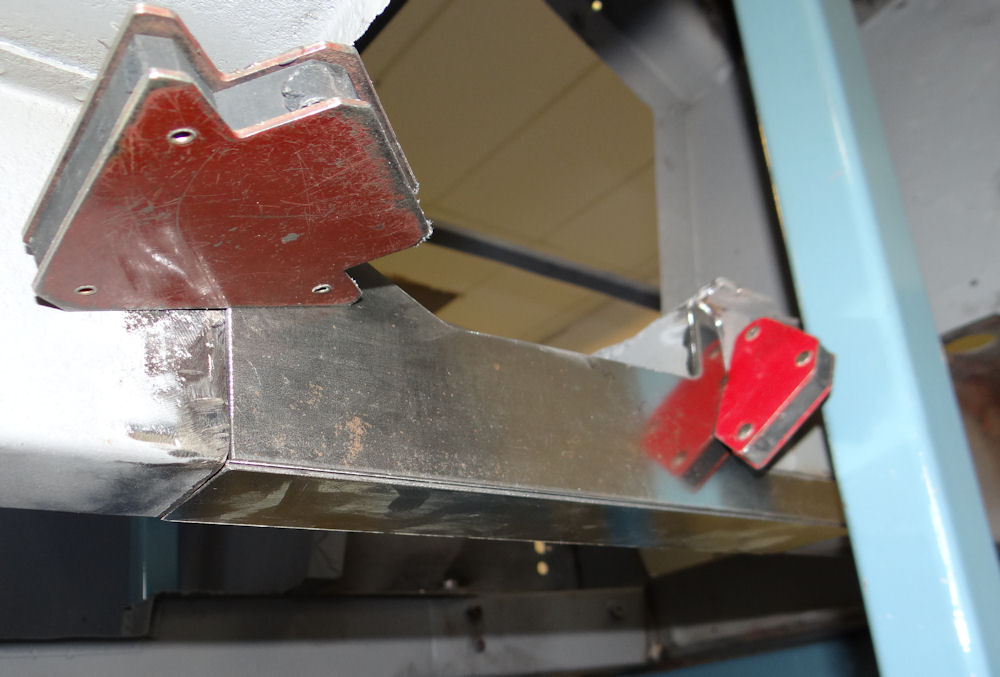 |
|
|
|
|
|
|
 |
 |
|
|
|
|
|
|
 |
 |
|
|
|
|
|
|
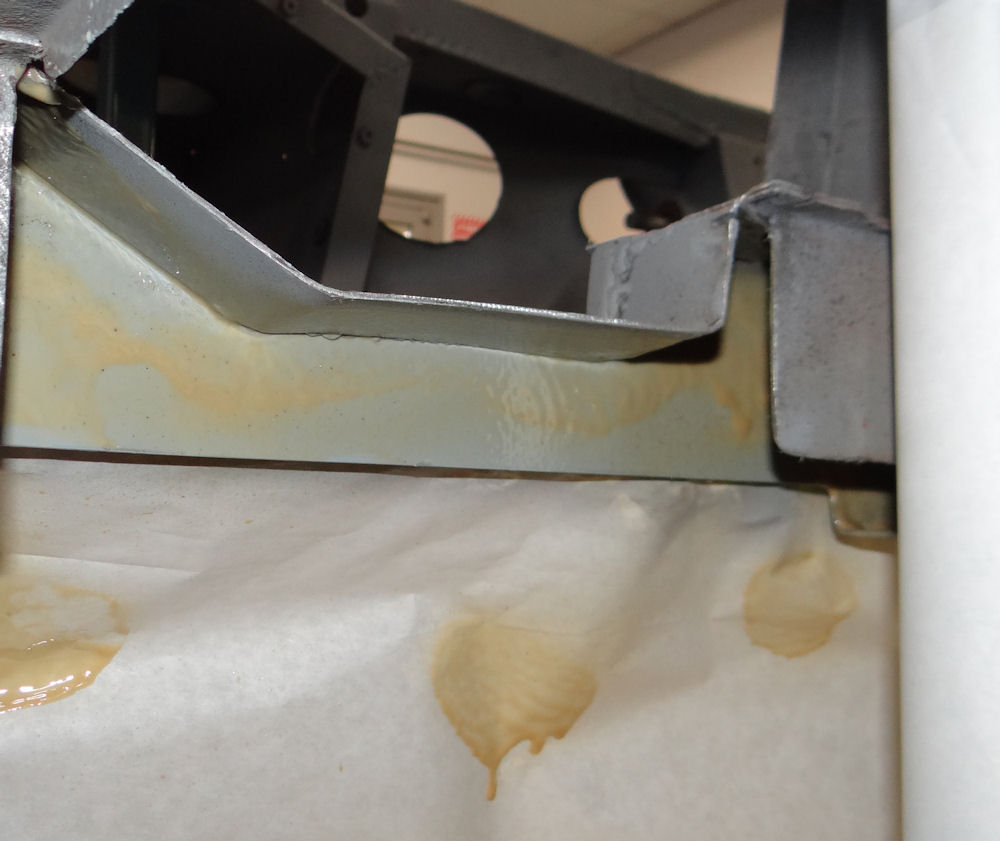 |
 |
|
|
|
|
|
|
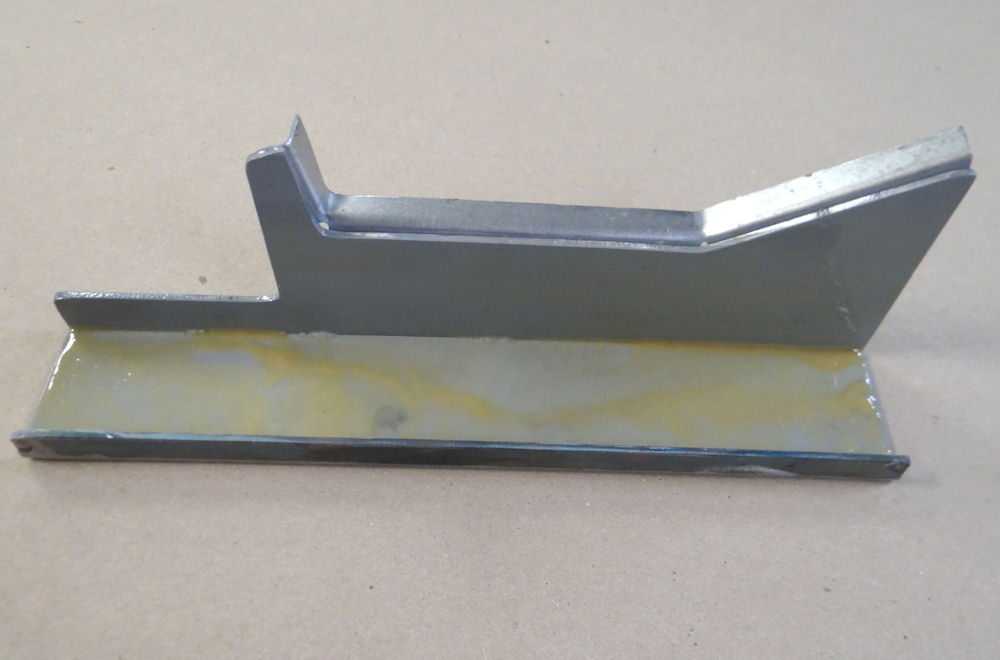 |
|
More progress with the superleggera chassis...
 |
 |
|
|
|
 |
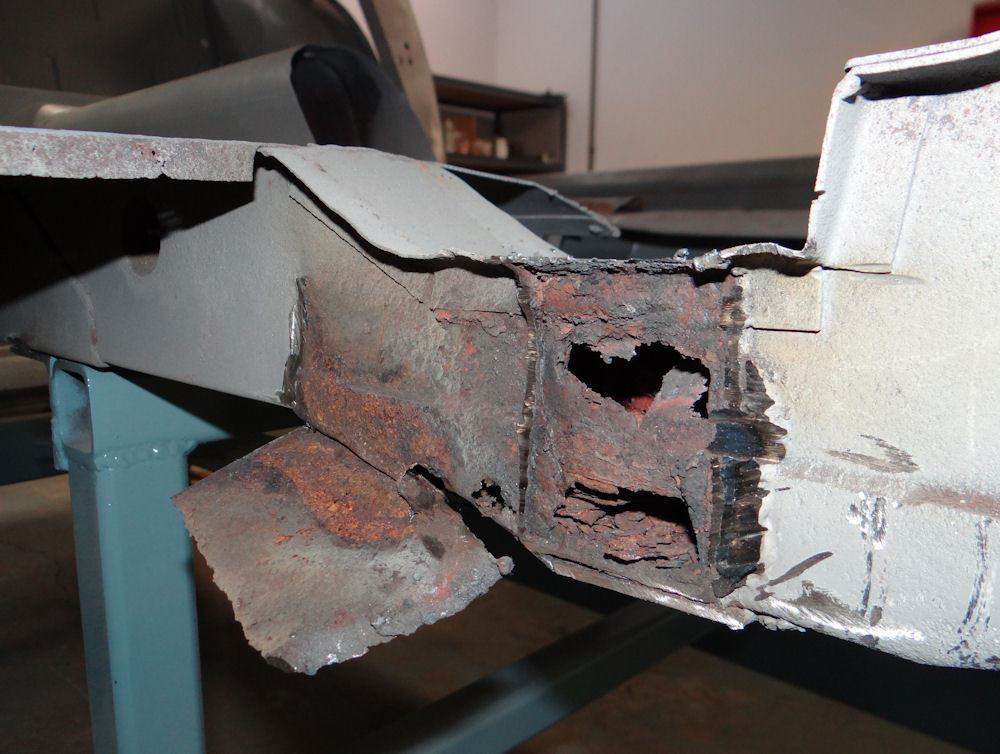 |
|
|
|
 |
 |
|
|
|
 |
 |
|
|
|
 |
 |
|
|
|
 |
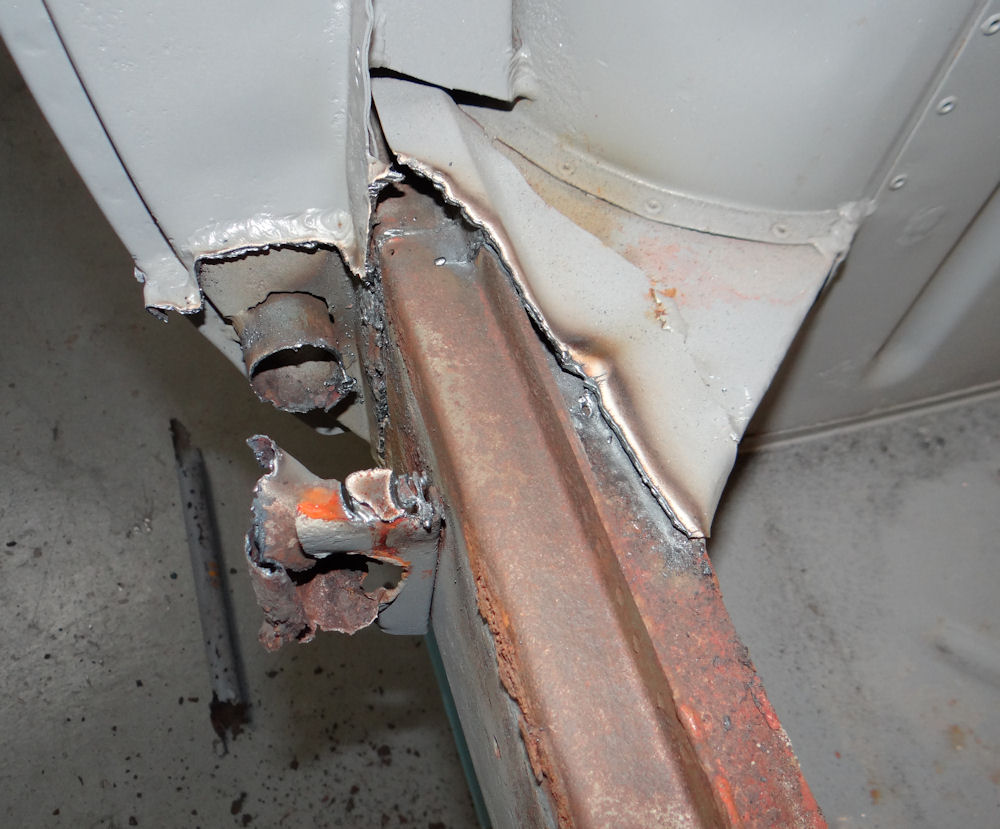 |
|
|
|
 |
 |
|
|
|
 |
 |
|
|
|
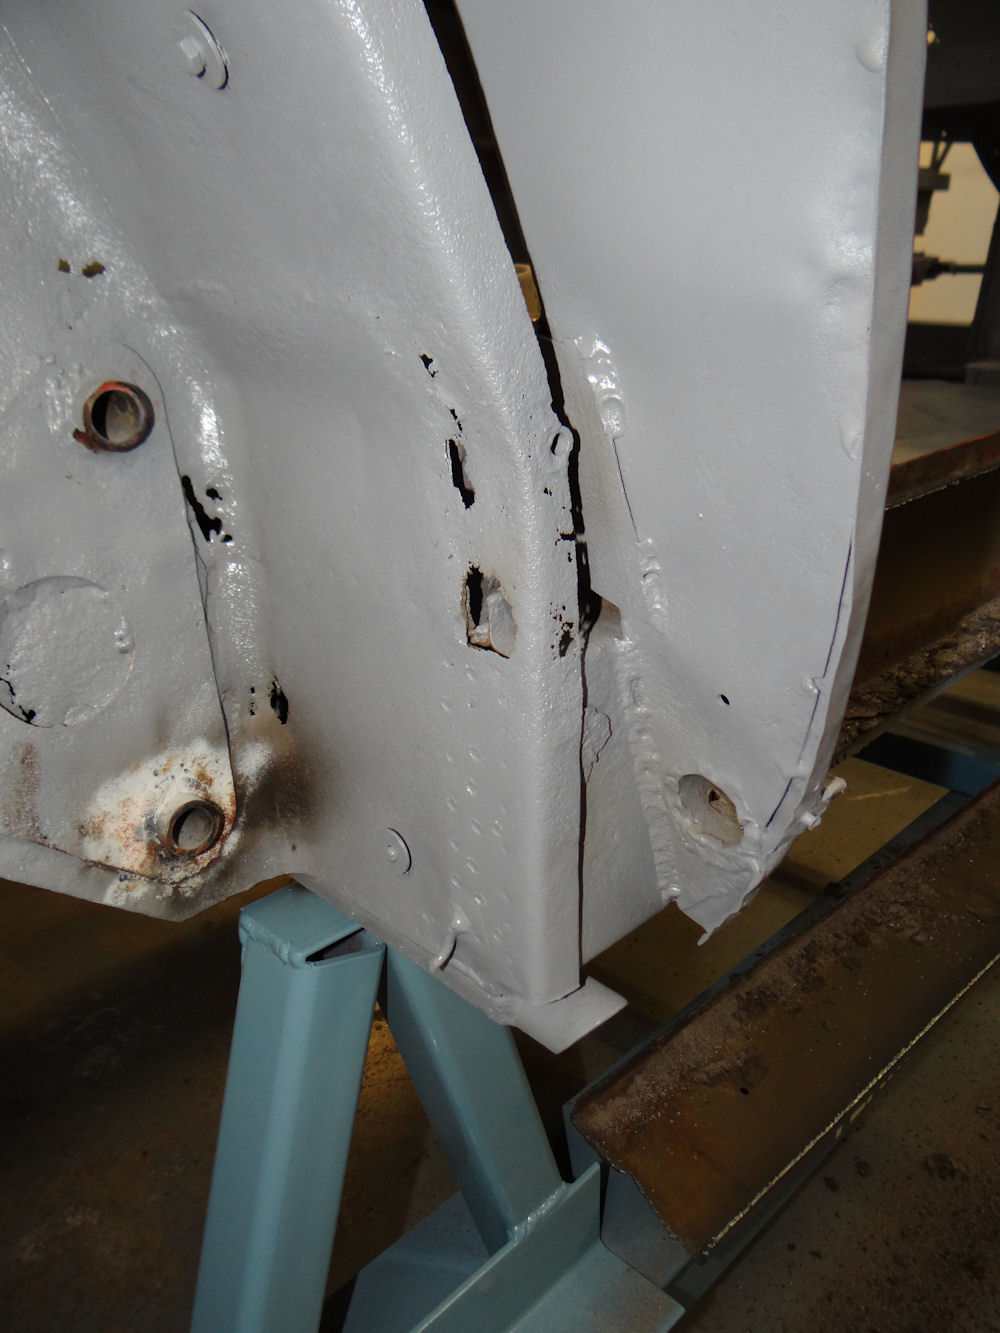 |
 |
|
|
|
 |
 |
|
|
|
 |
 |
|
|
|
 |
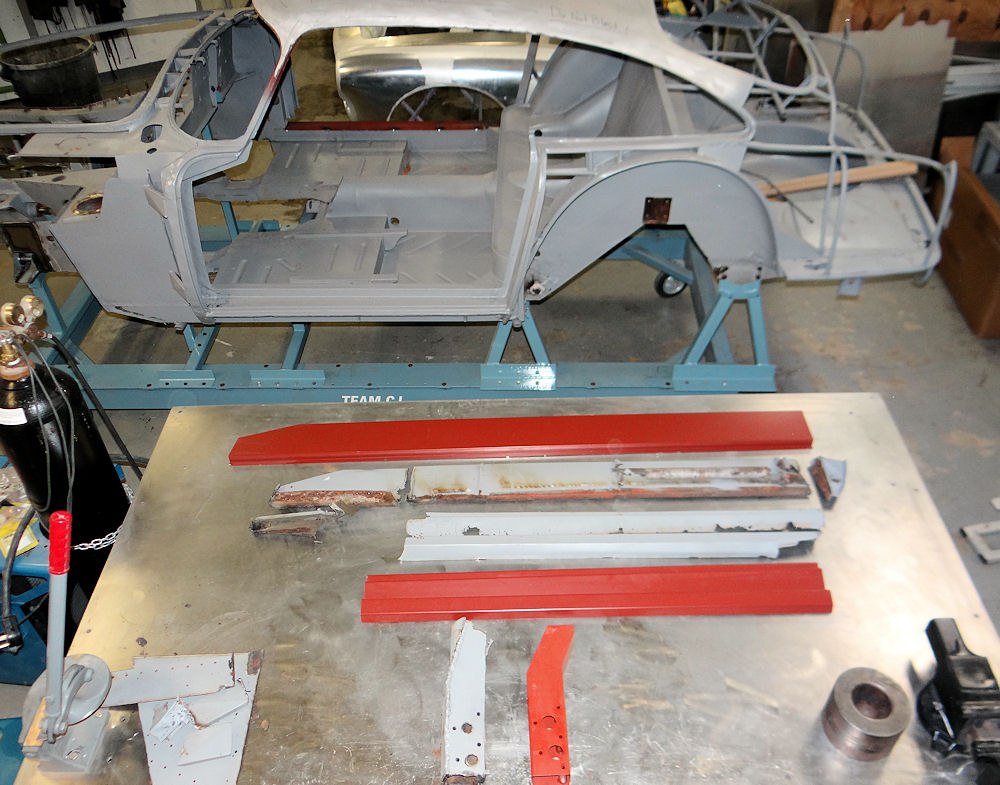 |
I have been having fun watching Jake fabricating more panels for the DB4...
 |
 |
|
hand side of the engine bay |
|
|
|
|
 |
 |
|
|
|
|
|
|
 |
 |
|
|
|
Jake has been busy in the engine bay...
 |
 |
|
|
|
|
|
|
 |
 |
|
|
|
|
|
|
 |
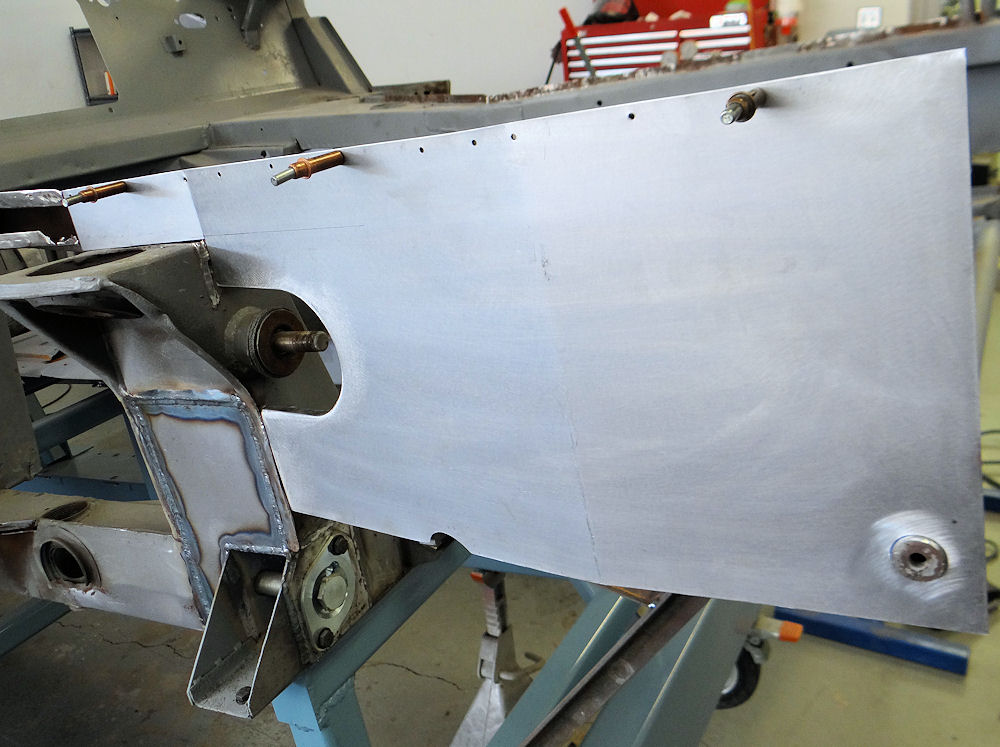 |
|
|
|
|
|
|
 |
 |
|
|
|
|
|
|
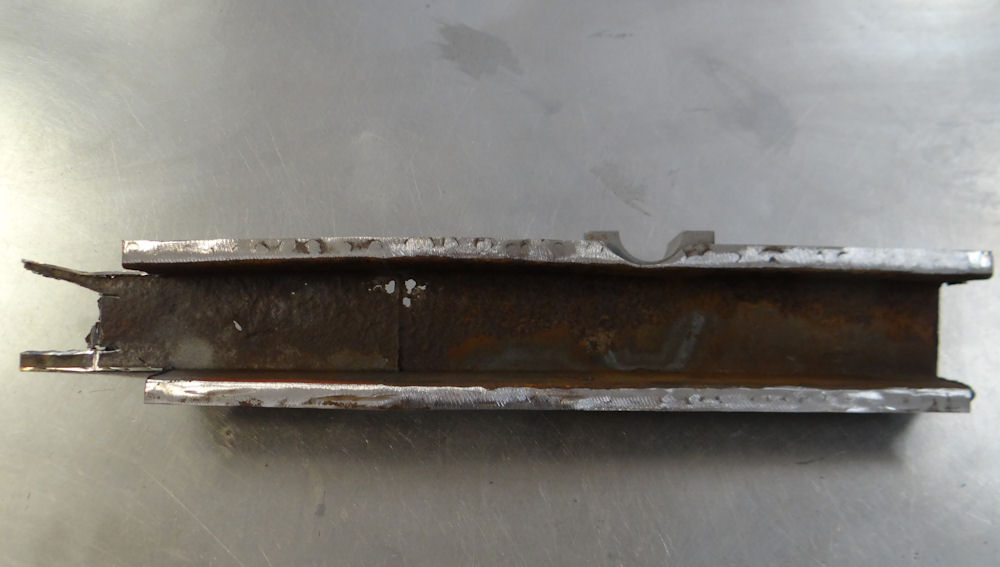 |
 |
|
|
|
|
|
|
 |
 |
|
|
|
Reconstructing the engine bay side frame rails..
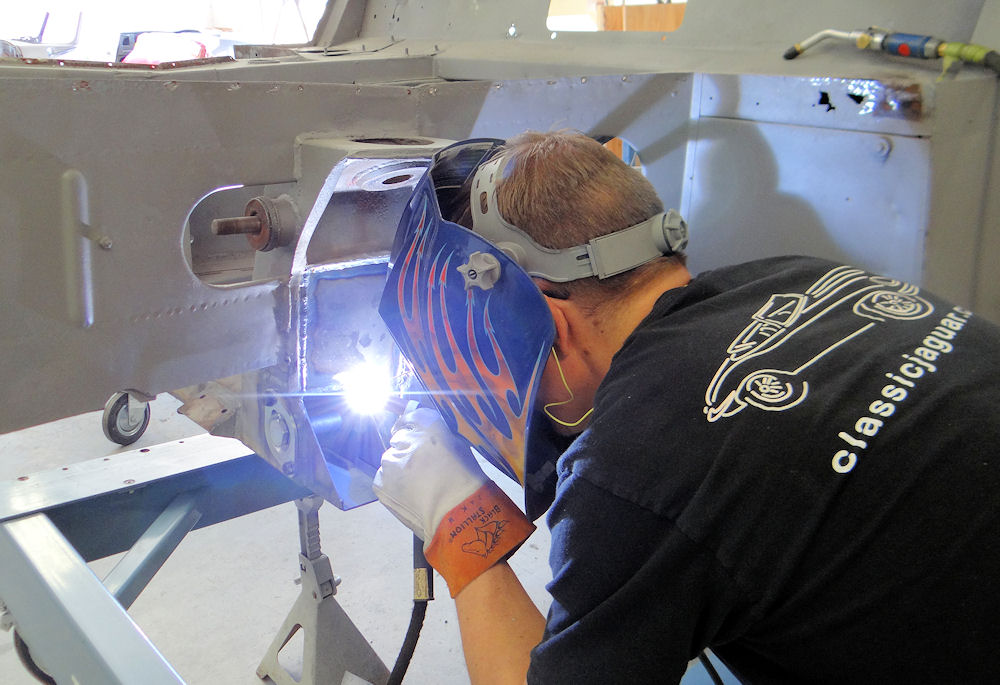 |
 |
|
|
|
|
|
|
 |
 |
|
|
|
|
|
|
 |
 |
|
|
|
|
|
|
 |
 |
|
|
|
|
|
|
|
|
|
|
|
|
More chassis repairs, welding new sheet metal in place...
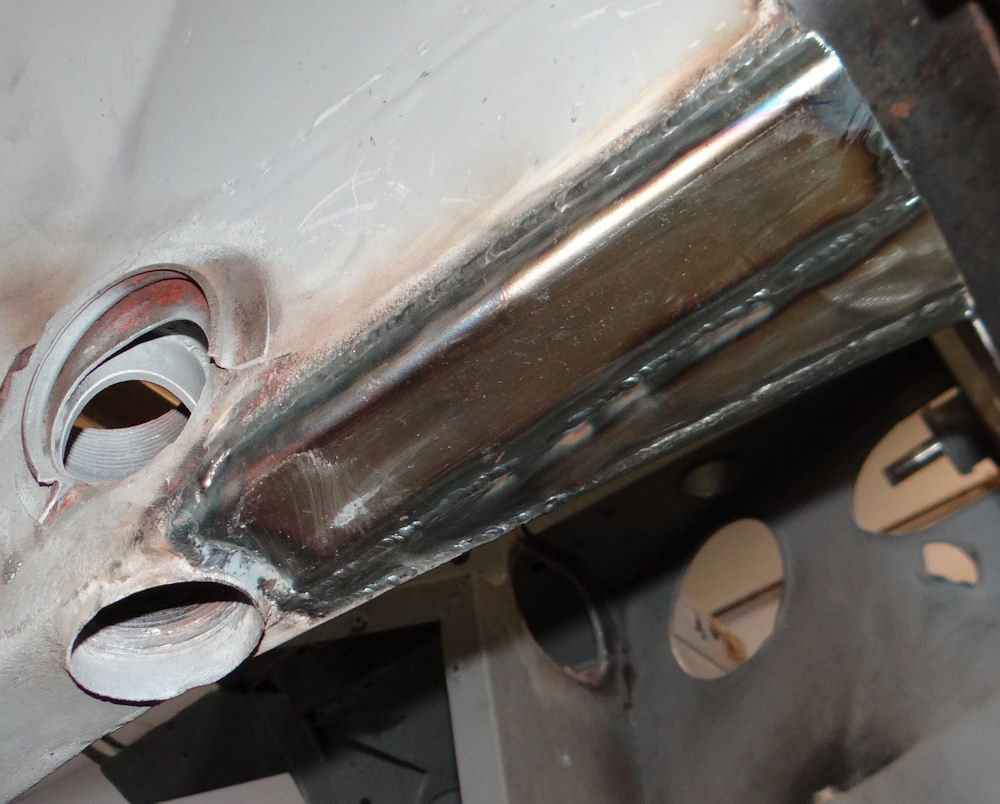 |
 |
|
|
|
|
|
|
 |
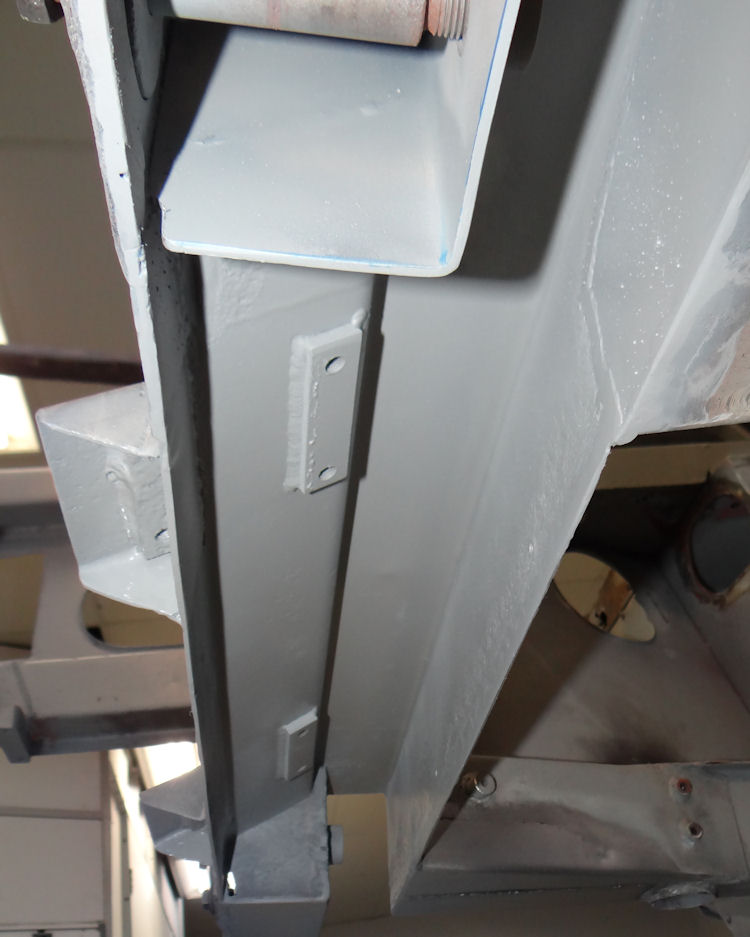 |
|
|
|
|
|
|
 |
 |
|
|
the bottom edge of frame crossmember |
|
|
|
 |
 |
|
|
|
|
|
|
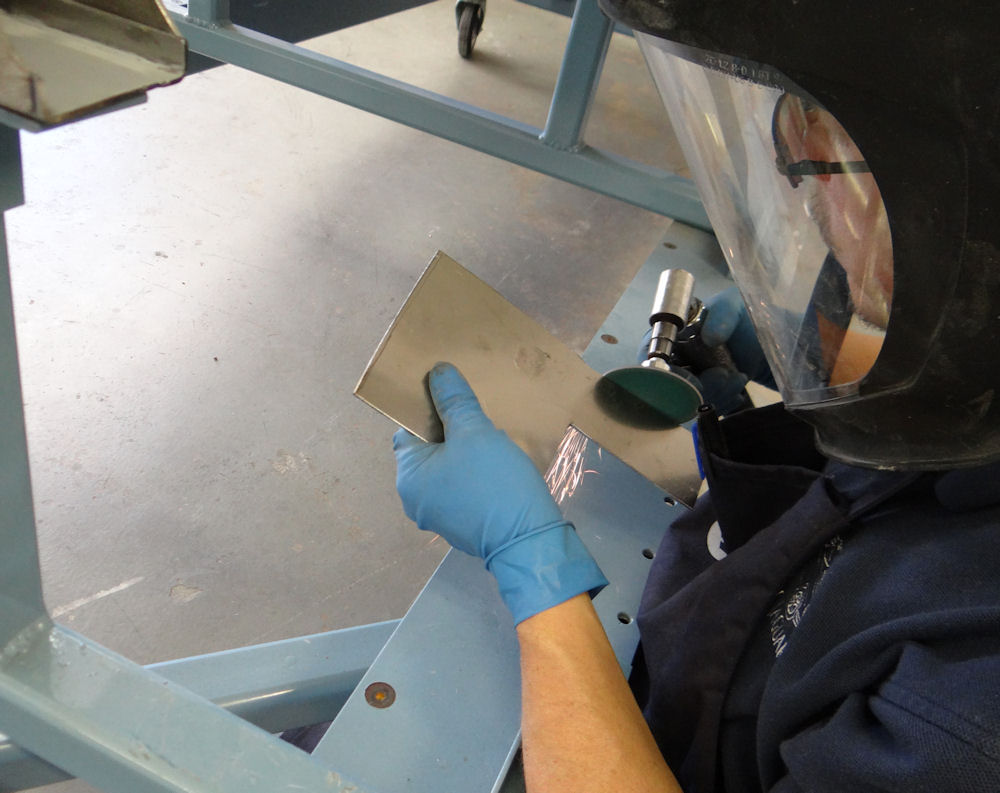 |
 |
|
|
|
|
|
|
 |
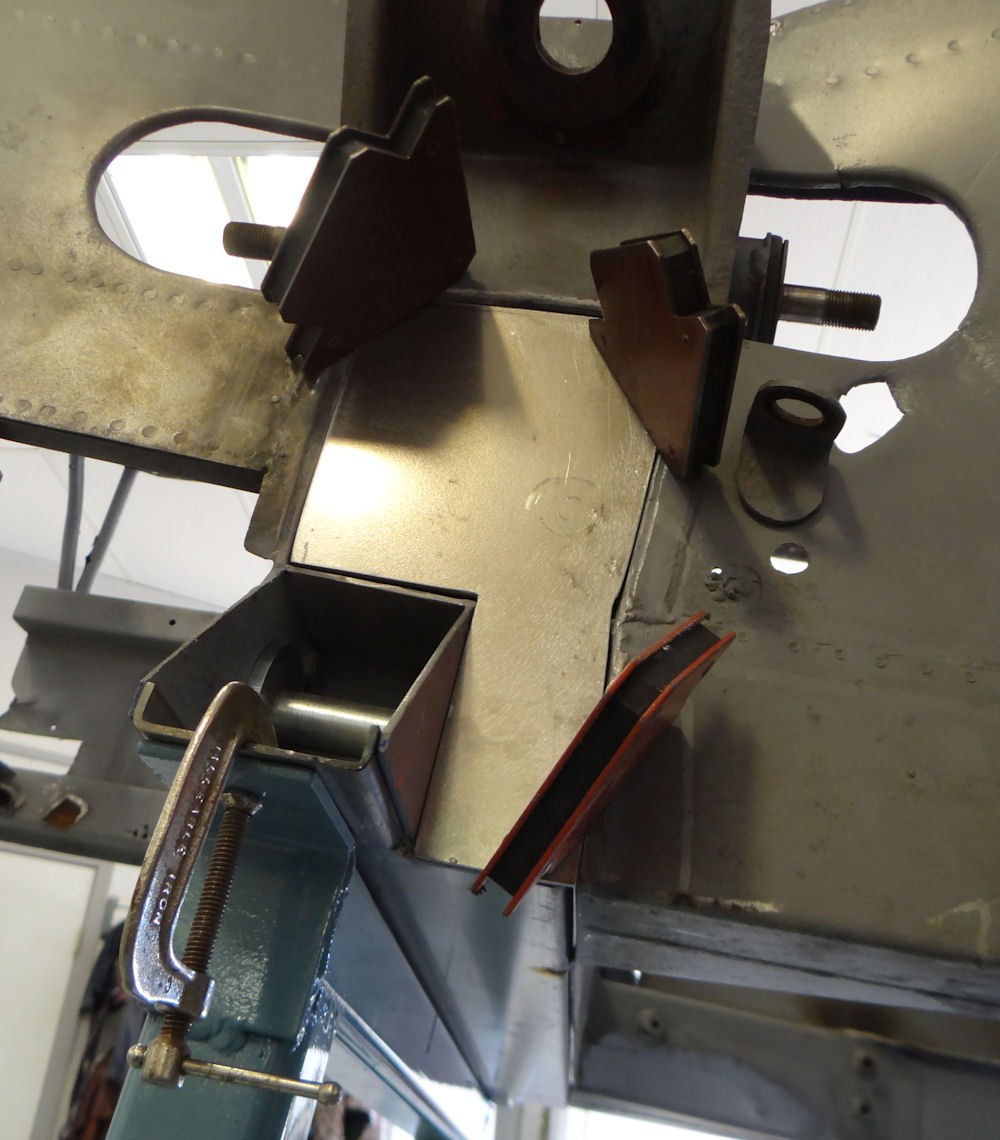 |
|
|
|
 |
 |
|
|
|
|
|
|
 |
 |
|
|
|
|
|
|
 |
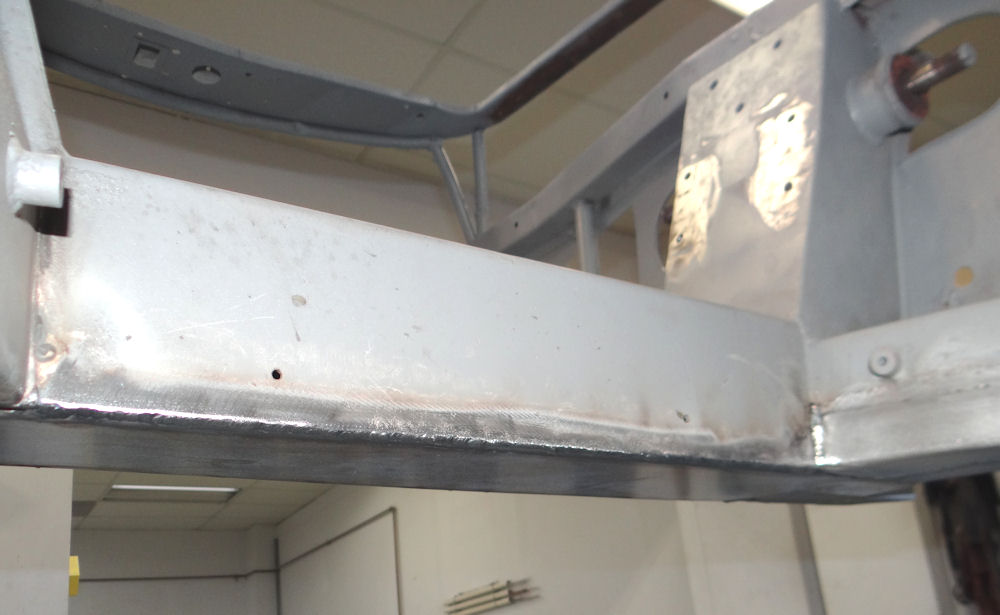 |
|
|
front cross-member is now better than new |
Chassis repairs, suspension rebuild components received from Aston Service Dorset...
 |
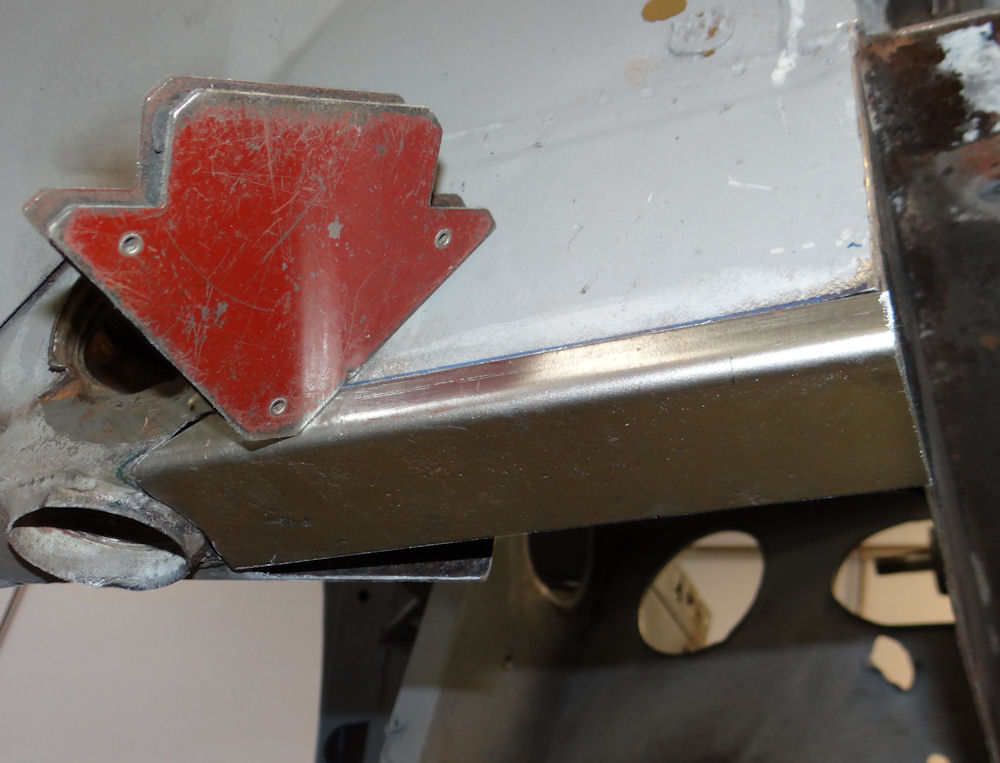 |
|
reconstructing this area of the frame |
|
|
|
|
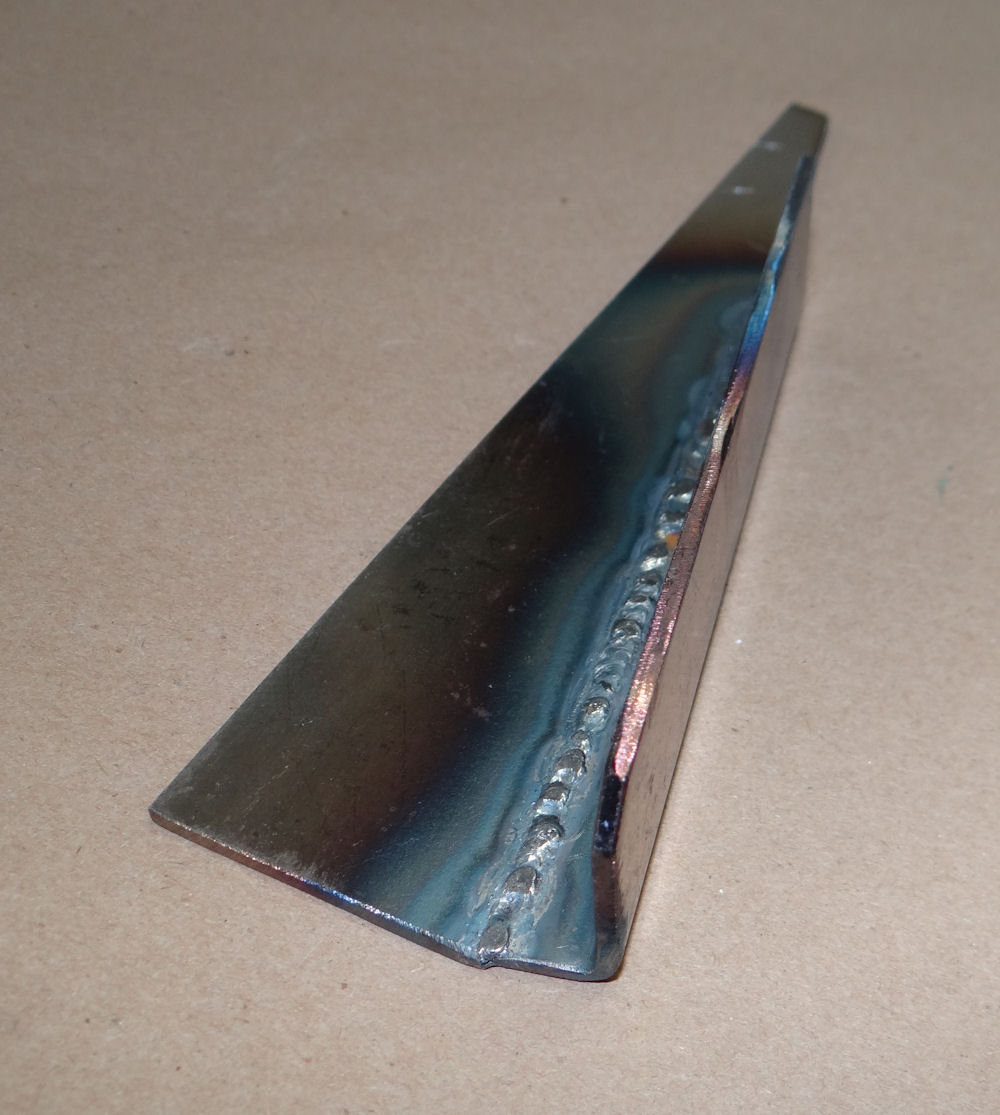 |
 |
|
|
|
|
|
|
 |
 |
|
|
prior to welding new section in place |
|
|
|
|
|
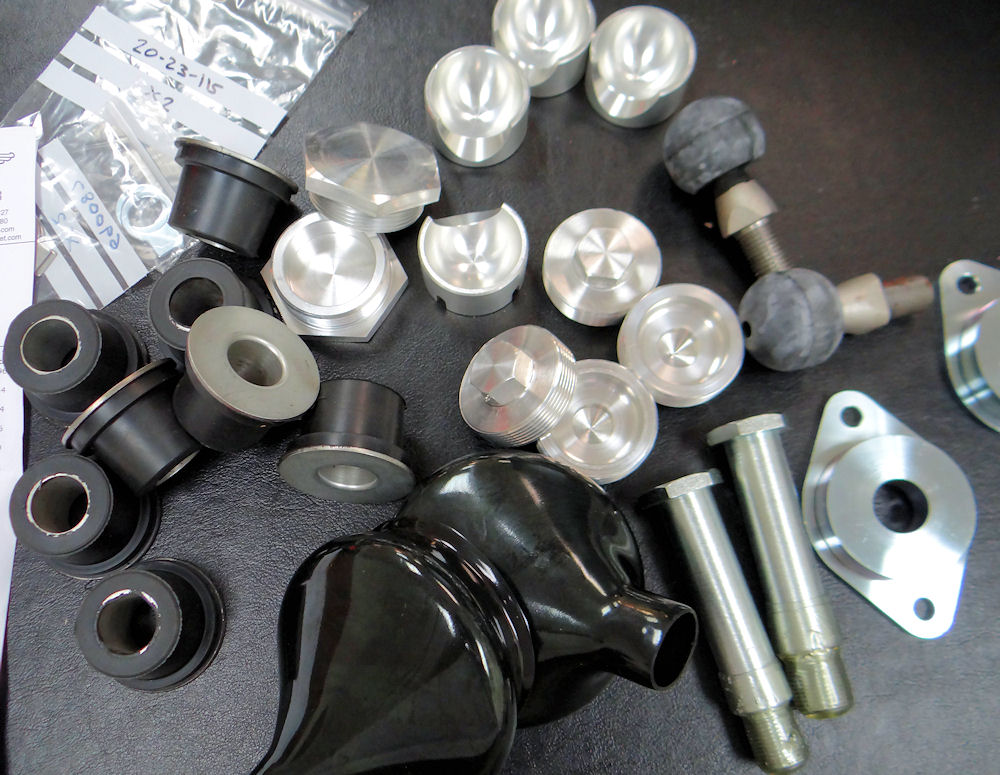 |
|
|
Aston Service Dorset |
Jake has been busy reconstructing the chassis at the forward anchor points for the lower control arms. He is also dealing with some serious corrosion in the frame behind each of the lower ball joint sockets - an obvious problem area because road grime finds its way past the ball joint boots, up inside the chassis frame. Some of the later photos in the sequence below show the damage caused by more than half a century of road grime.
 |
 |
|
ready to commit to welding new bracket in place |
|
|
|
|
 |
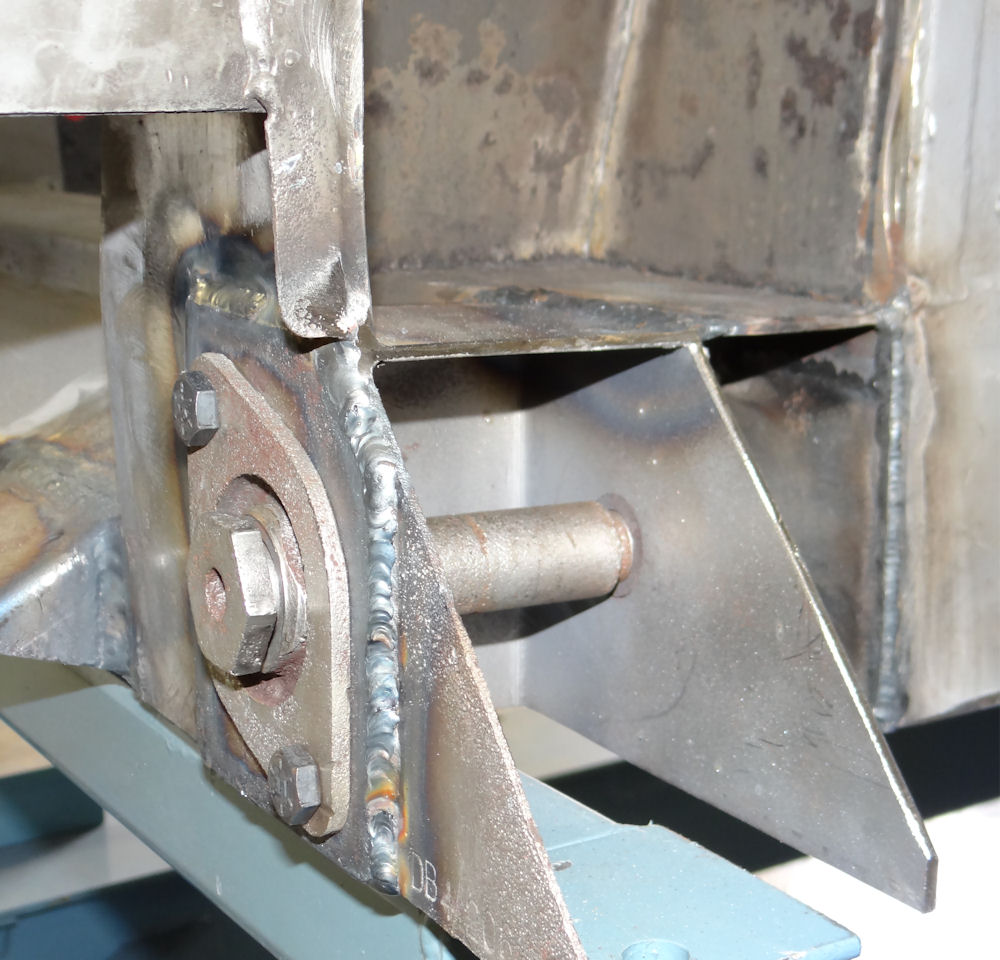 |
|
|
|
|
|
|
 |
 |
|
|
|
|
|
|
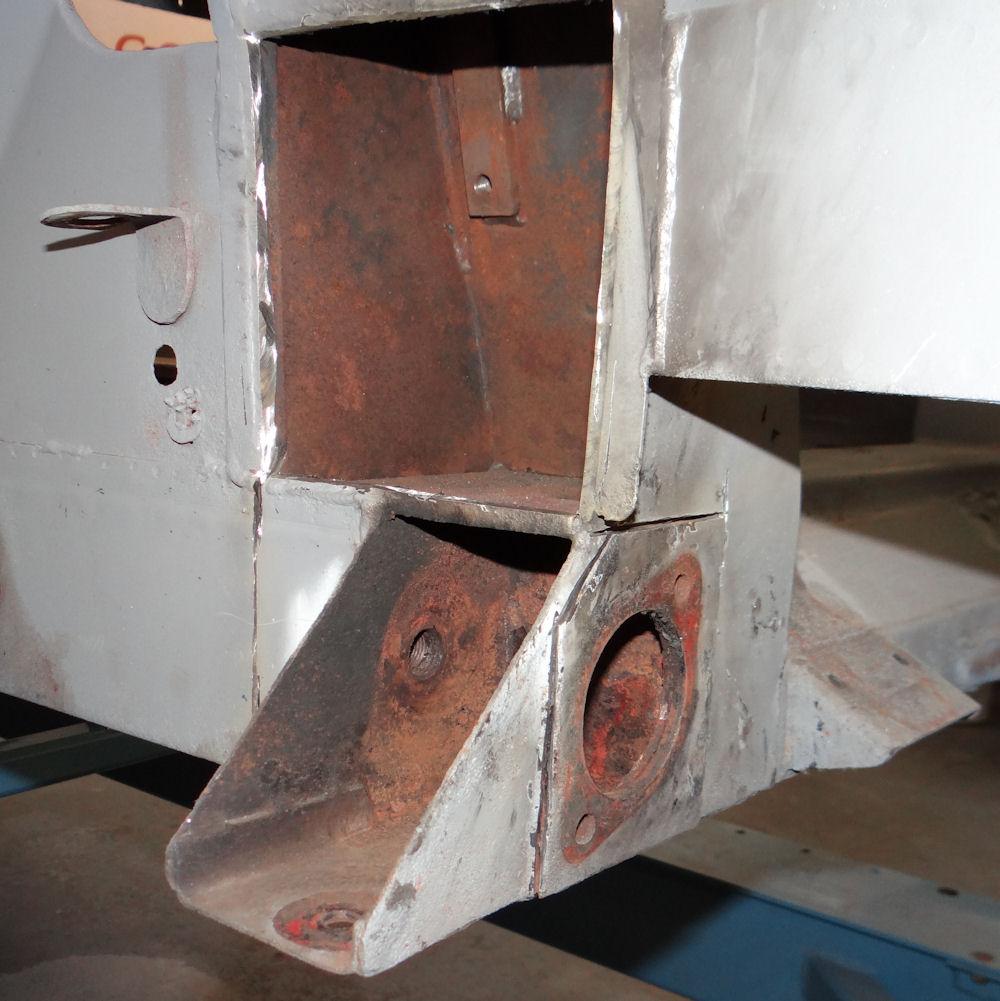 |
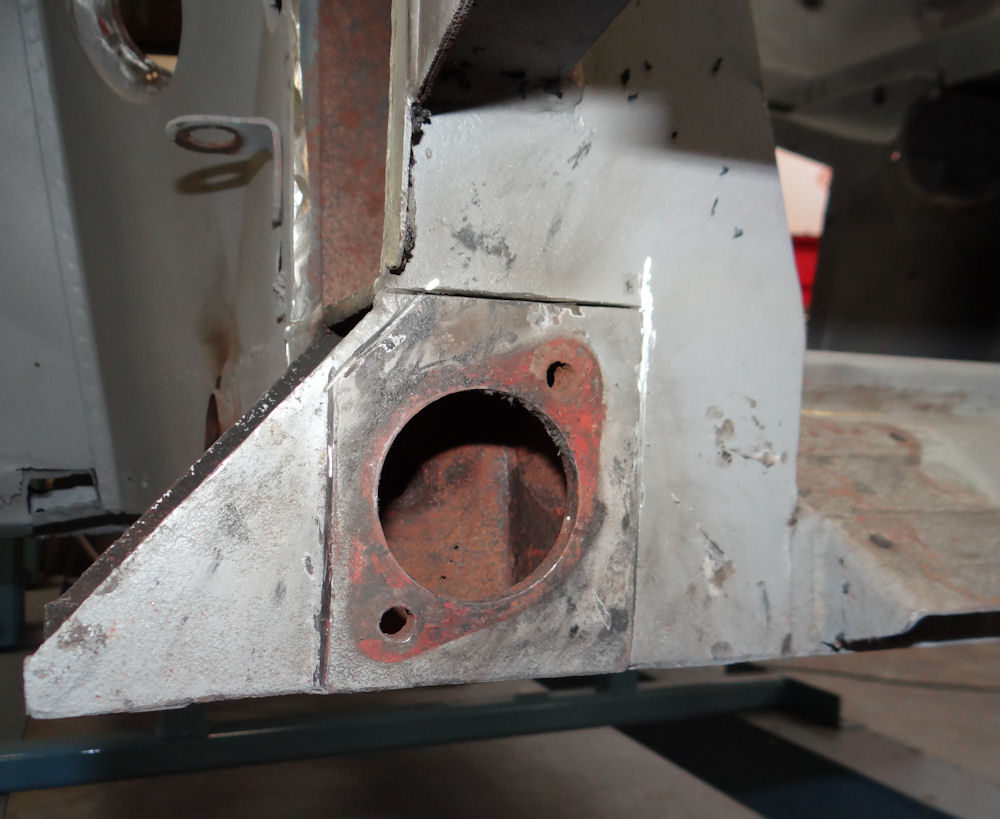 |
|
|
|
|
|
|
 |
 |
|
section requiring repair |
|
|
|
|
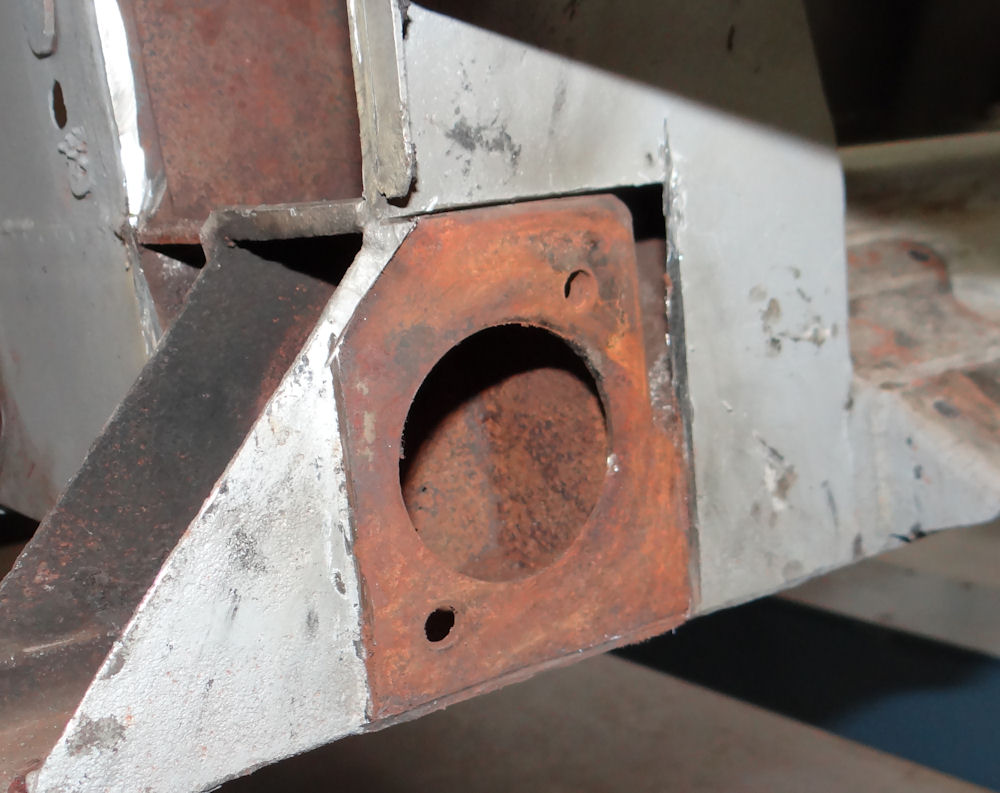 |
 |
|
|
|
|
|
|
 |
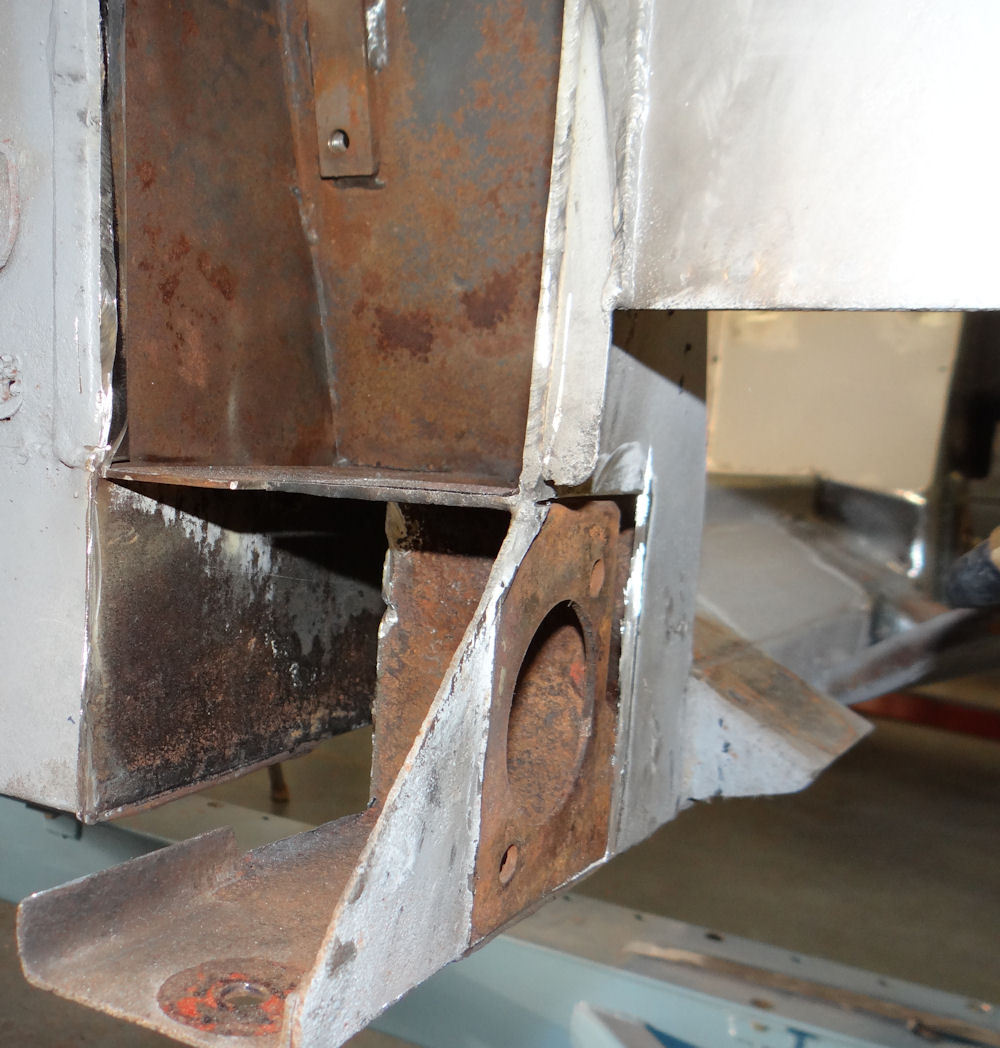 |
|
|
|
|
|
|
 |
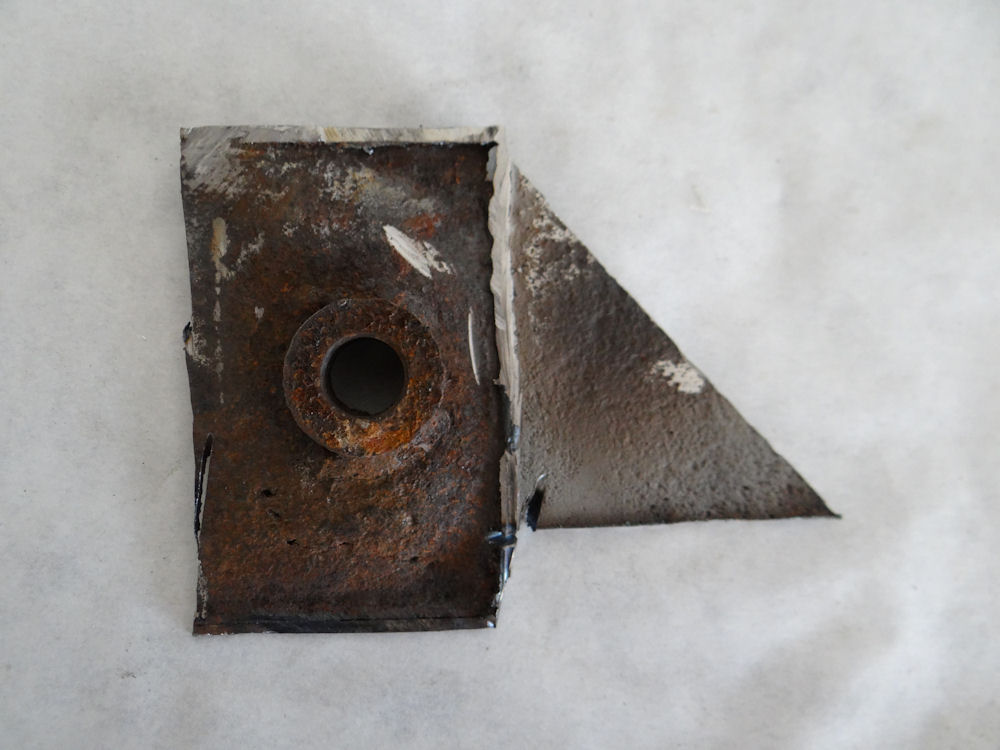 |
|
|
|
|
|
|
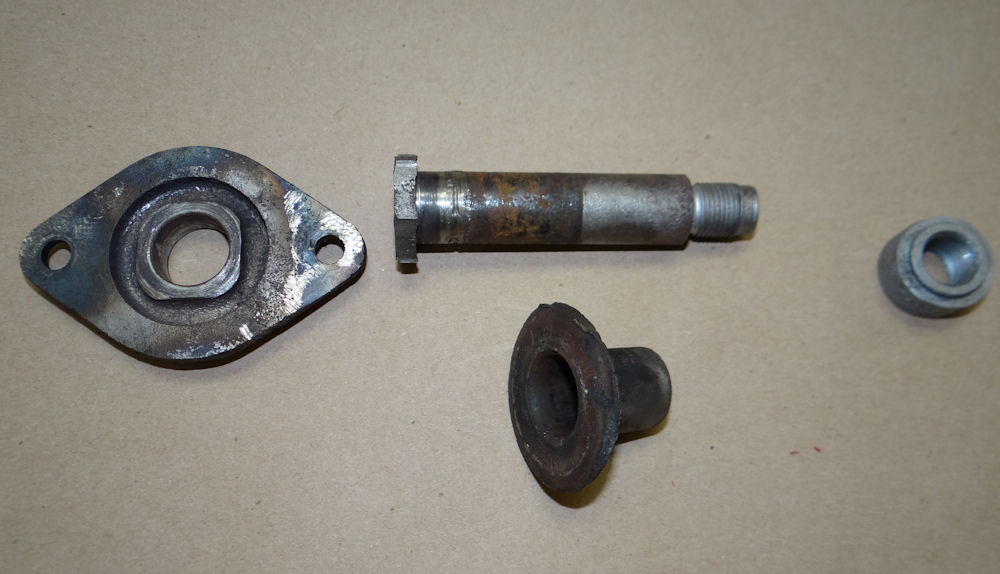 |
 |
|
replaced with new |
Aston Service Dorset in England |
|
|
|
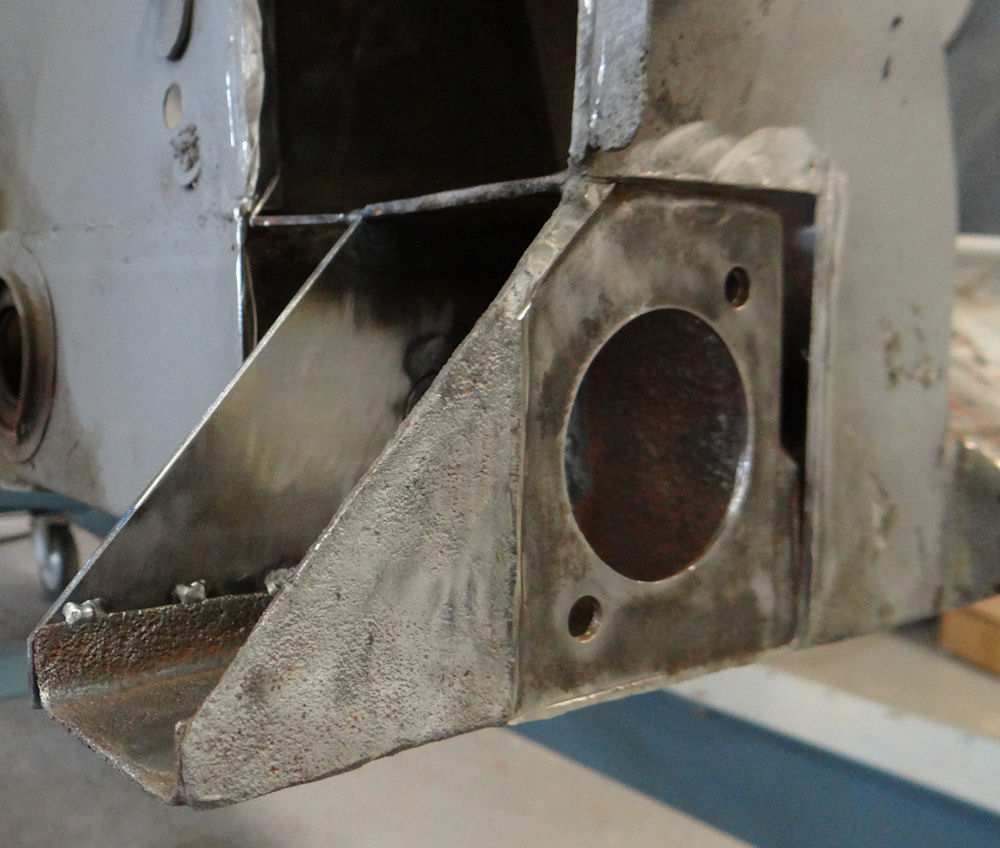 |
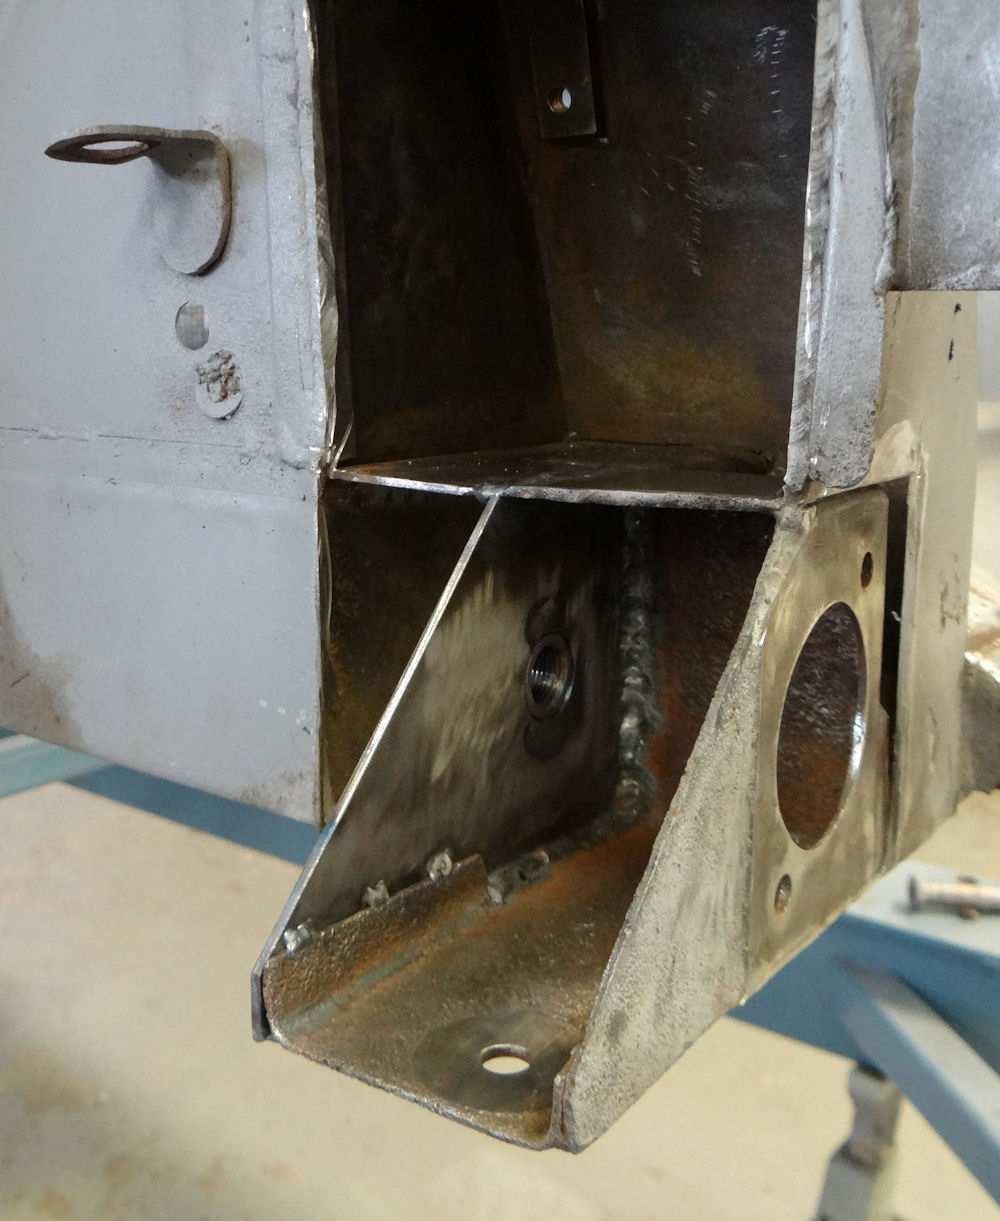 |
|
|
|
|
|
|
 |
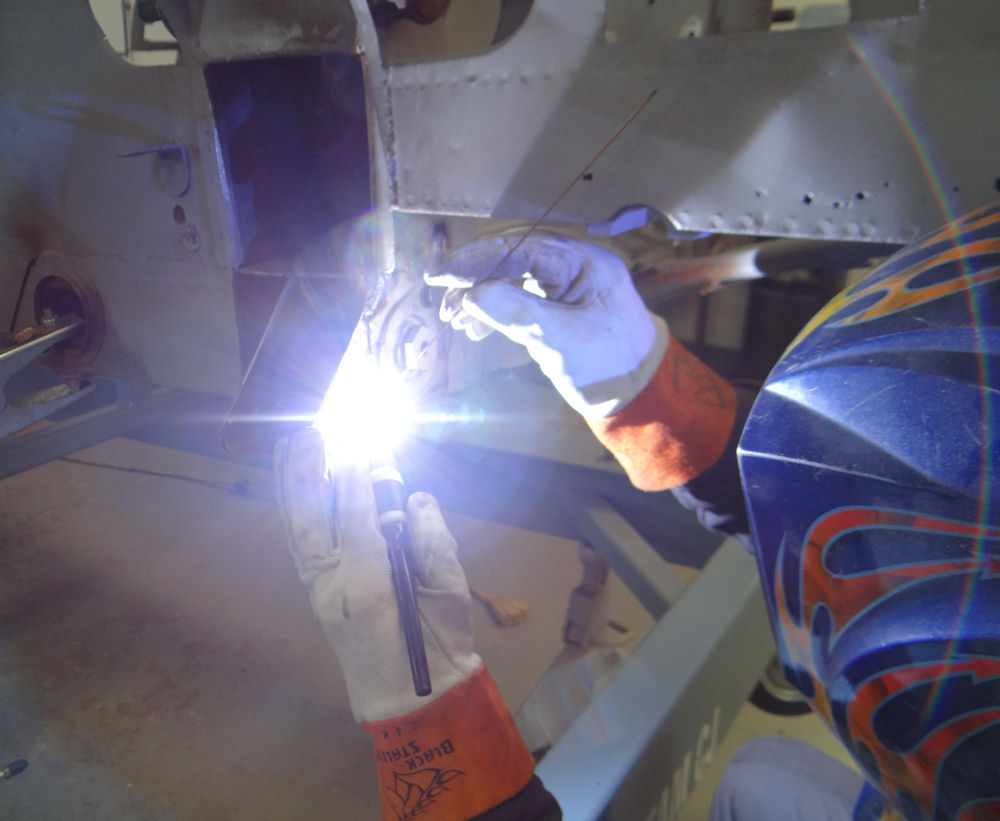 |
|
|
|
|
|
|
 |
 |
|
|
|
|
|
|
 |
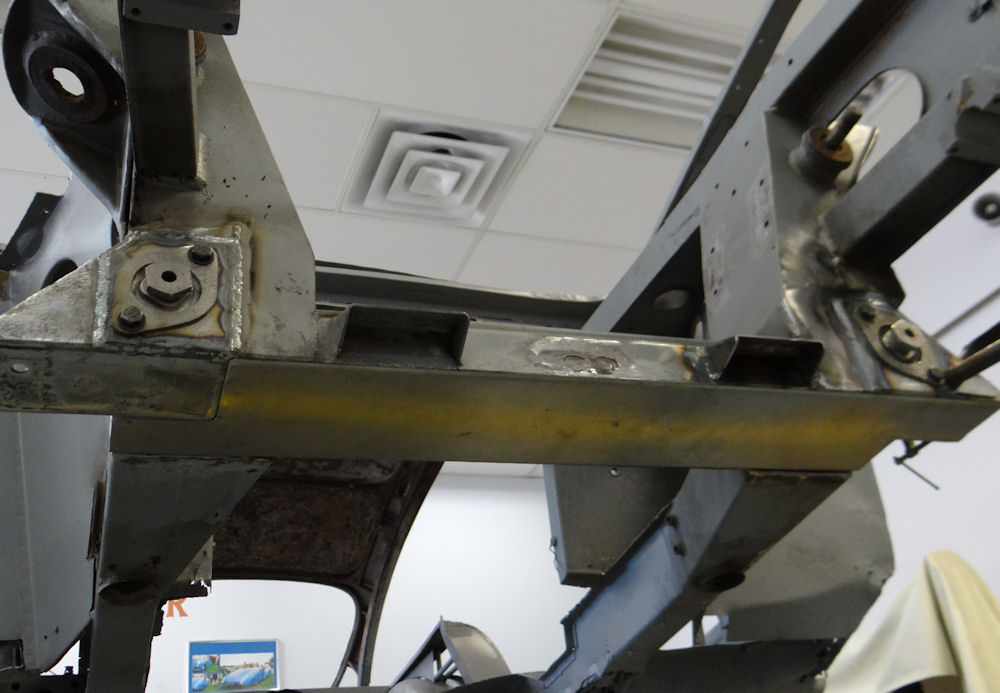 |
|
|
|
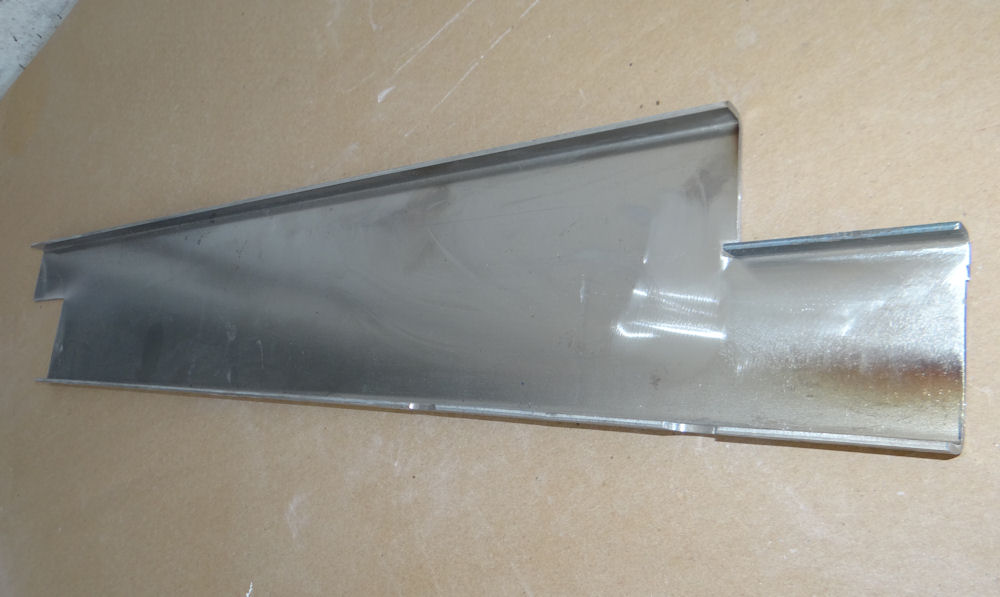 |
 |
|
have been acid washed, primed and treated with Body Wax |
|
|
|
|
 |
 |
|
of the lower ball joints - major surgey required |
grime getting past the rubber ball joint boots |
|
|
|
 |
 |
|
|
|
|
|
|
 |
 |
|
|
|
|
|
|
 |
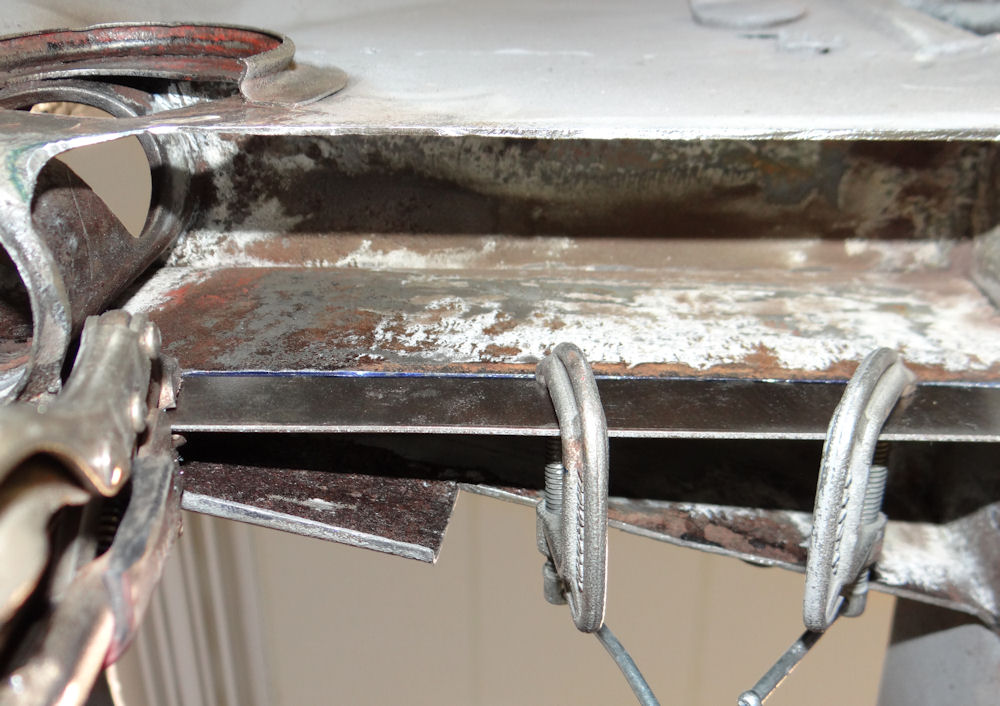 |
|
|
|
|
|
|
|
|
 |
|
|
|
|
|
 |
Reconstructing the left hand lower control arm anchor point...
 |
 |
|
|
|
|
|
|
 |
 |
|
|
|
 |
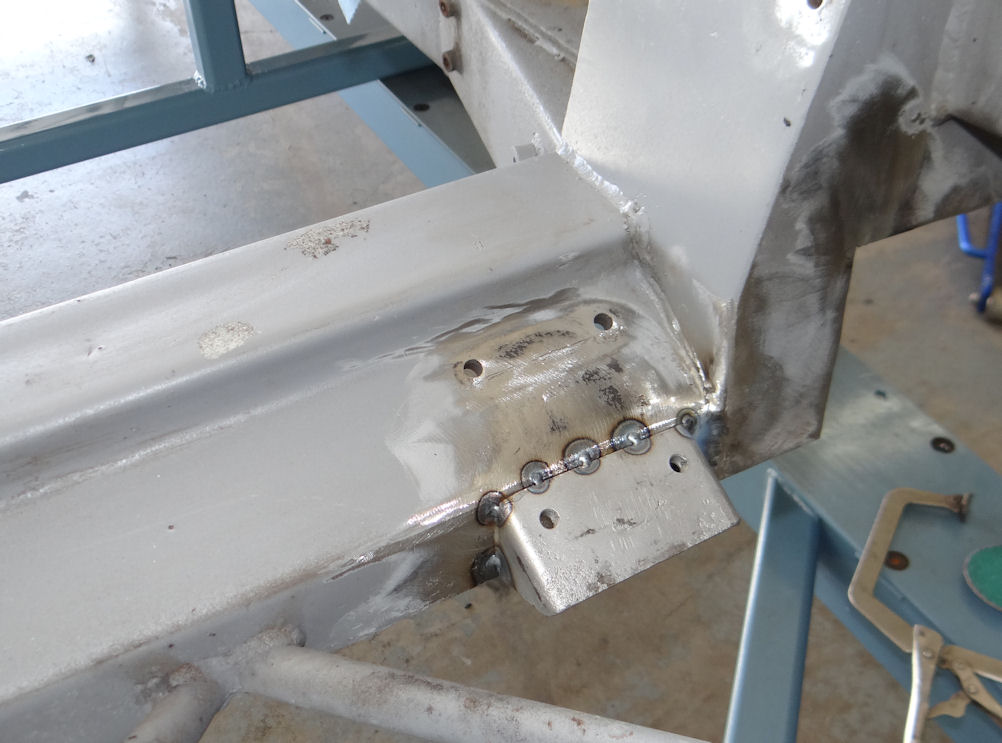 |
|
|
|
 |
 |
|
location of new lower control arm bracket |
|
|
|
|
 |
|
|
ready to commit to welding new bracket in place |
I am delighted to report that the new front clip was delivered earlier today and we had some fun setting it on the car for a photo shoot. The workmanship is absolutely spectacular...
 |
 |
|
|
|
 |
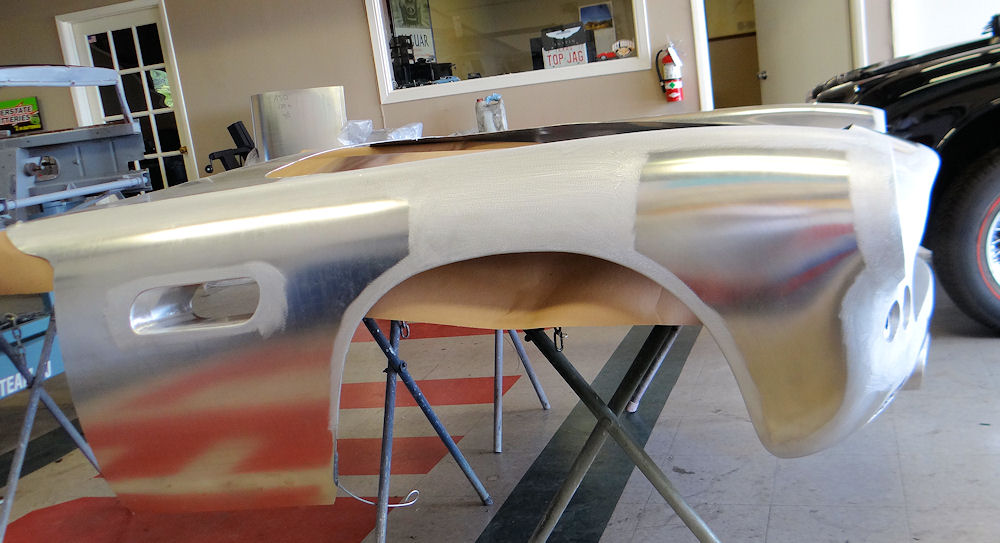 |
|
|
|
 |
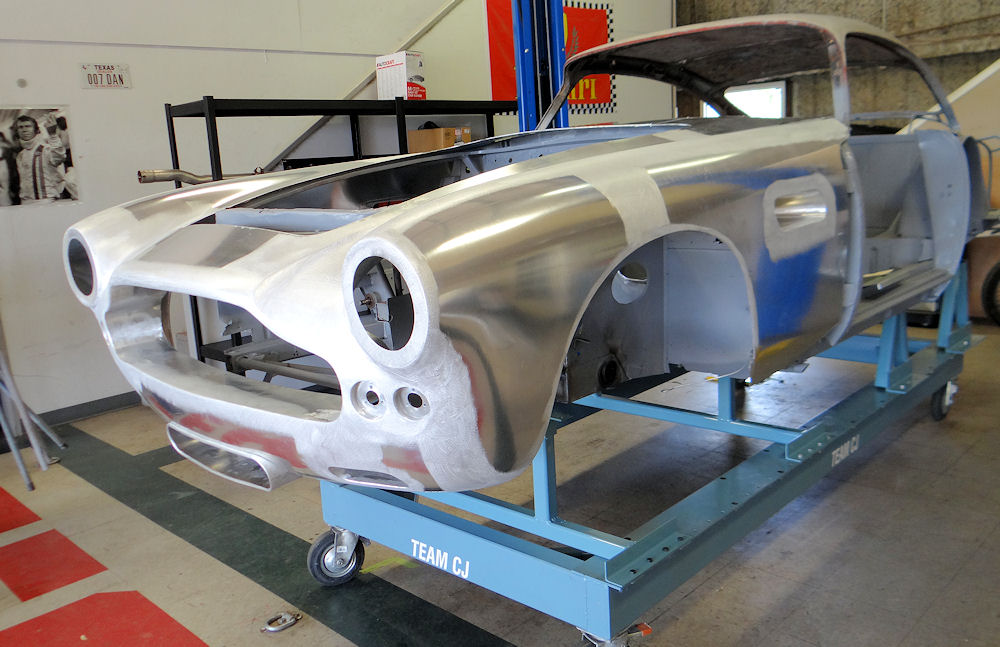 |
|
|
|
 |
 |
|
|
|
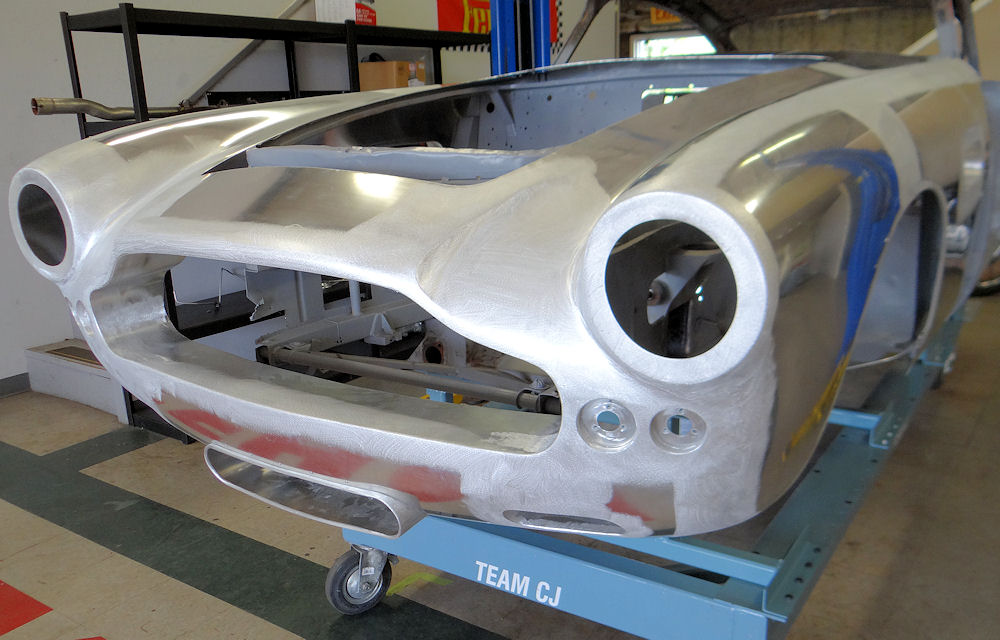 |
 |
My thanks to James Forshaw at Aston Service Dorset for sending the following photos of our new rear clip under construction. The new front clip is scheduled to be delivered to us today.
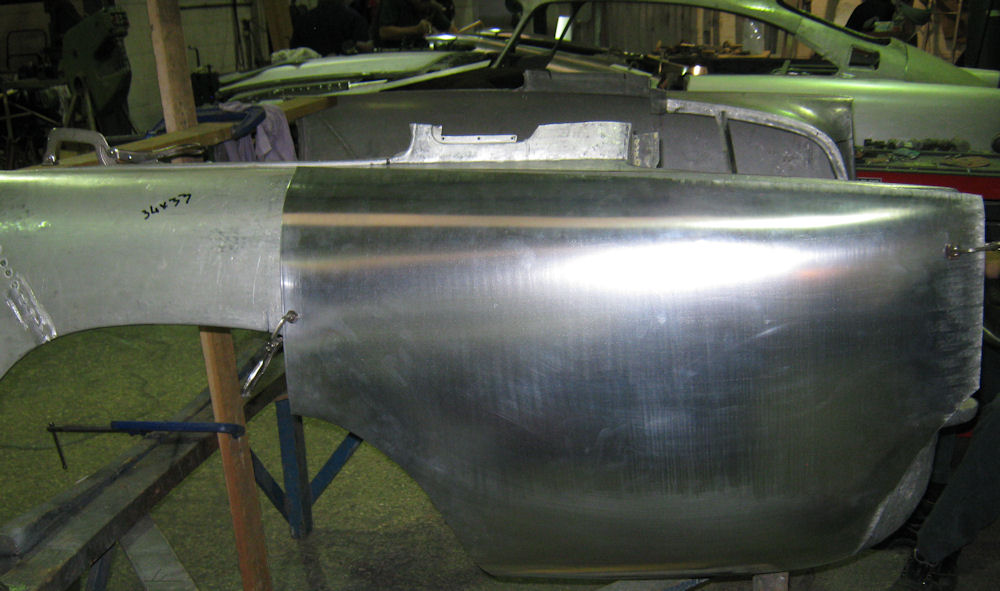 |
 |
|
|
|
 |
 |
|
|
|
 |
 |
|
|
|
 |
 |
|
|
|
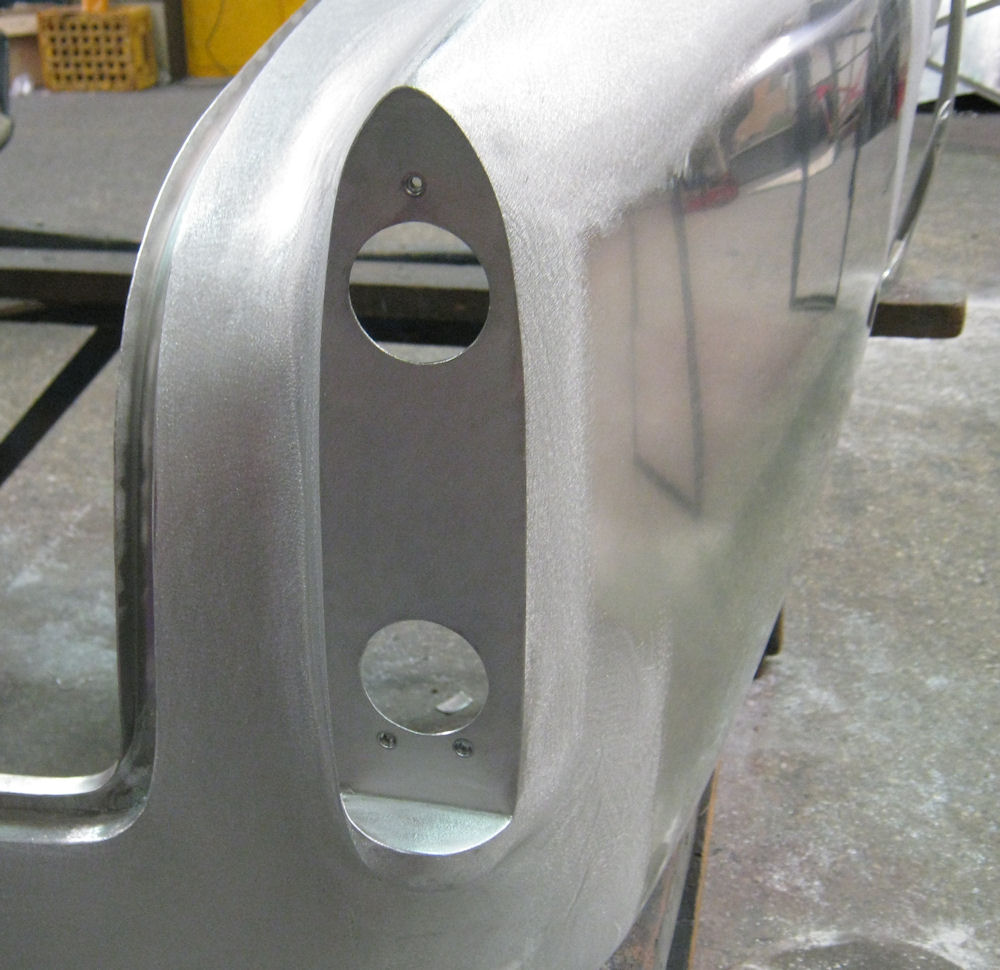 |
 |
 |
 |
|
|
is treated with Wurth Body Wax |
|
|
|
|
|
 |
|
|
|
Dealing with the rust in the steel platform chassis in the same way you would eat an elephant...one bite at a time...
 |
|
|
is rotten and will be rebuilt |
|
|
|
|
 |
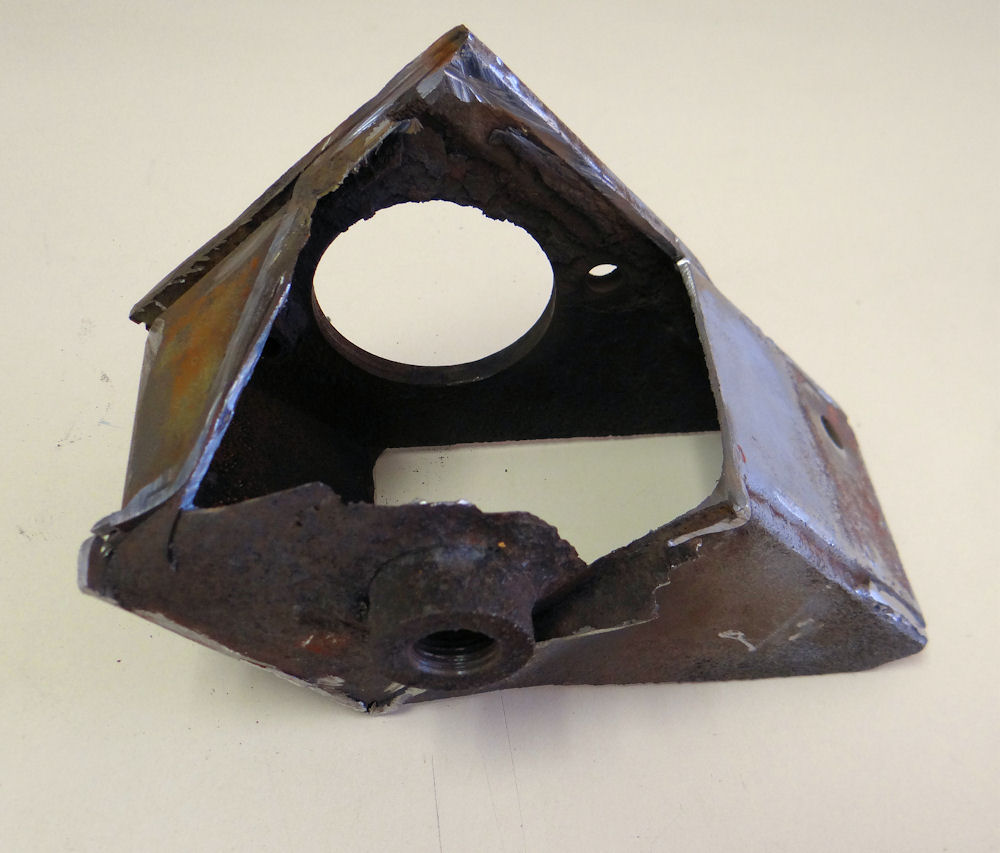 |
|
|
|
|
|
|
 |
 |
|
|
|
 |
 |
|
sealed with epoxy and rust proofed |
|
|
|
|
 |
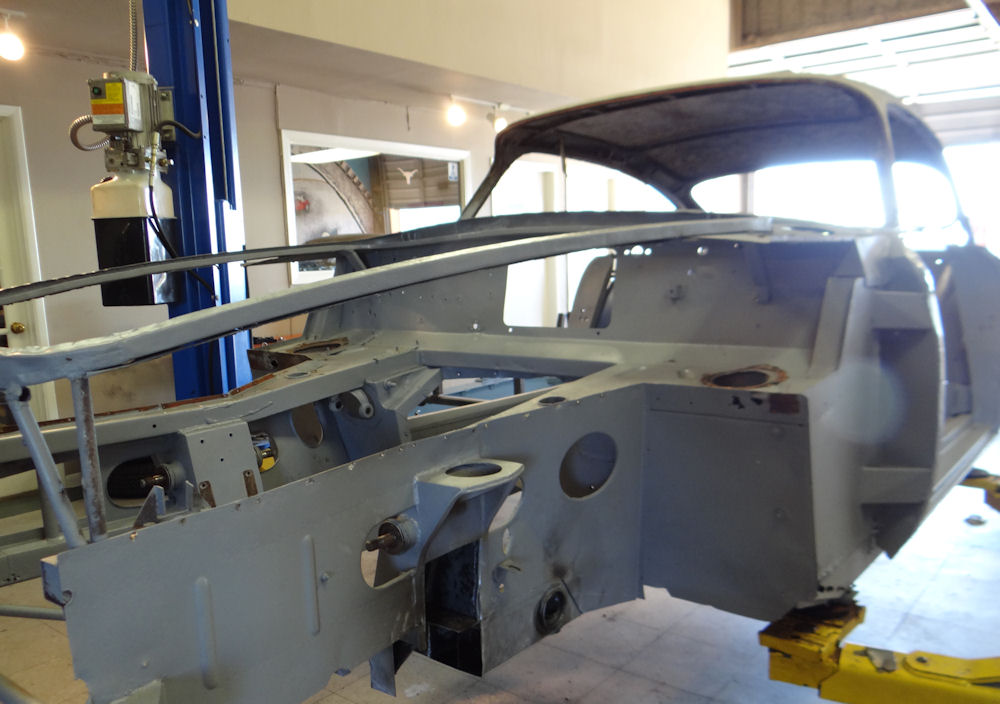 |
|
|
|
 |
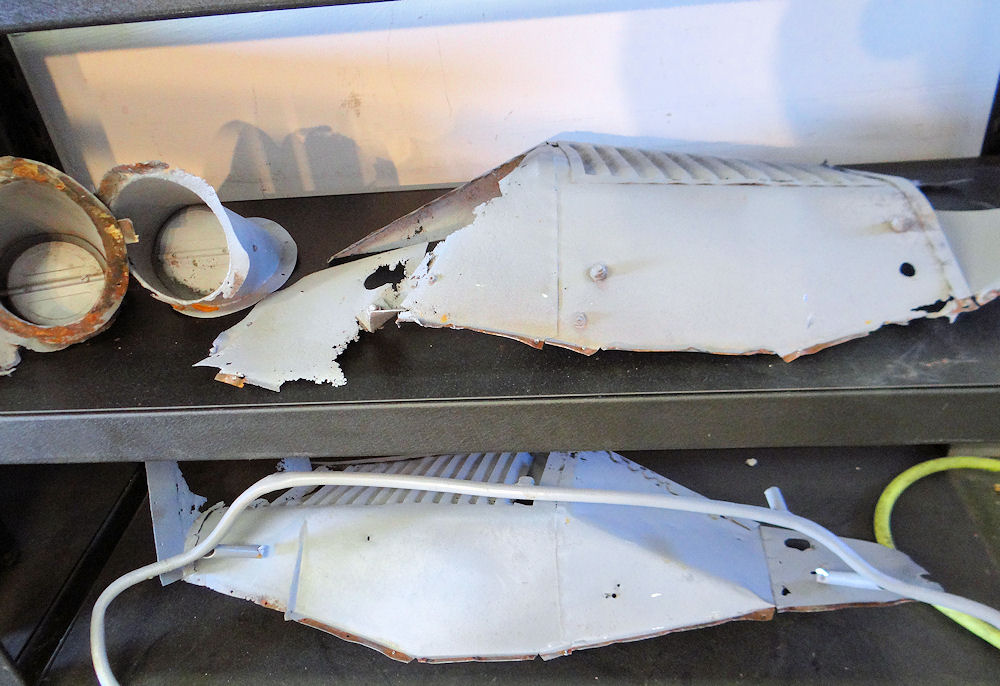 |
|
surround has also been cut out |
|
|
|
|
 |
 |
|
|
|
 |
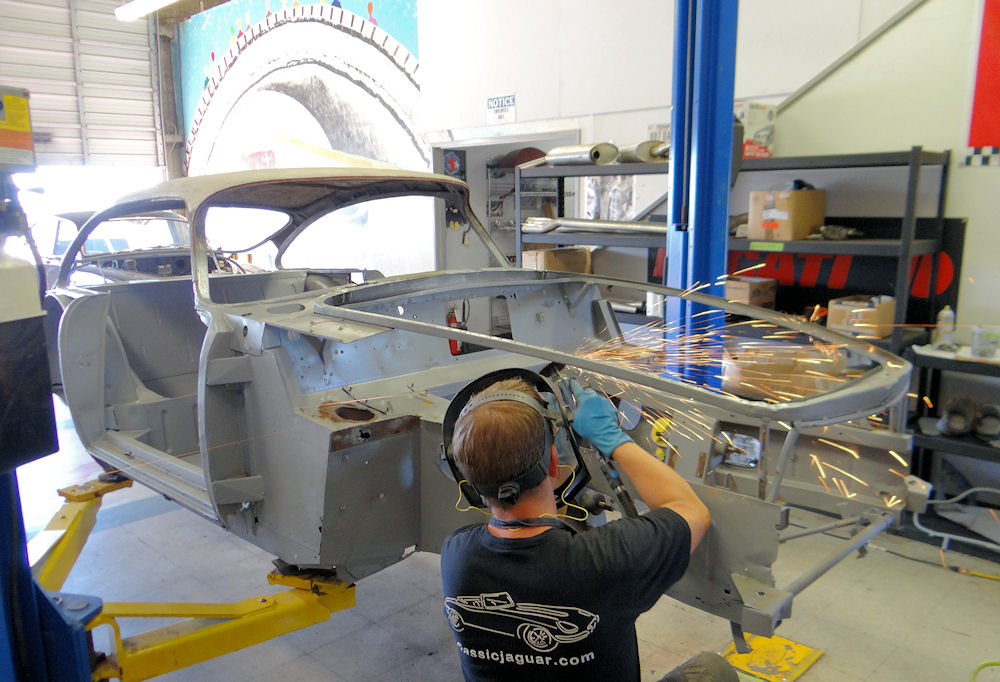 |
|
|
|
The following sequence of photos demonstrate how adept an Aston can be at hiding serious corrosion issues. A highly respected marque specialist once told me that any Aston Martin DB4, DB5 or DB6 that has not been completely restored, is basically a car awaiting restoration. He told me that even very presentable drivers, some with huge price tags, invariably have significant corrosion lurking beneath the fragile alloy skin. Accordingly, the only way to properly restore an Aston Martin DB4 is to completely strip the car down to its bare superleggera steel platform chassis, which is what we have now done to our DB4.Incidentally, in searching the web I really couldn't find any detailed photographic records of DB chassis and body restoration, so hopefully the pictorial record of this restoration will be of use to others.
 |
 |
|
|
|
 |
 |
|
|
|
 |
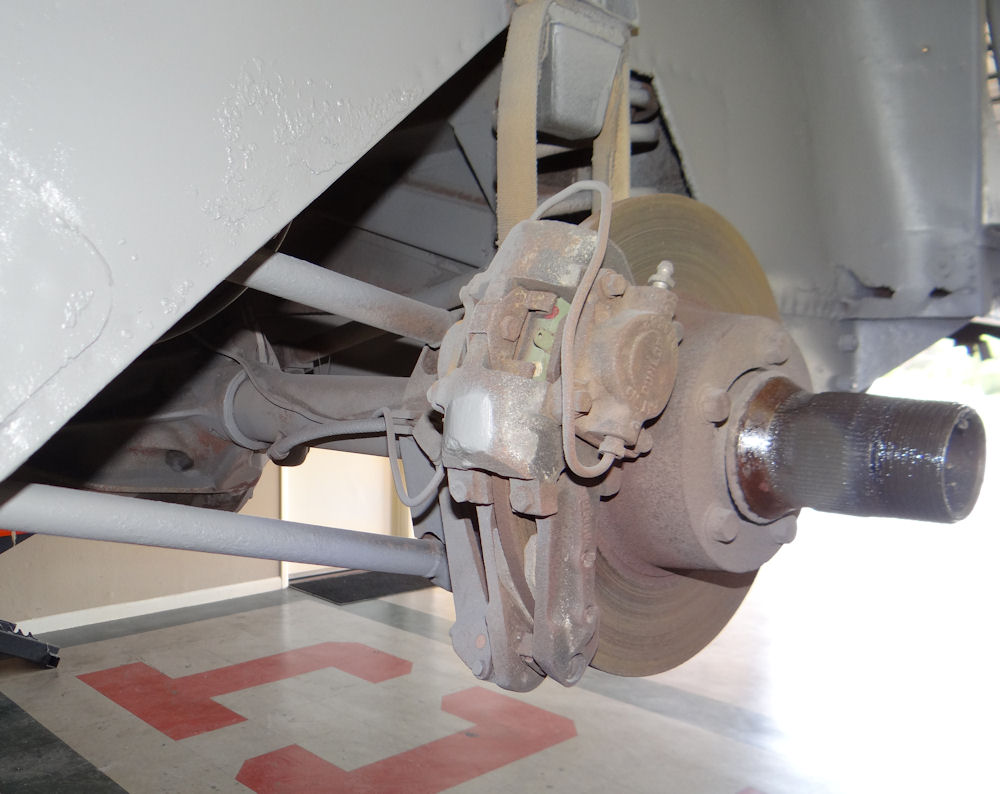 |
|
|
|
 |
 |
|
|
|
 |
 |
|
|
|
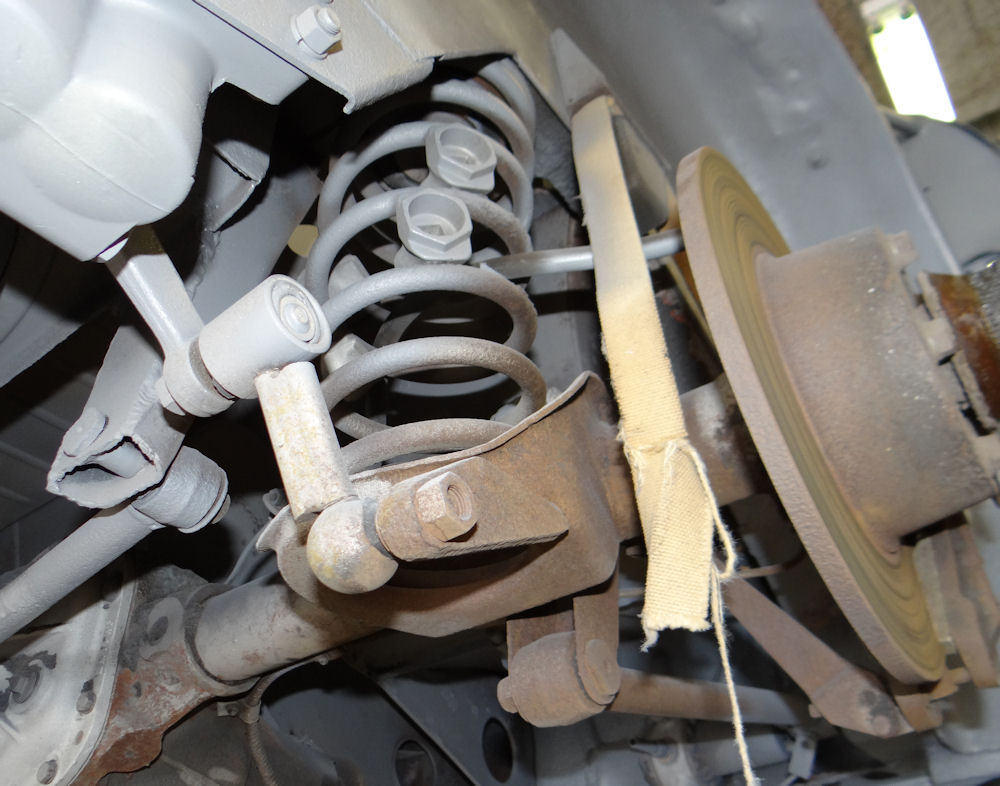 |
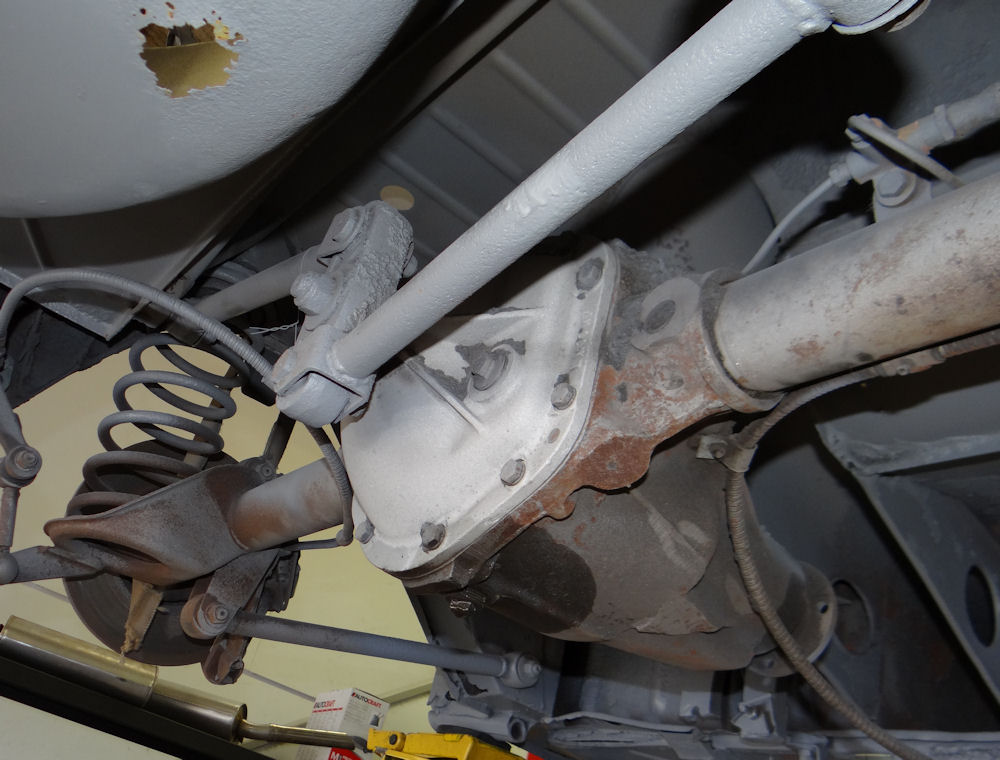 |
|
|
|
 |
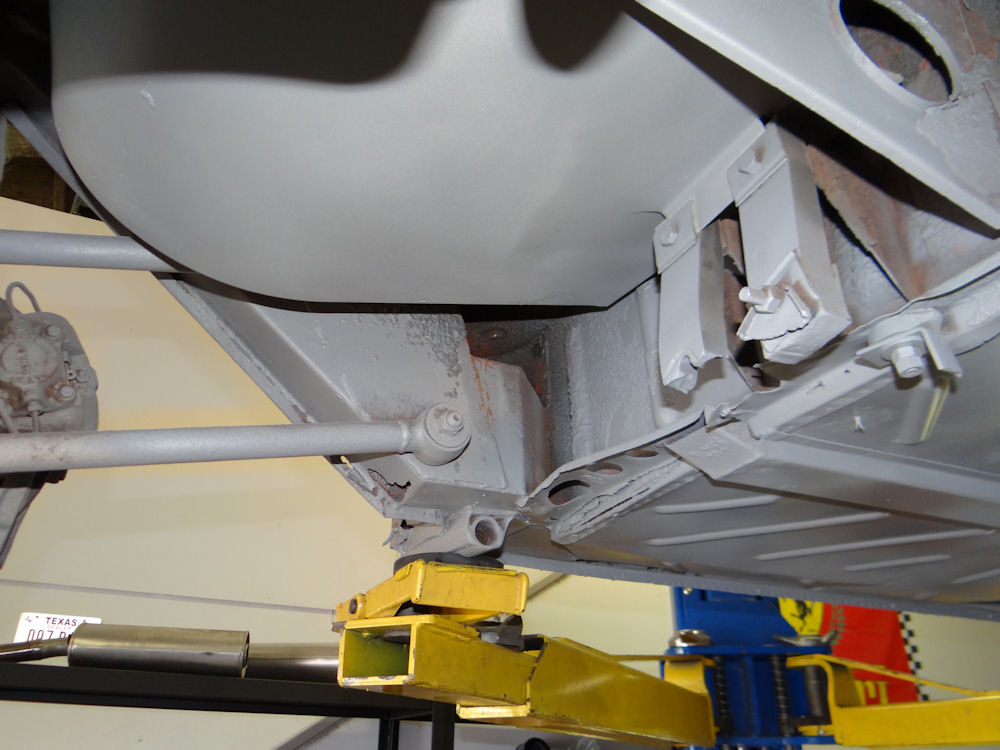 |
|
|
|
 |
 |
|
|
|
 |
 |
|
|
|
 |
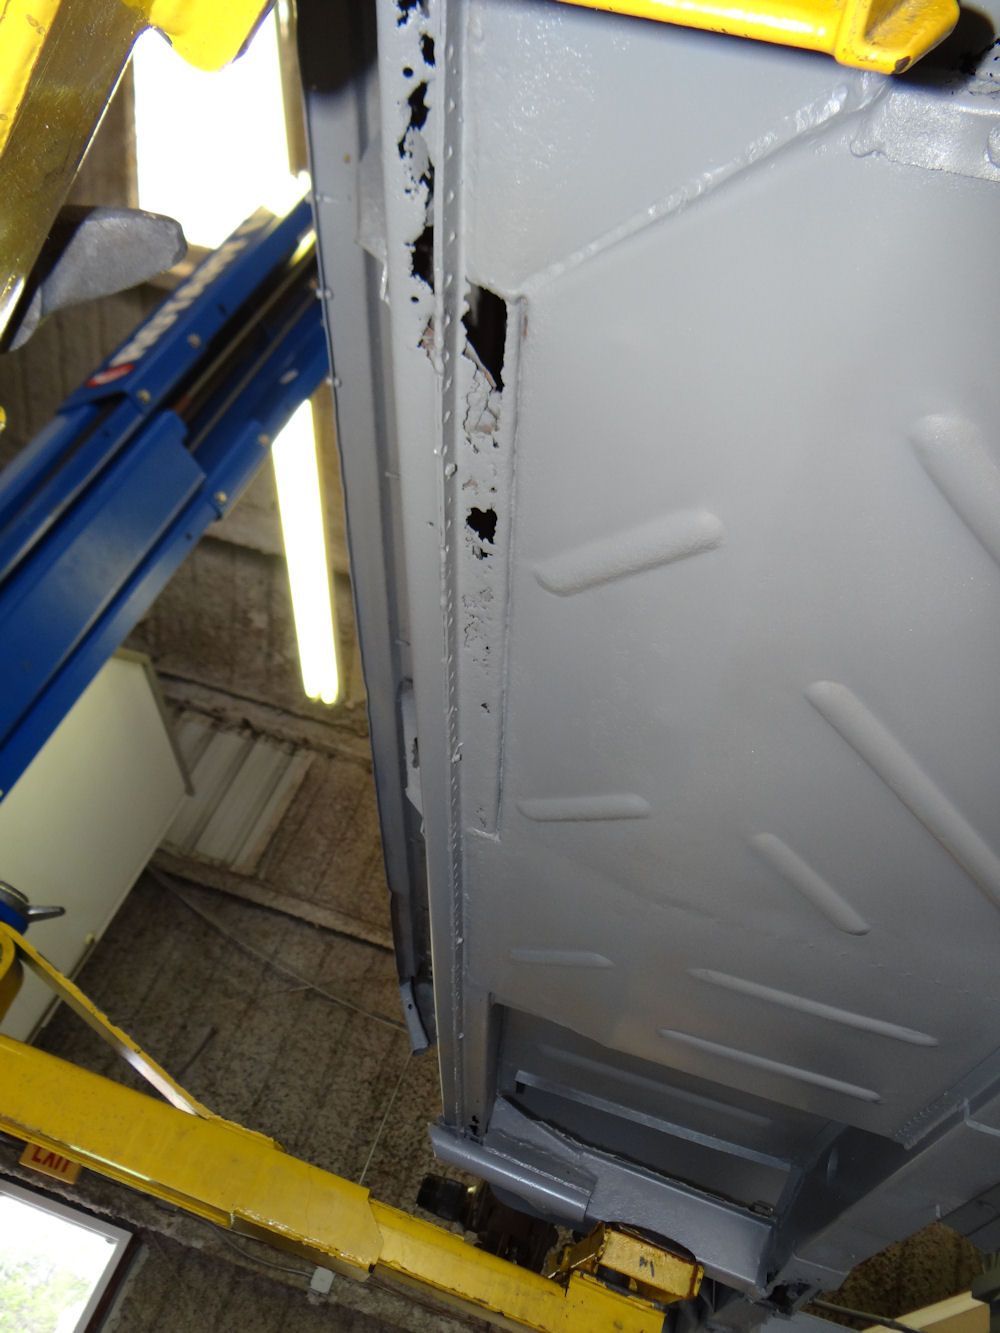 |
|
|
|
 |
 |
|
|
|
 |
 |
|
|
|
 |
 |
|
|
|
 |
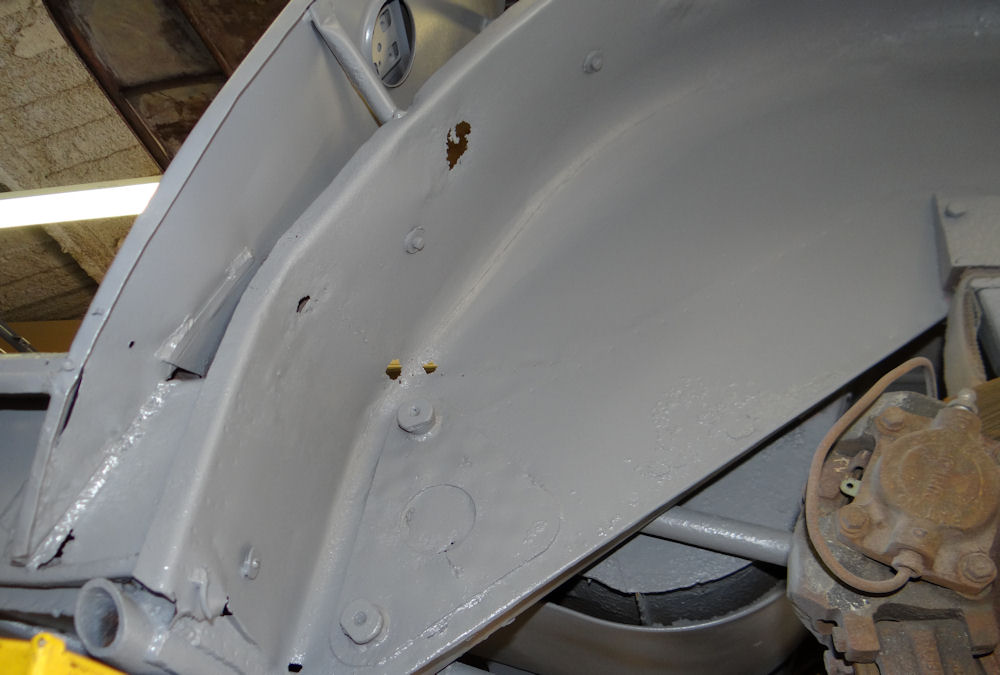 |
|
|
|
 |
 |
|
|
|
 |
 |
|
|
|
 |
 |
|
|
|
 |
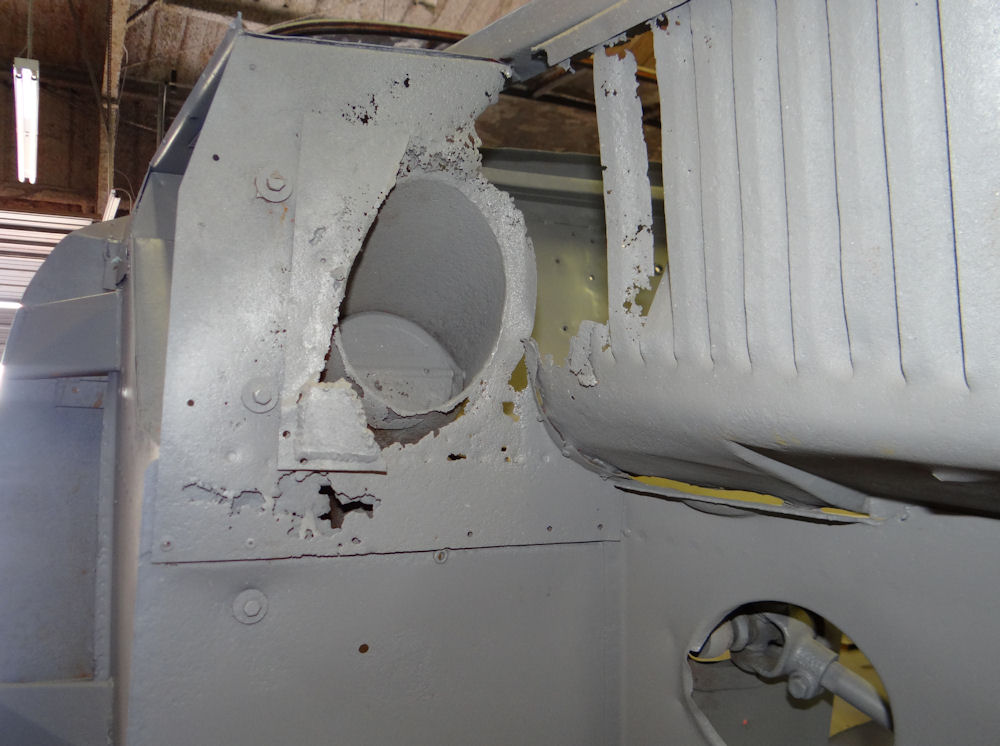 |
|
|
|
 |
 |
|
|
|
 |
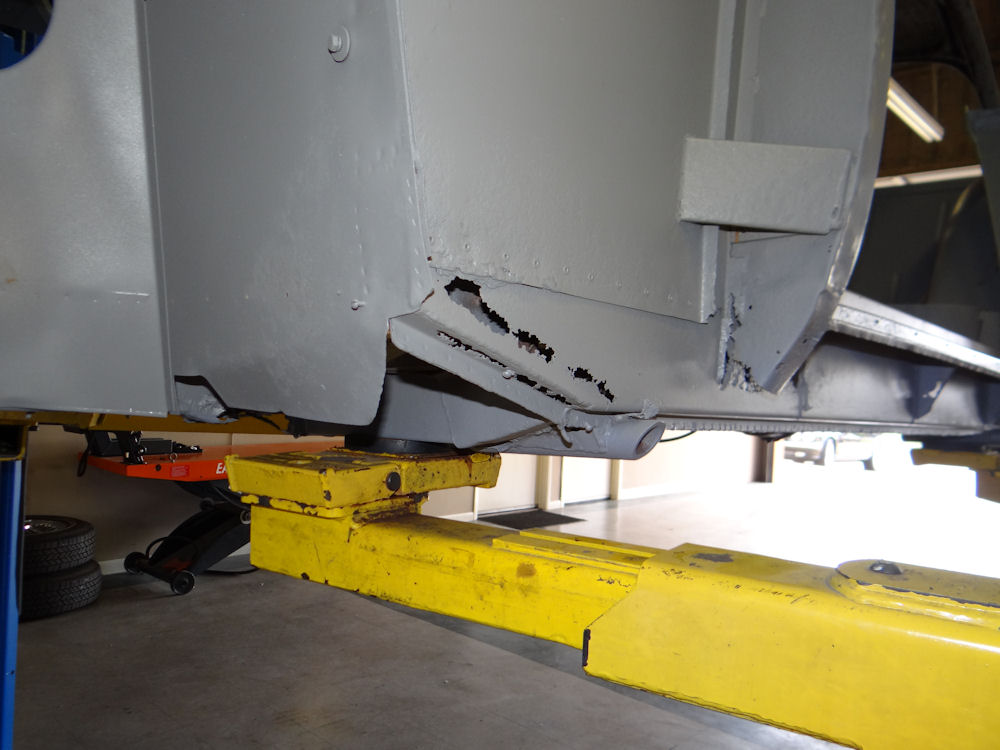 |
|
|
|
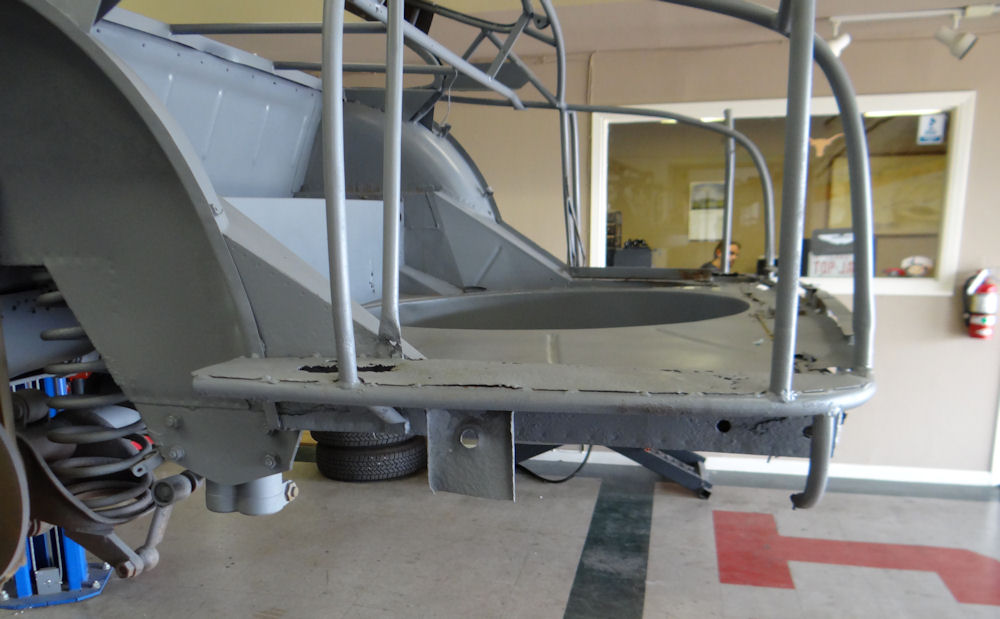 |
 |
|
|
|
 |
 |
|
|
|
 |
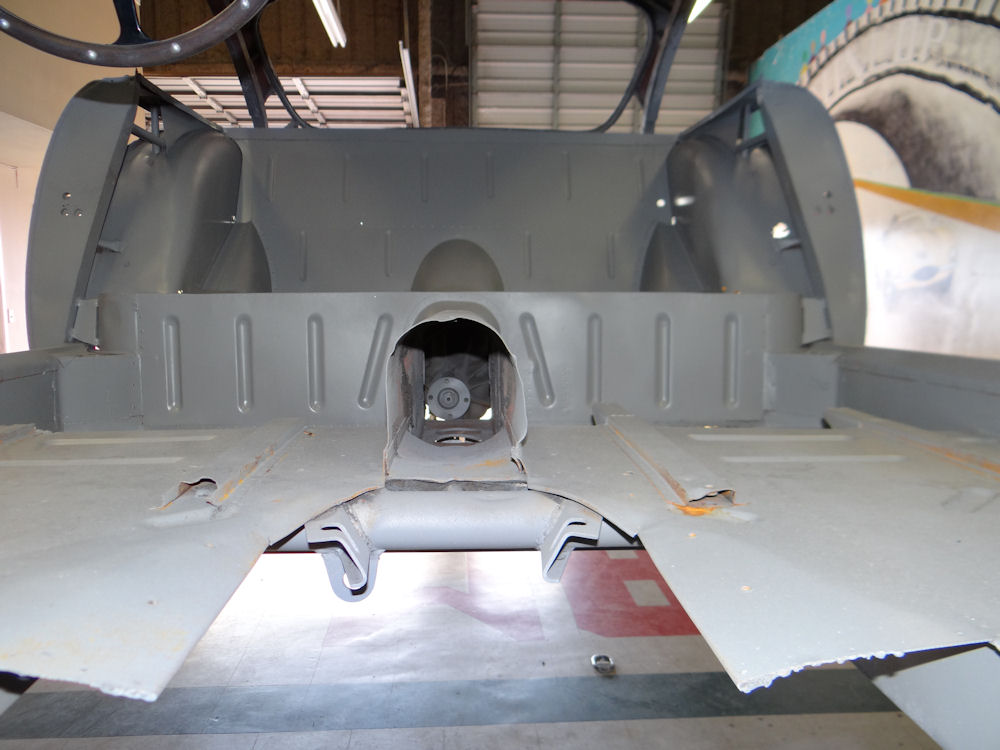 |
|
|
|
 |
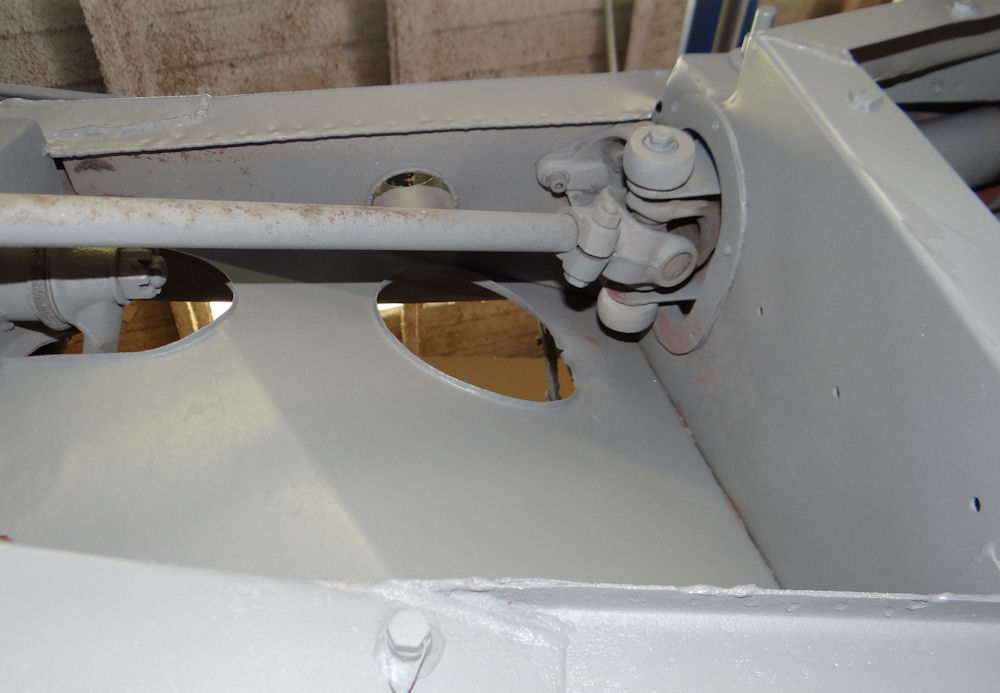 |
|
|
|
 |
 |
|
|
|
 |
|
|
|
|
 |
 |
|
|
|
 |
 |
|
|
|
 |
 |
|
|
|
 |
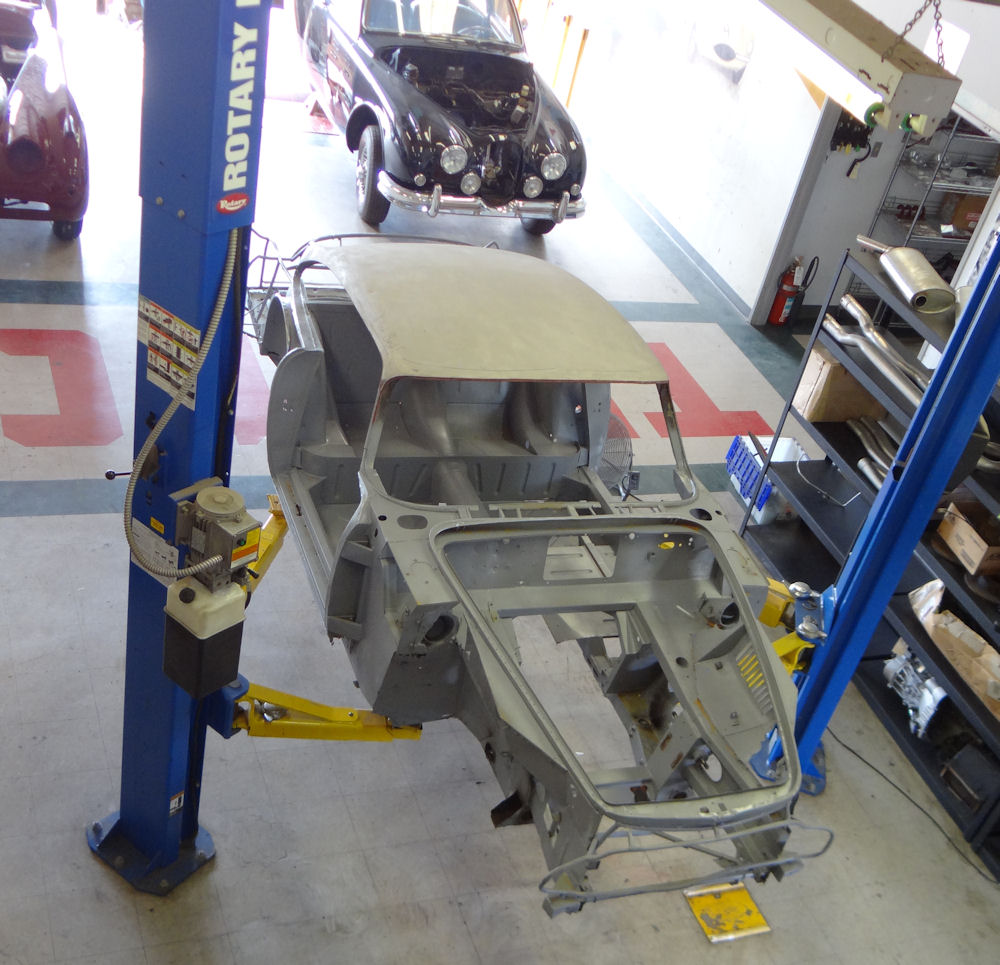 |
Yesterday we received a shipment of some of the repair panels that we will need to restore the steel platform chassis. Supplied by The Aston Workshop in England, the panels are heavy gauge and of superior quality. The panels include new chassis outriggers, door sills, door step panels, door frame bottoms and new seat runner mounting brackets.
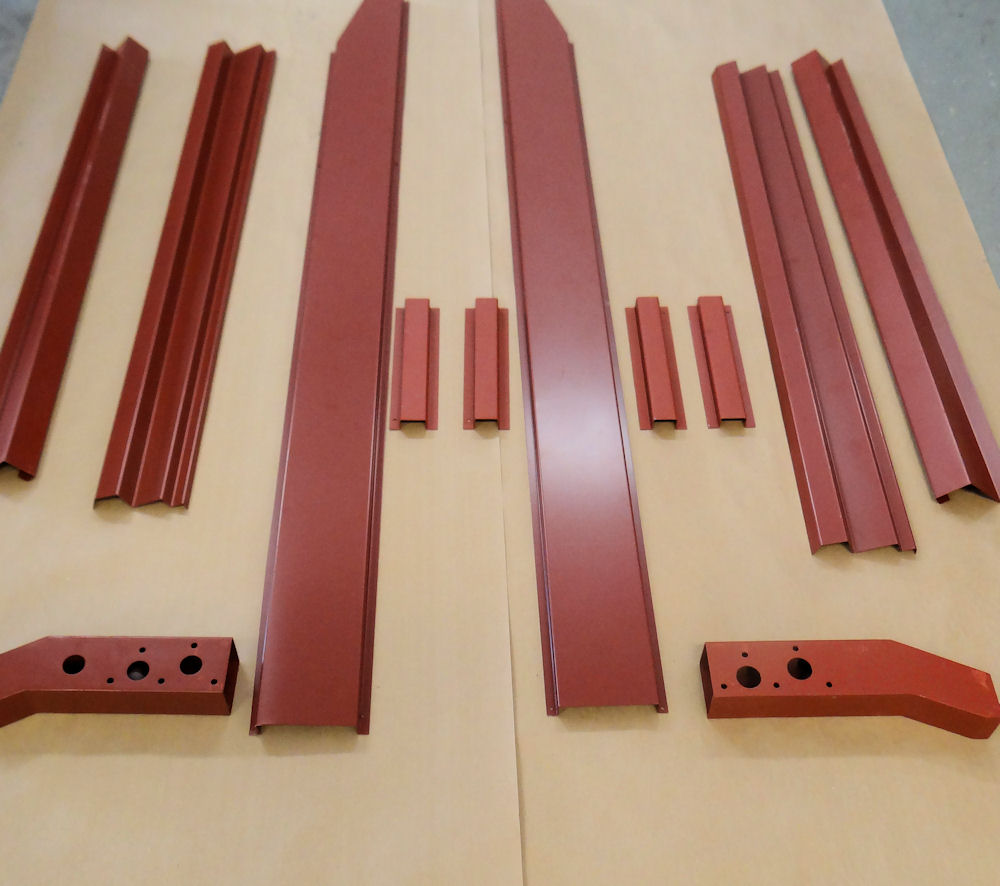 |
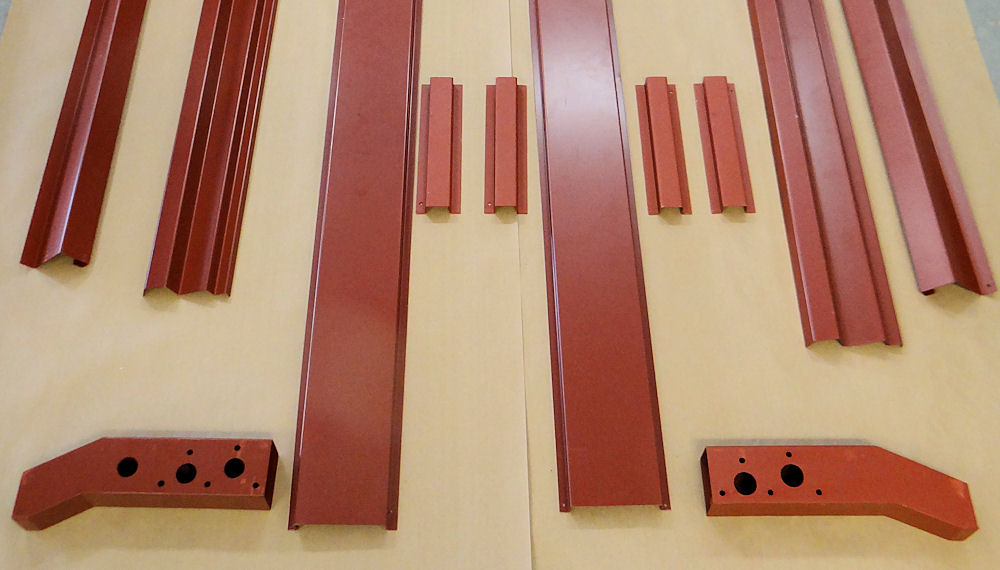 |
Removing front and rear clips, blasting steel platform chassis...
 |
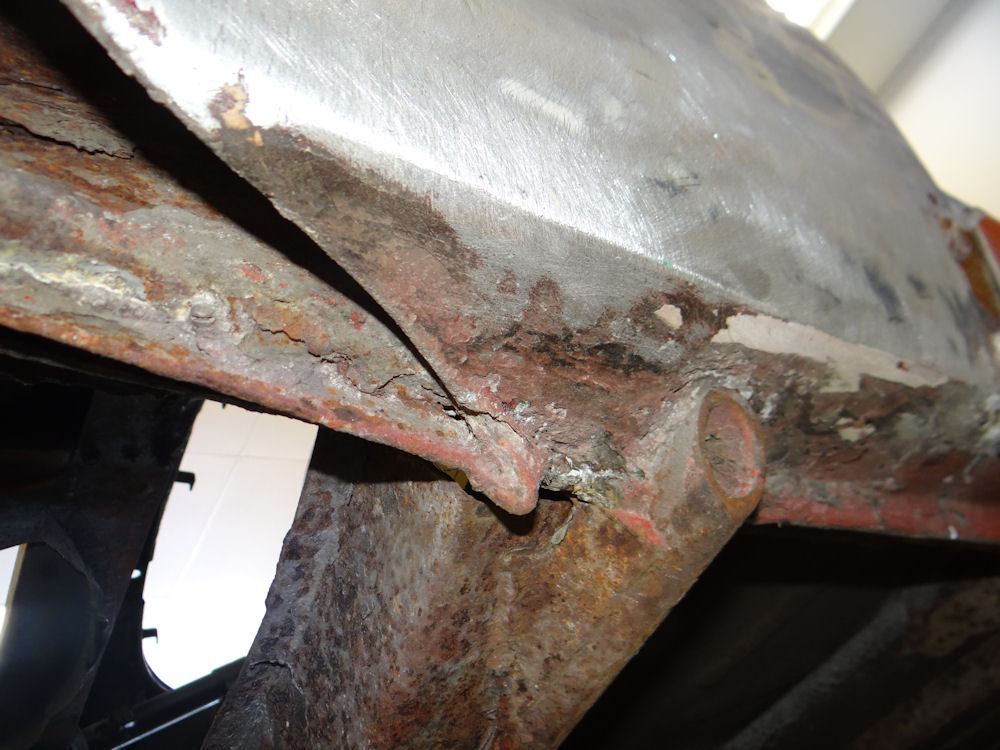 |
|
|
|
|
|
|
 |
 |
|
|
|
|
|
|
 |
 |
|
|
|
|
|
|
 |
 |
|
|
|
|
|
|
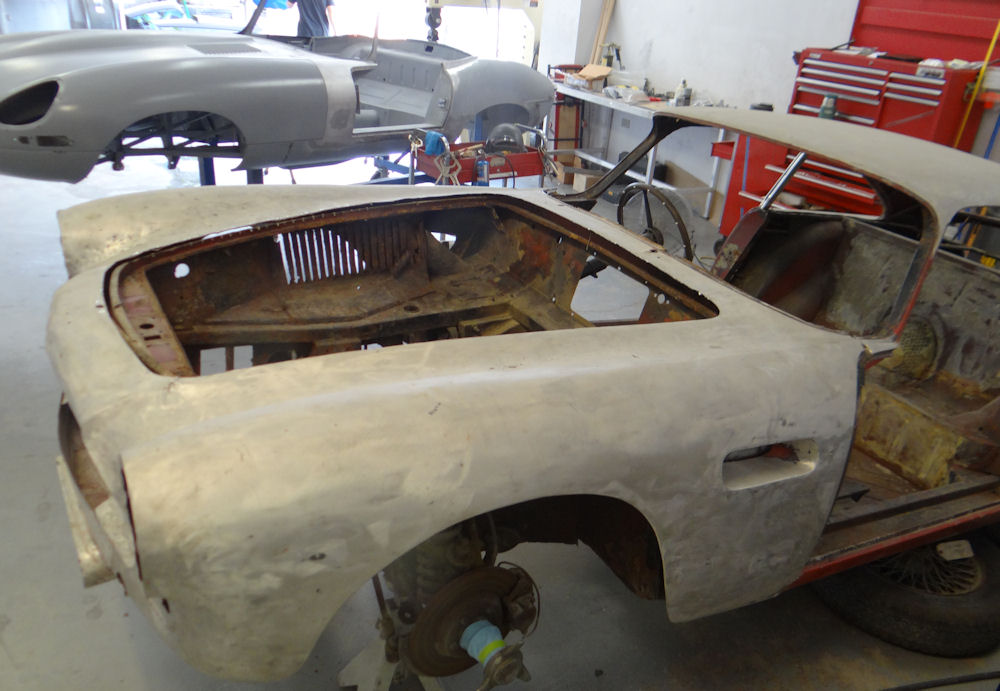 |
 |
|
|
|
|
|
|
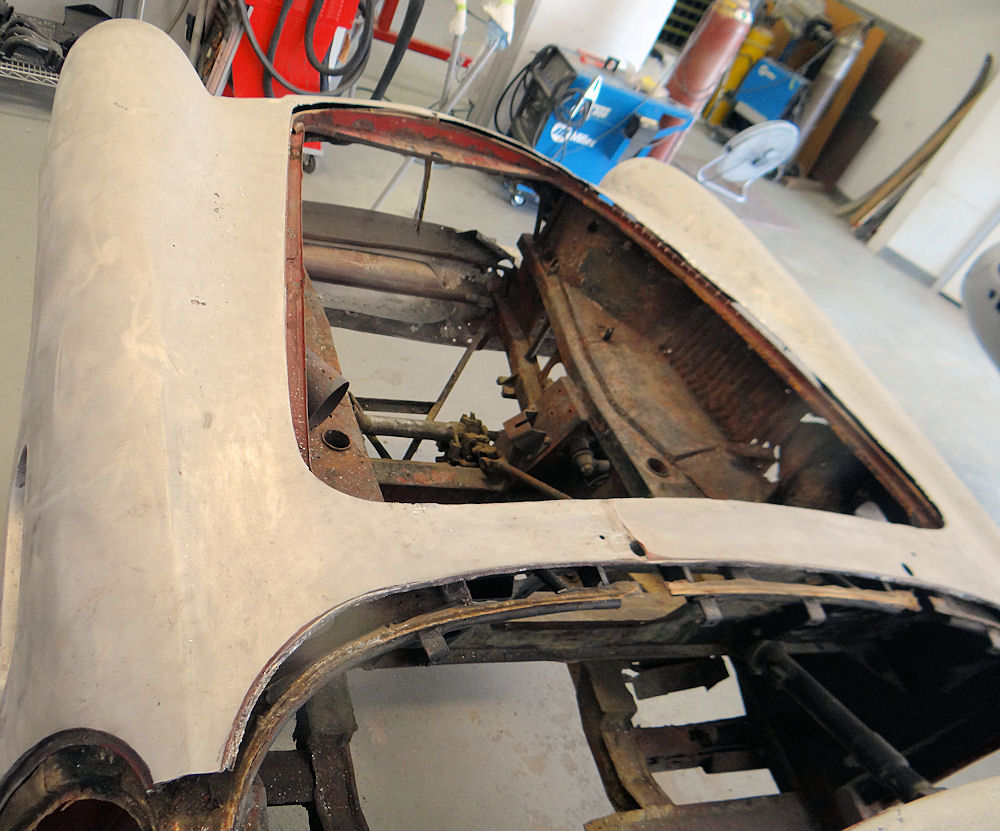 |
 |
|
|
|
|
|
|
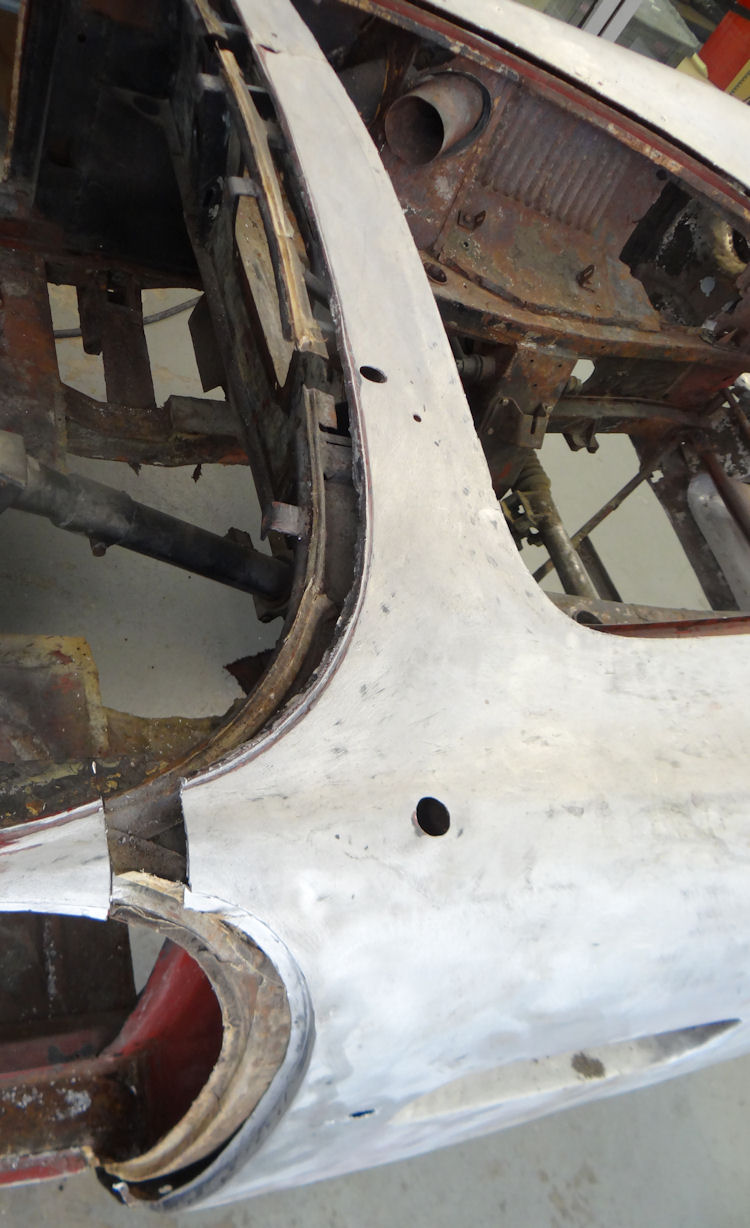 |
 |
|
|
|
|
|
|
 |
 |
|
|
|
|
|
|
 |
 |
|
|
|
|
|
|
 |
 |
|
|
|
|
|
|
 |
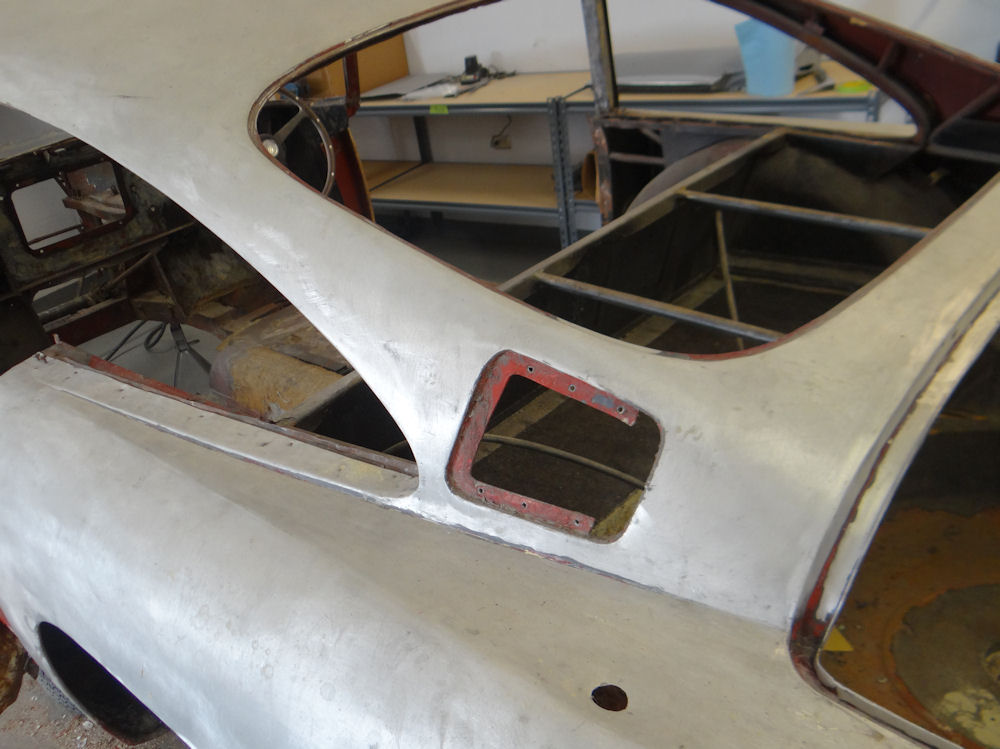 |
|
|
|
|
|
|
 |
 |
|
|
|
|
|
|
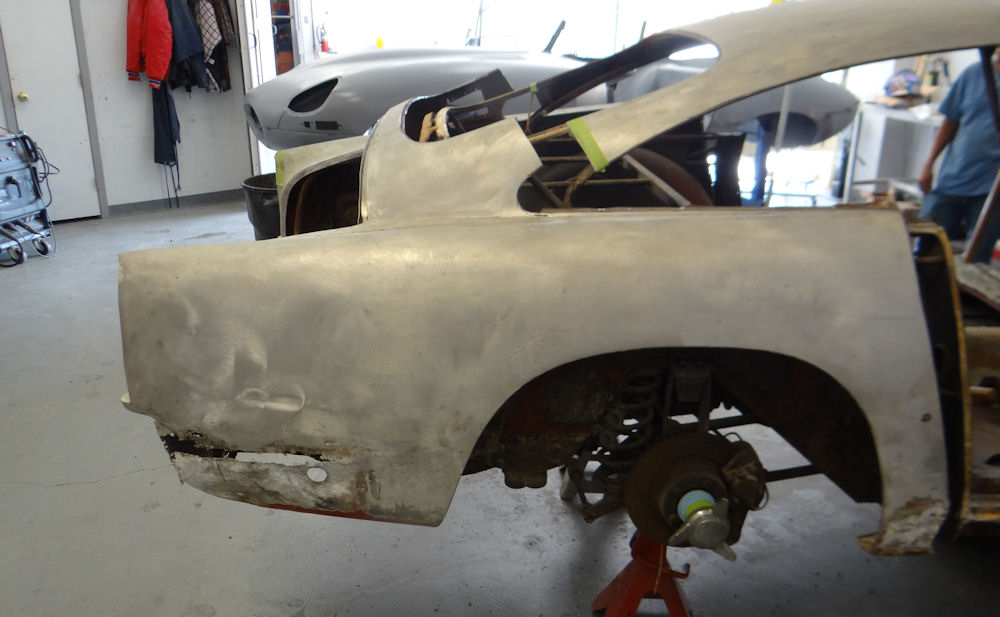 |
 |
|
|
|
|
|
|
 |
 |
|
|
|
|
|
|
 |
 |
|
|
|
|
|
|
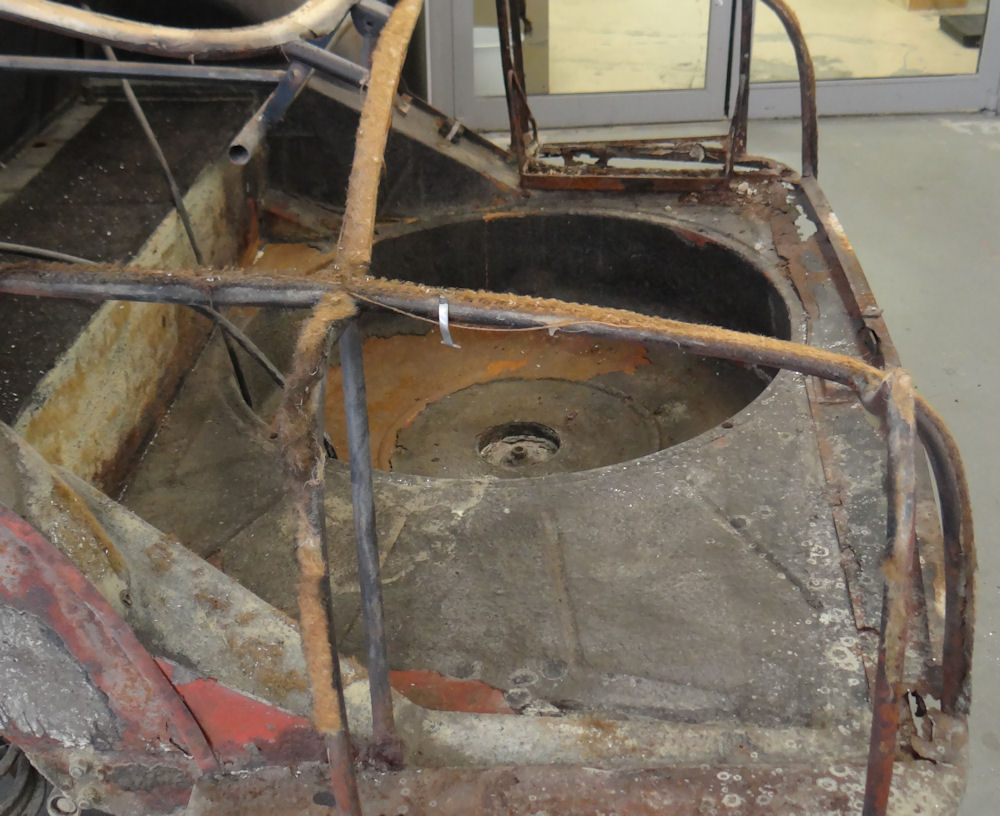 |
 |
|
|
|
|
|
|
 |
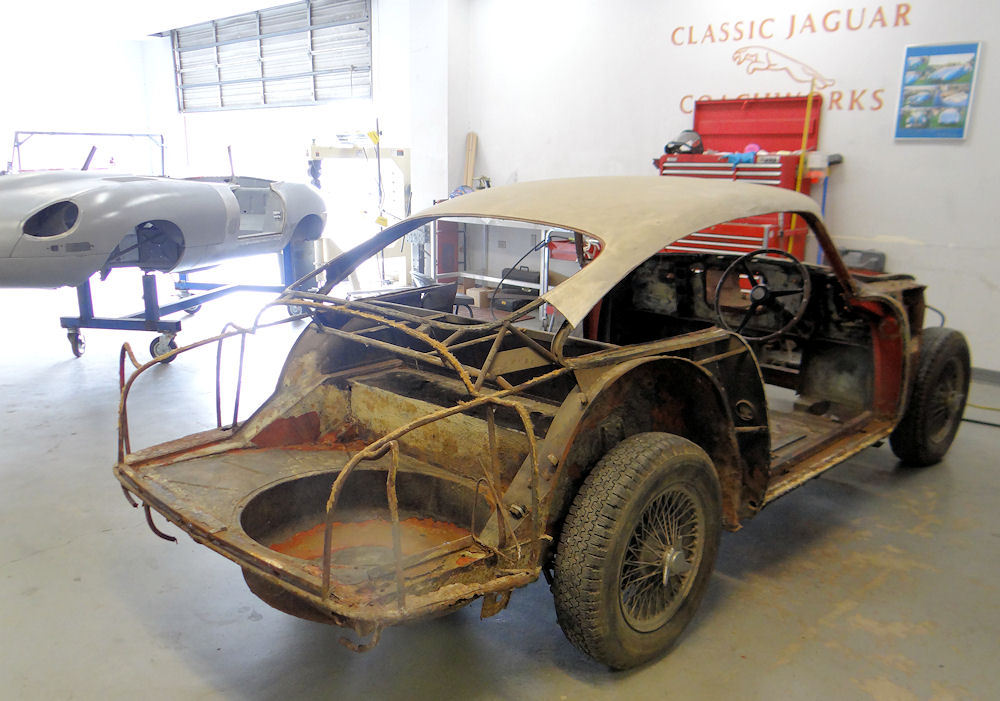 |
|
|
|
|
|
|
 |
 |
|
|
|
|
|
|
 |
 |
|
|
|
|
|
|
 |
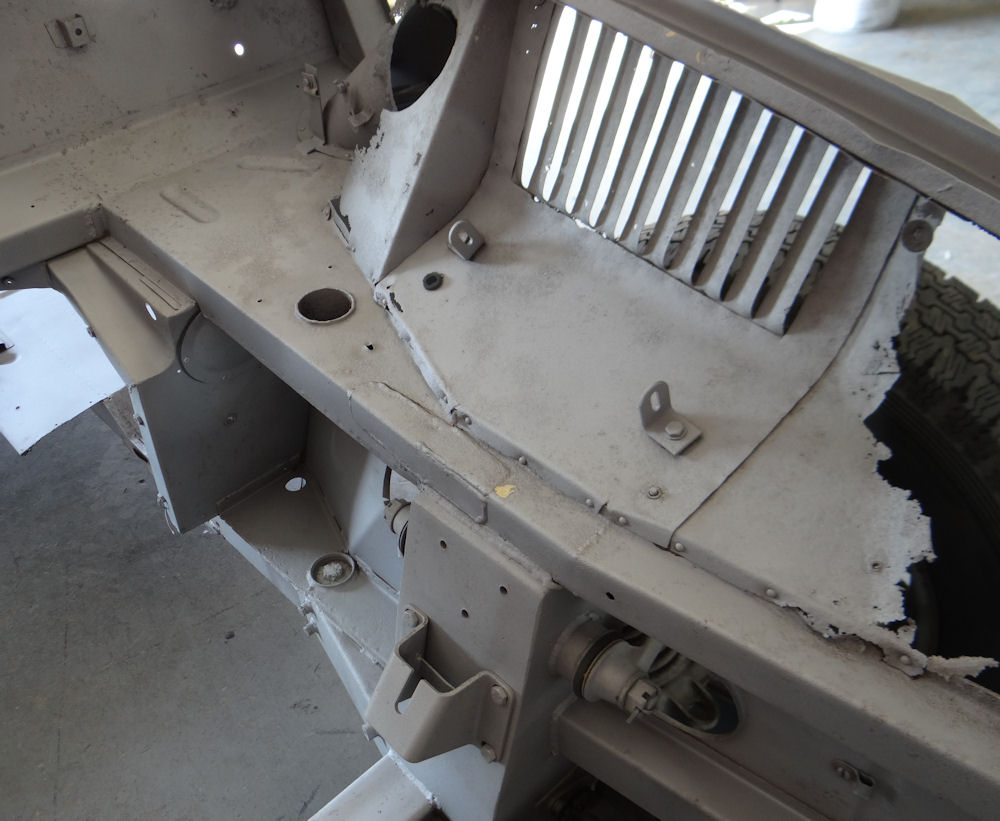 |
|
|
|
I am pleased to report that our new front clip has now been completed and should be Texas bound in the next few days. My thanks to James Forshaw at Aston Service Dorset for sending the photos below.
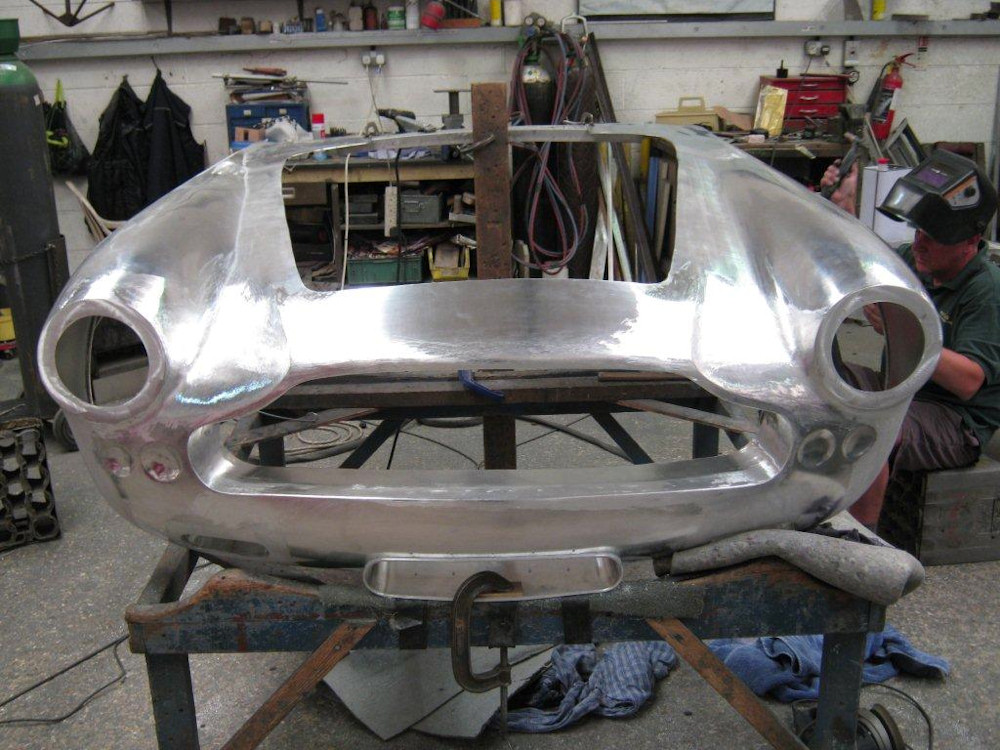 |
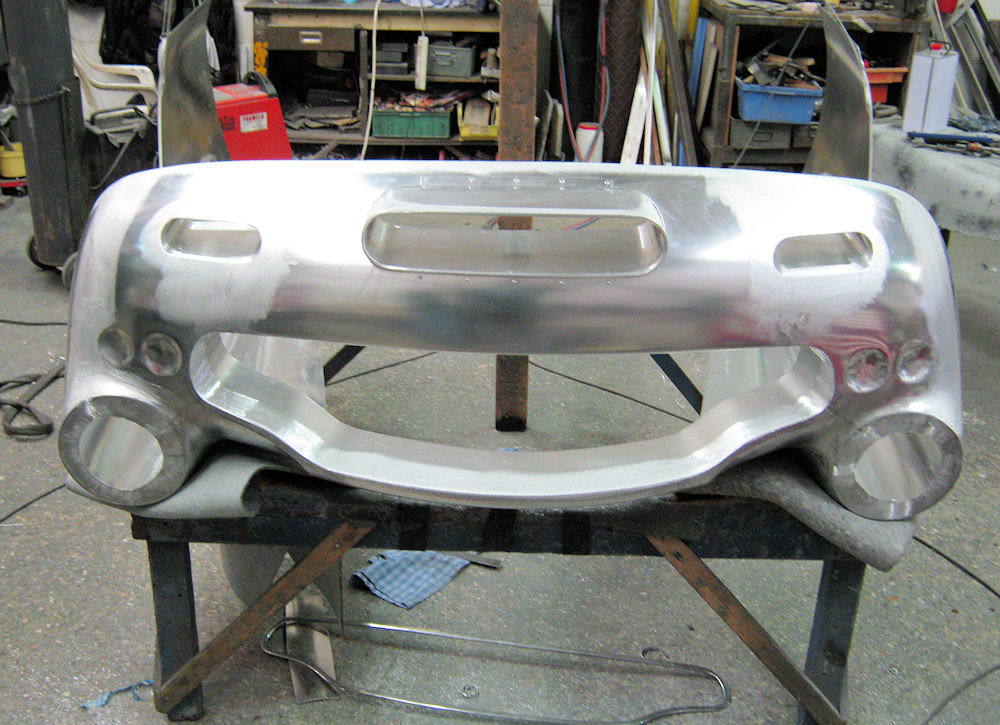 |
My thanks to Aston Service Dorset for providing the following photos showing the construction of the new front clip for our DB4. Great to see craftsmen hammering out flawless body panels from flat sheets of aluminium over ancient wooden bucks.
 |
 |
|
|
|
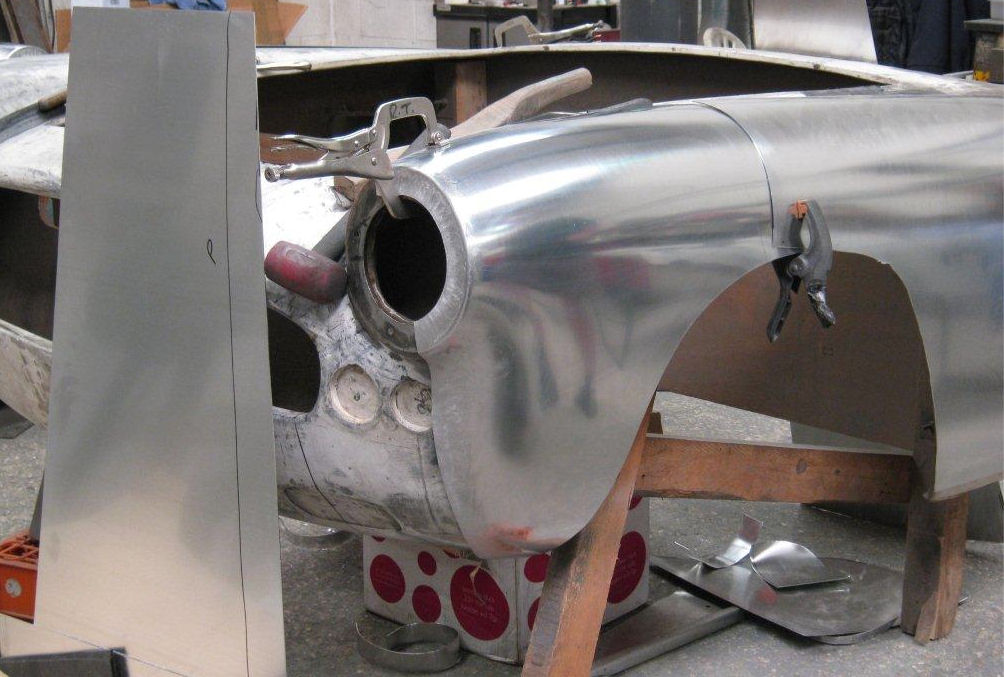 |
 |
The body panels have been ordered from Aston Martin Service in Dorset, England. The exploded diagram below shows the panels that we will be replacing.
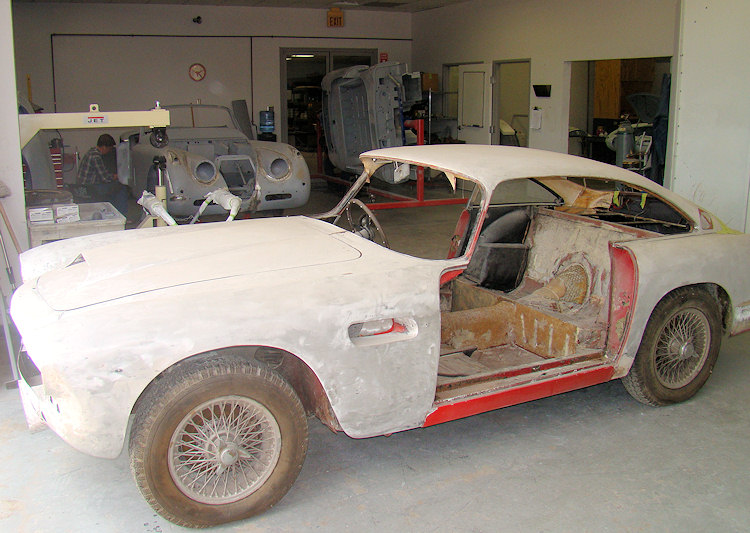 |
 |
|
|
As we prepare to get the body restoration underway, our first task is to construct a sturdy jig that will allow us to repair the steel platform chassis while keeping everything perfectly aligned.
 |
 |
|
|
|
|
|
|
 |
 |
|
|
|
|
|
|
 |
 |
|
|
|
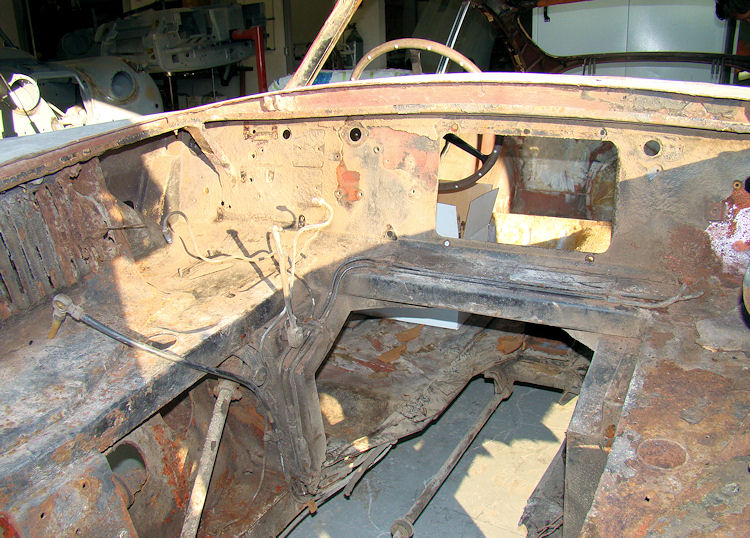 |
 |
|
|
|
|
|
|
 |
 |
The DB4 waiting in line for attention in the CJ Coachworks.
I was pleased to find a good used timing chain cover to replace the corroded original. My thanks to Nick Candee of Aston Martin of New England for providing that much needed component.
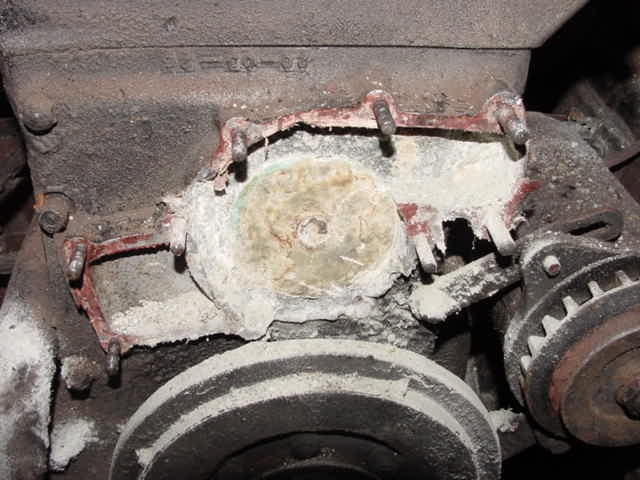 |
 |
|
|
|
Body now completely stripped...
 |
 |
 |
|
profiles in the automotive world |
of bondo and paint |
than its RH counterpart |
|
|
|
|
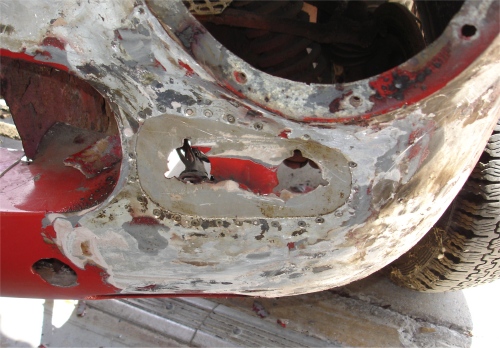 |
 |
 |
|
of the indicator/marker light plinth |
|
|
|
|
|
|
 |
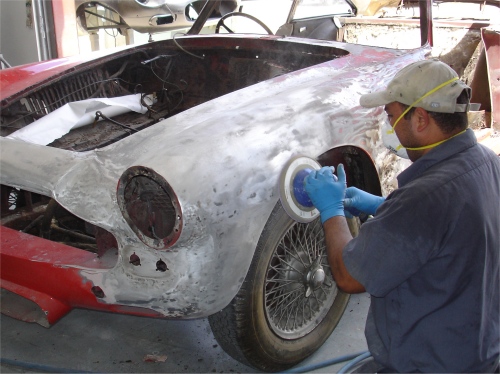 |
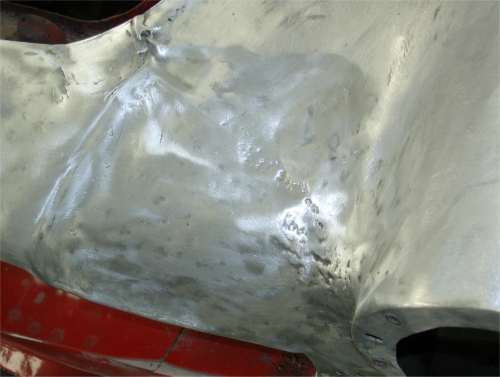 |
|
|
the front grill |
 |
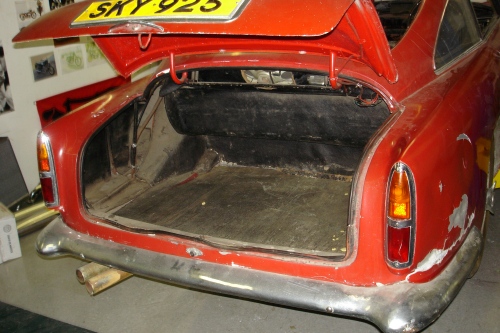 |
 |
|
|
||
 |
 |
 |
|
|
||
 |
 |
 |
|
|
||
 |
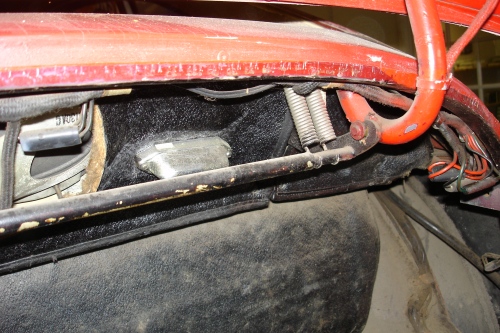 |
 |
|
|
||
 |
 |
 |
|
|
||
 |
 |
 |
|
|
||
 |
 |
 |
|
|
||
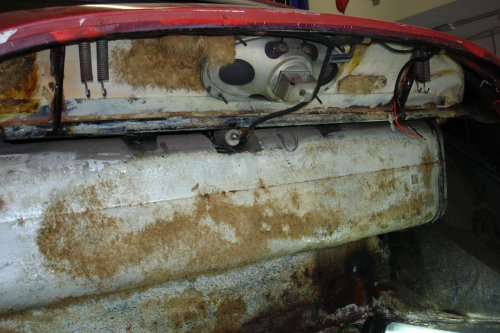 |
 |
 |
|
|
||
 |
 |
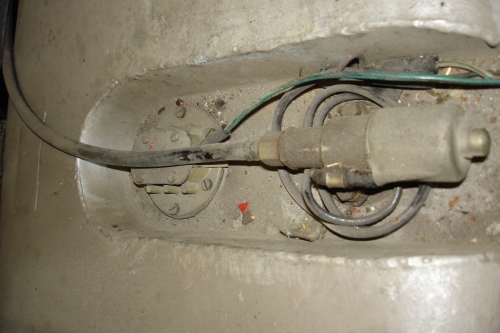 |
|
|
||
 |
 |
 |
|
|
||
 |
 |
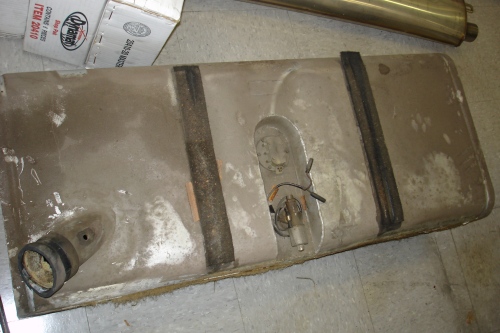 |
|
|
||
 |
 |
 |
|
|
||
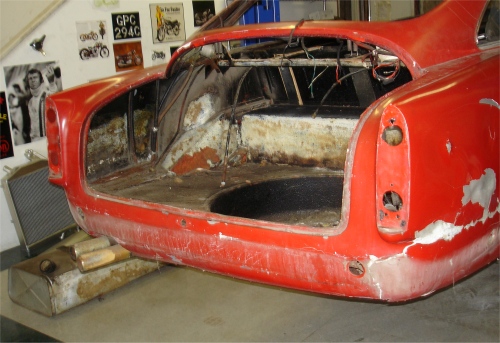 |
 |
 |
|
|
||
 |
 |
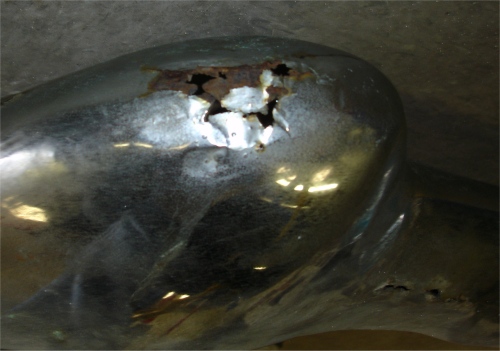 |
|
|
||
 |
 |
 |
|
|
||
 |
 |
 |
|
|
||
 |
 |
 |
|
|
||
 |
||
A little interior work....and an absolutely gorgeous aluminium expansion tank...
 |
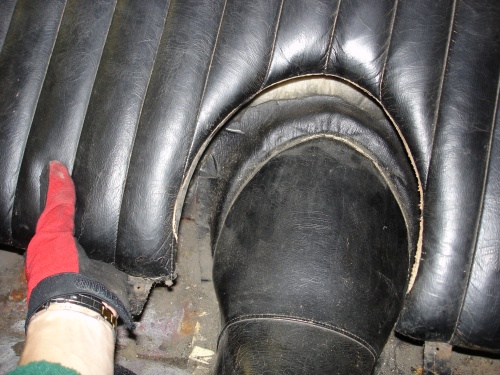 |
 |
|
|
|
|
|
|
|
|
 |
 |
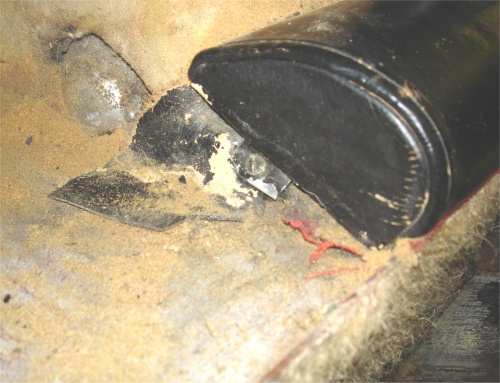 |
|
leather exposed |
|
|
|
|
|
|
 |
 |
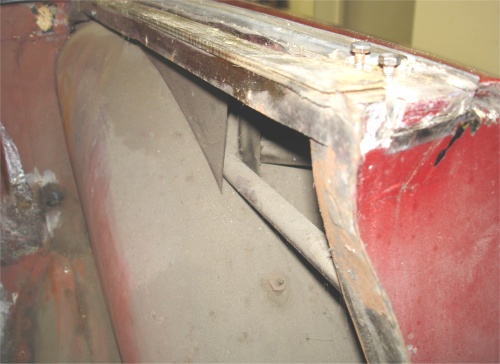 |
|
|
penmanship! |
|
|
|
|
|
 |
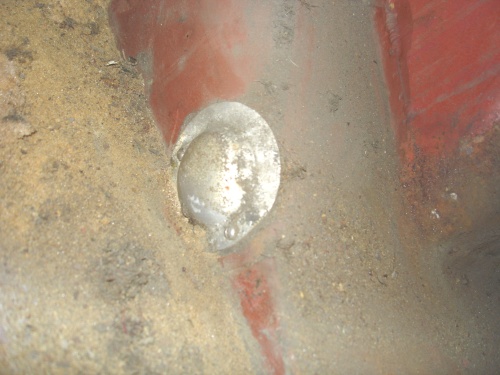 |
 |
|
|
||
|
|
|
|
 |
 |
 |
|
screwdriver reveals more rust |
|
|
|
|
|
|
 |
 |
 |
|
|
a gallant fight.... |
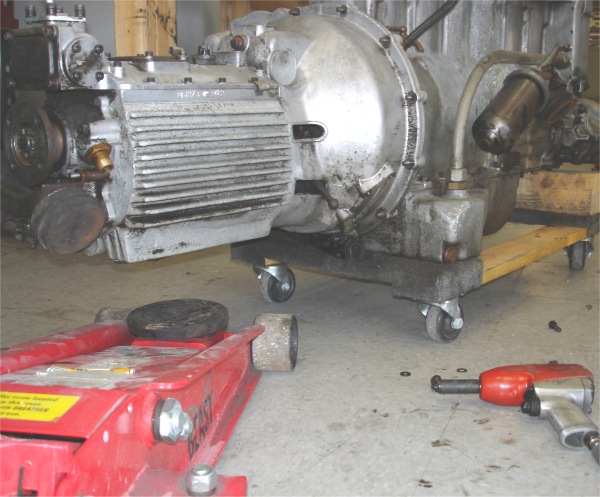 |
 |
 |
|
engine is straightforward |
from lower bellhousing |
|
|
|
|
|
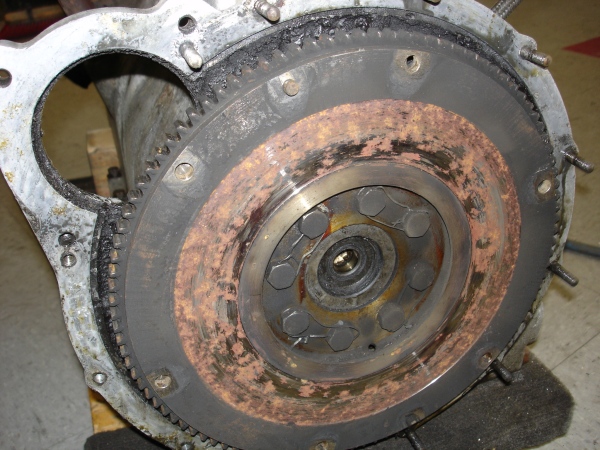 |
 |
 |
|
|
|
by clutch pressure plate bolts.... |
|
|
|
|
 |
 |
 |
|
assembly |
|
|
|
|
|
|
 |
 |
 |
|
|
|
|
|
|
|
|
 |
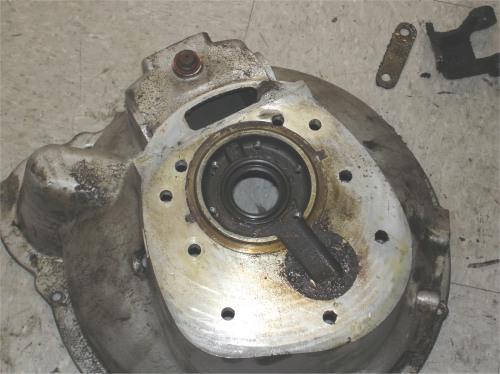 |
 |
|
|
||
|
|
|
|
 |
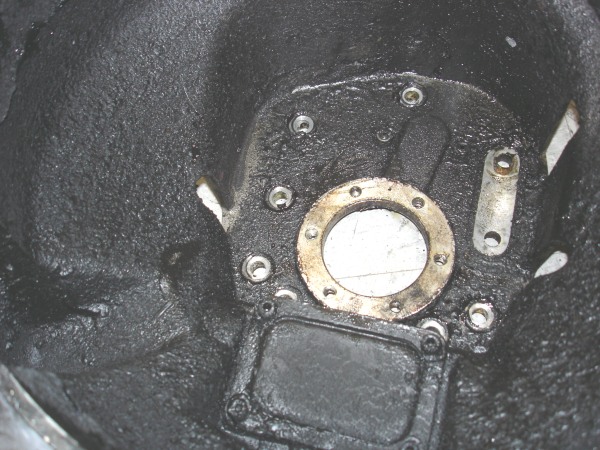 |
|
|
|
 |
 |
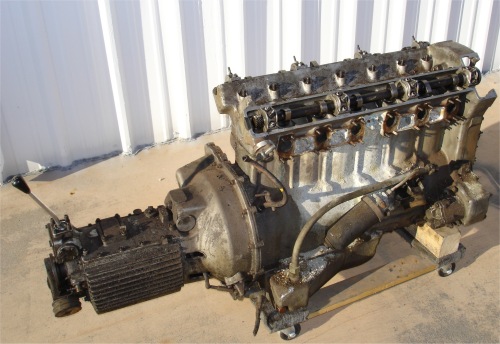 |
|
|
|
steam cleaning |
|
|
|
|
 |
 |
 |
|
|
|
|
|
|
|
|
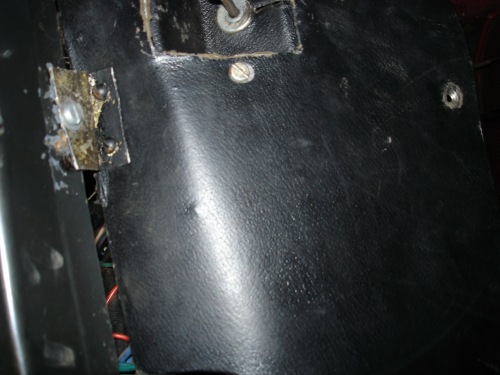 |
 |
 |
|
panels |
|
chain removed |
|
|
|
|
 |
 |
 |
|
|
|
|
|
|
|
|
 |
 |
 |
|
|
|
|
|
|
|
|
 |
 |
 |
|
|
|
|
|
|
|
|
 |
 |
 |
|
|
|
|
|
|
|
|
 |
 |
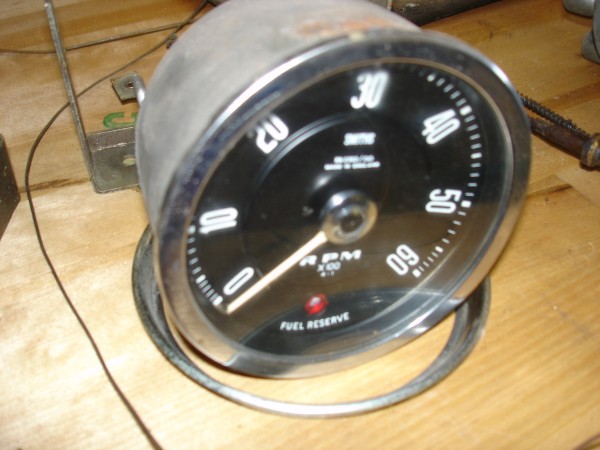 |
|
|
|
|
|
|
|
|
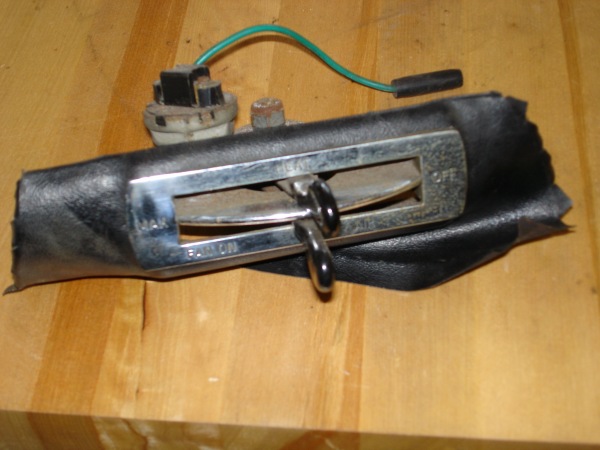 |
 |
 |
|
|
|
of the dash |
|
|
|
|
 |
 |
 |
|
|
|
|
|
|
|
|
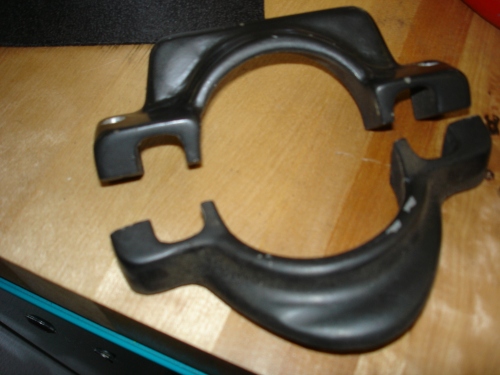 |
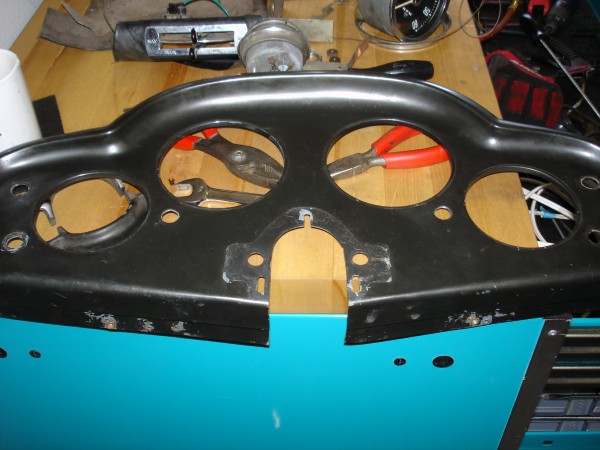 |
 |
|
|
shaped fascia |
|
|
|
||
 |
 |
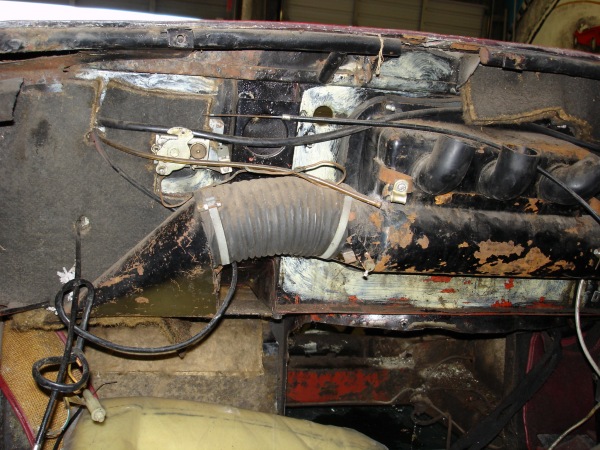 |
|
the dash removed |
||
|
|
|
|
 |
 |
 |
|
|
|
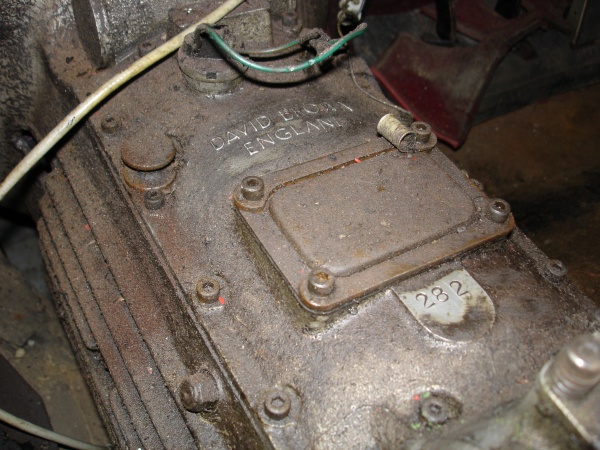 |
 |
|
build sheet |
build sheet |
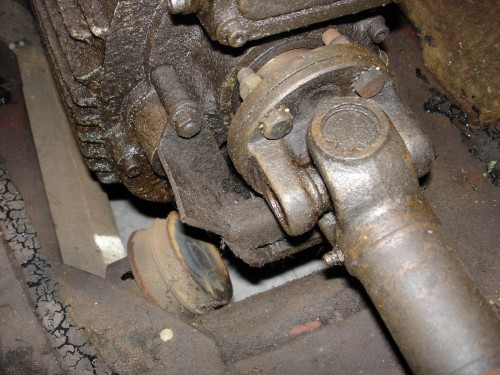 |
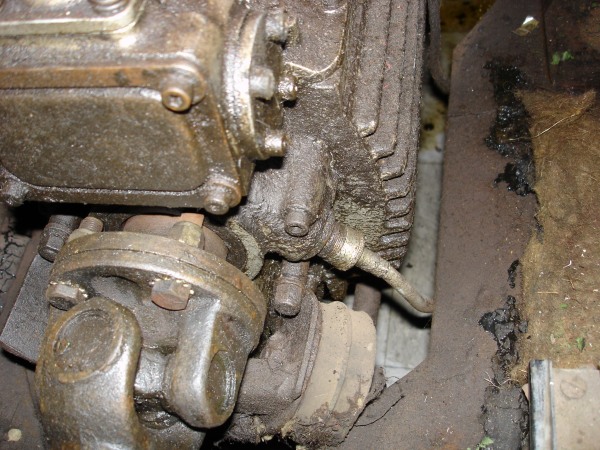 |
 |
|
|
|
|
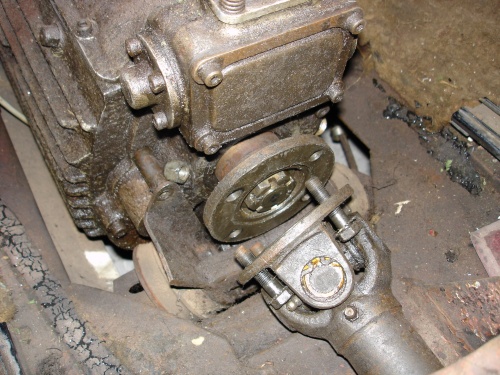 |
 |
 |
|
|
attached to the engine |
cover vent tube |
 |
 |
 |
|
it will be a tight squeeze on the way out |
the floors |
|
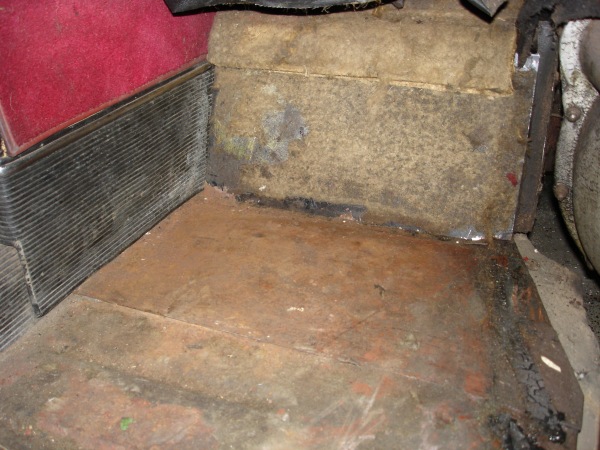 |
 |
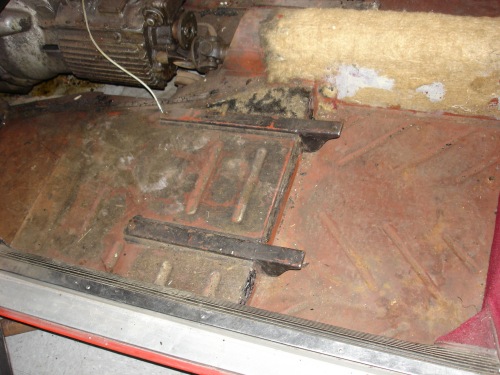 |
|
main floors appear to be |
|
|
 |
 |
 |
|
|
||
 |
 |
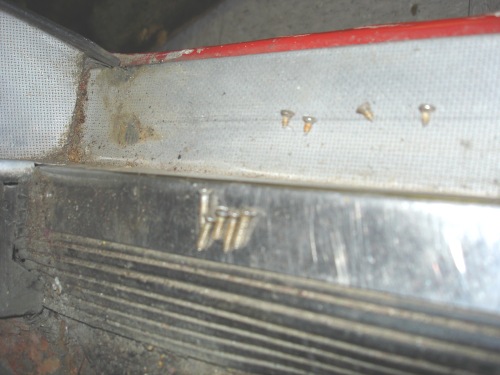 |
|
|
|
|
 |
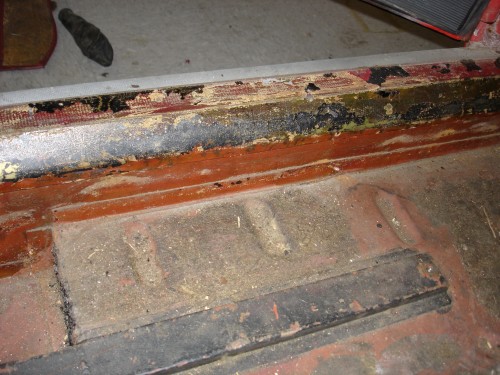 |
 |
|
|
|
|
 |
 |
 |
|
is stamped with the chassis number |
||
 |
 |
 |
|
|
|
quite yellow! |
 |
 |
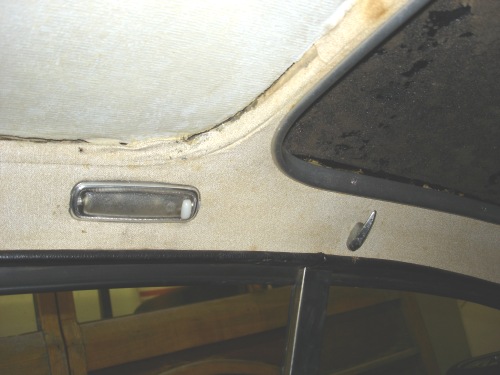 |
|
directly on top of the original |
|
|
 |
 |
 |
|
|
lots of corrosion |
feature of of S1 cars |
 |
 |
 |
|
|
||
 |
 |
 |
|
to clear the front cowling |
|
|
 |
 |
|
|
with engine out of car |
|
 |
 |
 |
|
|
|
|
 |
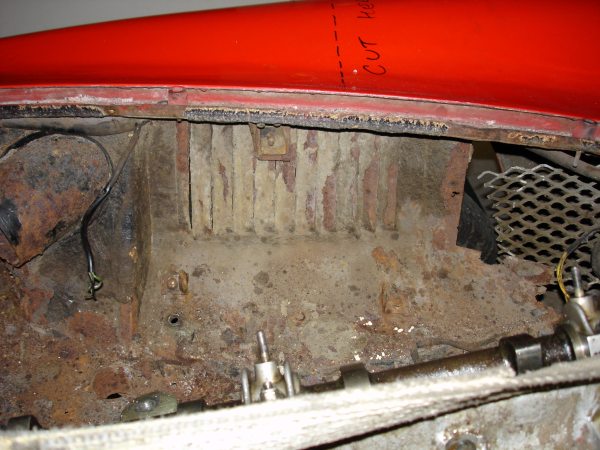 |
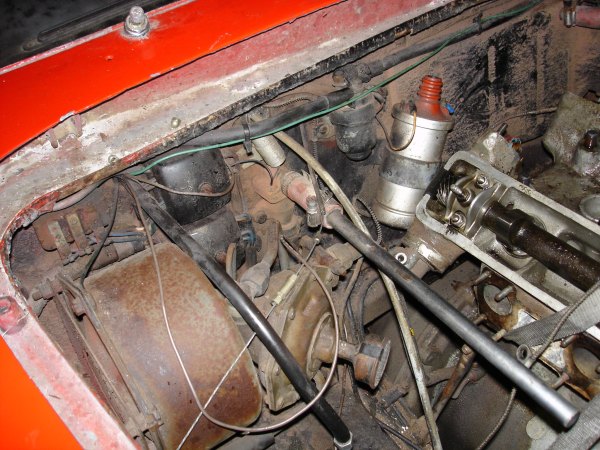 |
|
|
|
target today |
 |
 |
 |
|
and a couple of scuffed knuckles |
lay-out to fuse boxes |
|
 |
 |
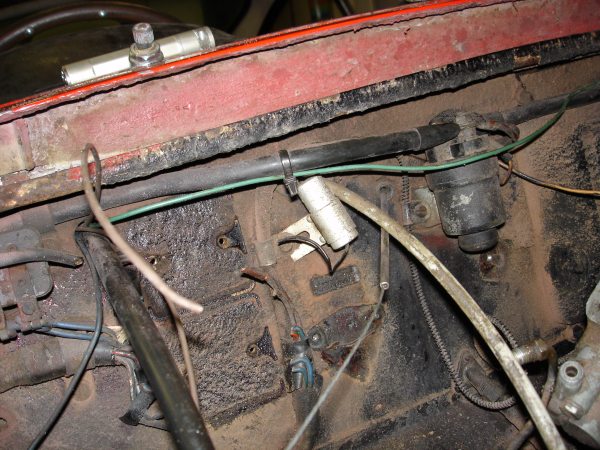 |
|
|
cork insulation |
|
 |
 |
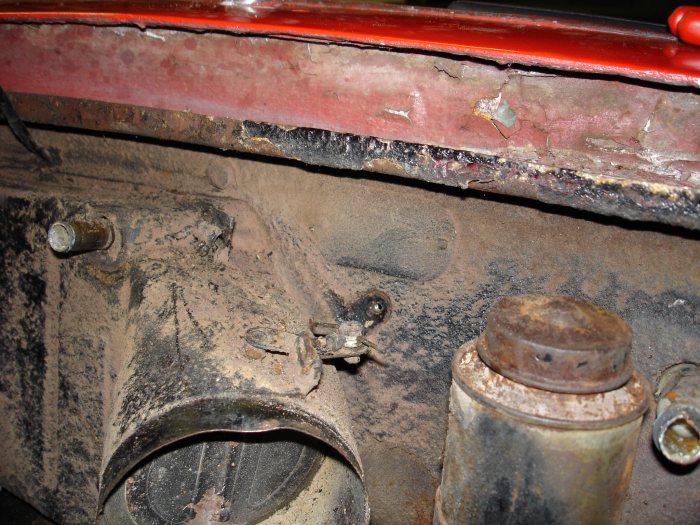 |
|
slab of cork.... |
||
 |
 |
 |
|
upper left of the firewall |
pillar trim |
original beige colour |
 |
 |
 |
|
much 'hand made' |
off when I open it |
|
 |
 |
|
|
|
 |
 |
 |
|
to two blocks of wood! |
indicative of poor quality workmanship done in the past |
|
|
|
|
|
 |
 |
 |
|
|
venerable Jaguar XK engine |
penatrating oil |
|
|
|
|
 |
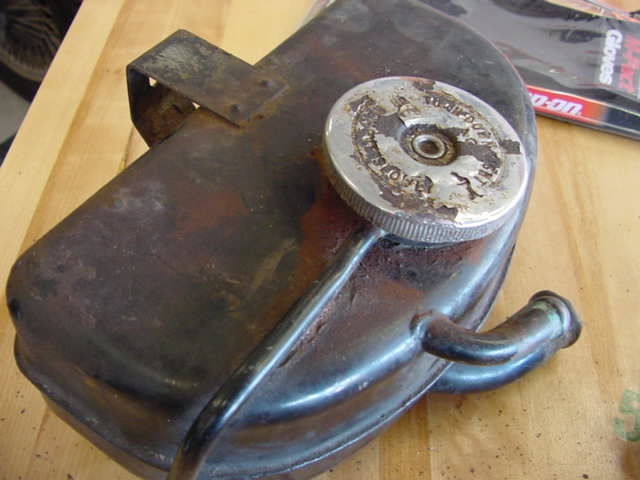 |
|
|
|
aluminium expansion tank |
|
 |
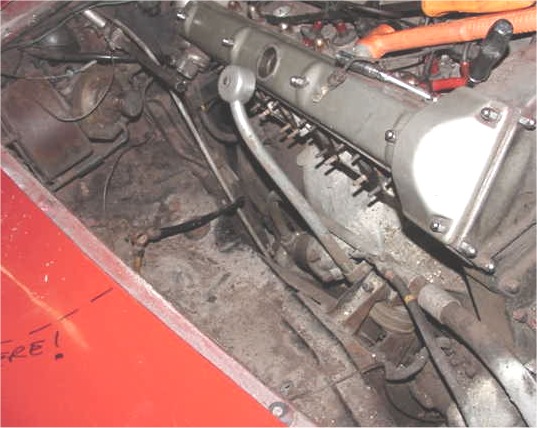 |
 |
|
carbs and intake manifolds |
|
|
|
|
||
 |
 |
 |
|
|
|
|
|
|
||
 |
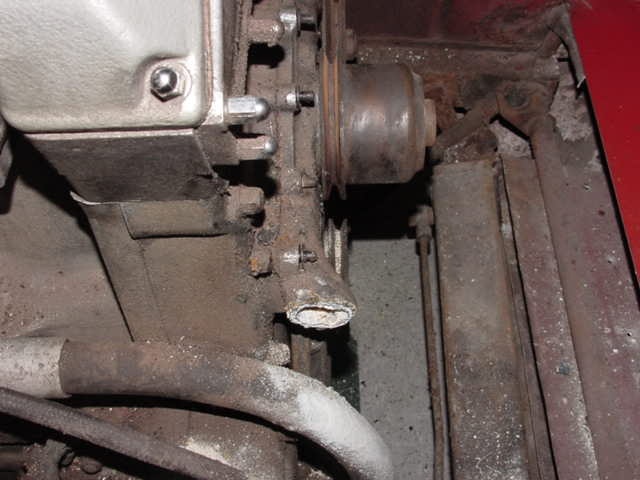 |
|
|
|
|
beyond repair |
|
|
||
 |
||
|
|
New high torque gear reduction starter motor.

Custom alloy radiator...Tipping the scales at just 13lbs and upgraded to handle over 400 HP, the new alloy radiator we had custom made represents a prodigious performance upgrade over the original.

Unfortunately, the DB4 has sustained a pretty decent hit in the right front at some time in its past, so it looks as if a new front clip is in the car's future. Really the only decision to be made is whether to buy a nose section (from midway along the wheel arches forward) or a complete assembly (everything from the windscreen forward).The next task will be to pull the engine and transmission, something I hope to find time to do next week.
 |
 |
 |
|
simple to remove |
away from the wing! |
and bondo |
|
|
||
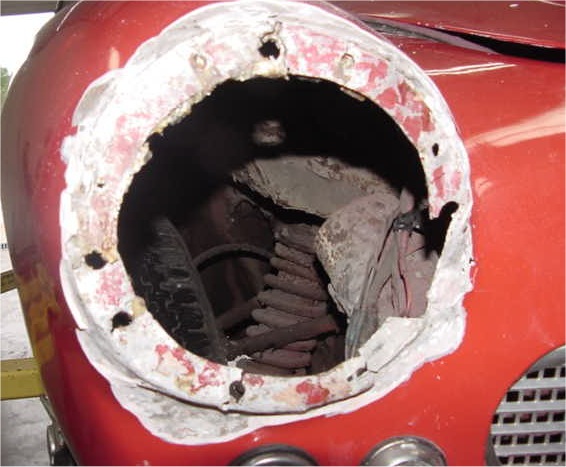 |
 |
 |
|
pushed back in collision |
to hold side and indicator lamps |
removed for safe keeping |
|
|
||
 |
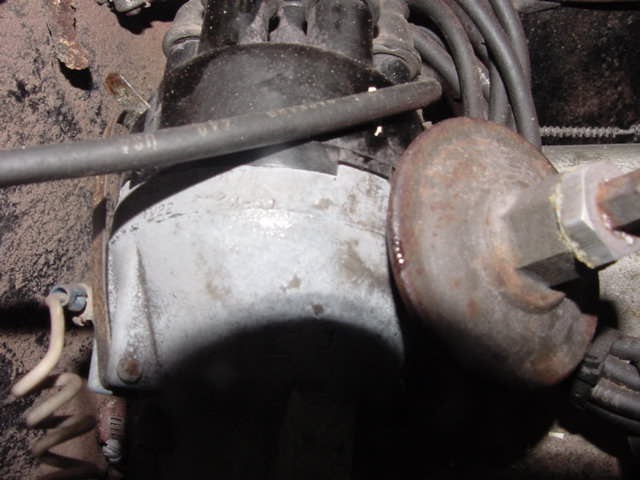 |
 |
|
|
replica of the radiator |
|
|
|
||
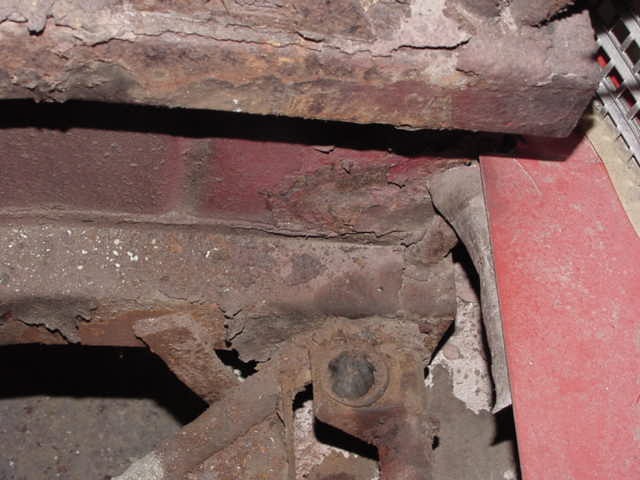 |
 |
 |
|
rotten |
have to go..... |
full of powdered lime |
|
|
||
 |
 |
 |
|
is actually original equipment |
condition |
|
|
|
||
 |
 |
 |
|
further back towards the screen! |
a couple of minutes |
beneath the edge of the wing |
|
|
||
 |
 |
 |
|
water pipe |
inside grill opening |
|
|
|
||
 |
||
 |
 |
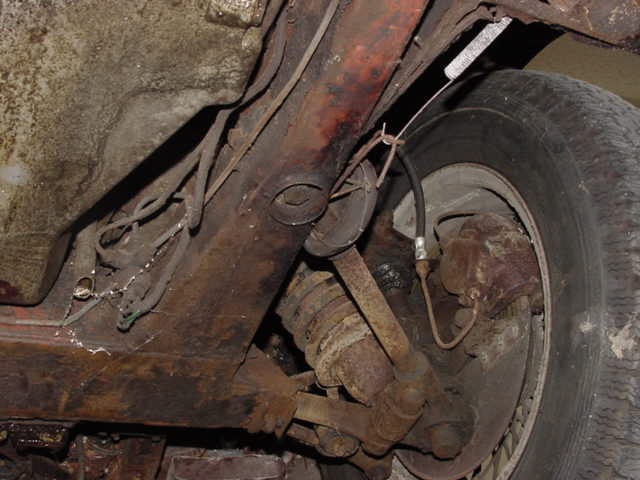 |
|
|
||
 |
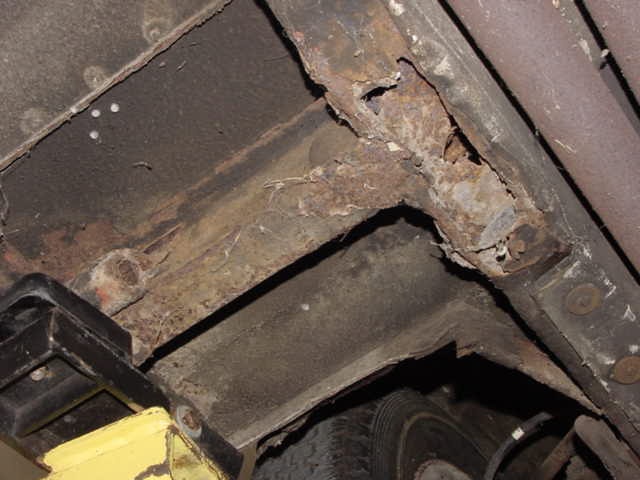 |
 |
|
|
||
 |
 |
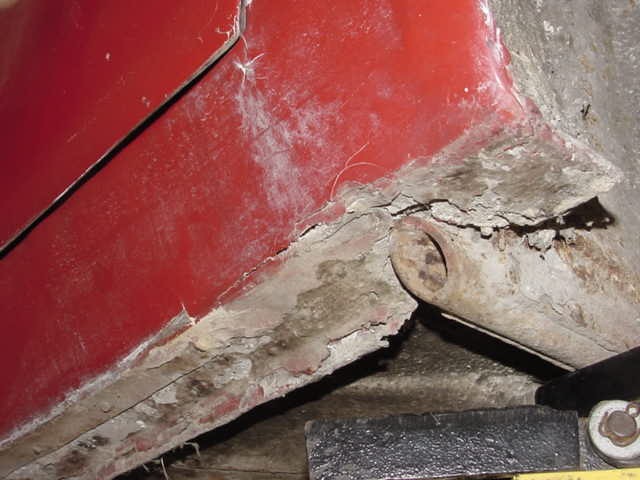 |
|
|
||
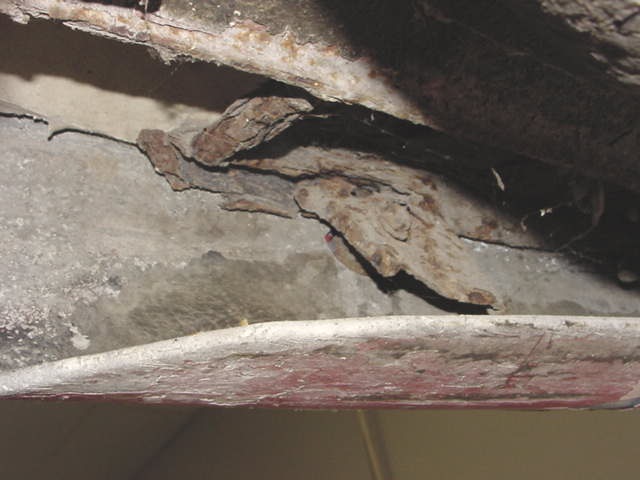 |
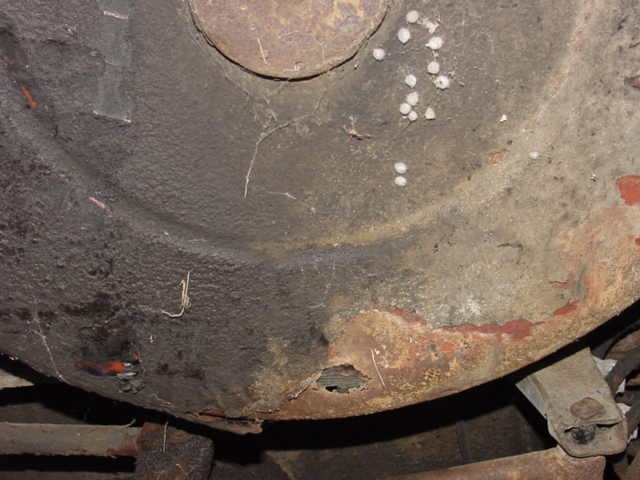 |
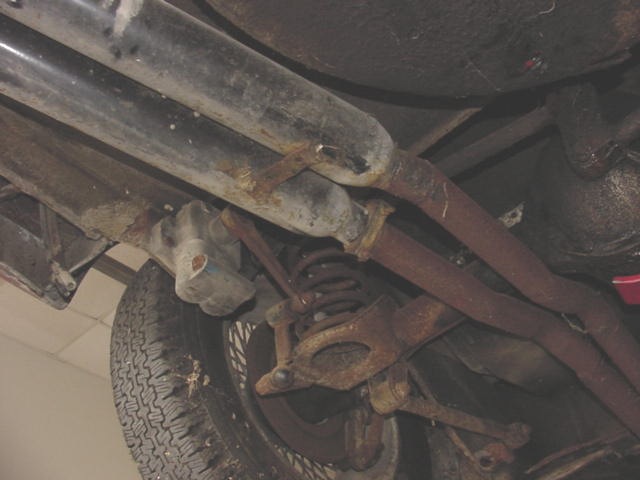 |
|
|
||
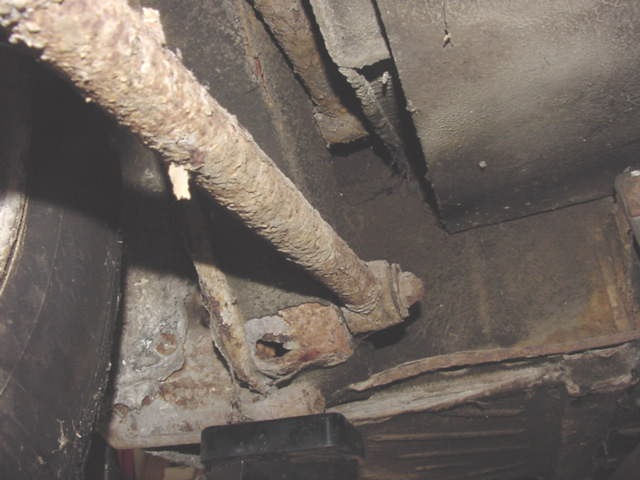 |
 |
 |
|
|
||
 |
 |
 |
|
|
||
 |
 |
 |
|
|
||
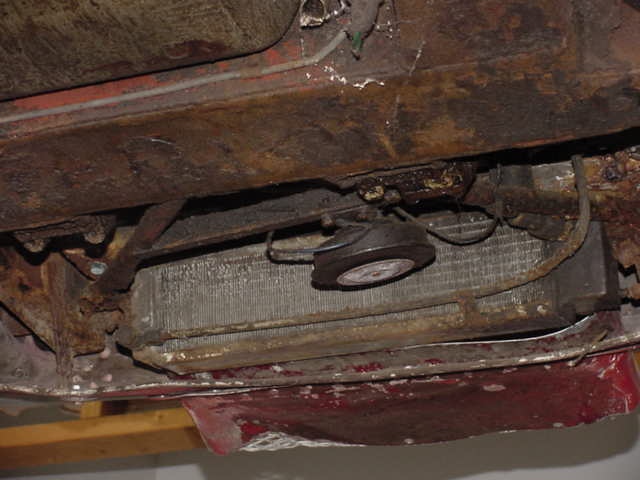 |
 |
 |
|
|
||
 |
 |
 |
|
|
||
 |
 |
 |
|
|
||
 |
 |
 |

I am delighted to report that the DB4 is now safe and sound at Classic Jaguar. The following photographs are as much for reference purposes as anything else, although some of them may also be of general interest.I would love to think the indicated mileage of 13,530 is correct, although of course that would seem to be unlikely. More research needed on that front. The glove box contained a handful of invoices dating back to the mid 1970's.
We have learned from Aston Martin Heritage that the number plate (SKY 925) is original to the car, having been issued in Bradford, England in 1959. Incidentally, the car was last registered for the road in Indiana in August, 1976.
 |
 |
 |
|
parking place for DB4 |
||
|
|
|
|
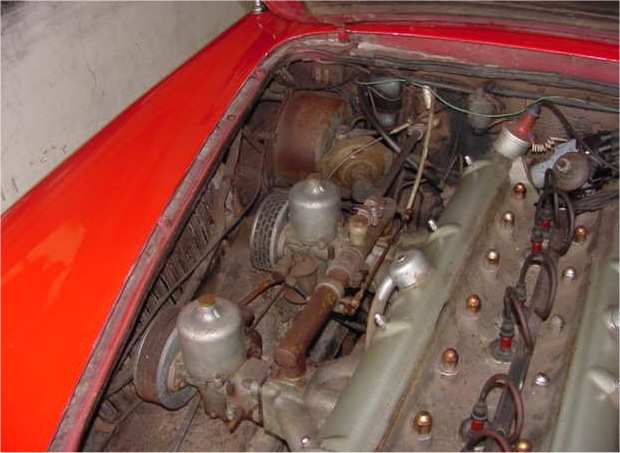 |
 |
 |
|
|
|
|
 |
 |
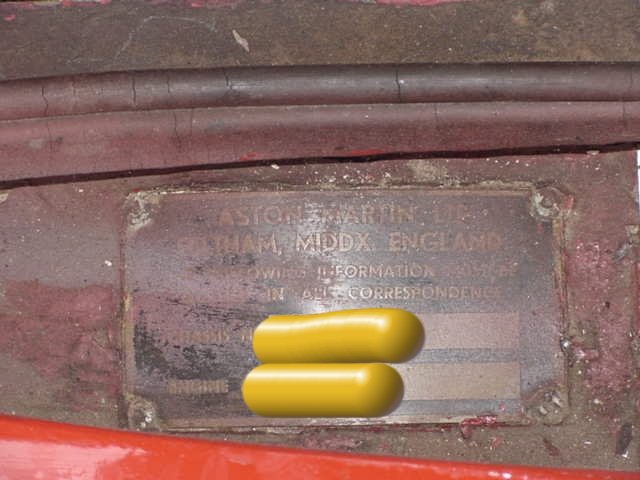 |
|
|
||
|
|
|
|
 |
 |
 |
|
from Touring of Milan |
|
|
|
|
|
|
 |
 |
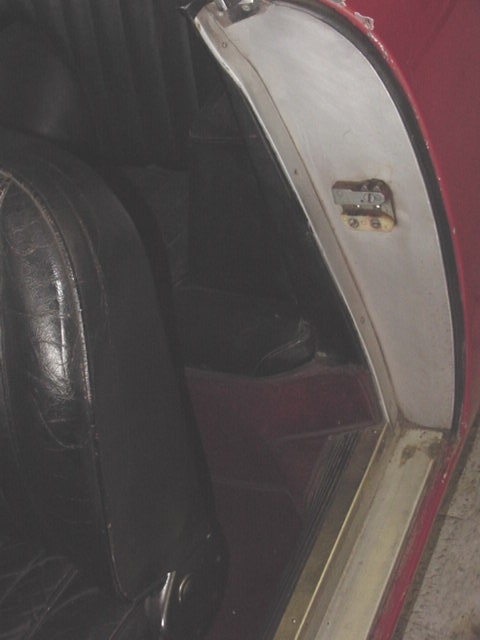 |
|
car since new |
trimmed and well finished |
|
|
|
|
|
 |
 |
 |
|
|
black (originally beige) |
|
|
|
|
|
 |
 |
 |
|
good condition |
original miles |
|
|
|
|
|
 |
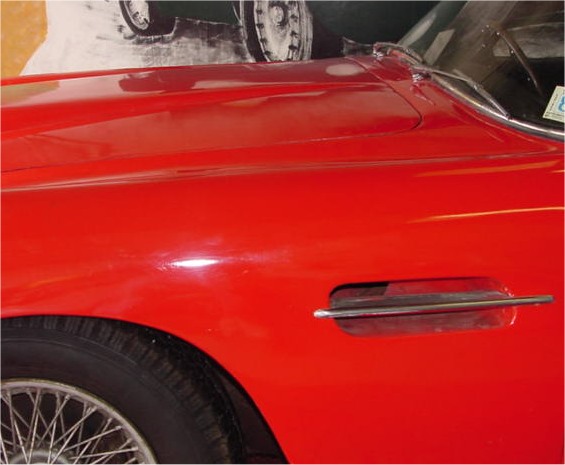 |
 |
|
extremely comfortable! |
|
|
|
|
|
|
 |
 |
 |
|
at one time! |
particularly in the rear |
|
|
|
|
|
 |
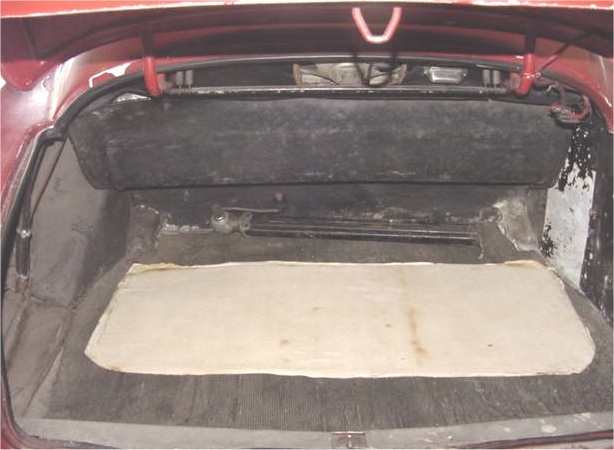 |
 |
|
|
perfectly |
The starting point...

As purchased - 1960 Aston Martin DB4. One of only 149 S1 cars built and one of only 66 survivors known to the AMOC register.
 |
 |
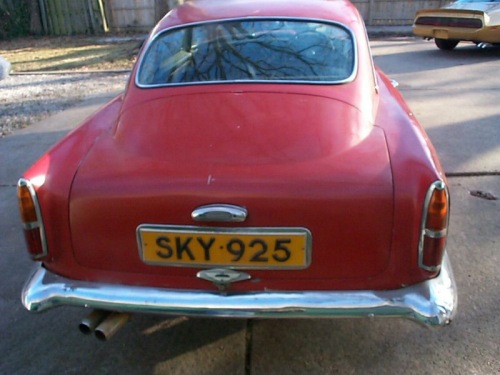 |
 |
|
|
Original build sheet also includes a record of various repairs that were carried out under warranty during the first few months of the car's life. This list makes interesting reading!
- January 6, 1960 - An engineer attended (presumably the selling dealership) and tuned the carbs, adjusted the choke and torqued head nuts found to be loose
- January 12, 1960 - Delivery date/supplied to A. Mainz & Son, Limited, 7 Arundel Street, Bradford, Yorks
- February 8, 1960 - Cylinder head removed, broken inlet tappet cap and outer valve sping replaced, # 3 inlet valve replaced, valves ground and new parts fitted: engine timed: track checked: king pin nuts tightened
- June 22, 1960 - Camshaft covers removed and all auxillaries cylinder head and cylinder head itself removed: all components cleaned off, new gaskets fitted, cylinder head refitted, engine tuned and timed (work carried out in Germany)
- July 7, 1960 - New crankshaft, 6 new rods and all new bearings fitted: block and oil filter drilled out: summer thermostat fitted and thermostat housing opened up: head faced up: one new inlet valve and guide fitted: new set of valve springs and one new tappet fitted: new piston rings, starter rack and clutch plate fitted
- July 7, 1961 - Repairs carried out due to accident, including respray
- November 5, 1961 - Underside of spare wheel carrier sprayed
I suspect Aston Martin were relieved to get this particular car out of warranty!


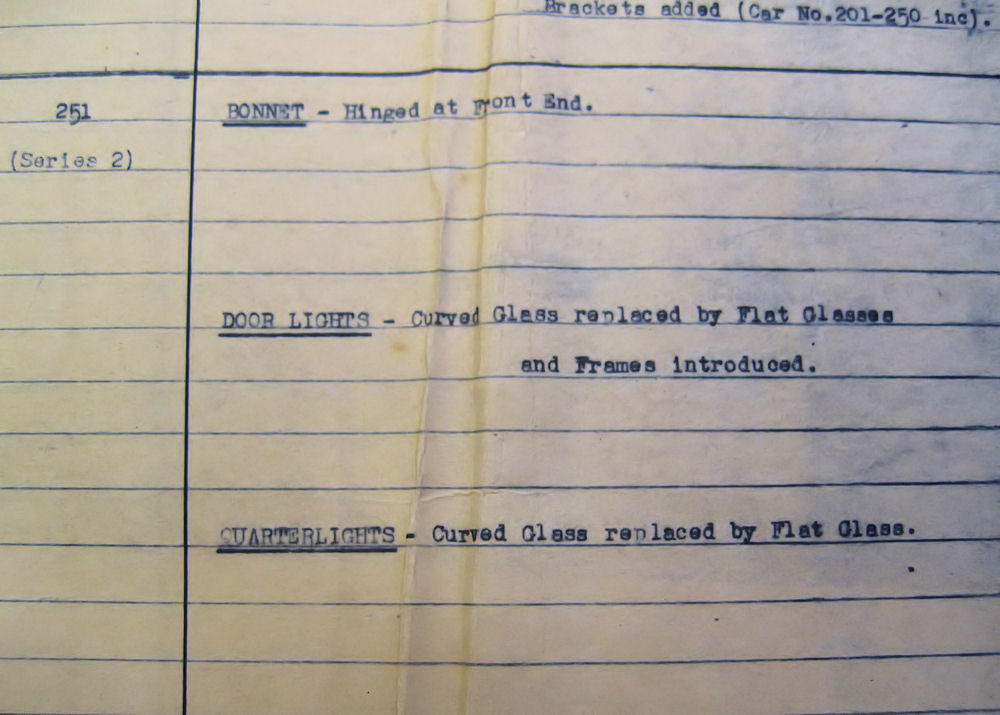