Total restoration, ultra-high performance upgrades
| 1966
E
Type FHC (ER) Total restoration, ultra-high performance upgrades |
Restoration log by Dan Mooney |
|
|
Update report - May 5, 2022
Update report - April 26, 2022
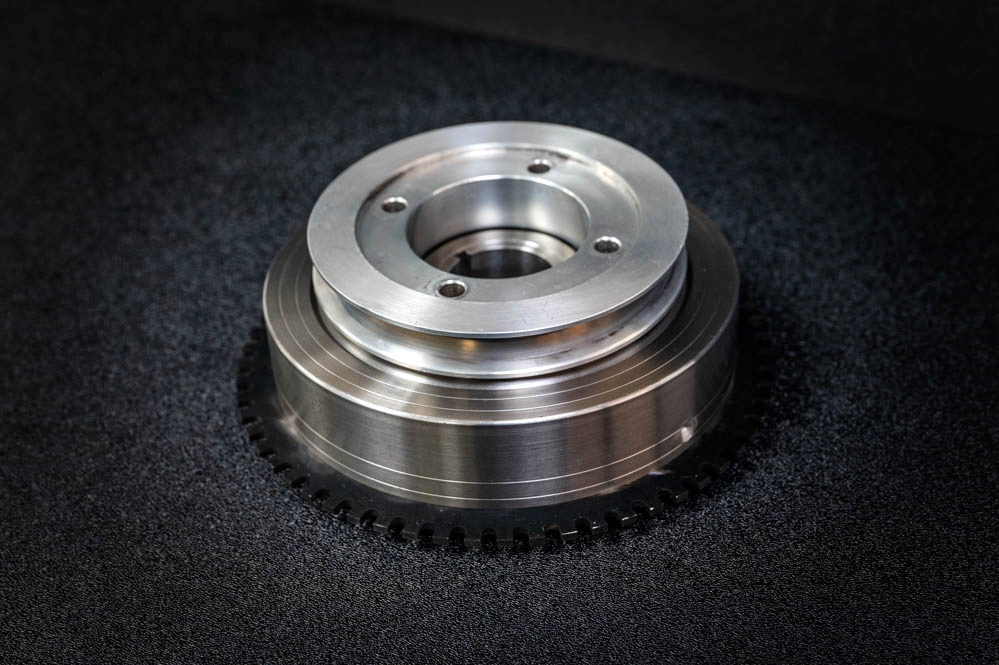
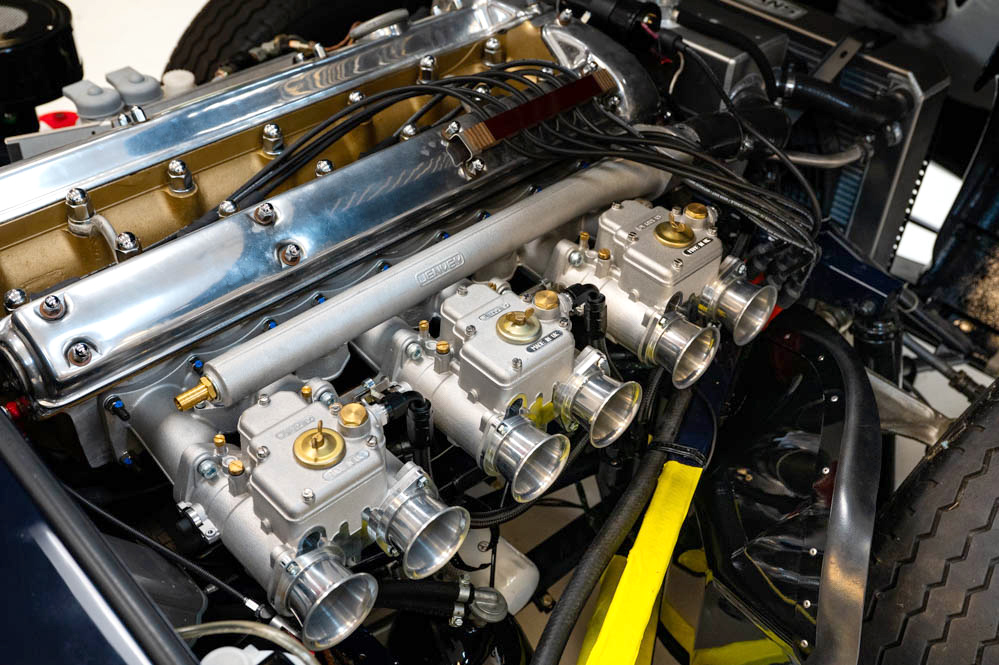
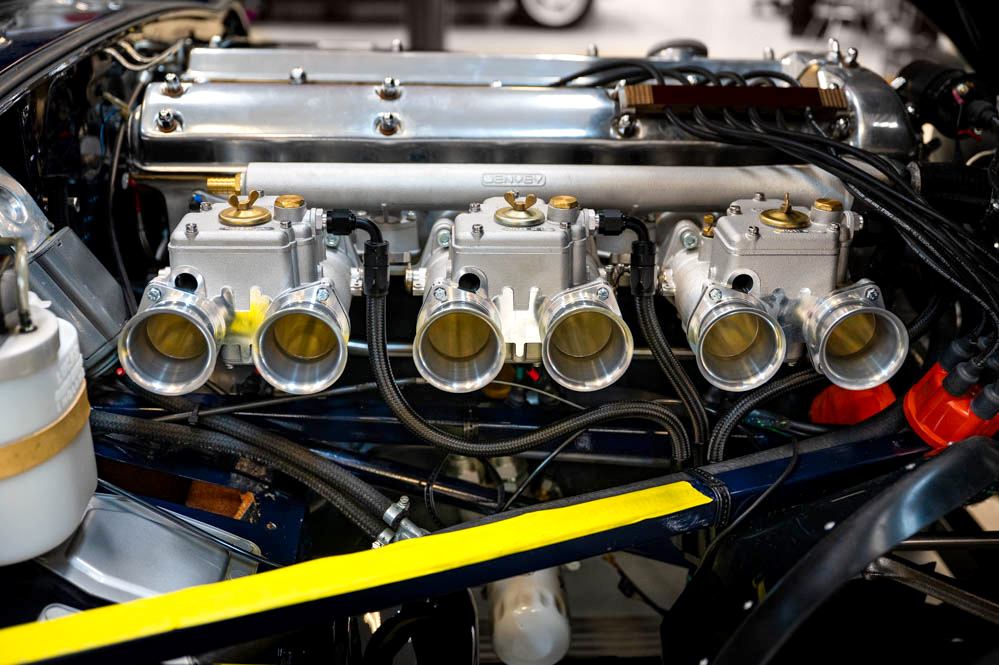
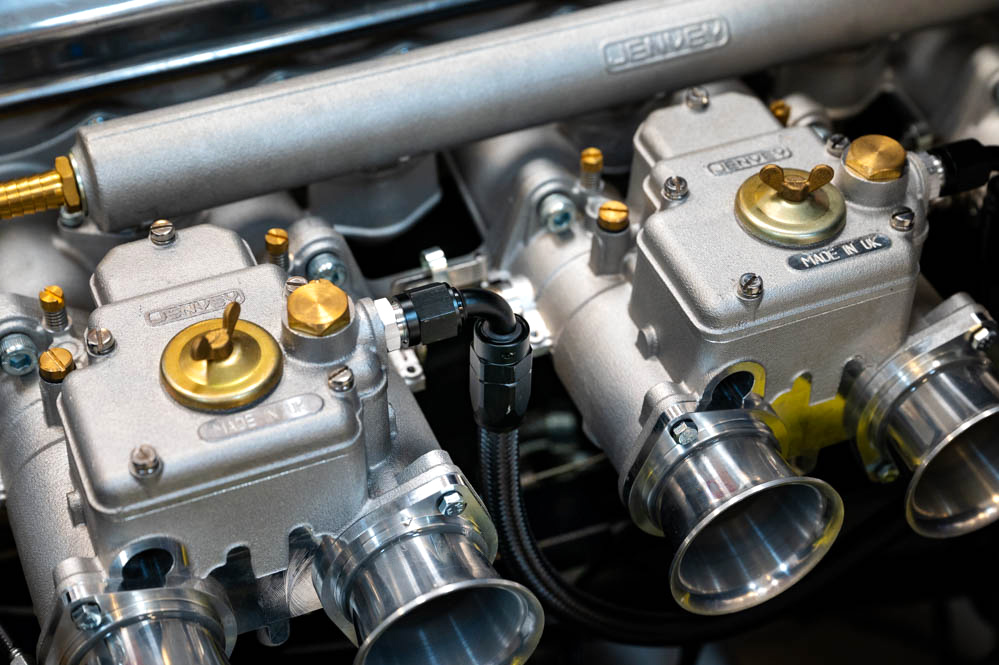
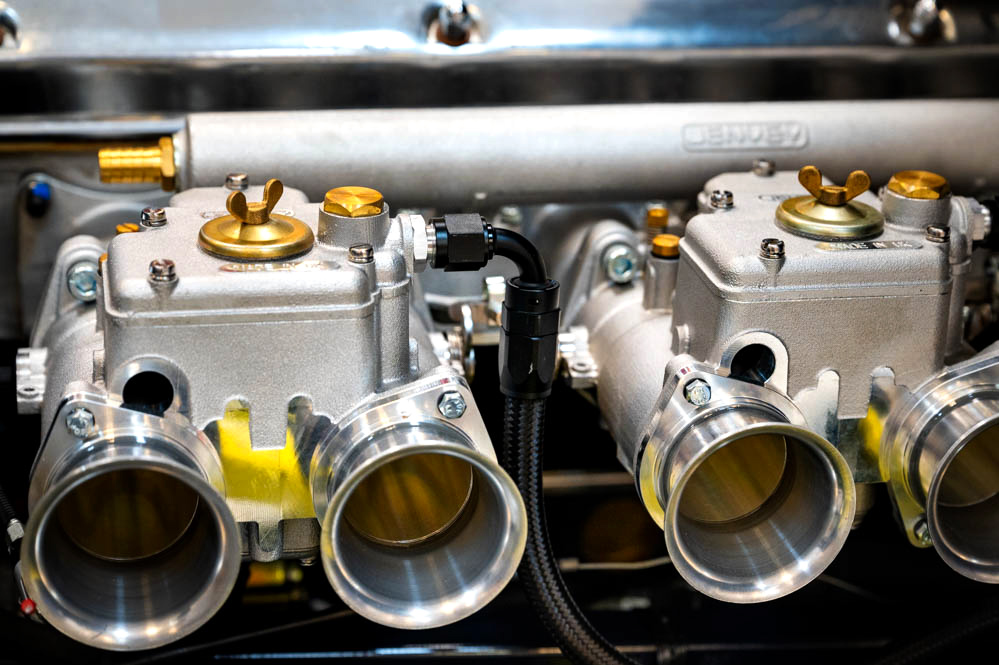
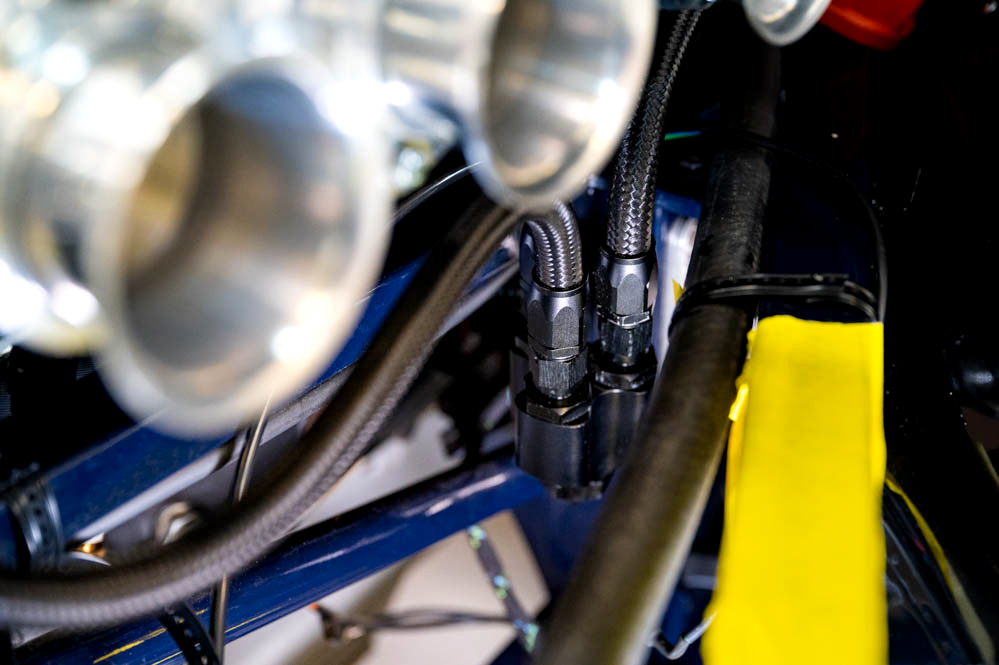
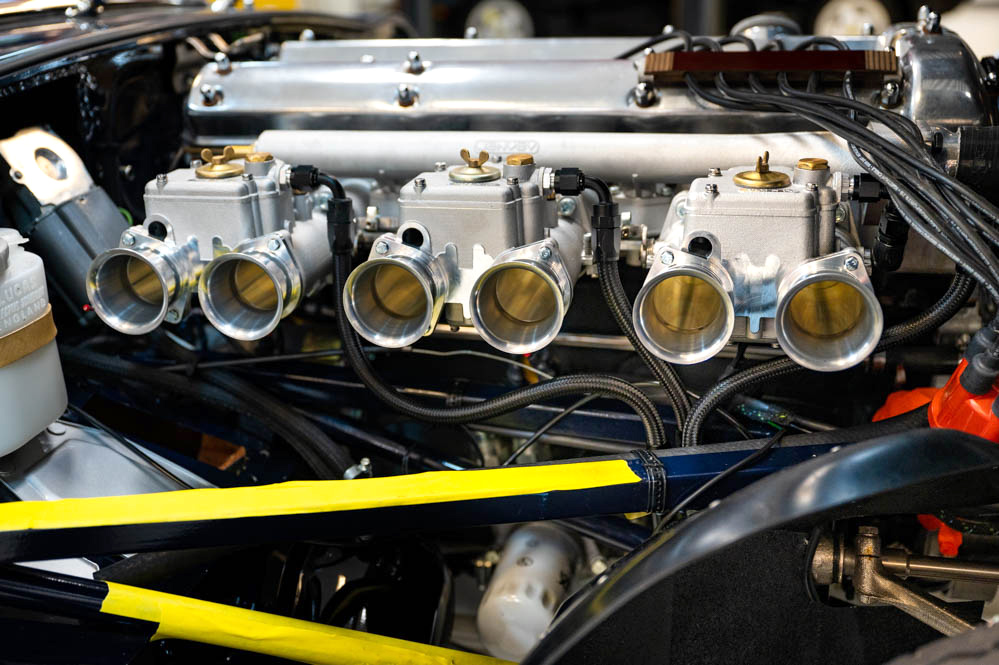
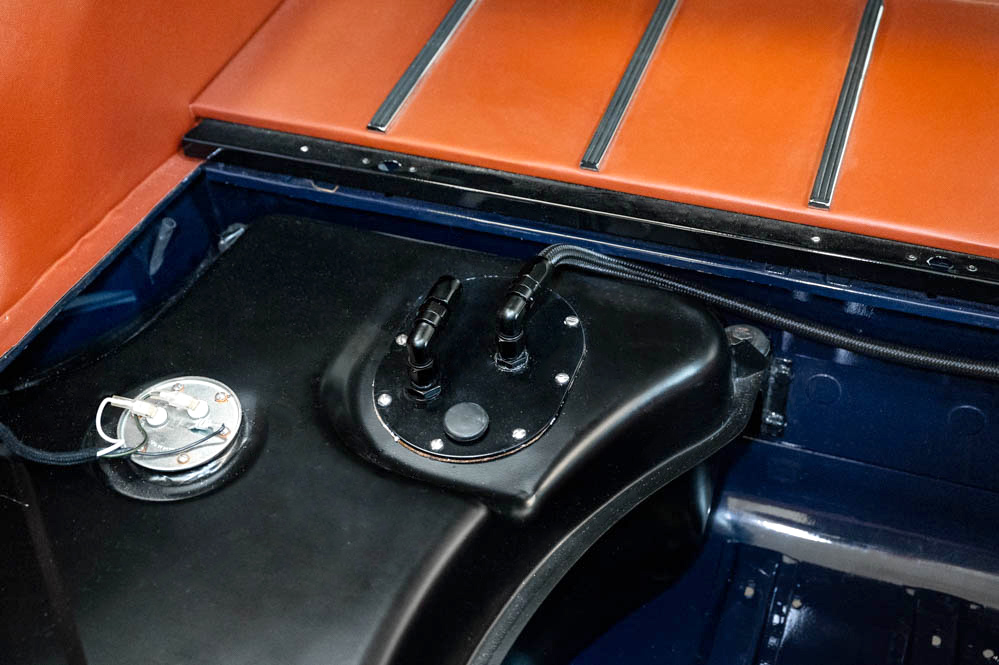
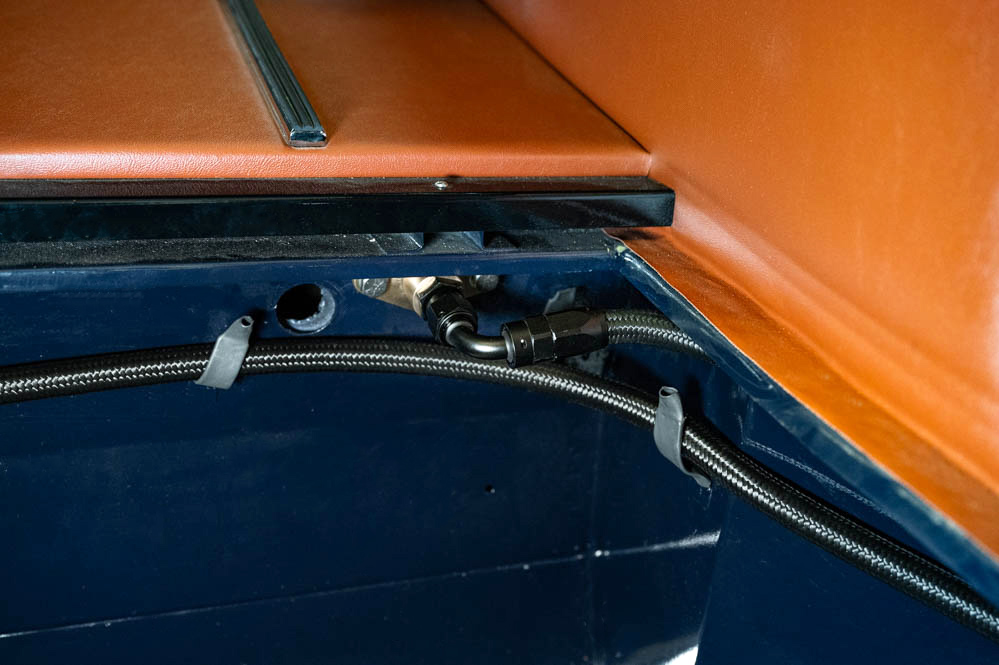
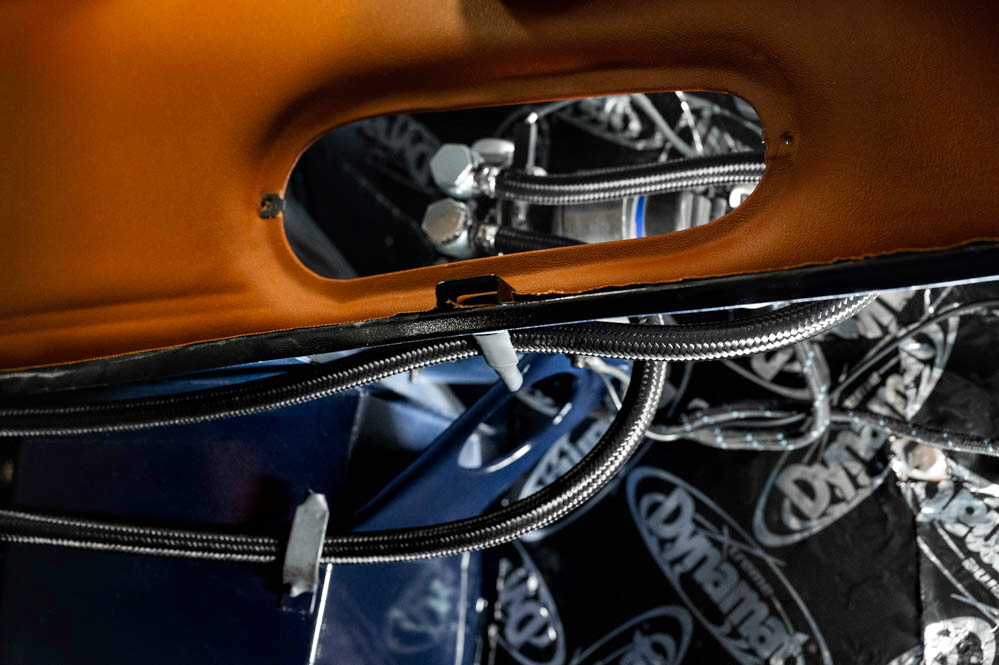
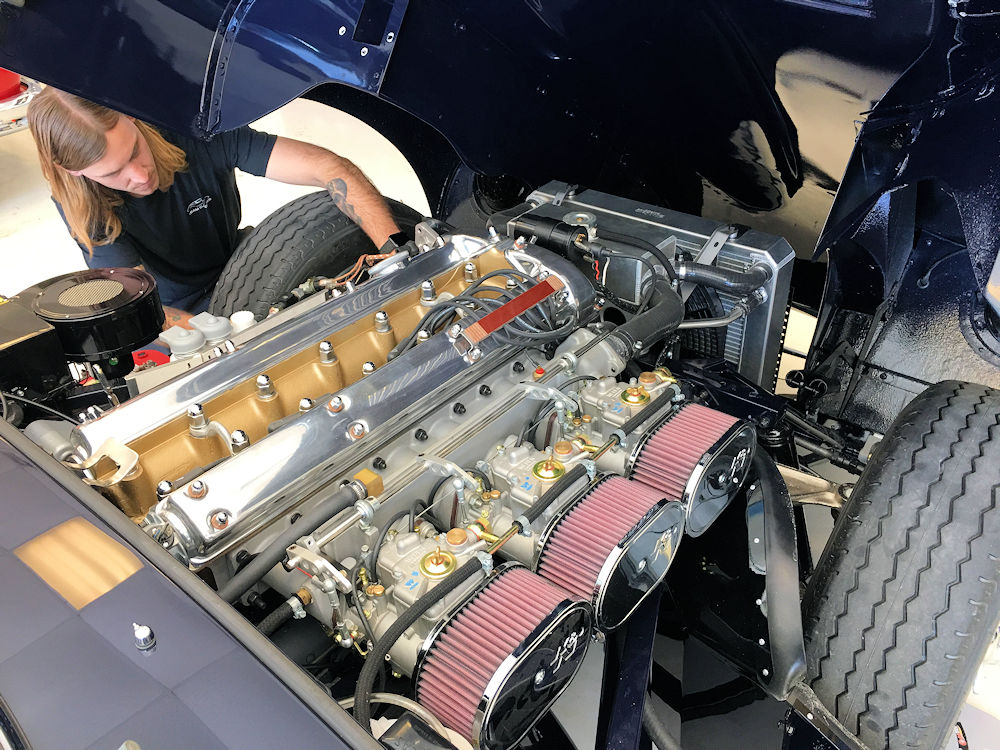
Lots of progress with Jenvey fuel injection upgrade.
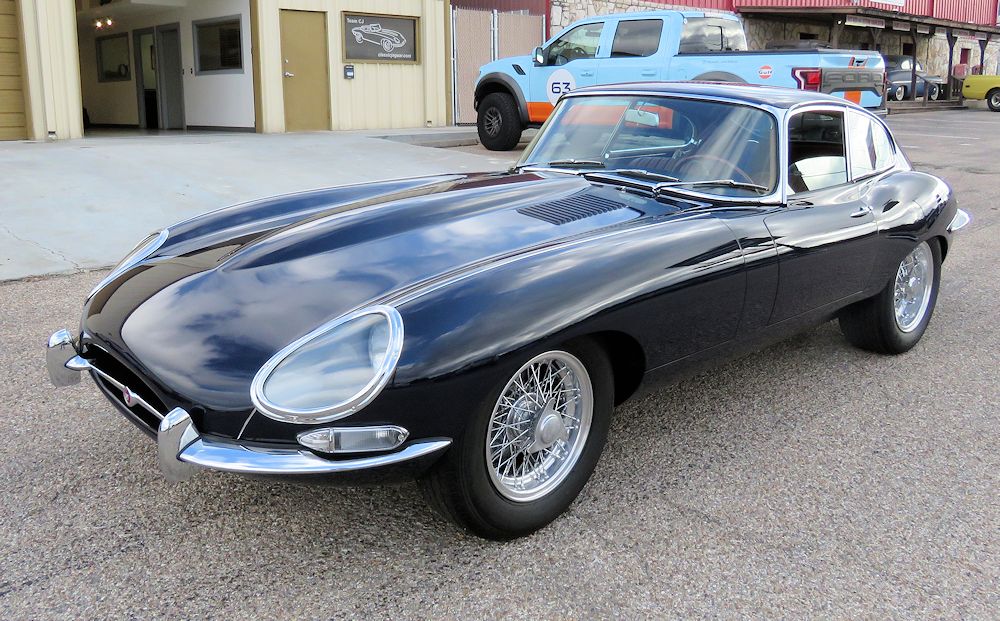
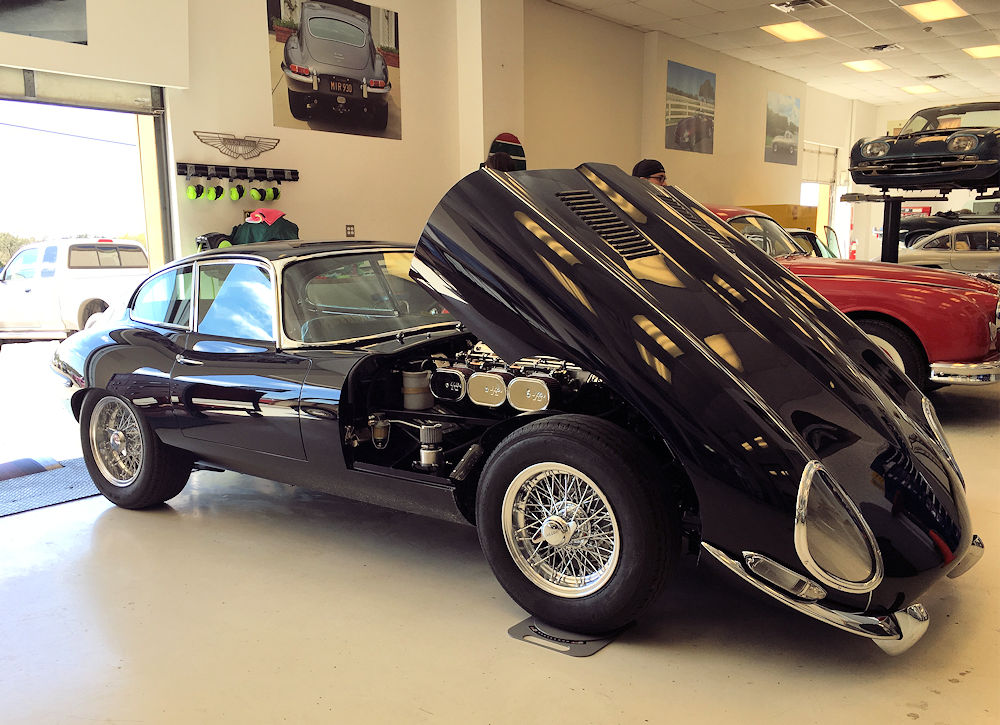
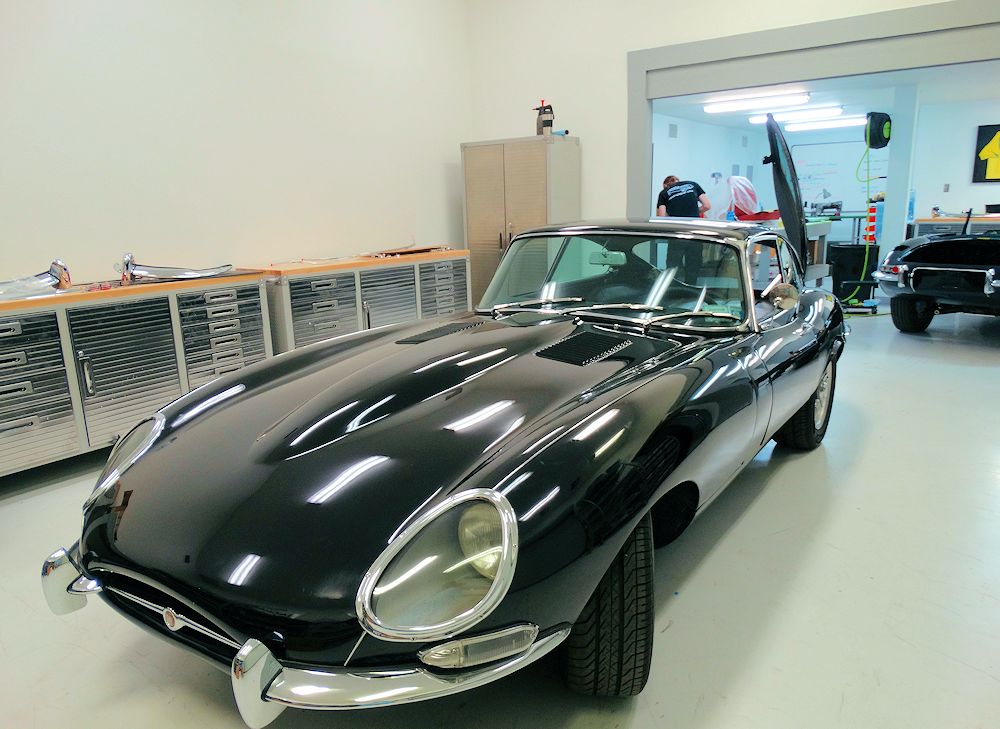
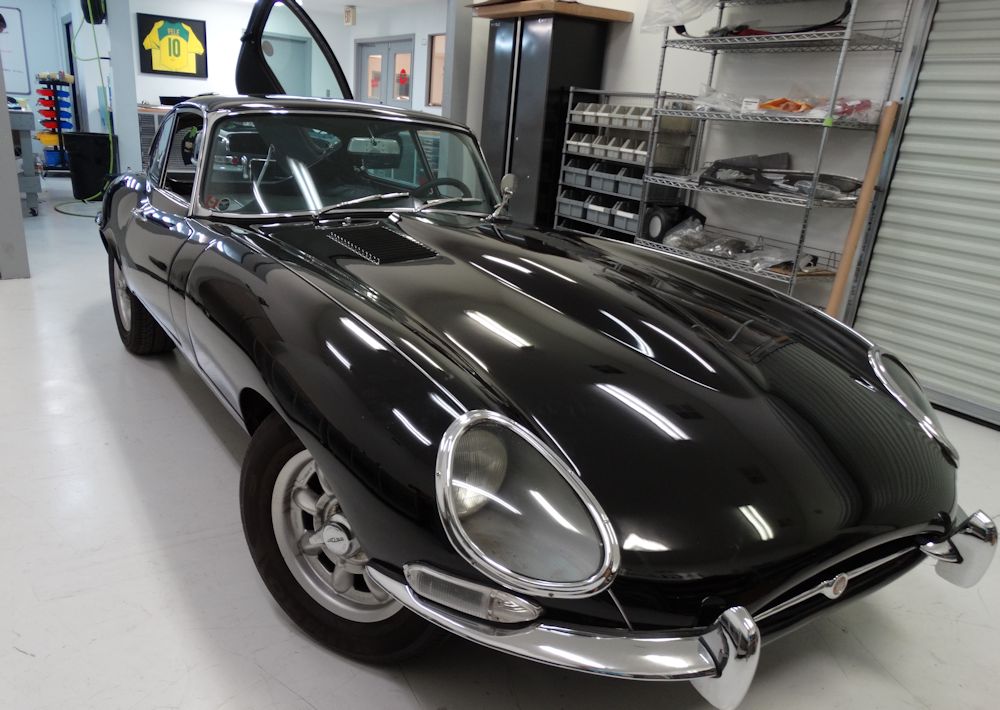
Another total Team CJ restoration wrapped up and ready to head home!
 |
 |
 |
 |
 |
 |
 |
 |
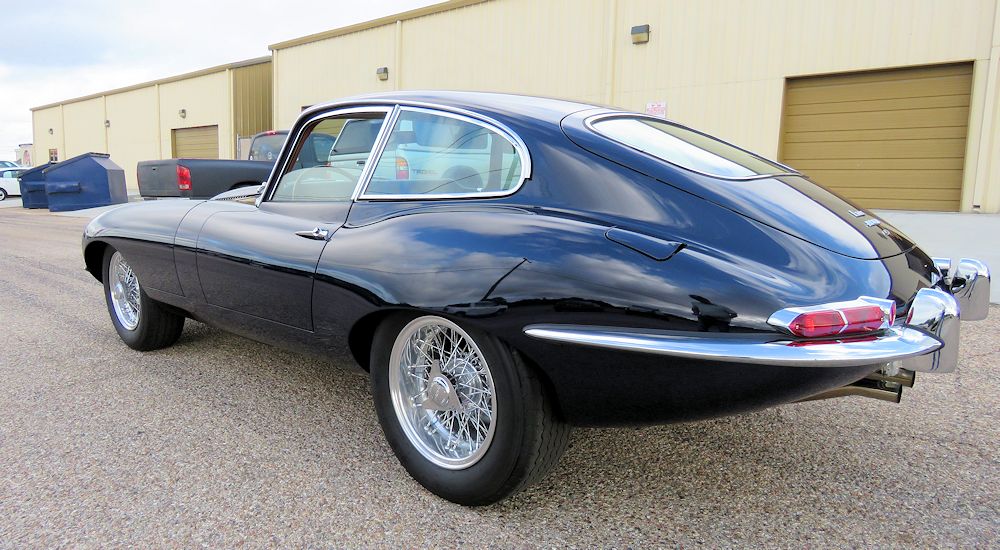
I am delighted to report that we are now well into the road testing phase of this project. So far the car is performing beautifully!
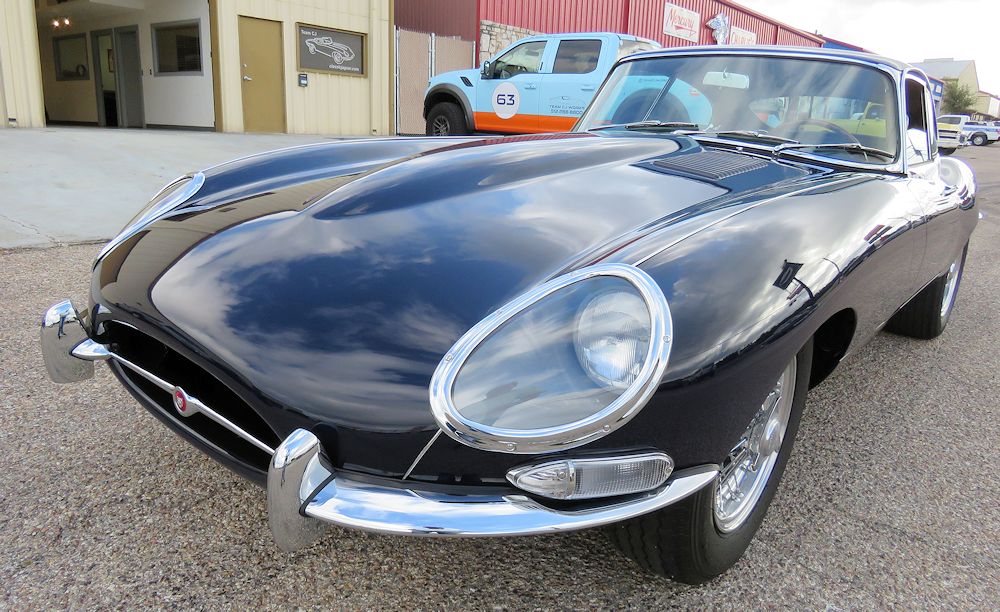
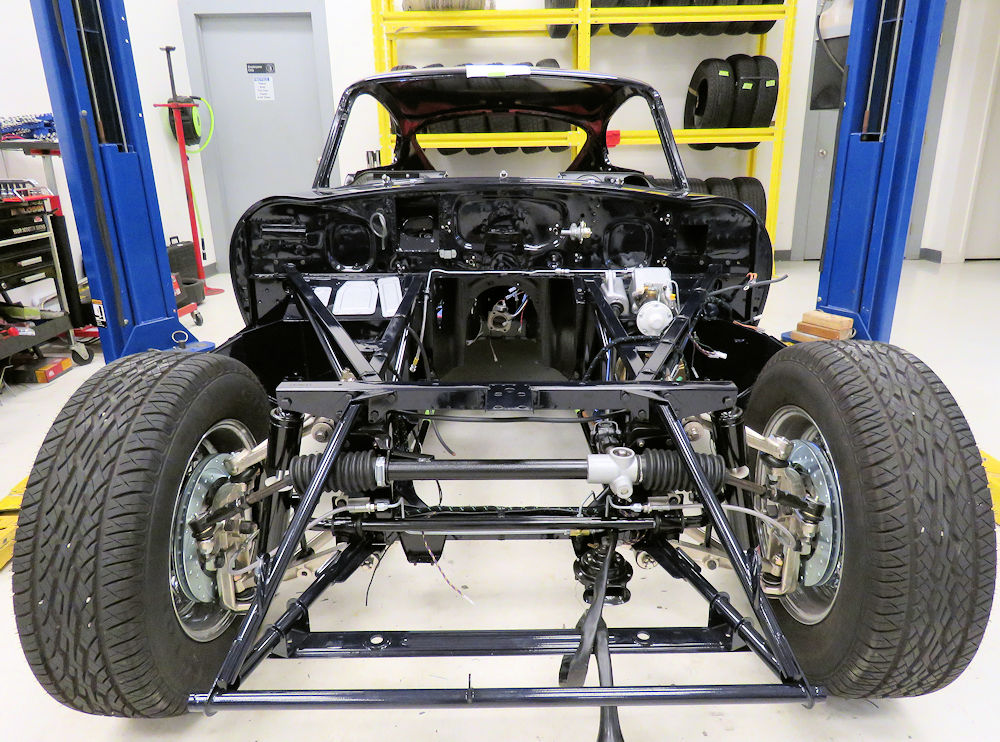
The starting point for this special restoration was a car that had already been very heavily modified and was something of a road legal racer. A previous restorer had installed V12 E Type flared rear arches but we decided to remove those and increase the width of the rear arches in a more subtle way.
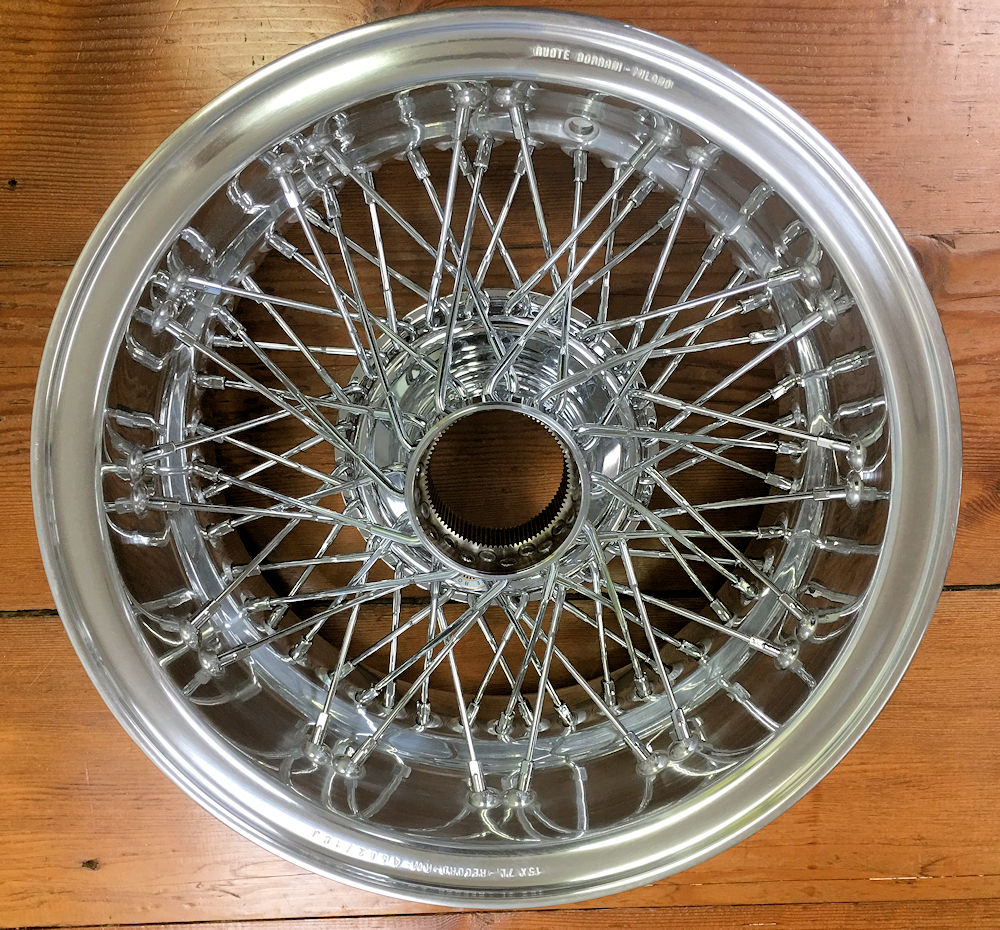
The goal was to be able to put a wider wheel and tire beneath the rear, but to make it look like it could have been part of Malcolm Sayer's original design. You really have to look very closely before you notice that the rear wings are about an inch wider than stock, increasing the overall width of the car at the rear by a total of 2 inches. The extra space in the rear wheel wells allowed us to design a custom 7 inch wide CJ Borrani, to which we installed a 225/60 Avon radial. At the front of the car we are retaining the 6 inch CJ Borranis shod with a 205/70 Avon radials.
At the conclusion of this project we are planning a full professional photo shoot of this beautiful E Type.
 |
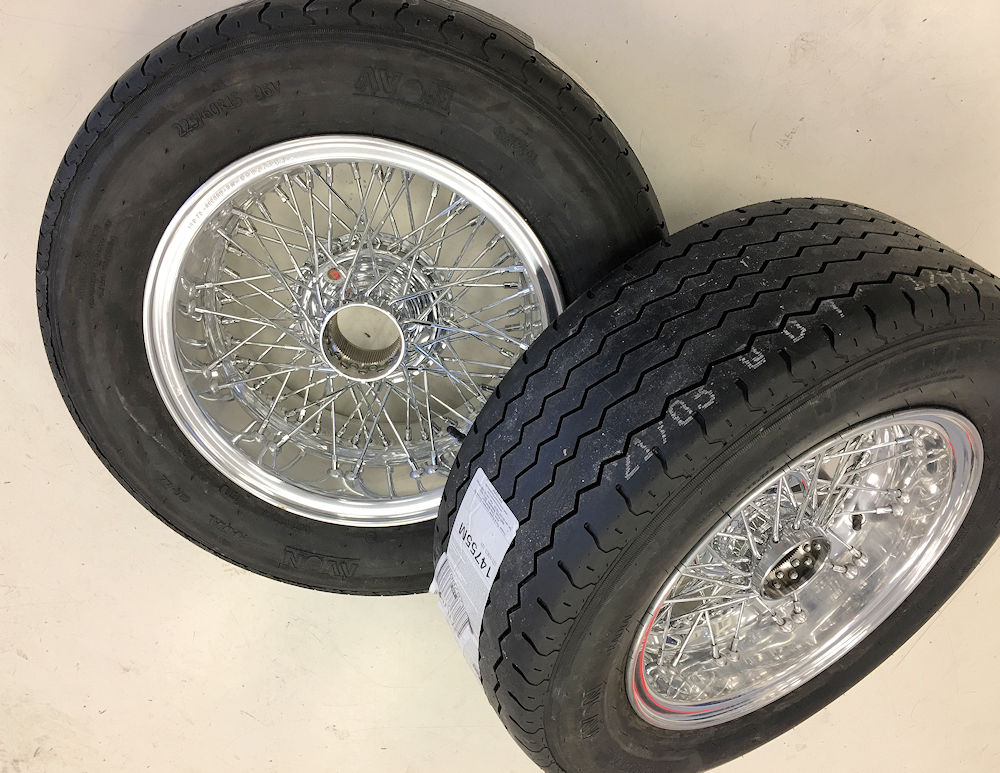 |
| Custom 7" CJ Borrani wheel, designed and
built especially for this project |
Avon radials are a nice mix of period look and modern performance |
 |
 |
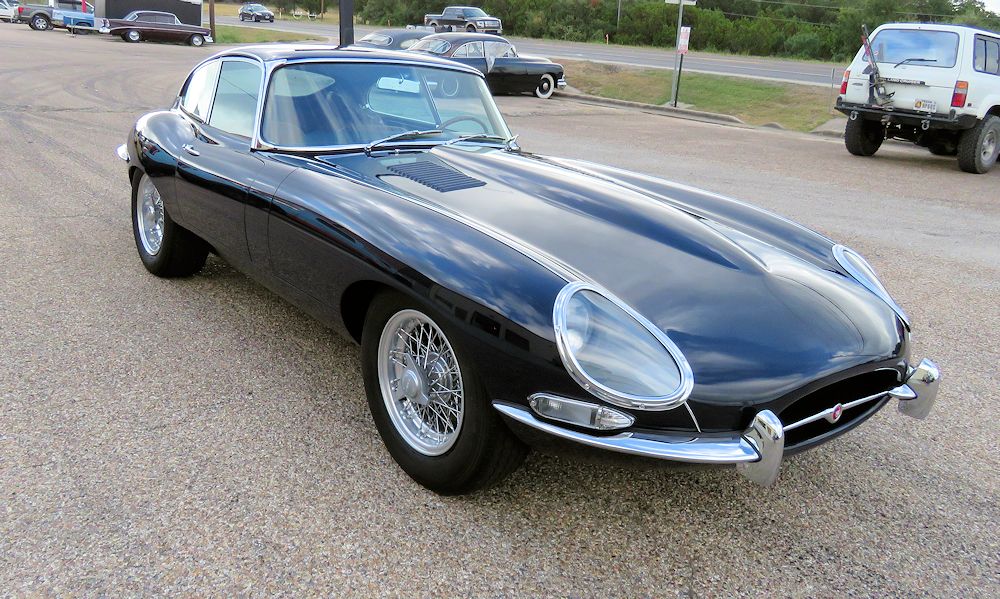
| Road testing underway - this car is fast! |
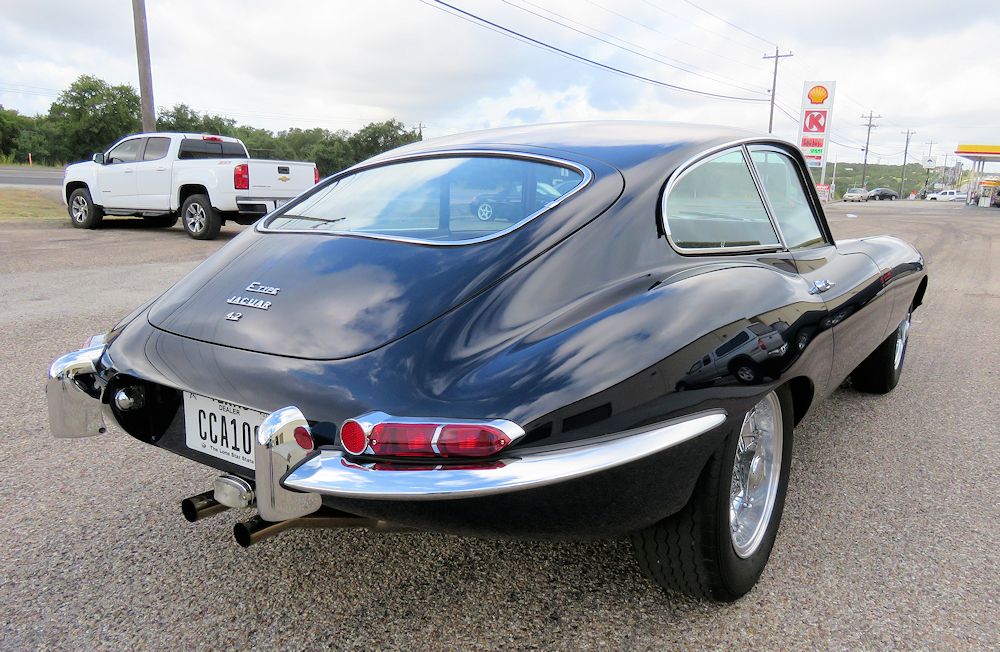
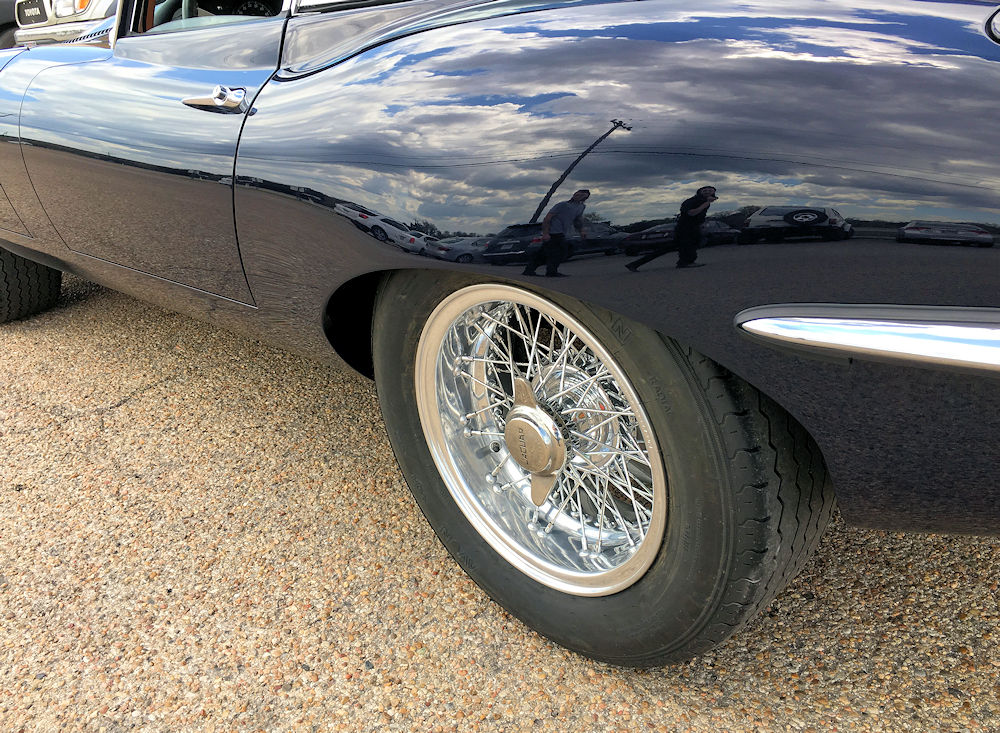
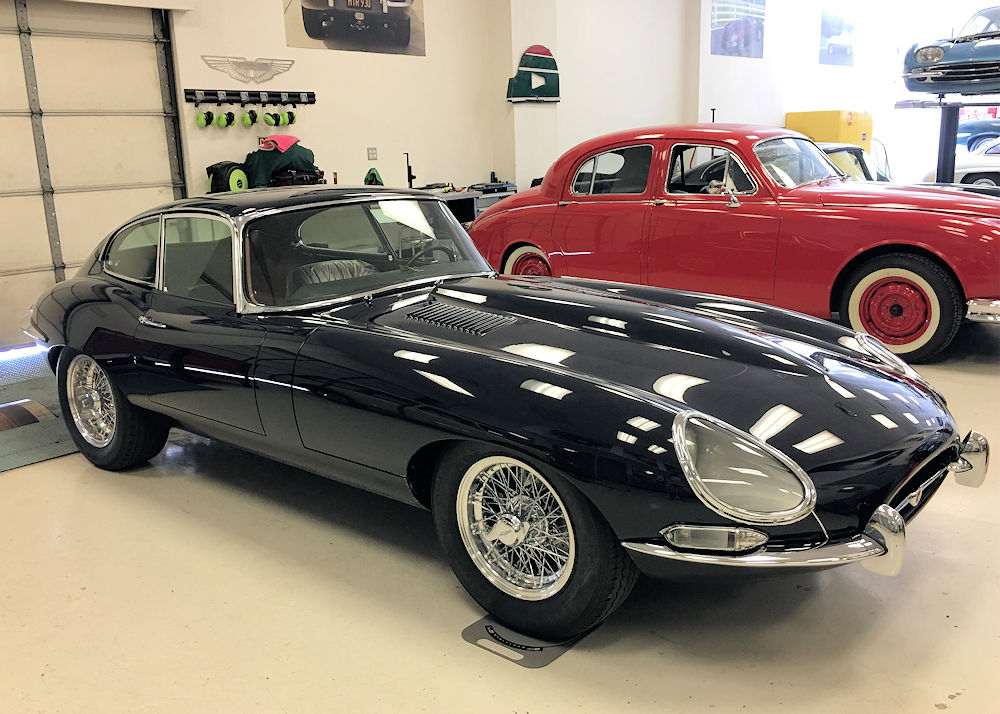
Note how the subtly modified rear wings
allow room for the wider wheel and 225/60 Avon |
 |
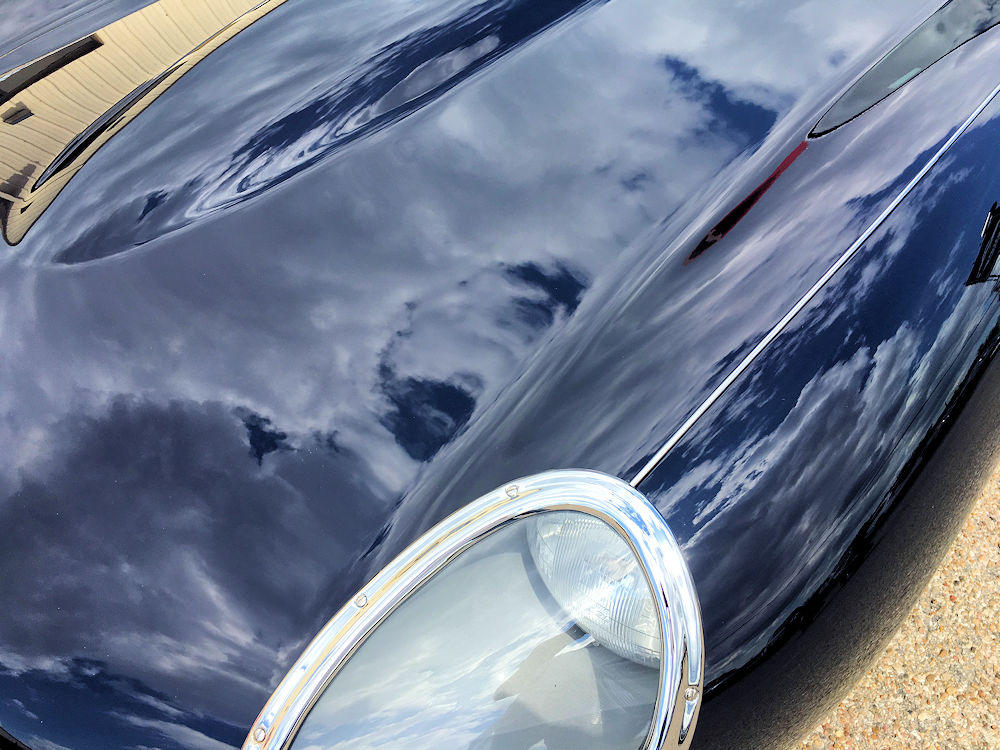 |
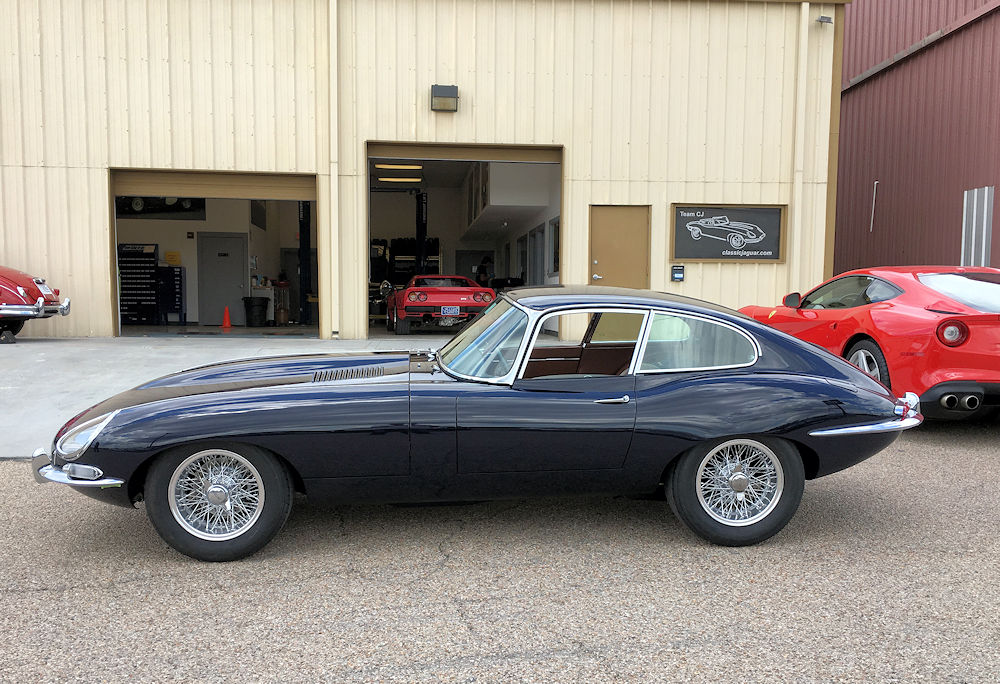
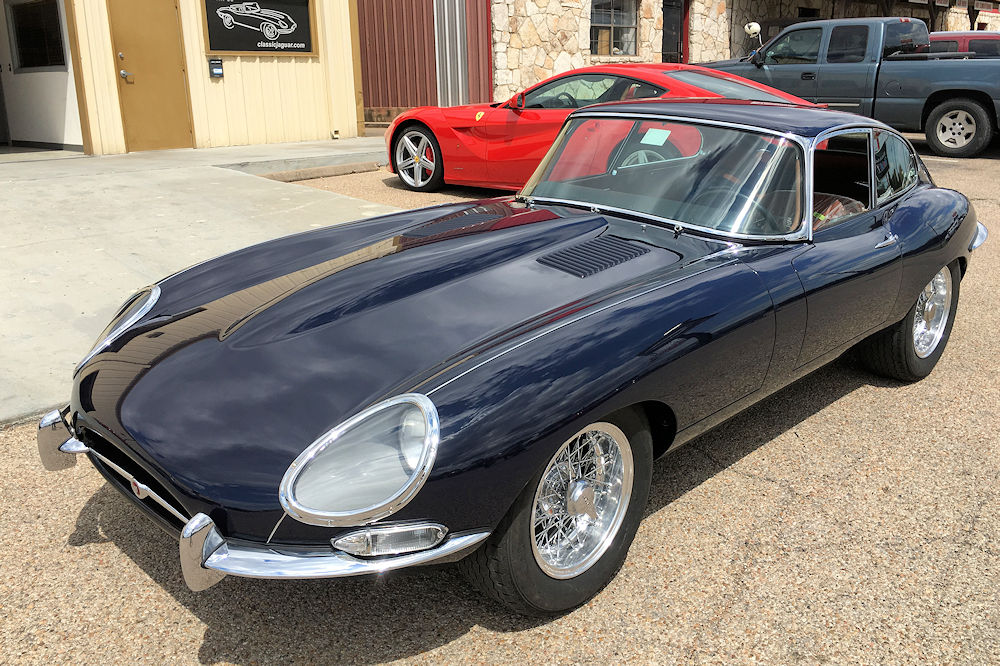
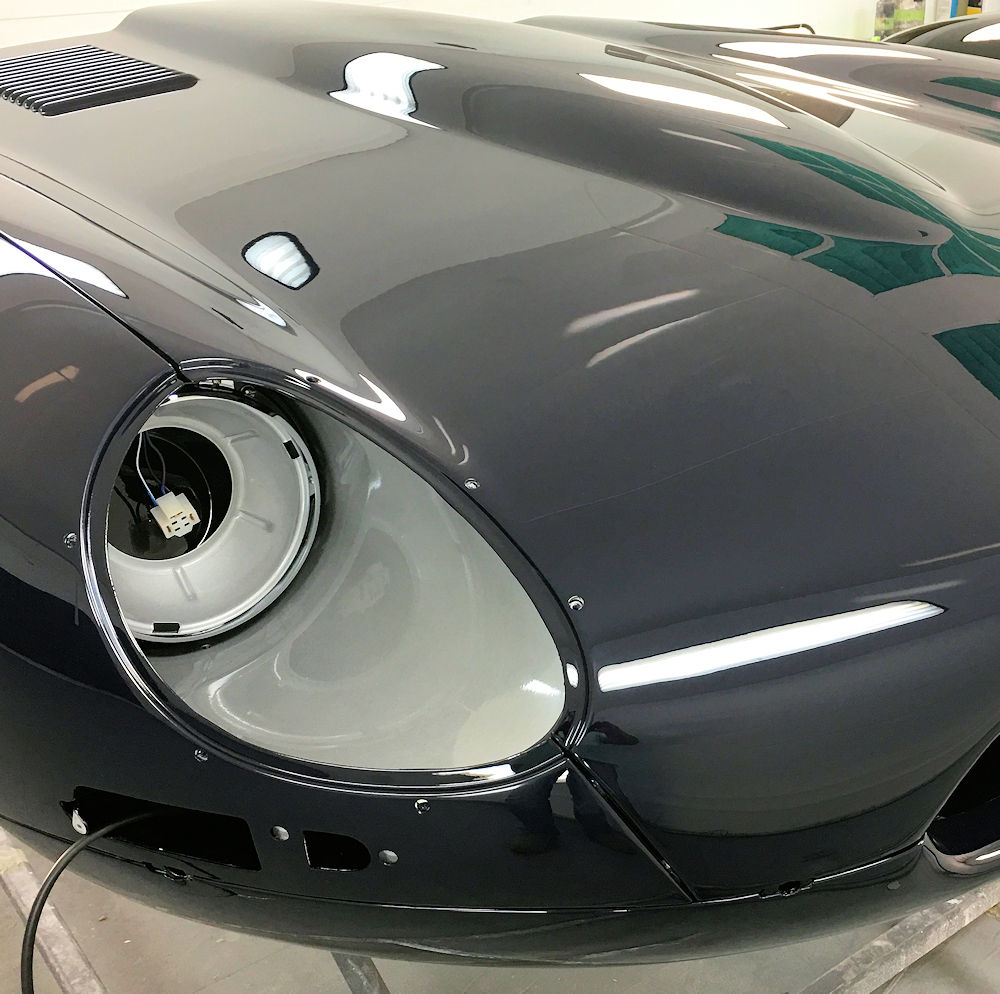
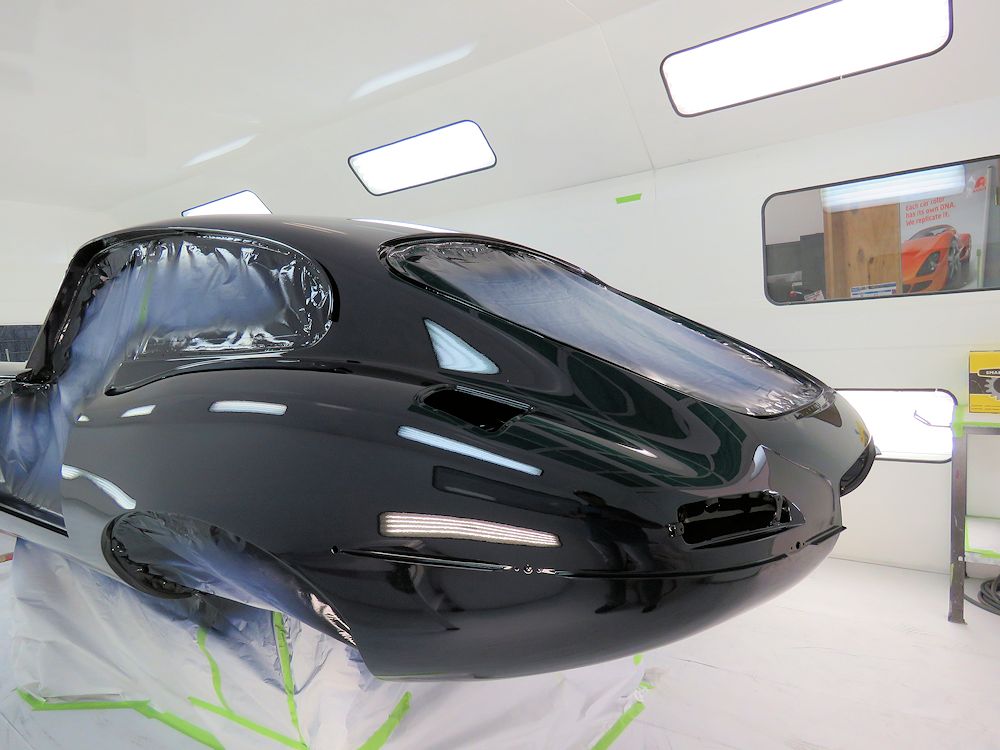
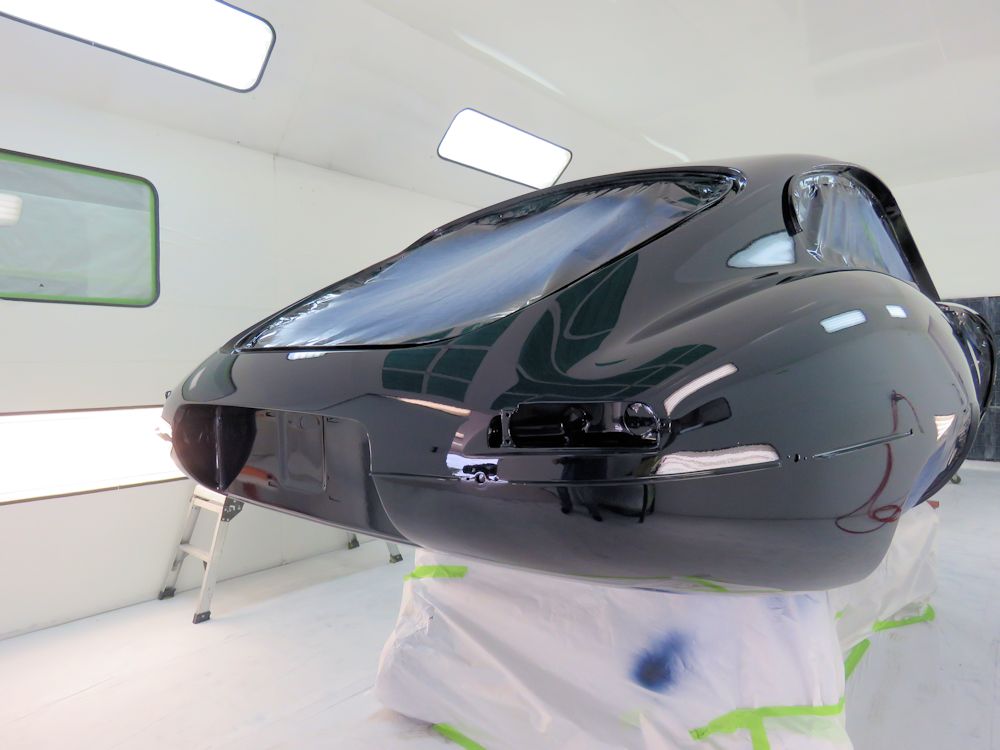
| Dark Blue paintwork looks stunning outside |
|
 |
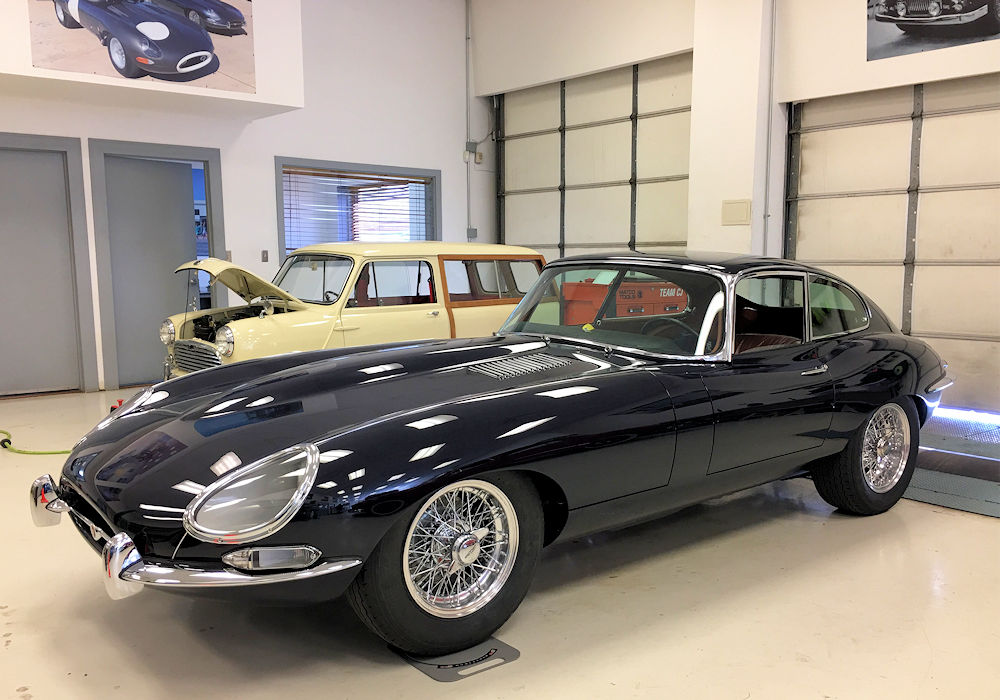 |
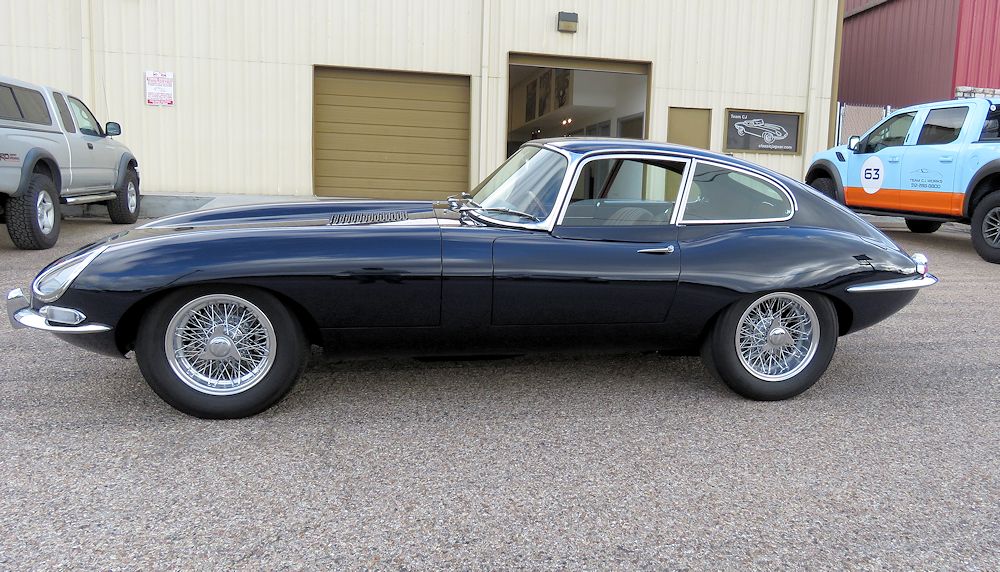
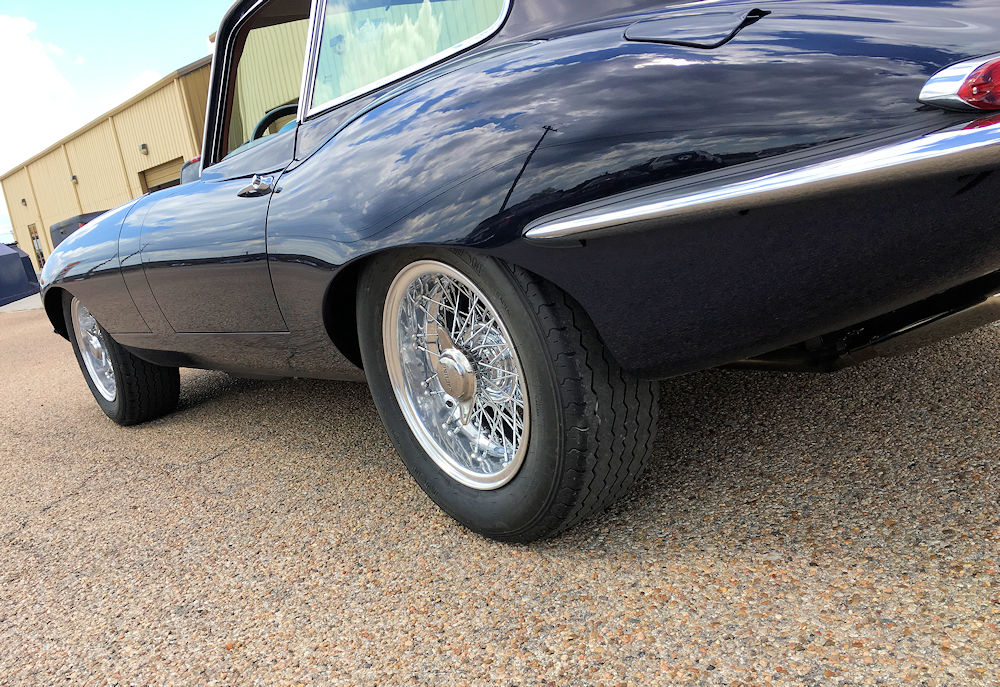
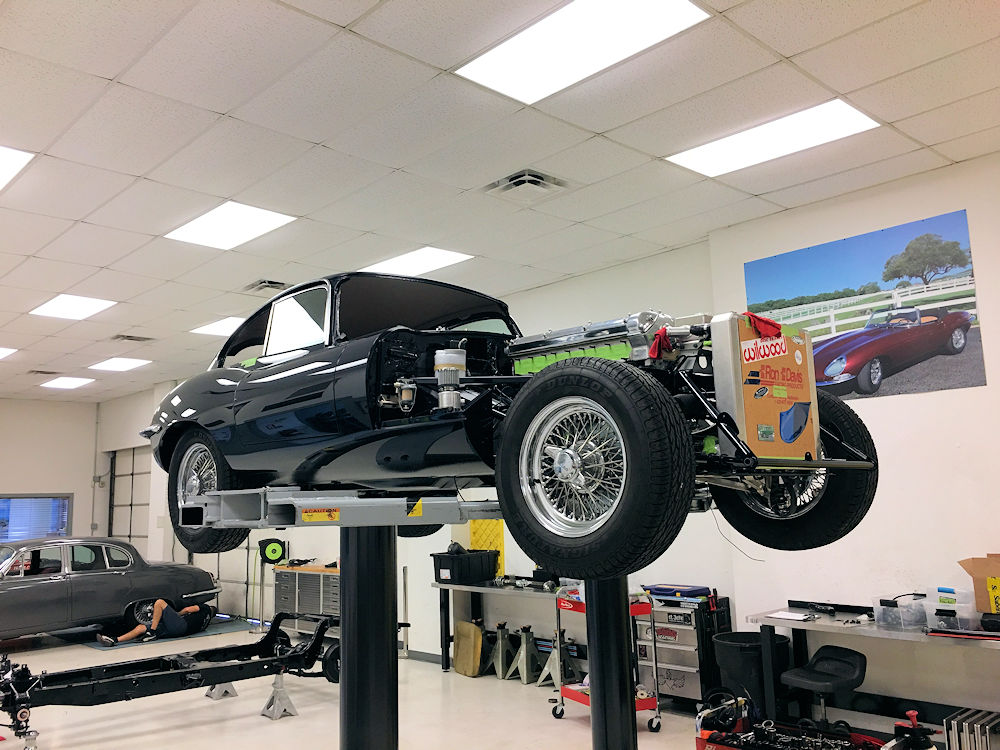
| This photo shows the staggered wheels, 7" in
the rear and 6 inches up front |
|
 |
 |
 |
 |
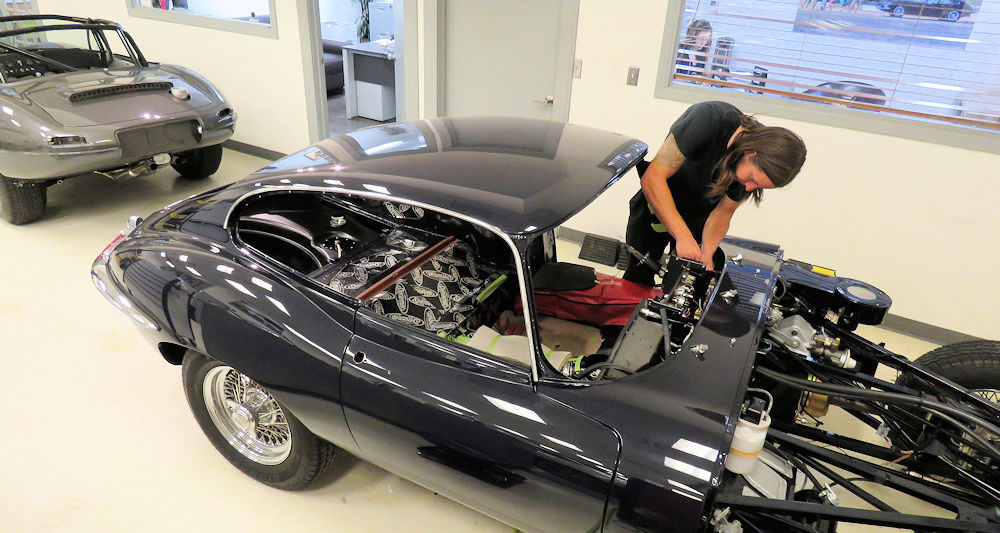
| Chris Scarborough adjusting the camber
between test drives |
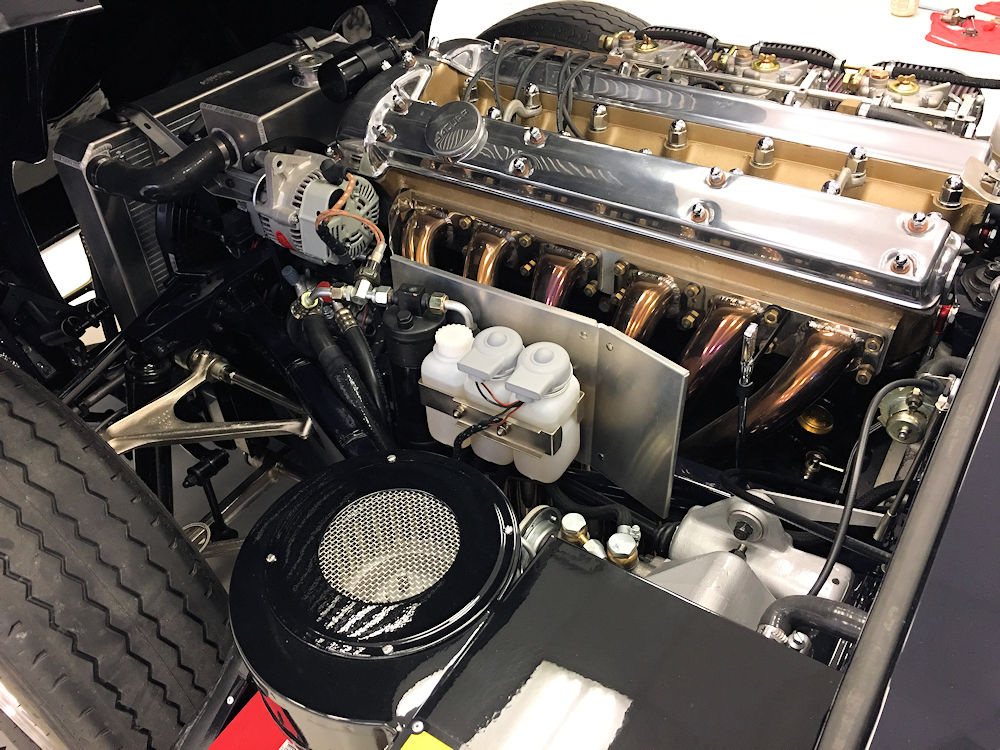
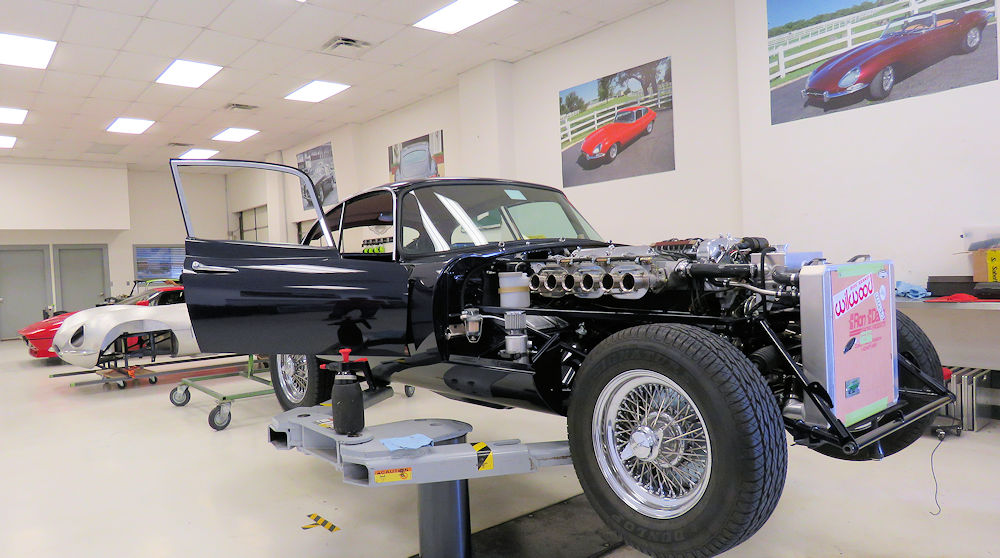
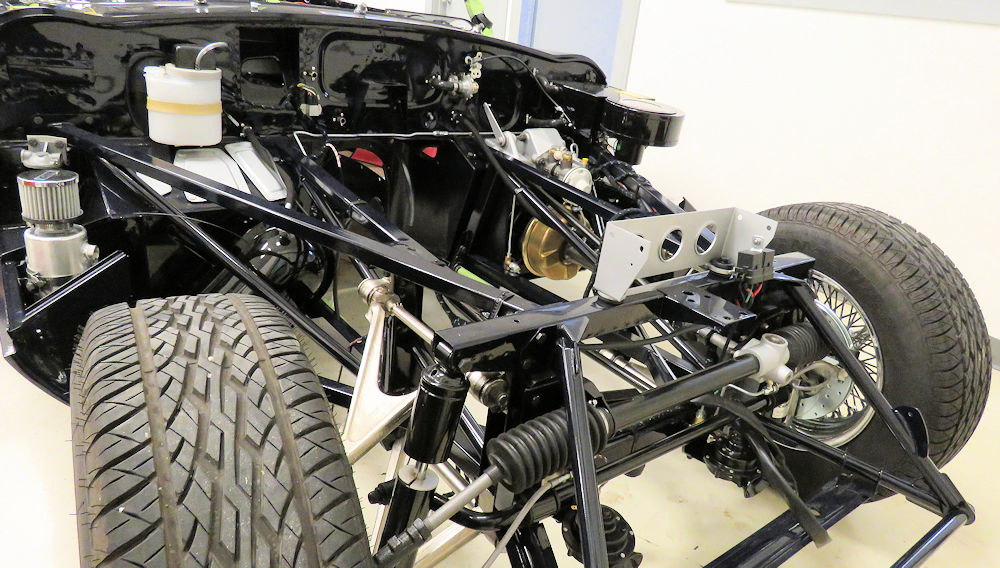
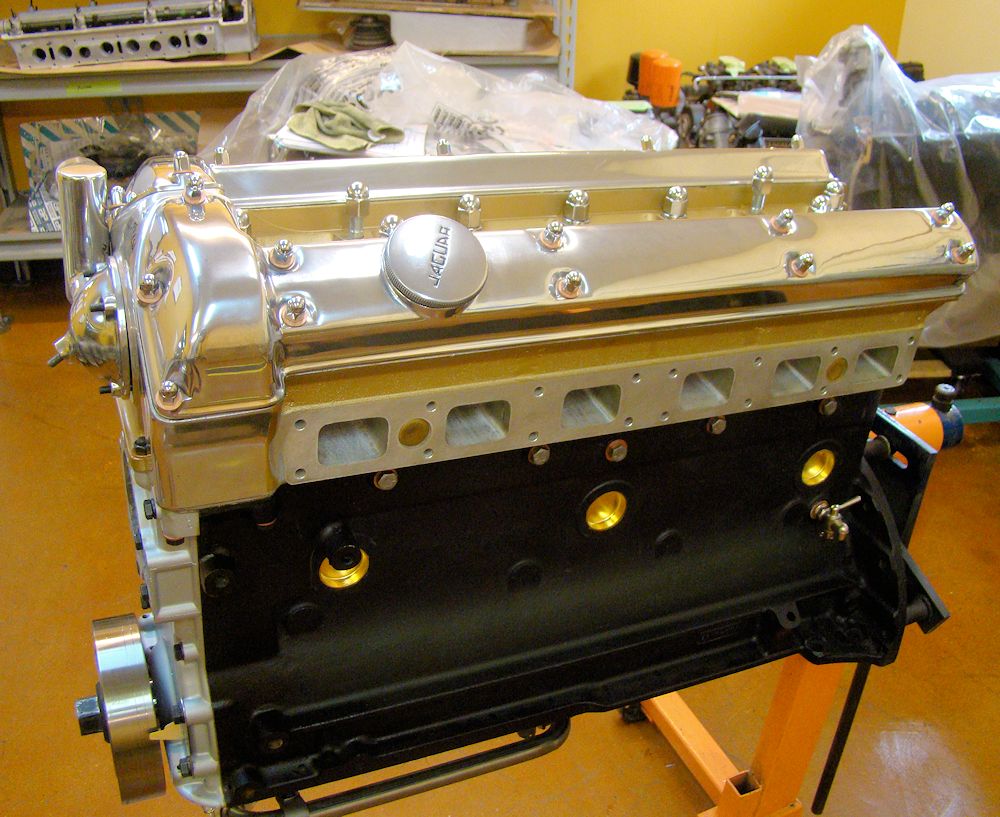
Team CJ Stage 2 engine with milder cam
option, breathing through full Stage Two headers/exhaust |
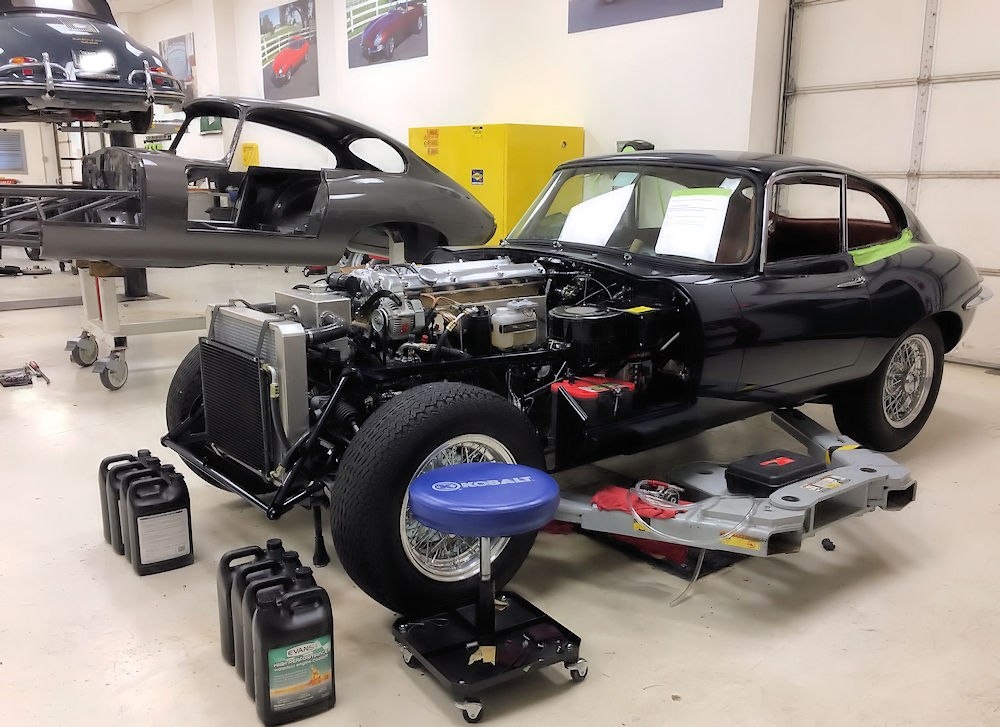
The engine and transmission have now been installed, maiden voyage just around the corner.
 |
 |
 |
 |
 |
 |
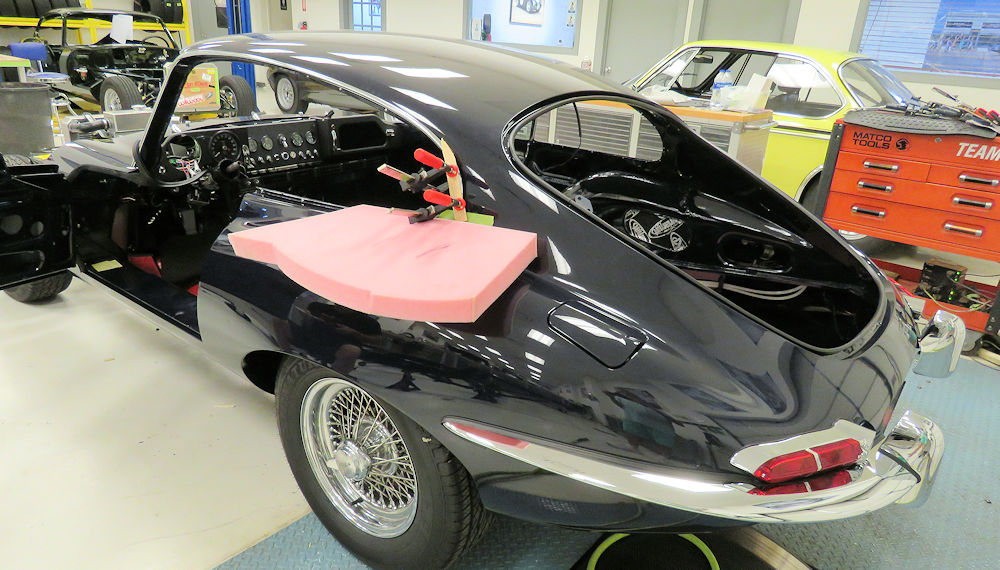
| Gluing and clamping the cantrail chrome in
place |
Passenger door now installed |
 |
 |
| 3 sets of hands needed to install the center section of the headliner! |
|
 |
 |
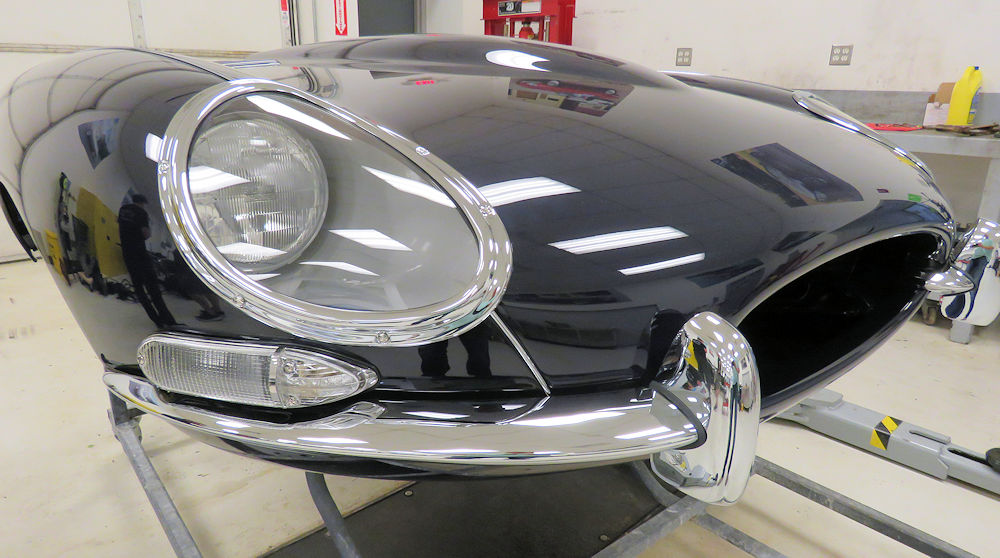
| Rear bumpers and lights are now installed |
Car is coming together very nicely! |
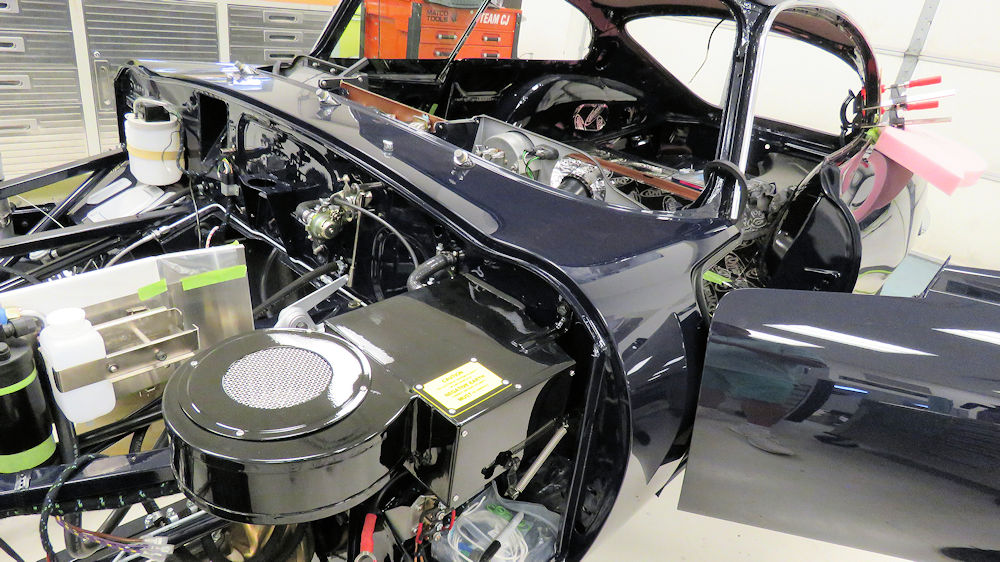
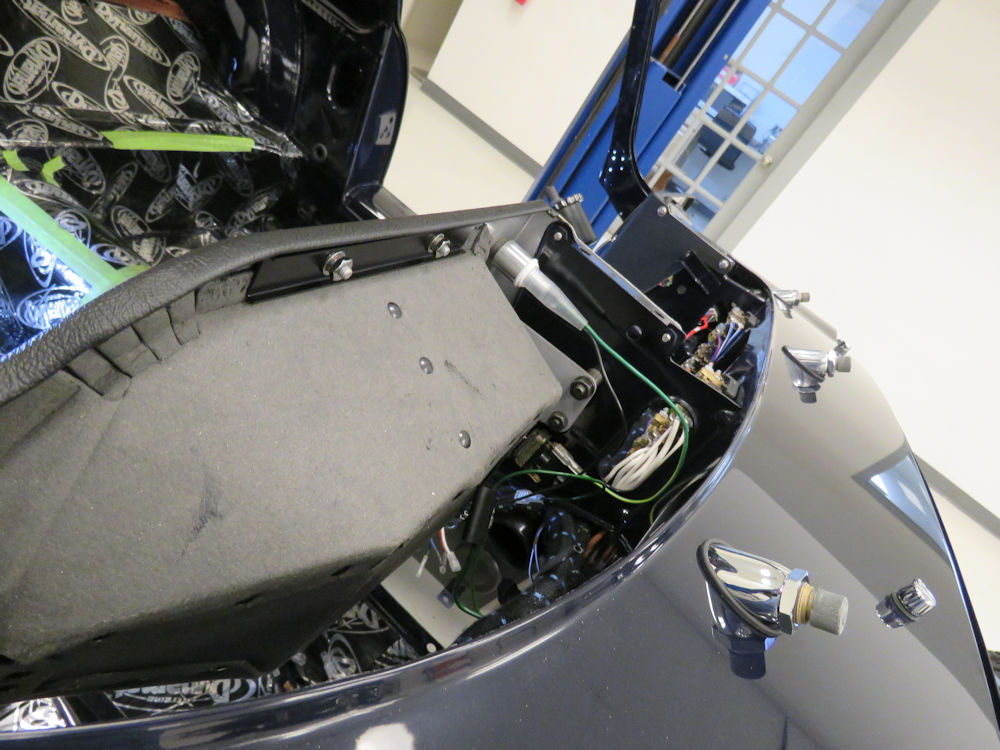
Installing the under dash AC unit and assembling the bonnet.
 |
 |
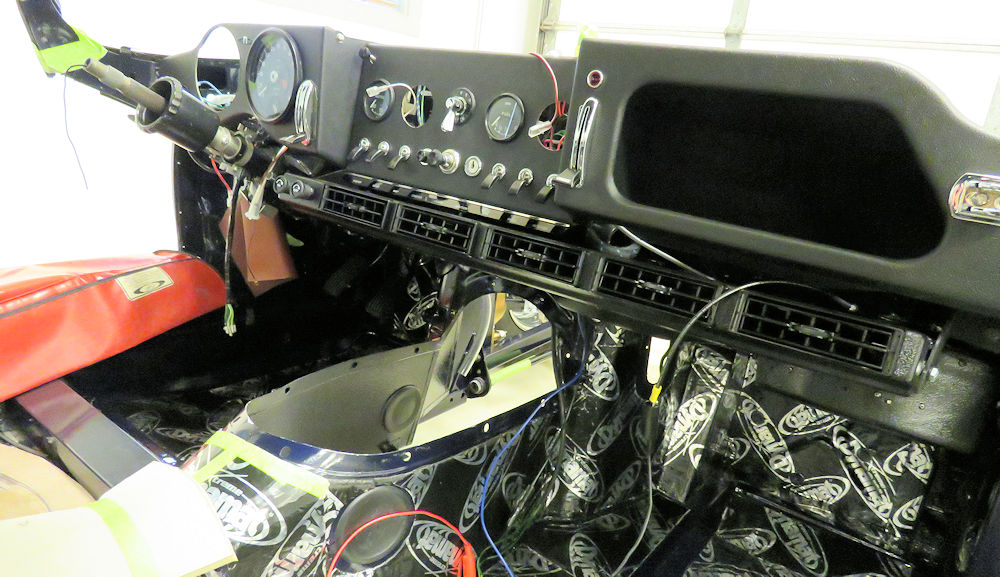
| Installing the under dash AC unit |
|
 |
 |
| Assembling the bonnet |
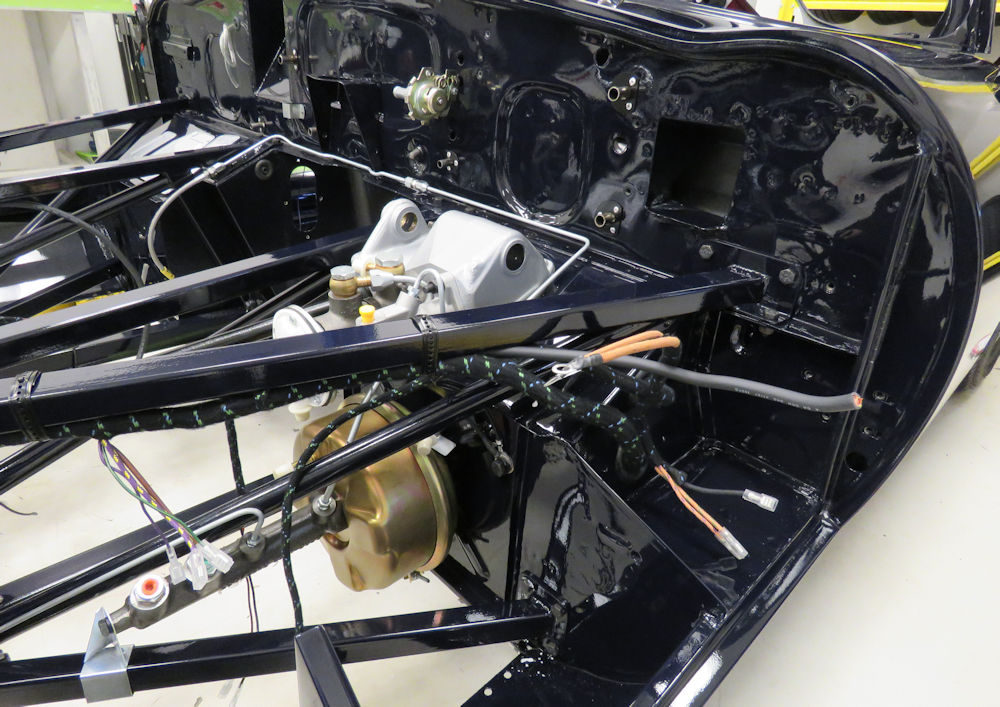
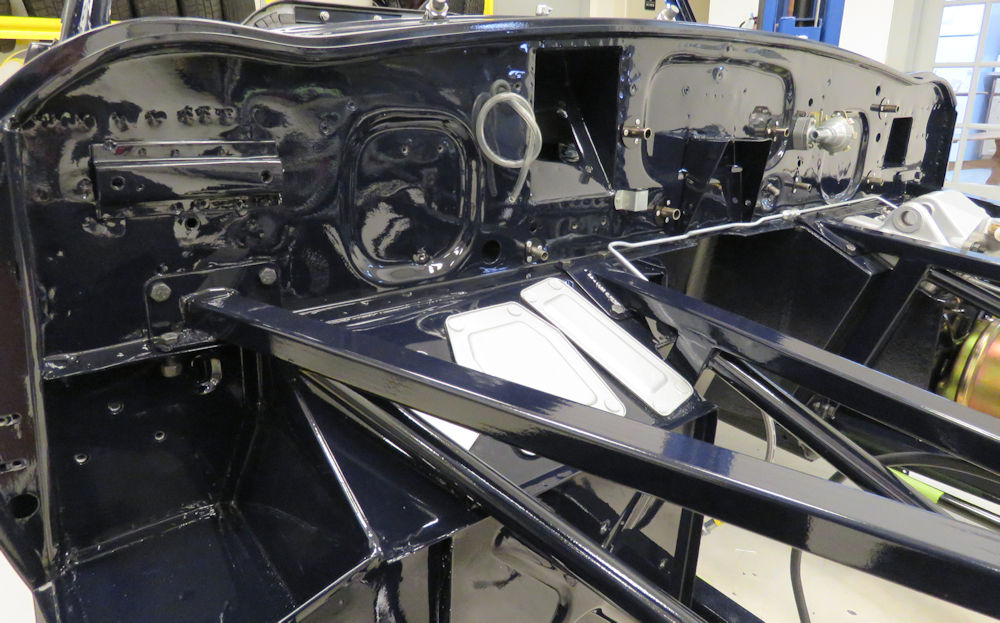
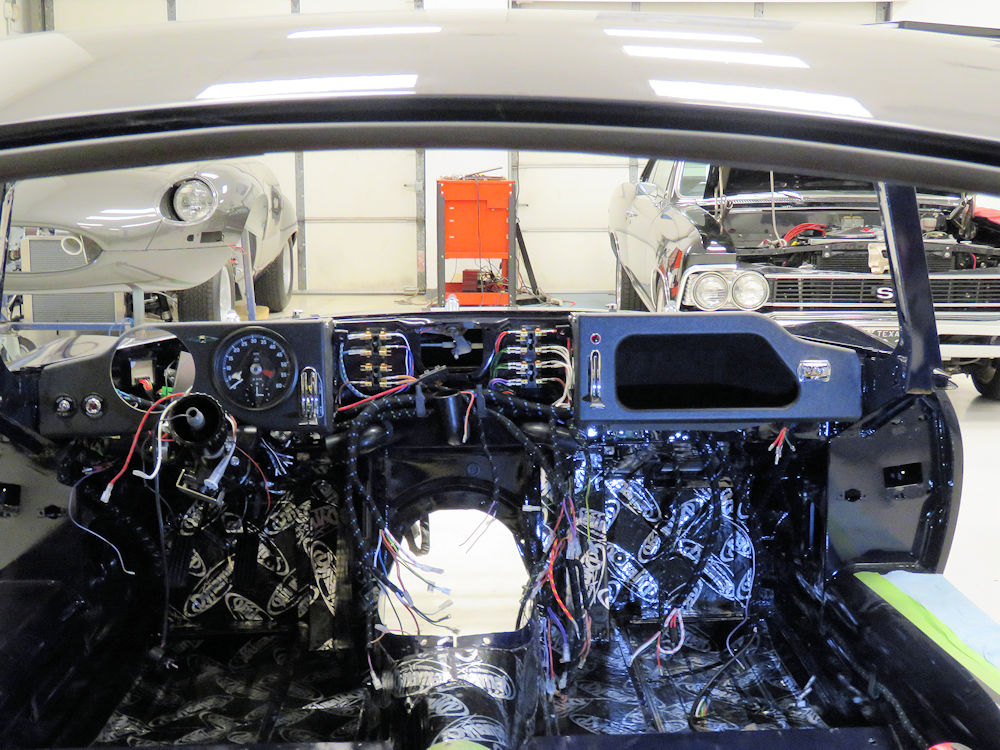
Reassembly well underway in the main CJ Workshop.
 |
 |
 |
 |
 |
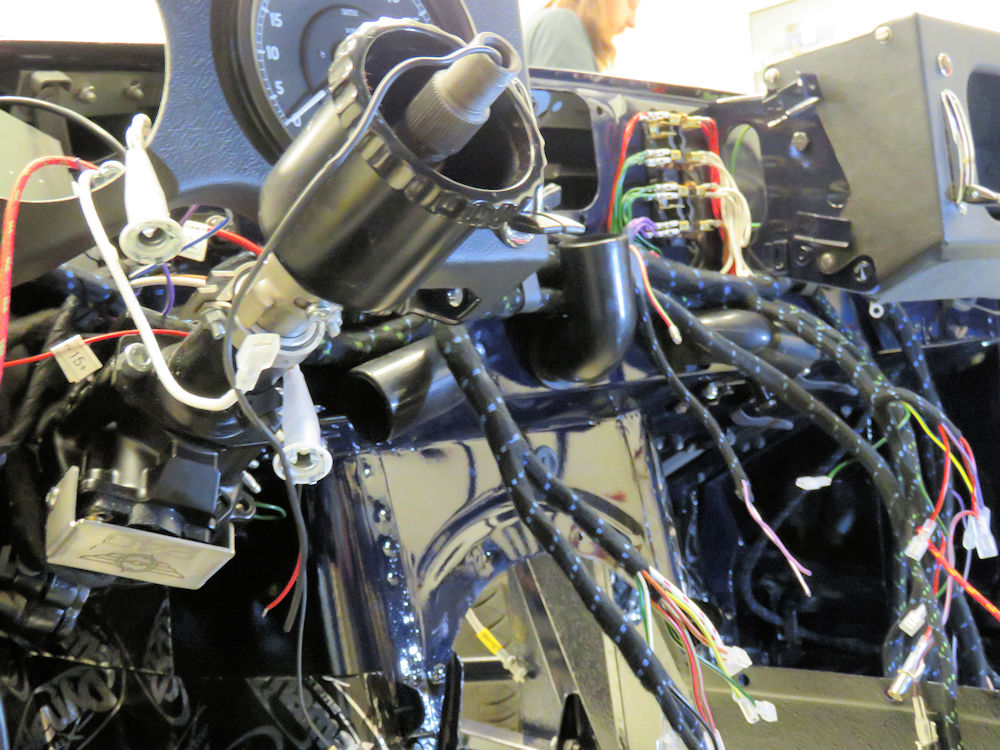 |
| Wiring the fuse boxes |
Note electric power steering beneath column |
 |
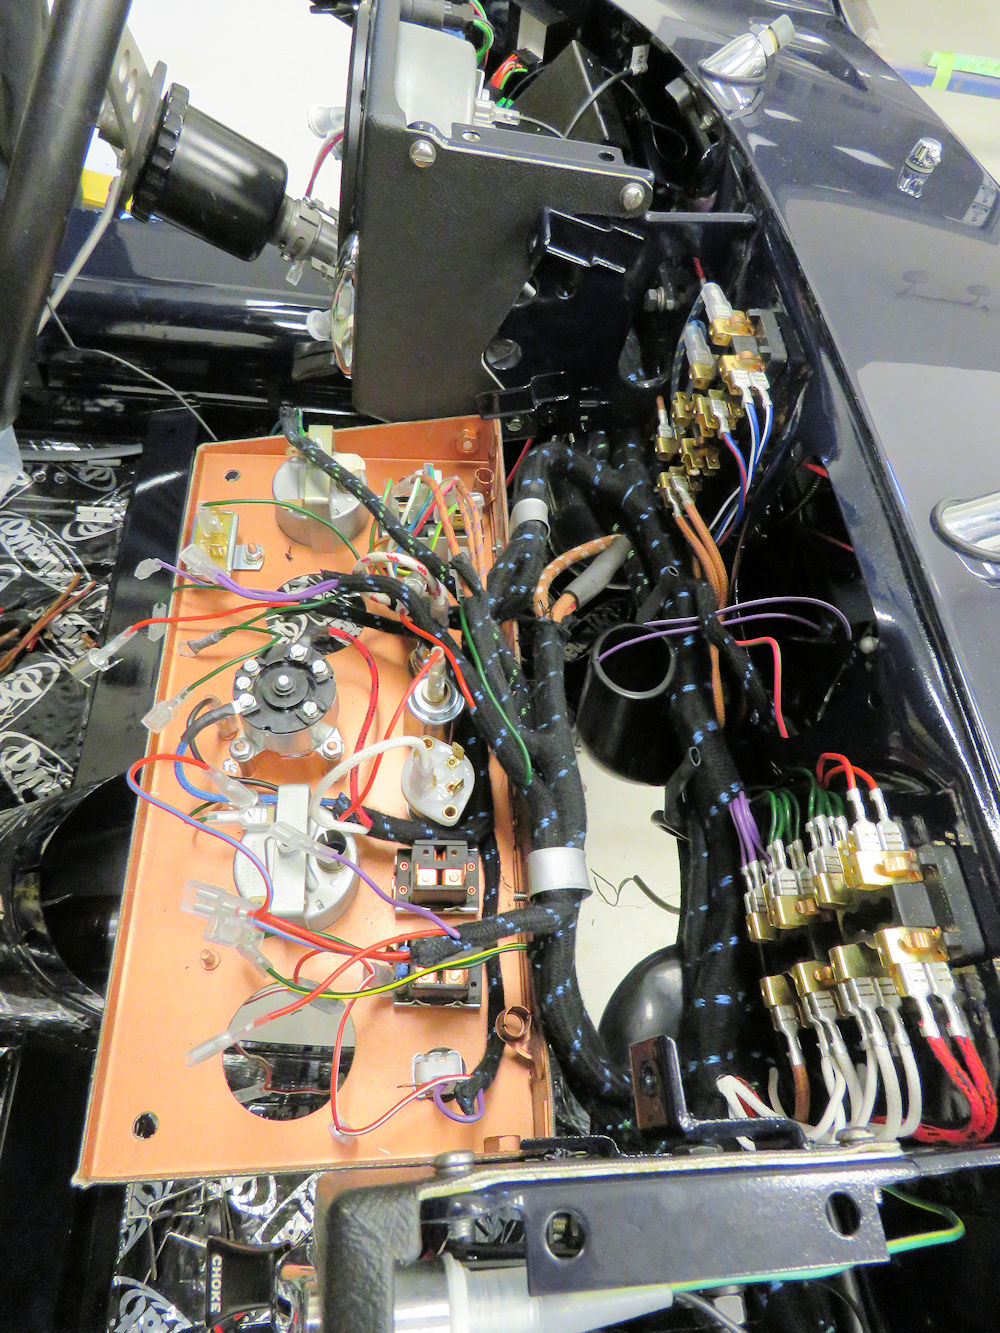 |
| Installing the minor gauge panel |
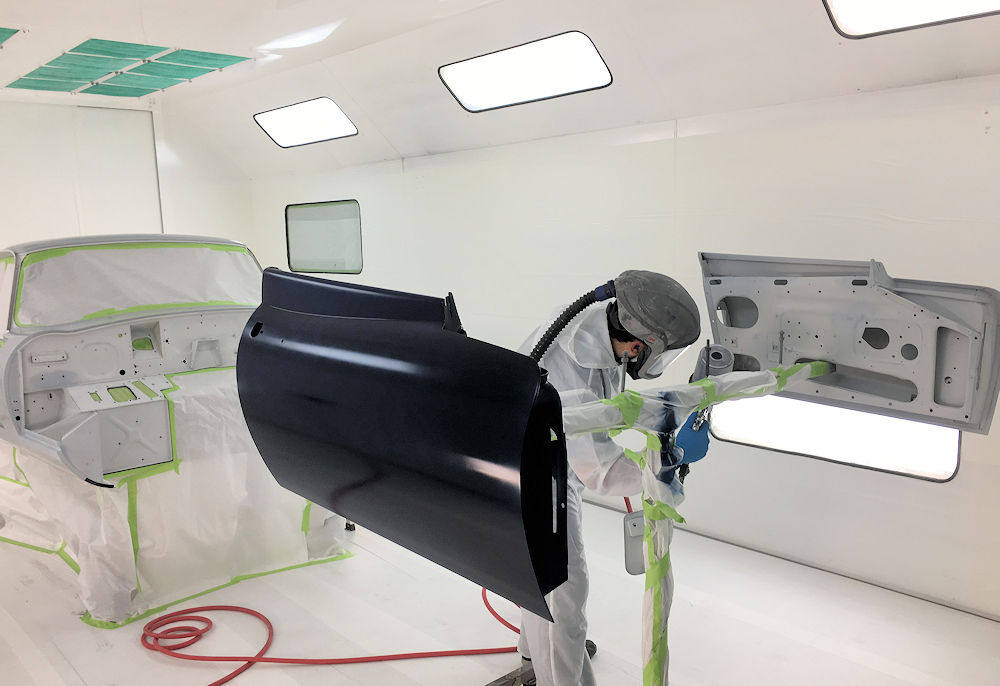
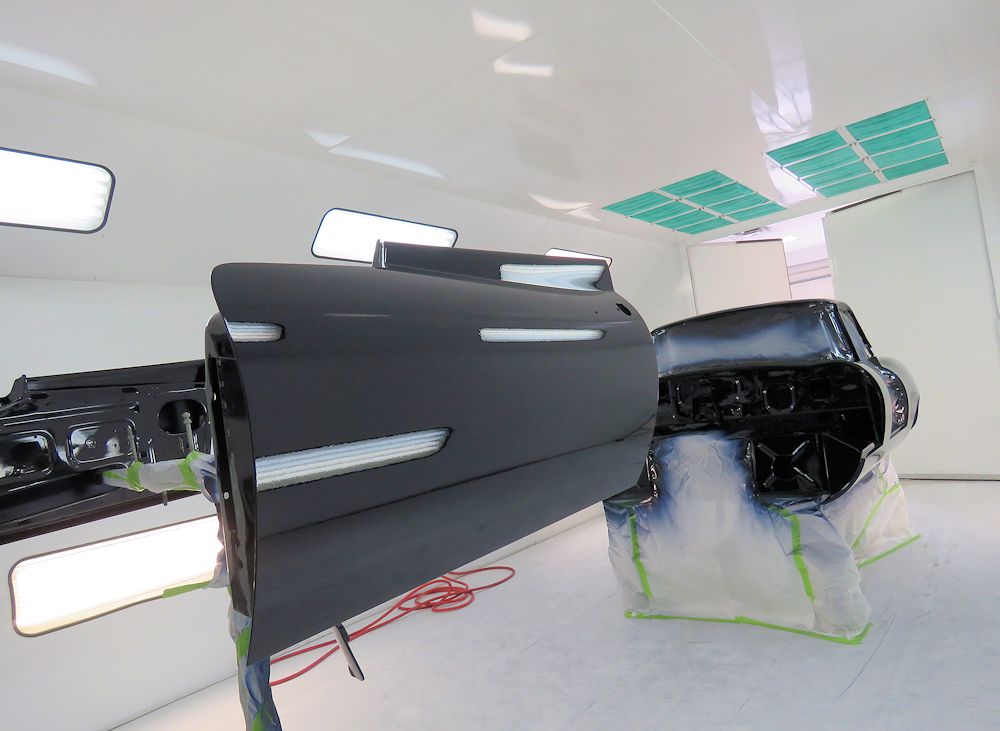
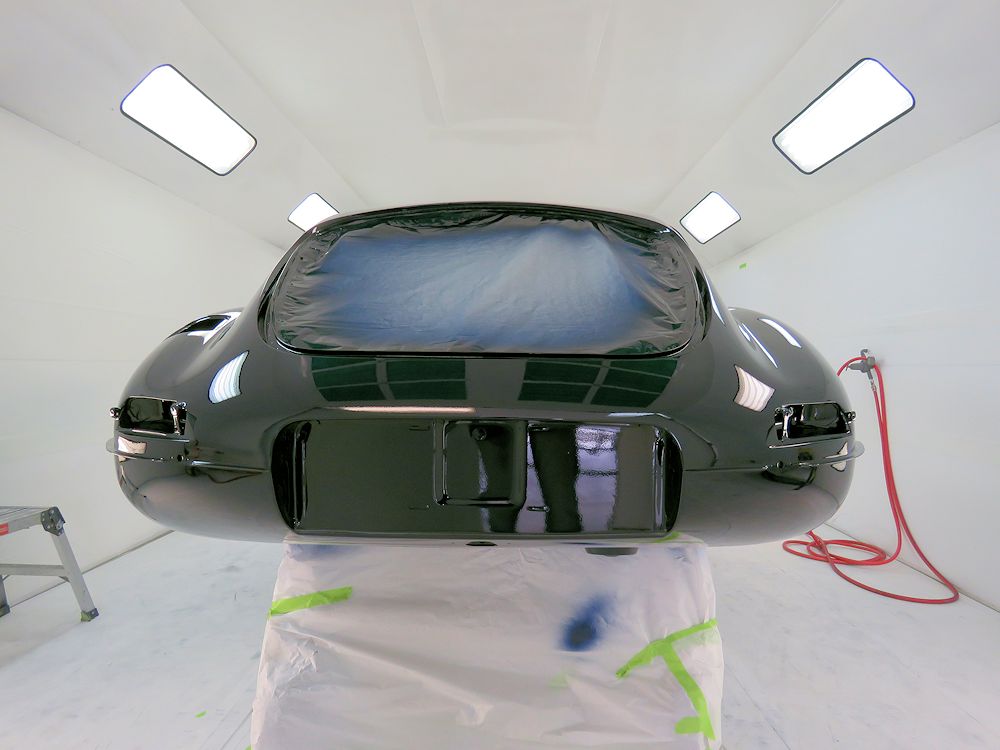
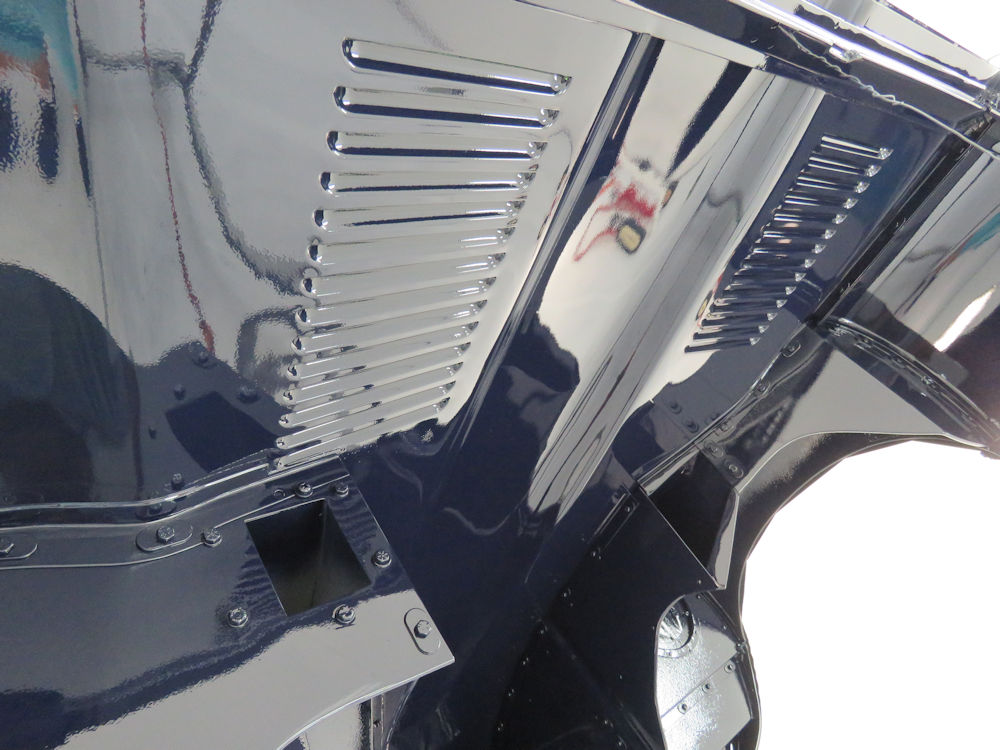
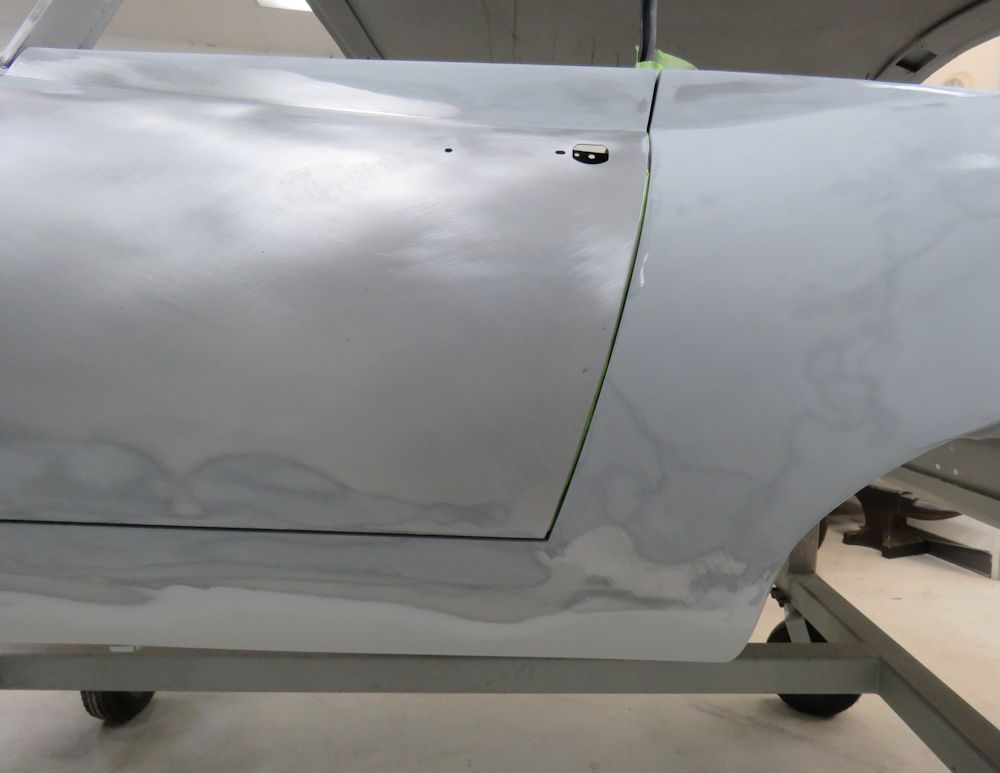
The main body and doors have now been painted.
 |
 |
 |
 |
 |
 |
 |
 |
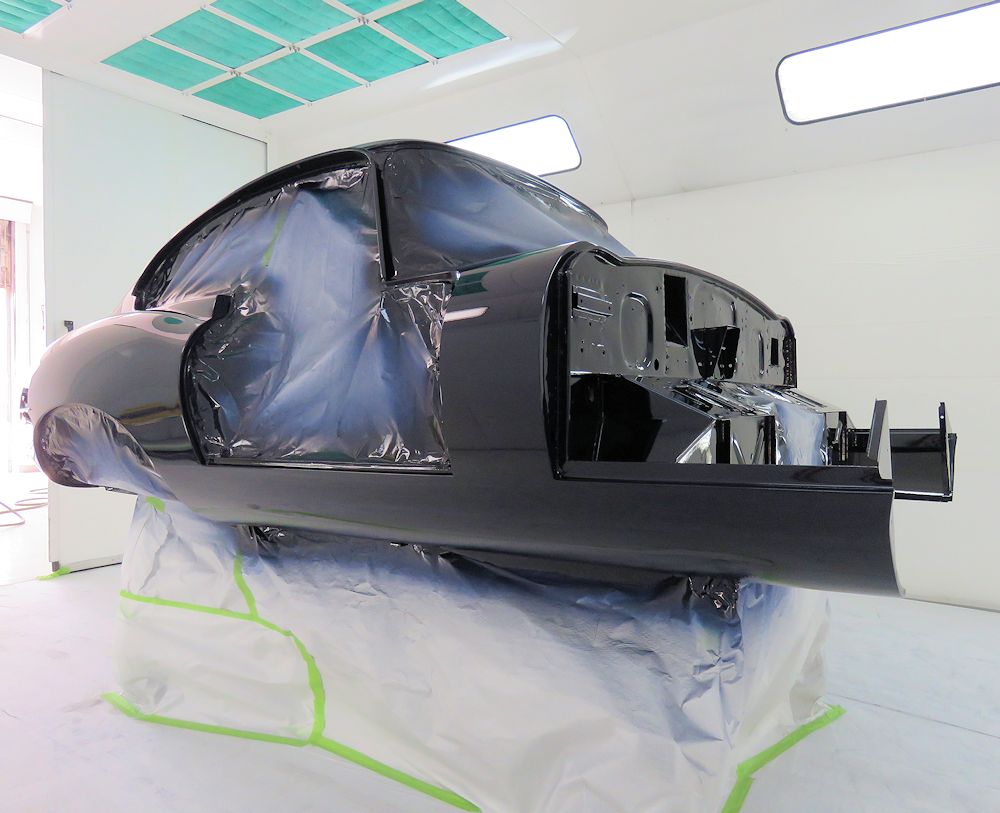
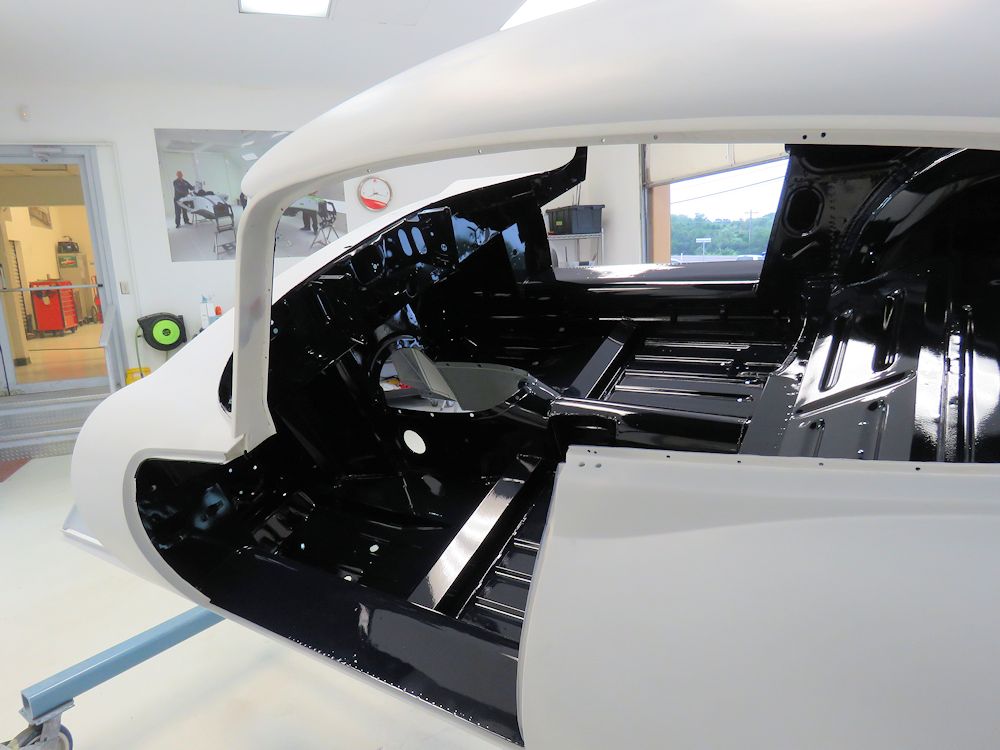
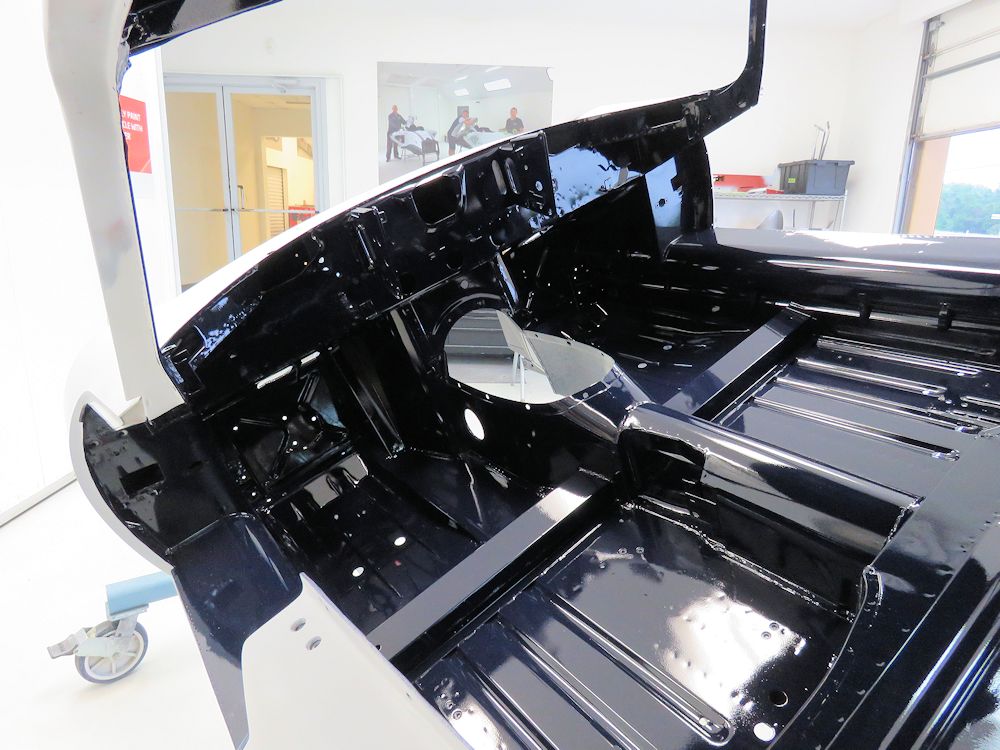
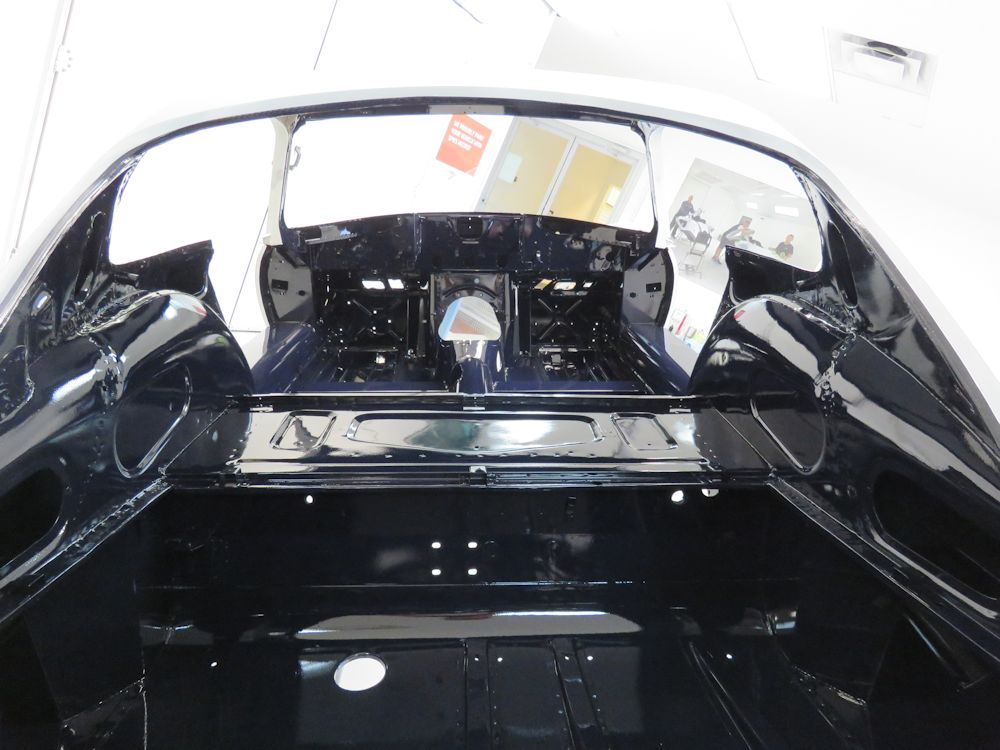
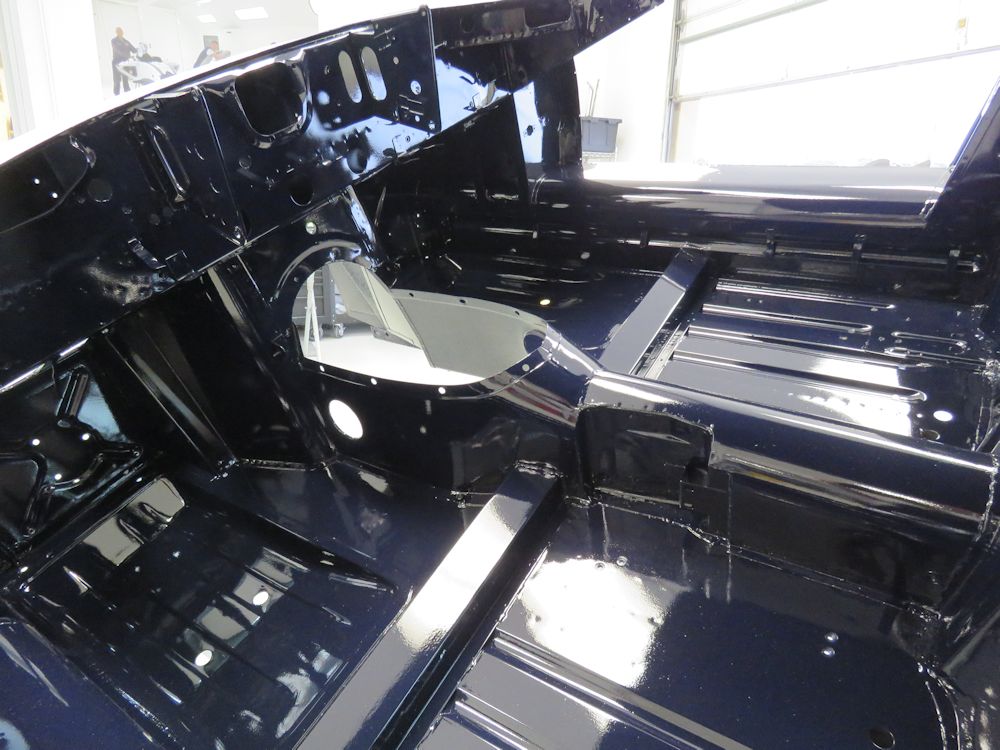
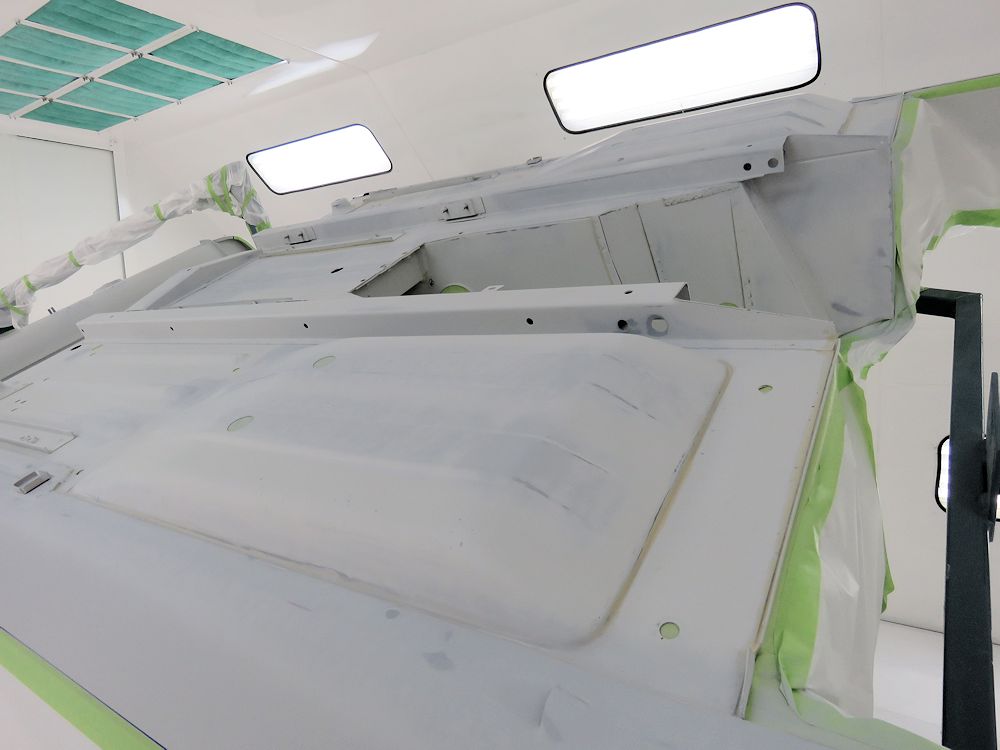
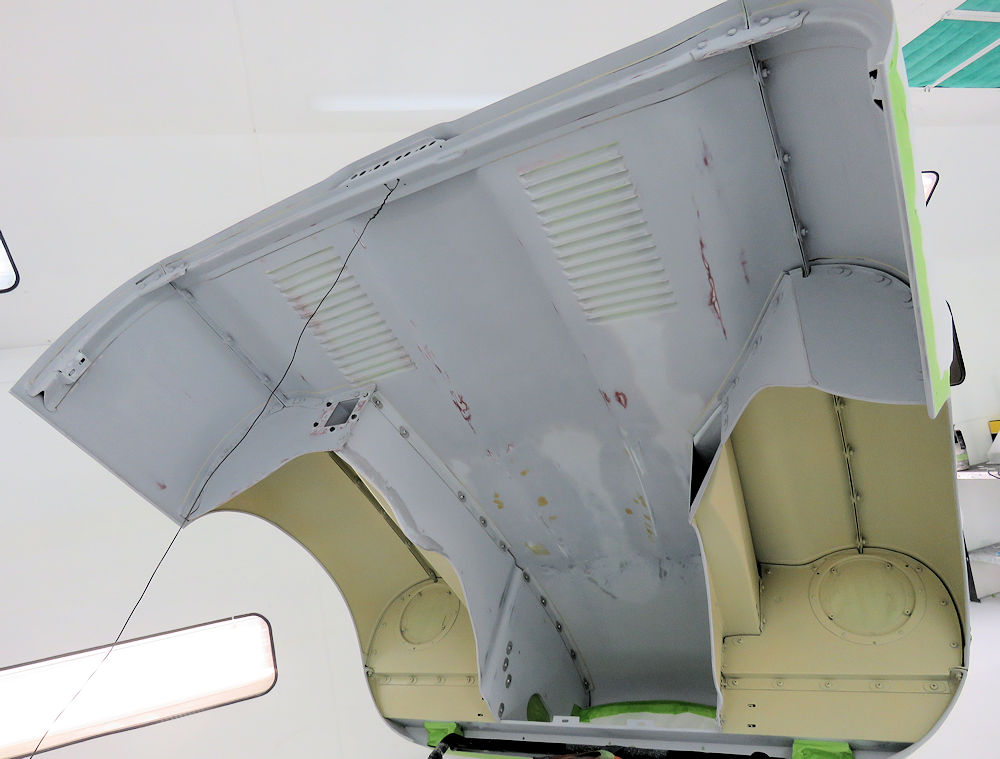
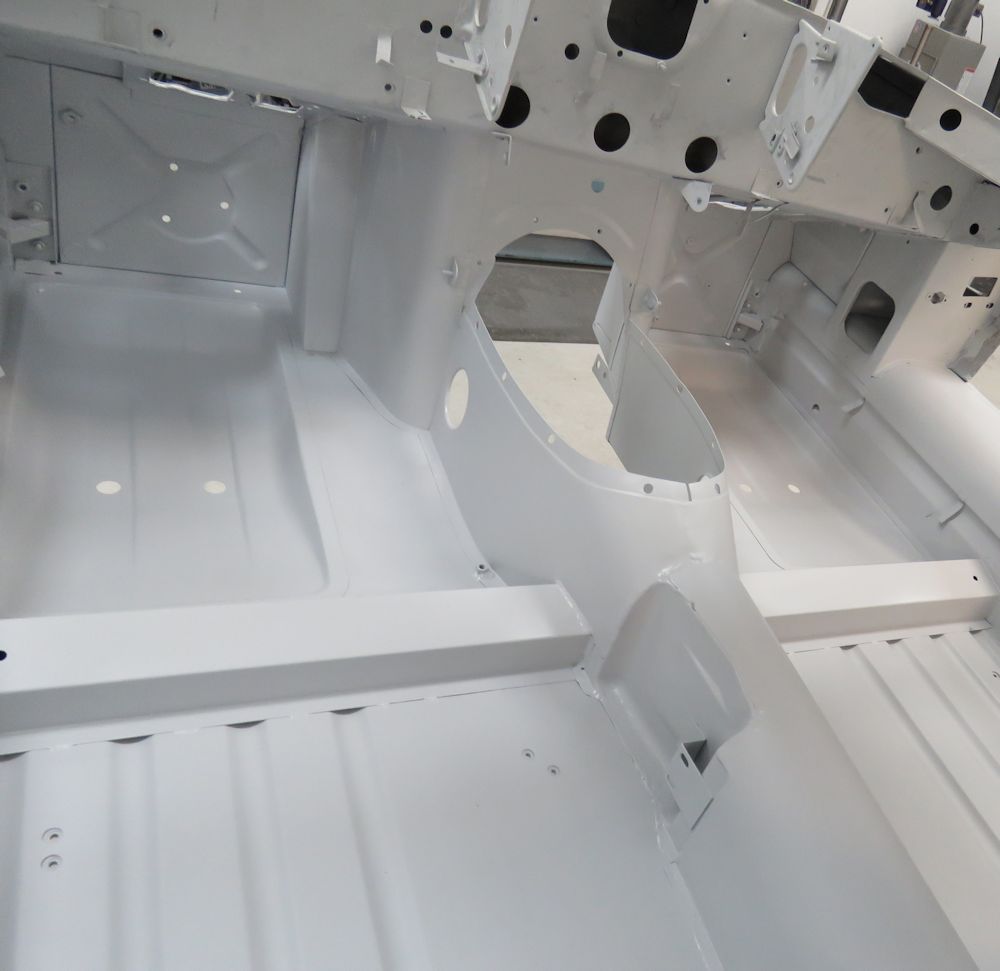
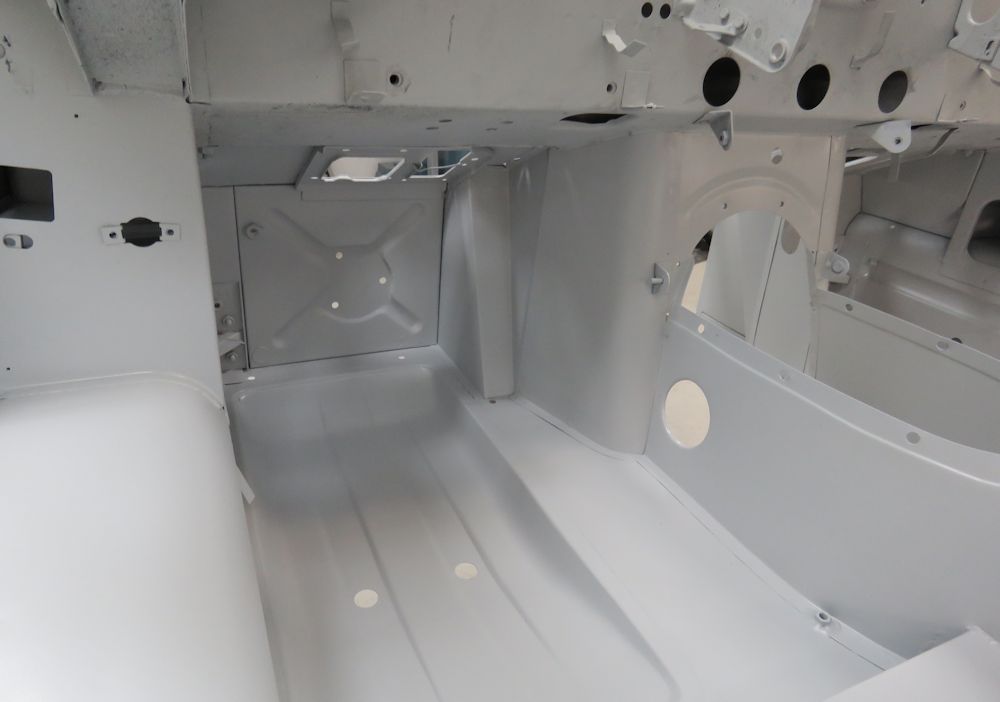
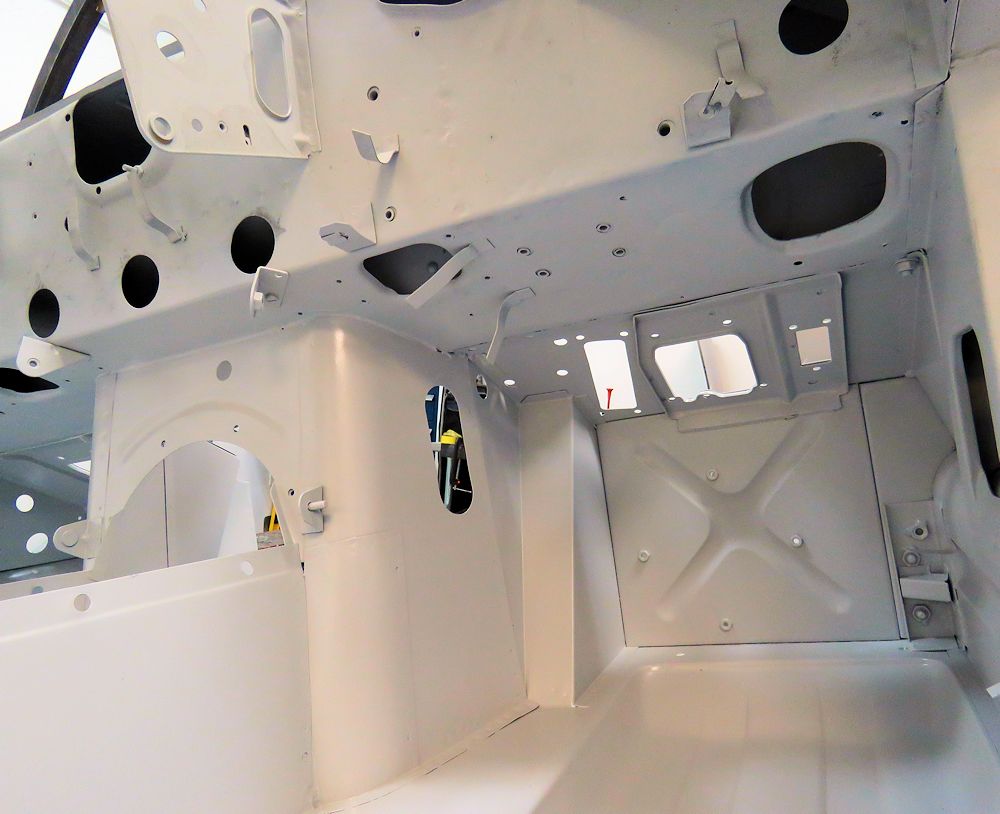
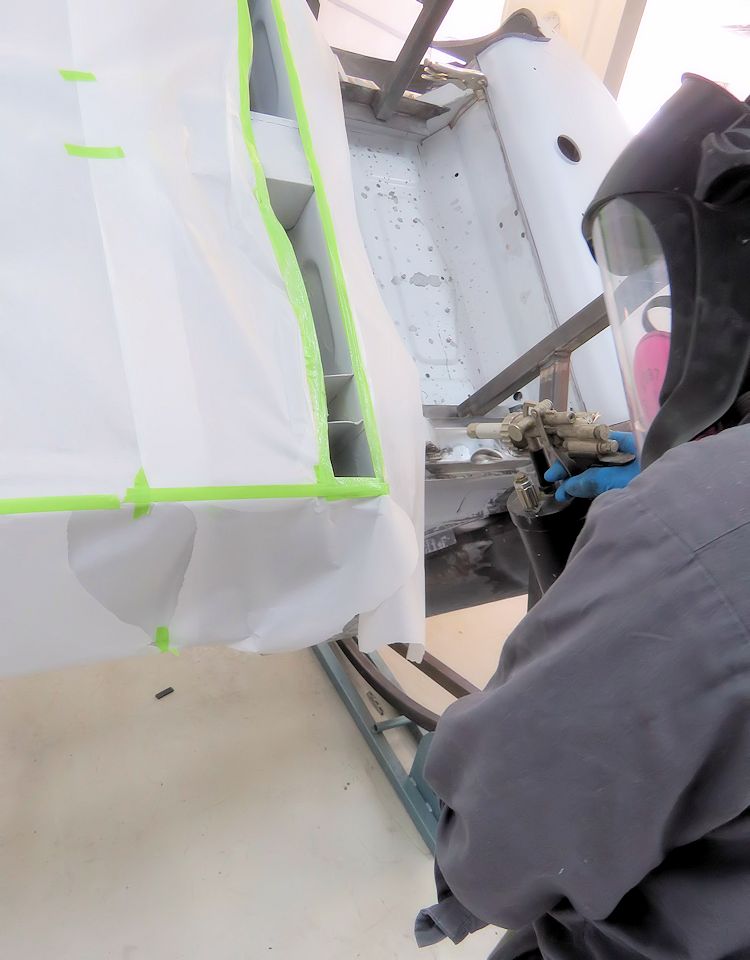
Gerardo has now painted the cabin area.
 |
 |
 |
 |
 |
 |
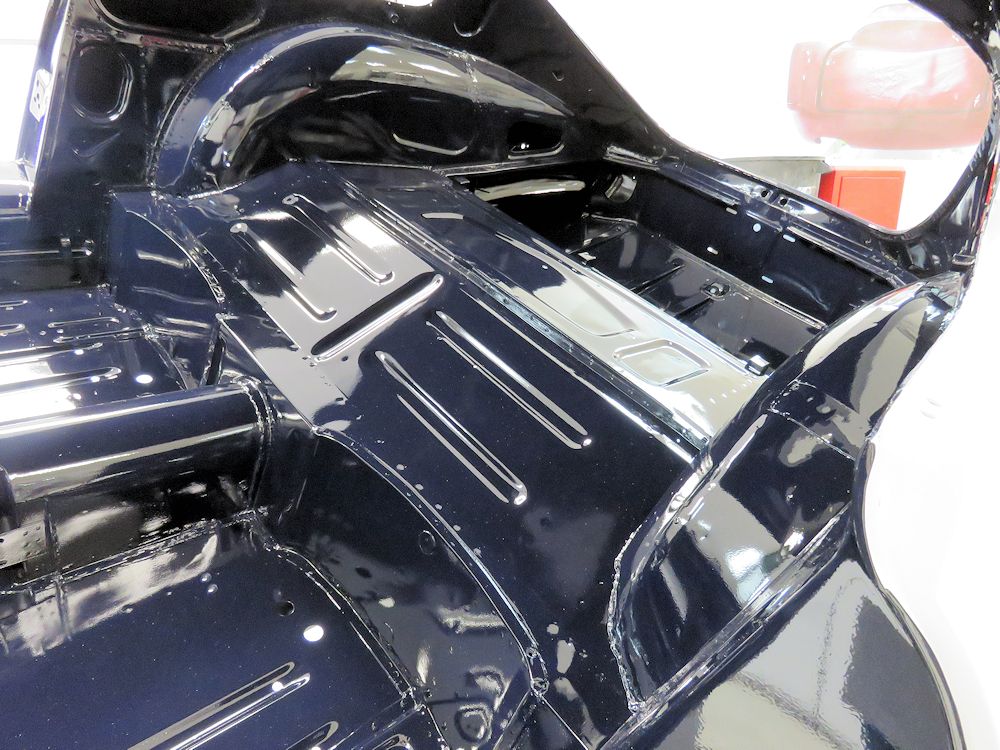
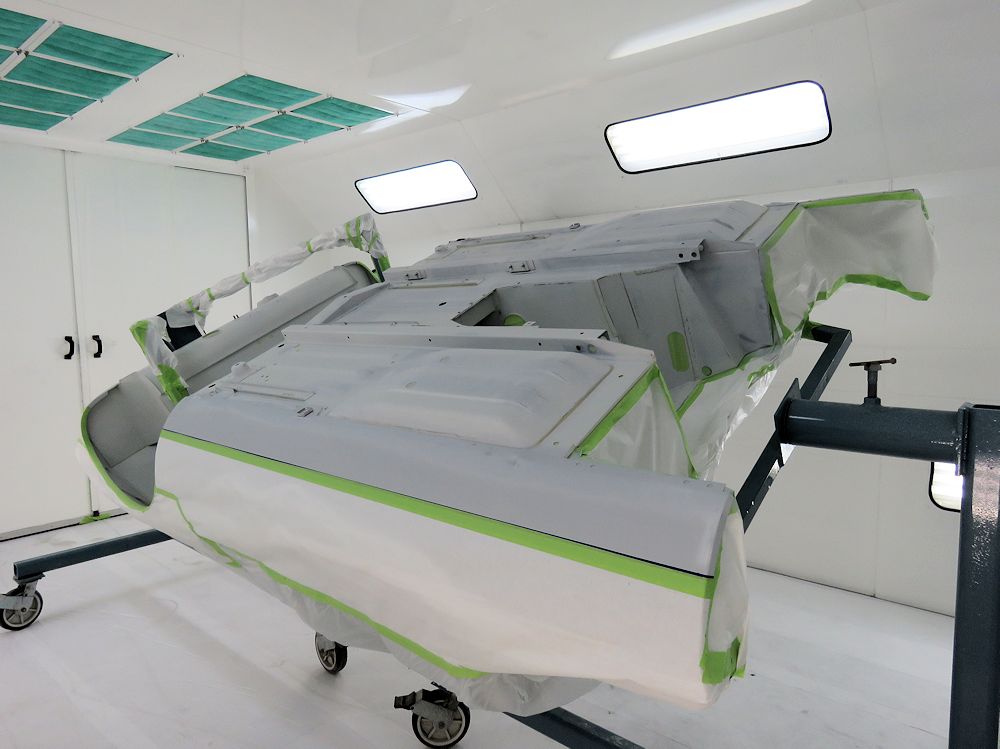
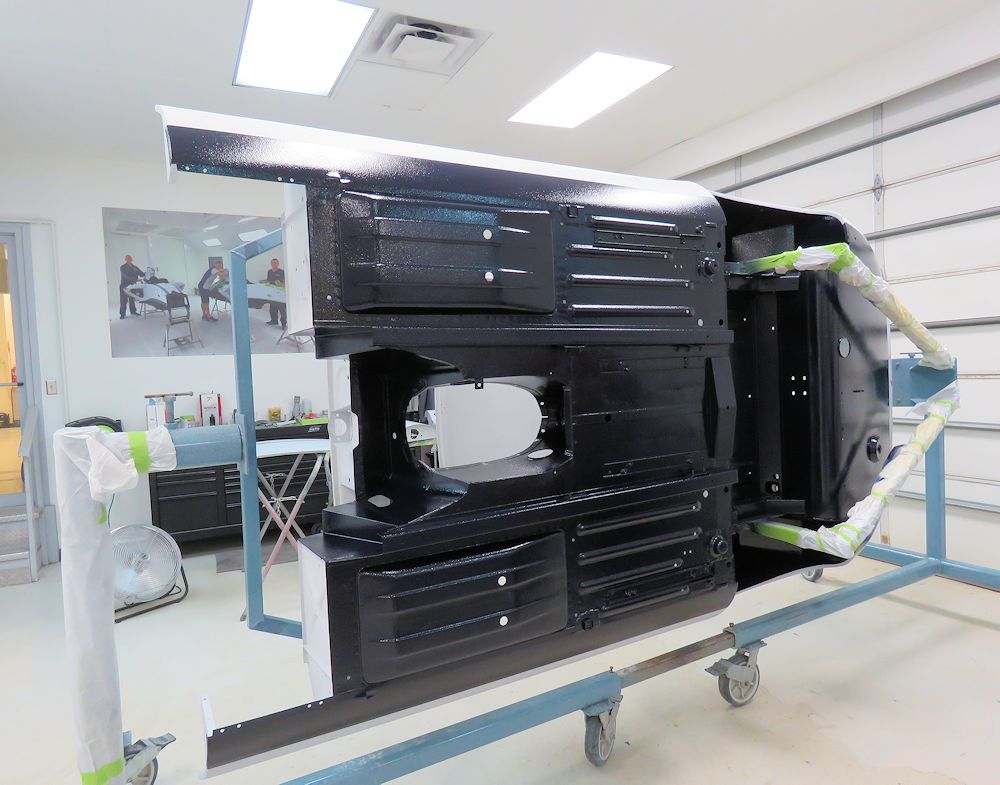
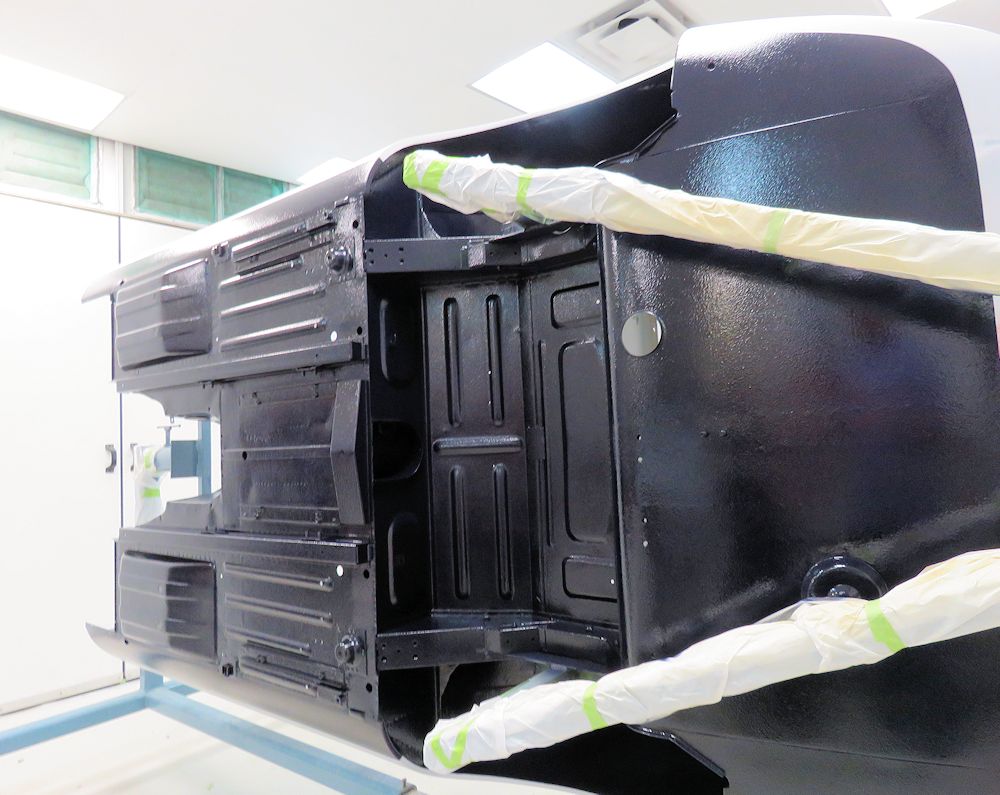
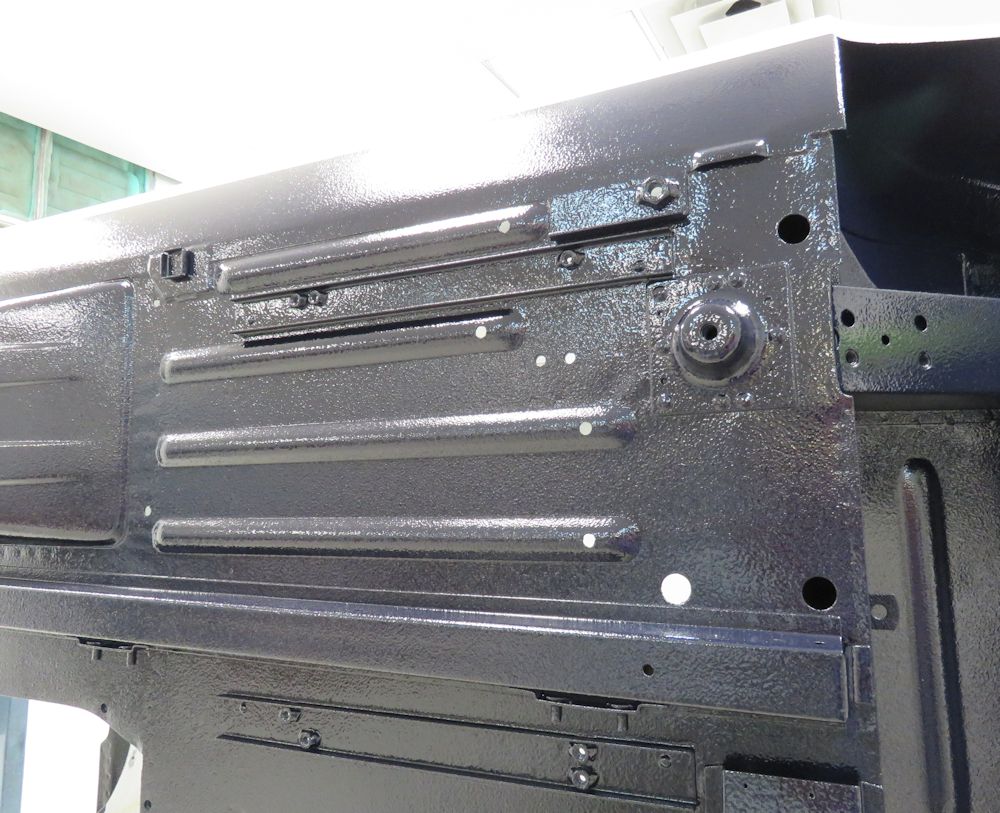
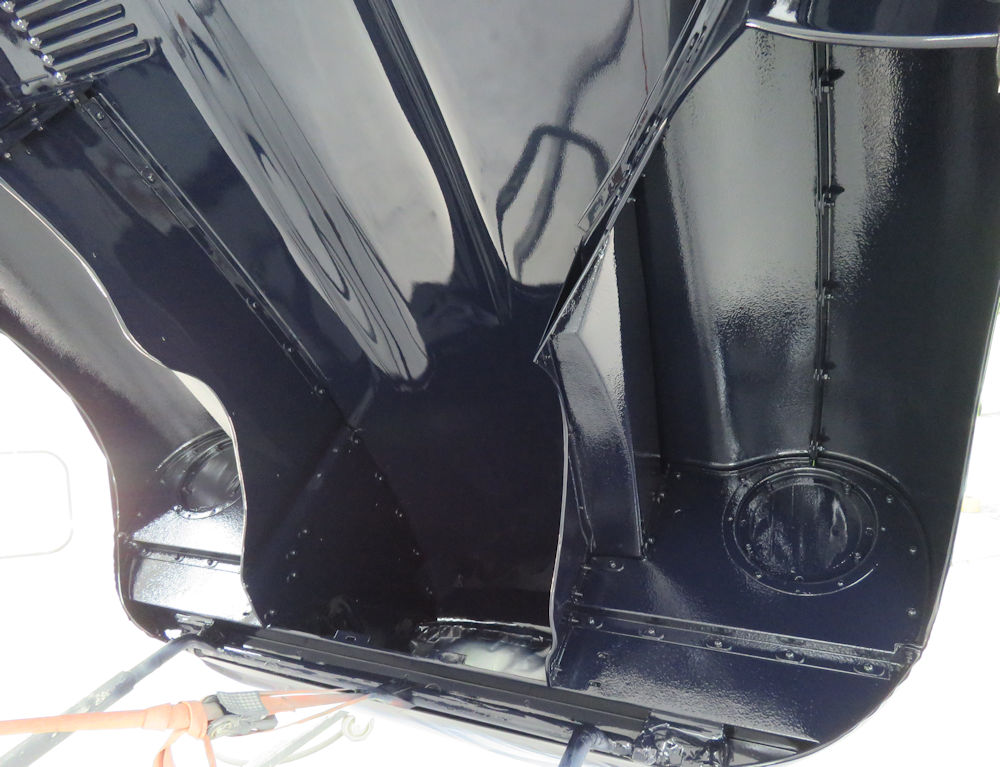
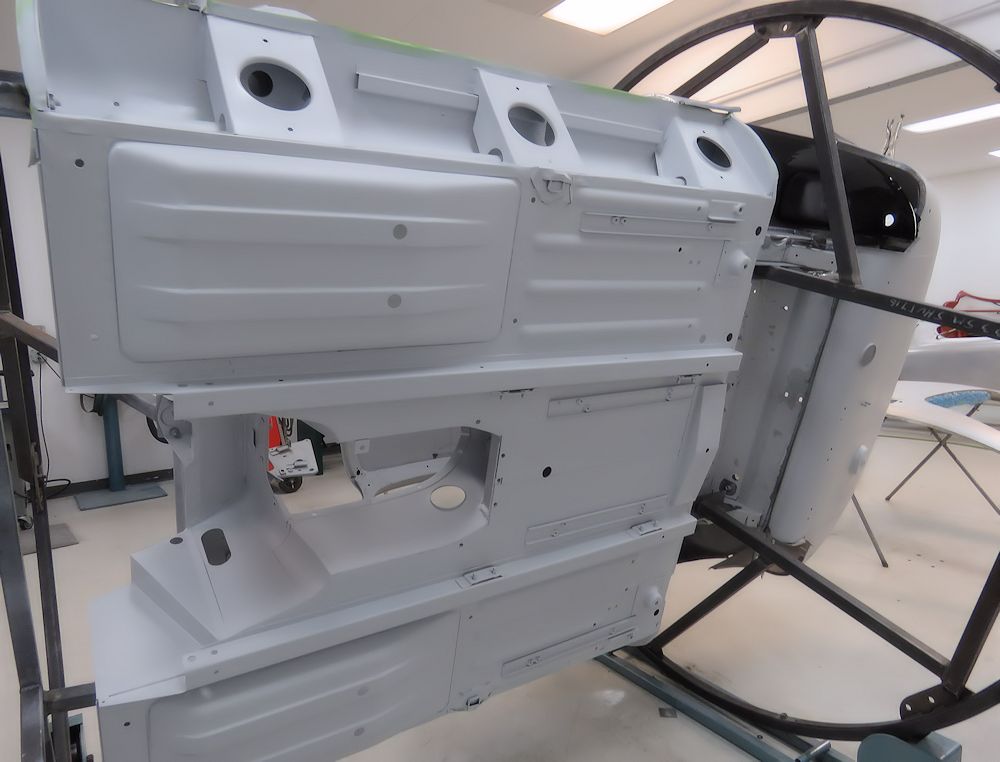
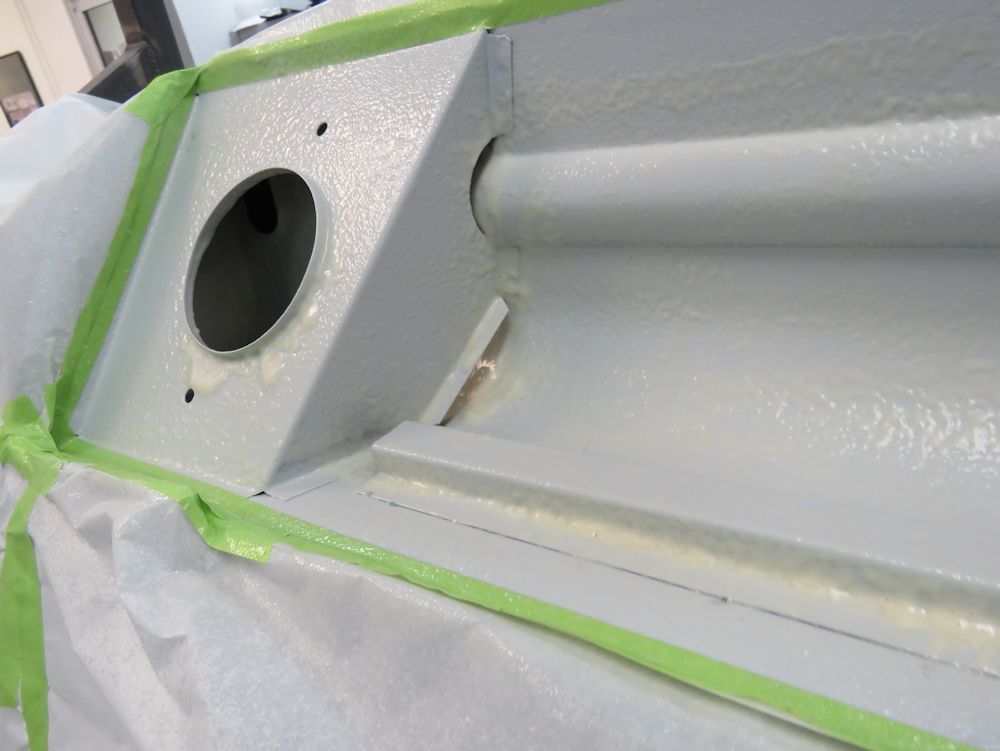
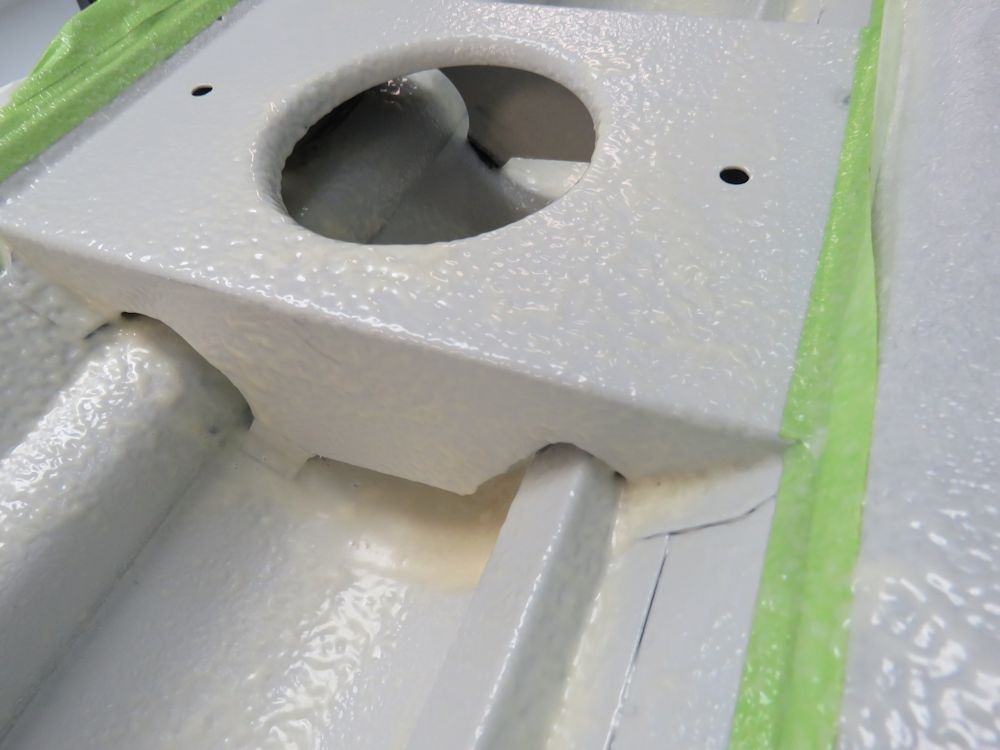
Painting the underside of the car.
 |
 |
 |
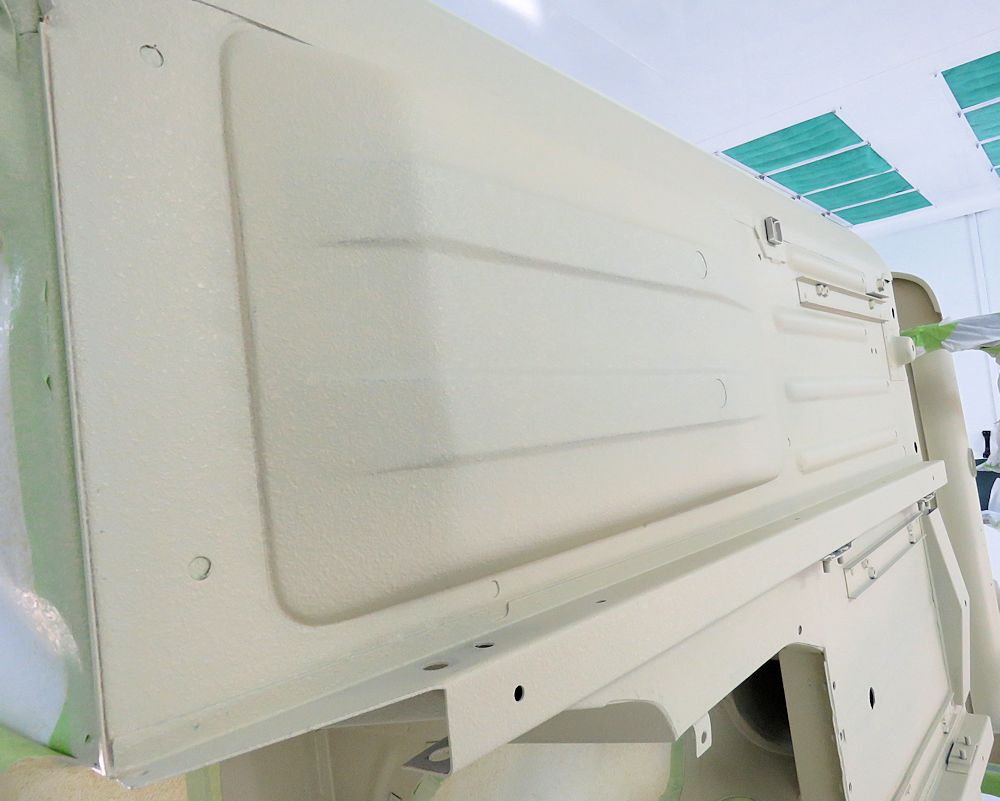 |
| Prior to sealing and painting, the Rocker
Guard is applied |
|
 |
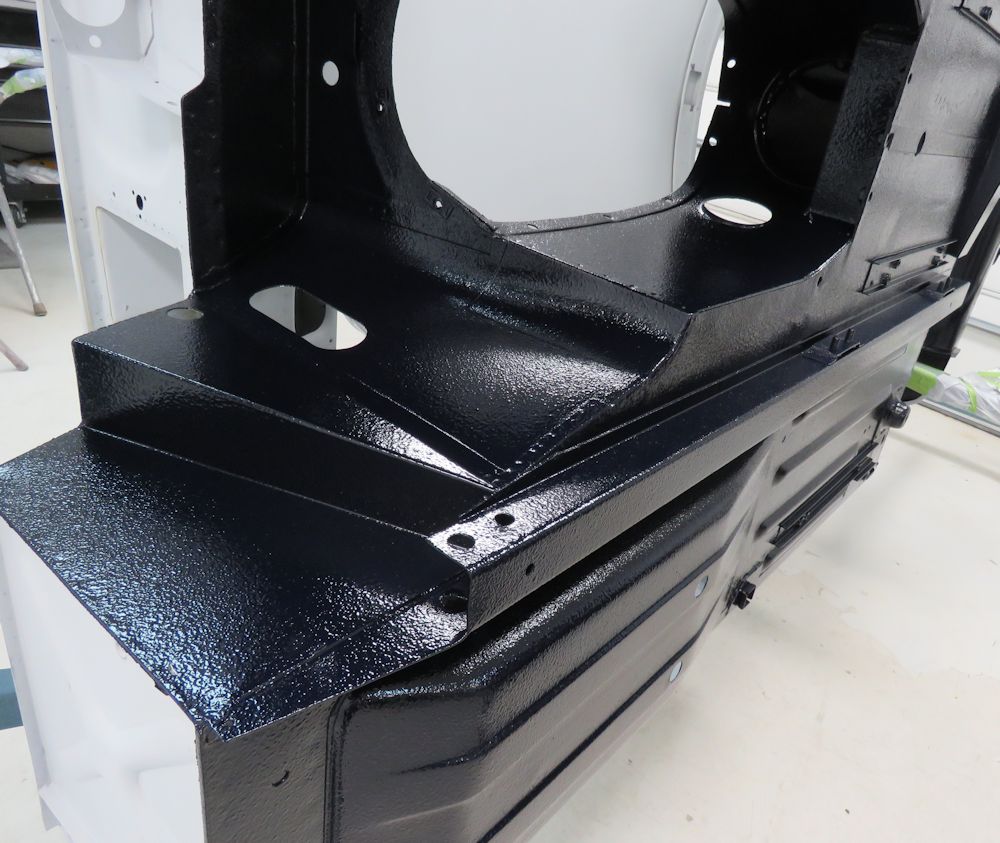 |
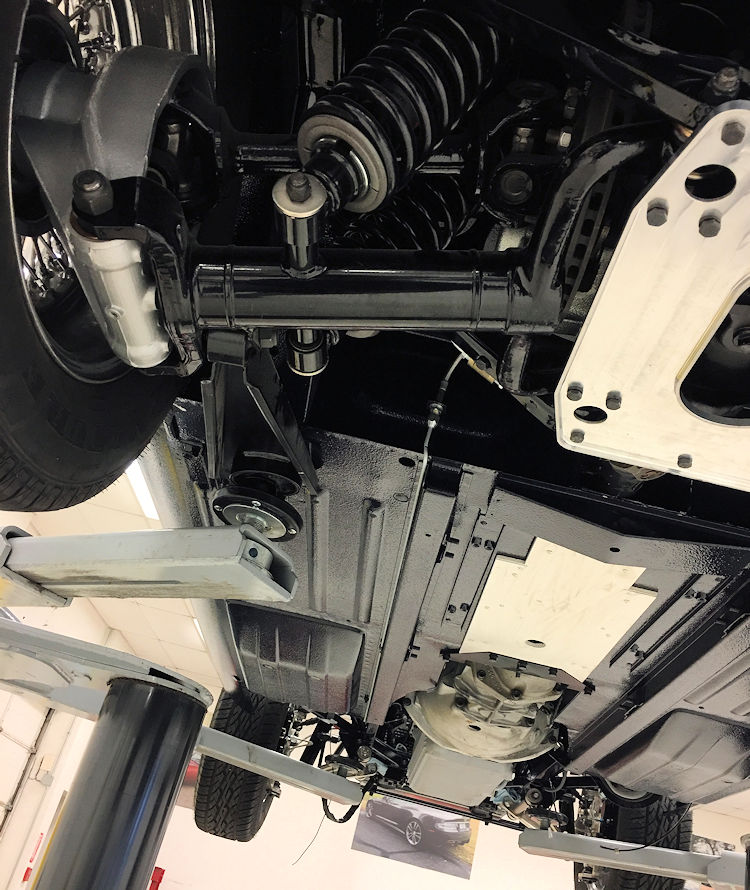
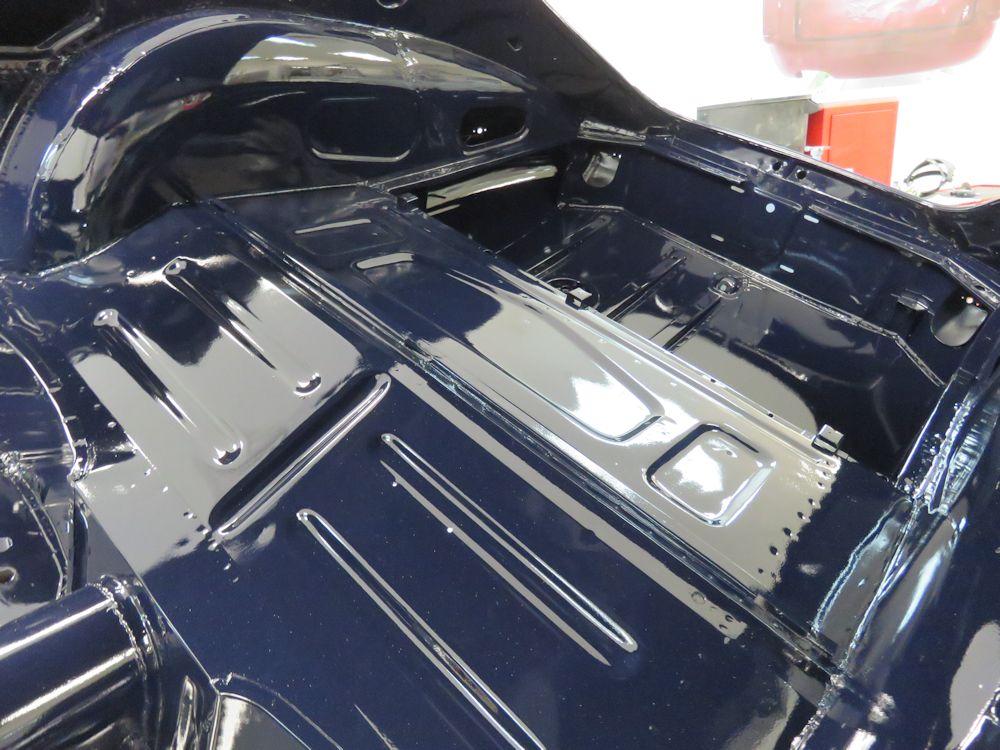
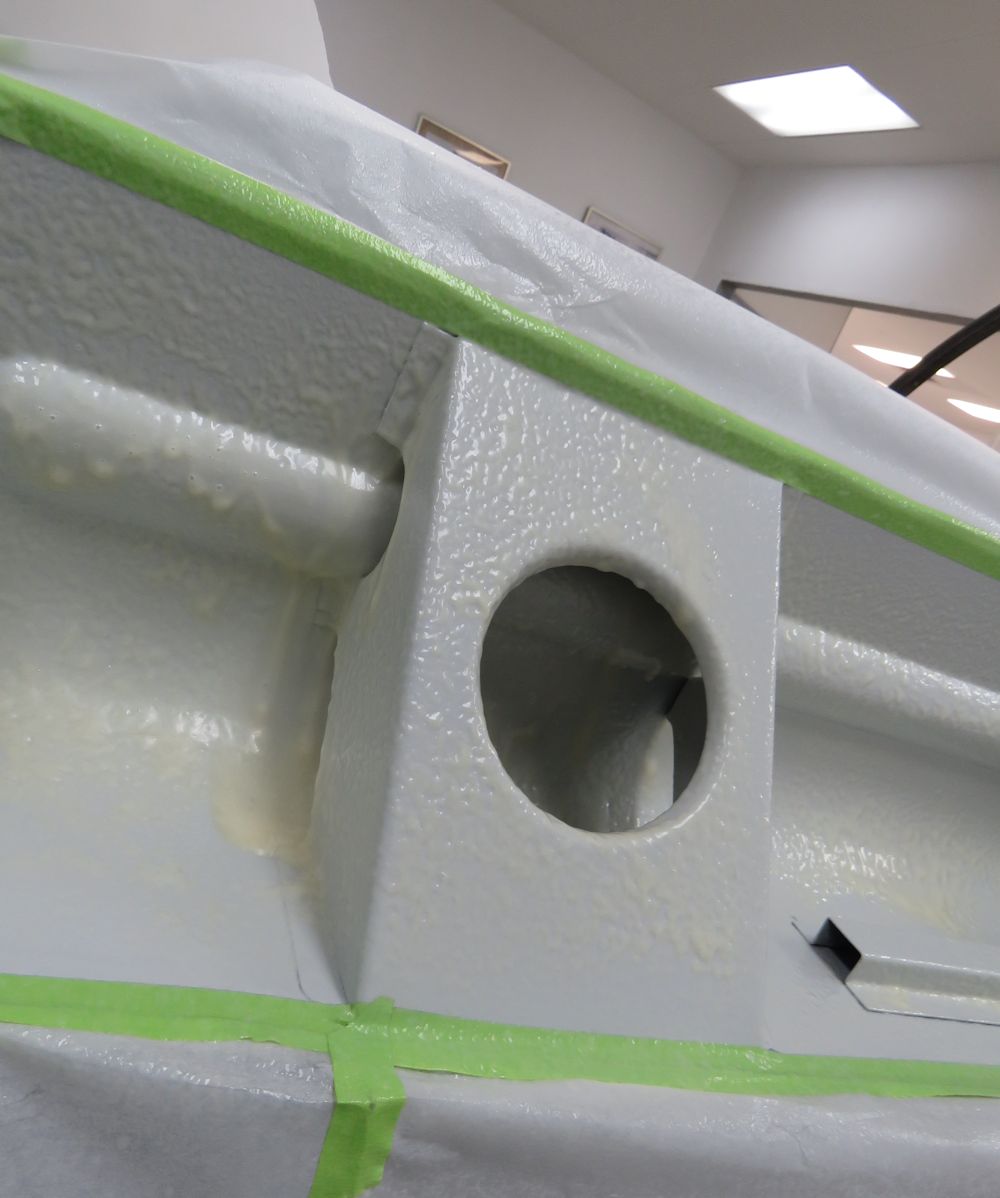
| Underside of the floors now Dark Blue |
|
 |
 |
| Next to be painted will be the cabin area |
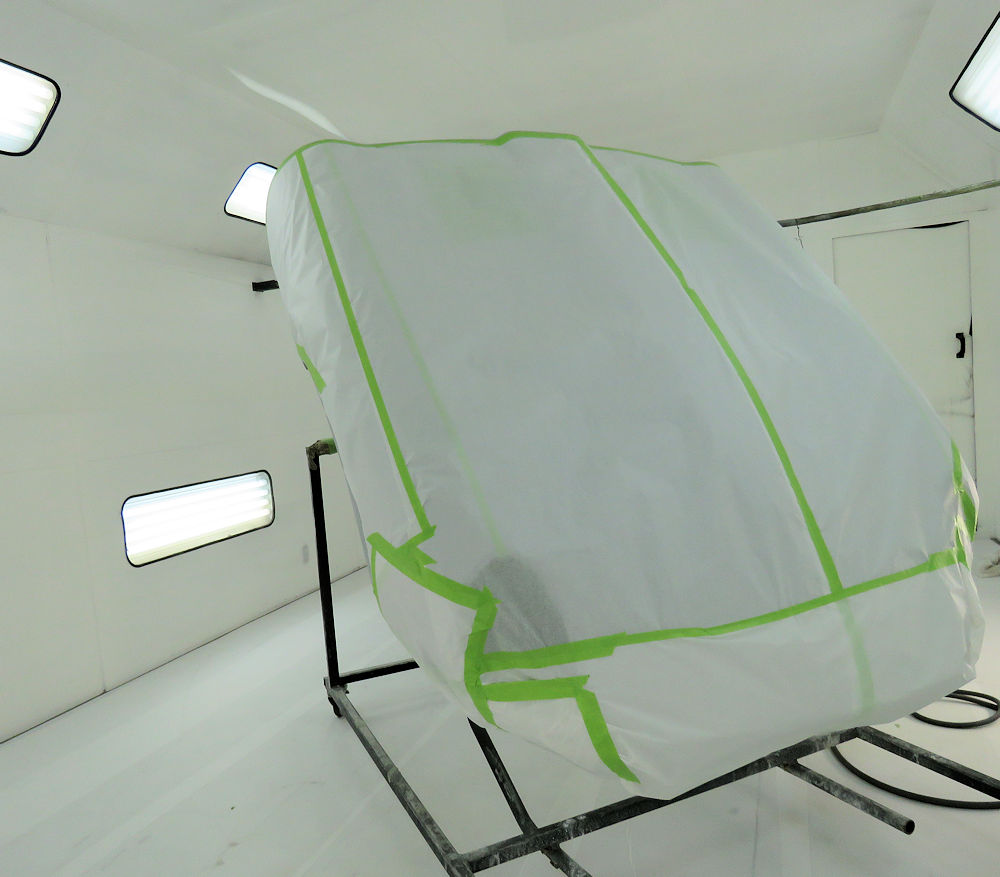
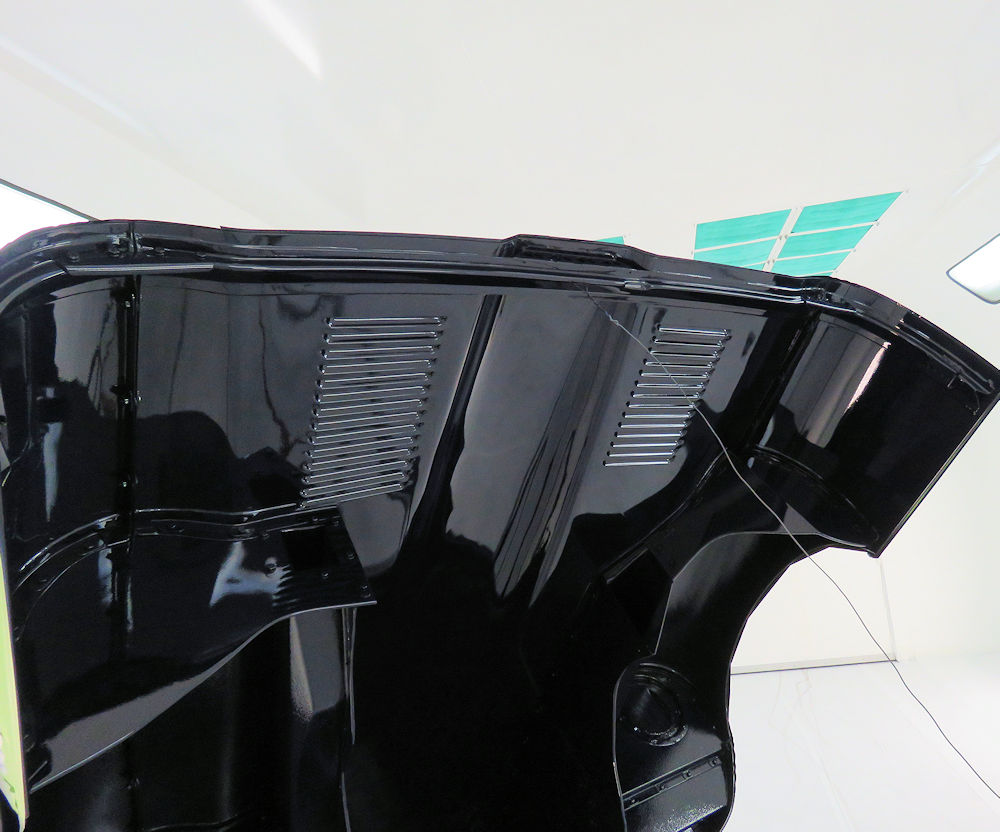
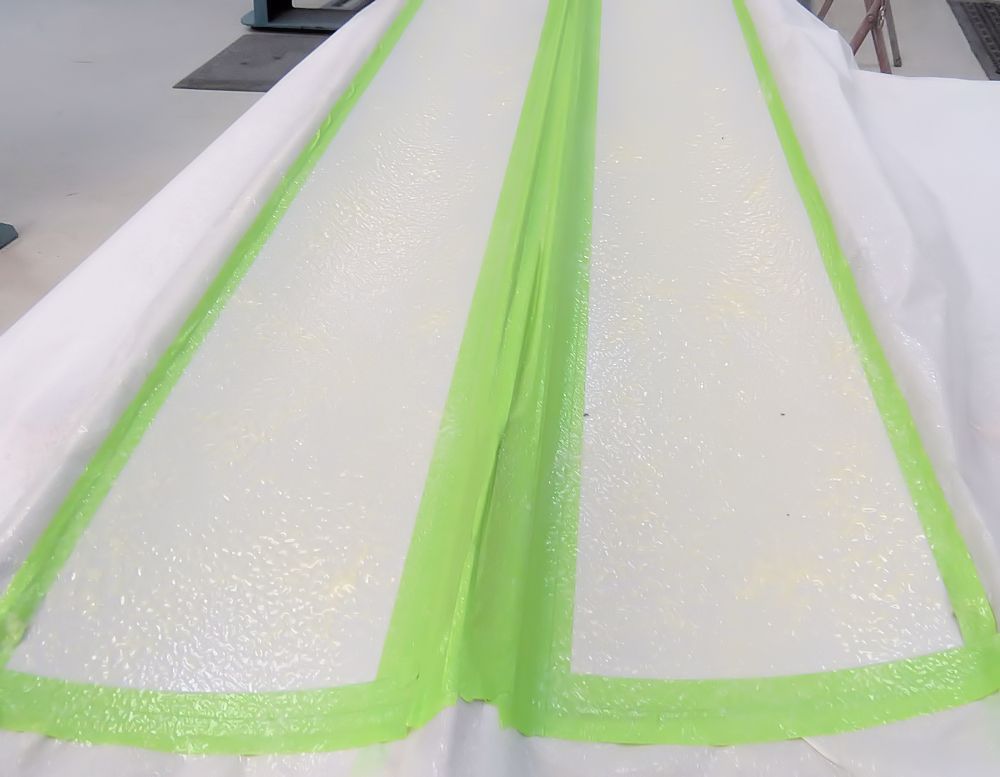
I am delighted to report that earlier today Gerardo applied the first of the Dark Blue paint. First to be painted was the underside of the alloy bonnet, although the rest of the car will be painted over the next several days. Exciting times!
 |
 |
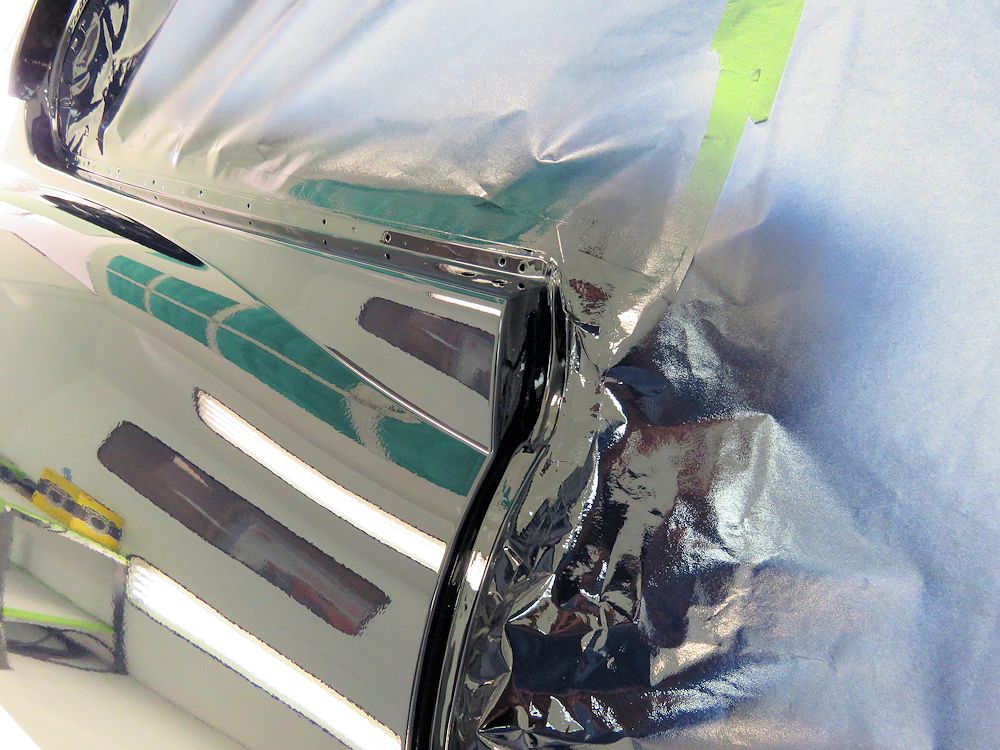
| Top side of the bonnet masked off |
Applying rocker guard in the wheel wells |
 |
 |
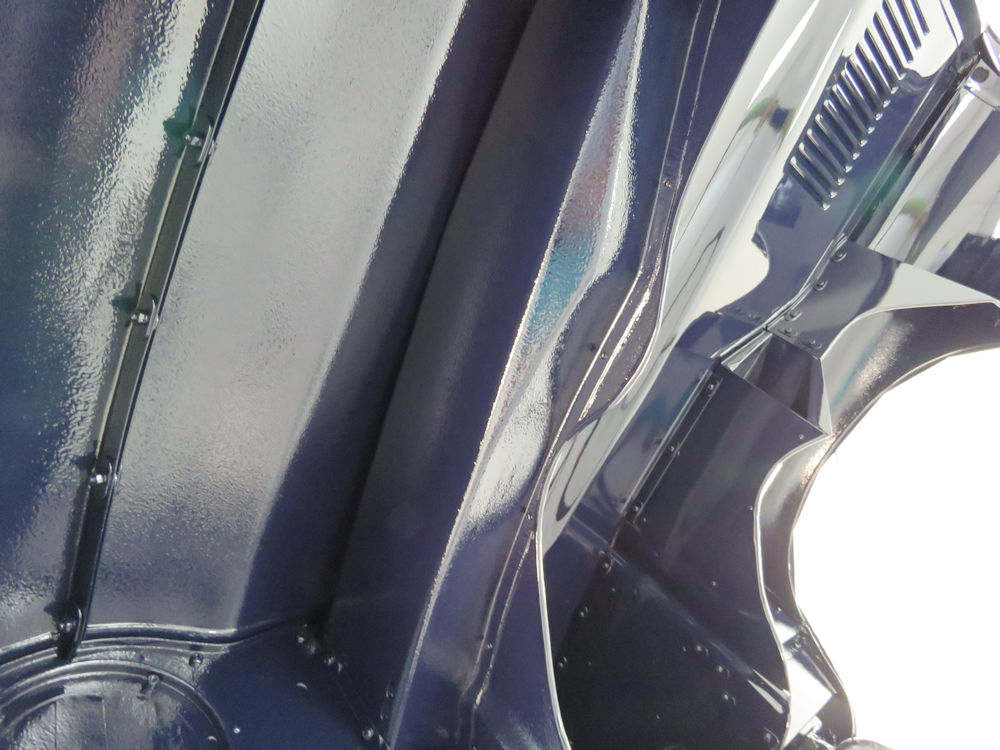
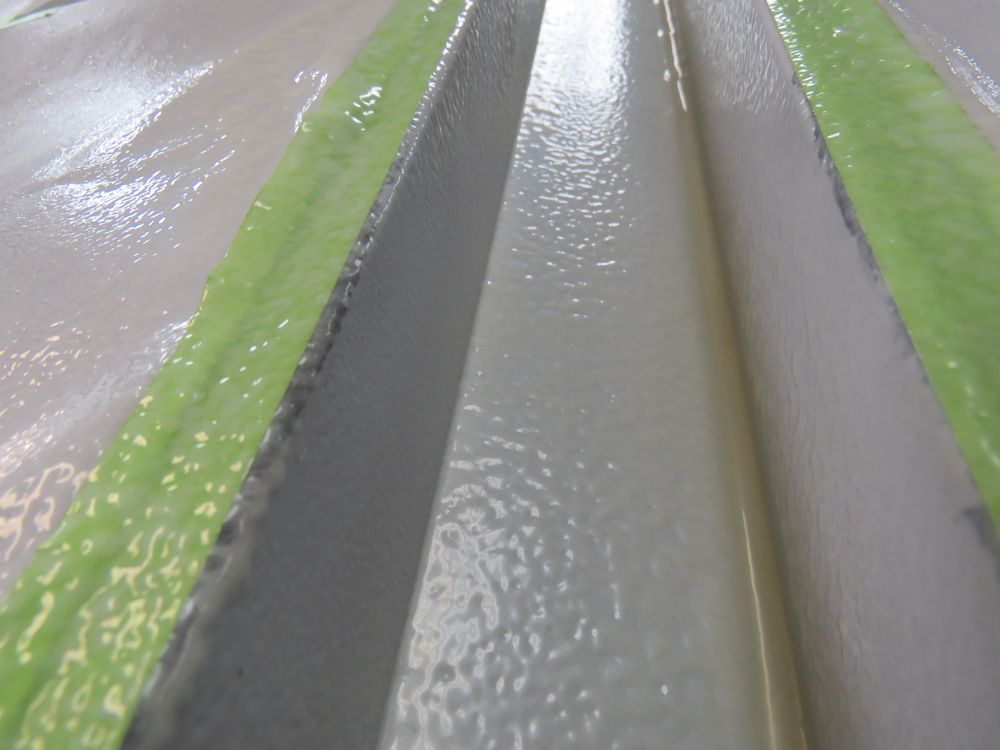
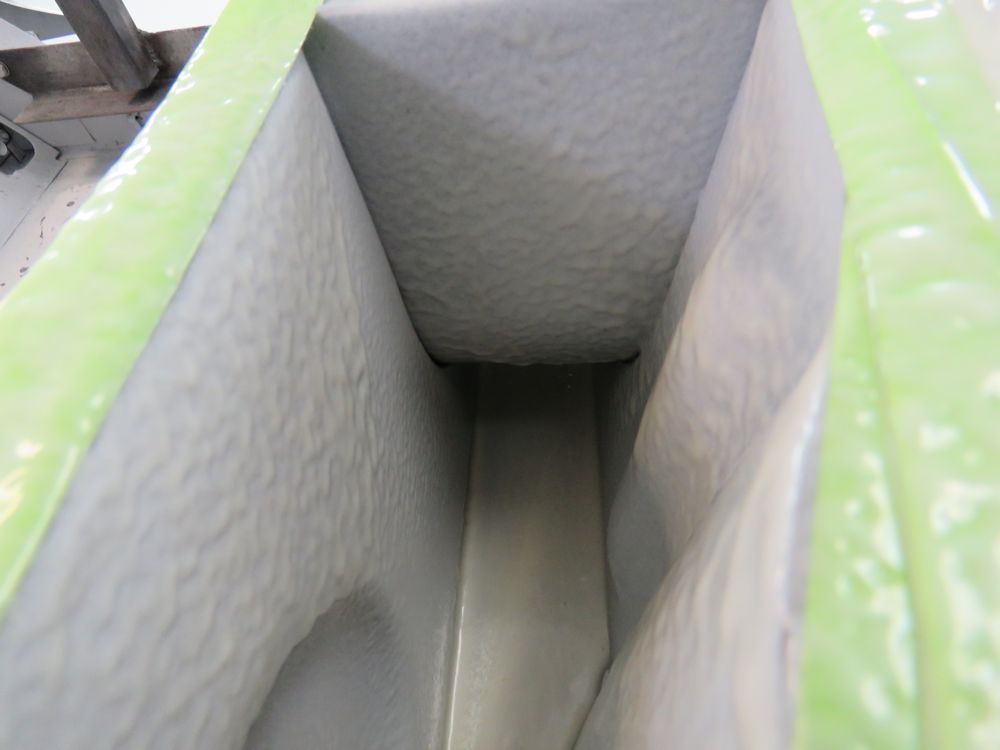
| I think the Dark Blue looks absolutely
beautiful! |
Note the slightly textured finish to the wheel
arches |
 |
 |
| Lots more photos next week! |
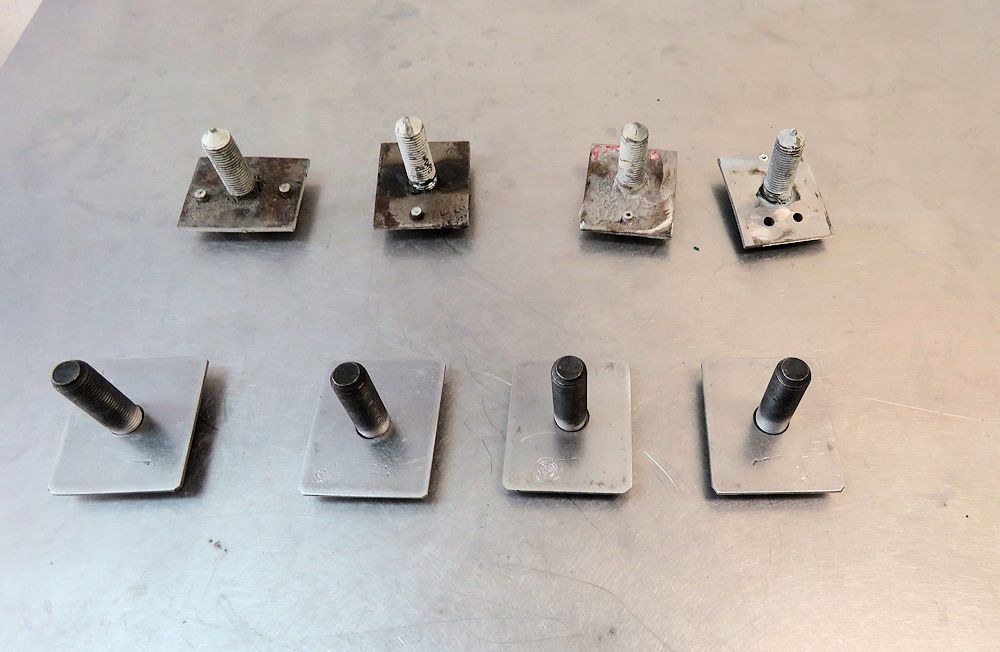
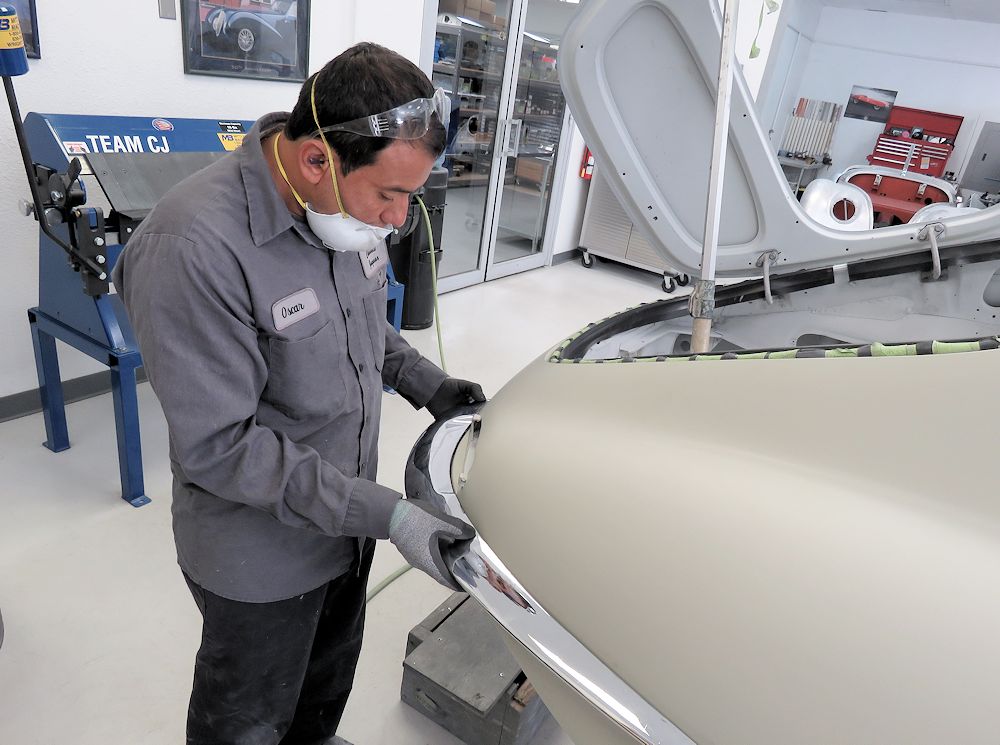
Oscar now has your chrome trial fit underway. Typically this process takes about a week to complete.
 |
 |
 |
 |
| Fabricating new rear bumper studs |
Oscar trial fitting your rear bumpers |
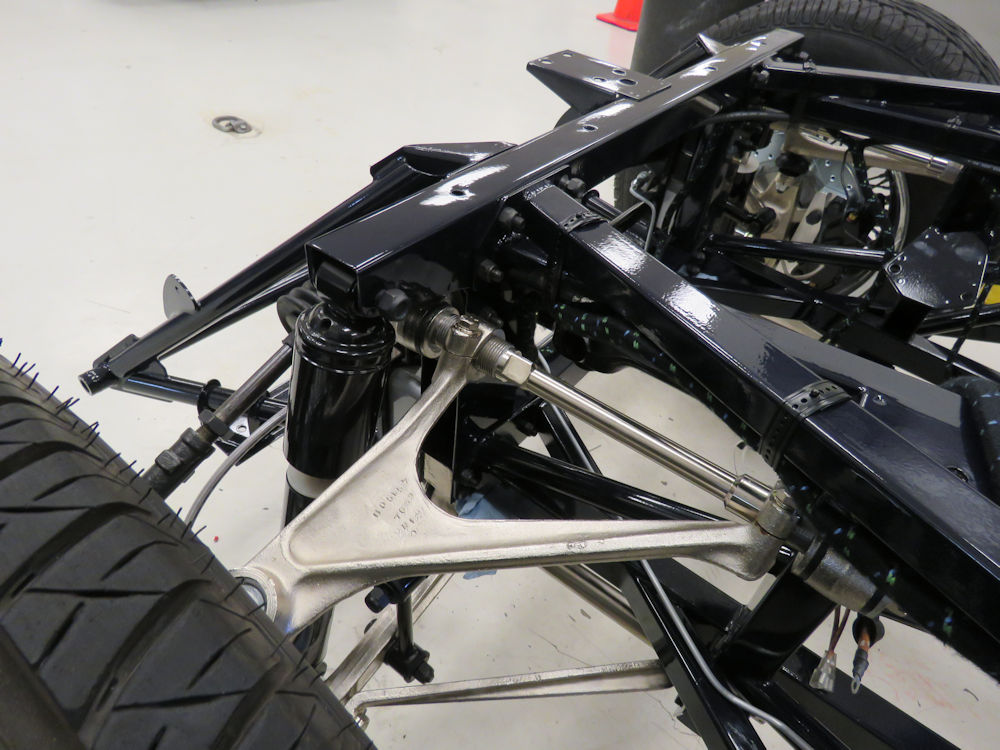
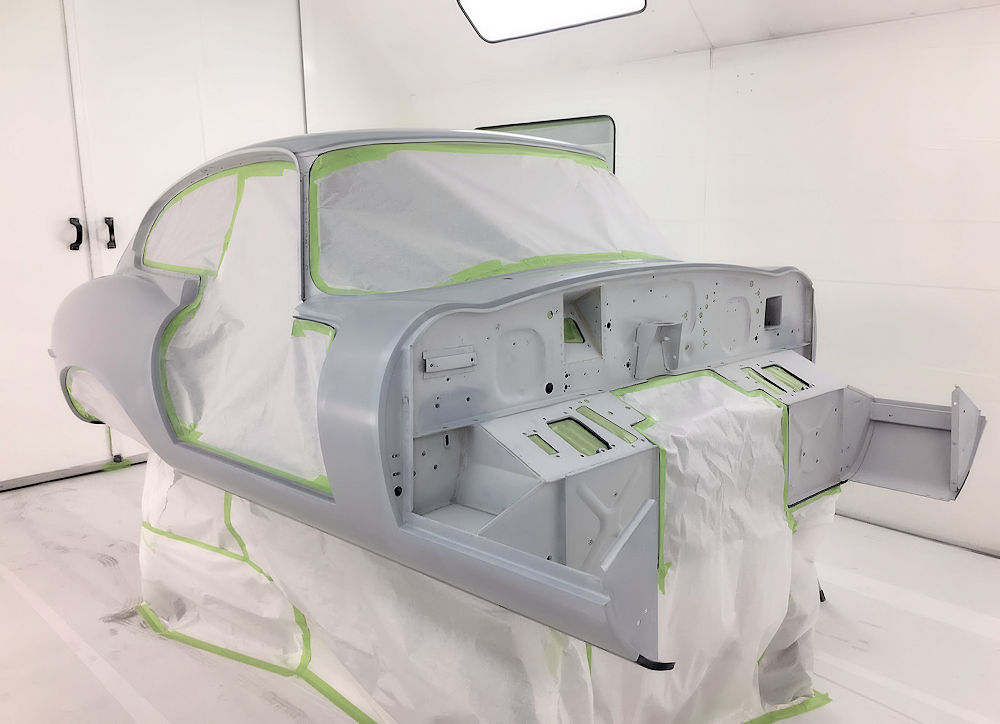
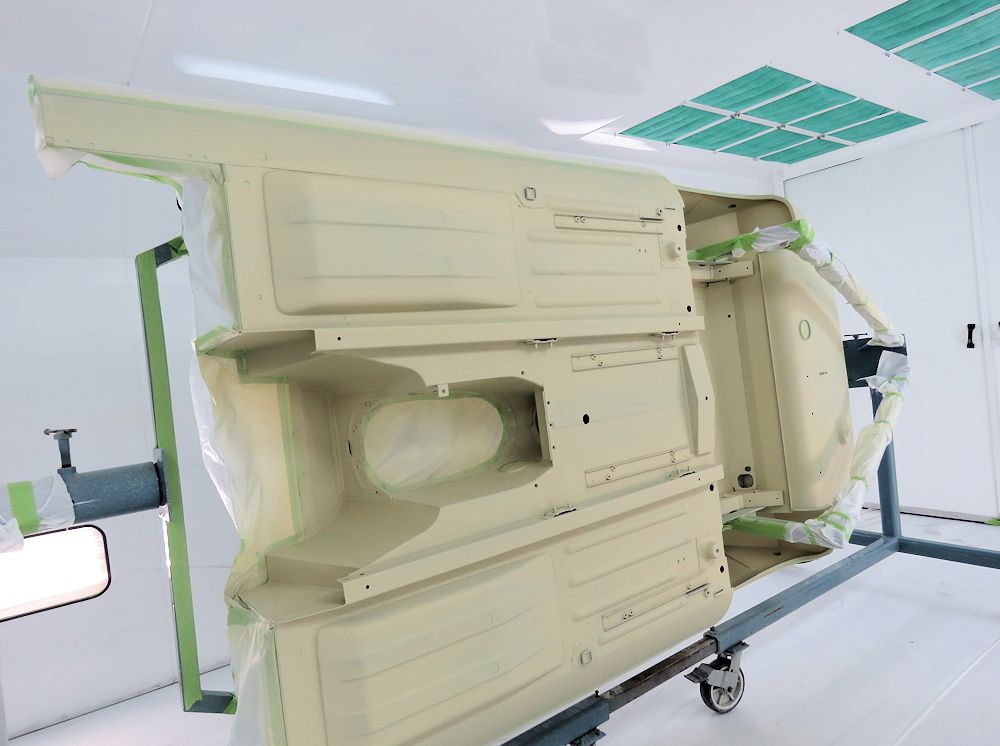
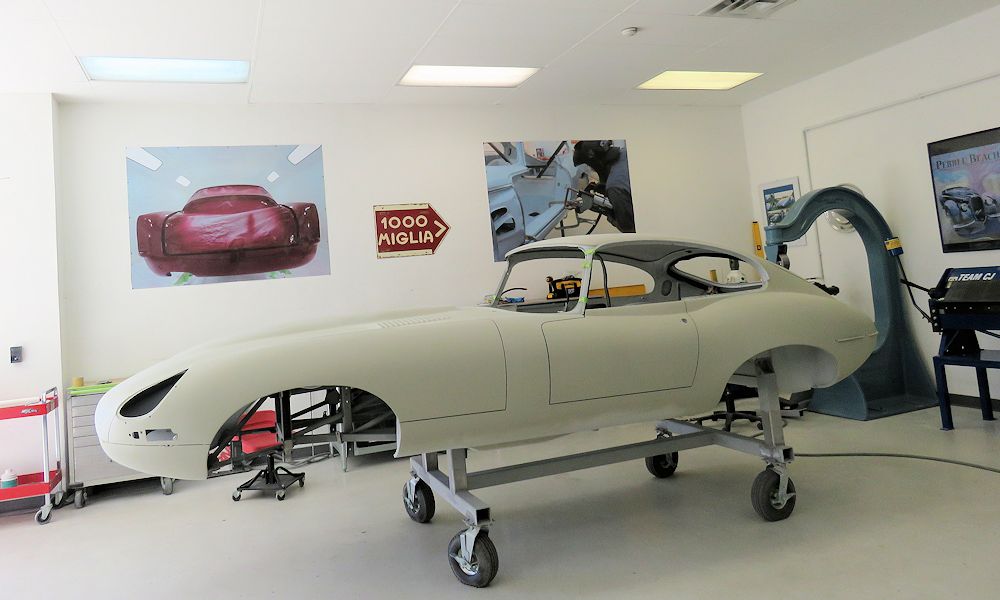
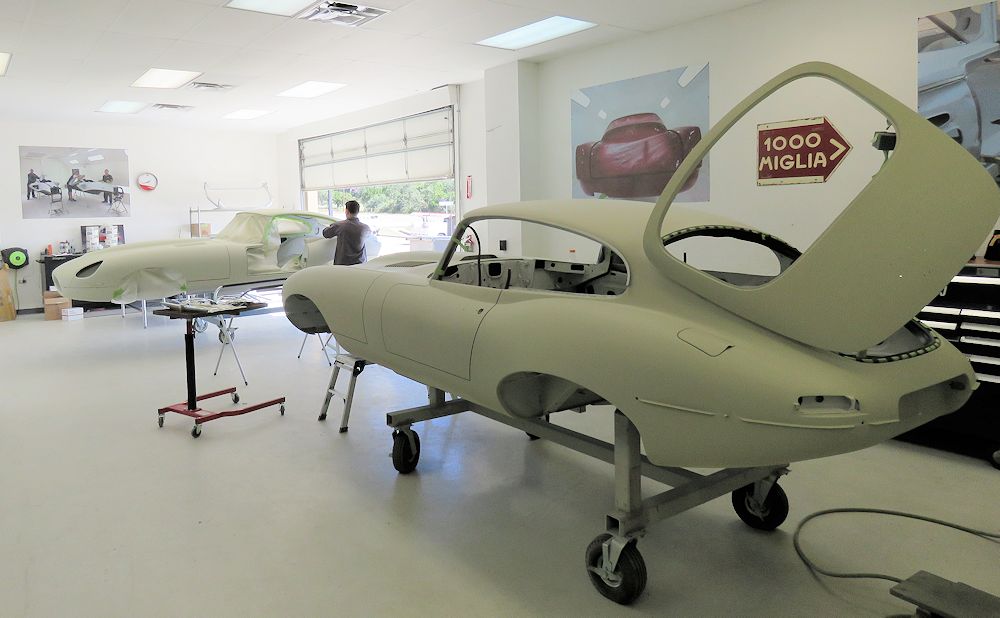
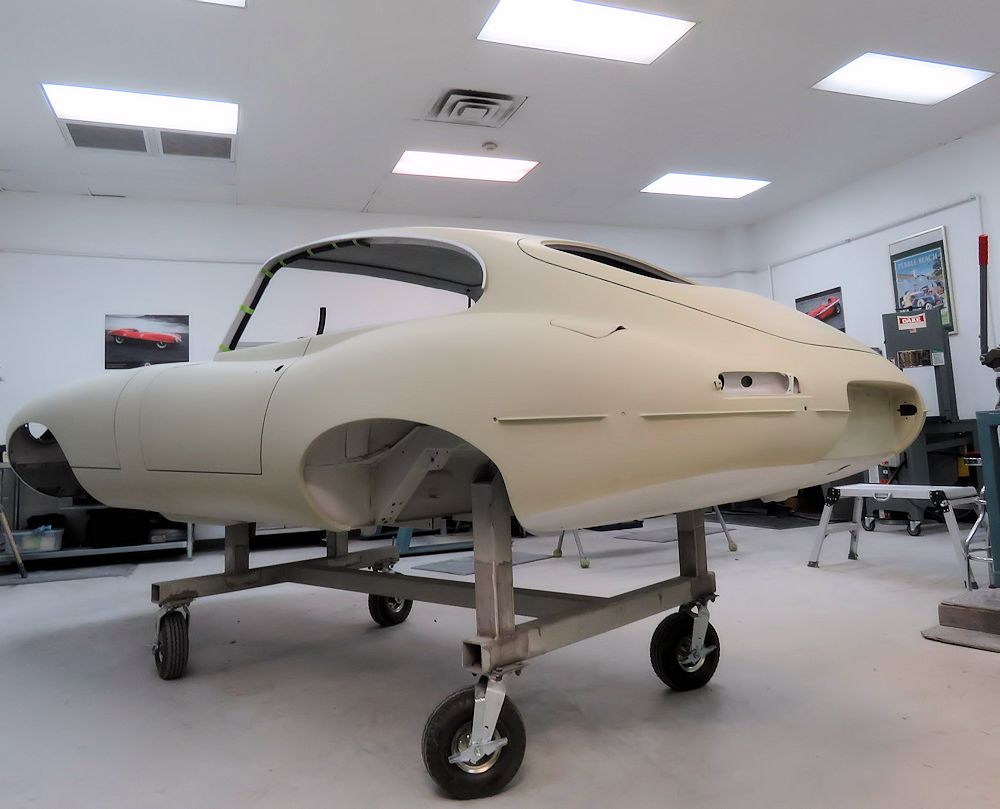
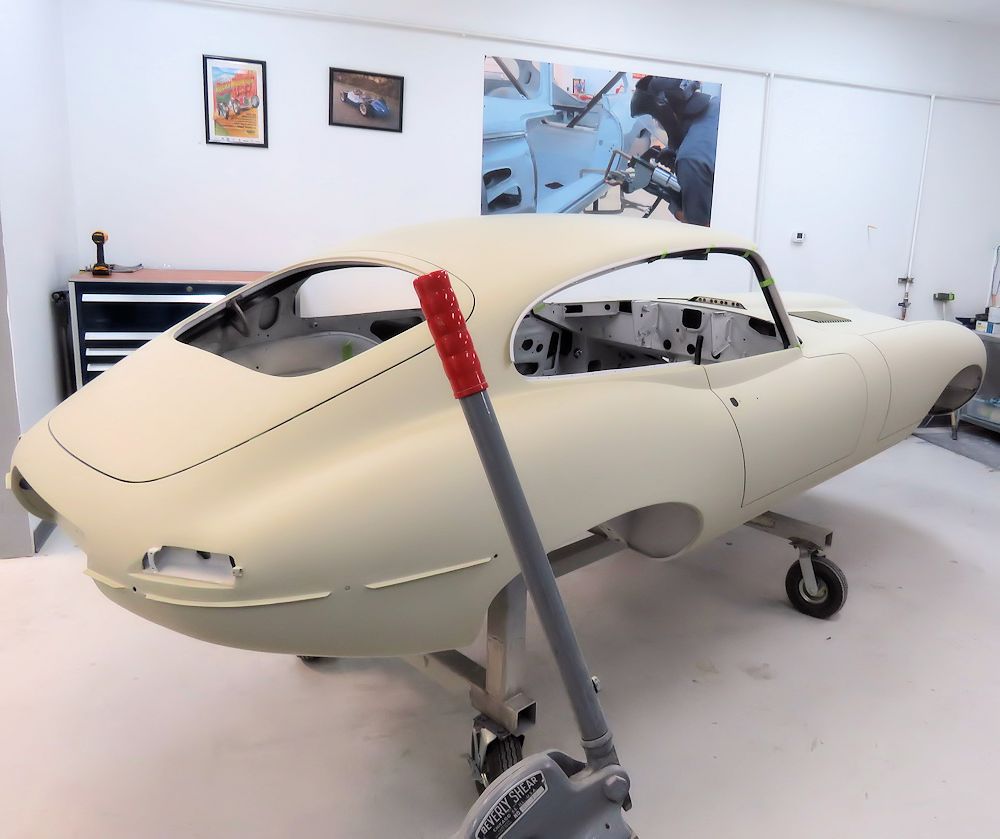
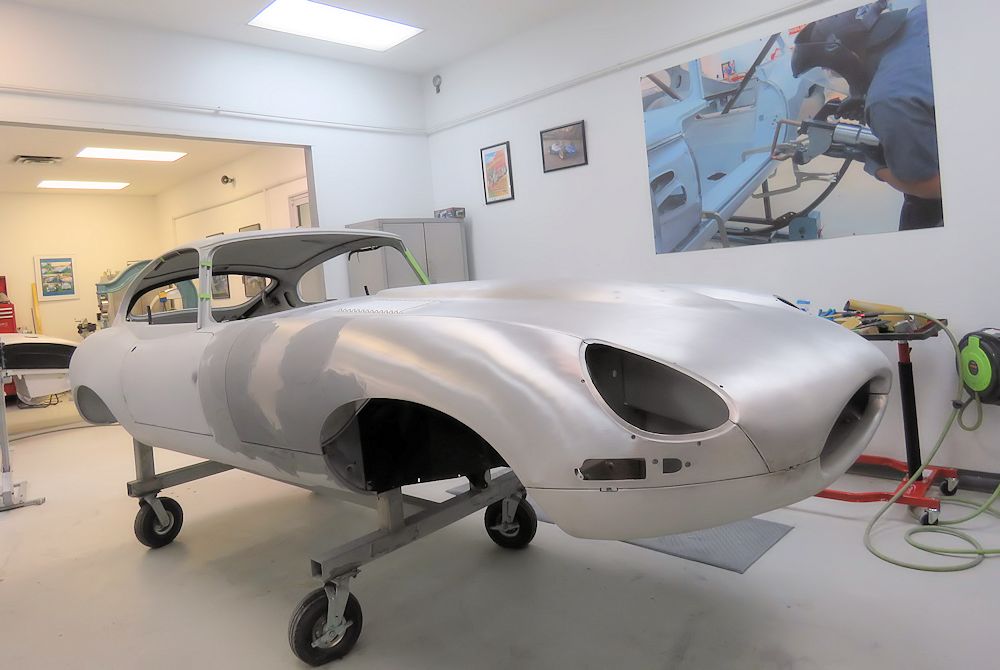
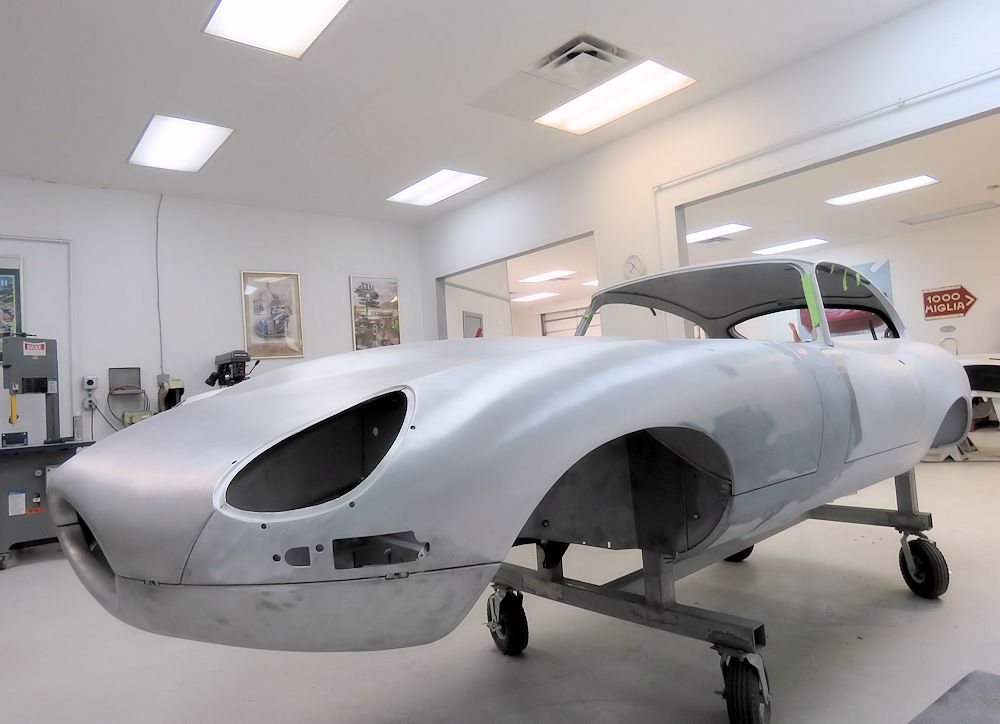
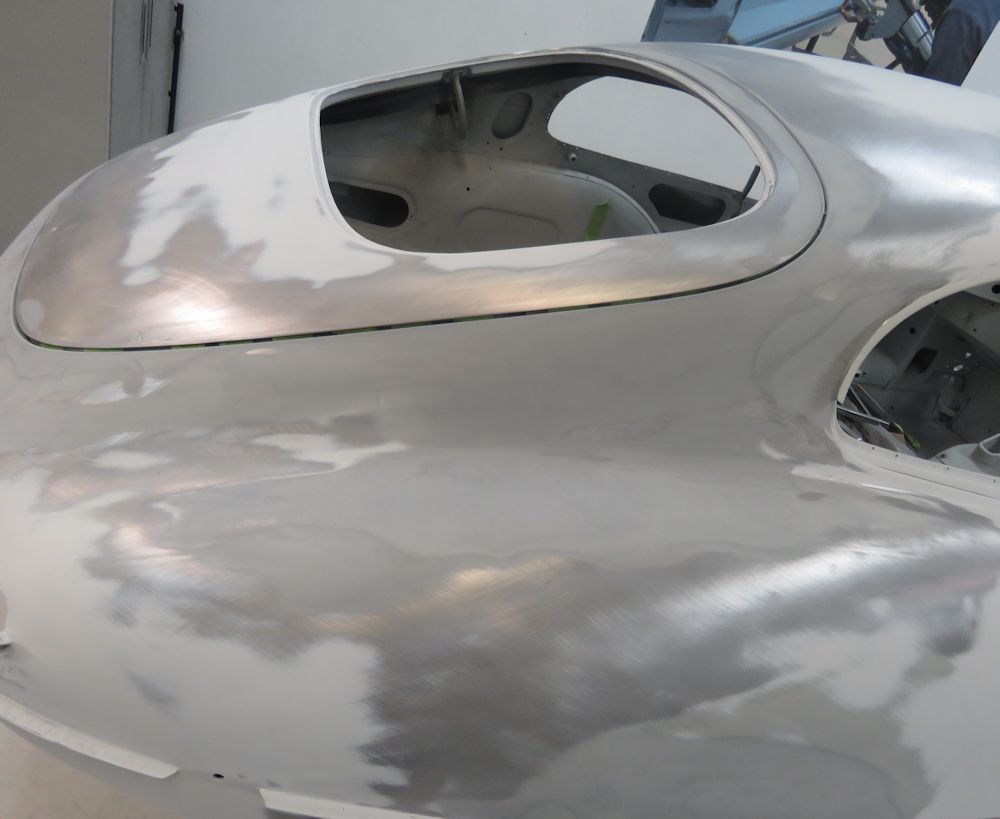
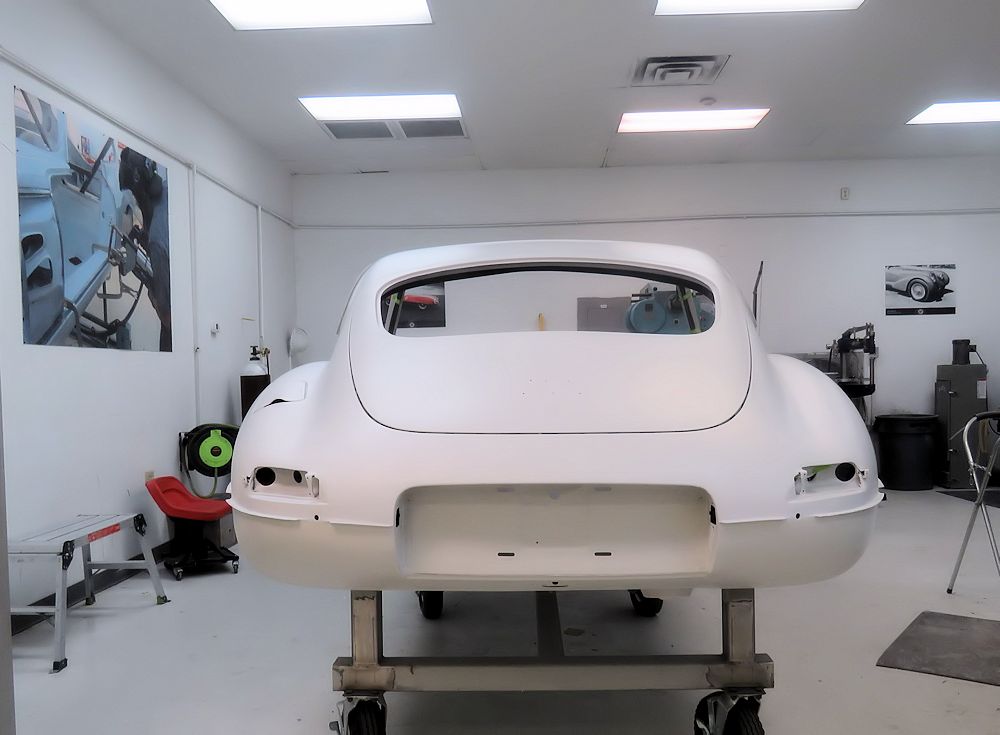
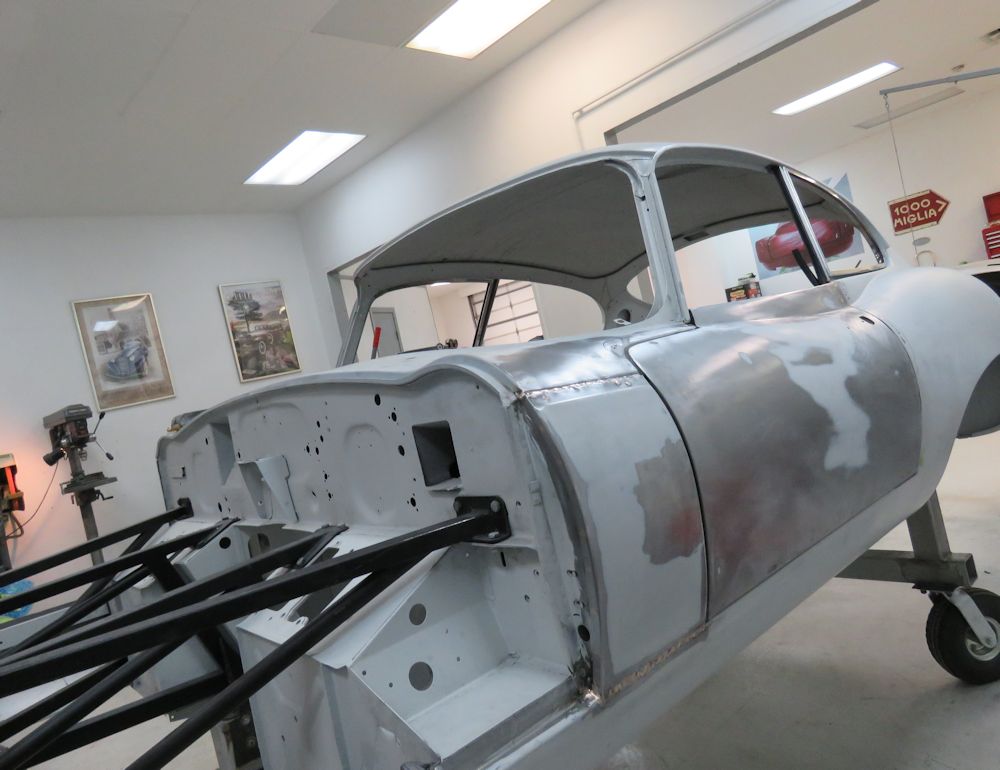
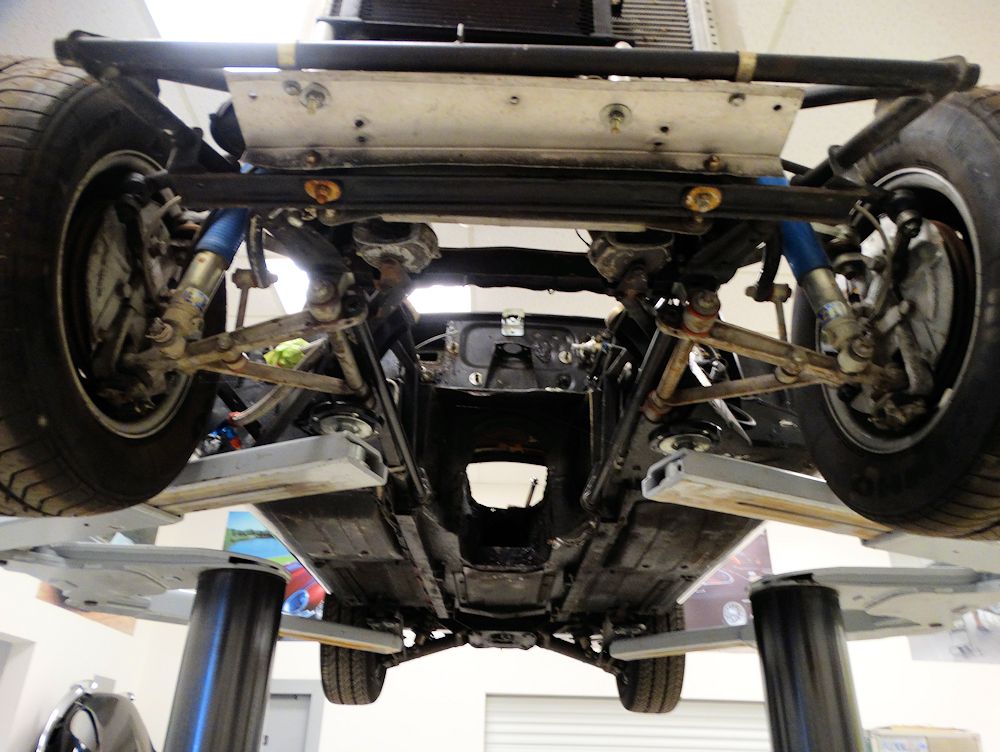
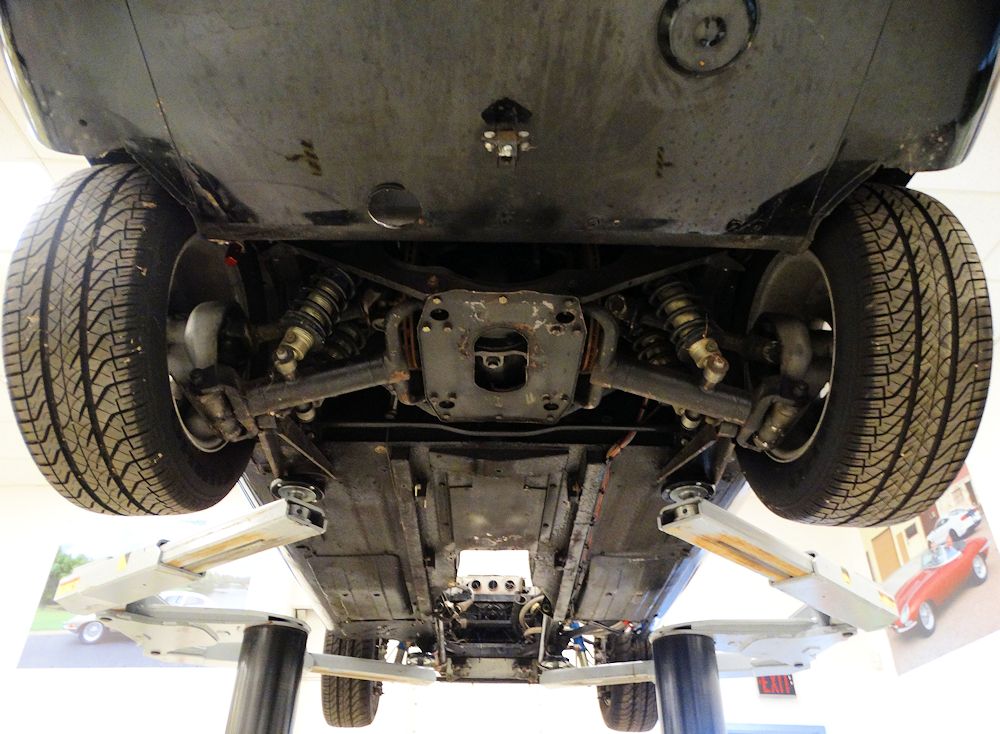
I am pleased to report that we have now finished the bulk of the bodywork and the car has been primed with Raderal sprayable Polyester primer. We have also completed the IRS rebuild.
 |
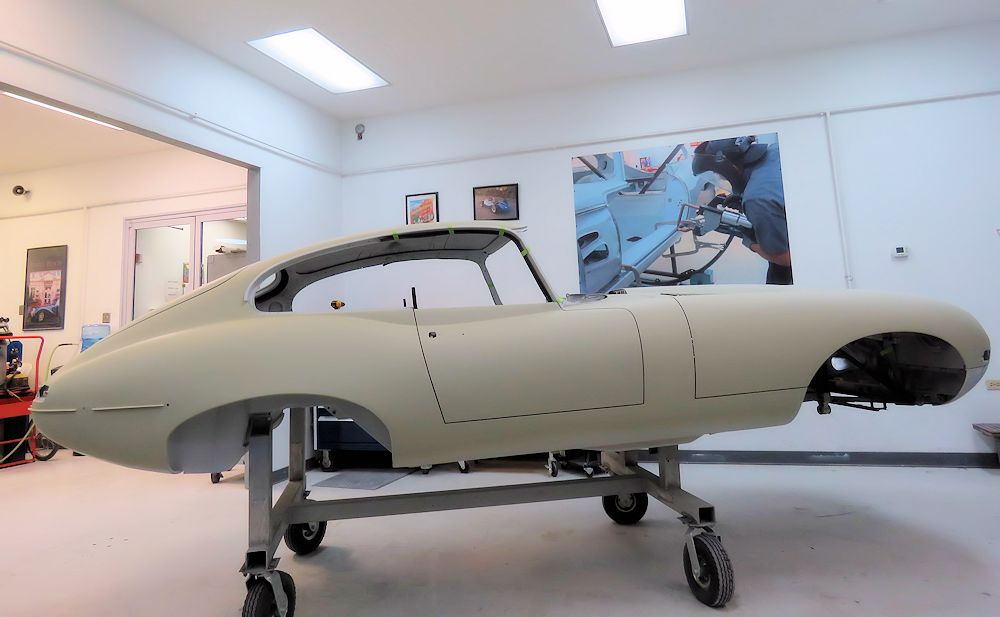 |
| Bodywork has now been completed |
Car has been primed with Raderal Polyester
primer |
 |
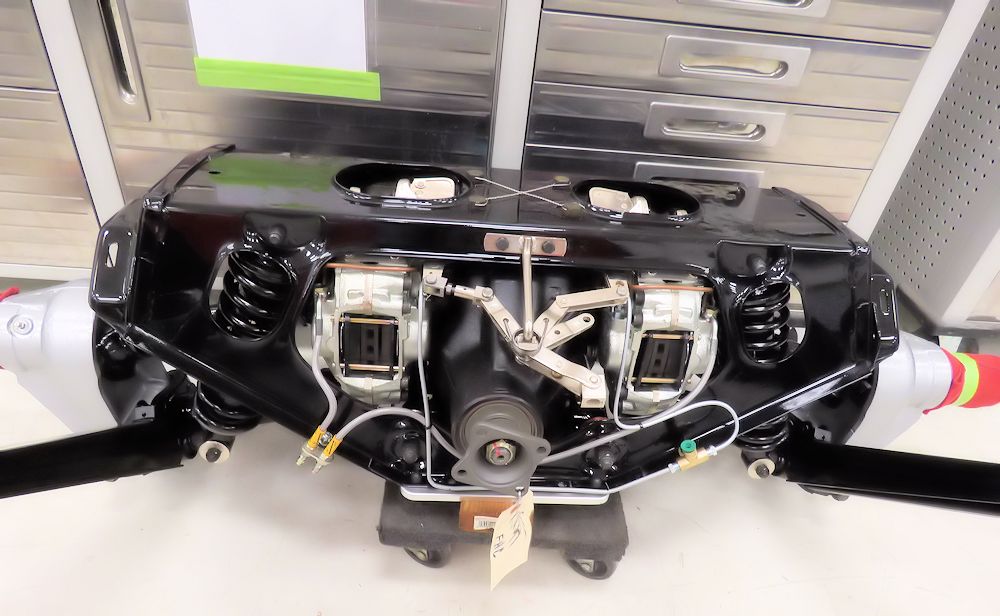 |
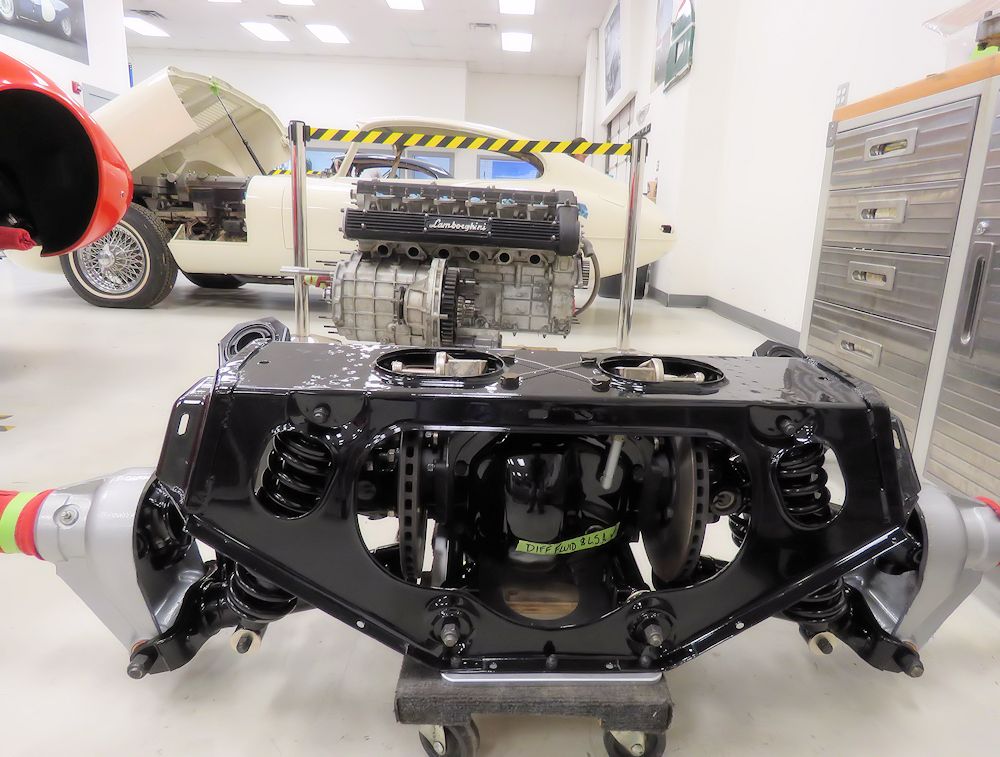
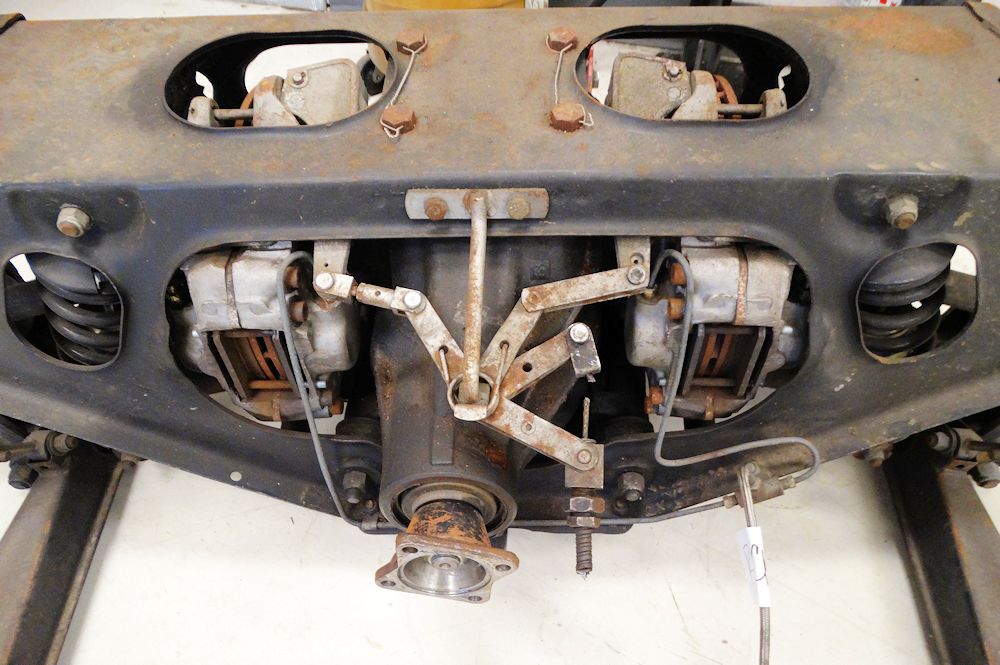
| IRS has been completely rebuilt |
|
 |
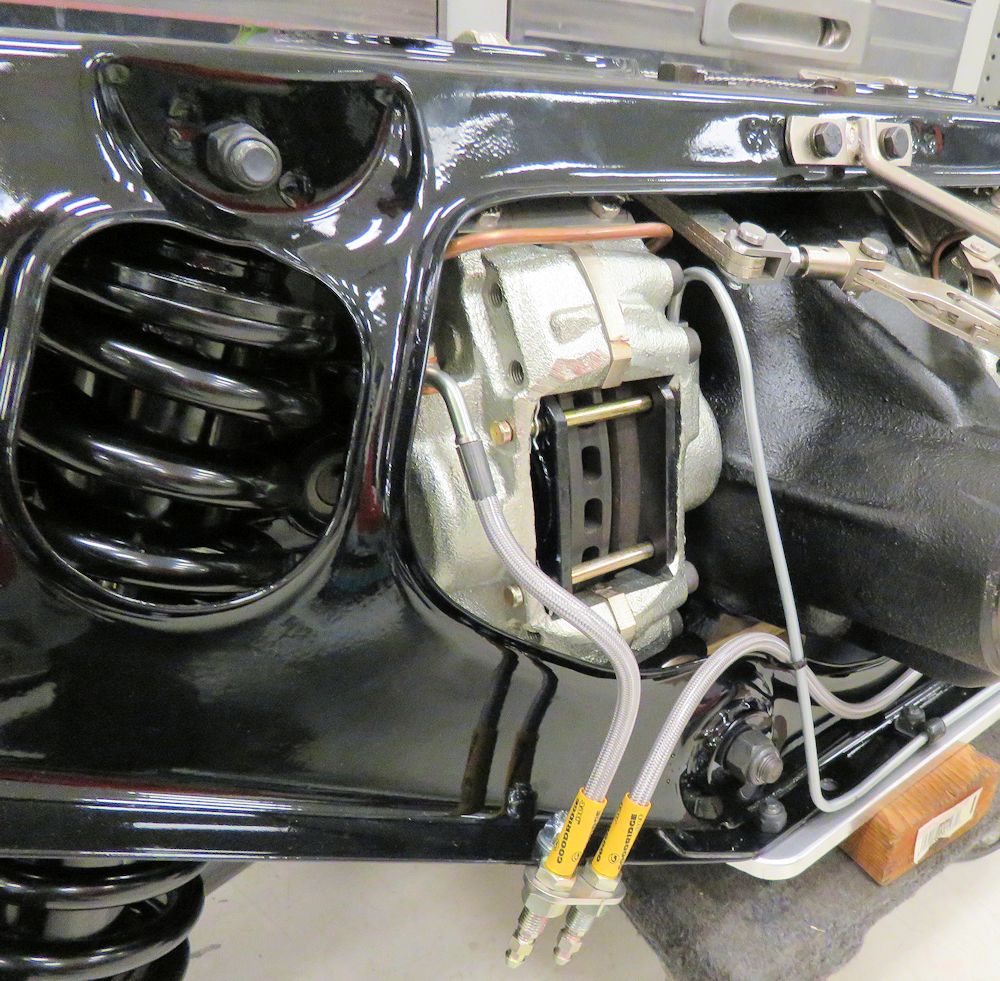 |
| RBR vented brakes and remote bleeder system |
Bonnet installation progressing well.
 |
 |
 |
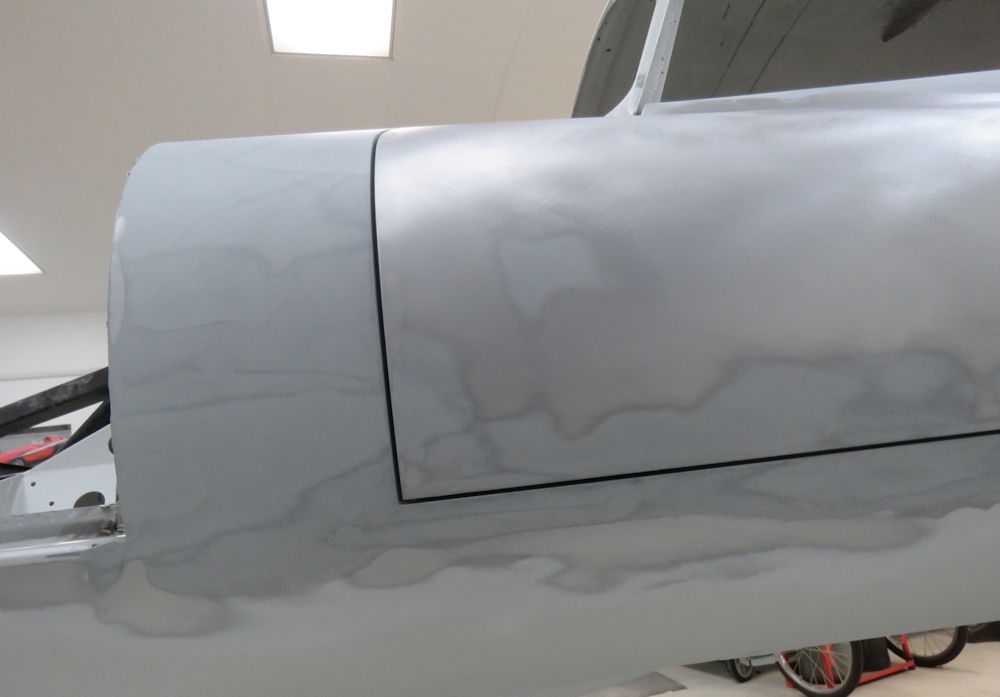
With the door and tailgate fit now perfected, it is now time to start fitting the new alloy bonnet.
 |
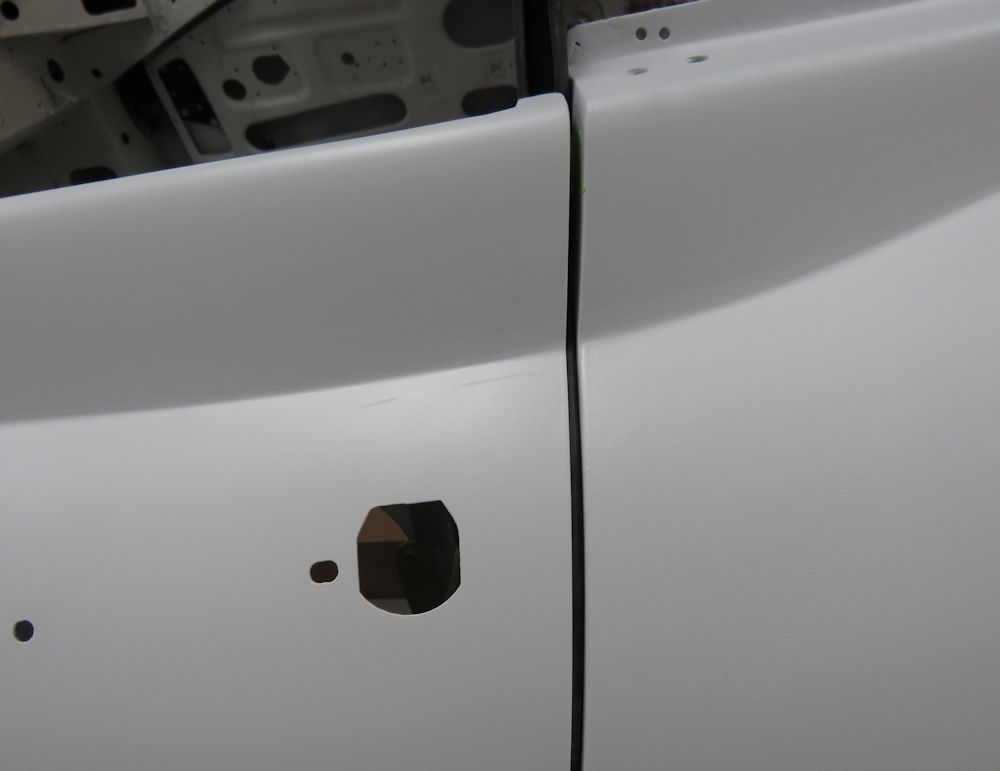 |
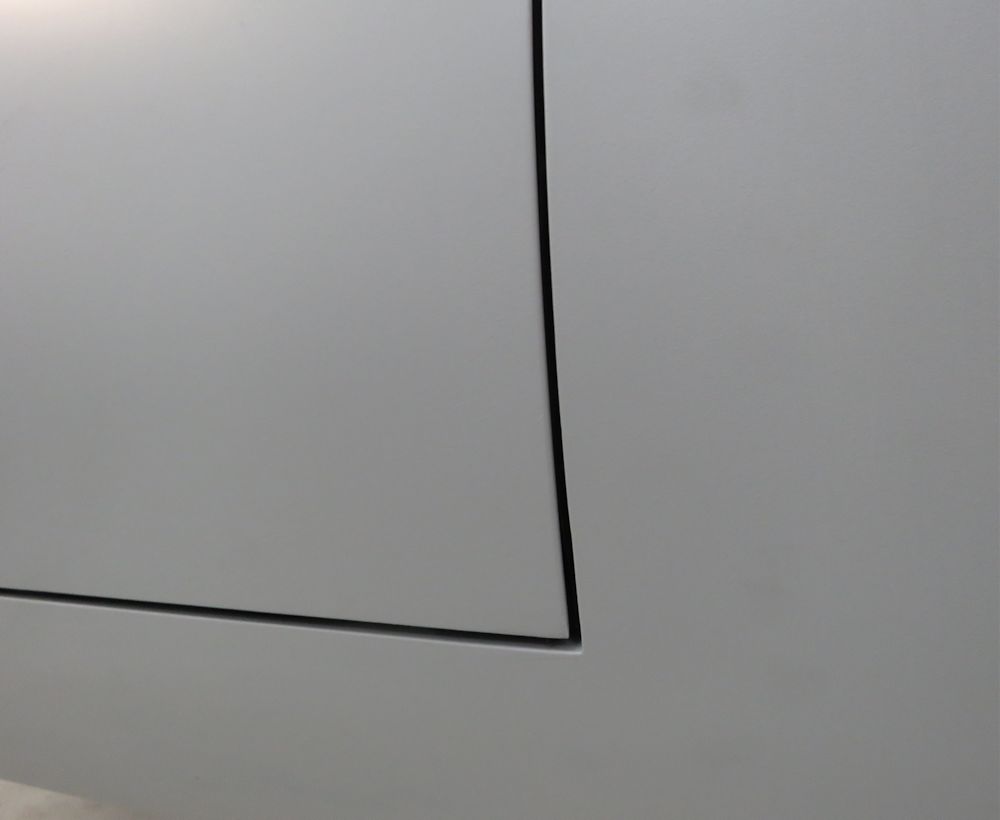
| Panel fit is beautiful throughout |
|
 |
 |
| Tailgate fits perfectly |
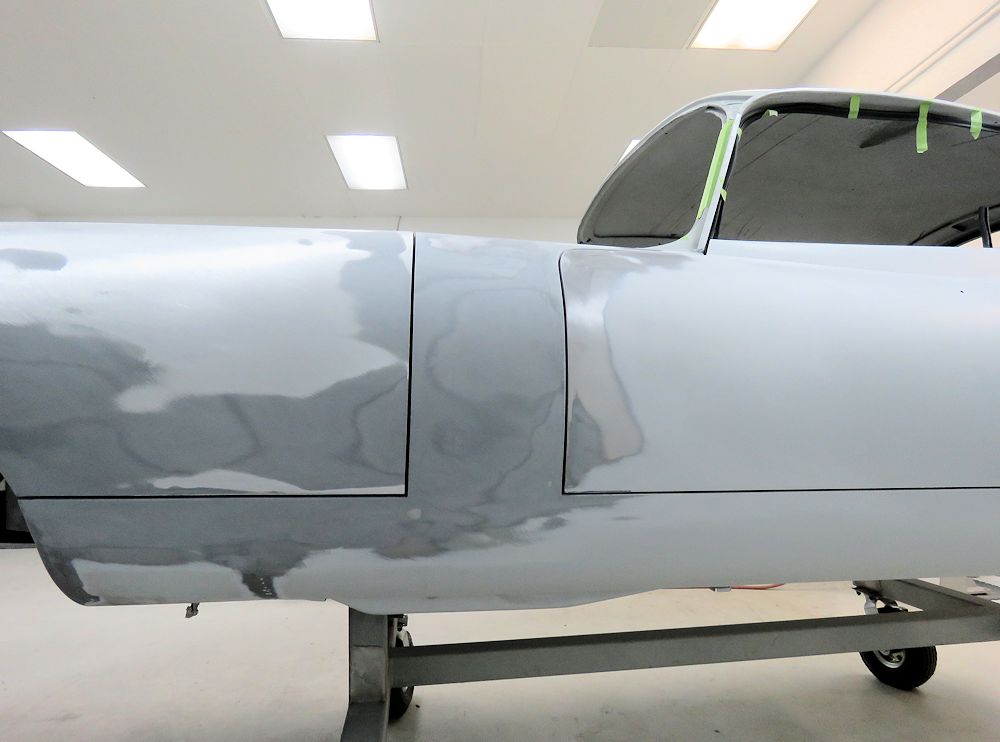
Main body now sealed in epoxy primer |
 |
 |
| Time to start fitting the new alloy bonnet |
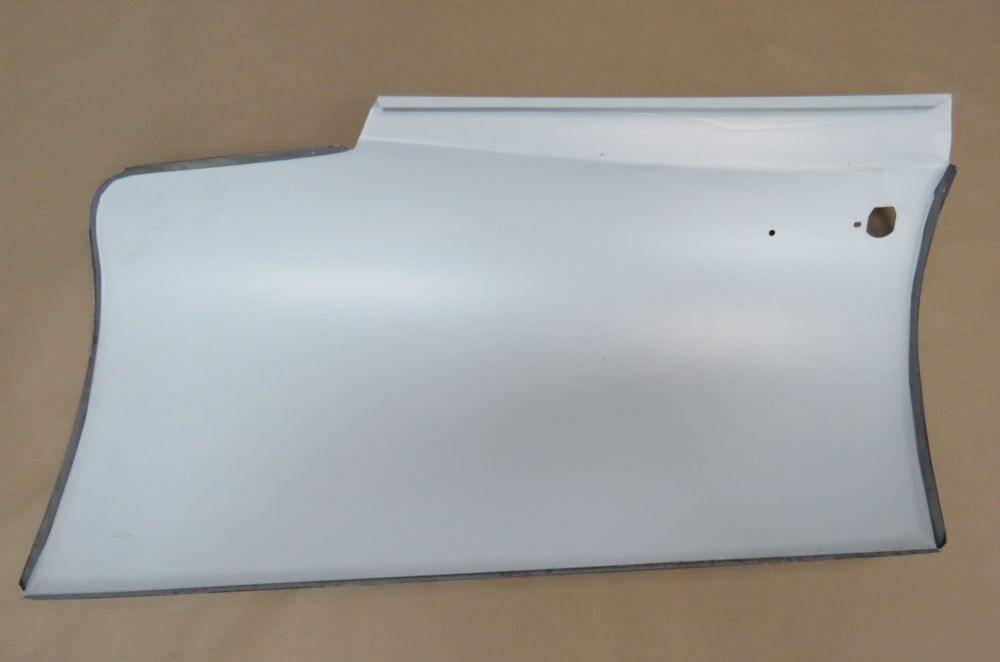
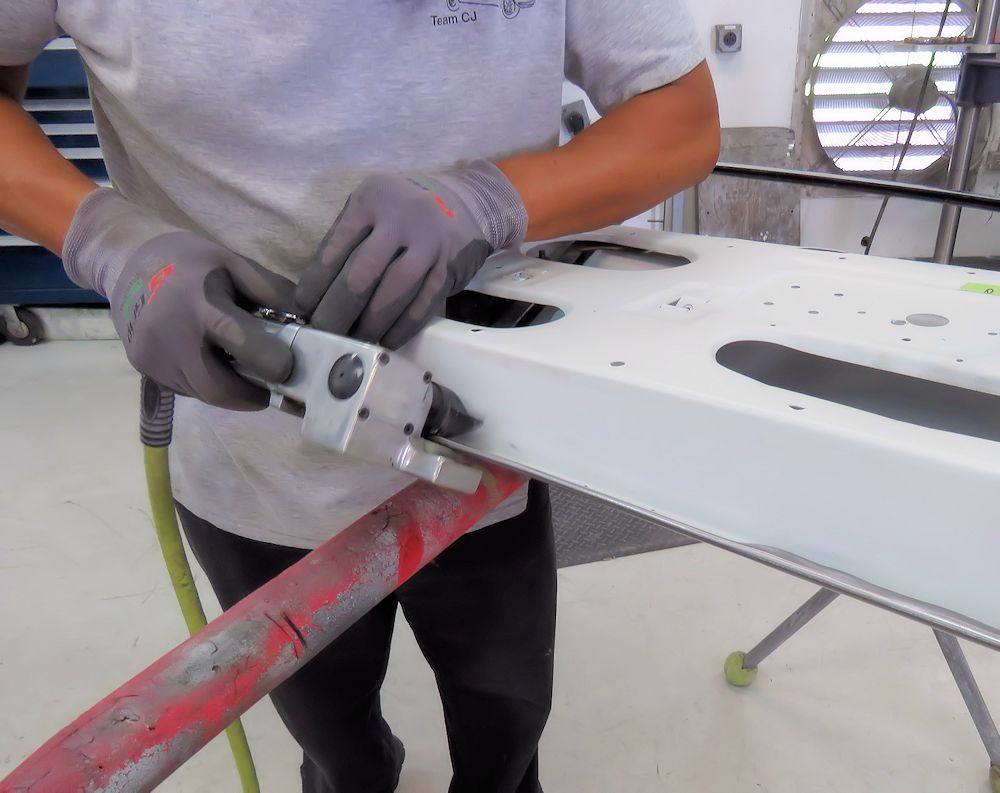
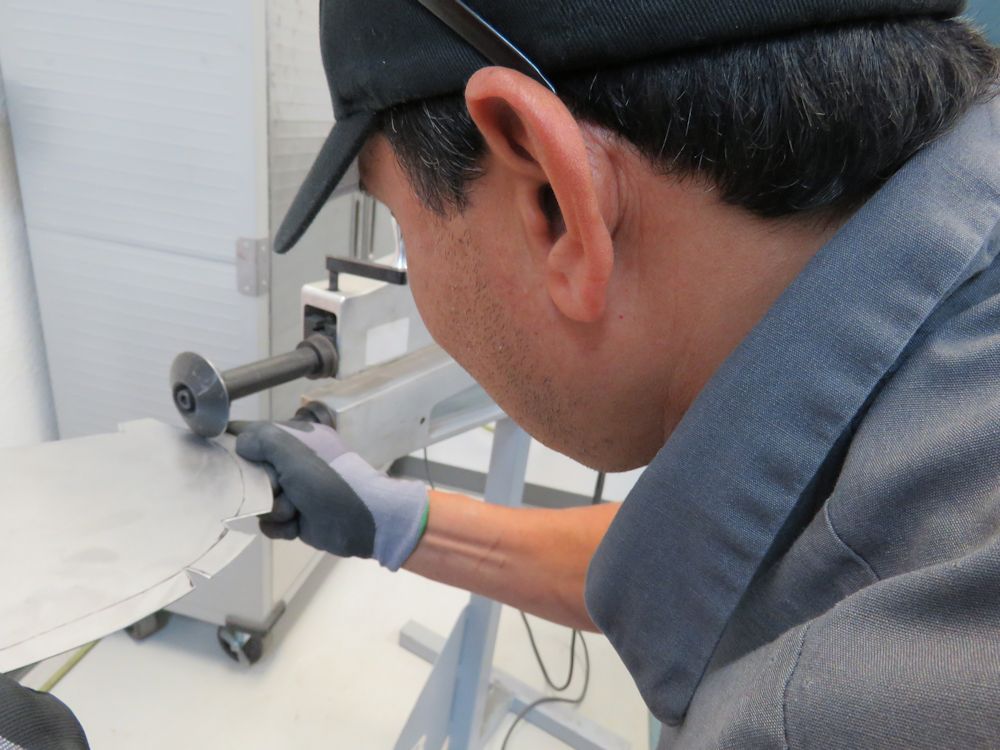
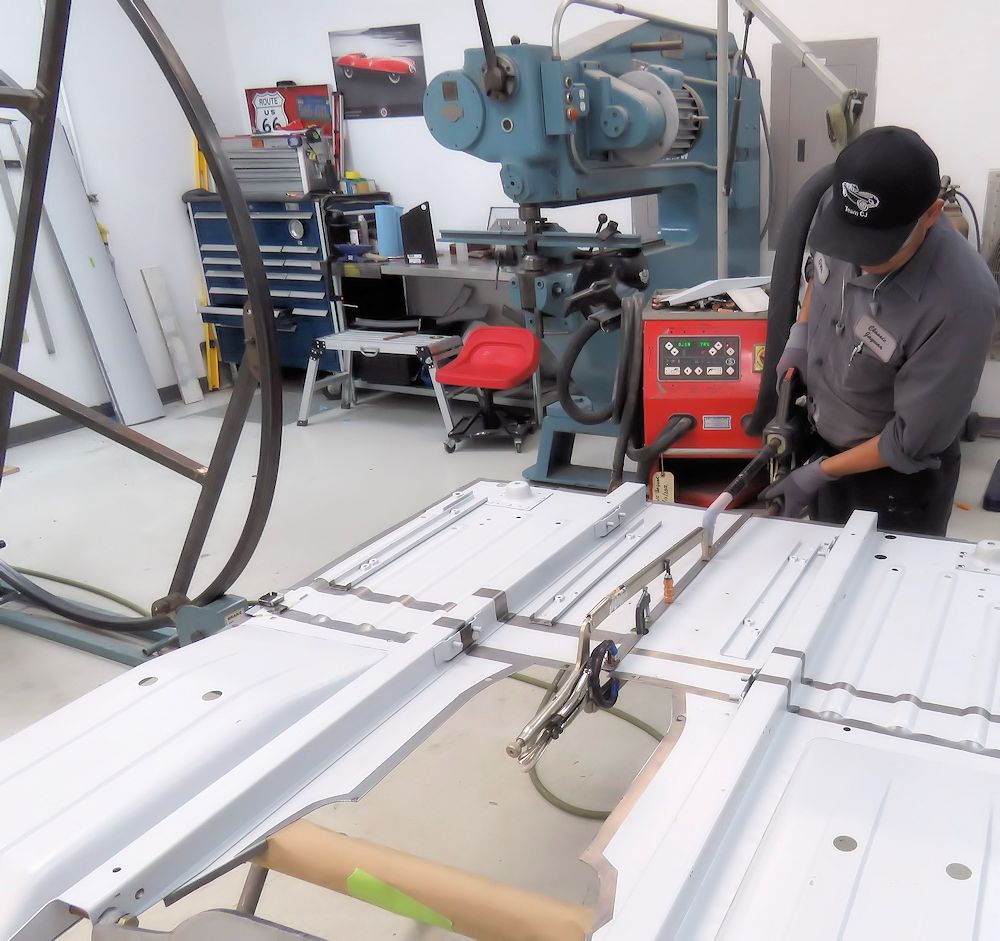
Oscar has been busy skinning and fitting the doors.
 |
 |
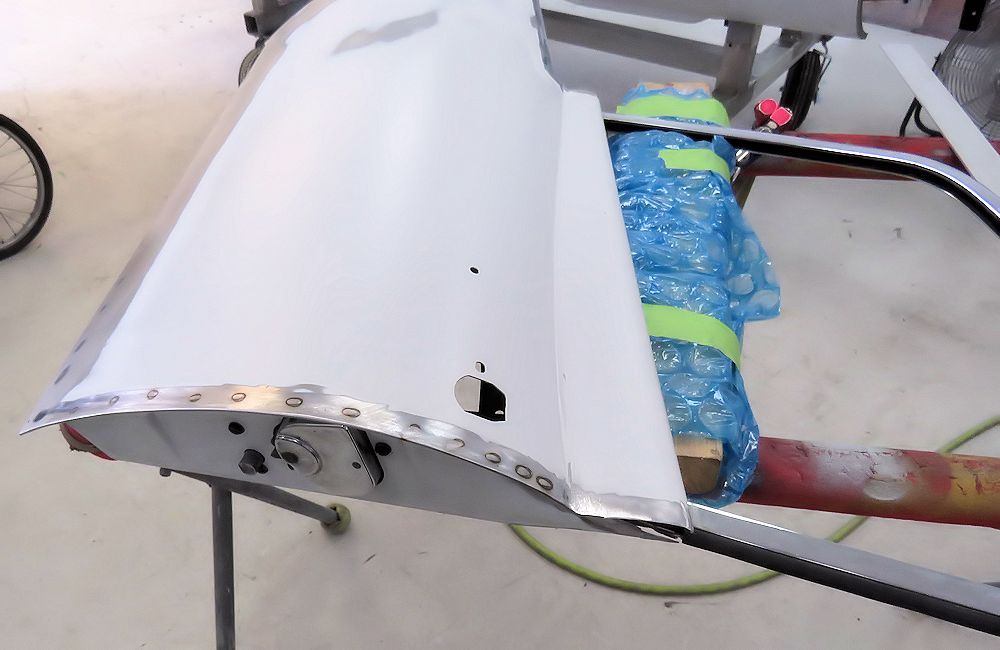
| Both doors are receiving new skings |
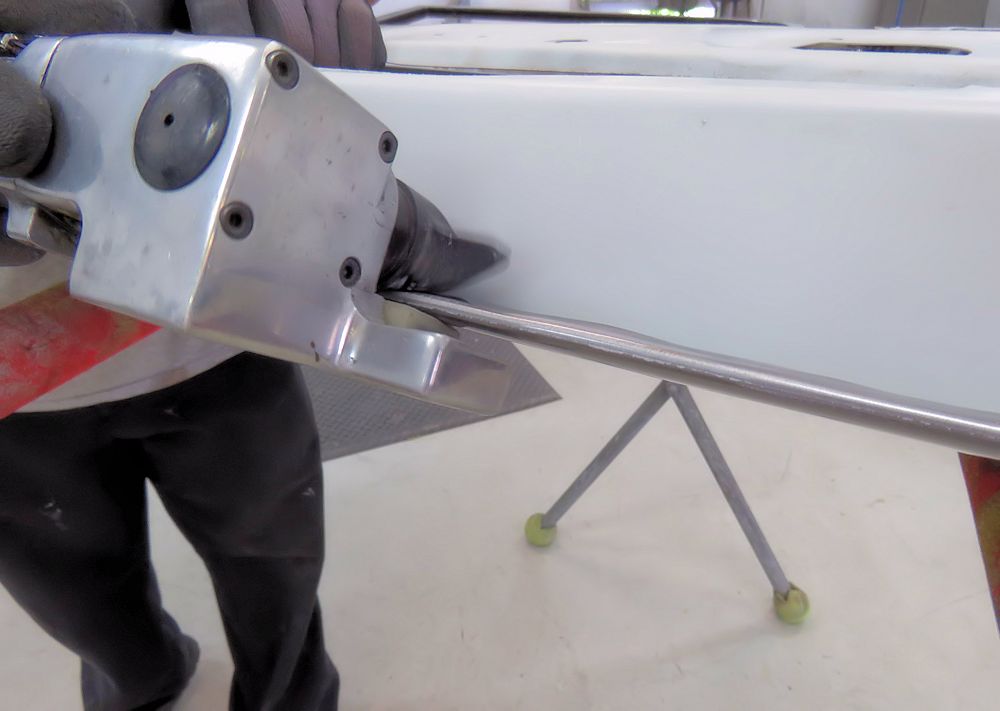
After hammering over the new skins, Oscar then used this machine to crimp them |
 |
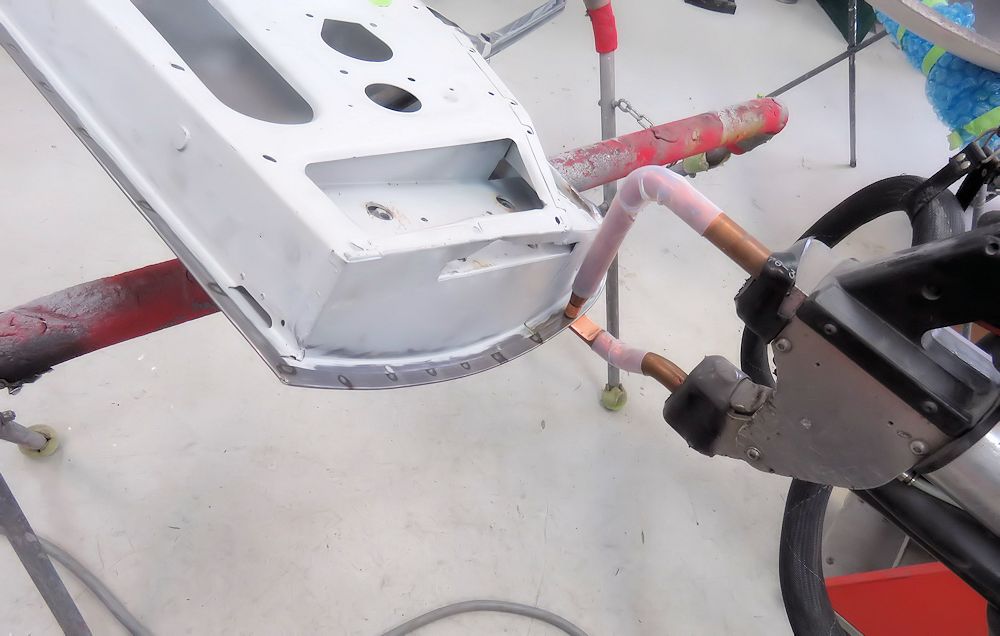 |
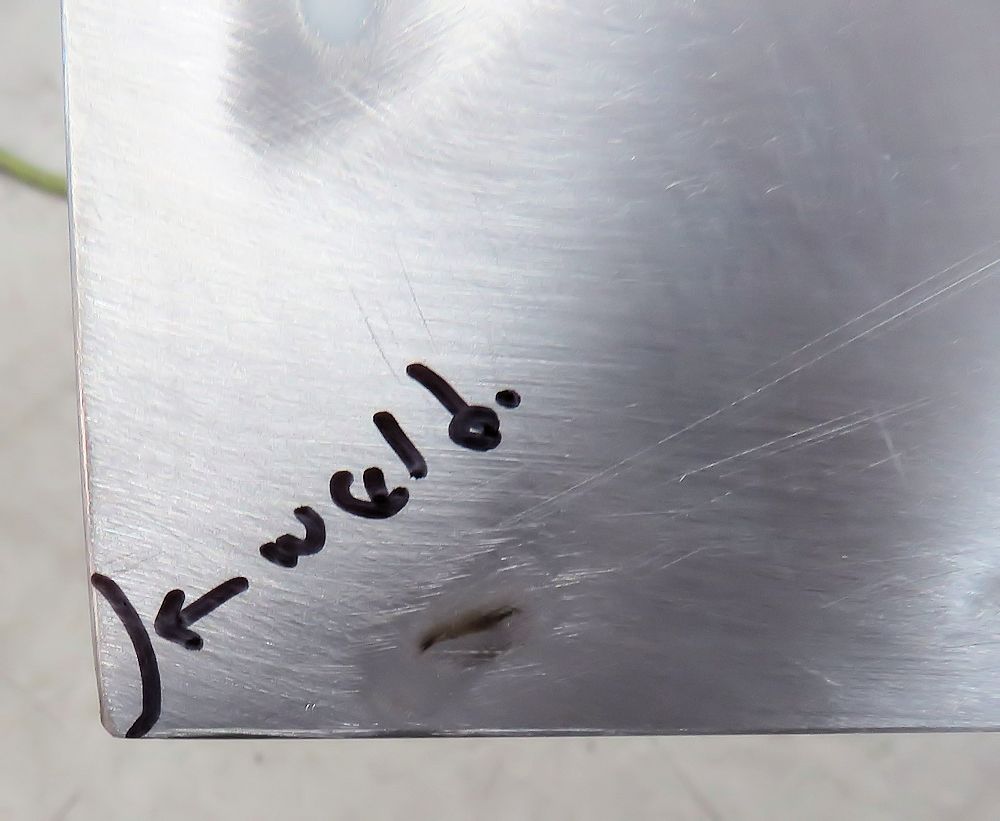
| The new skins were then spot welded in place |
|
 |
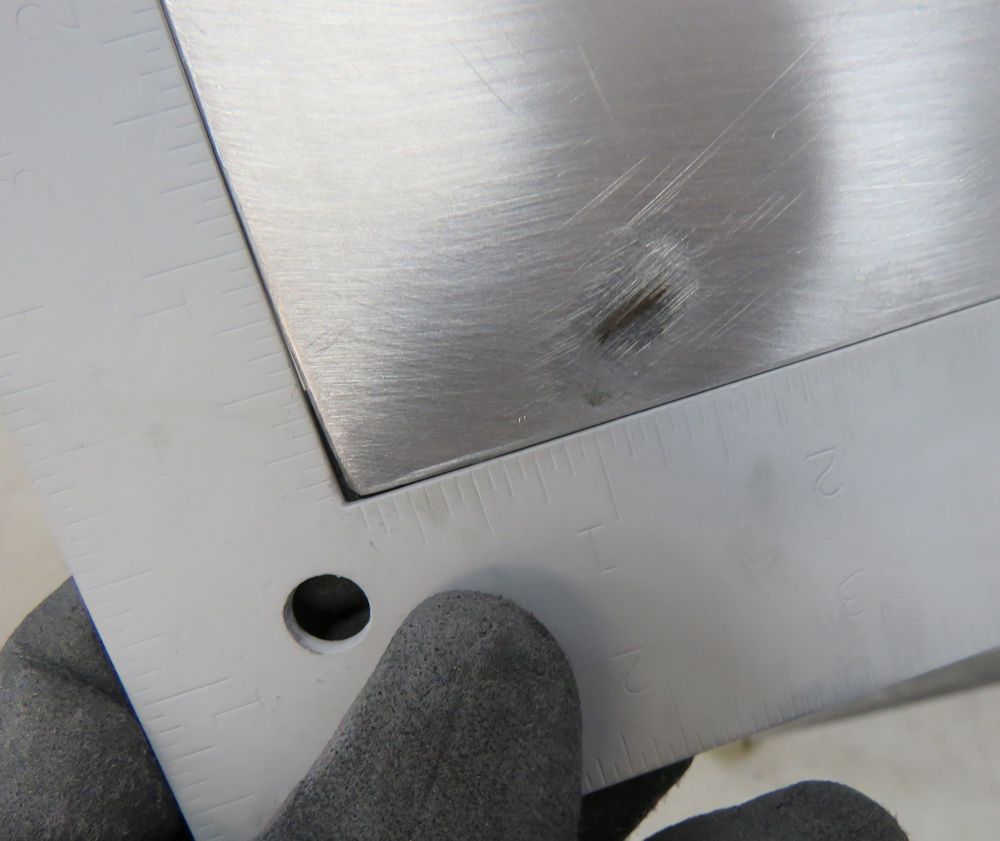 |
| Bottom corner not quite square and will be
built up with a bead of weld |
|
 |
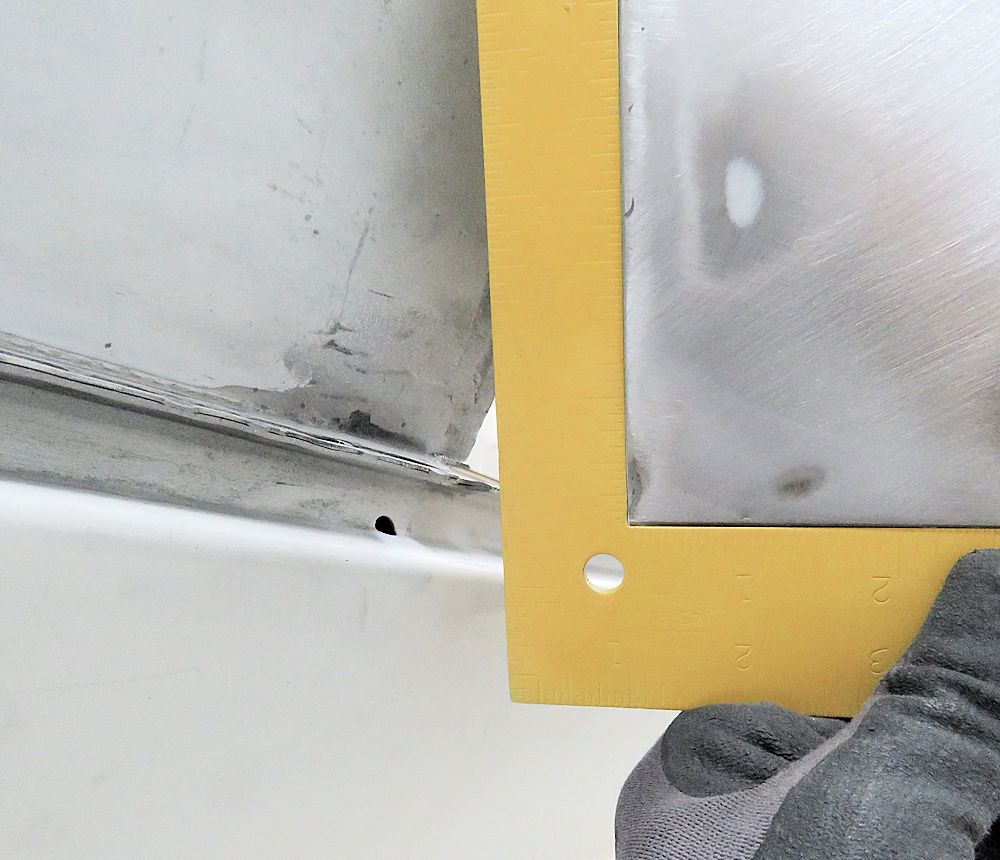 |
| After grinding back the weld the corner is now
perfectly square |
|
 |
 |
| Time to fit the door |
|
 |
 |
| Restored door fits beautifully |
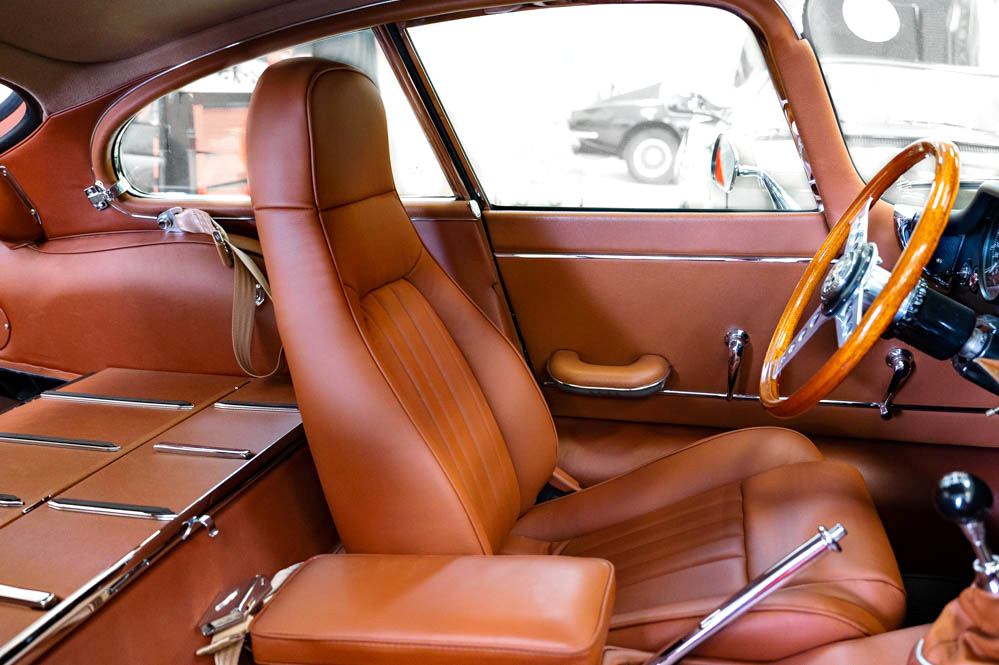
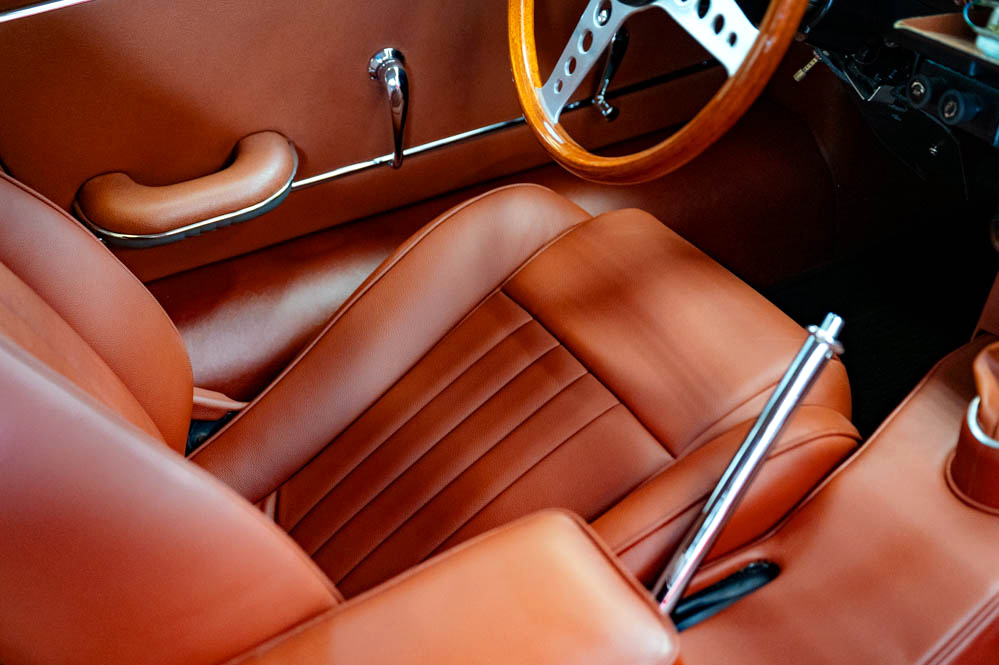
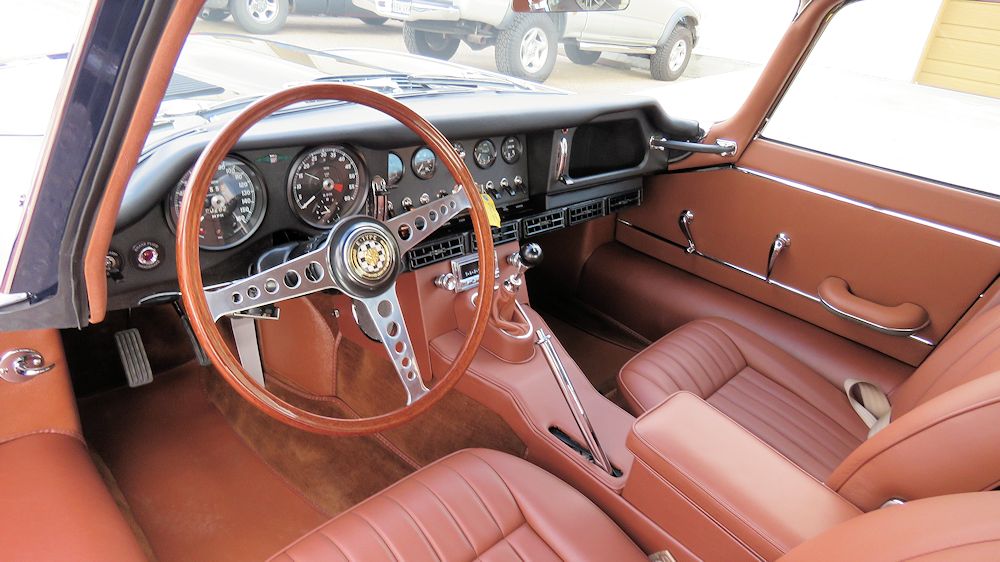
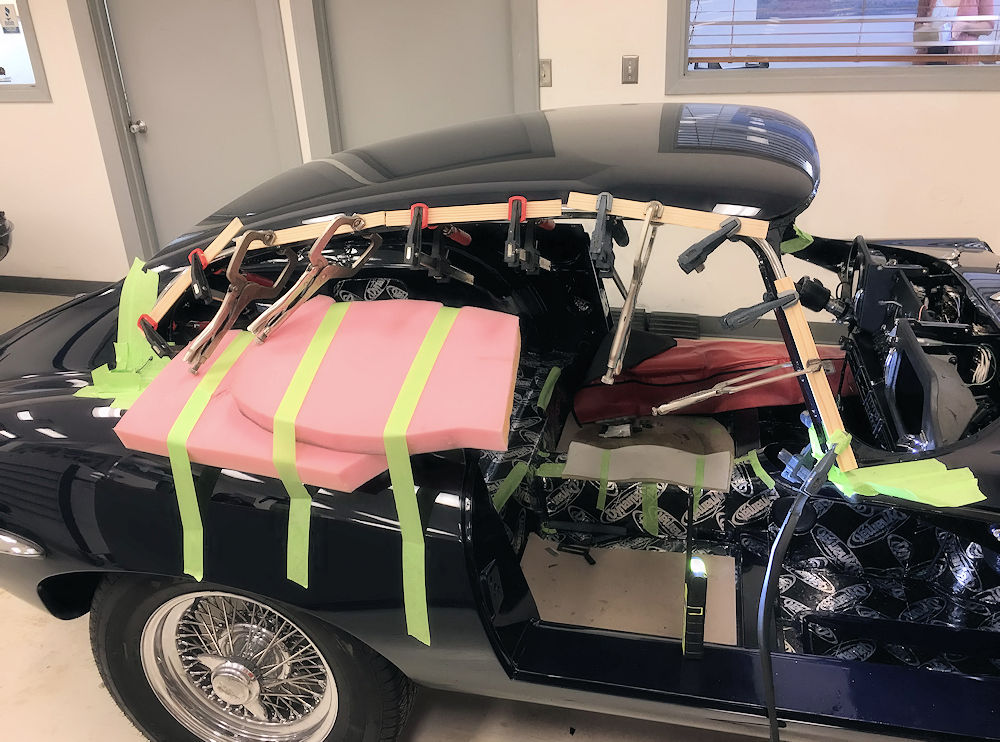
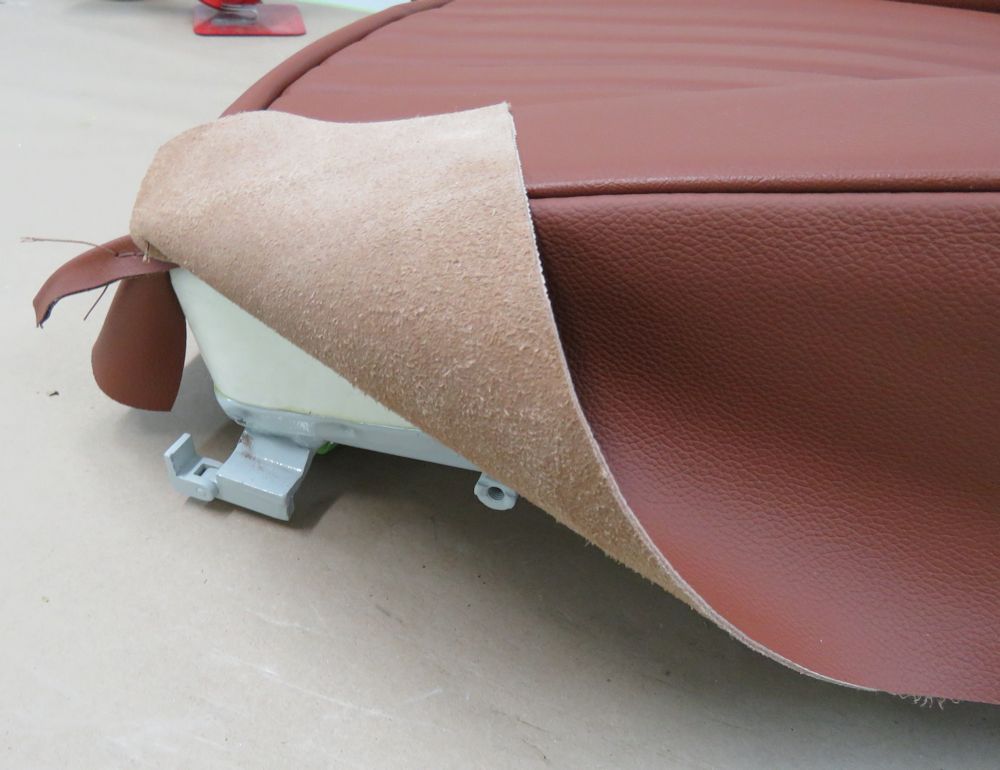
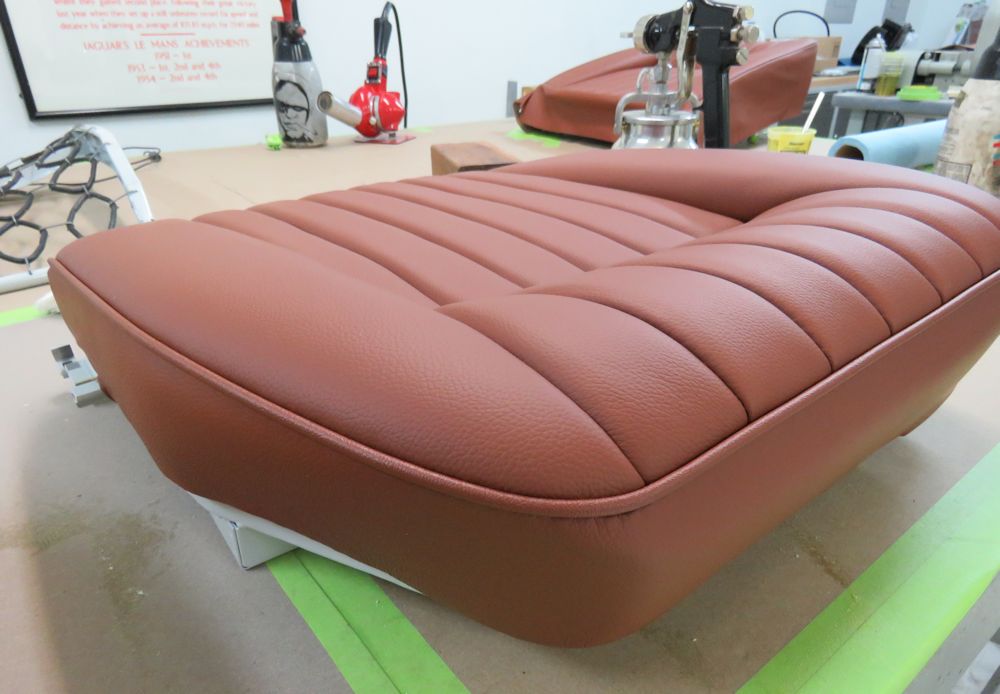
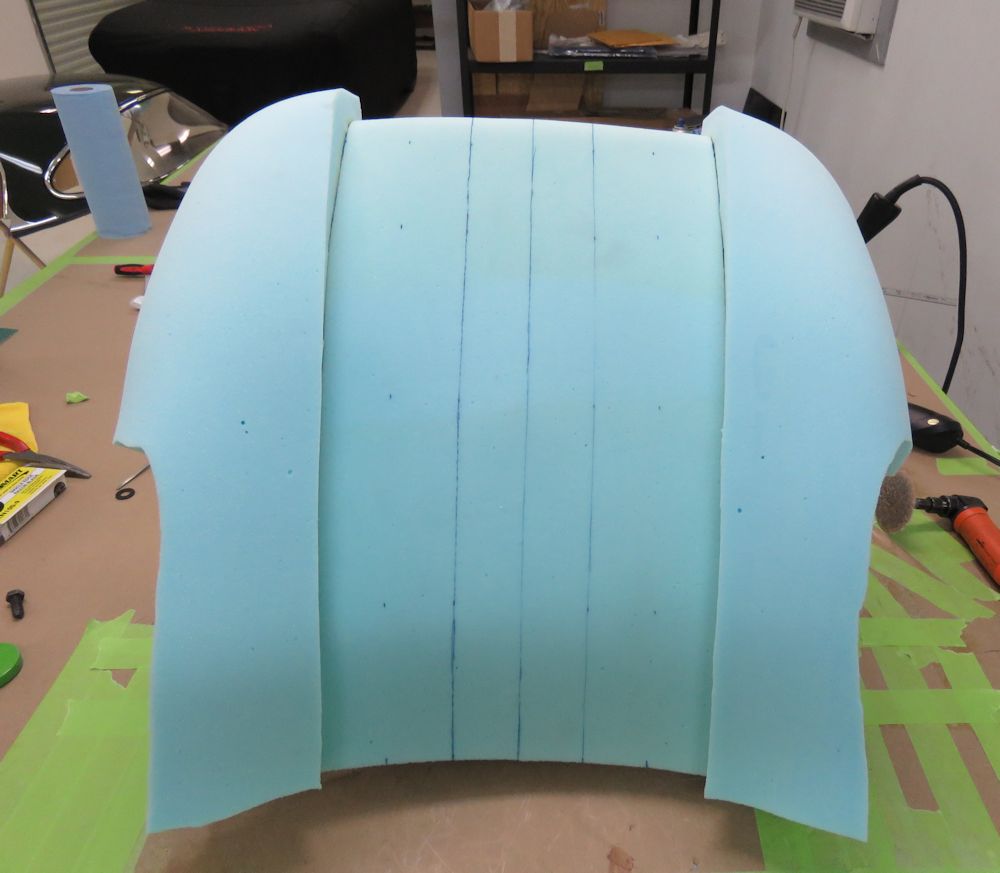
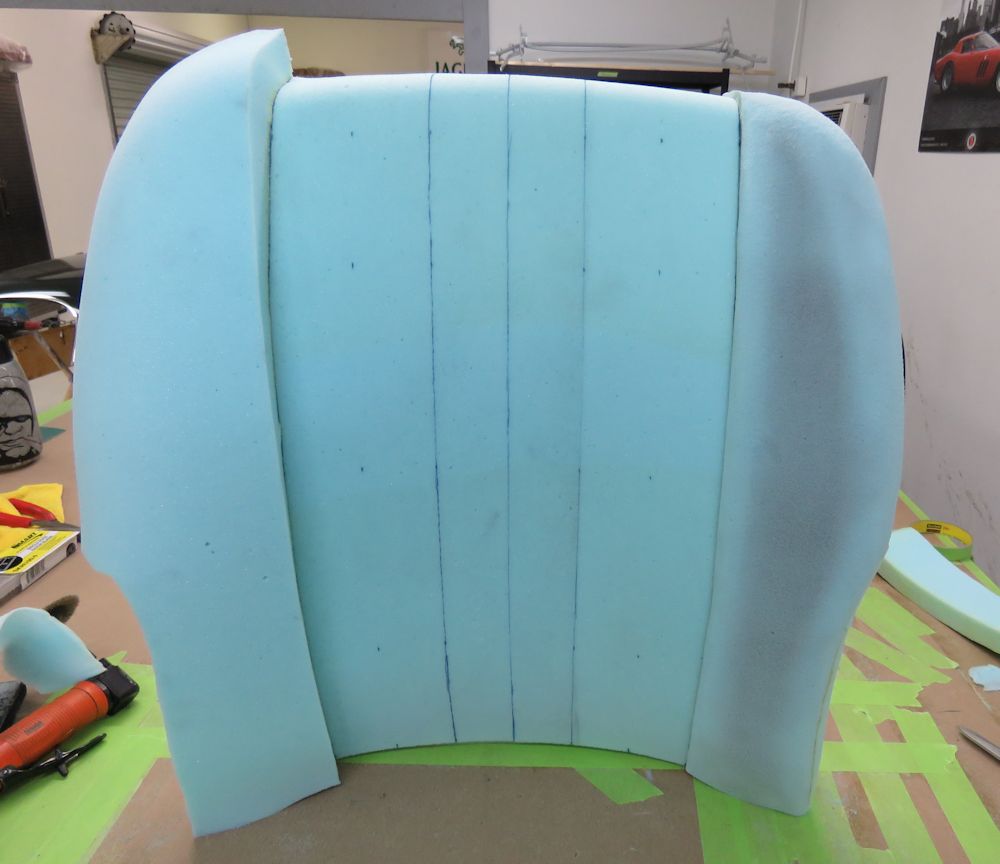
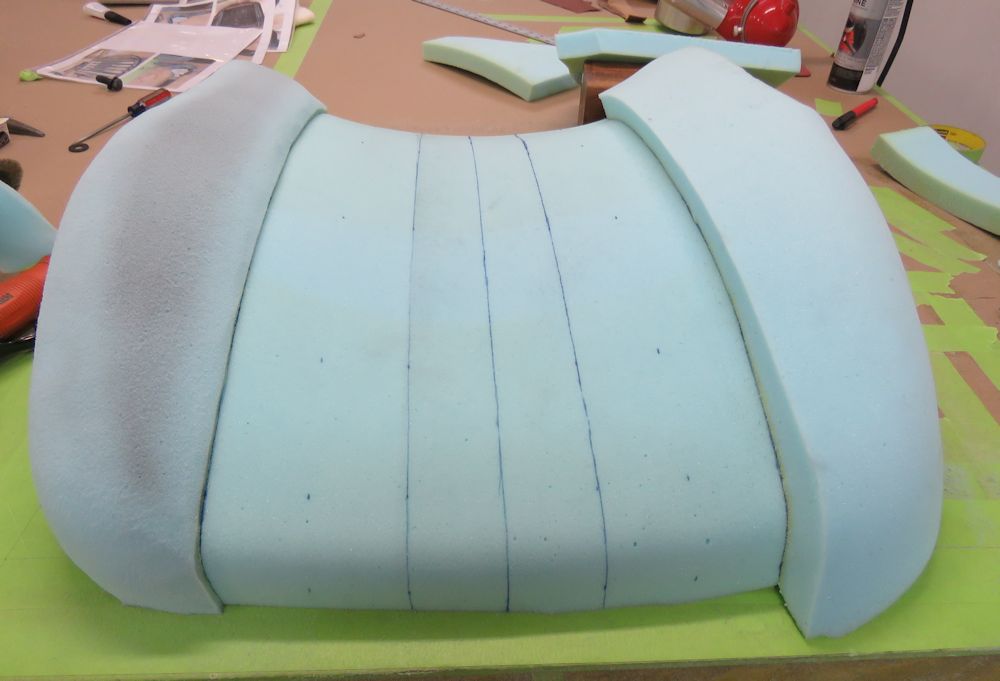
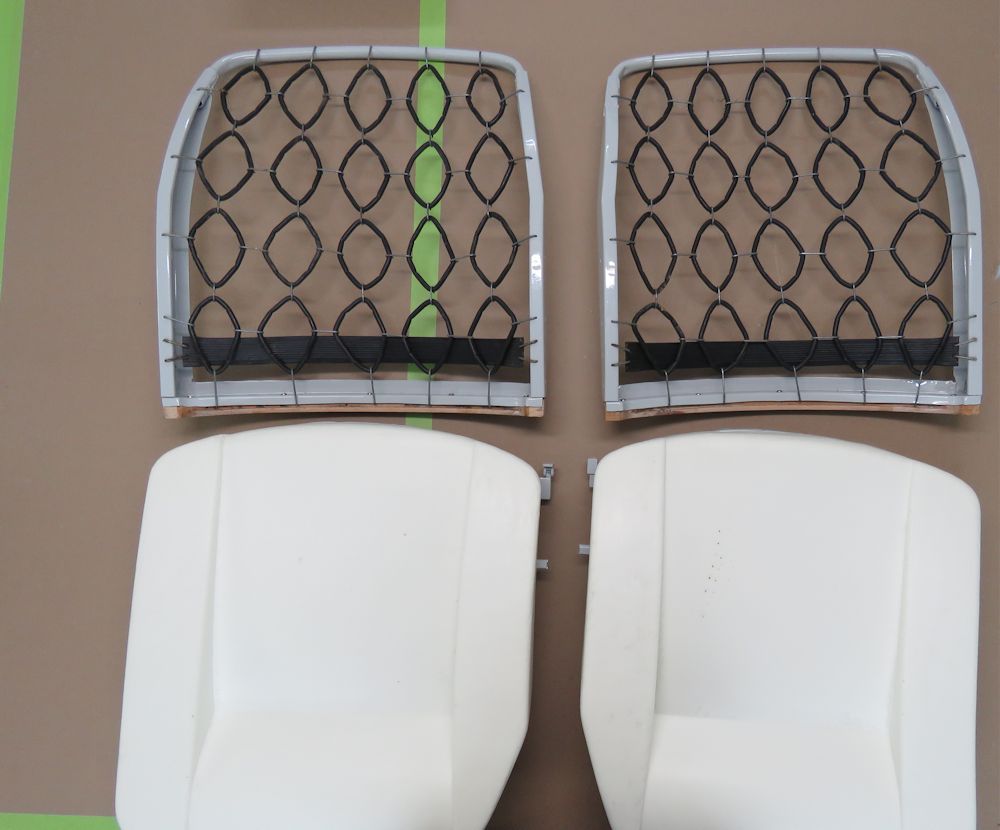
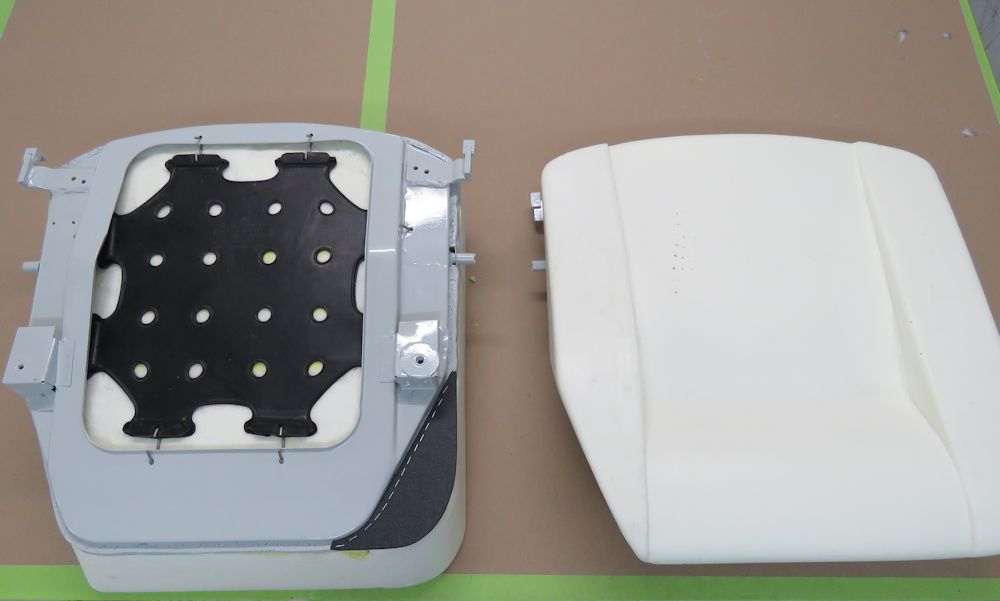
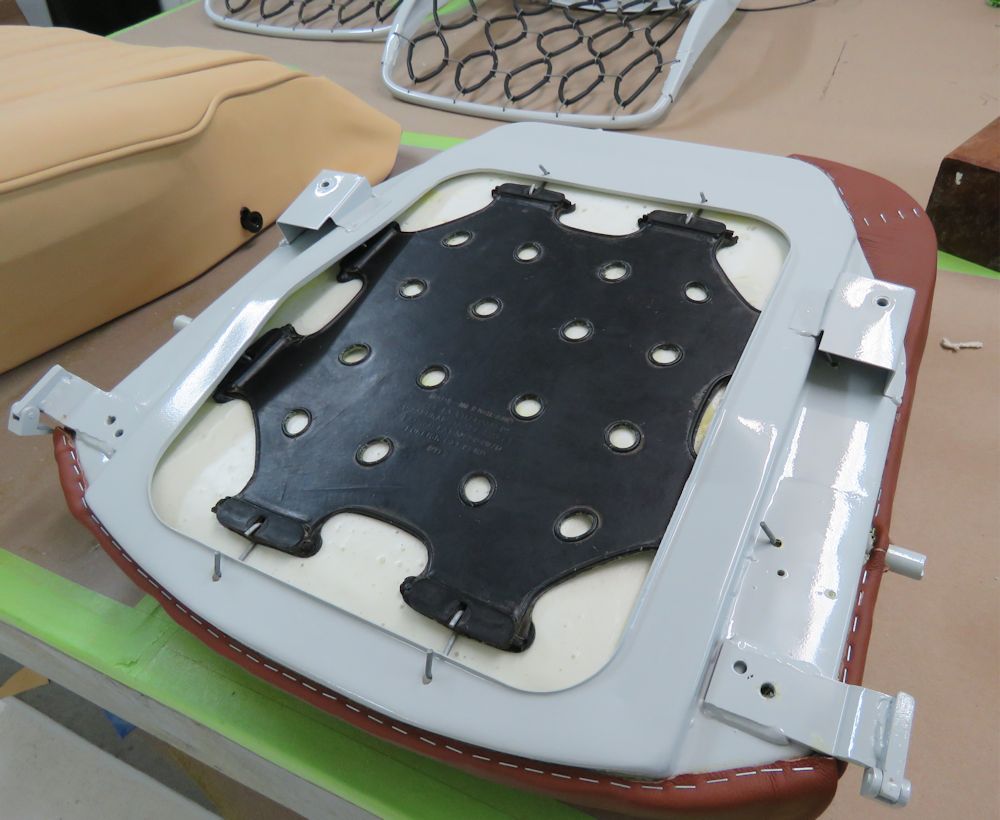
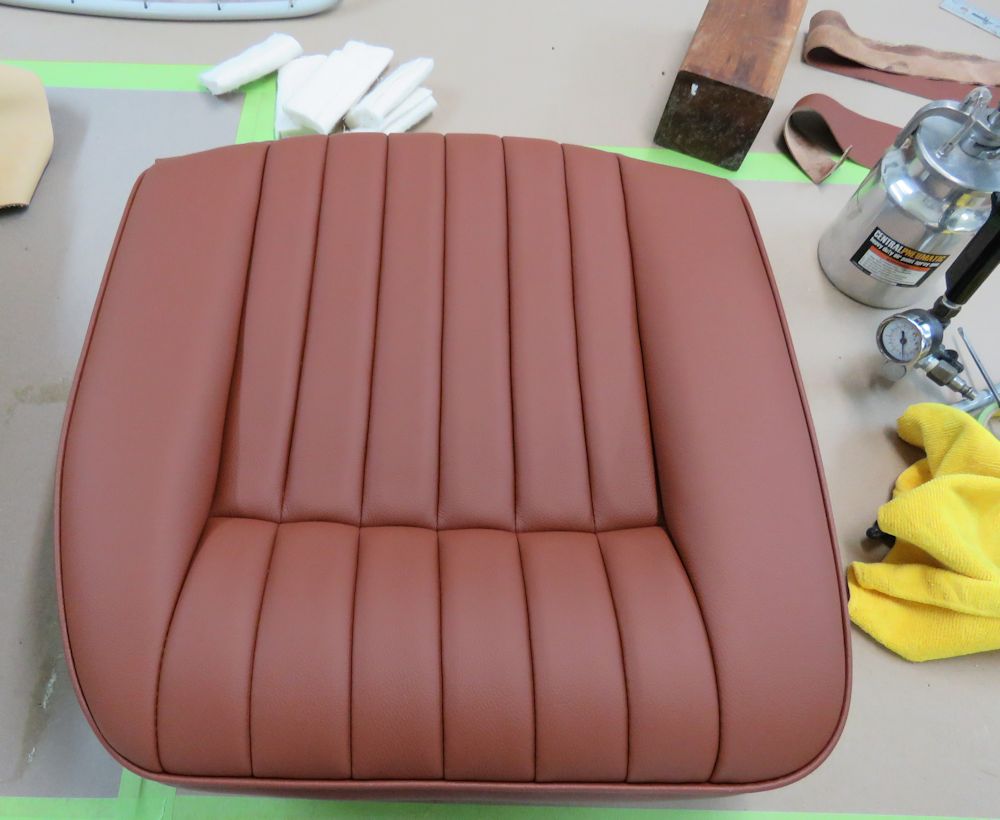
Hector has now finished restoring and trimming your seats. He added some extra contour and side bolster support to the seat backs by carving and shaping additional foam padding during the trimming process.
 |
 |
 |
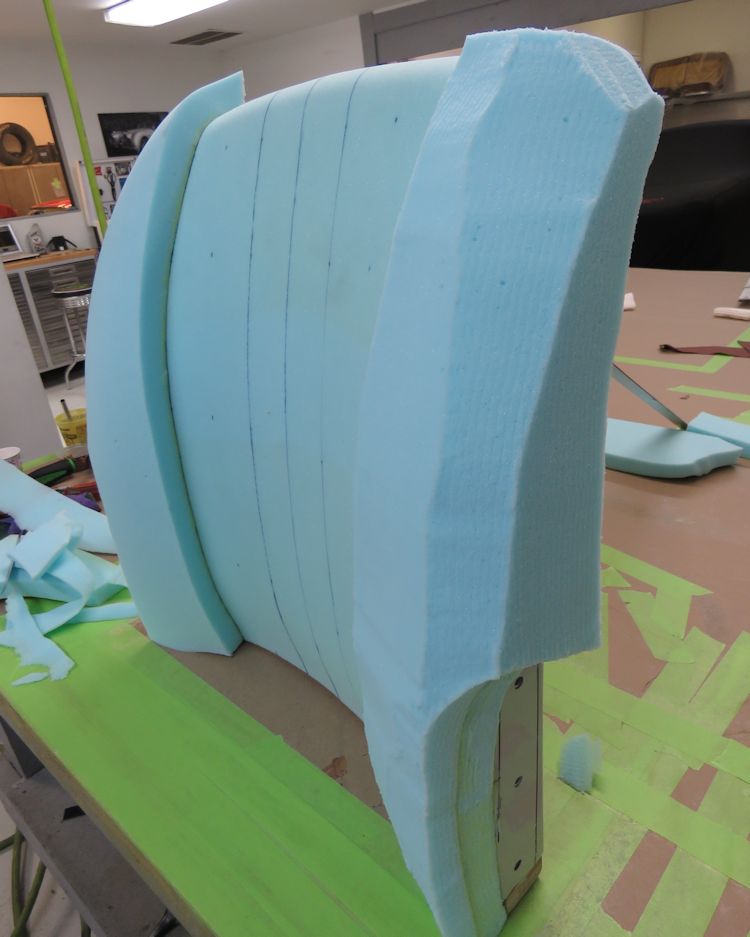 |
| Note extra foam padding to the bolsters |
Carving the left bolster to provide additional
contour and support |
 |
 |
| Note how left bolster has now been sanded
smooth |
|
 |
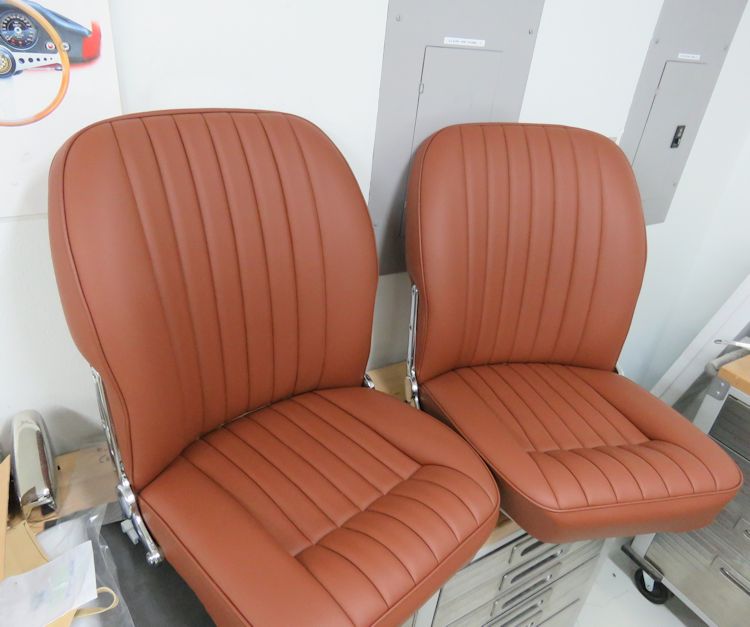 |
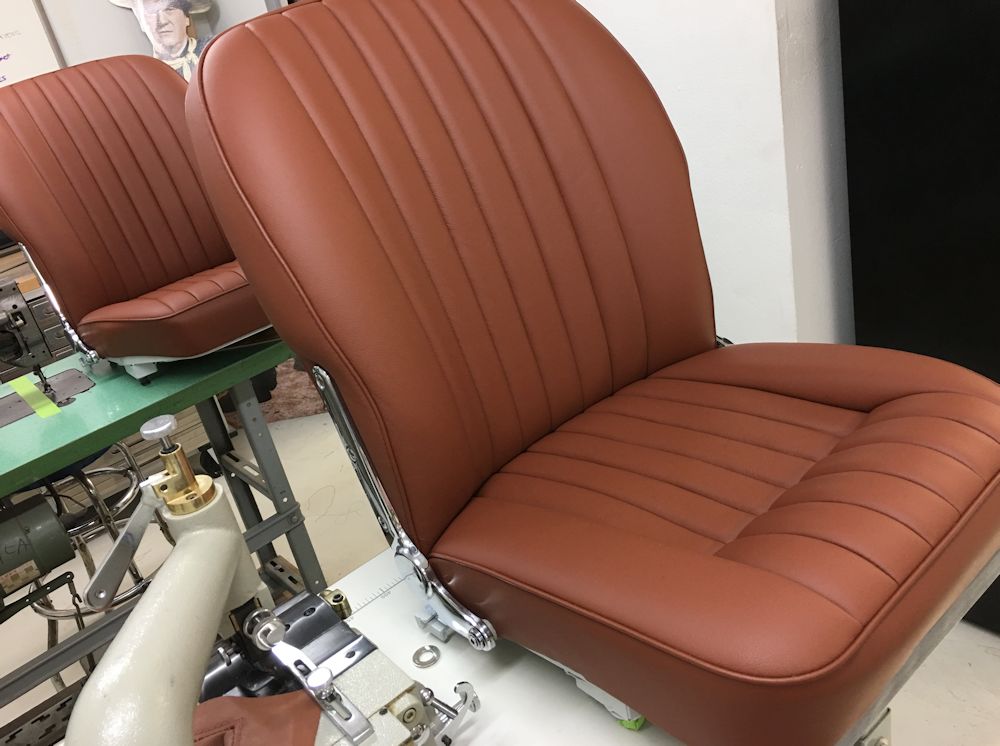
| The finished result is subtle but provides meaningful additional support |
The guys in the trim room are busy restoring and trimming your seats.
 |
 |
|
 |
 |
|
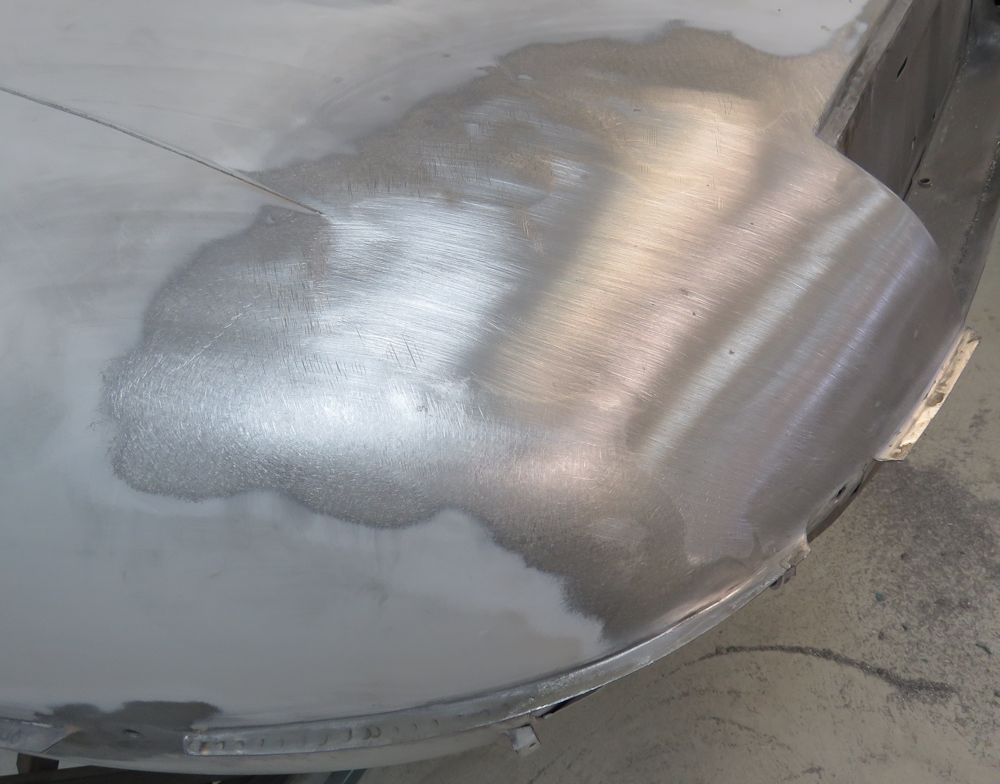
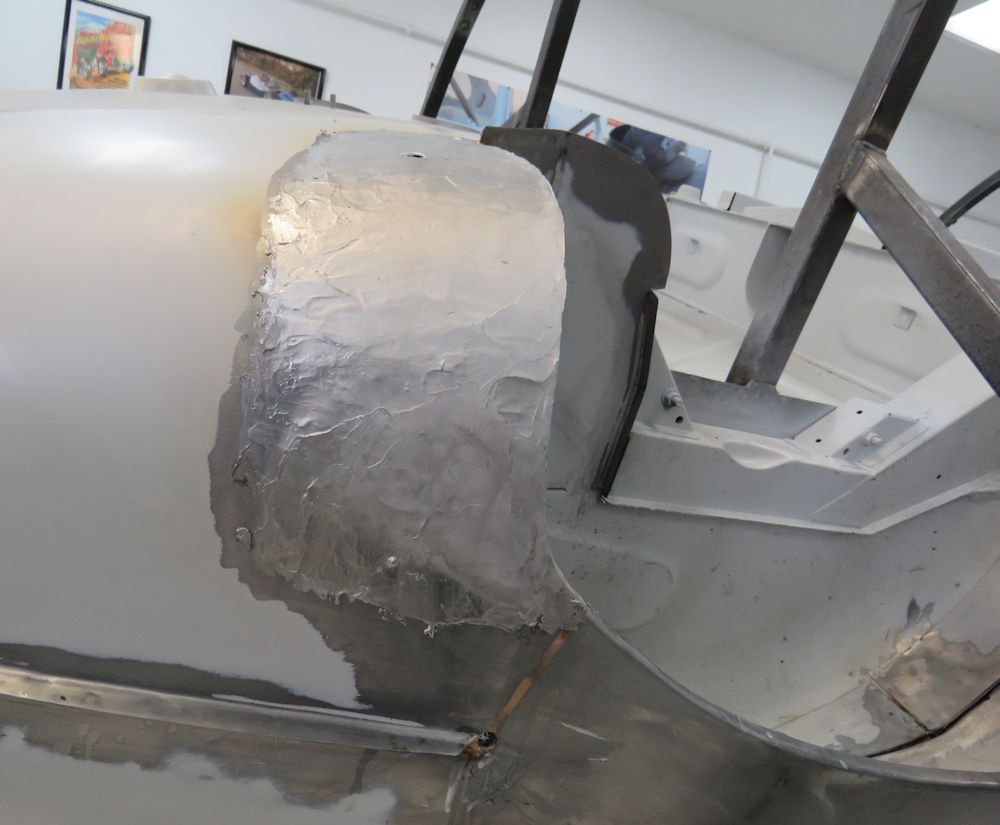
With the bulk of the sheet metal repairs and panel replacement completed at the rear of the car, Oscar has begun the lead loading process.
 |
 |
| Lead loading welded seams beneath the boot floor and rear quarters |
|
 |
 |
 |
 |
| Factory lead removed and roof line weld
exposed |
|
 |
 |
| Fresh lead applied to roof line welded seam |
Lead loading around rear lamp areas |
 |
 |
| Oscar hand filing and shaping the lead |
|
 |
 |
| Preliminary trial fit of rear lamp housings |
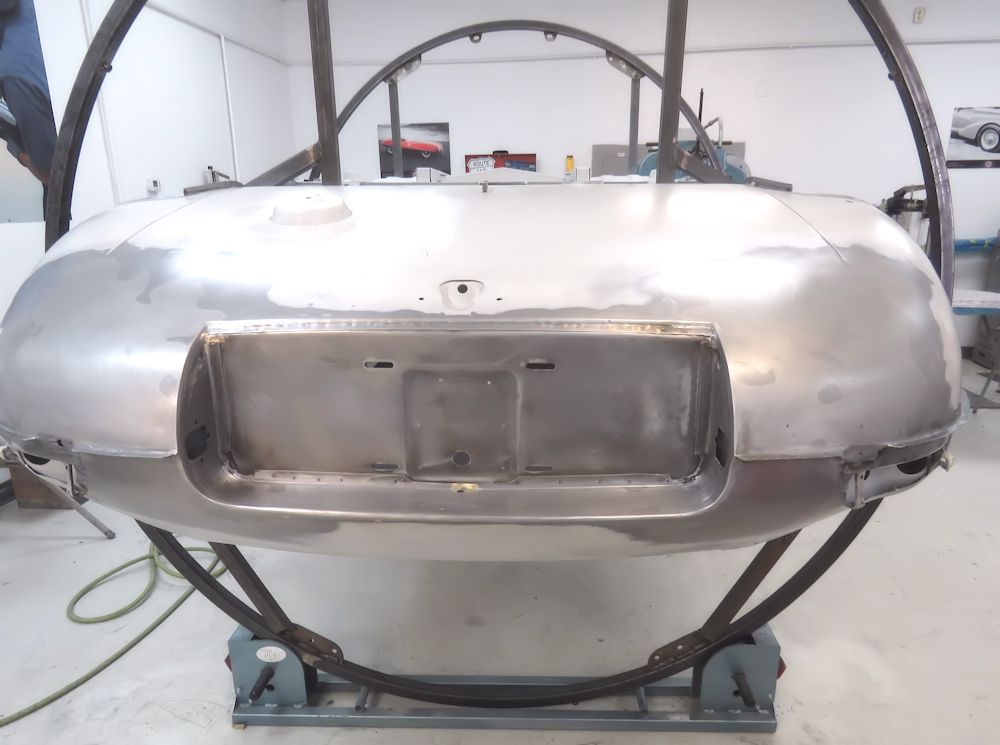
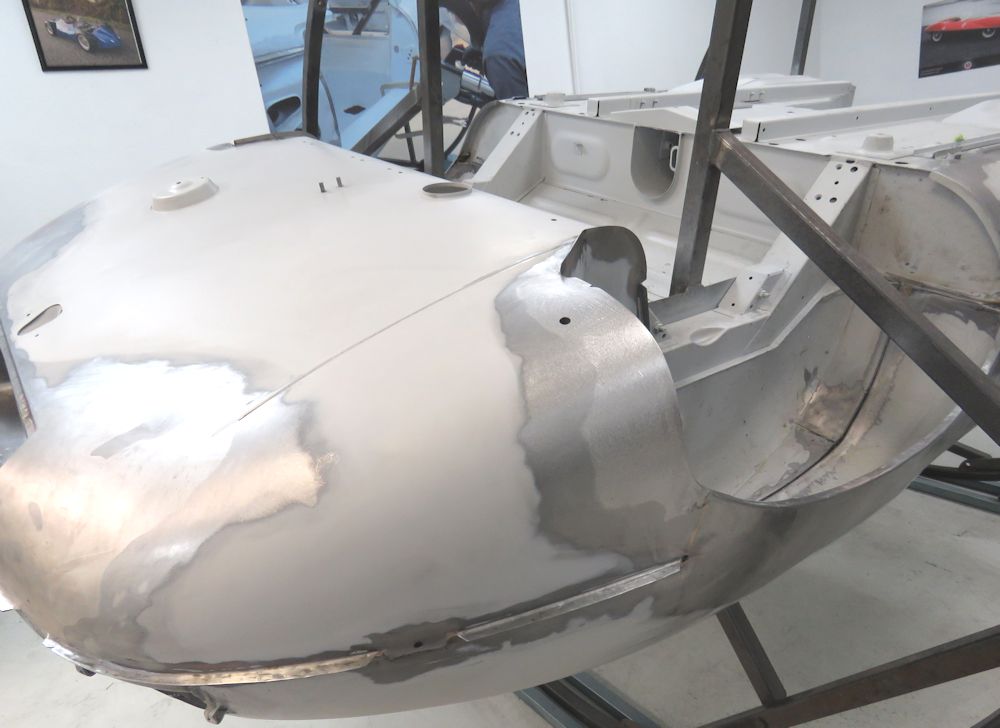
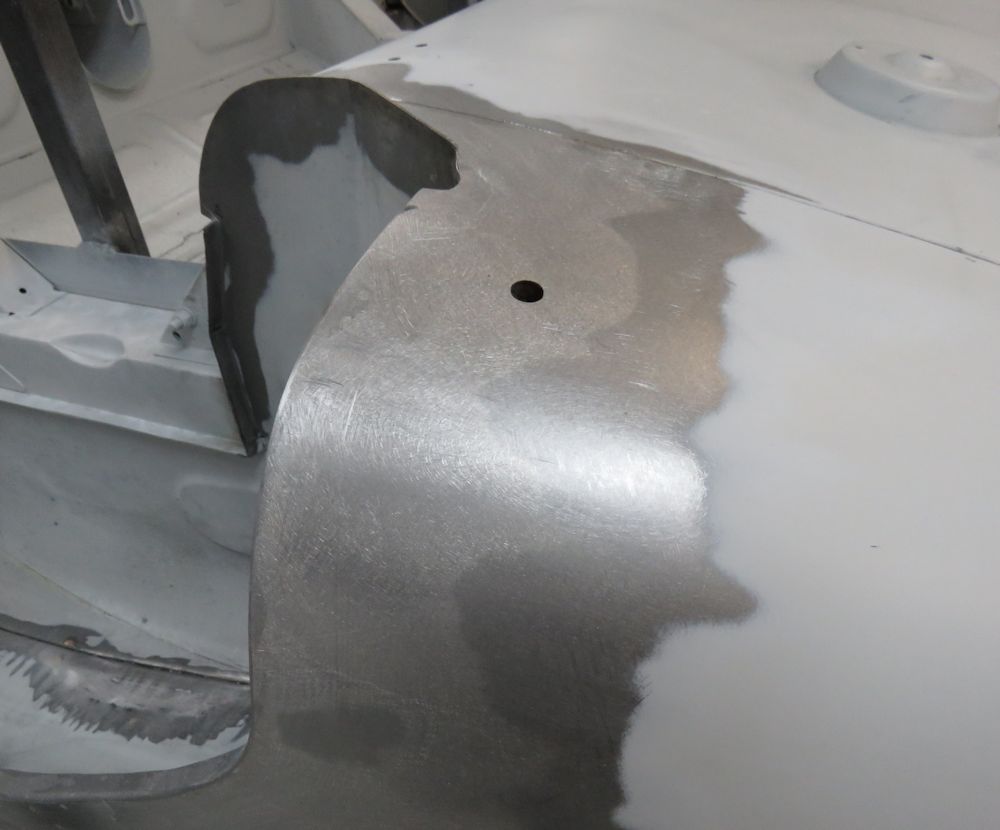
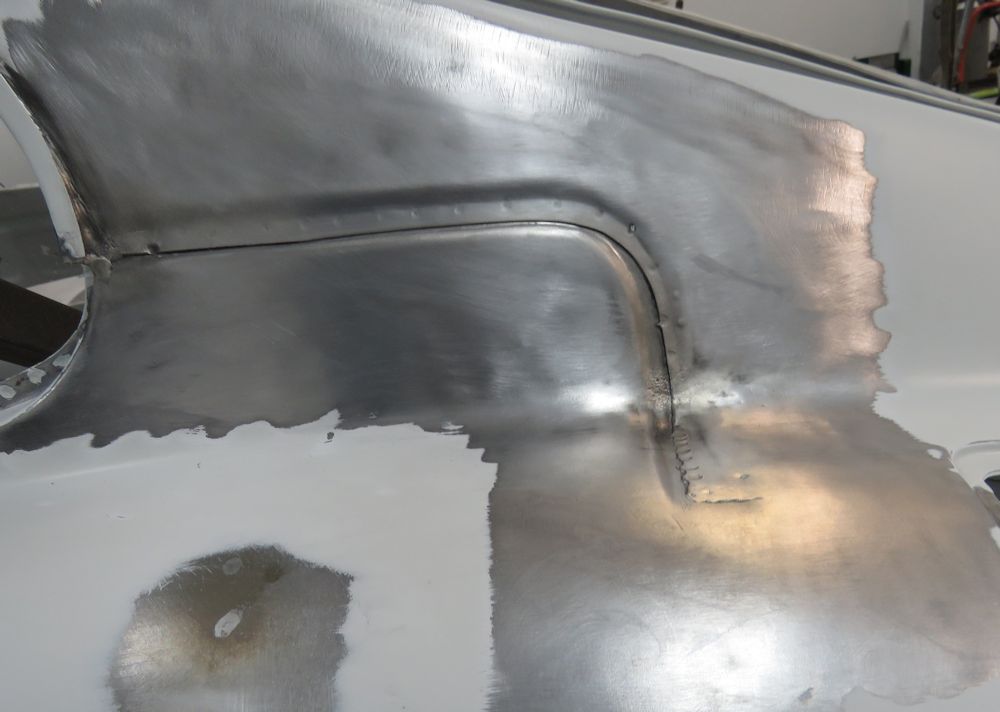
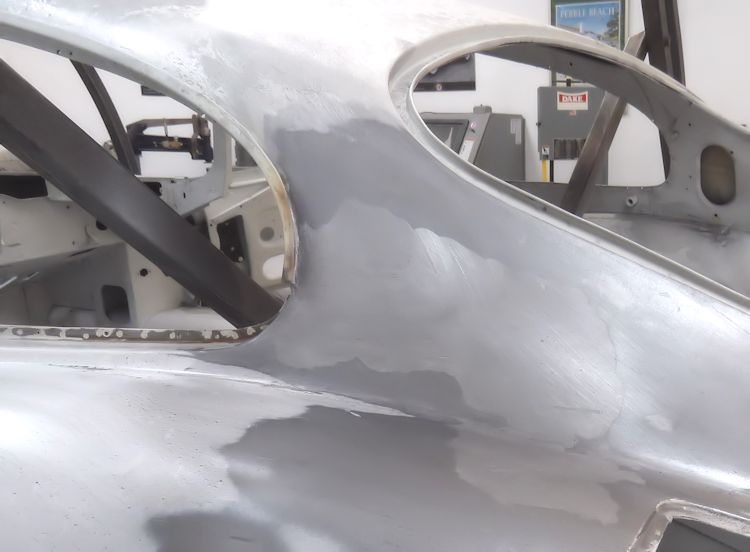
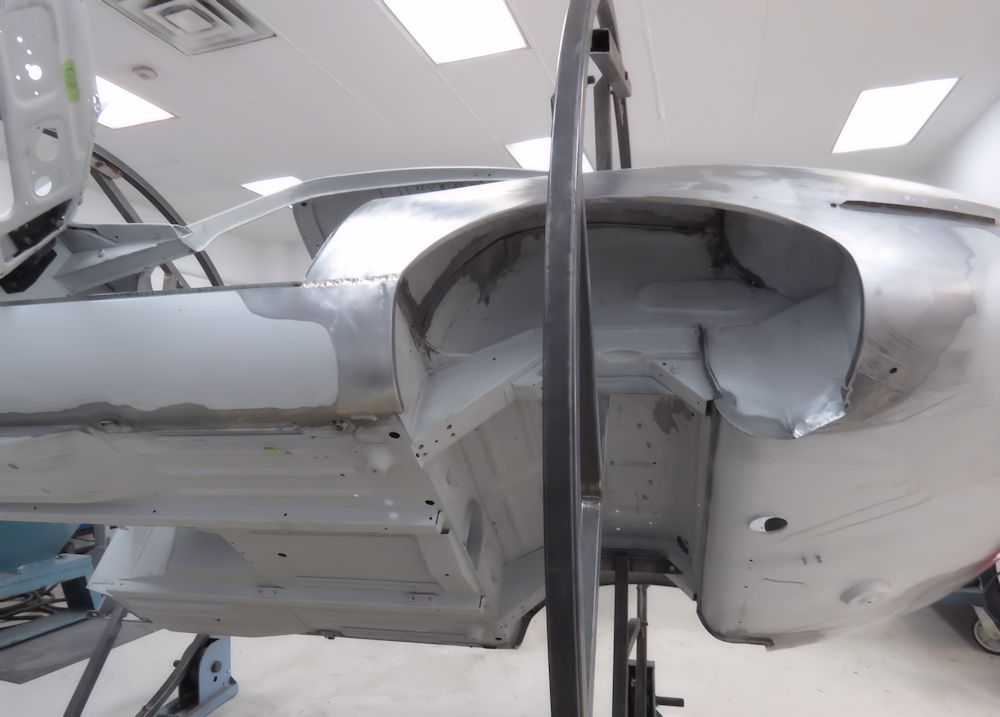
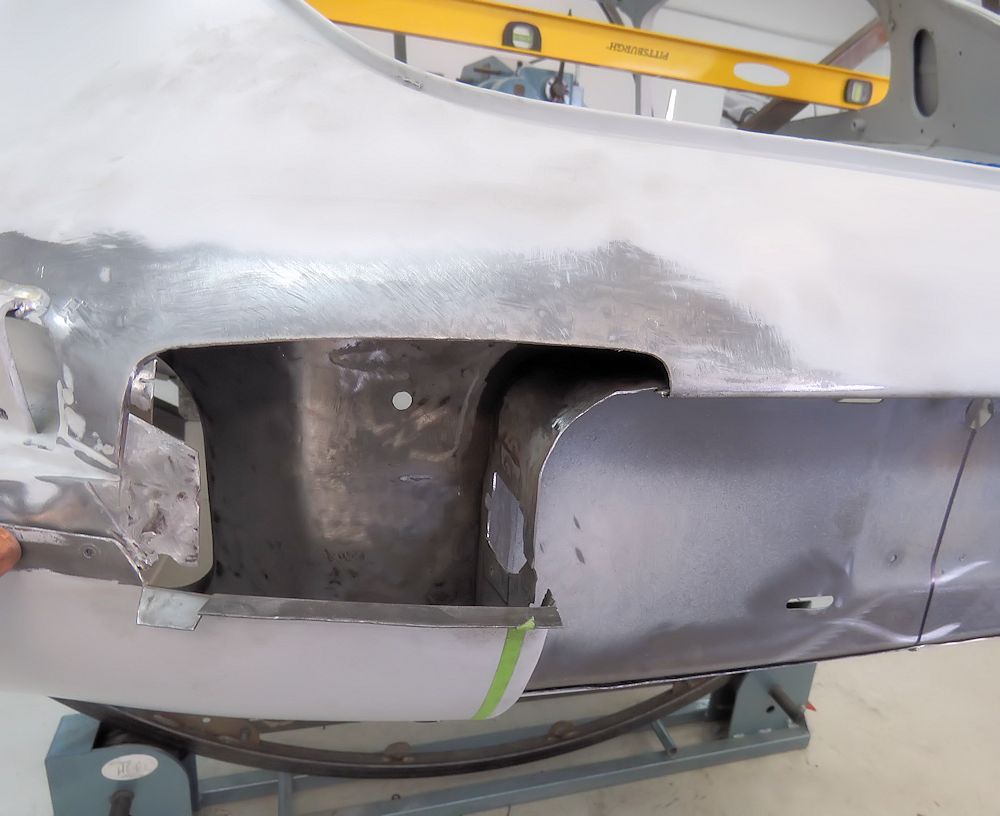
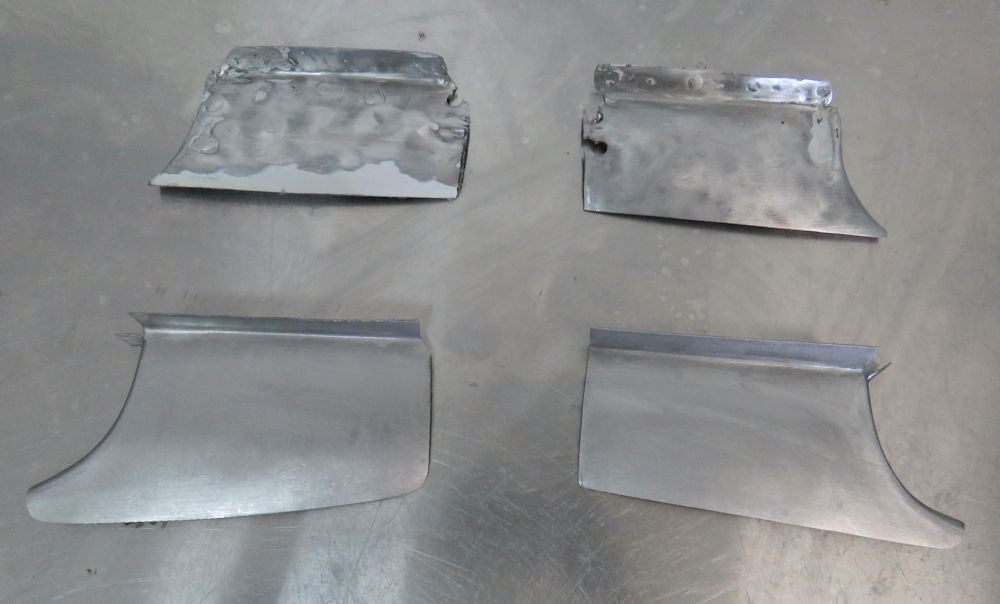
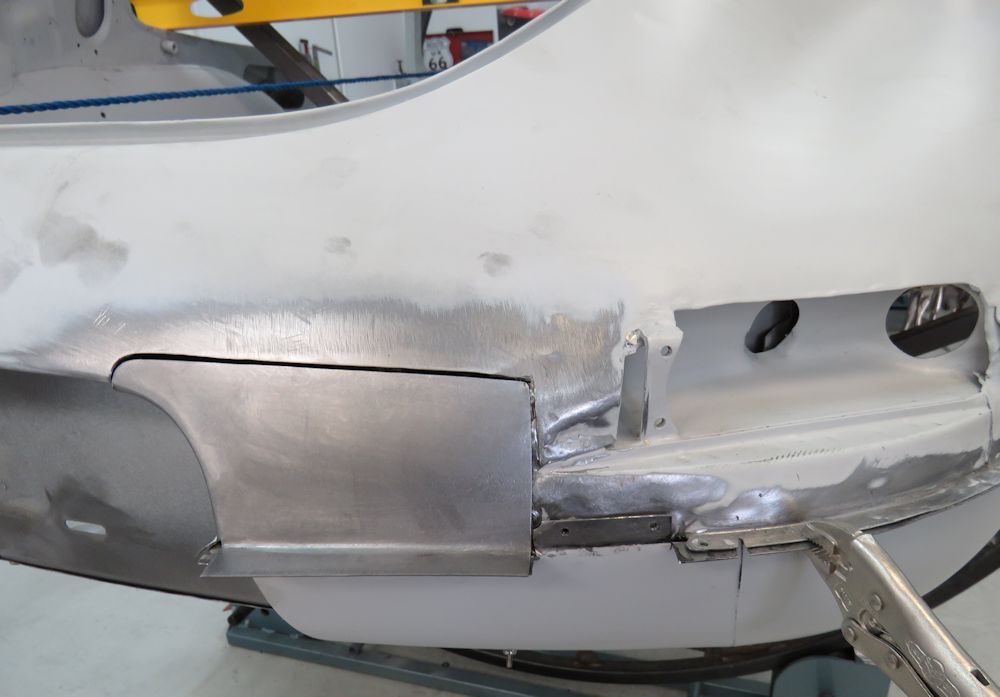
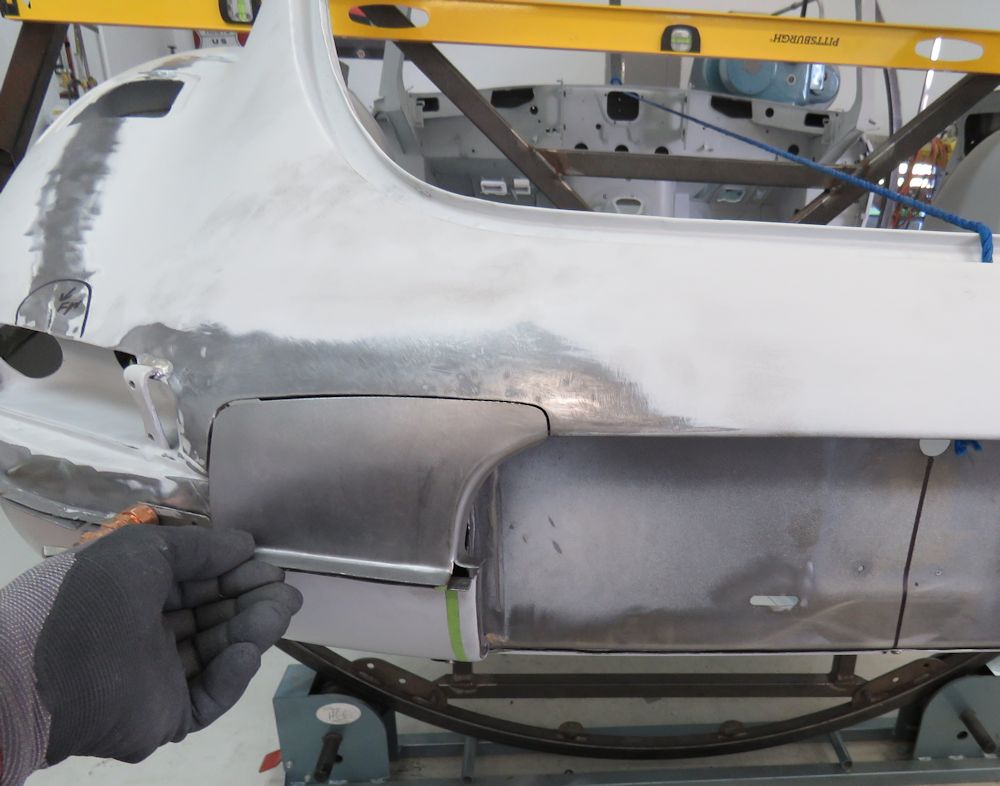
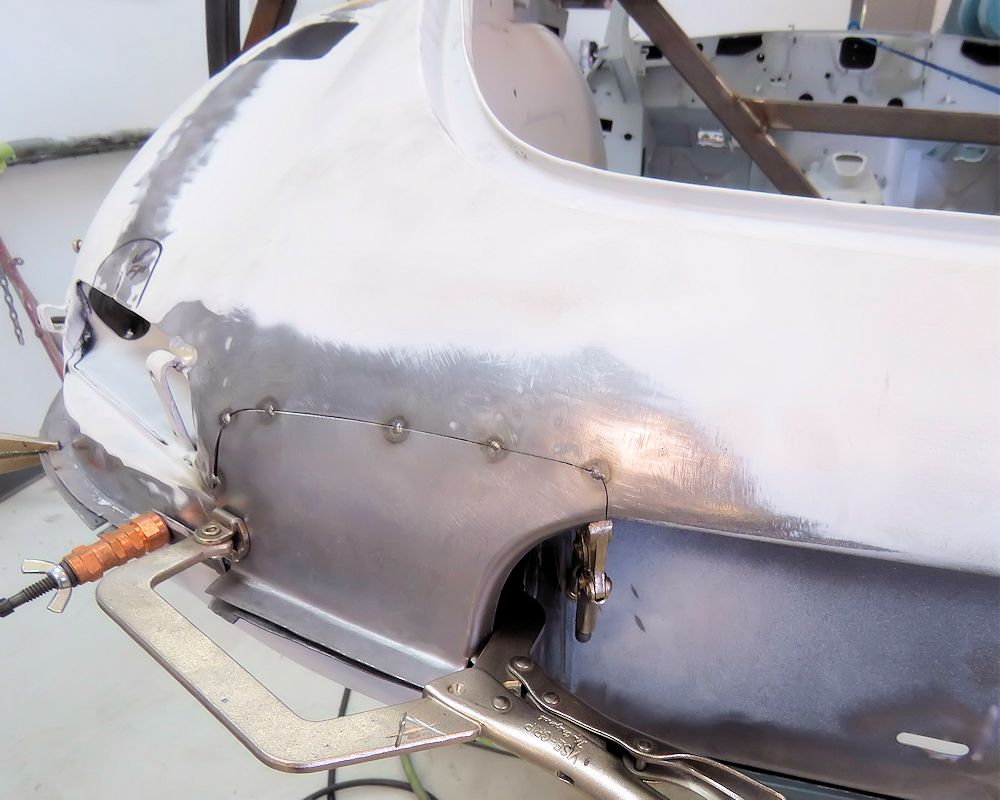
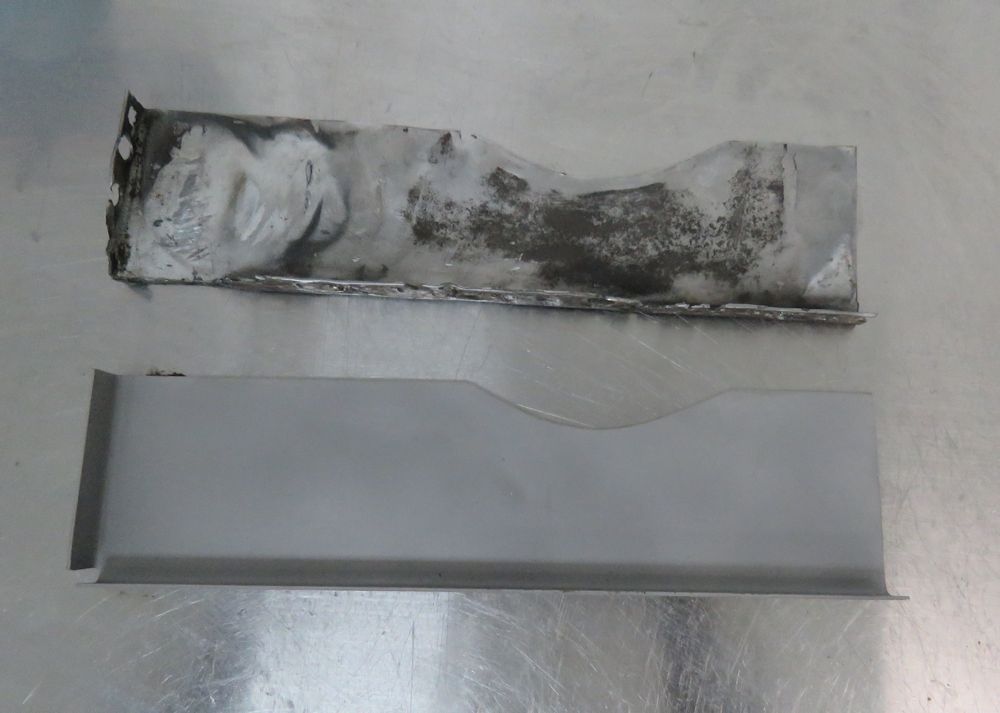
Oscar has been busy fabricating replacement panels for either side of the rear license plate panel and the (rear) inner wheel arch structures. Next up will be the discretely flared rear wheel arches.
 |
 |
 |
 |
 |
 |
 |
 |
 |
 |
 |
 |
 |
 |
 |
 |
 |
 |
 |
 |
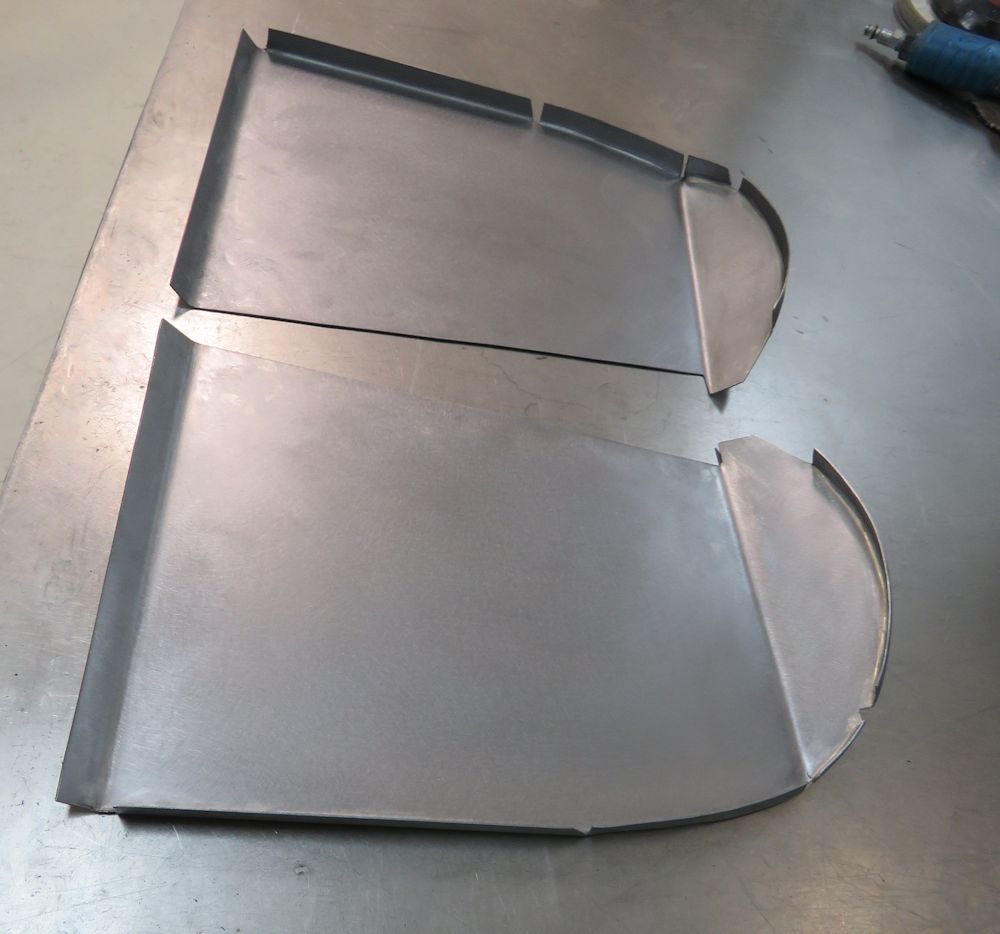
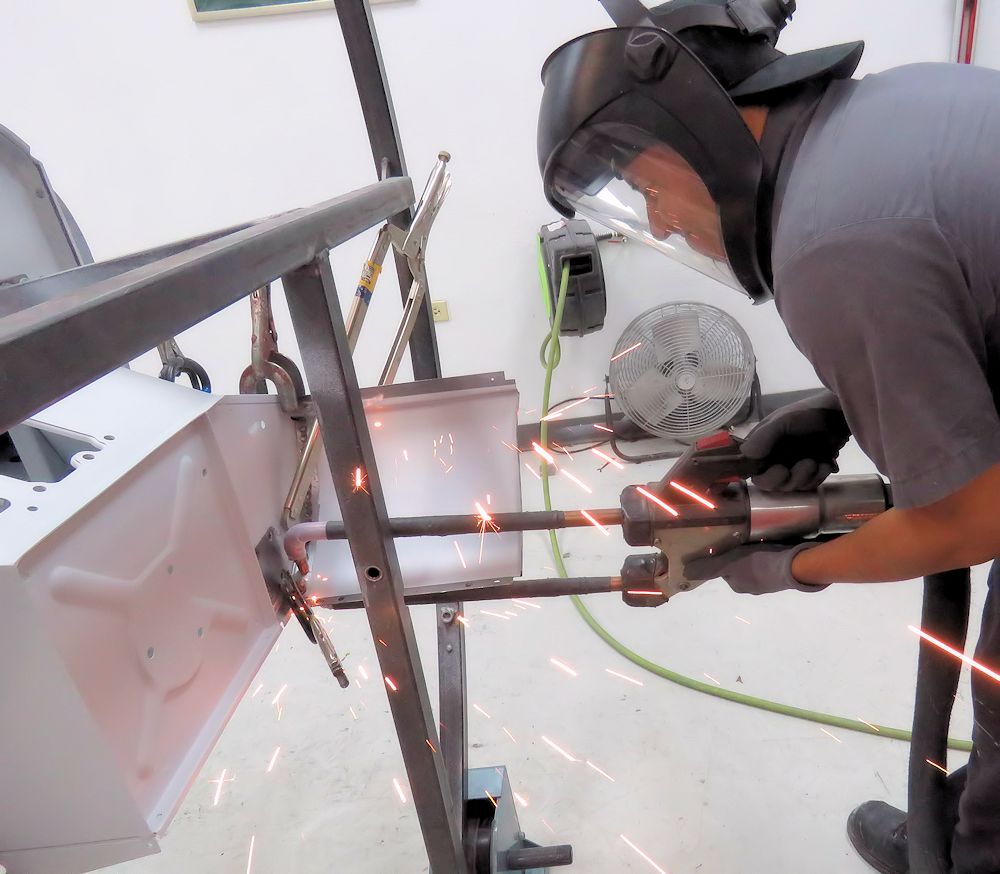
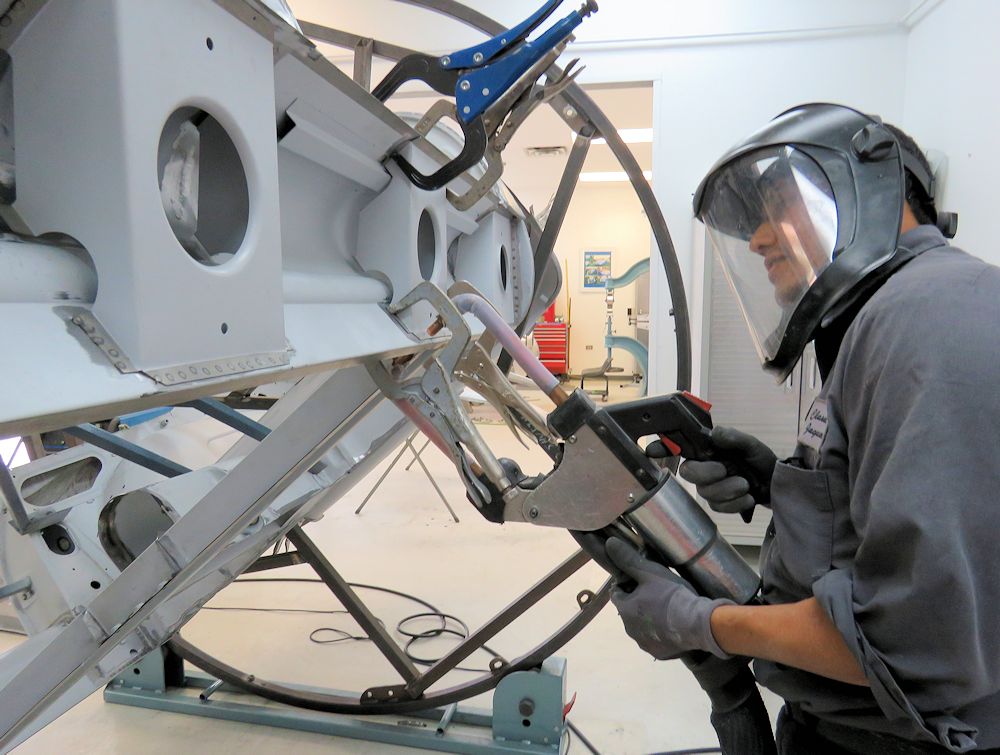
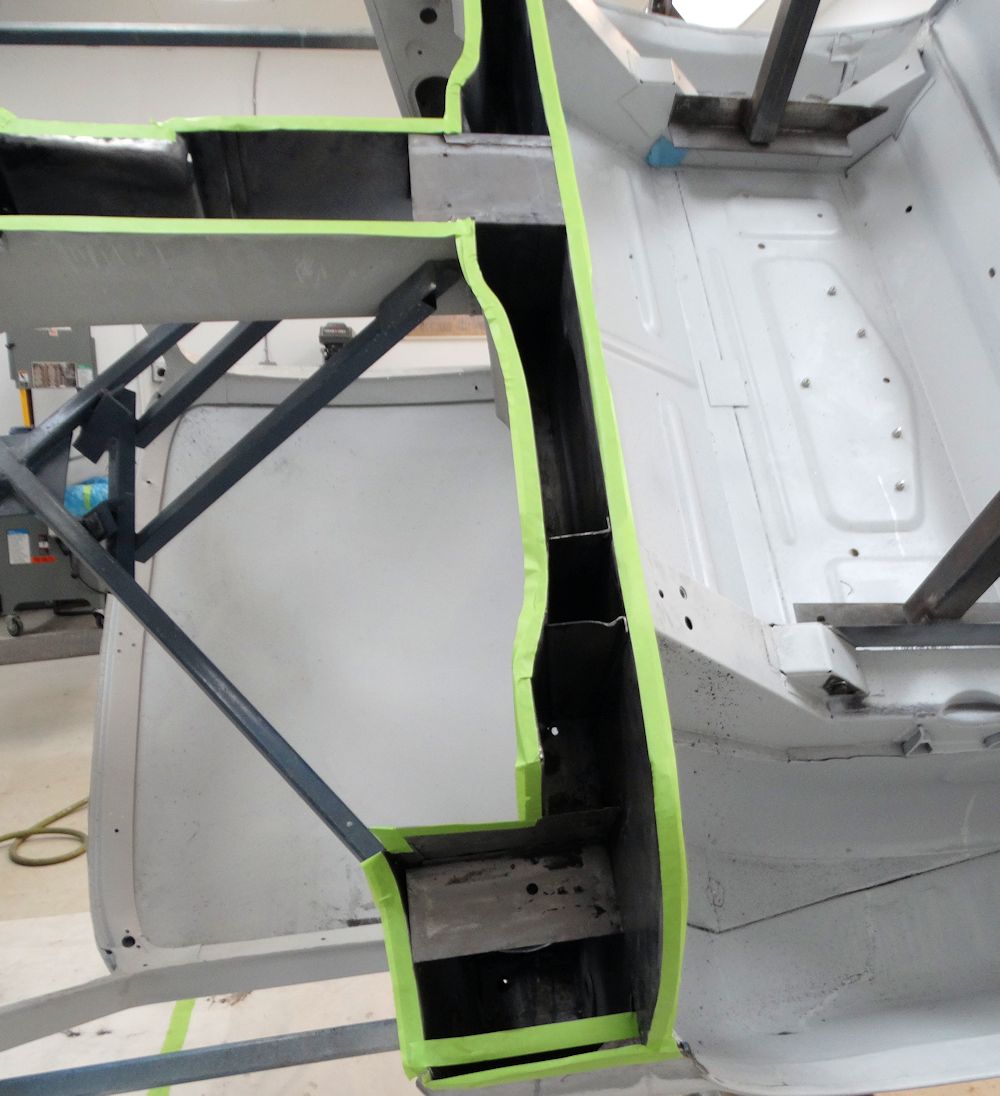
The following photos show Oscar rust proofing and installing the outer sills.
 |
 |
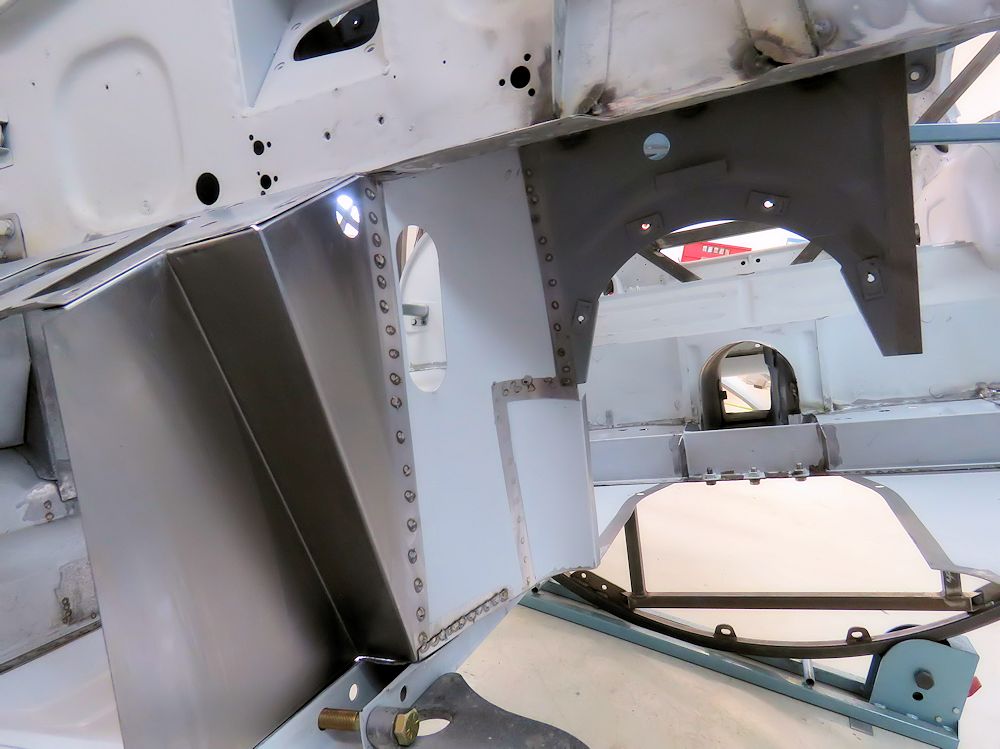
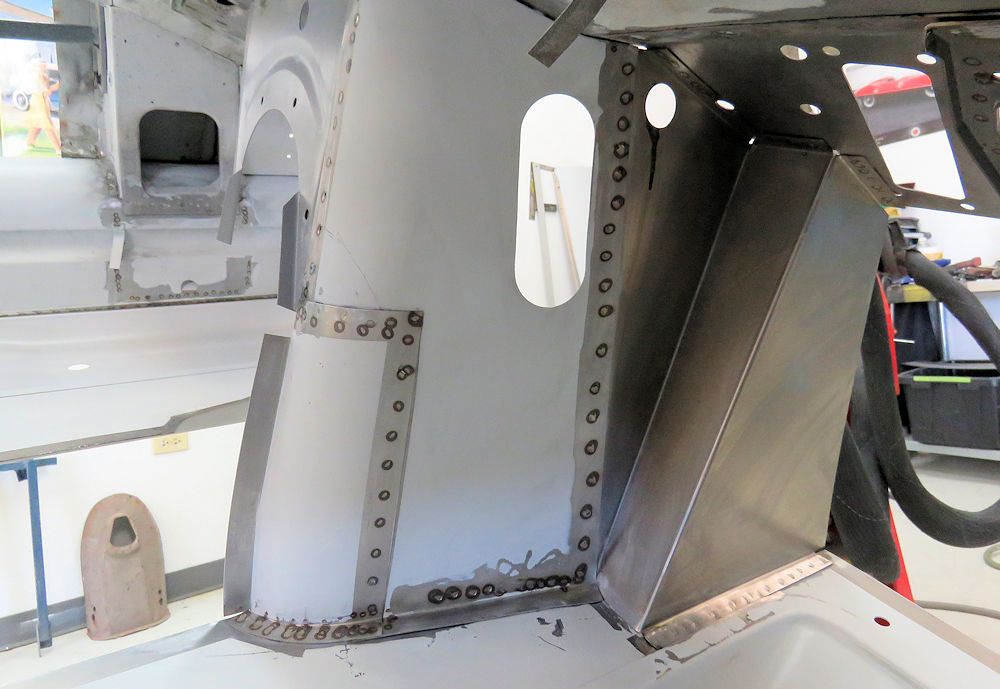
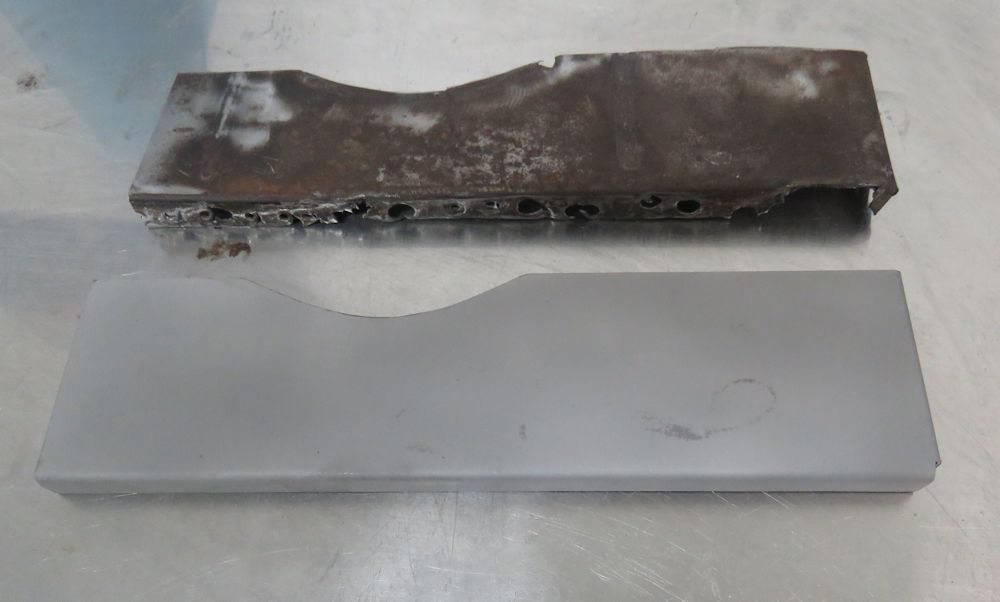
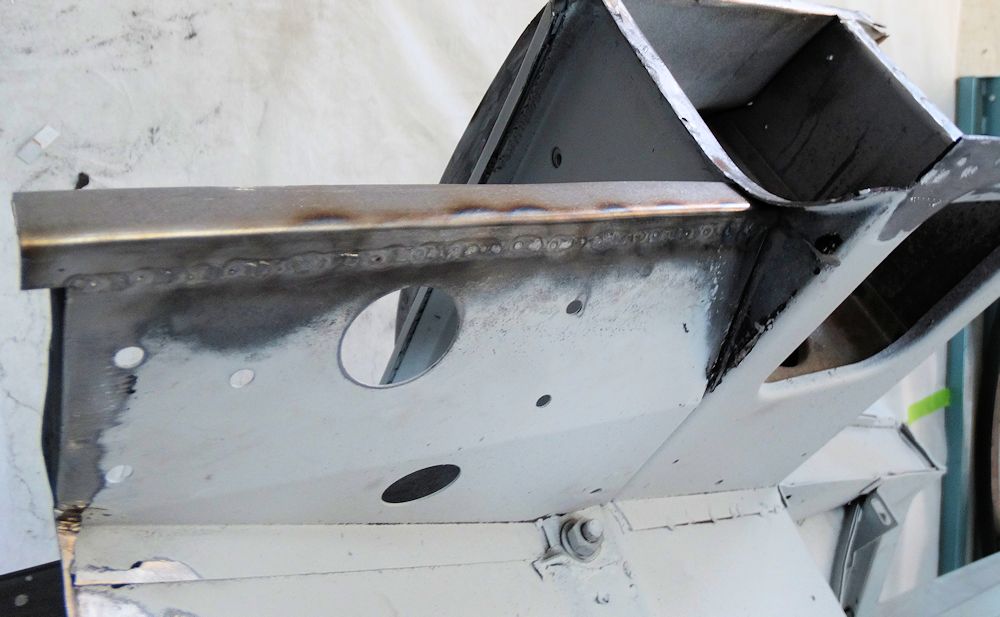
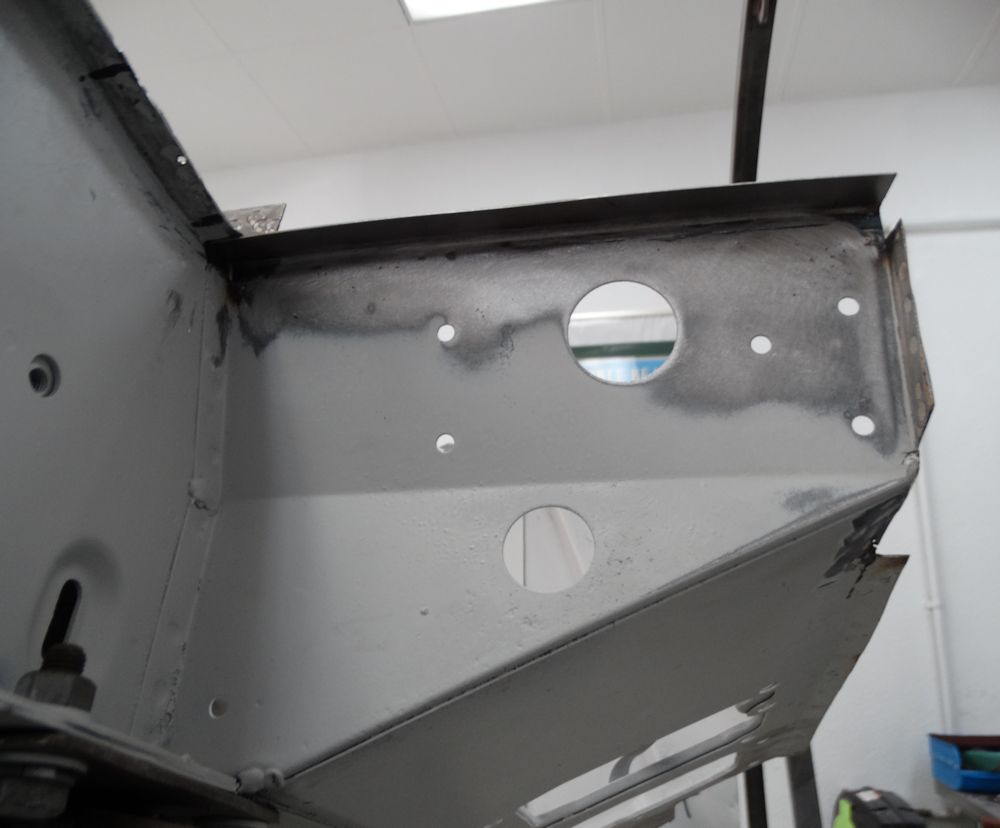
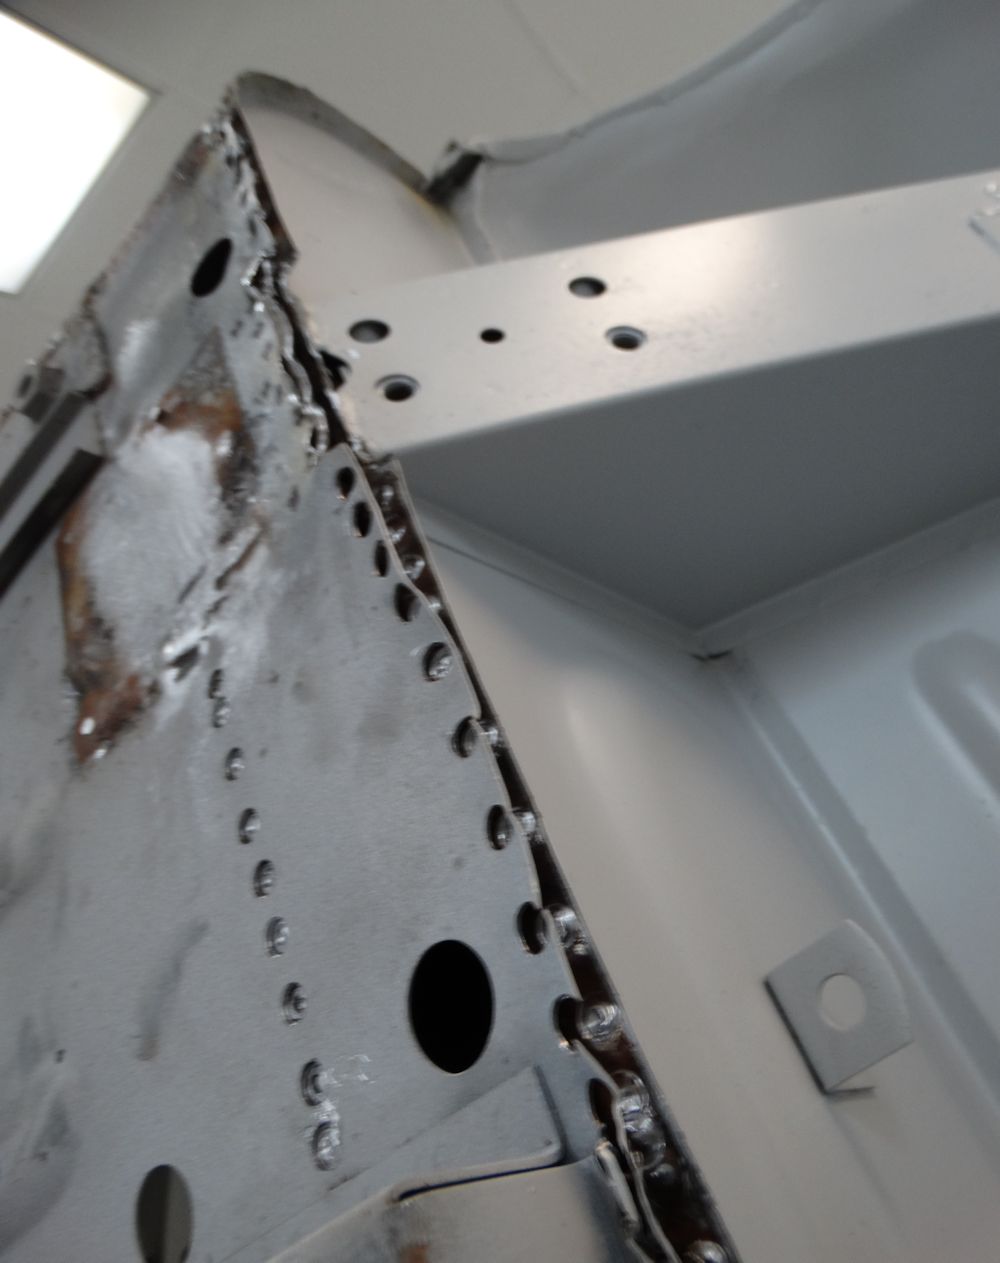
| Reconstruction of the trans and bell housing side panels now complete |
|
 |
 |
| Firewall repairs completed, floors and trans tunnel welded in place |
|
 |
 |
 |
 |
| Trial fitting new outer sills |
|
 |
 |
 |
 |
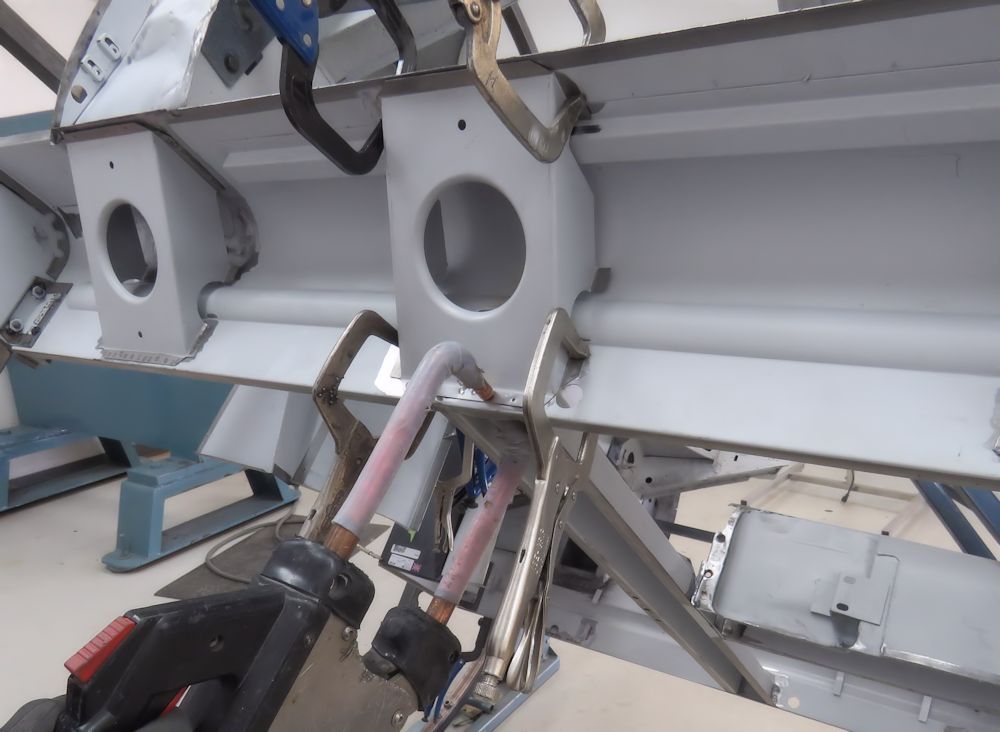
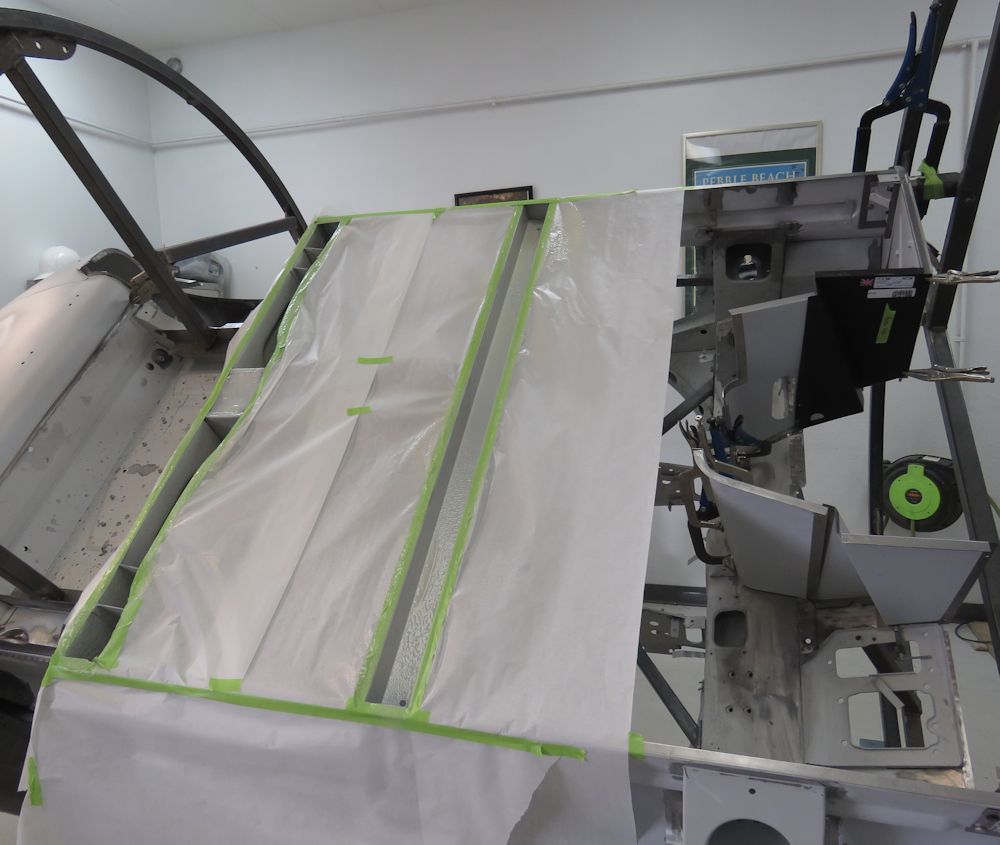
| Inner sill box section will be rust proofed
with Wurth Body Wax prior to installing outer panels |
|
 |
 |
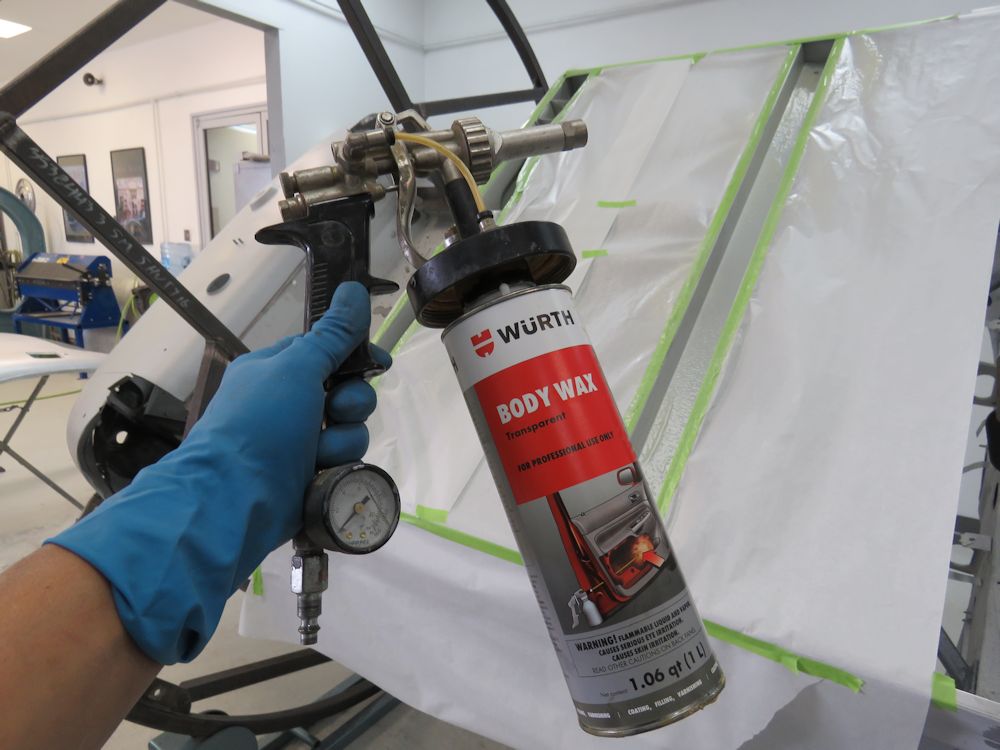
| Applying Body Wax to inner surface of outer
sills |
Wax also applied to inner sills |
 |
 |
 |
 |
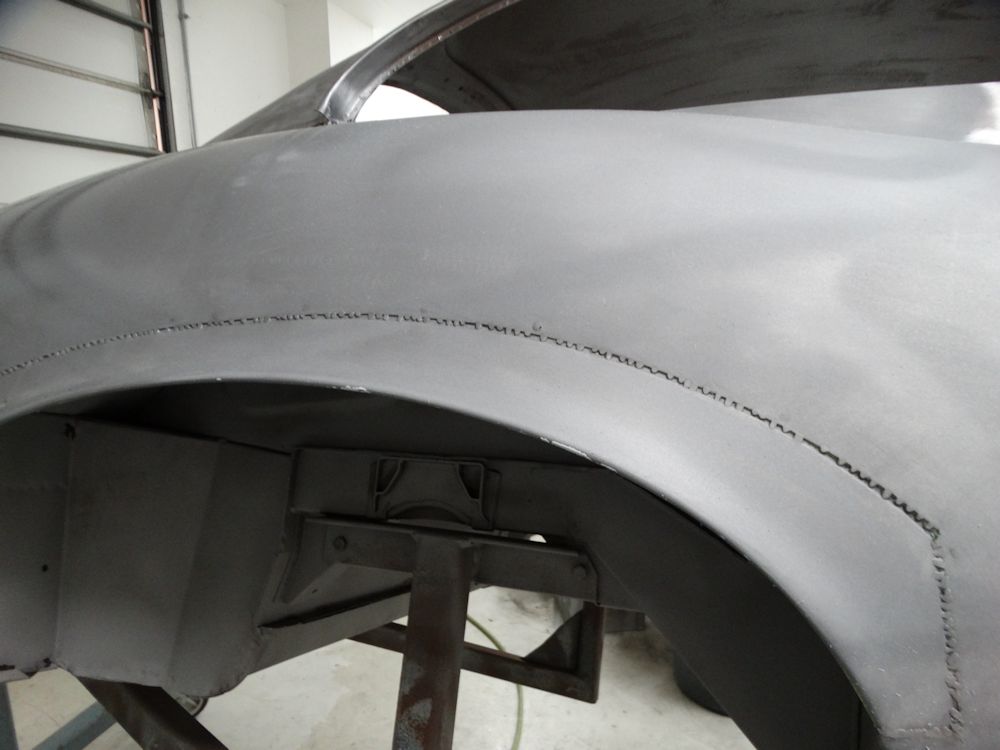
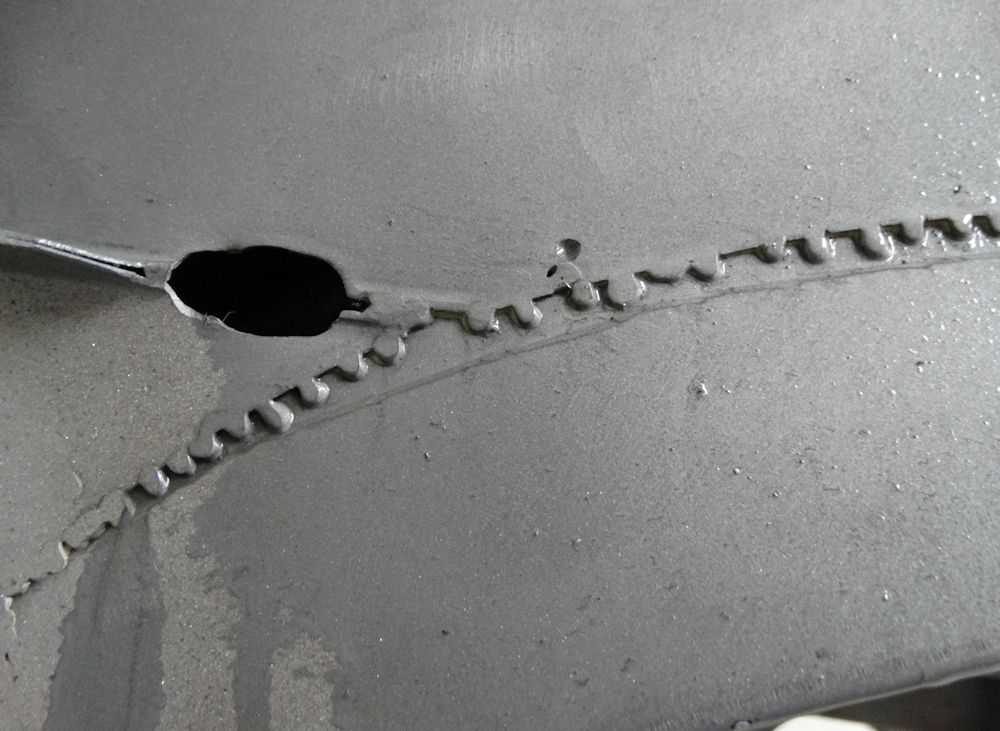
| Spot welding outer sills in place |
|
 |
 |
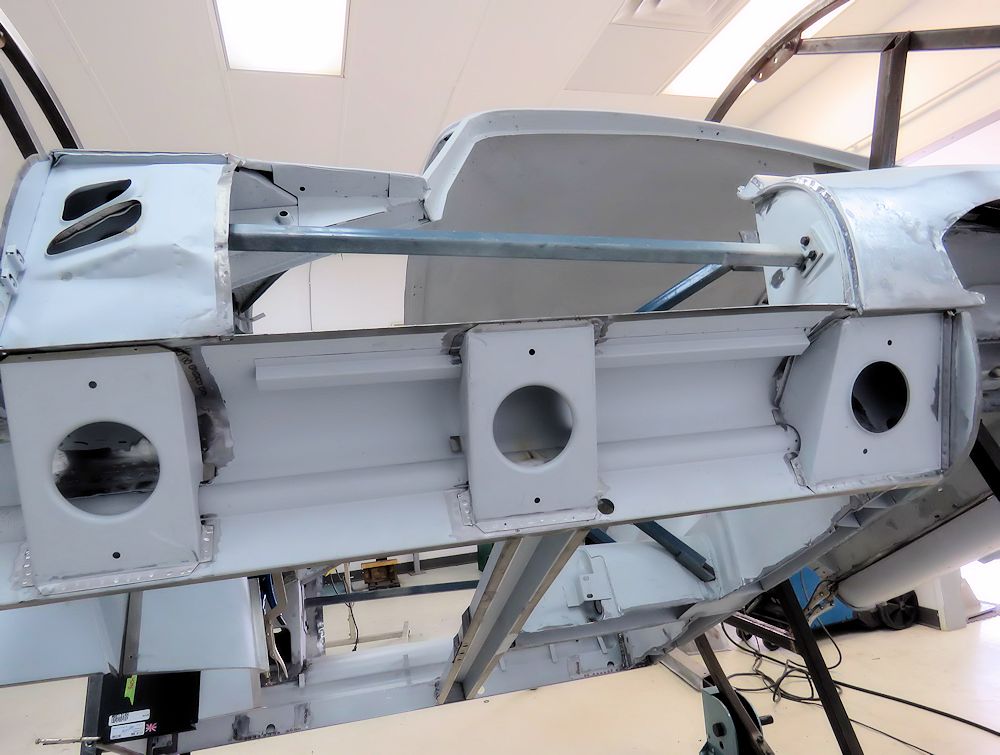
| With outer sills installed, next up is the new boot floor assembly |
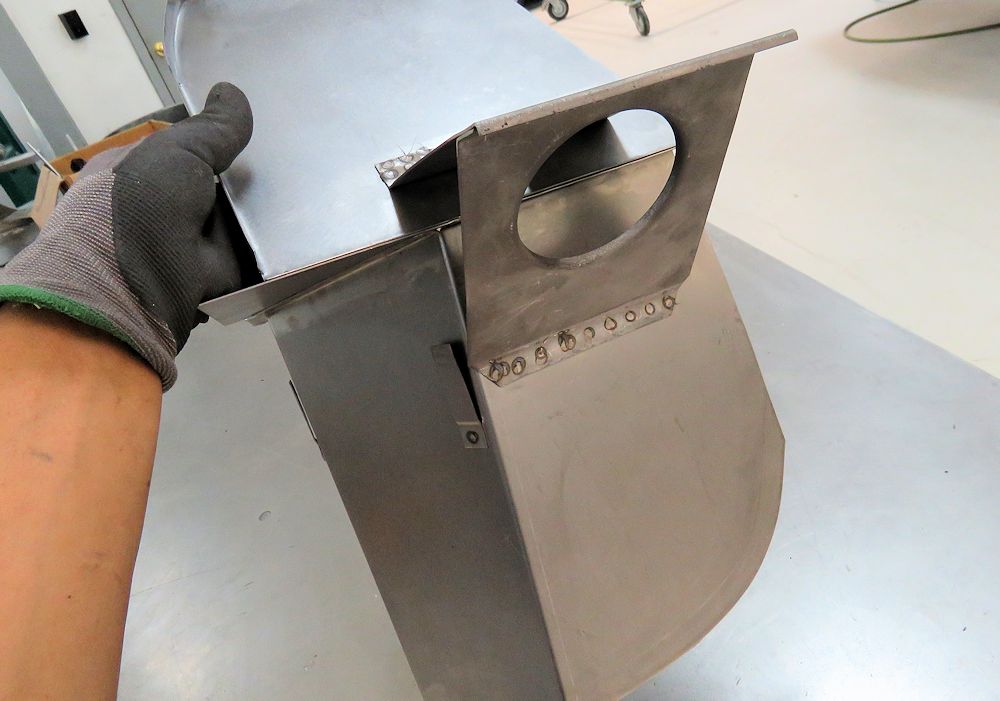
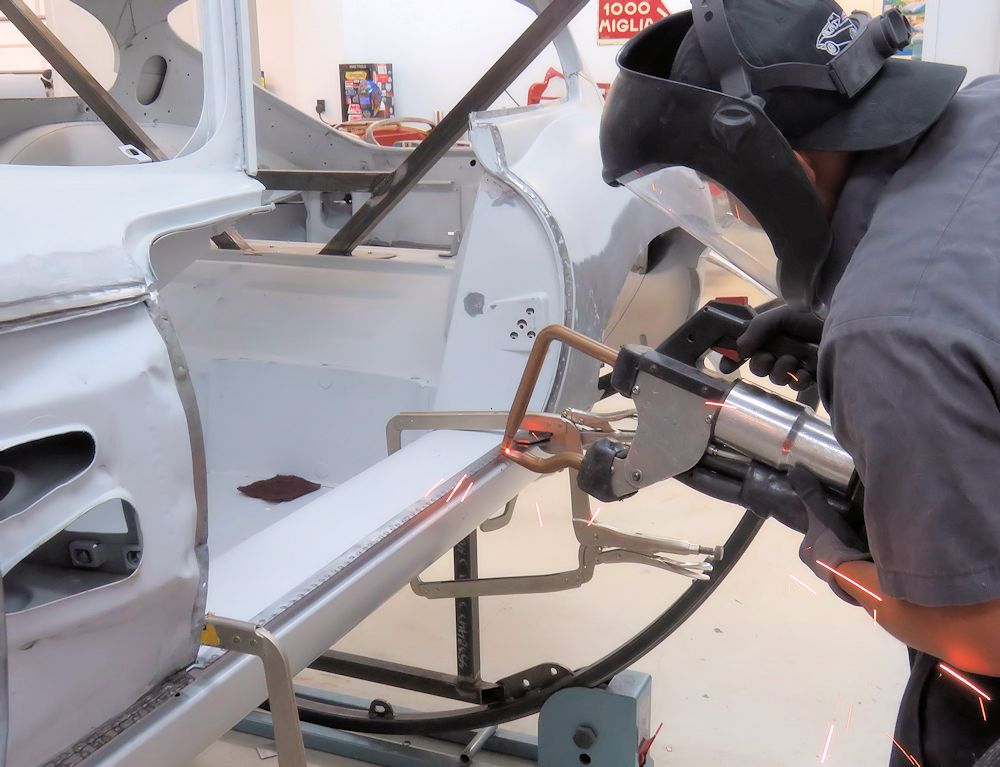
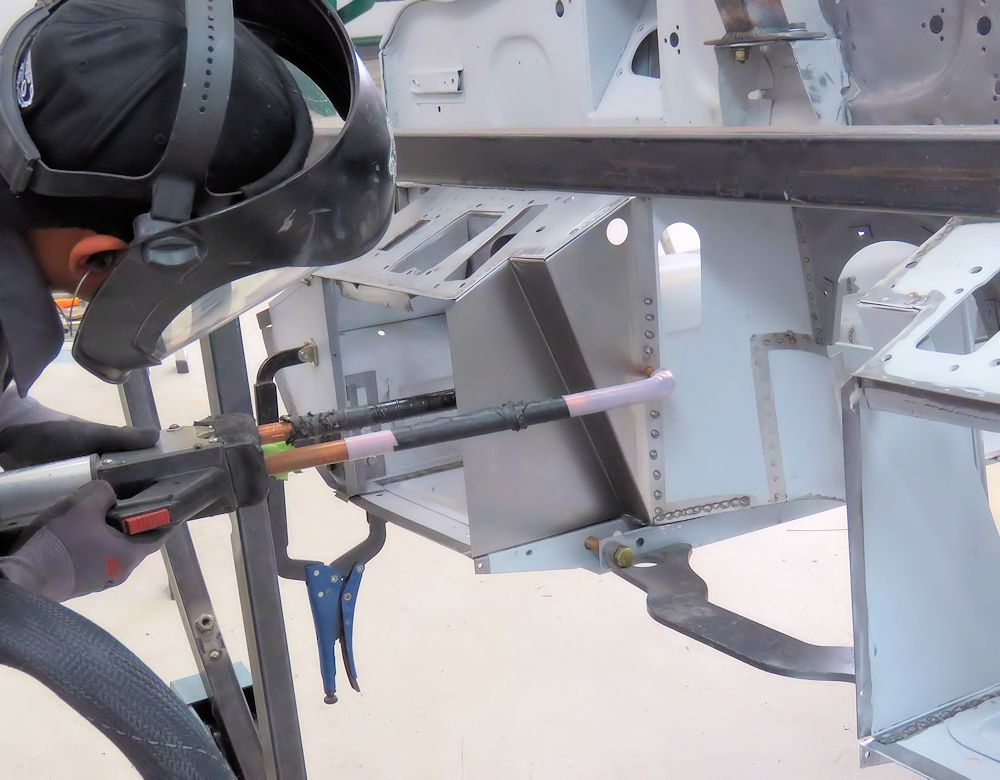
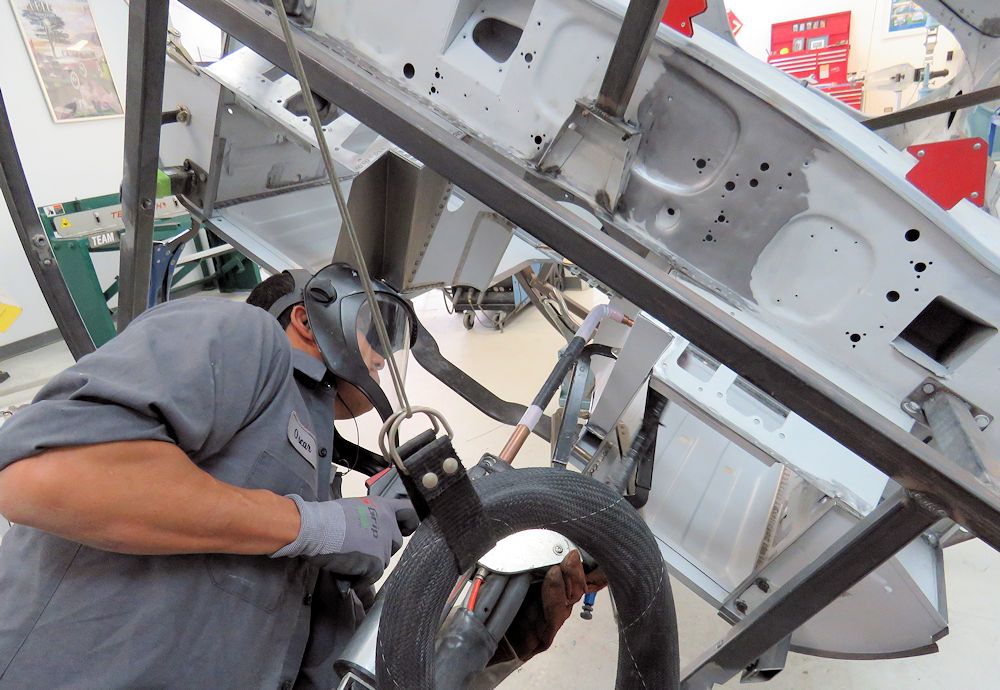
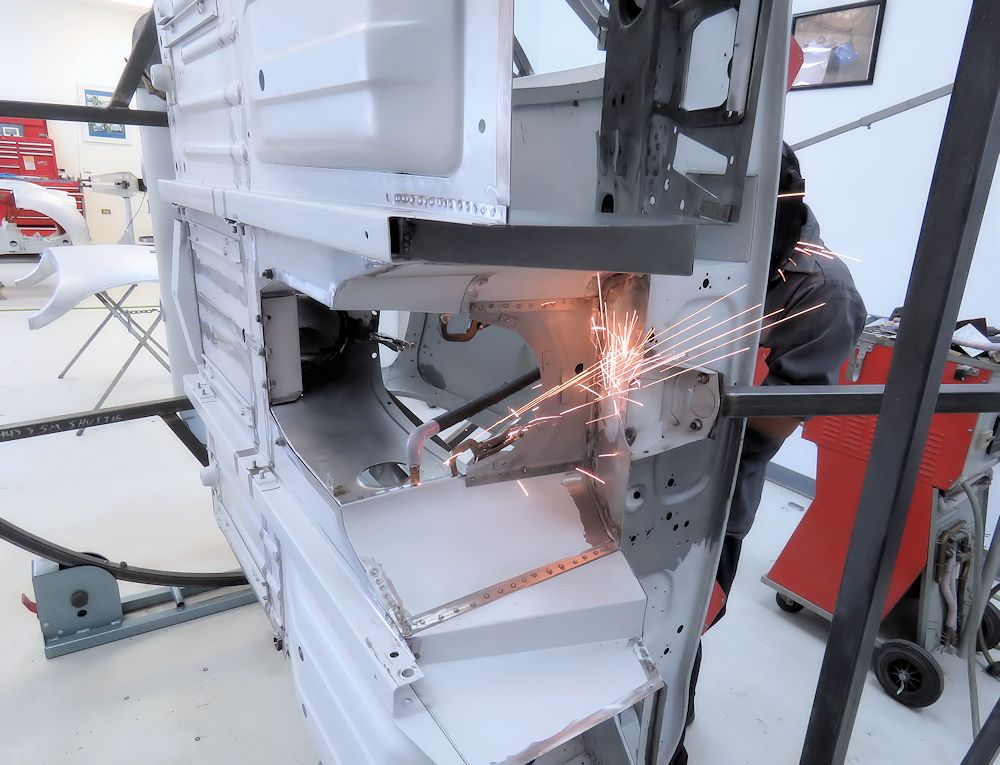
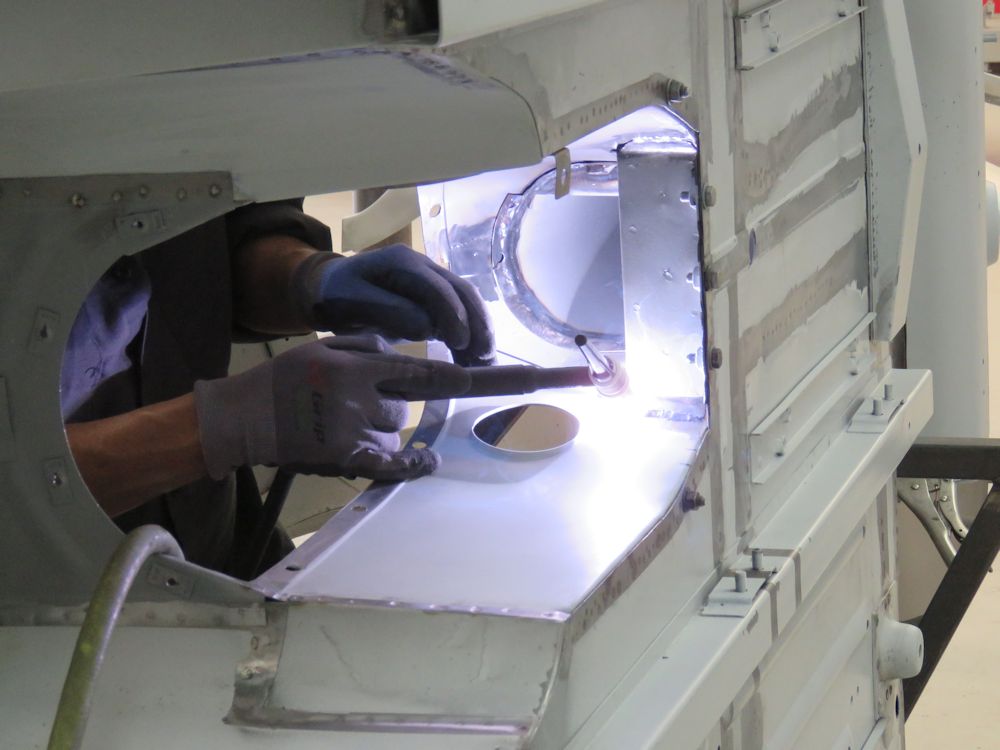
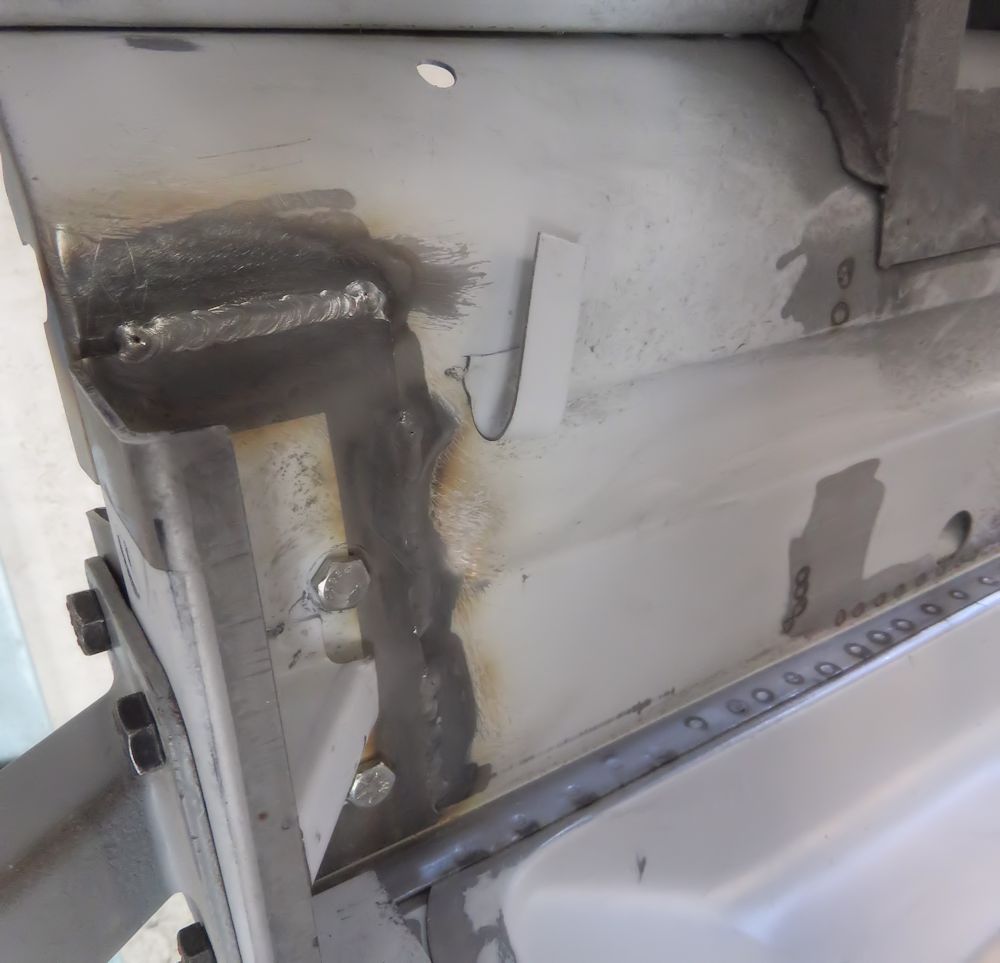
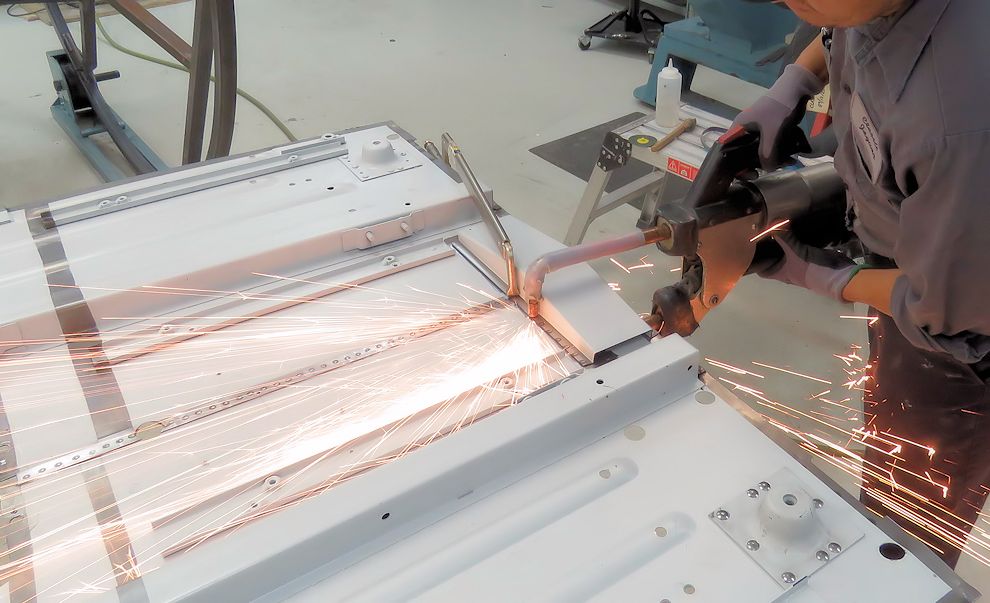
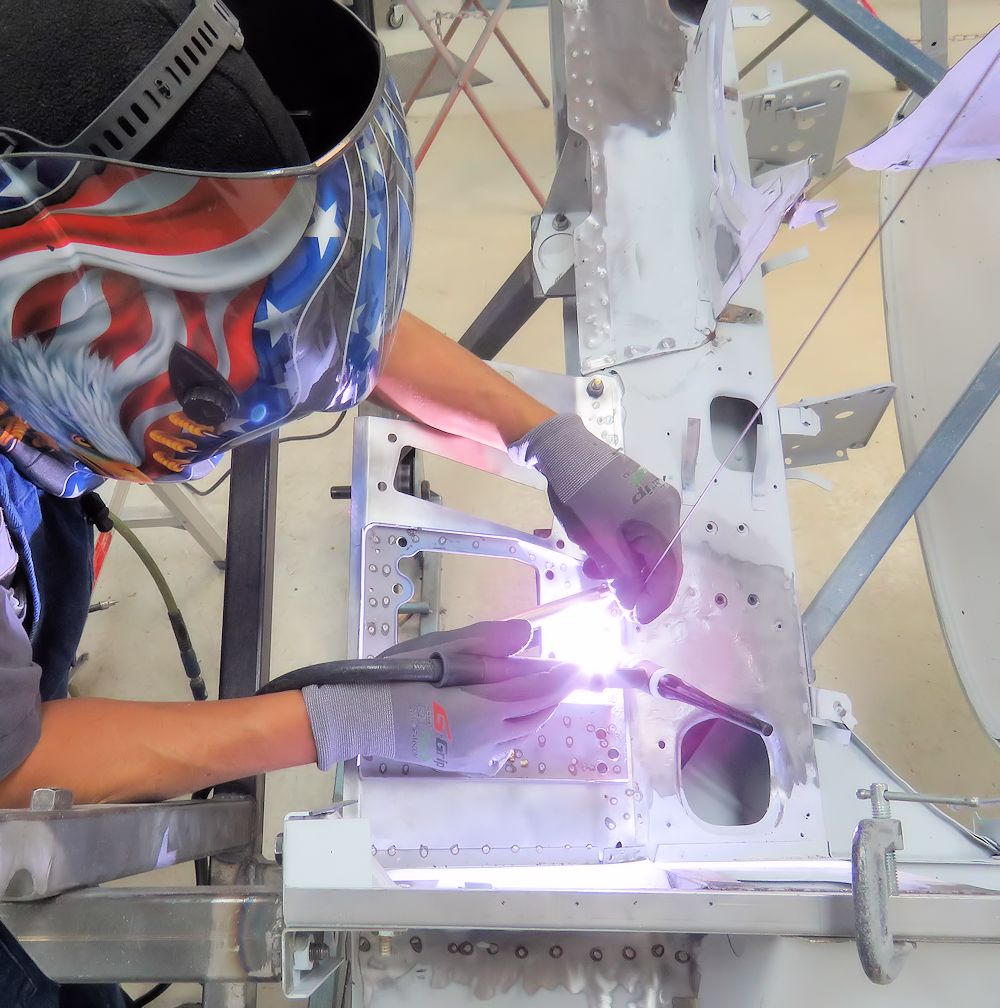
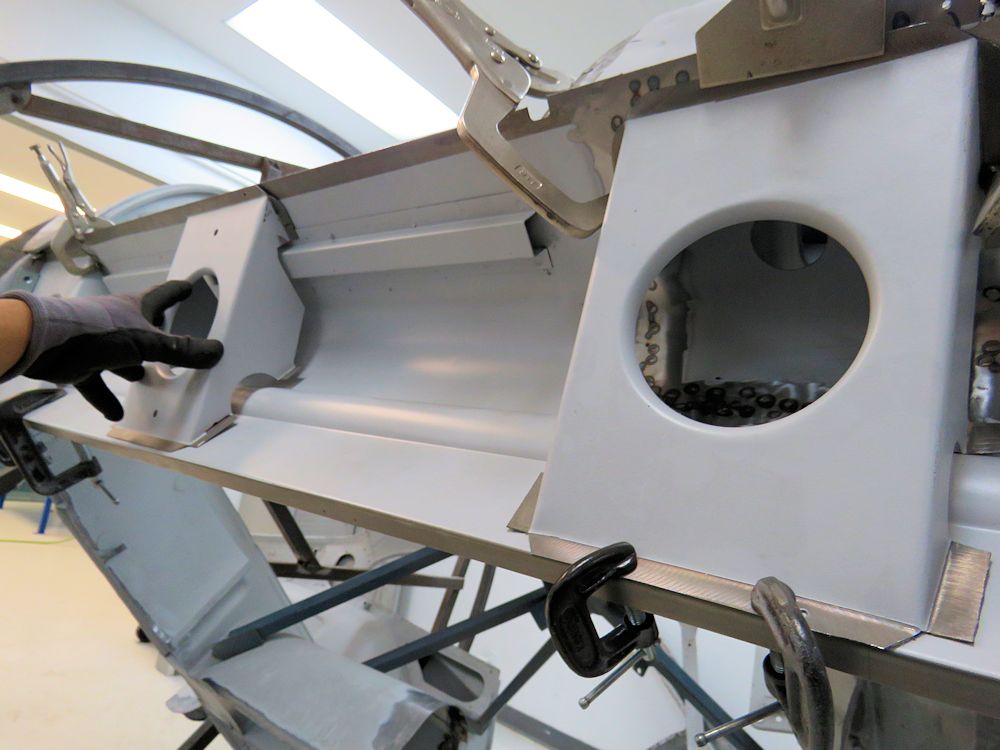
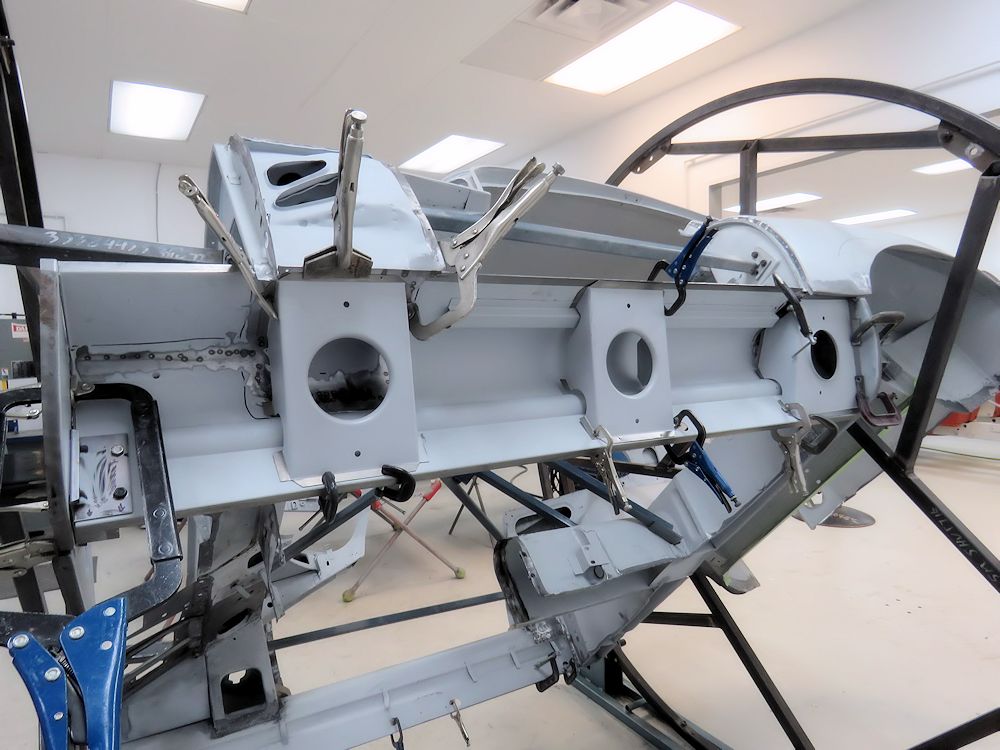
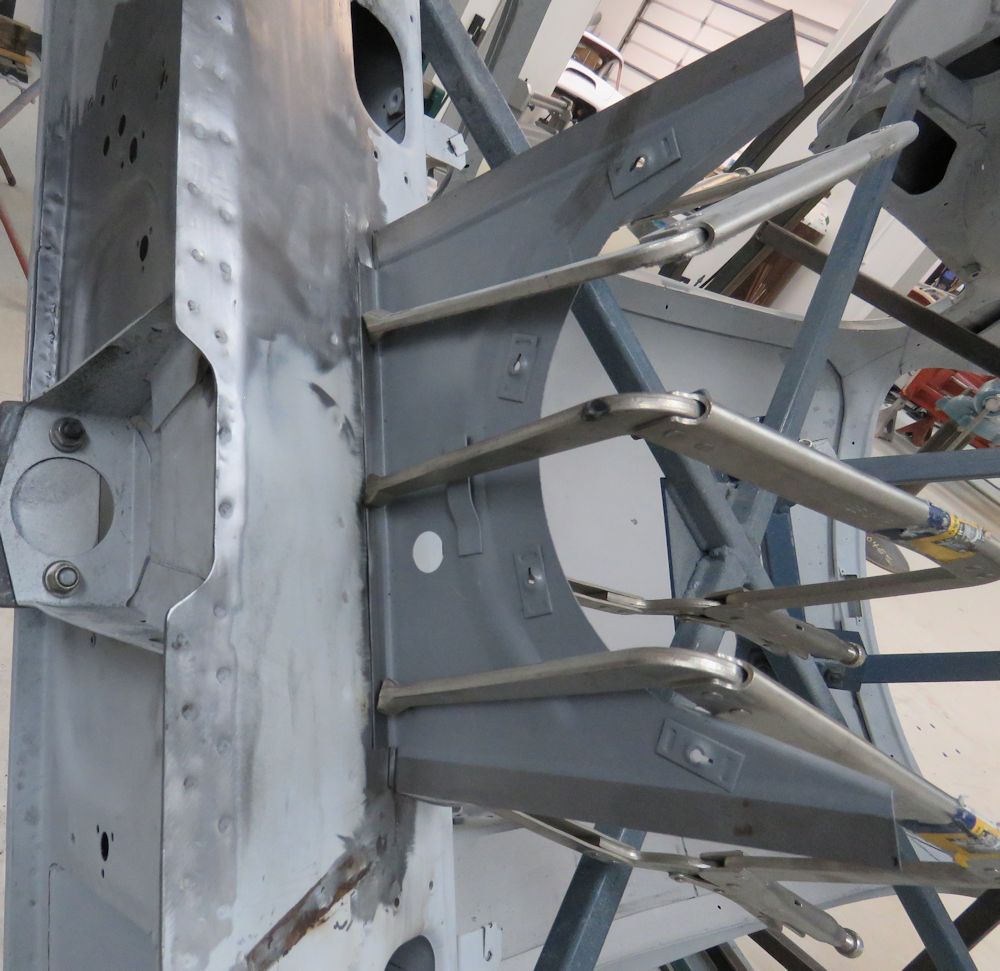
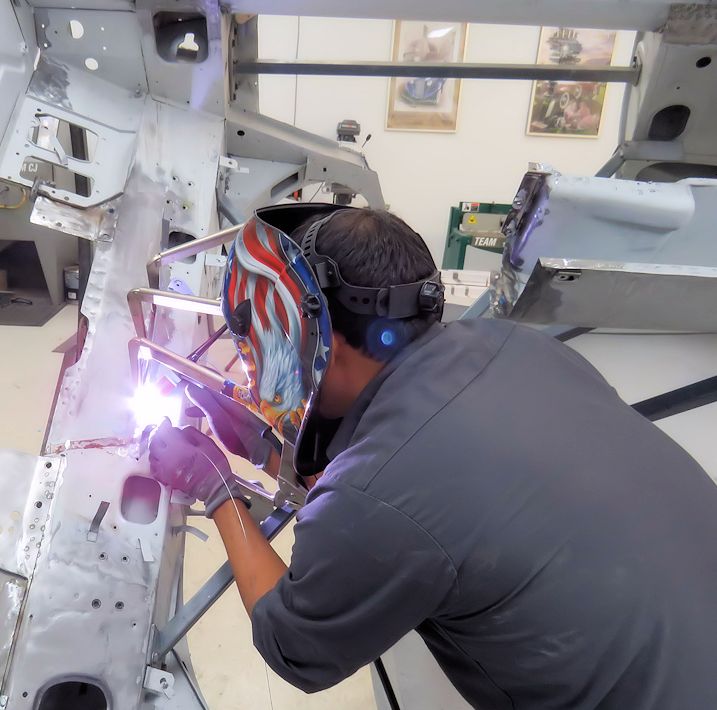
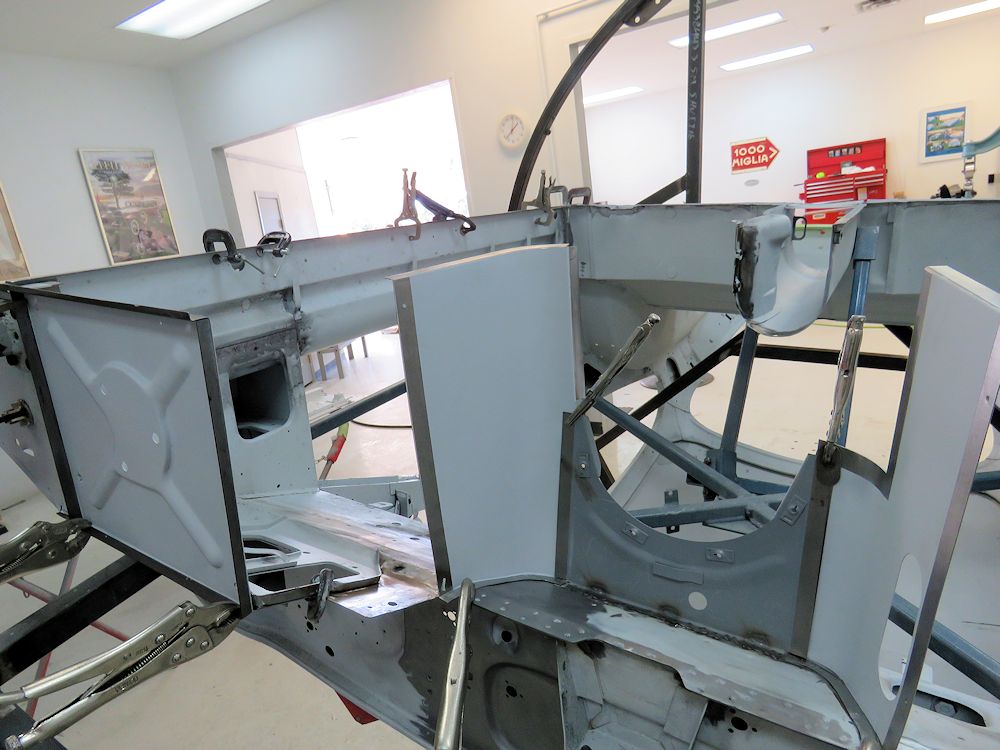
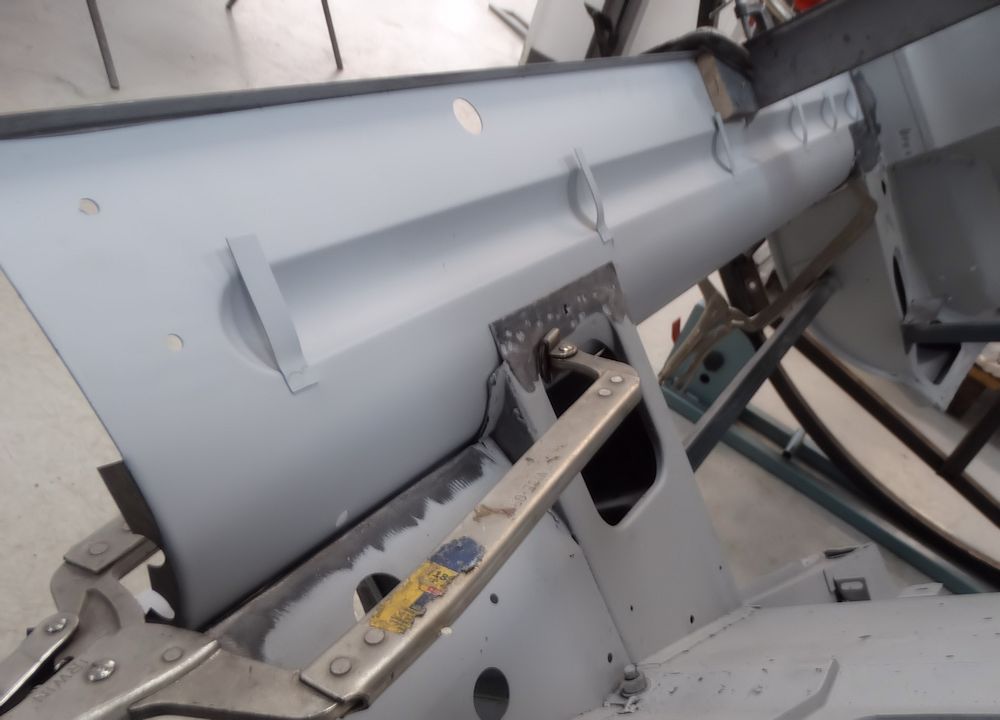
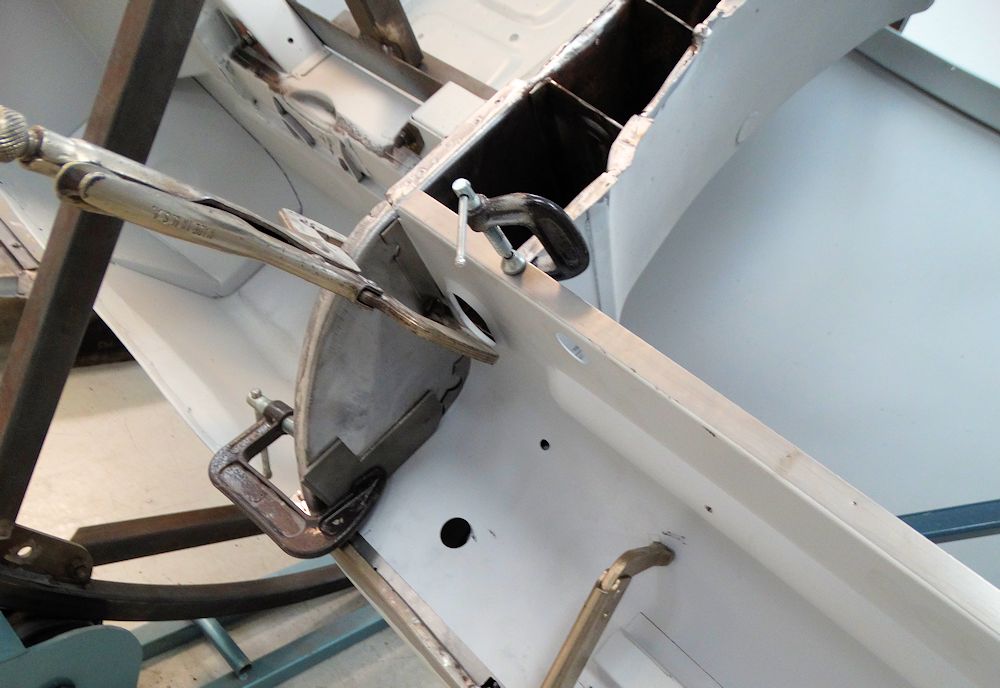
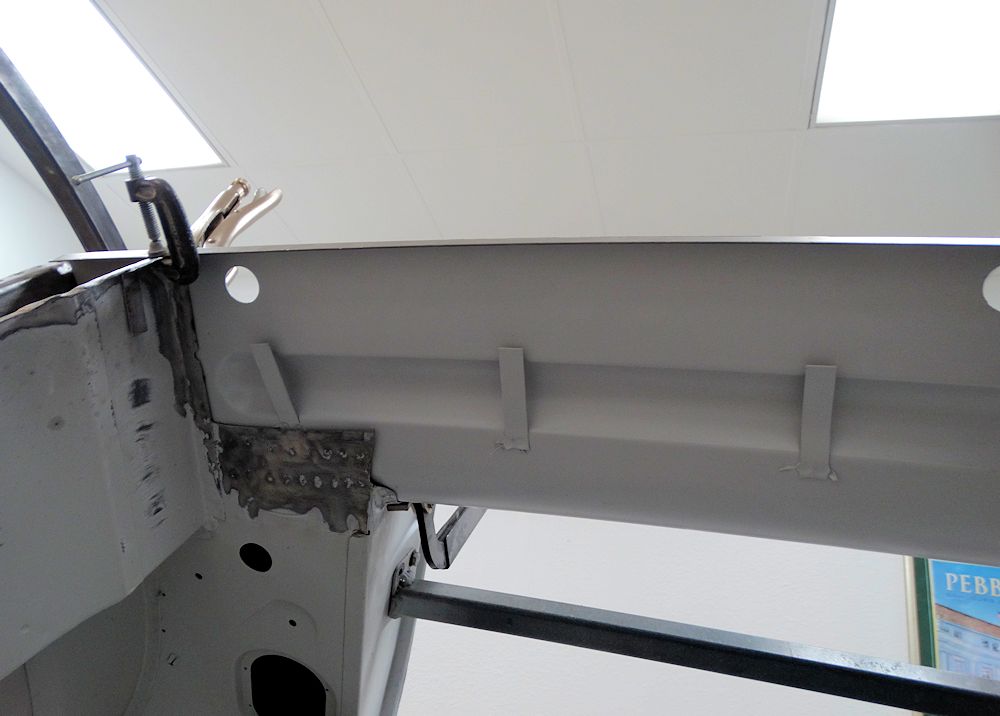
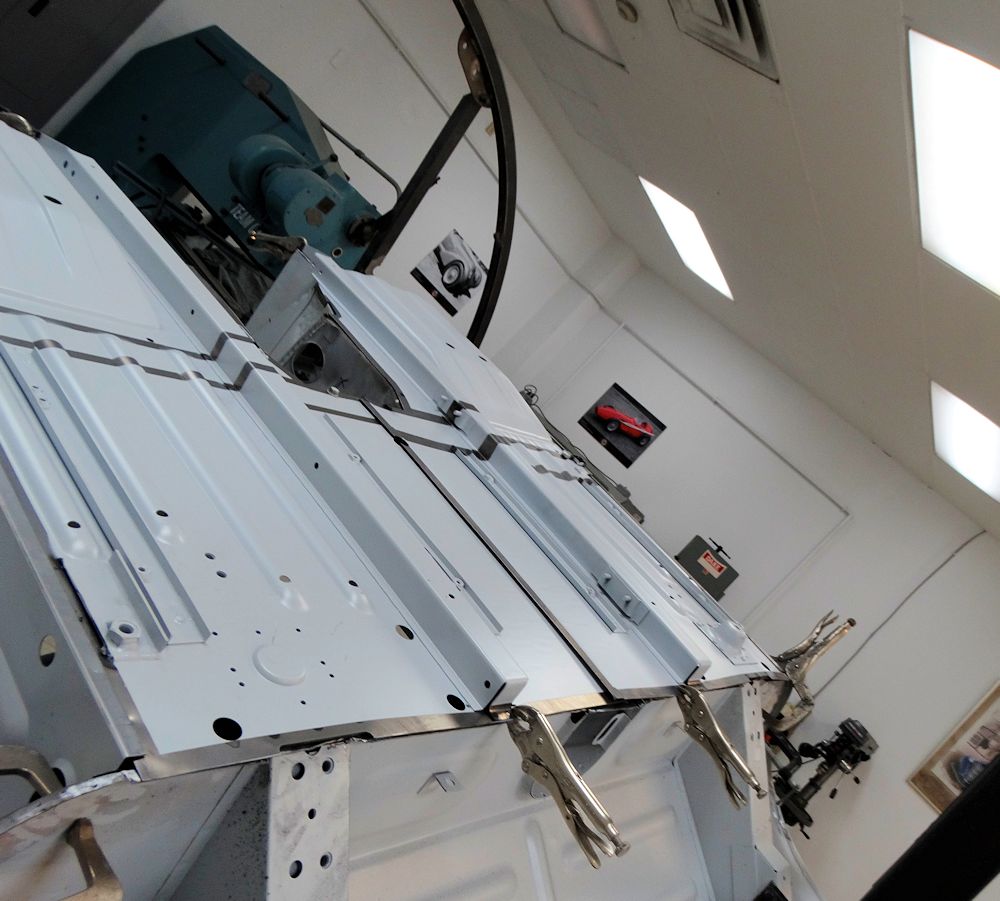
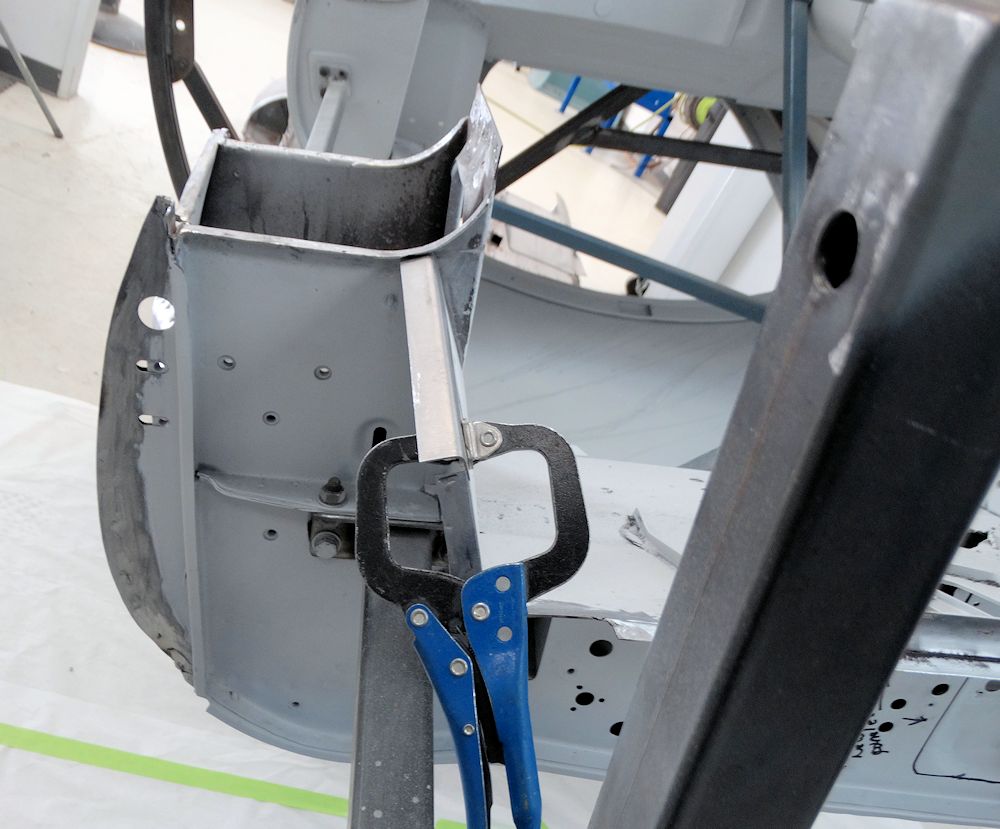
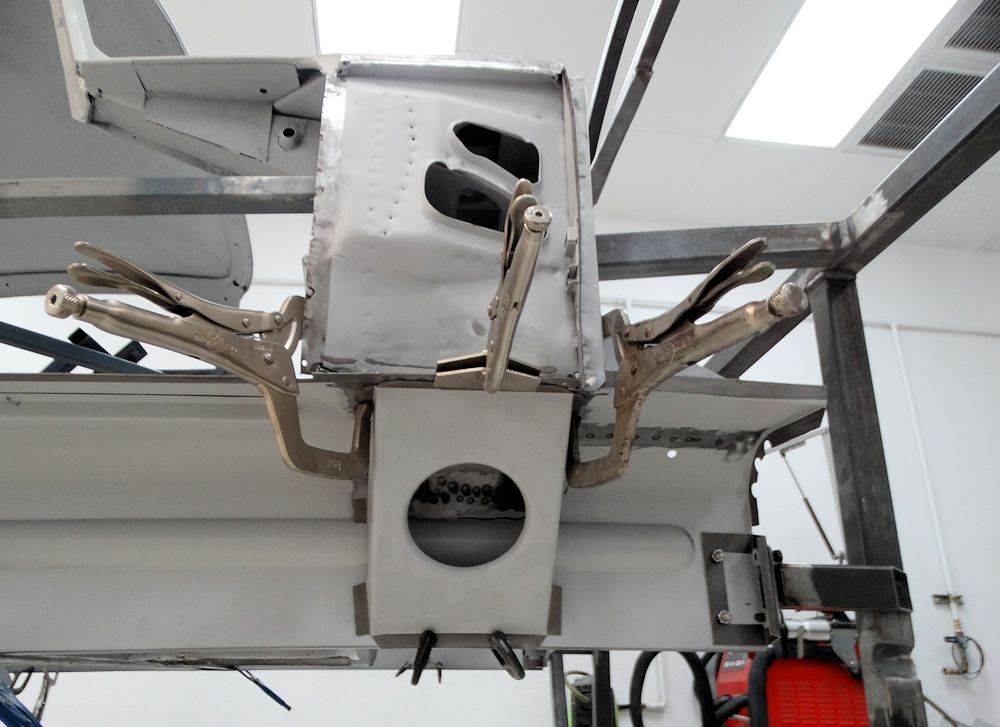
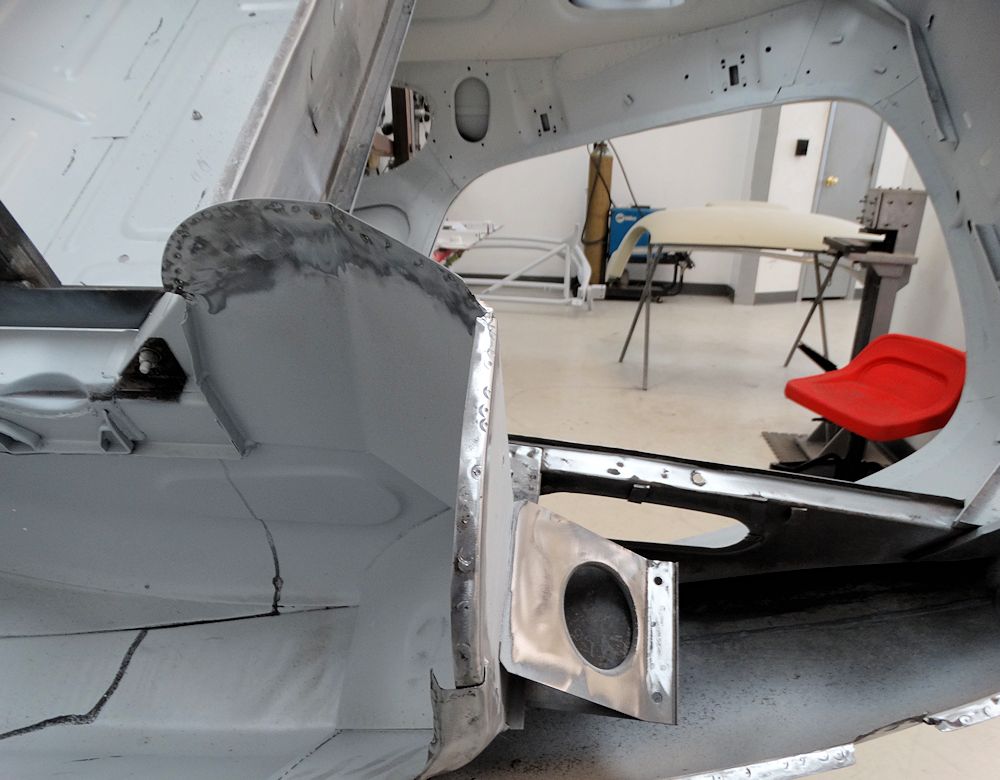
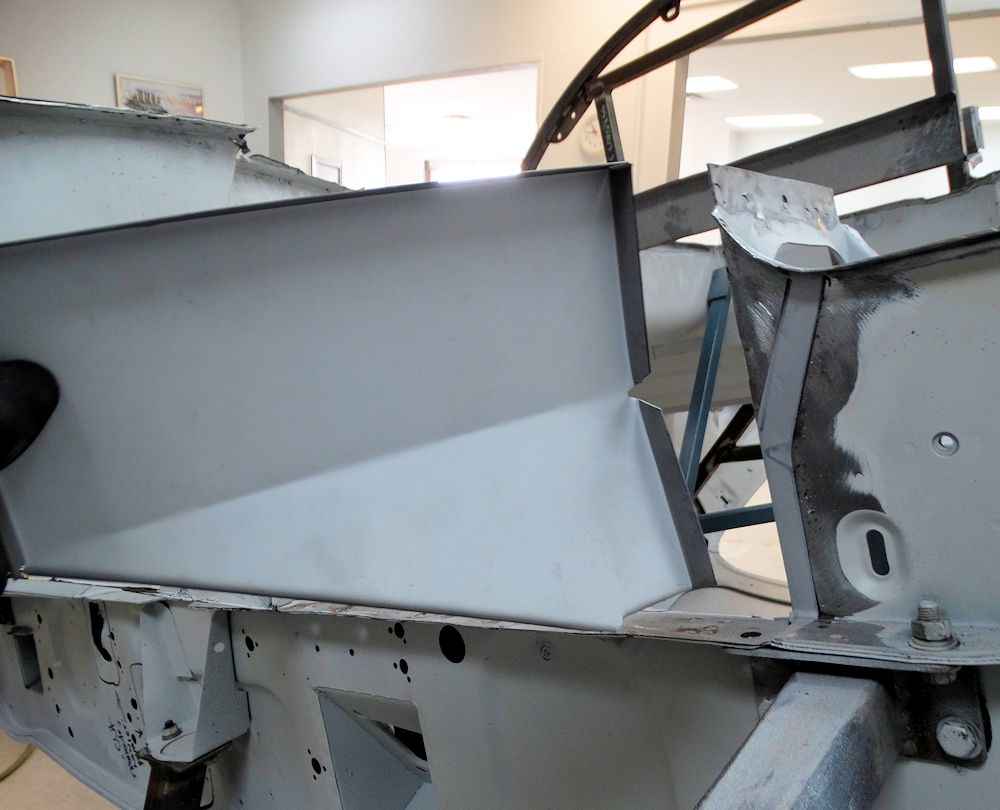
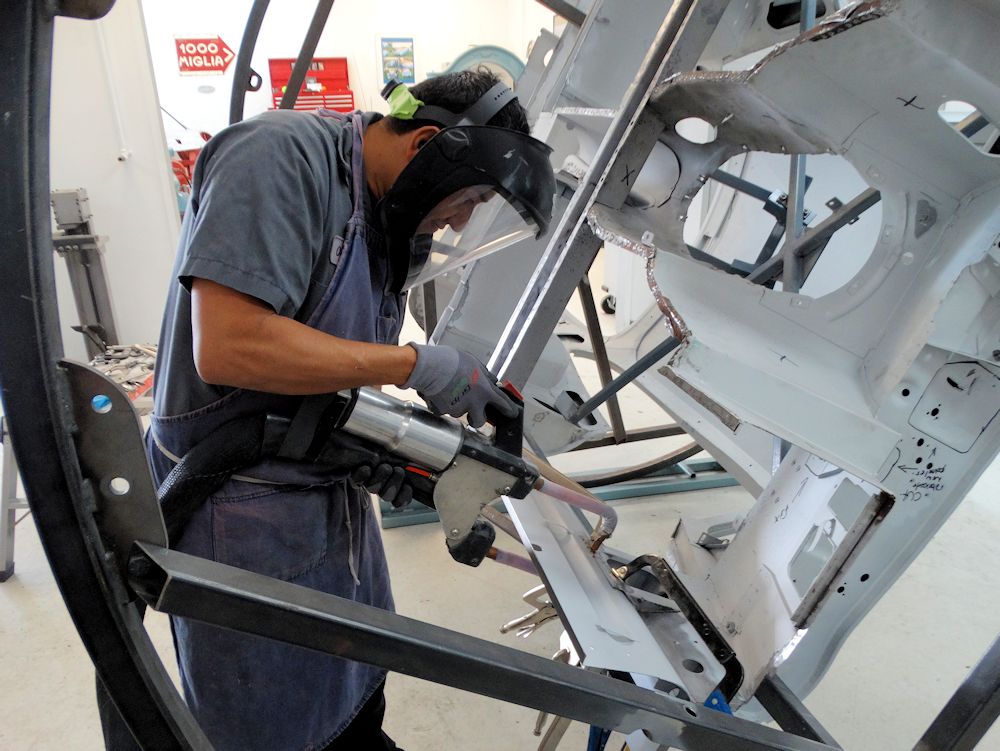
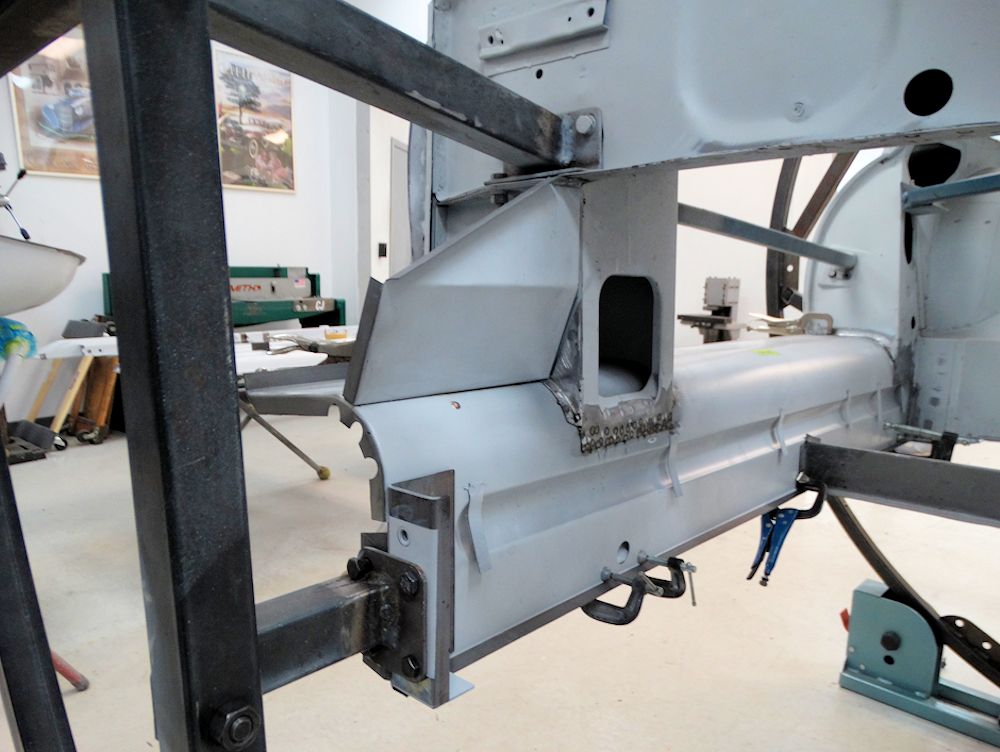
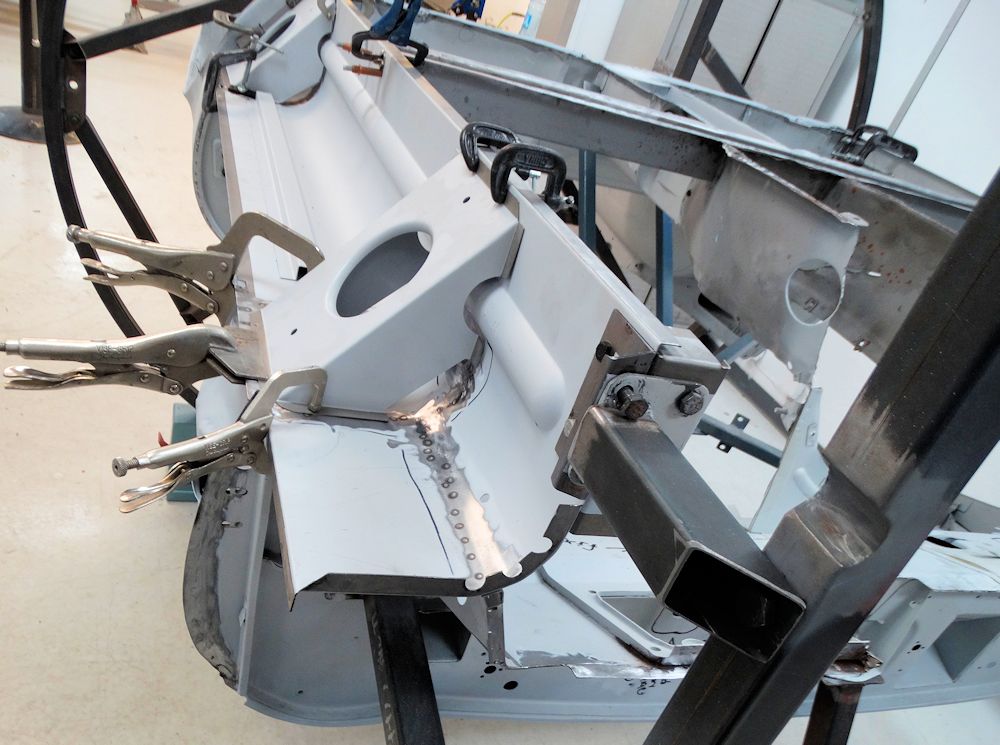
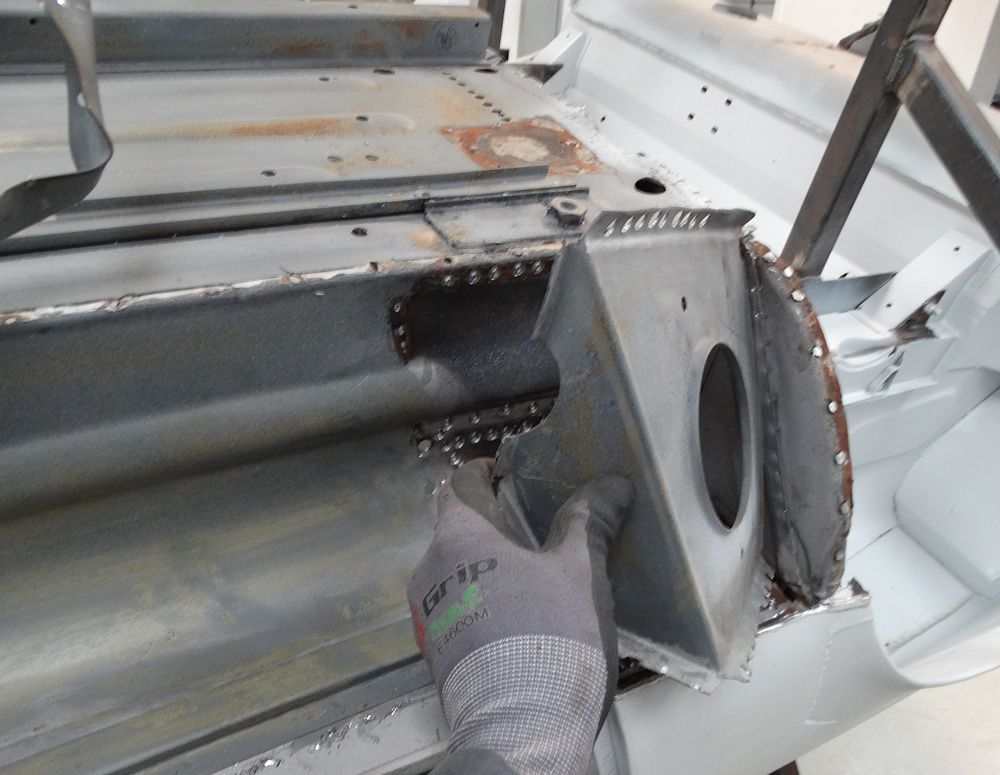
The following sequence of photographs show Oscar welding the bell housing side panels, transmission side panels and lower side frame anchor brackets in position.
 |
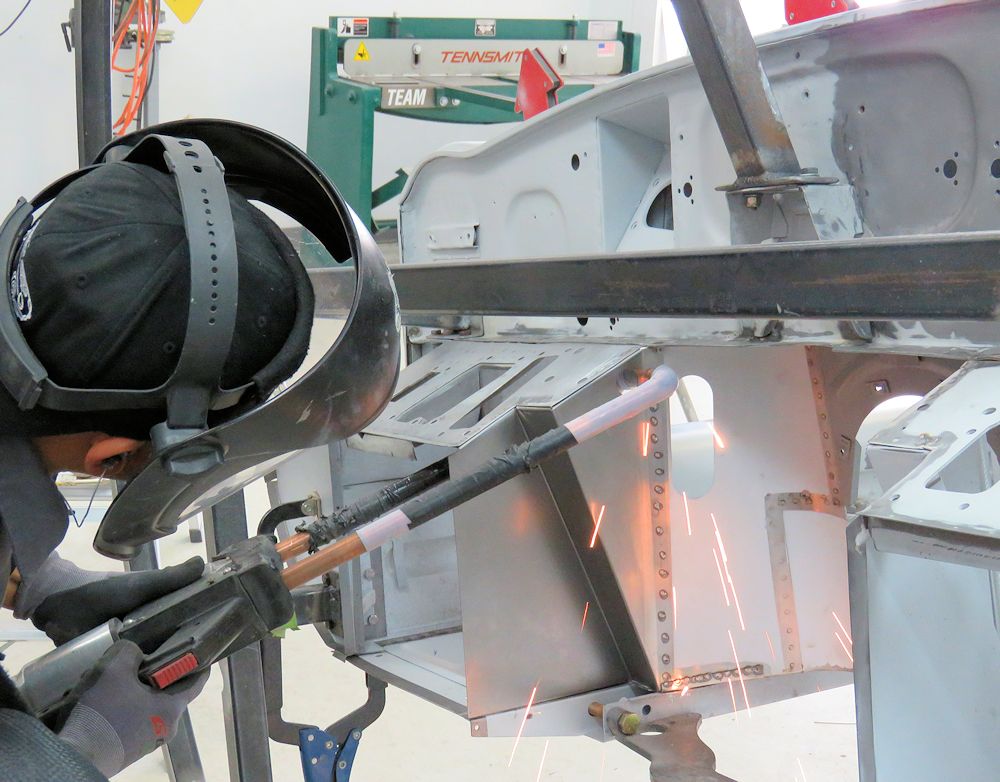 |
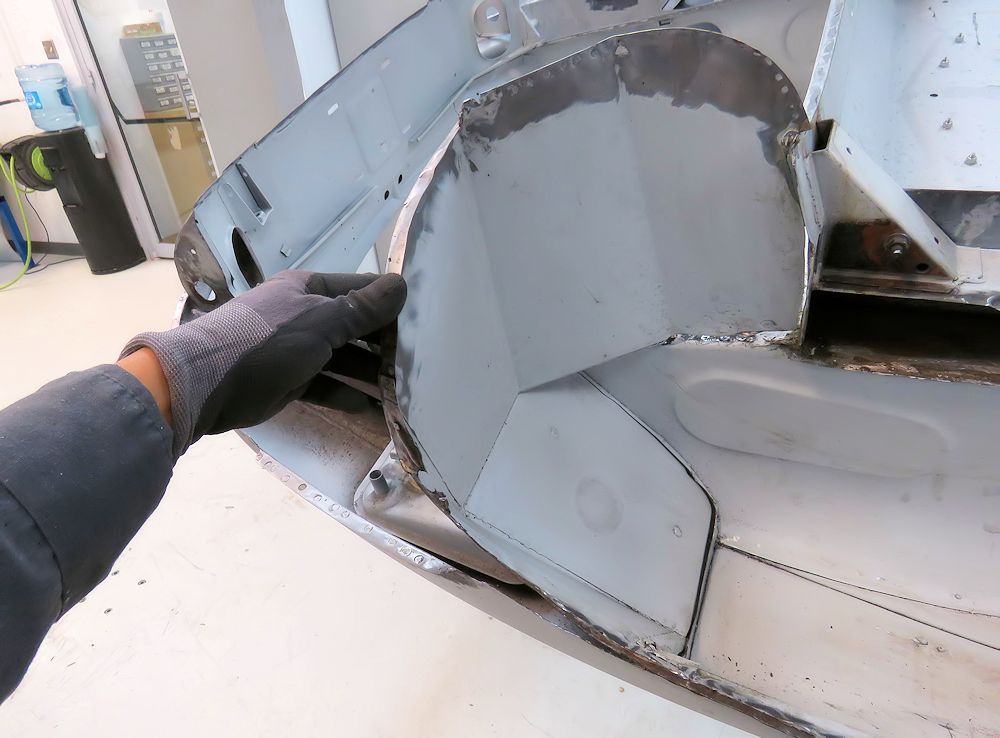
| Spot welding the RH bell housing side panel in position |
|
 |
 |
 |
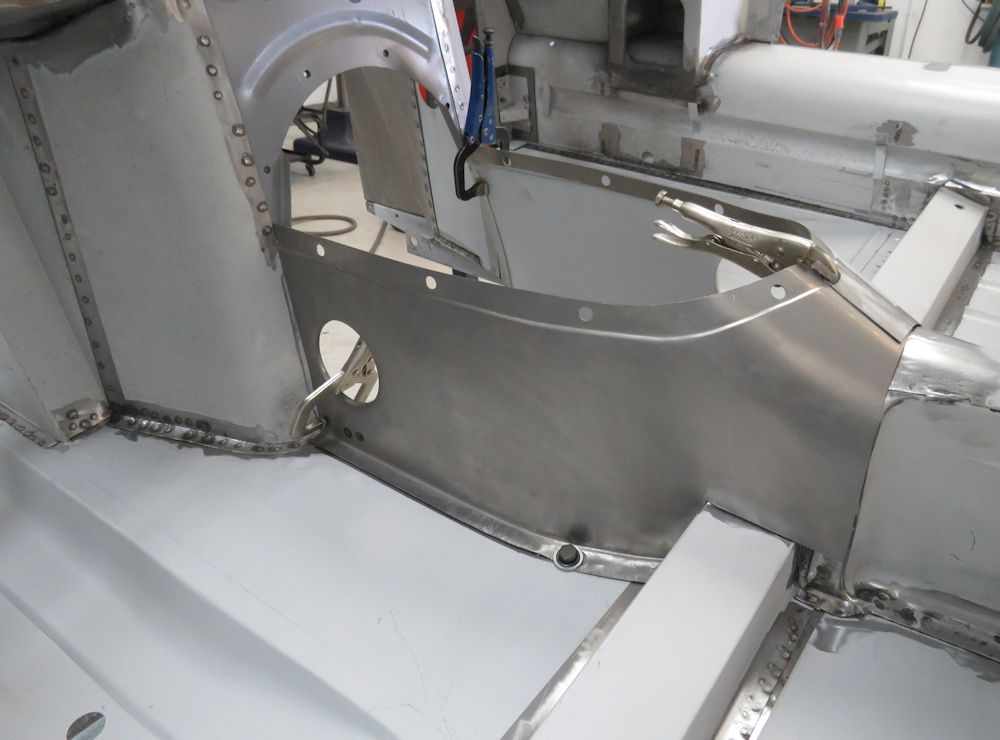 |
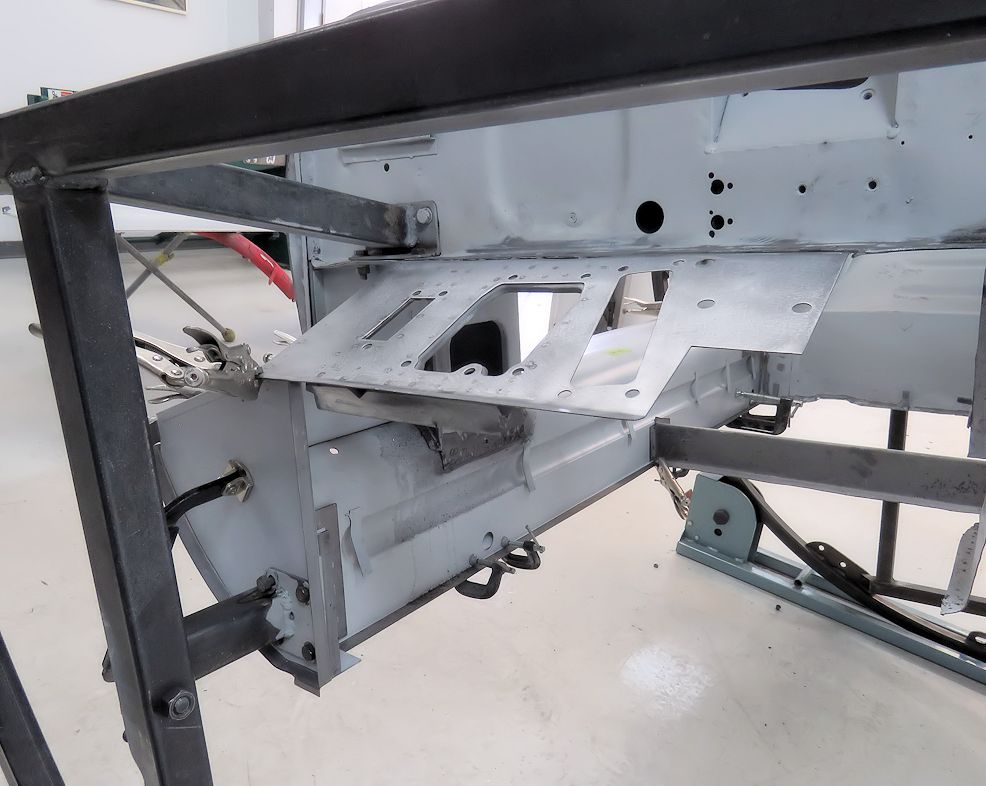
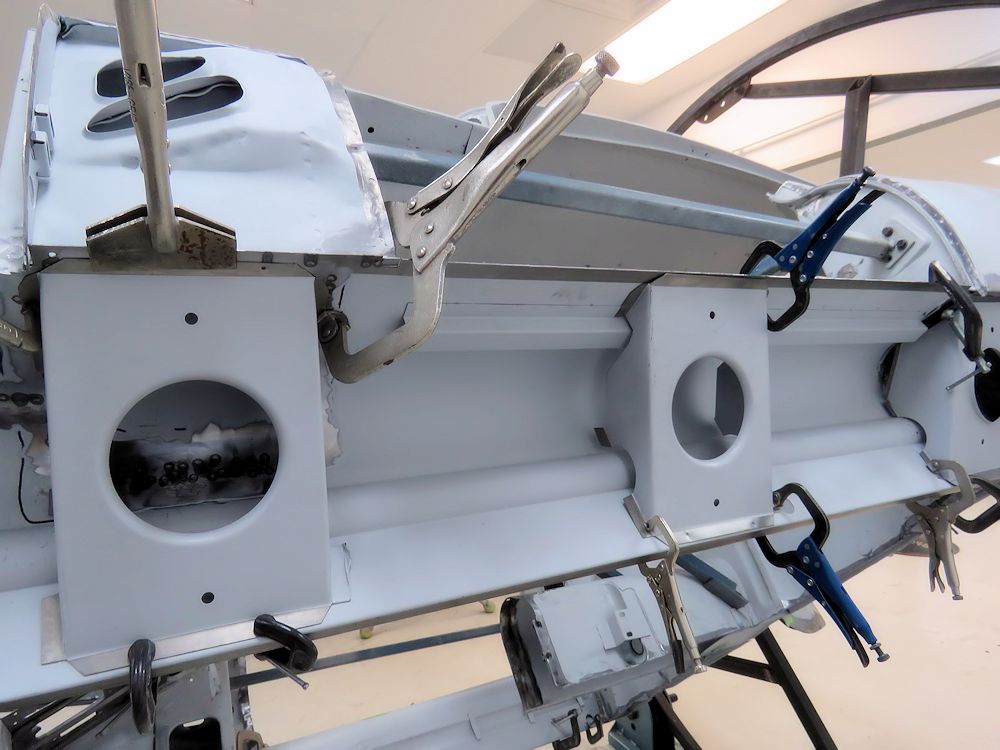
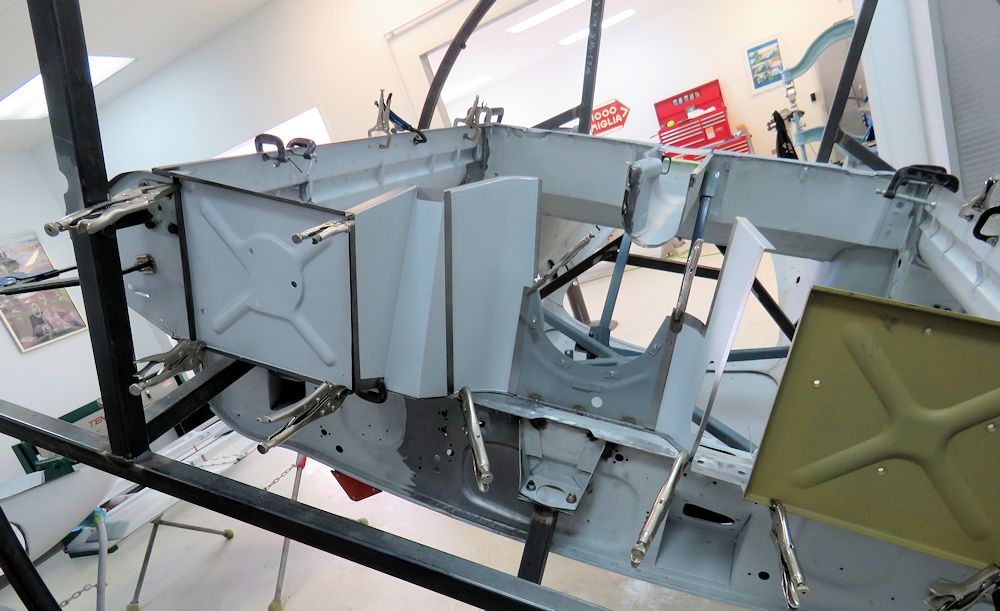
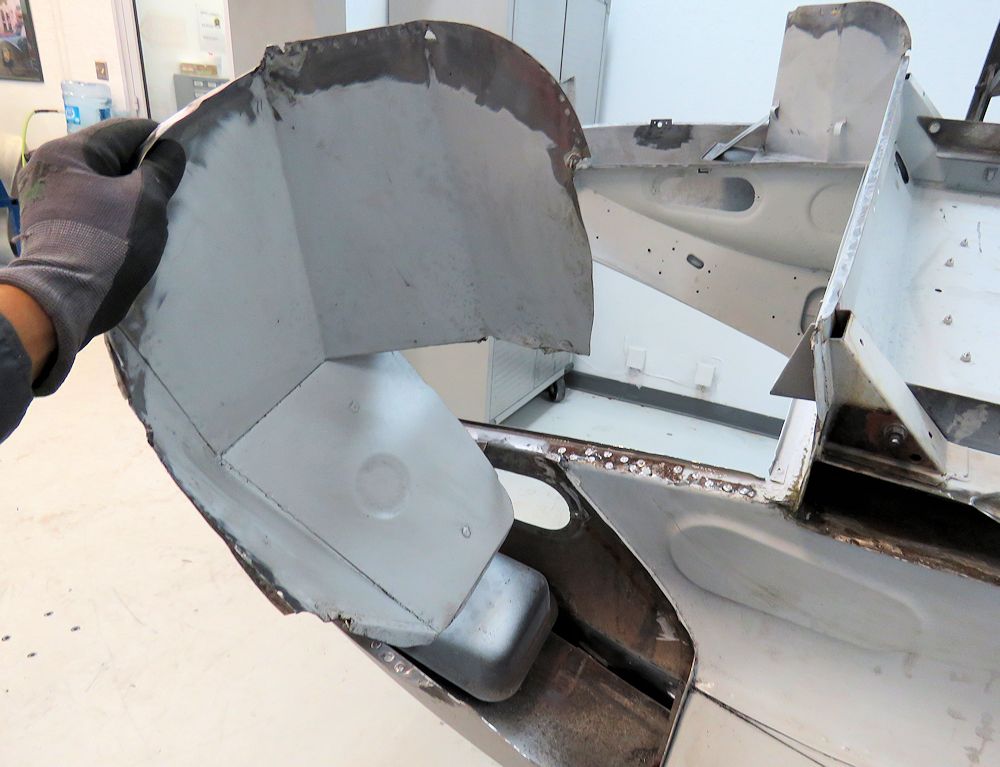
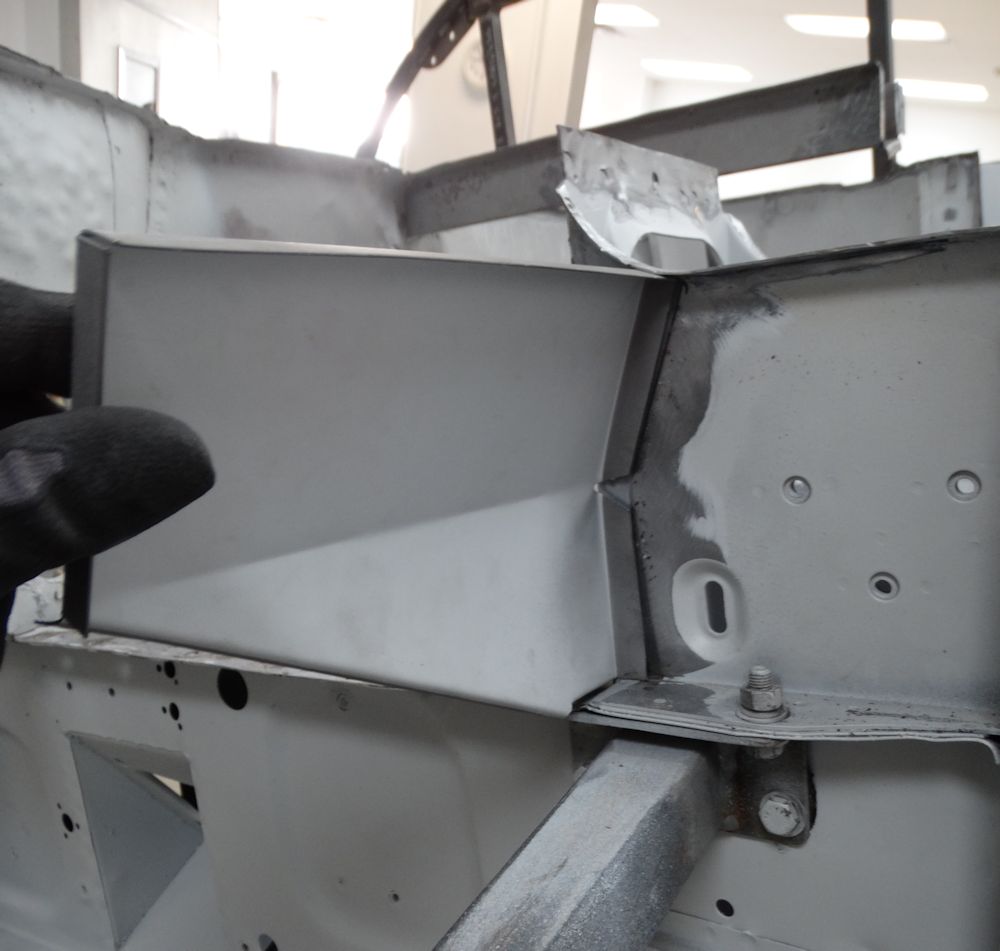
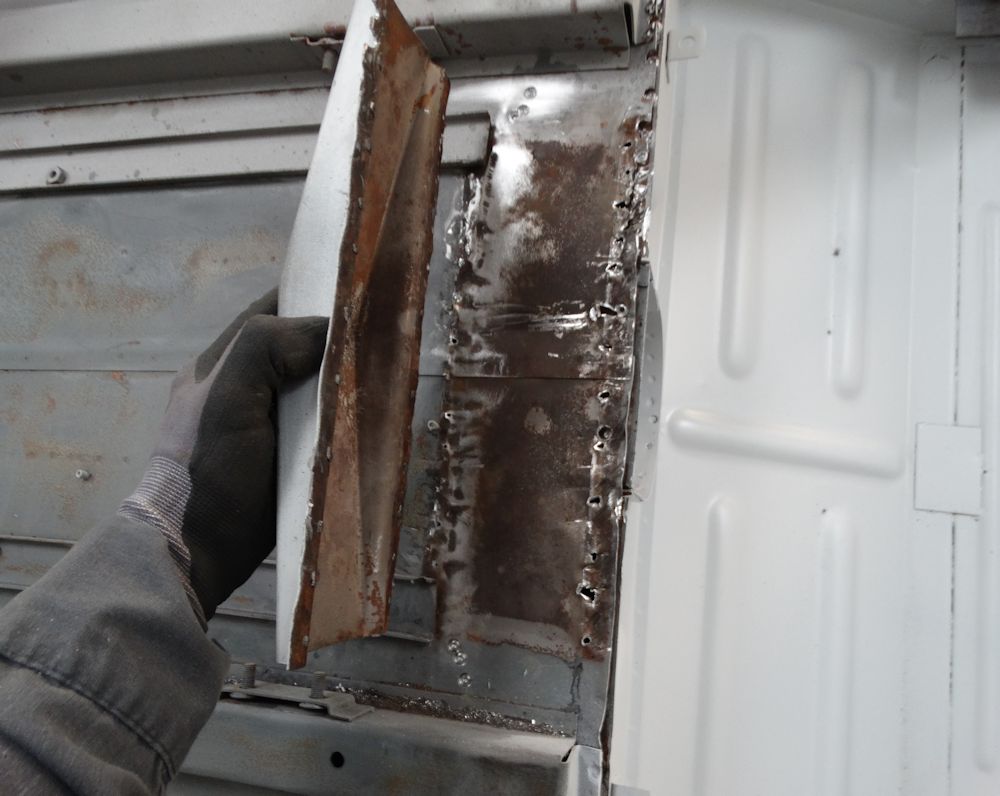
| Trial fitting the transmission side panels |
|
 |
 |
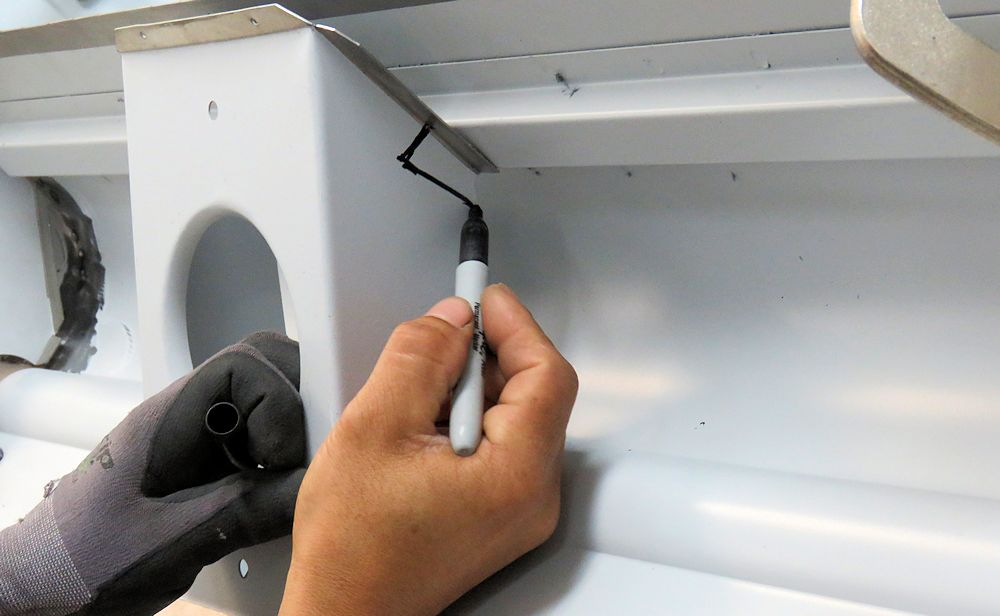
| Trimming floor opening to match shape of transmission side panels |
|
 |
 |
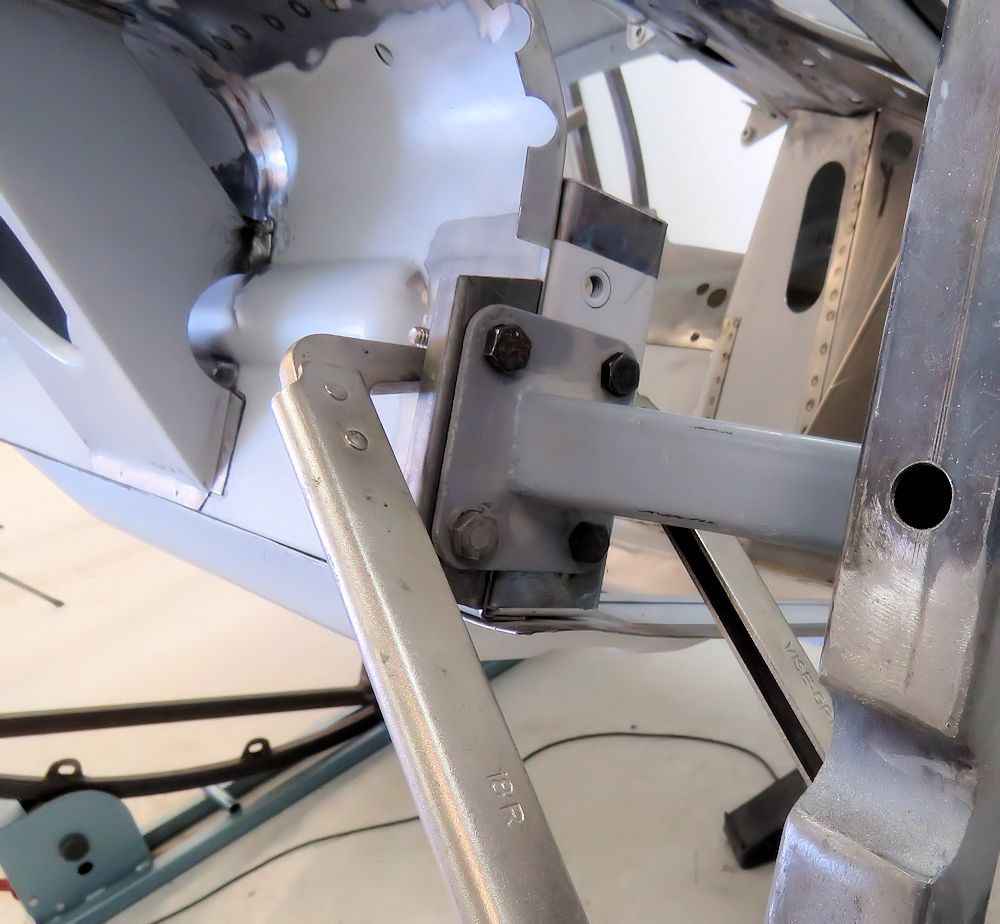
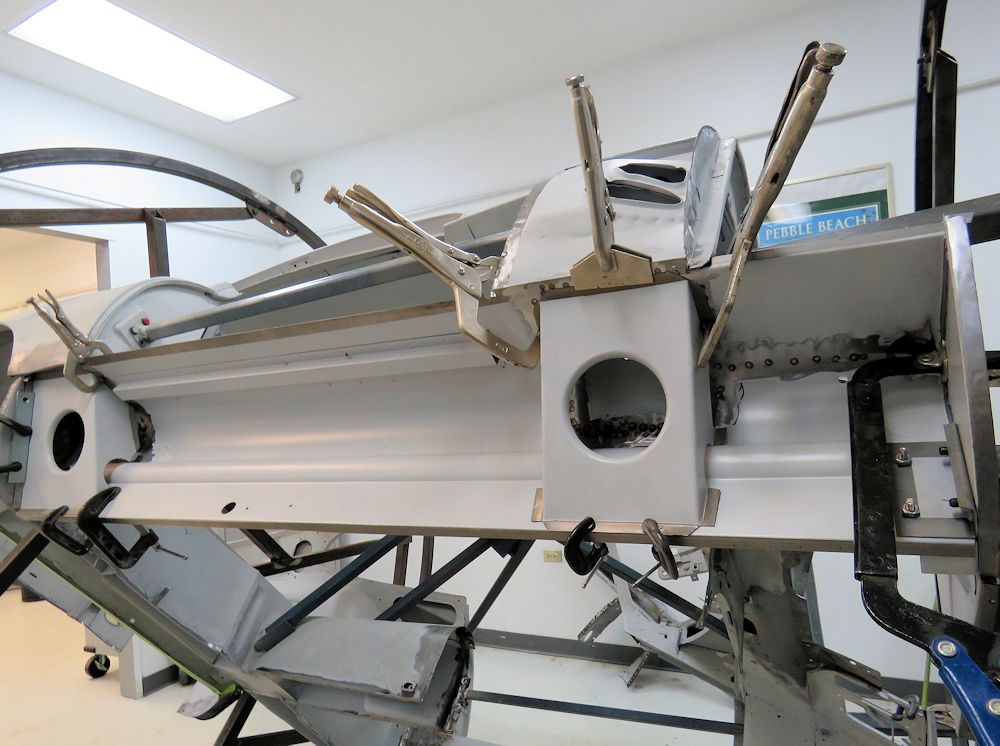
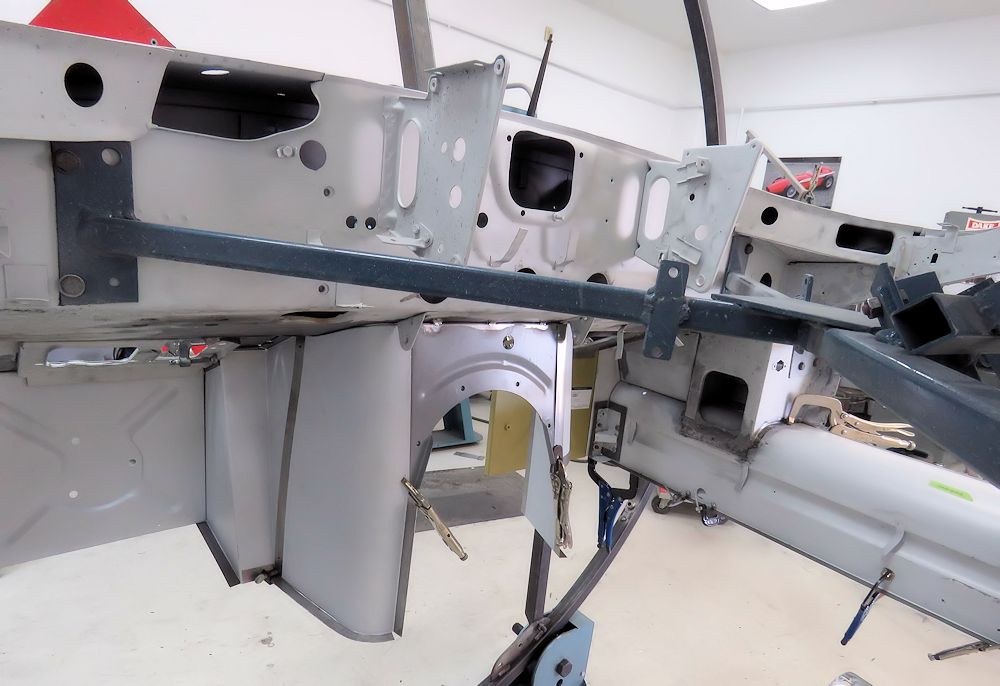
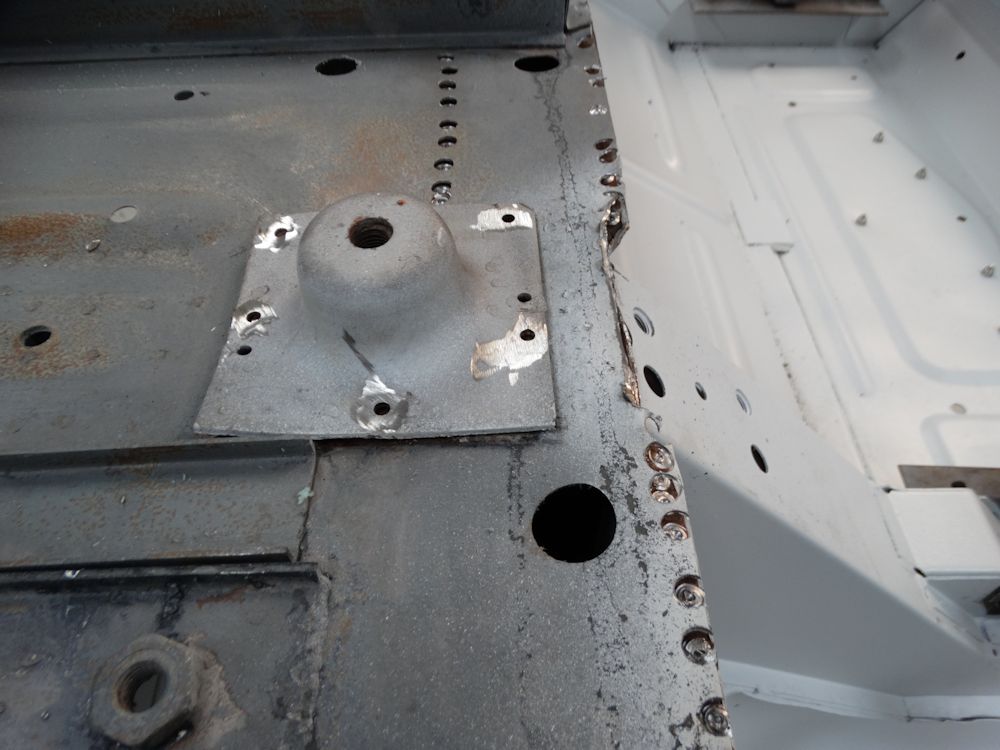
| Plotting position of new engine side frame lower anchor brackets |
|
 |
 |
| Welding new side frame brackets in place |
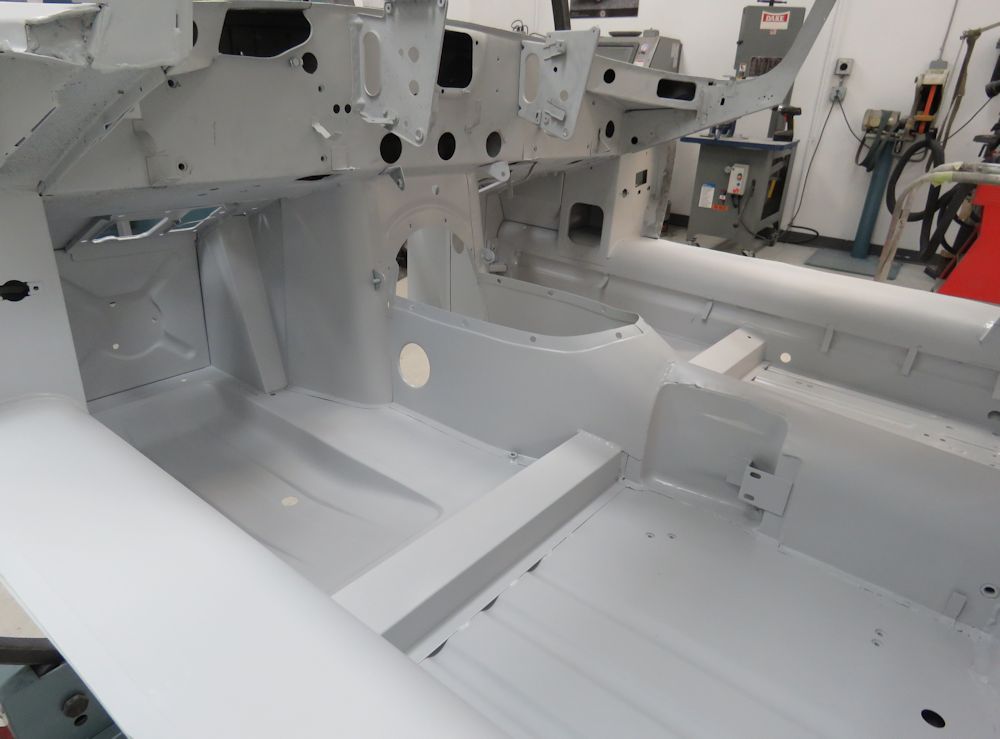
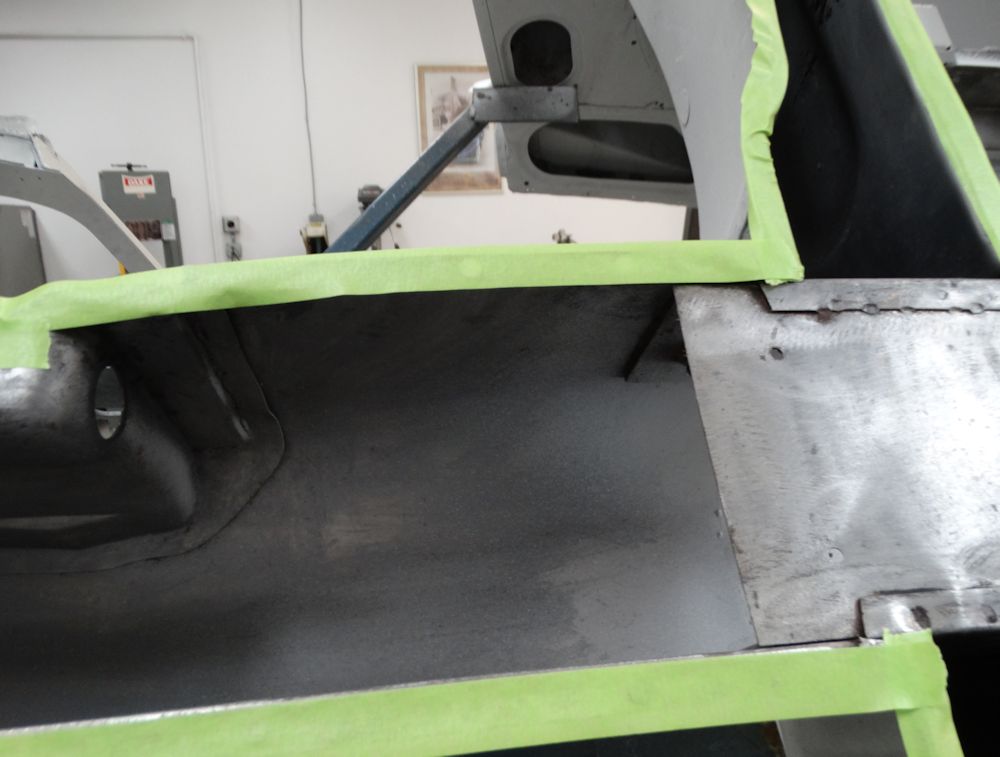
Oscar has now spot welded the main floors into place, having first rust proofed all the inner box sections that would eventually be enclosed when the floor panels were installed.
 |
 |
| Spot welding the additional inner sill gusset in place |
|
 |
 |
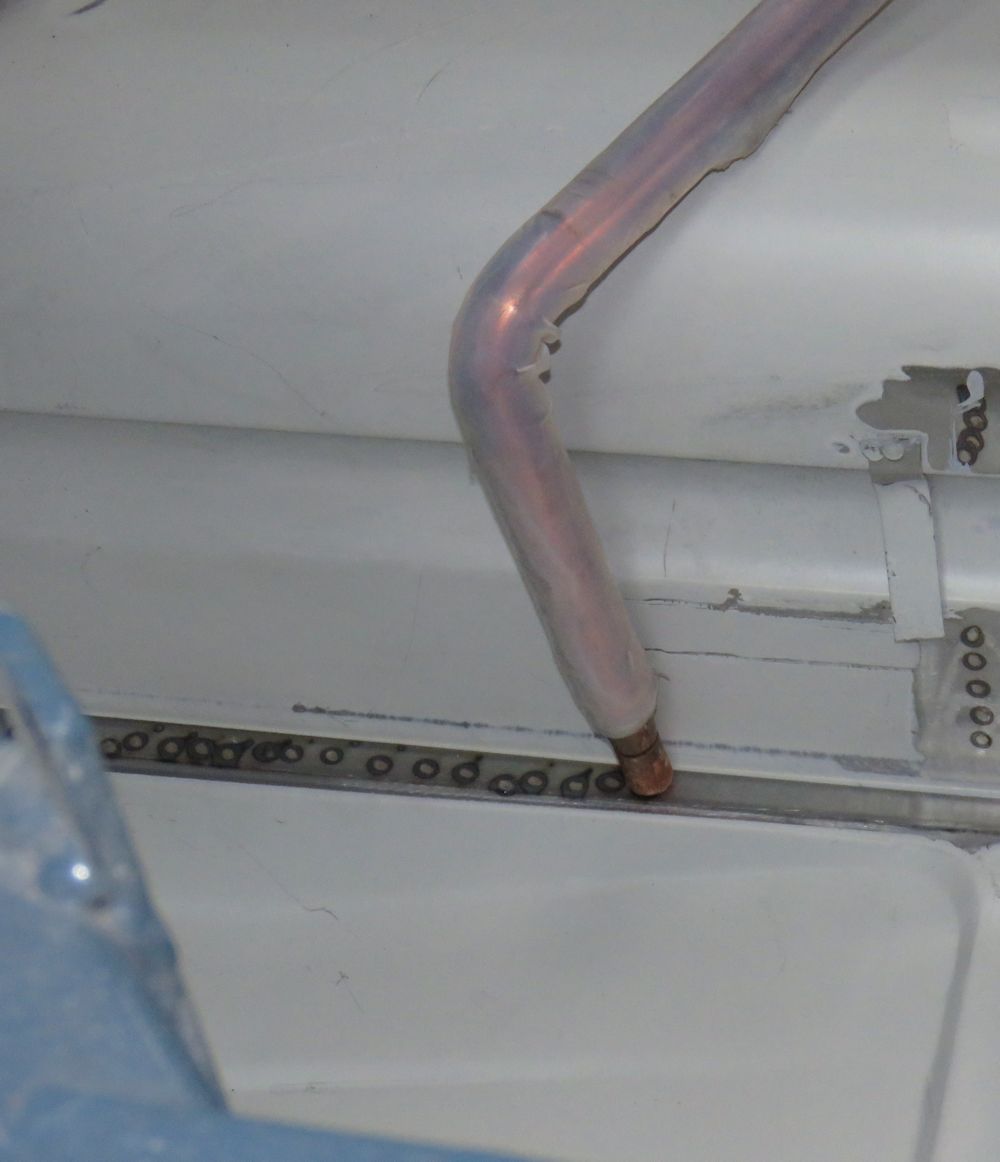
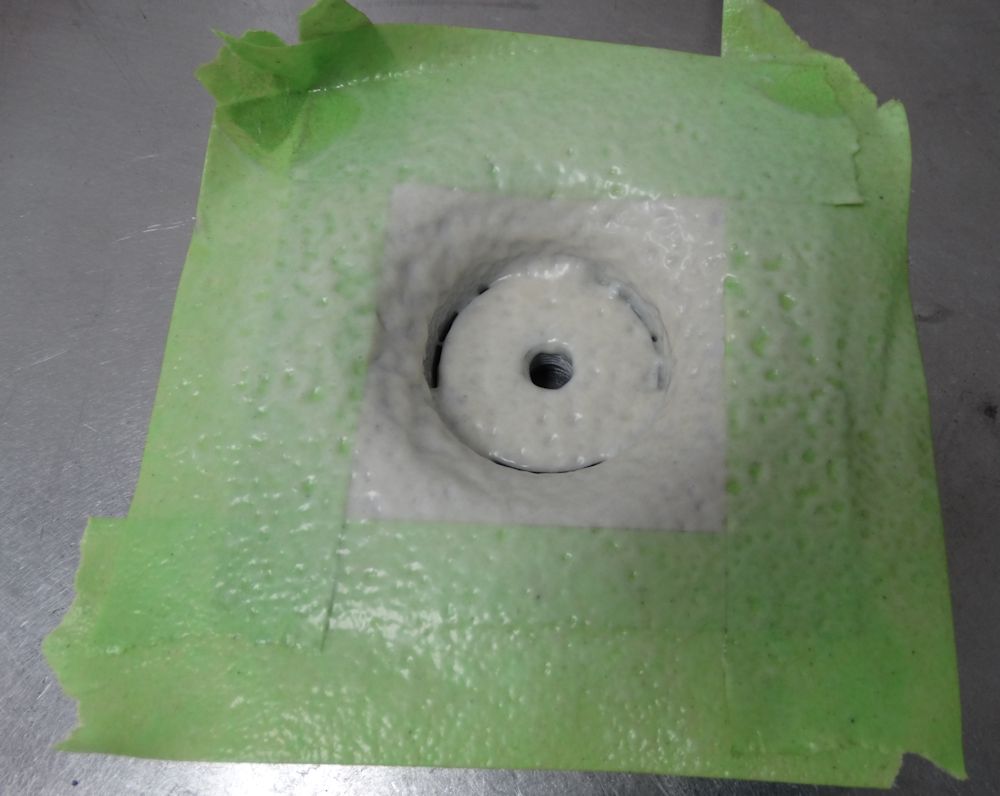
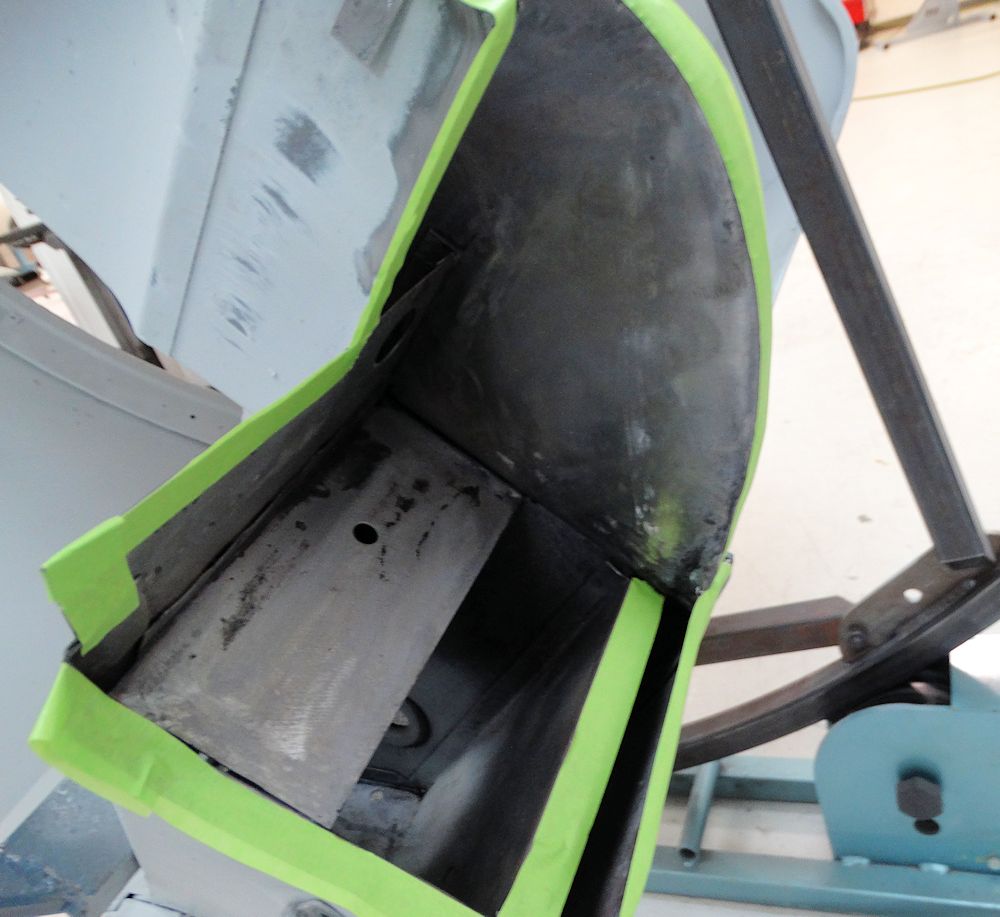
| Rust proofing the main cross-member and up
inside the rear bulkhead |
|
 |
 |
| We have used Wurth Body Wax for more than 20 years |
Applying body wax inside rear bulkhead |
 |
 |
| View inside rear bulkhead |
|
 |
 |
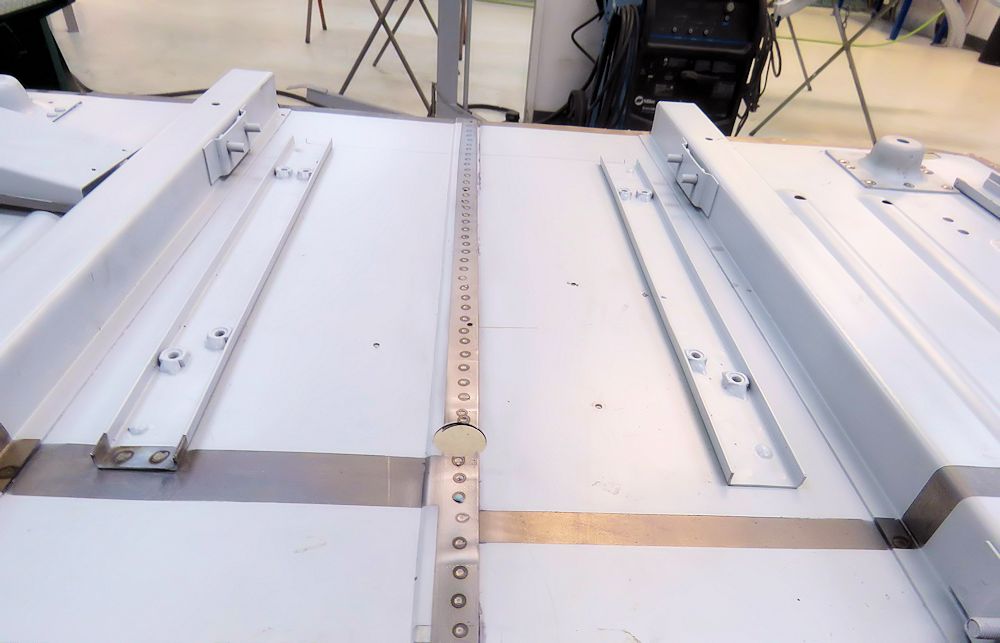
| Spot welding left and right floors together along the center line |
|
 |
 |
| Spot welding the floors to the drive shaft
tunnel |
|
 |
 |
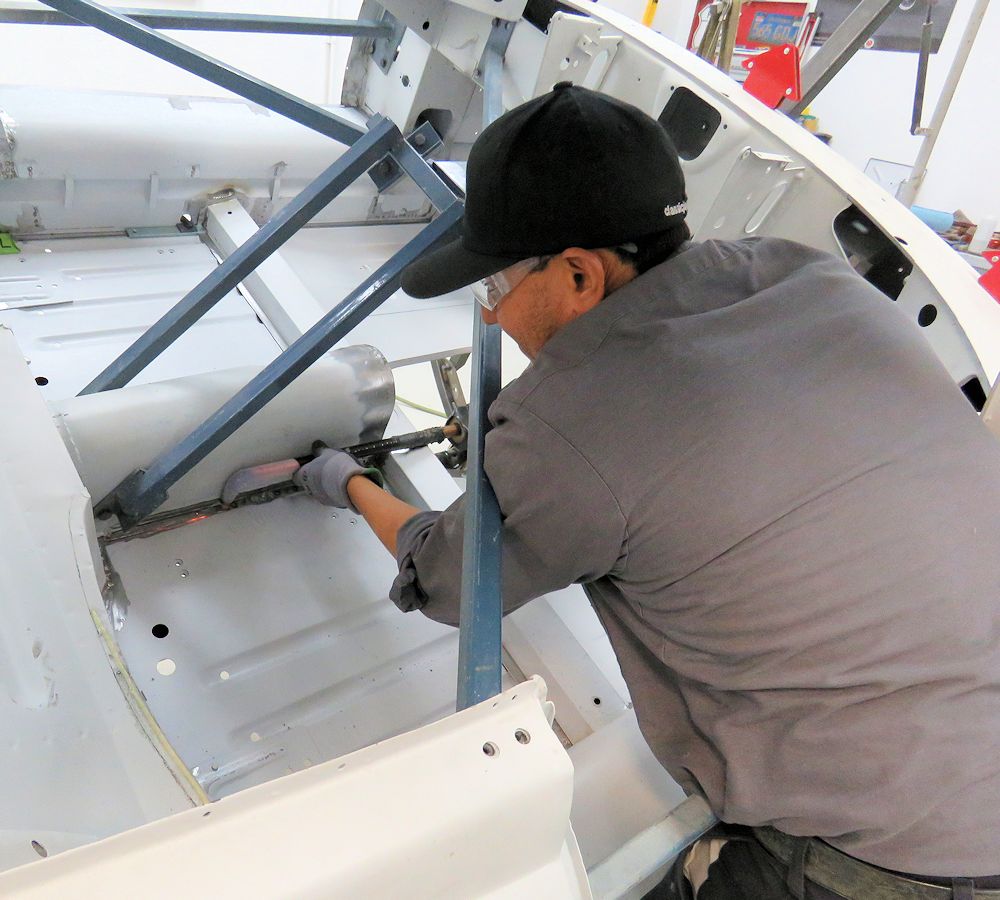
| Welding floors to the main cabin cross-member |
And to the inner sills... |
 |
 |
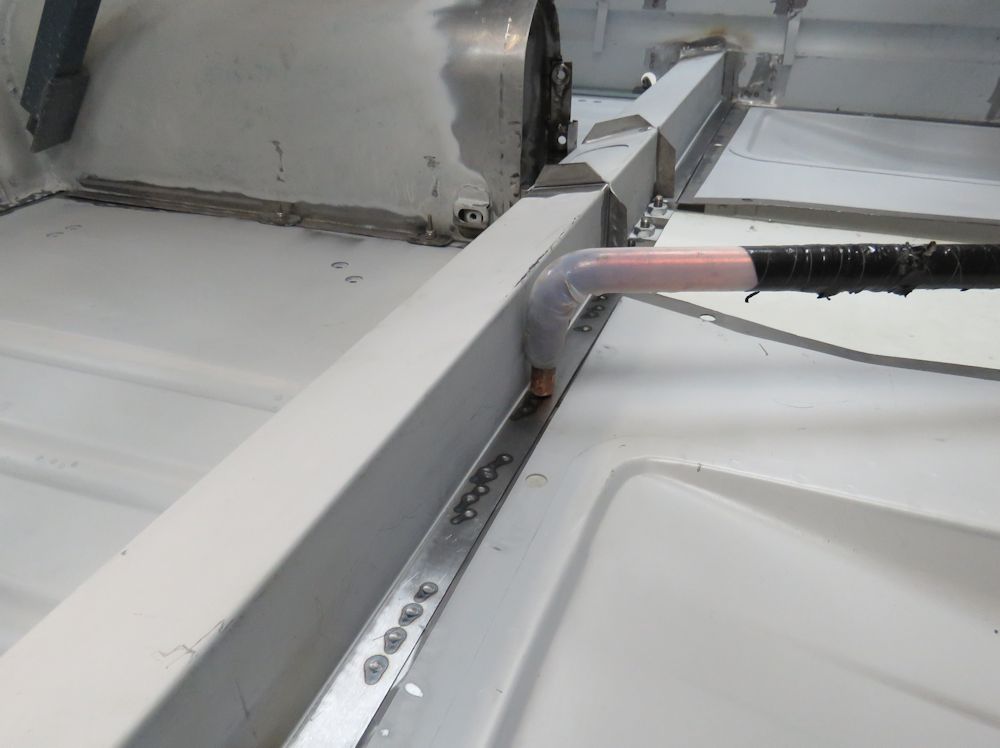
| Several hundred spot welds now hold the floors
and inner sills together |
Oscar has been hard at it since my last update, making excellent progress!
 |
 |
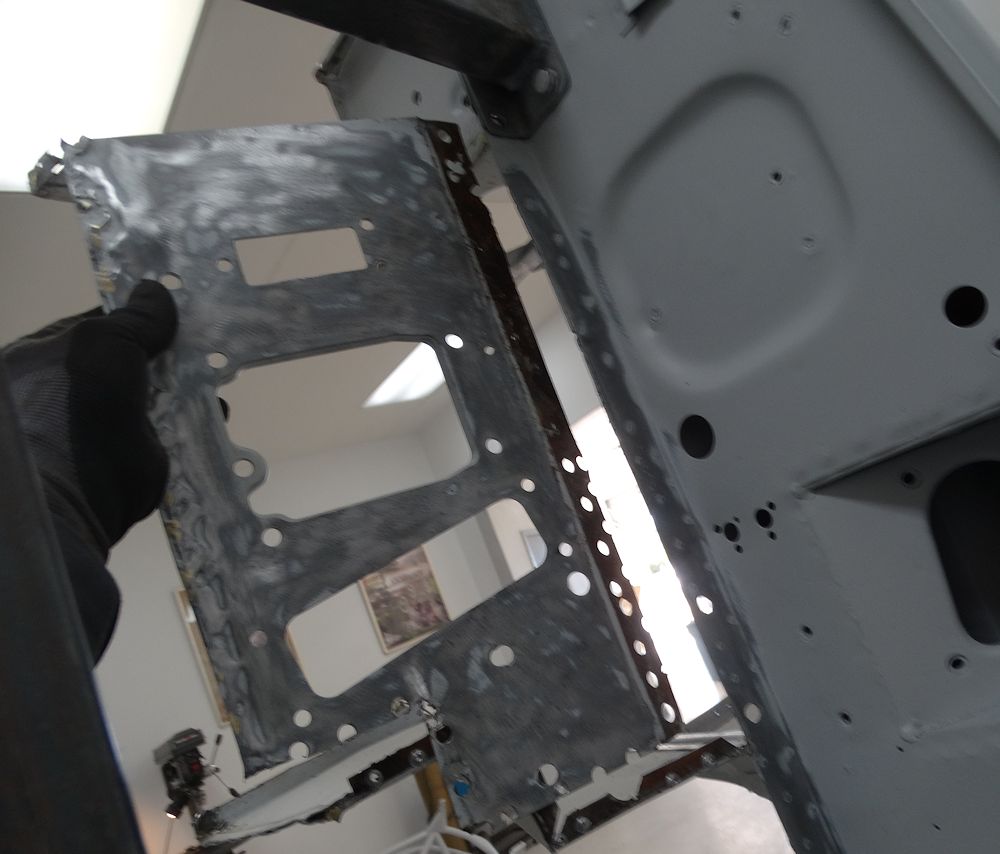
| Separating bracing plate from rear of old pedal box panel |
|
 |
 |
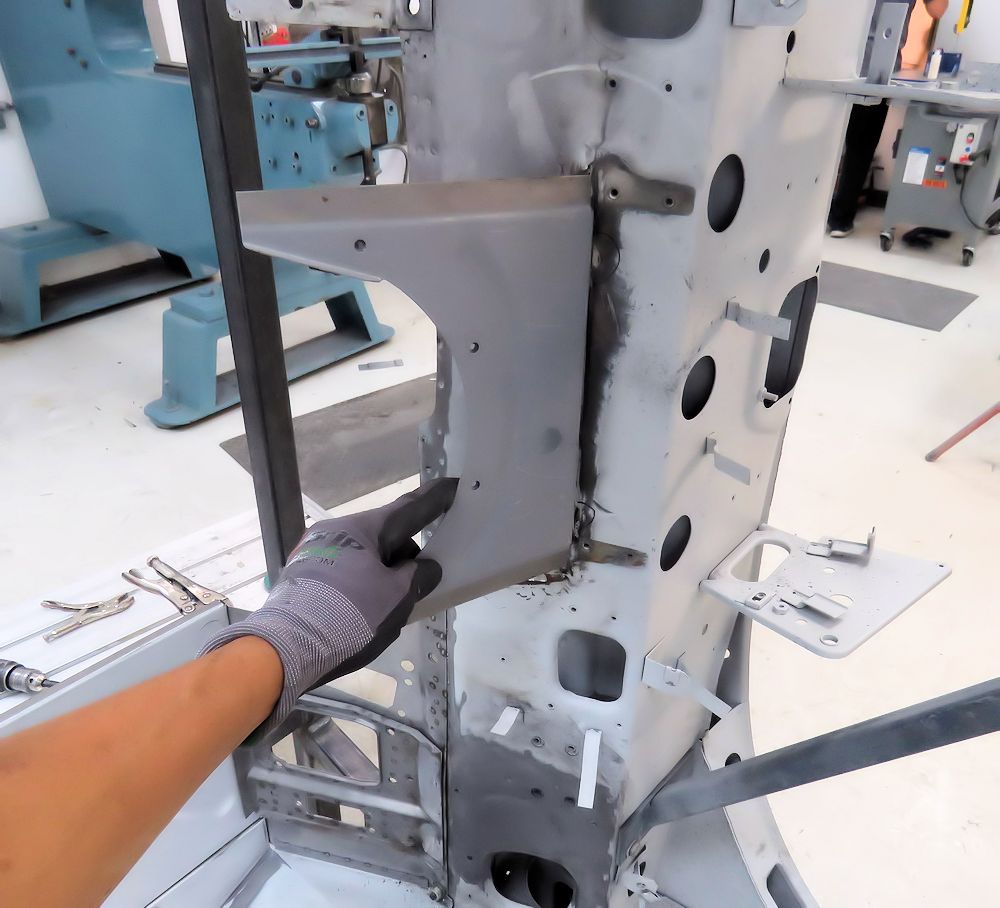
| Preparing to spot weld bracing plate to new
panel |
|
 |
 |
| Welding new panel to body |
|
 |
 |
 |
 |
 |
 |
| Trial fitting additional (third) inner sill
gusset |
Marking relief required to fit flush with
inner sill |
 |
 |
 |
 |
 |
 |
| Center transmission bulkhead cut away |
|
 |
 |
 |
 |
| Preparing to weld new center transmission bulkhead in place |
|
 |
 |
| Starting to fit bell housing side panels |
|
 |
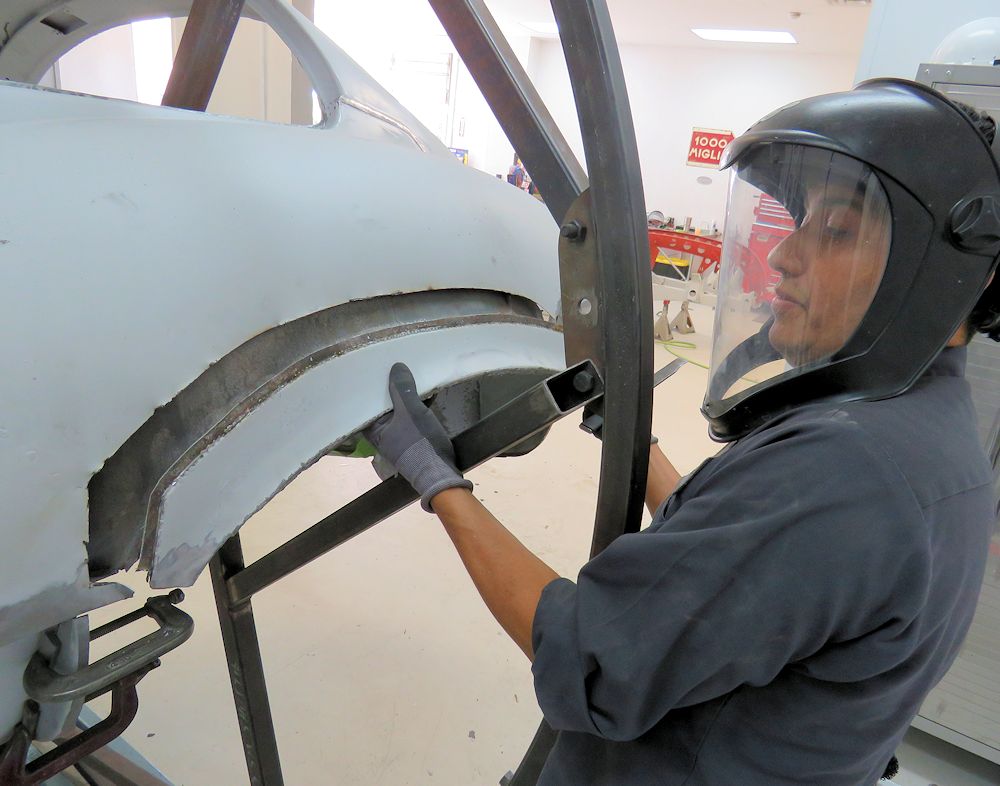 |
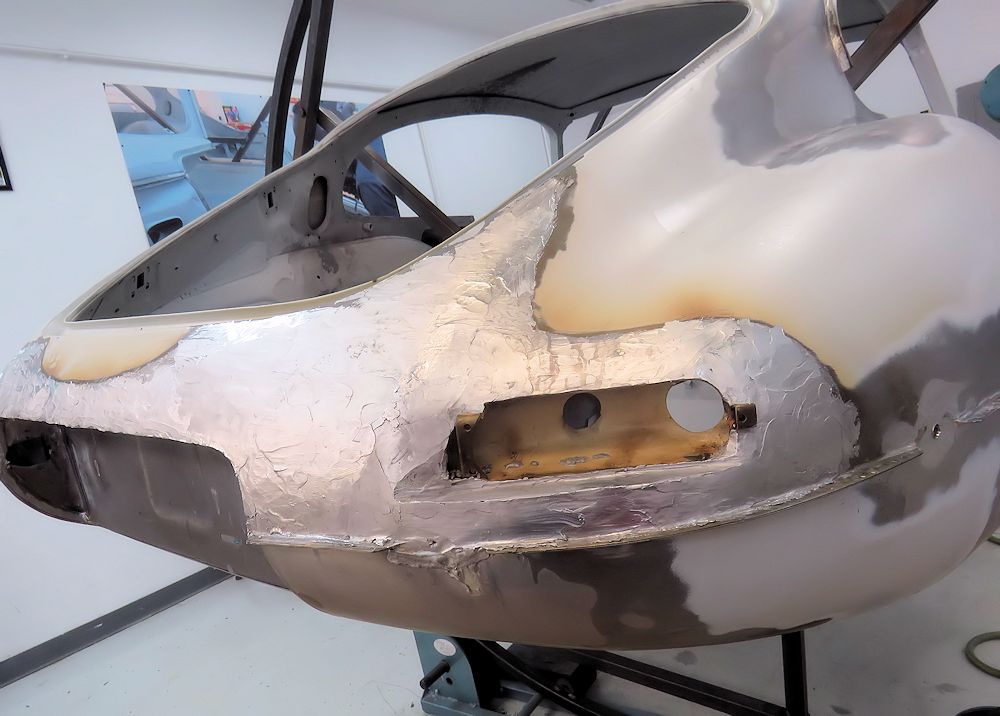
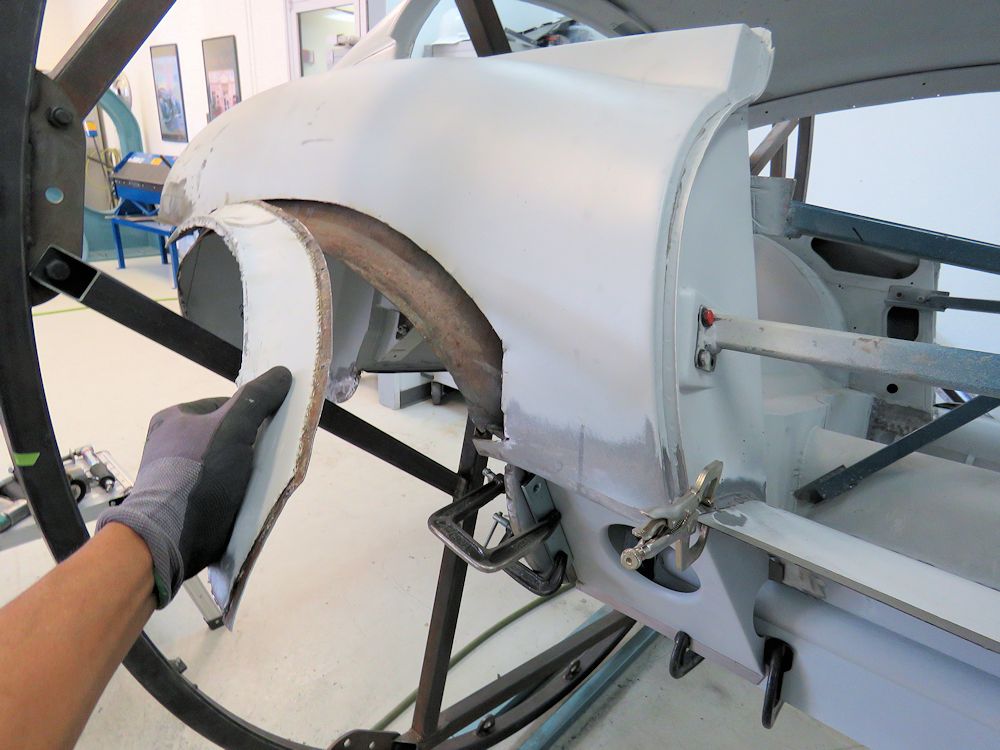
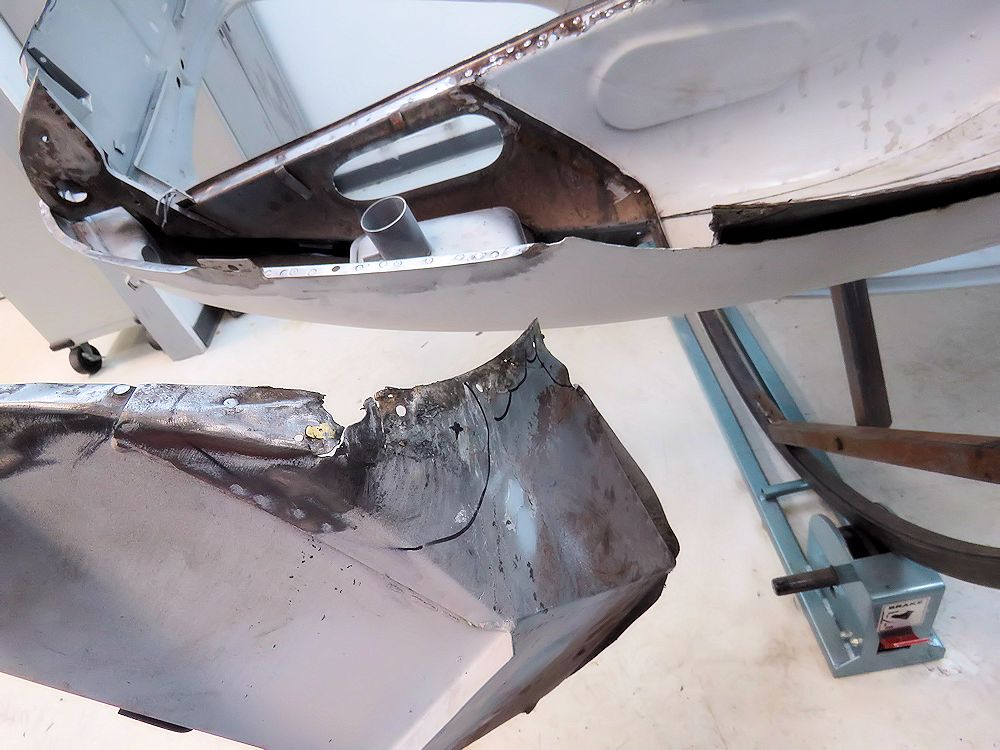
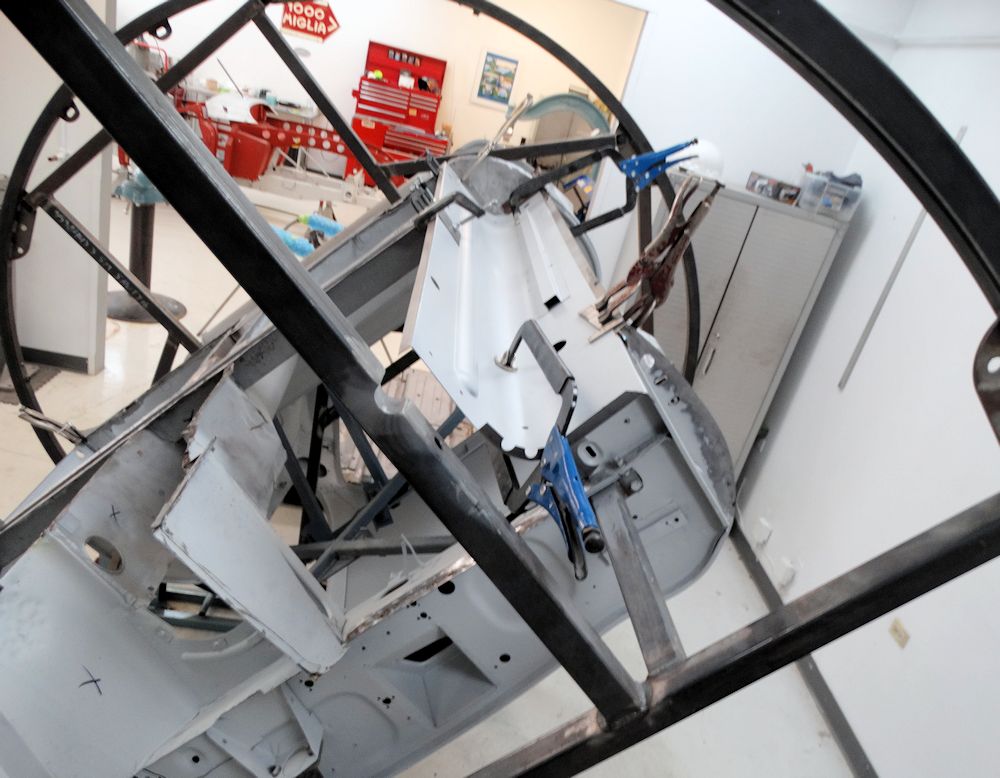
| Cutting away 'V12' flared wheel arches |
|
 |
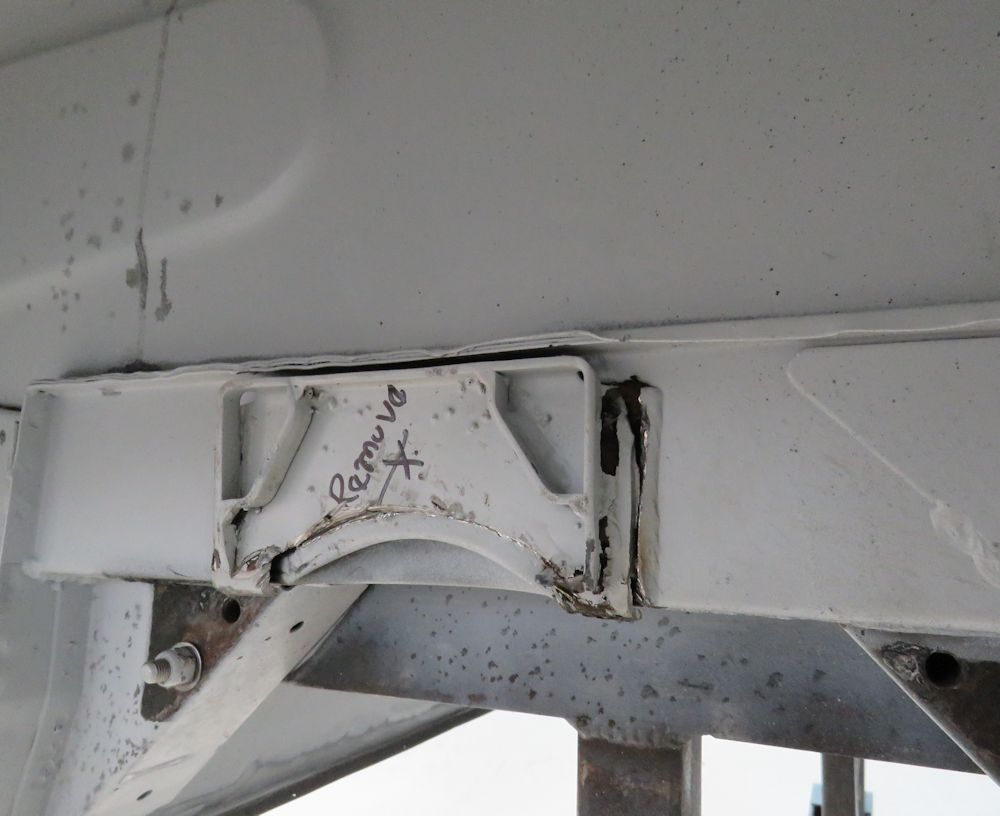 |
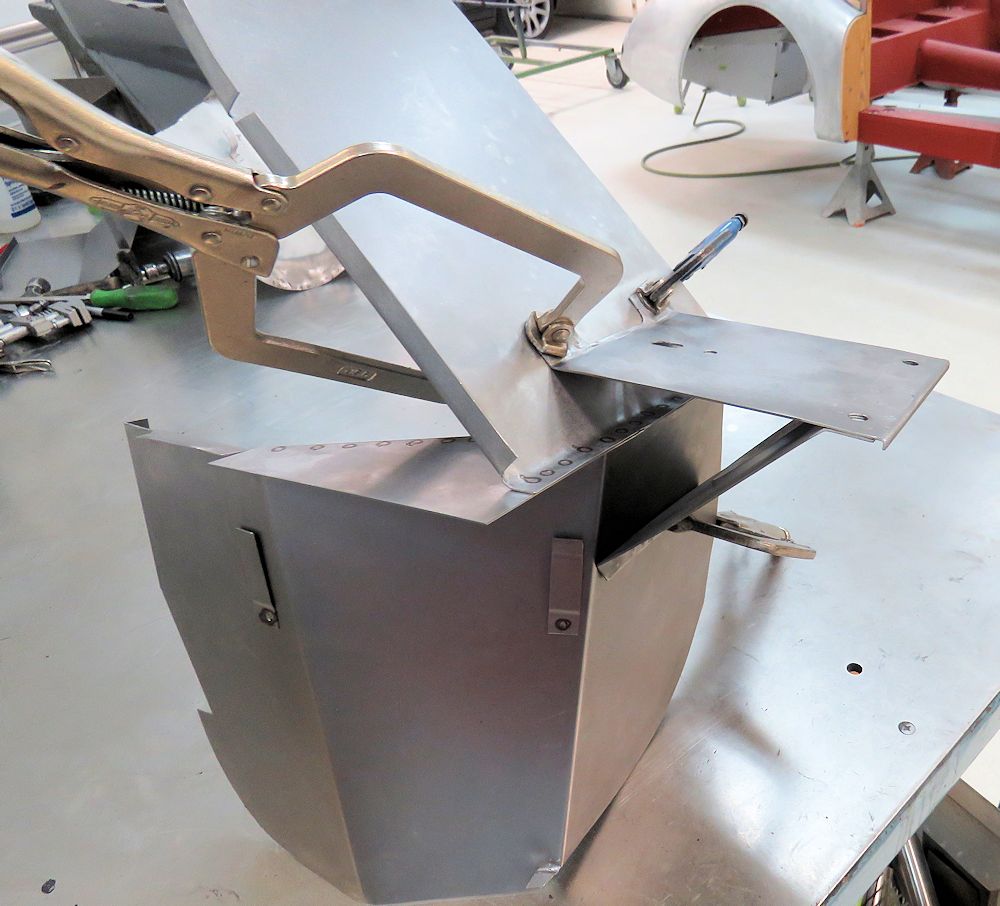
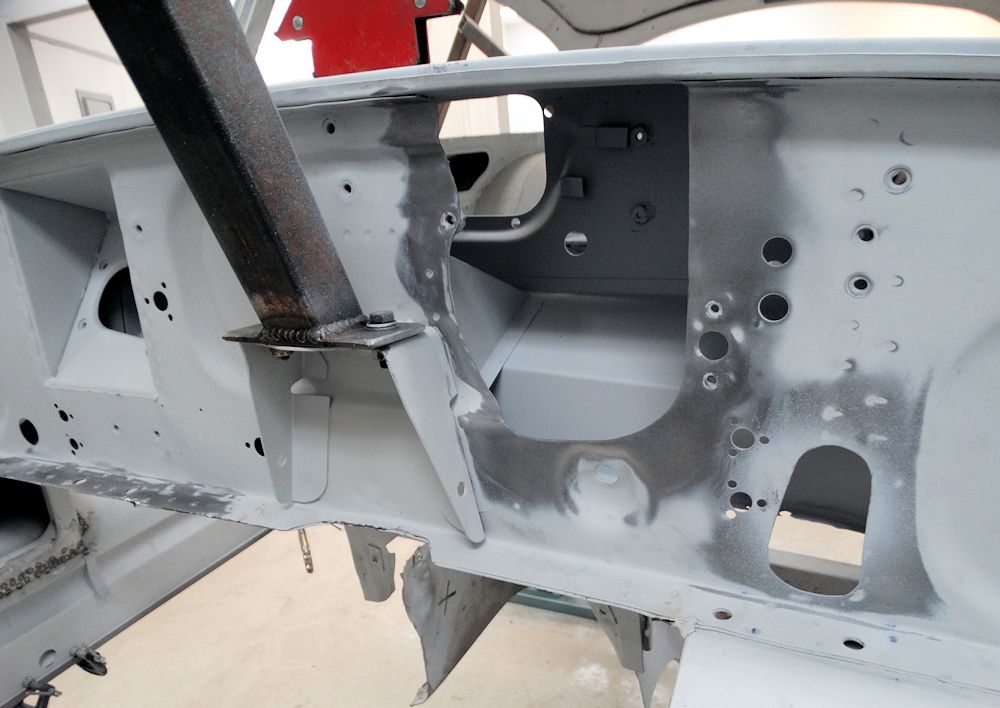
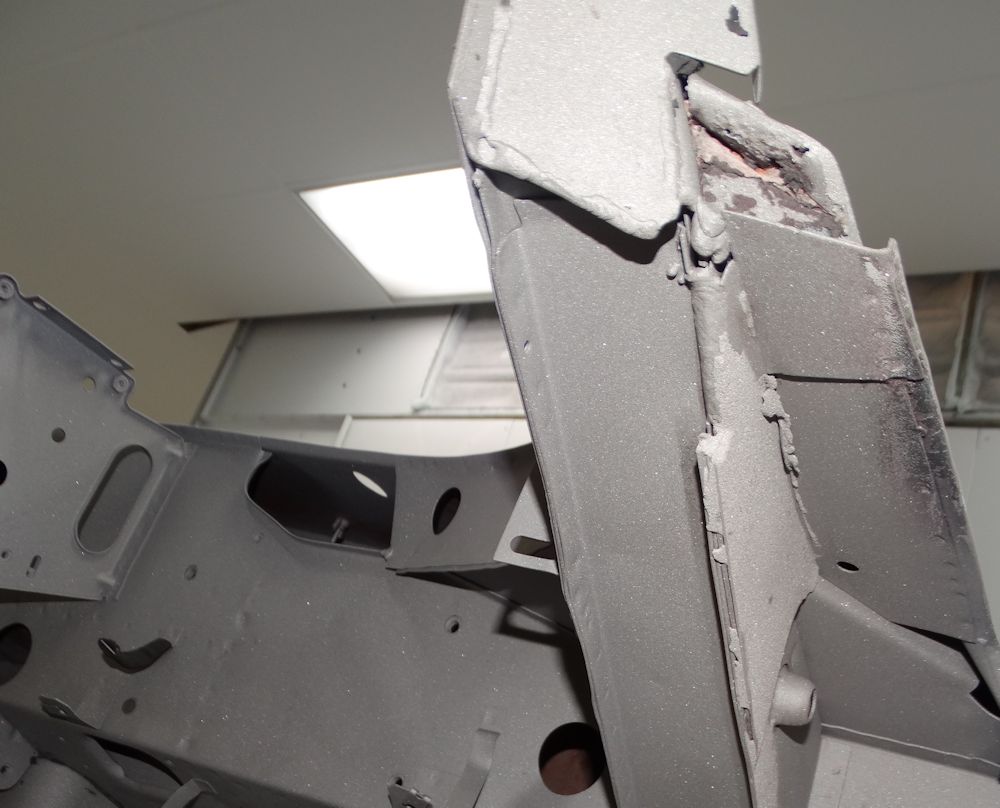
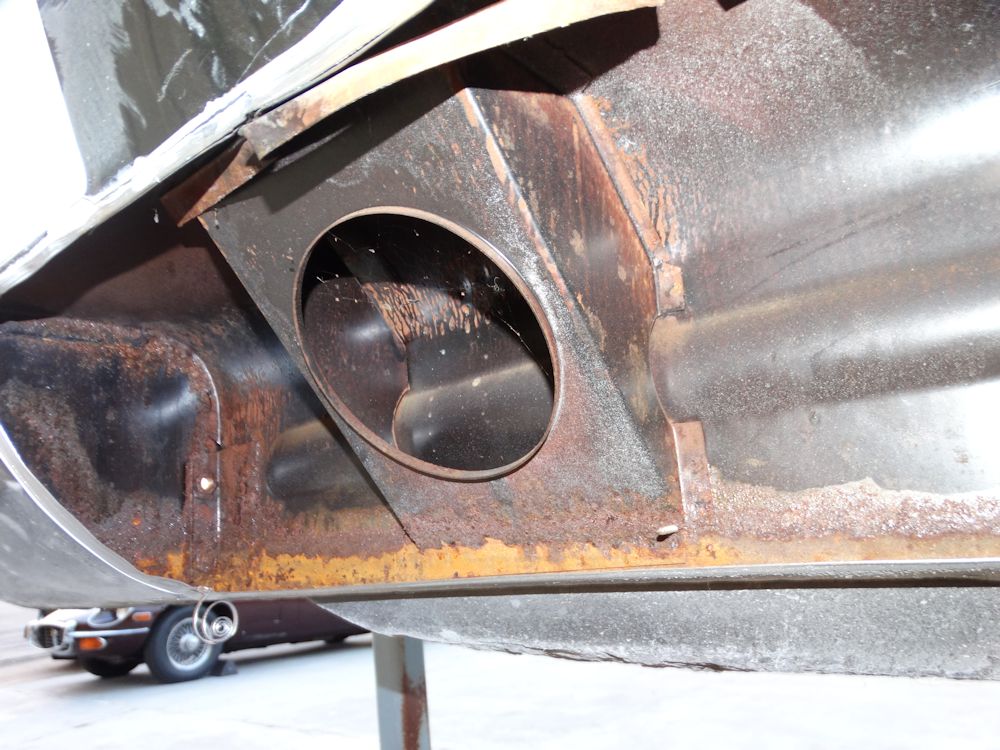
| Bump stop brackets will be removed |
|
 |
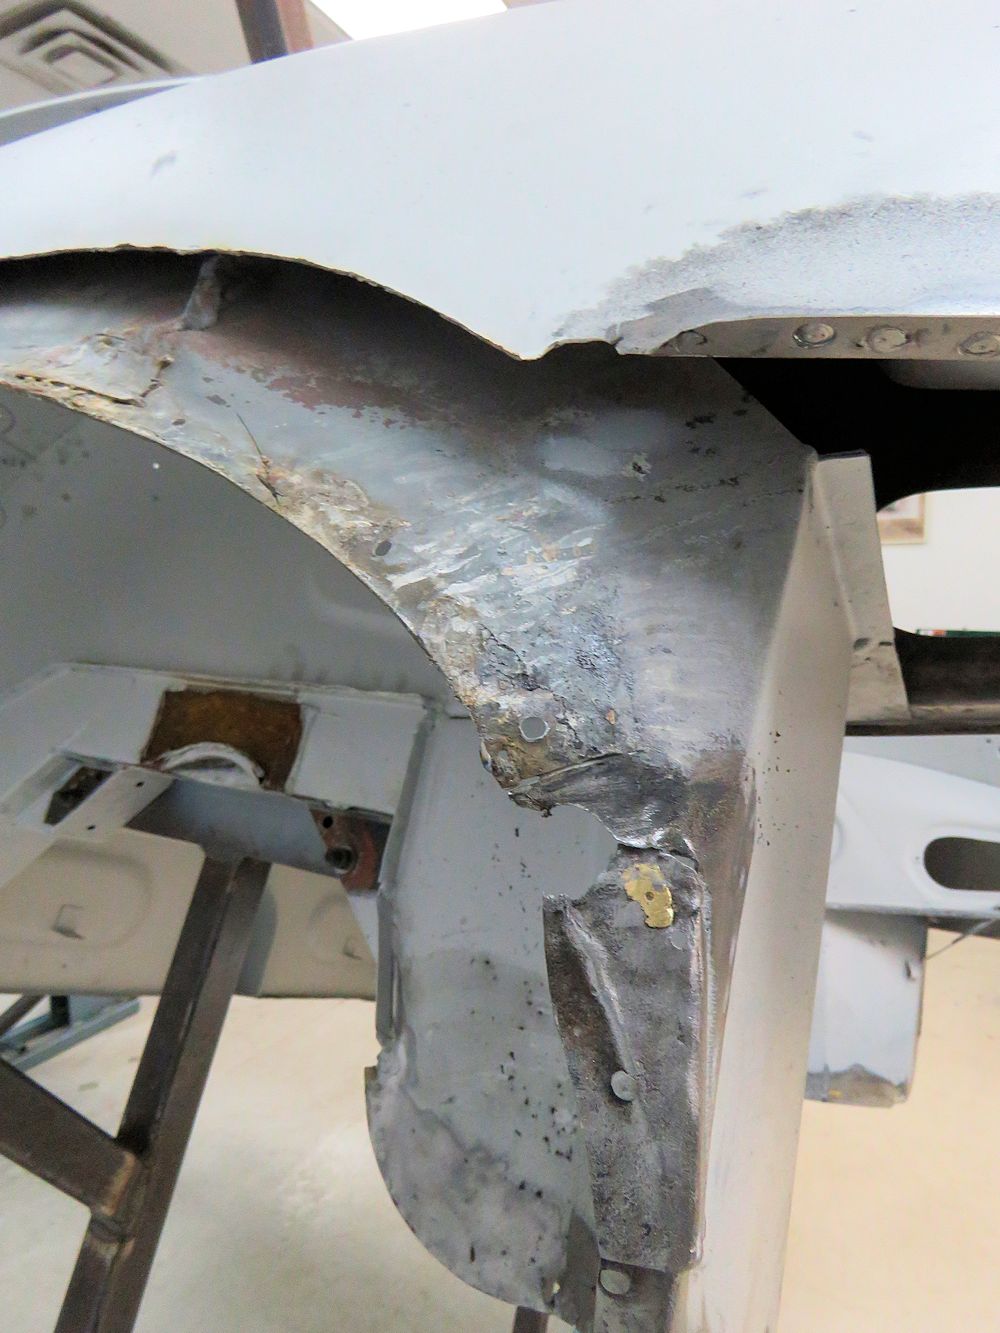 |
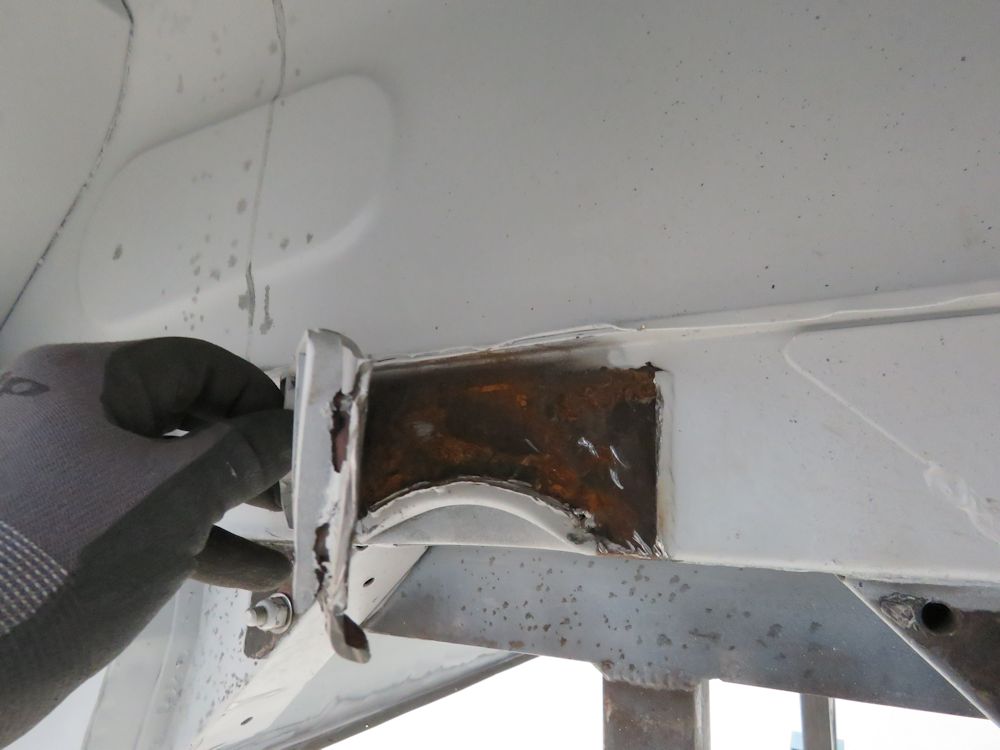
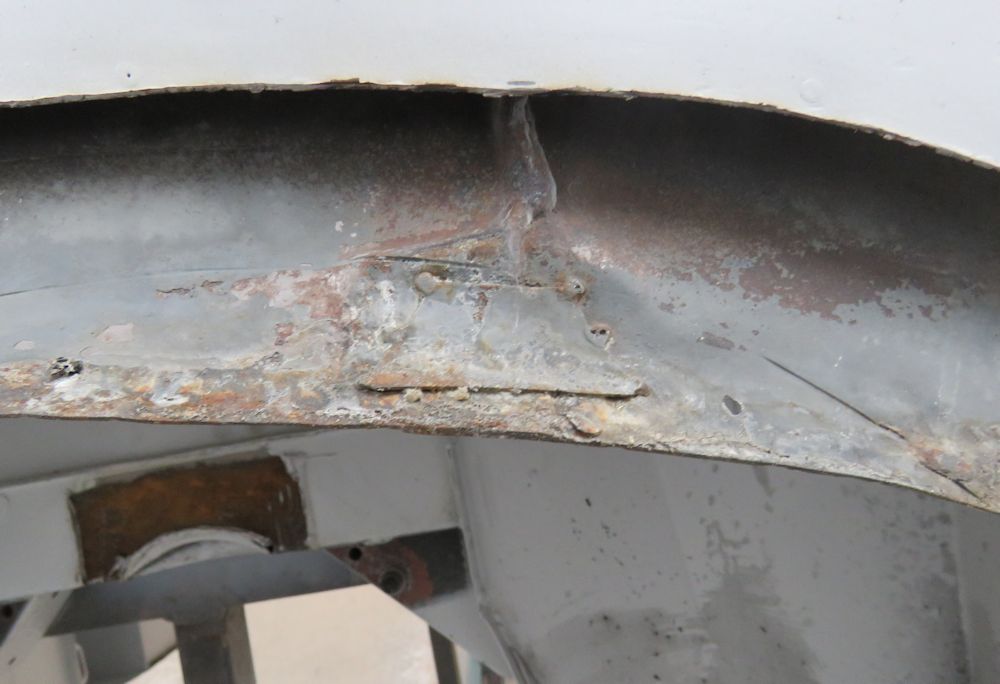
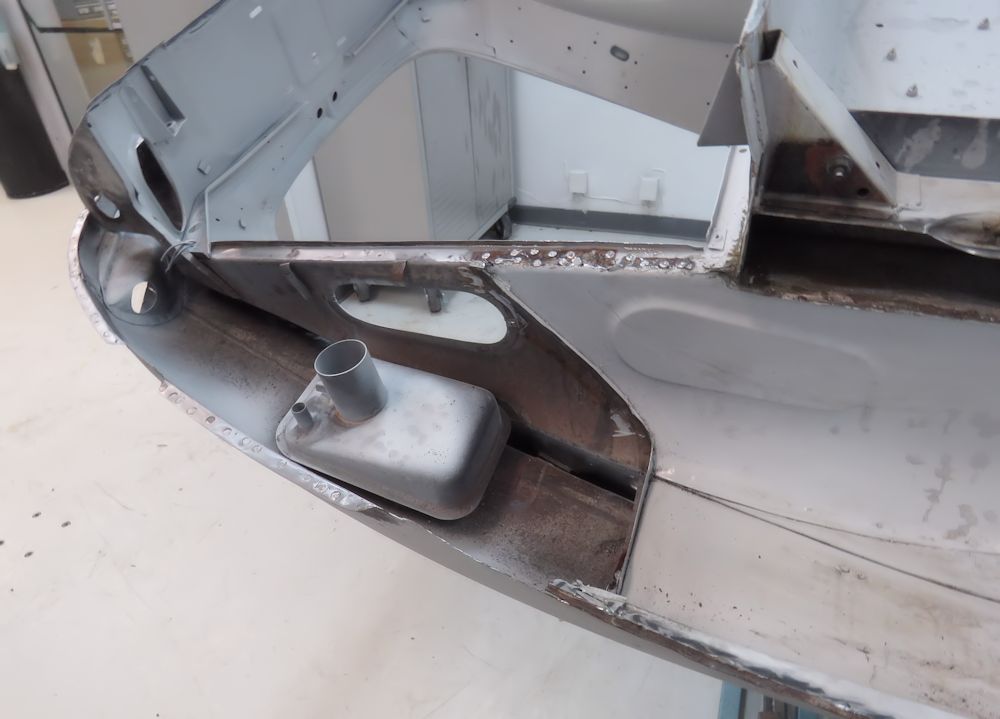
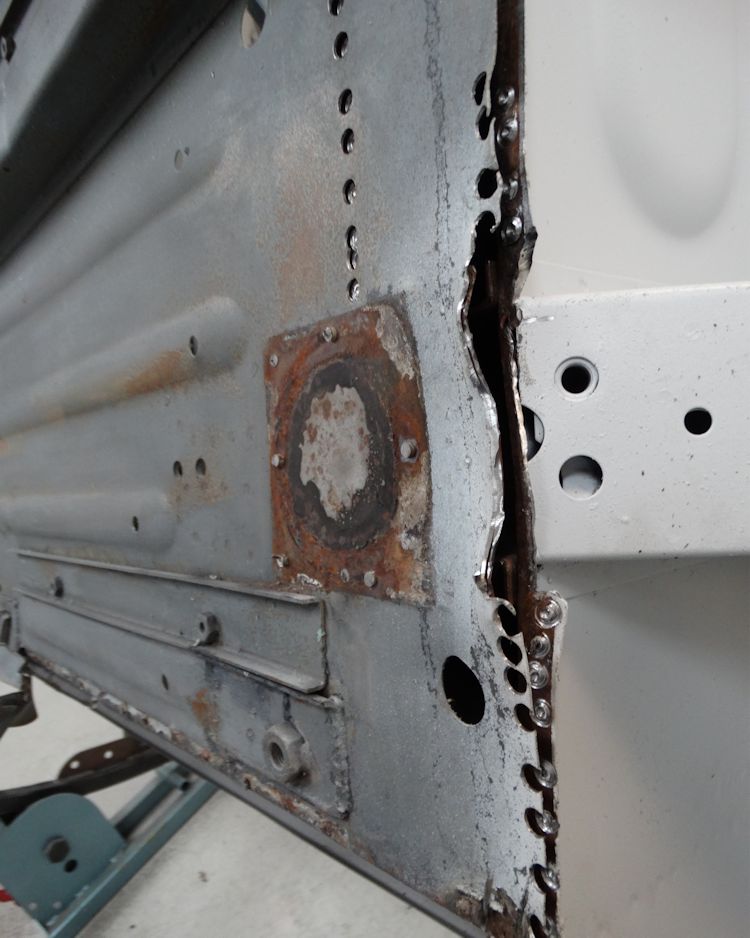
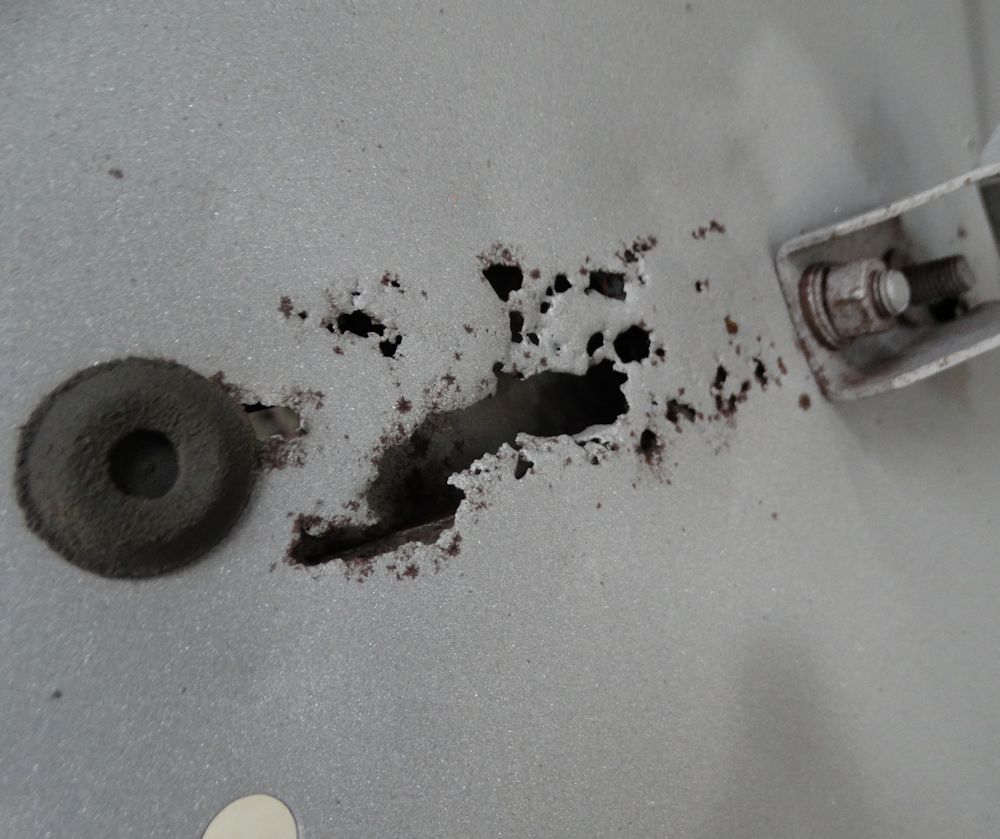
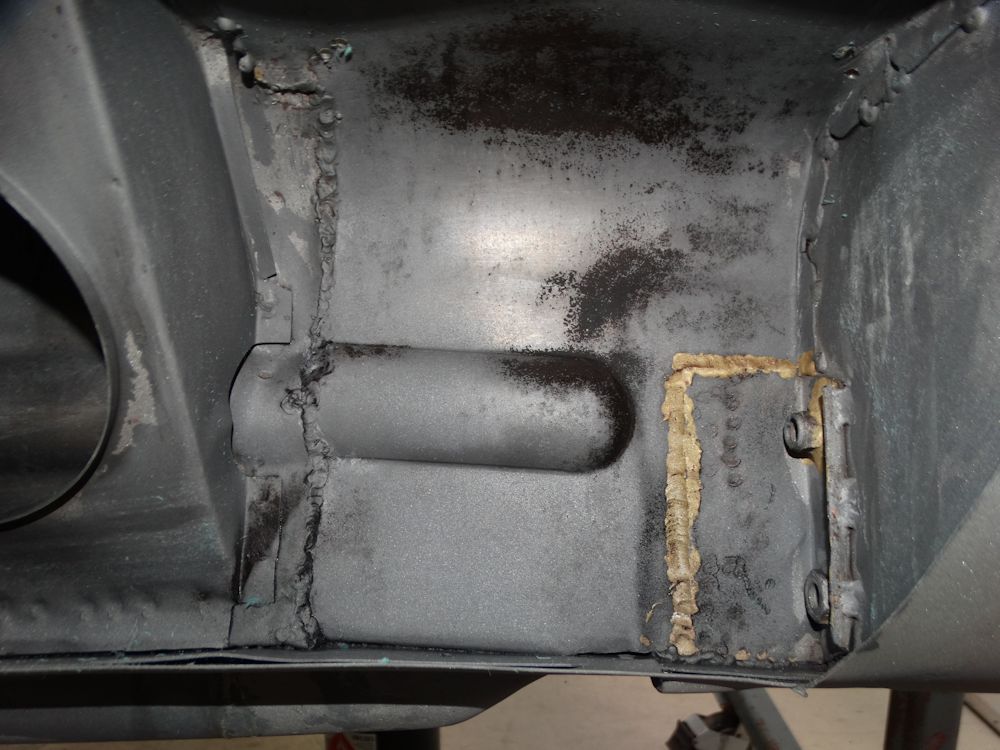
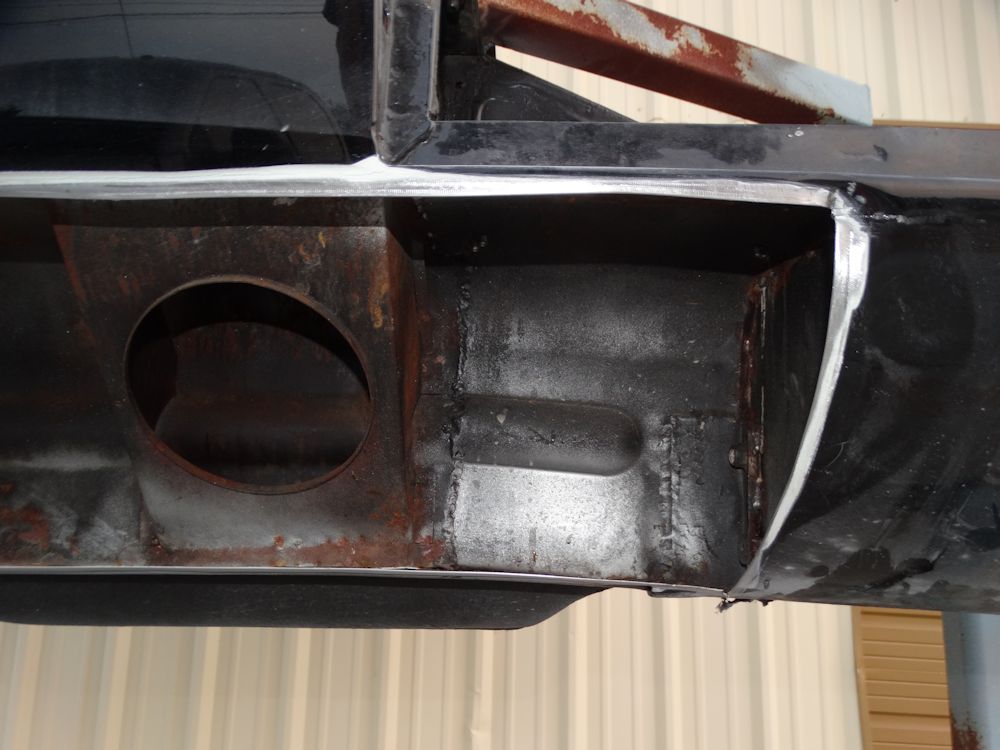
| Rust commonly found behind bump stop brackets |
Inner rear wheel arches are a bit of a mess |
 |
 |
| Lots of crude patching |
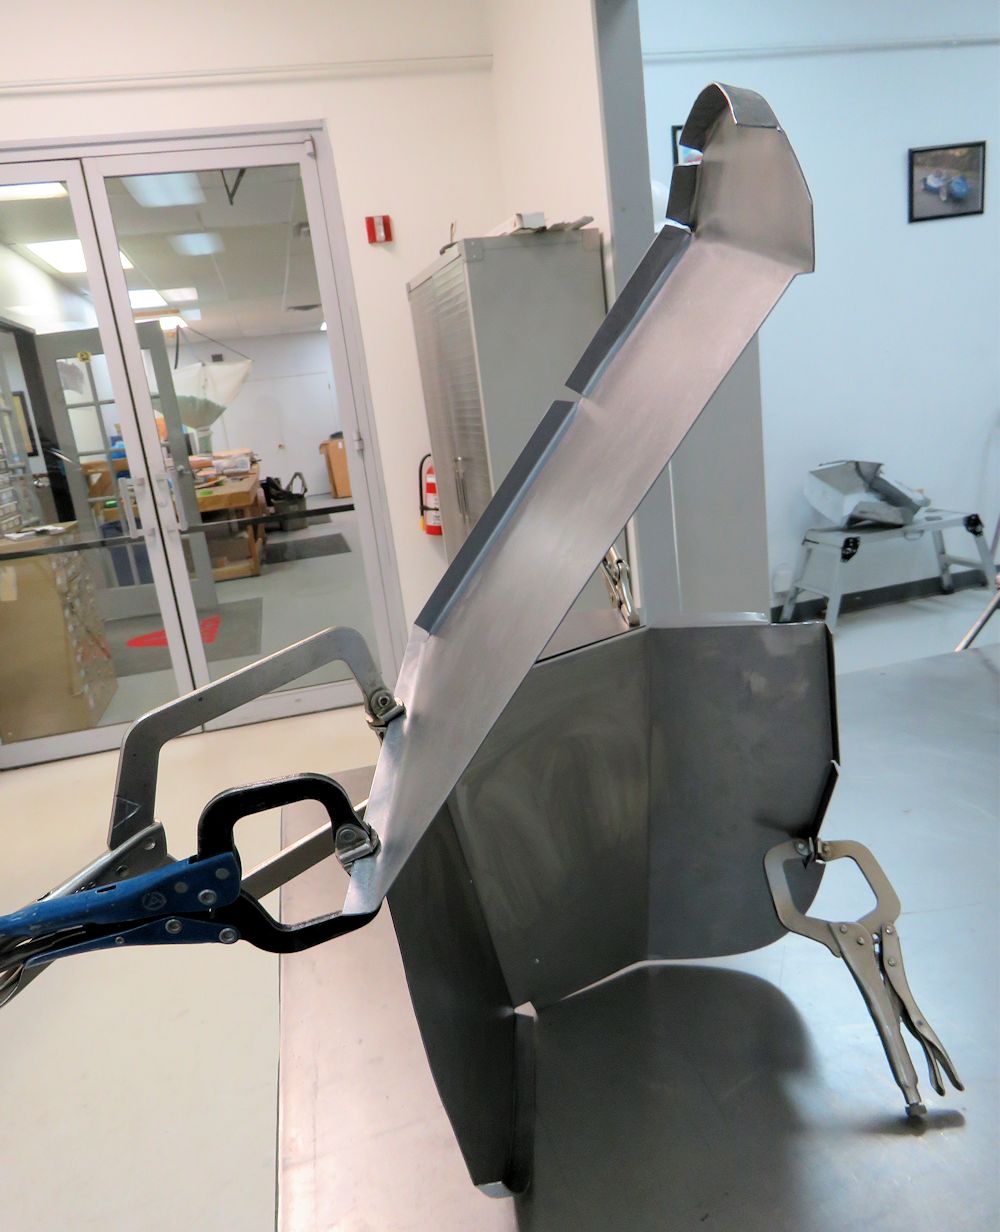
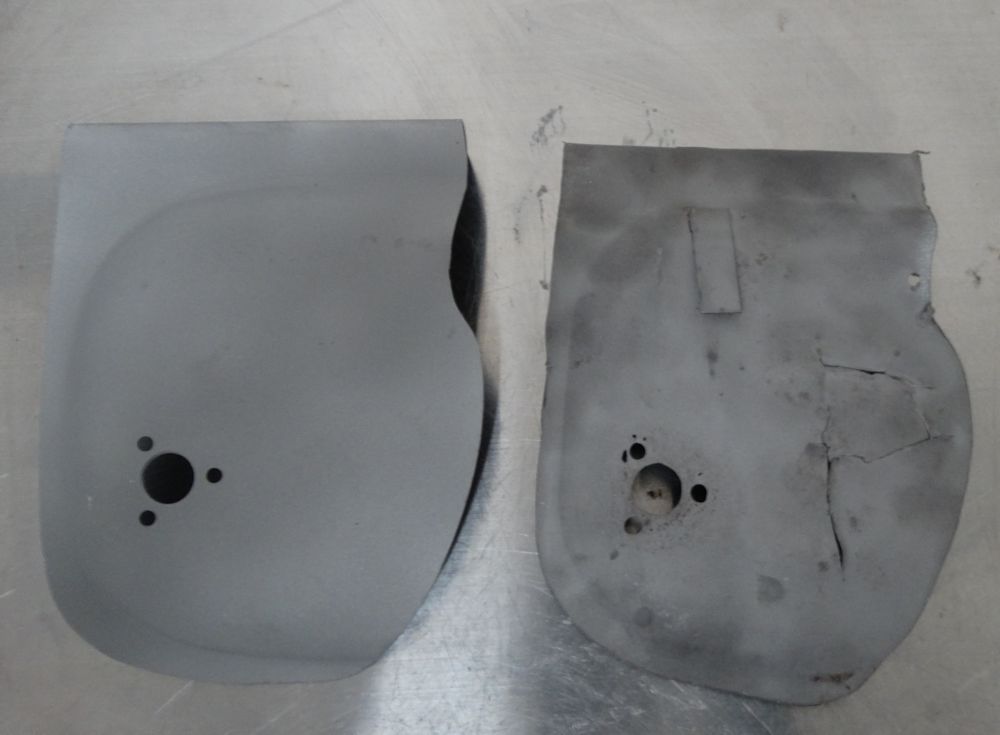
Panel behind bump stop bracket had rust pin
holes so it will be cut away and replaced |
 |
 |
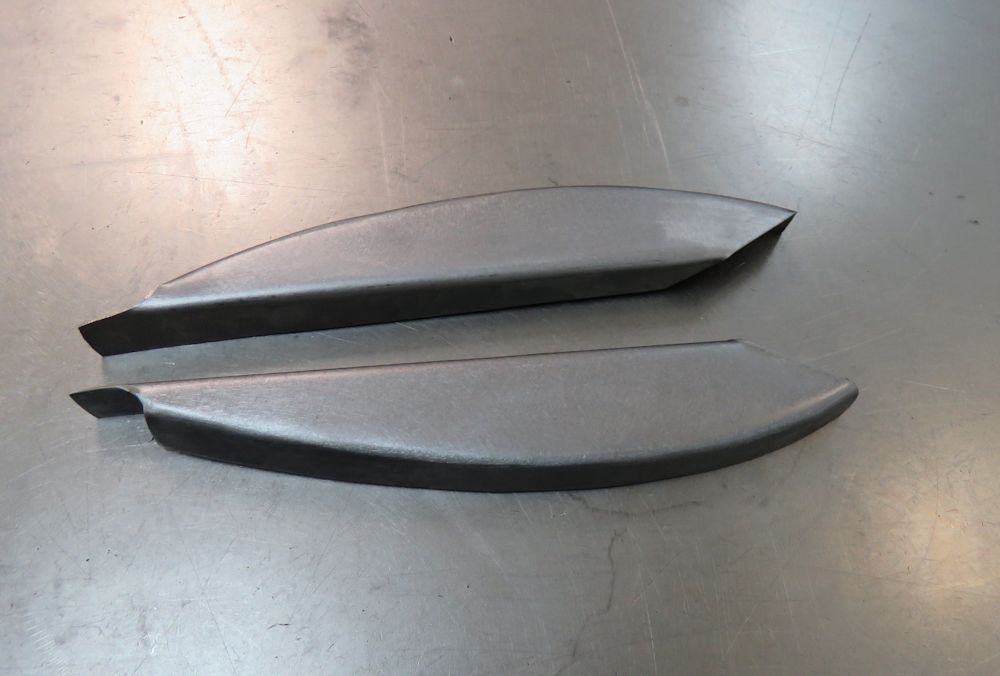
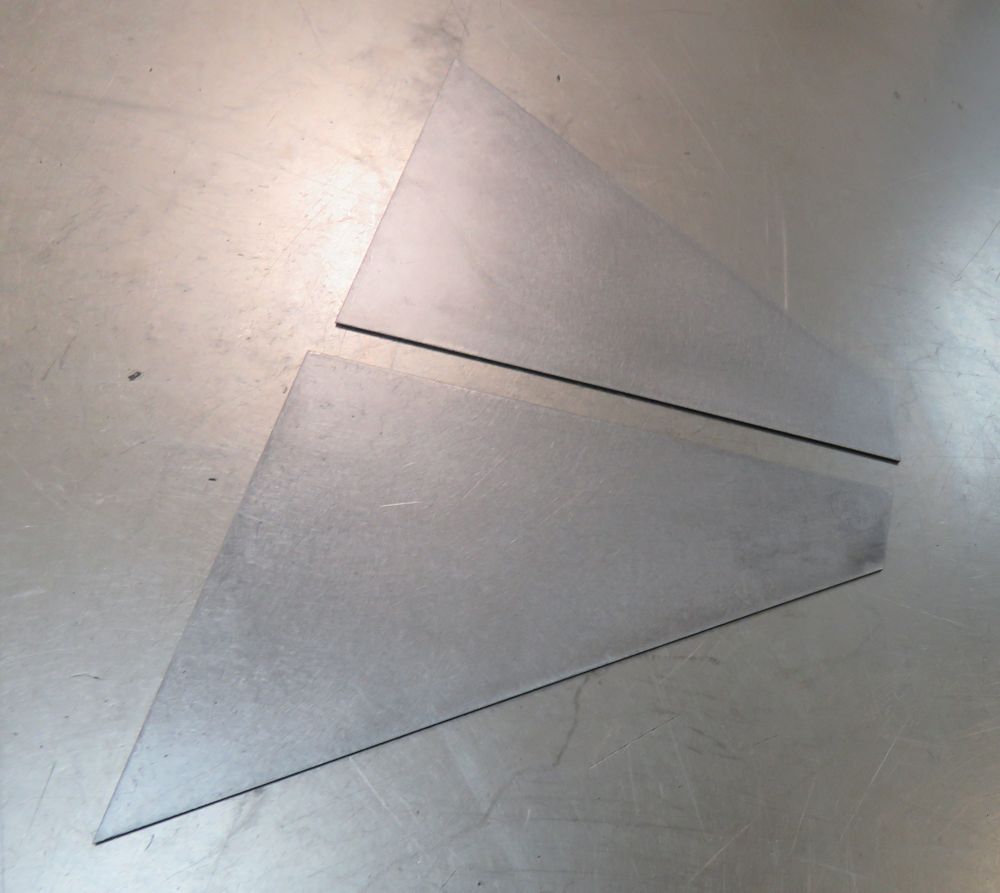
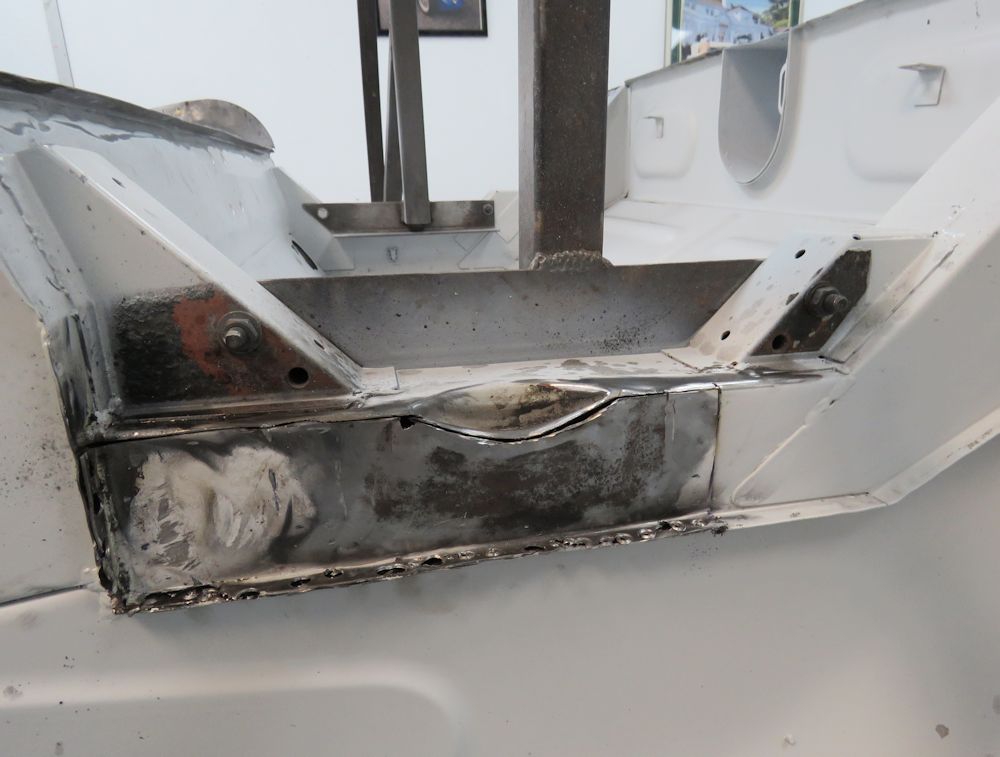
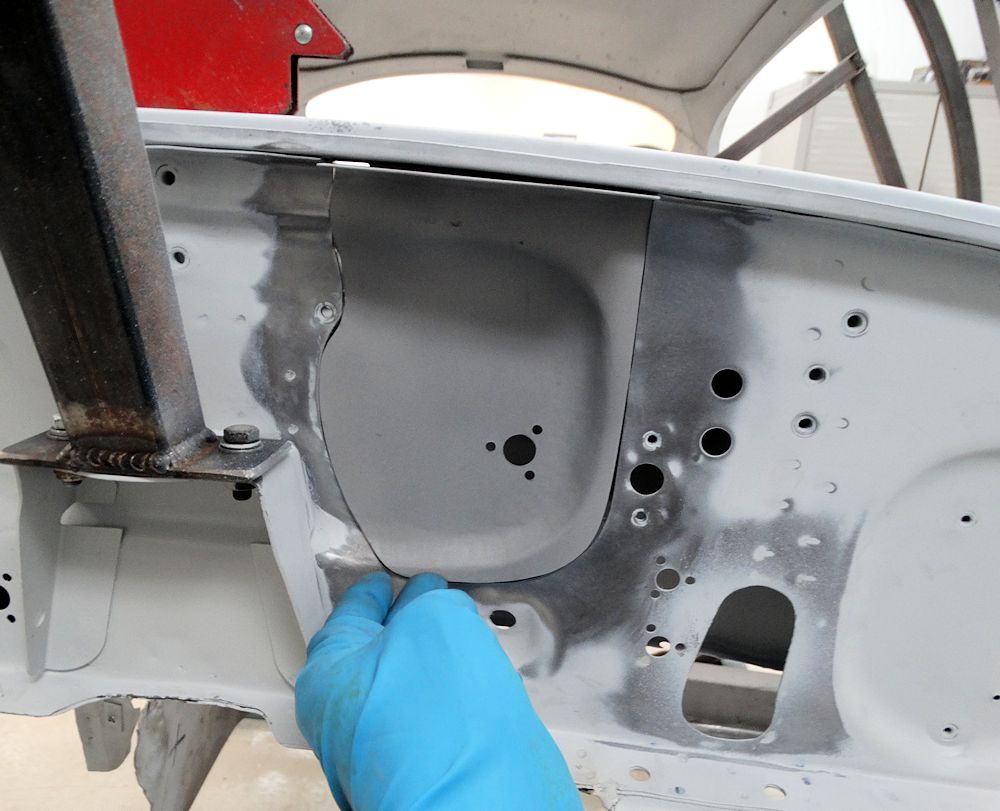
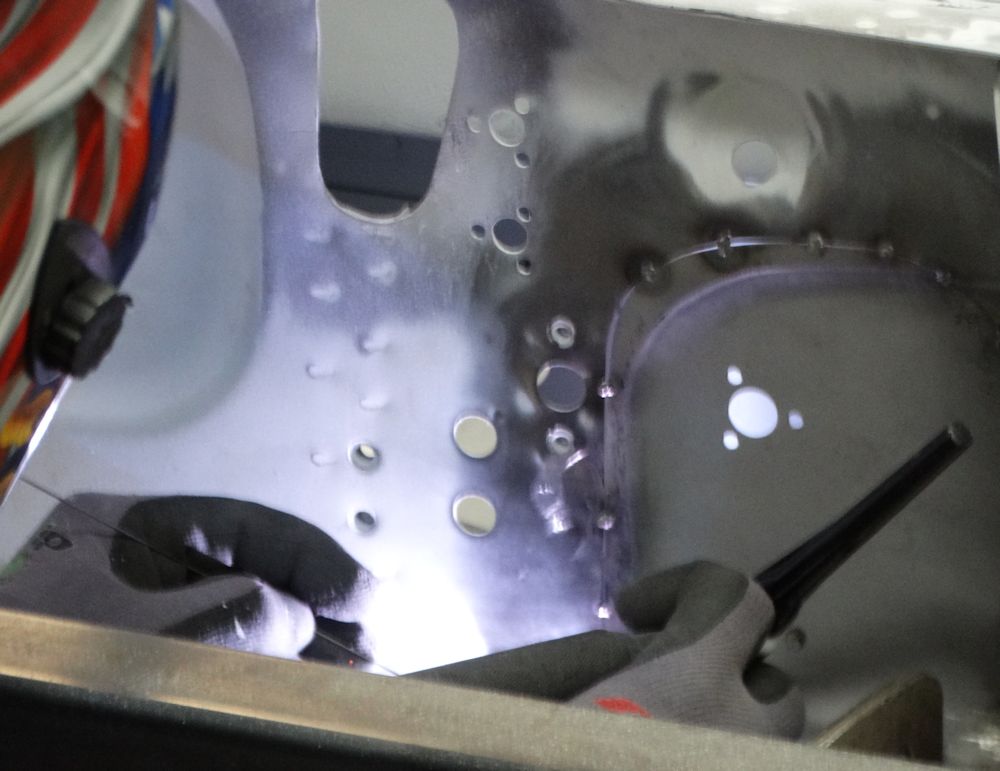
| Fabricating bump stop backing panel |
|
 |
 |
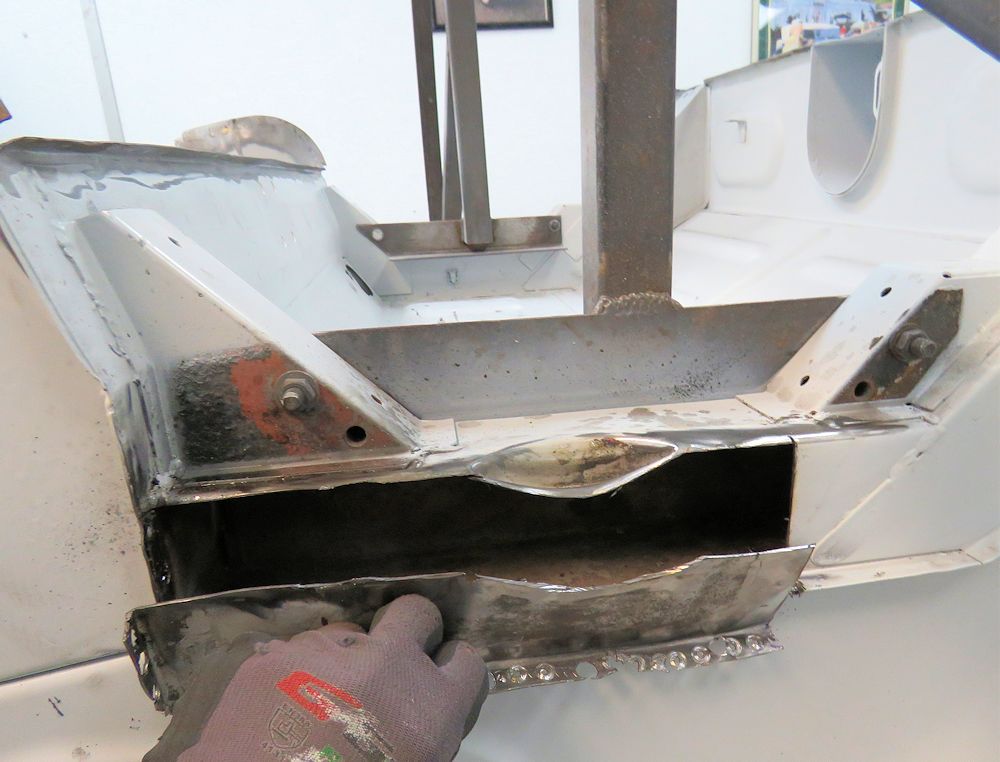
| Cutting away left hand inner wheel well |
|
 |
 |
 |
 |
| To be continued... |
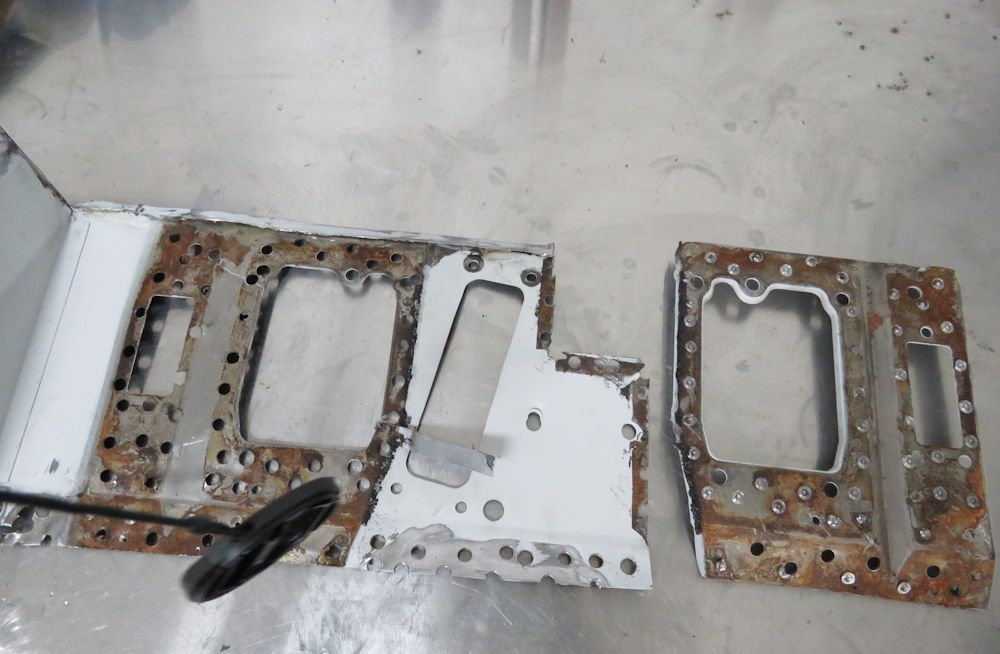
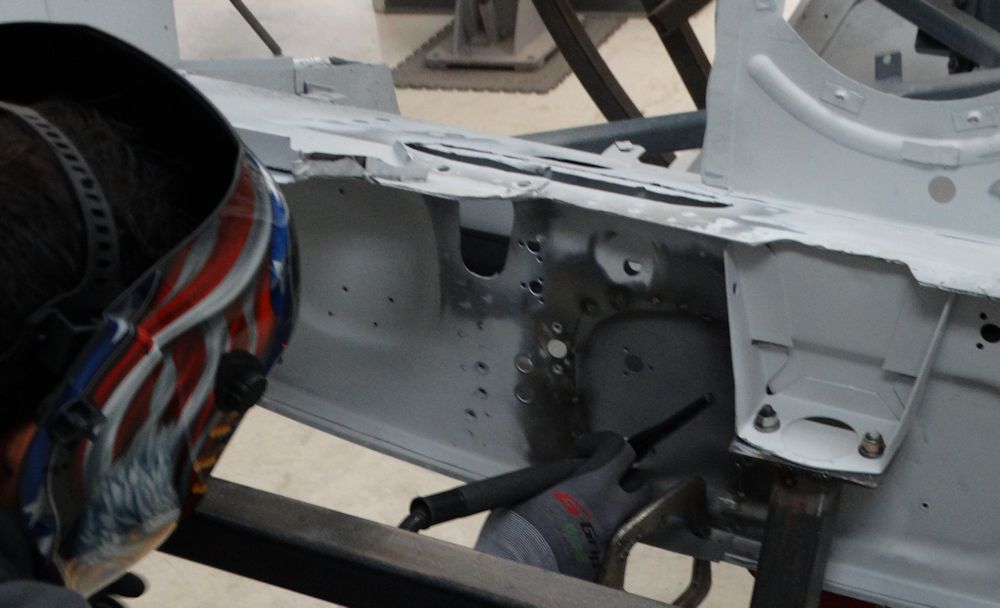
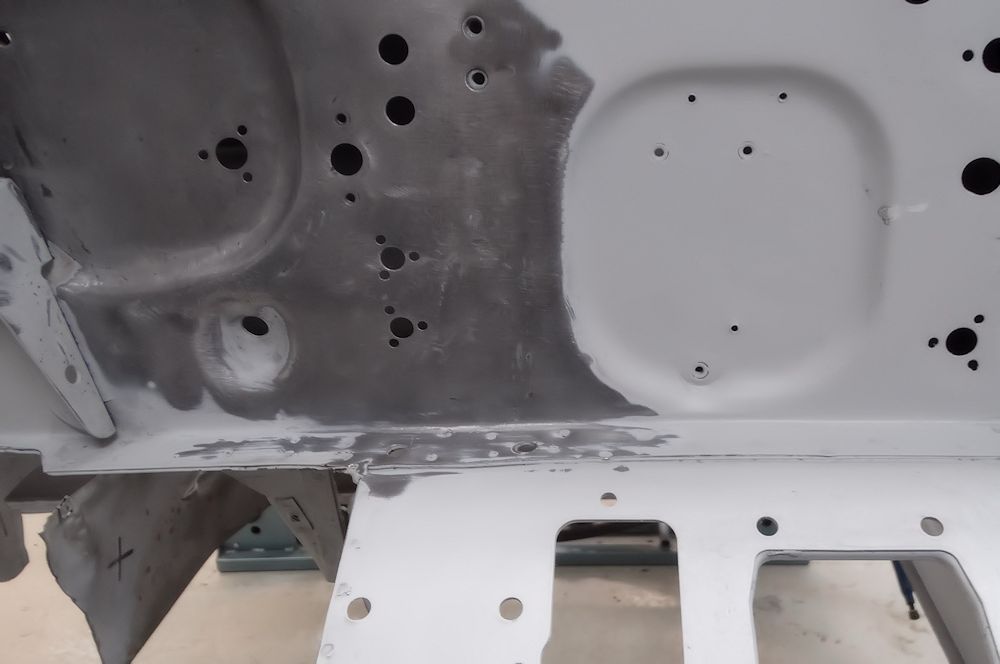
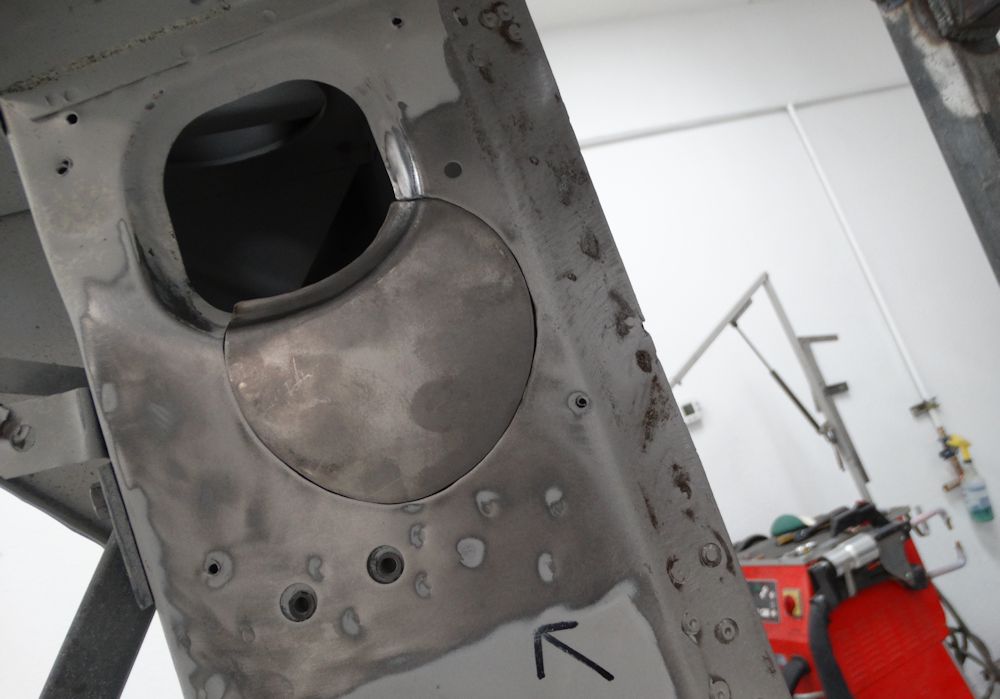
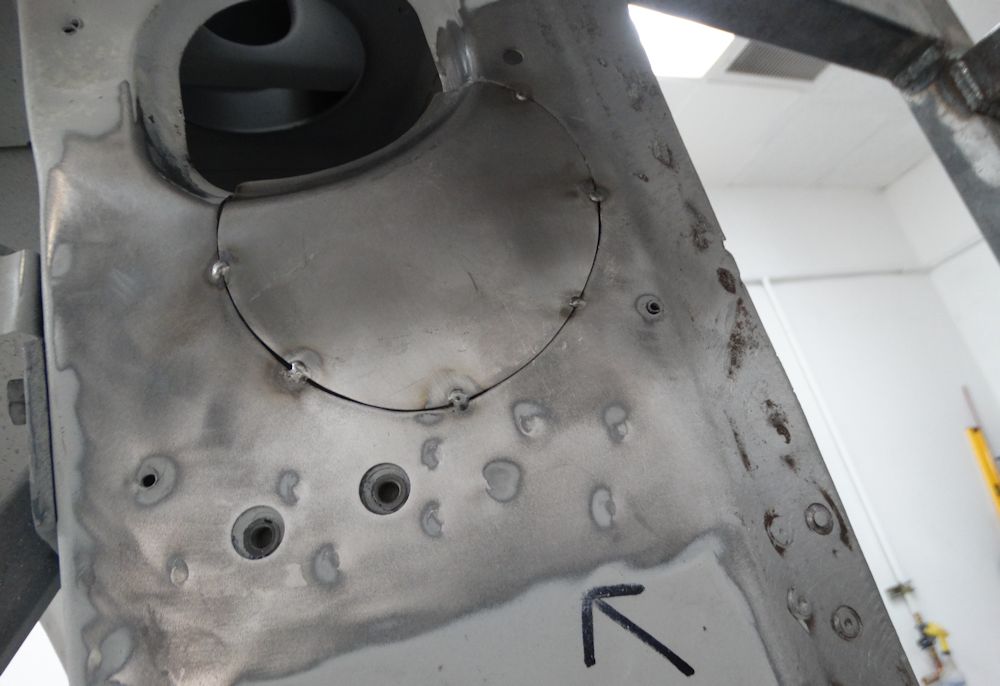
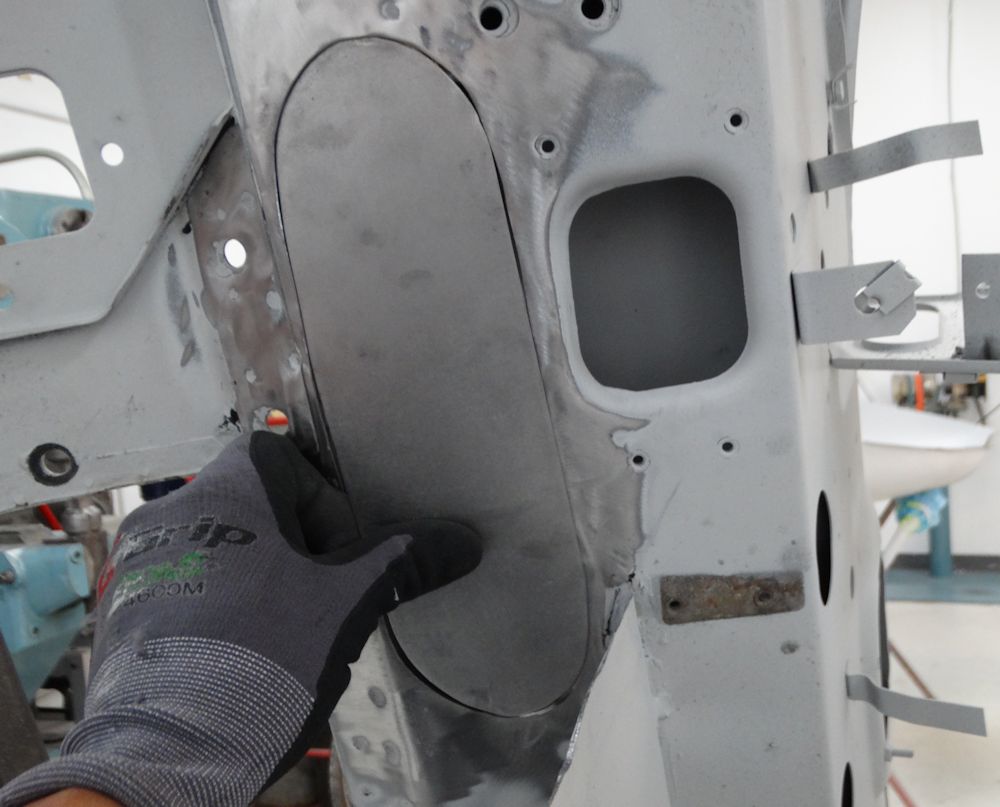
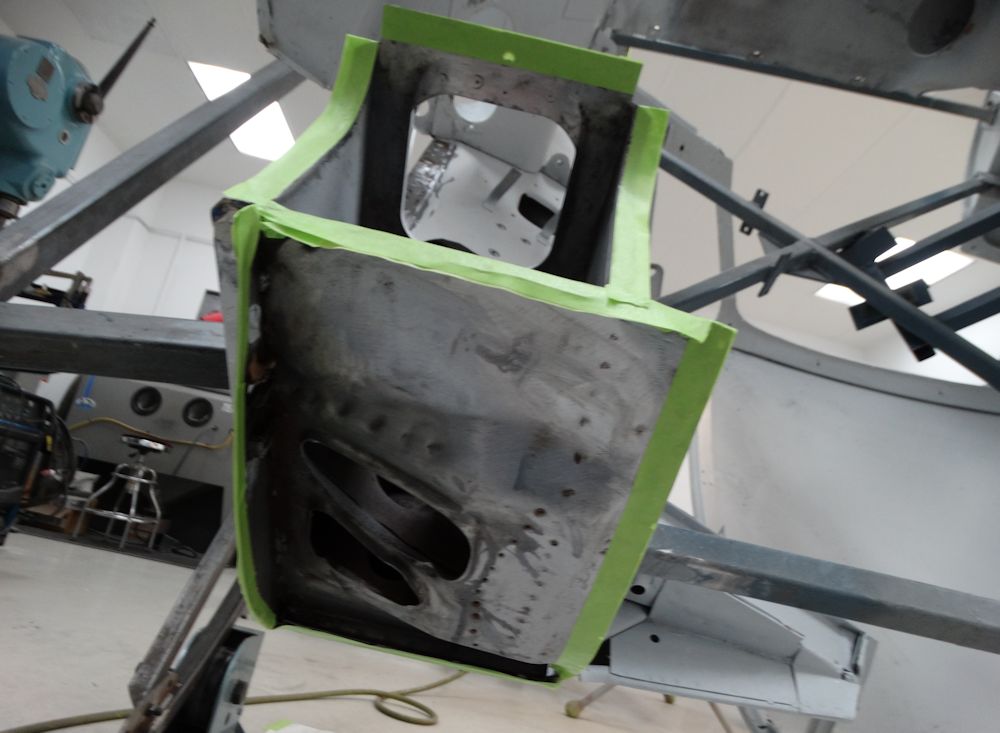
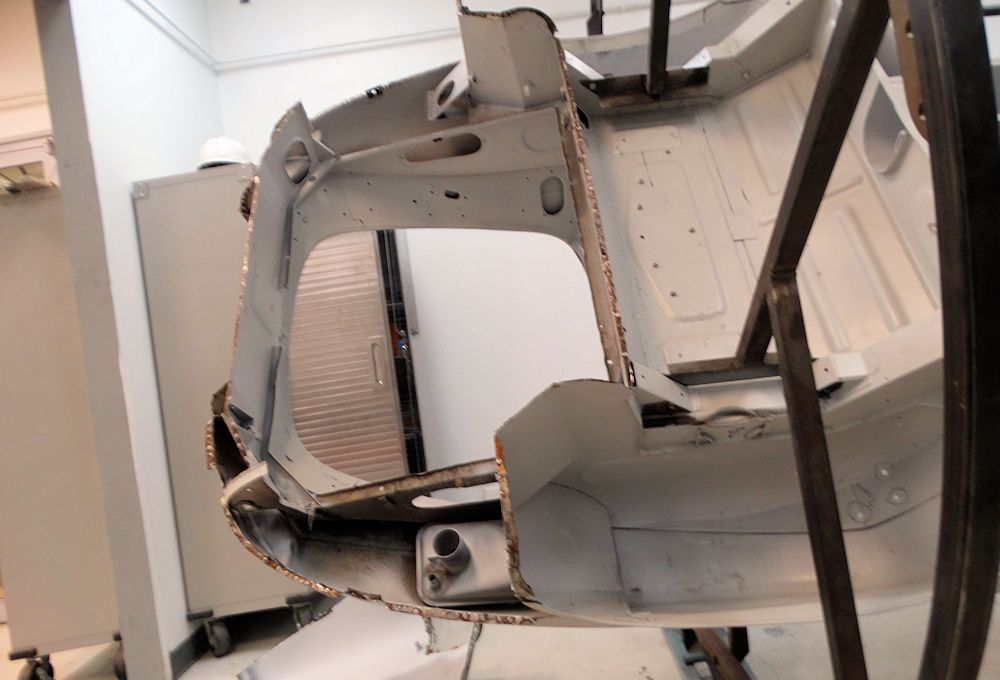
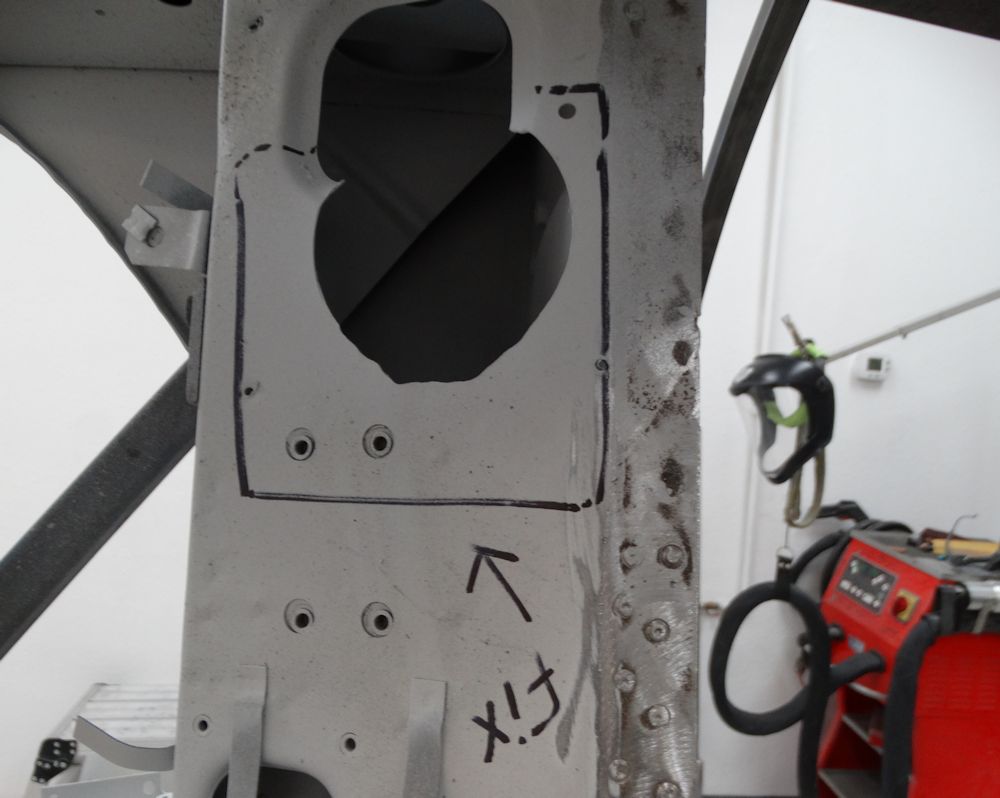
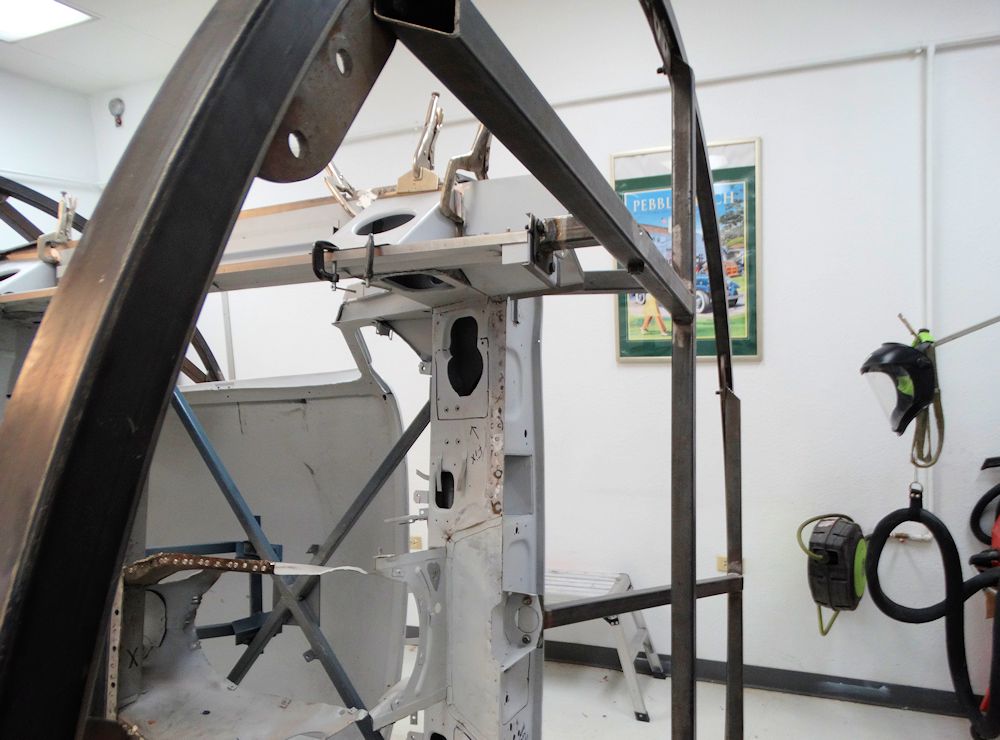
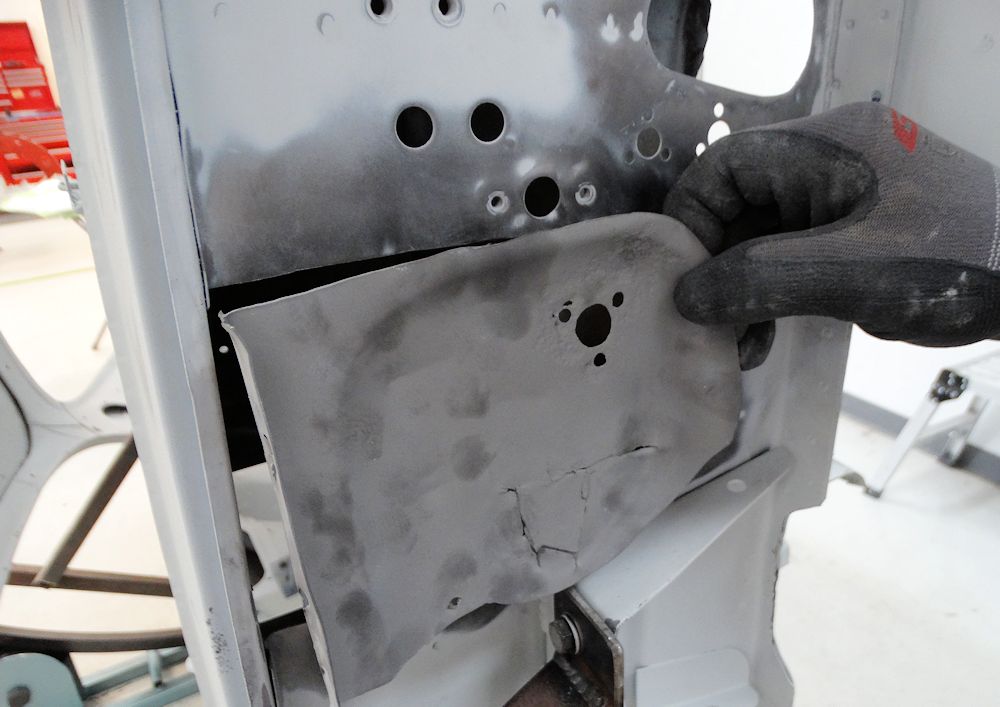
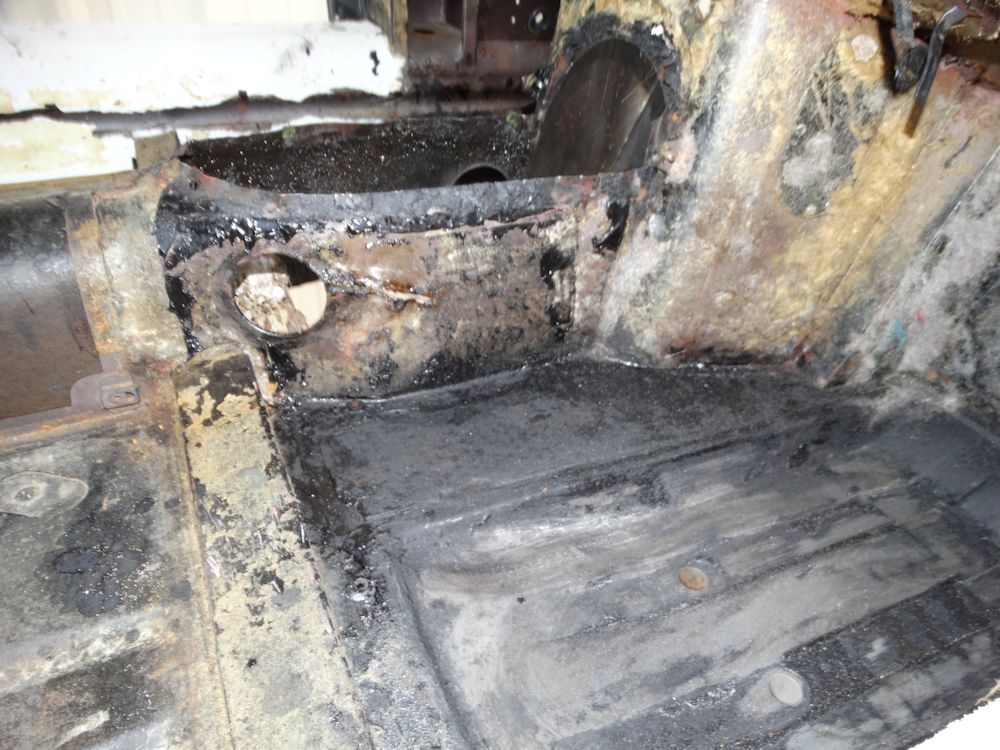
The following sequence of photographs follow Oscar's repairs and patching of the various damaged (and missing) panels in the firewall and beneath the dash. Not a particularly glamorous update, but essential repairs, nonetheless!
 |
 |
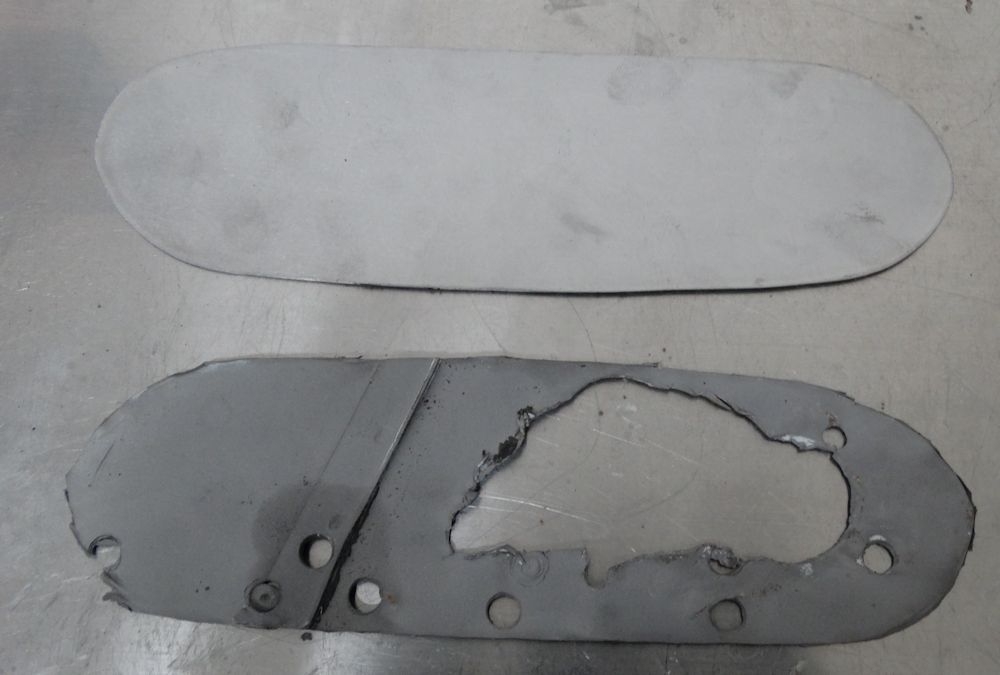
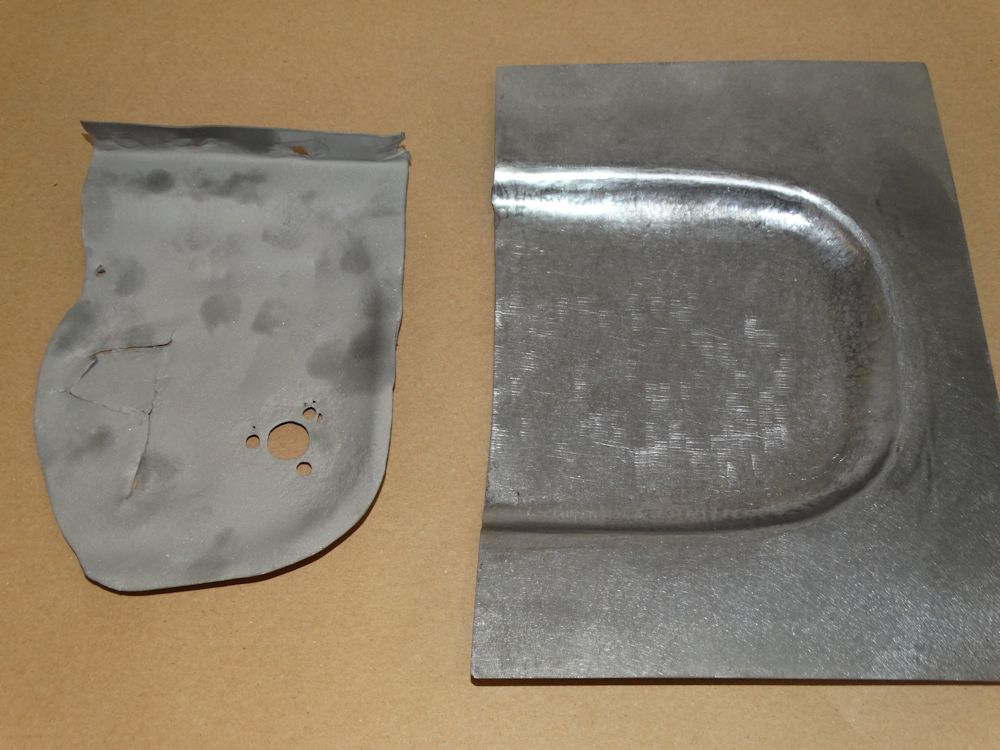
| Several firewall panels required replacement |
Newly fabricated repair panel on the left |
 |
 |
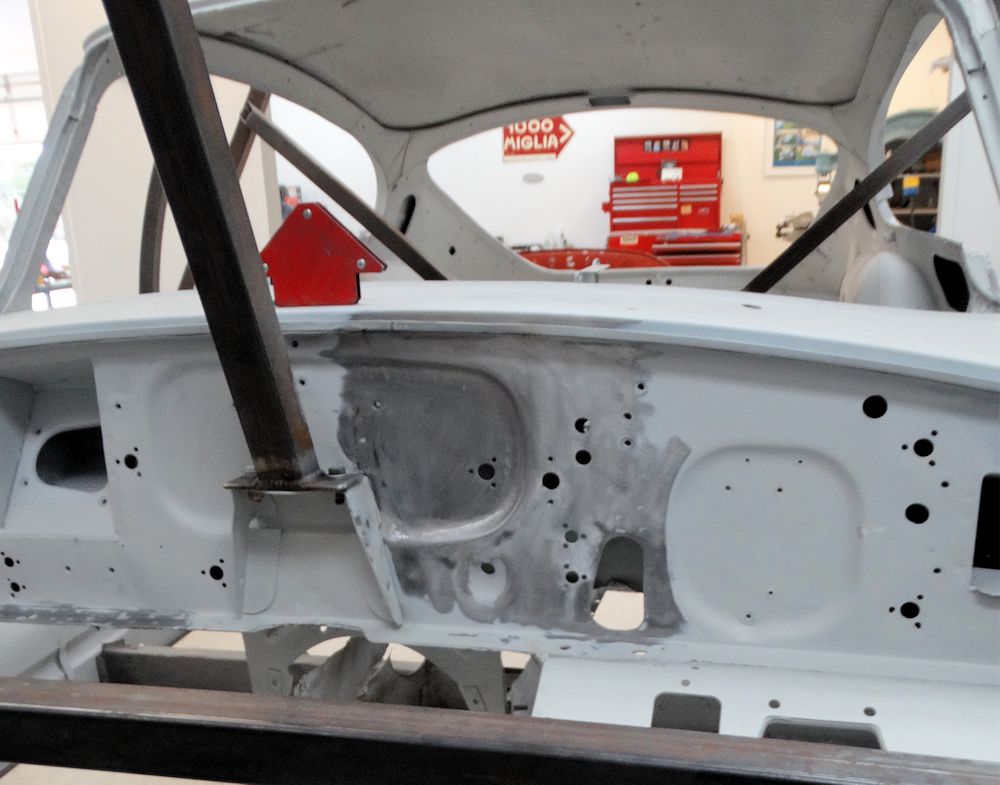
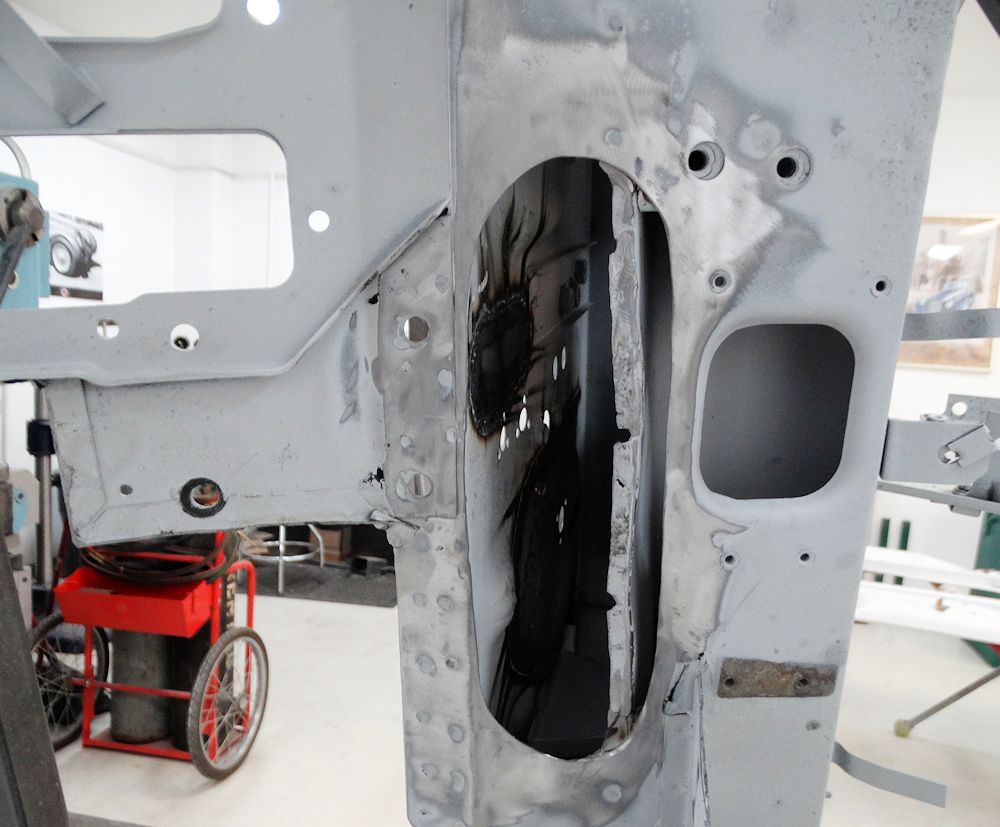
| The gaping hole this repair panel will fill |
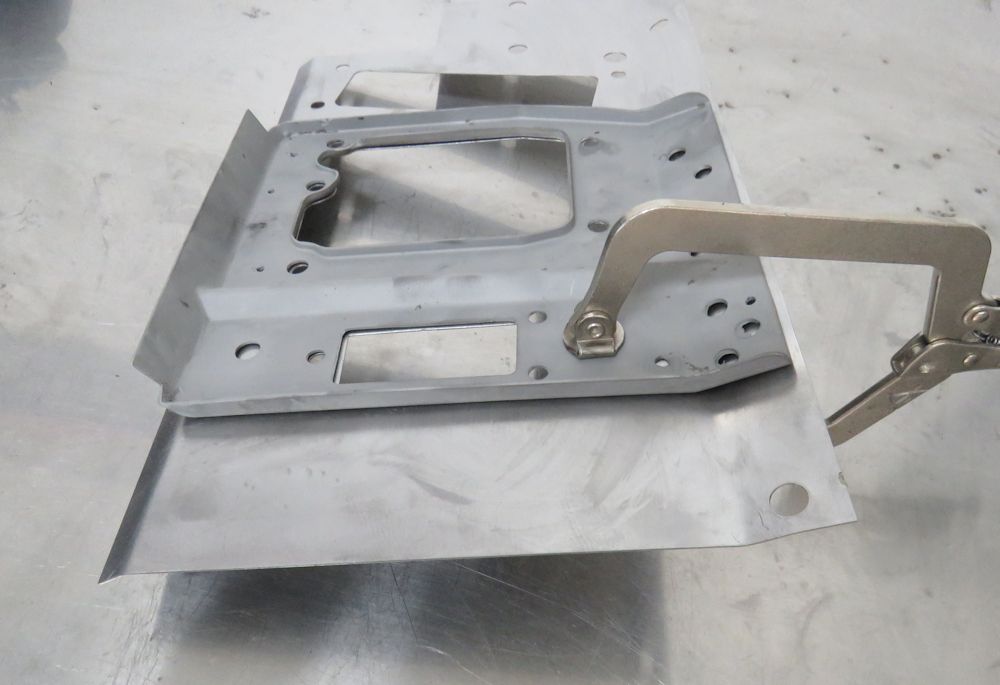
Trial fitting the new panel |
 |
 |
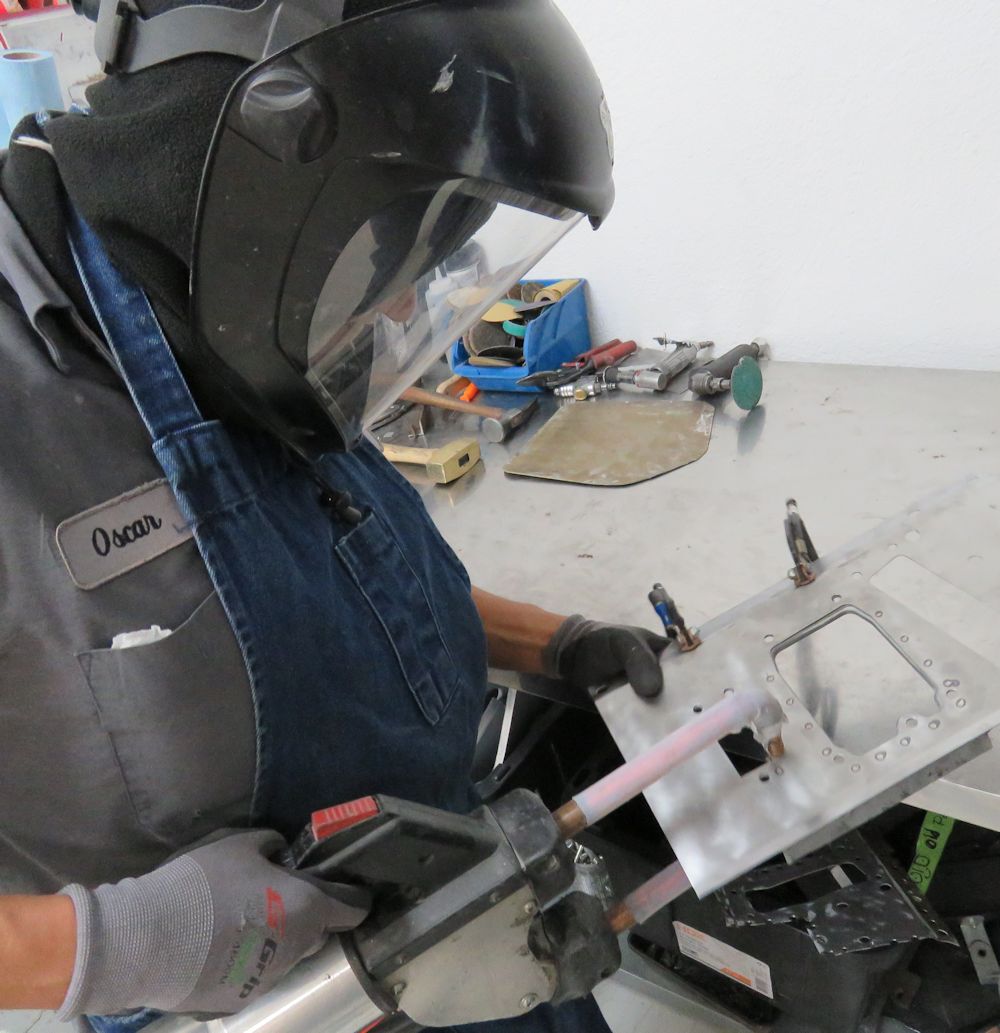
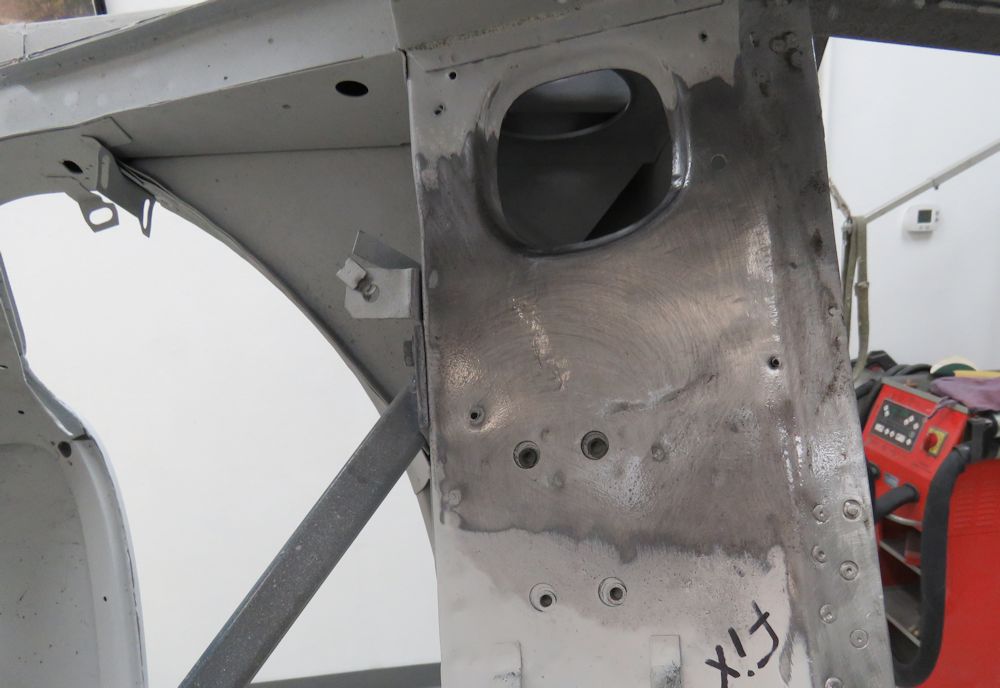
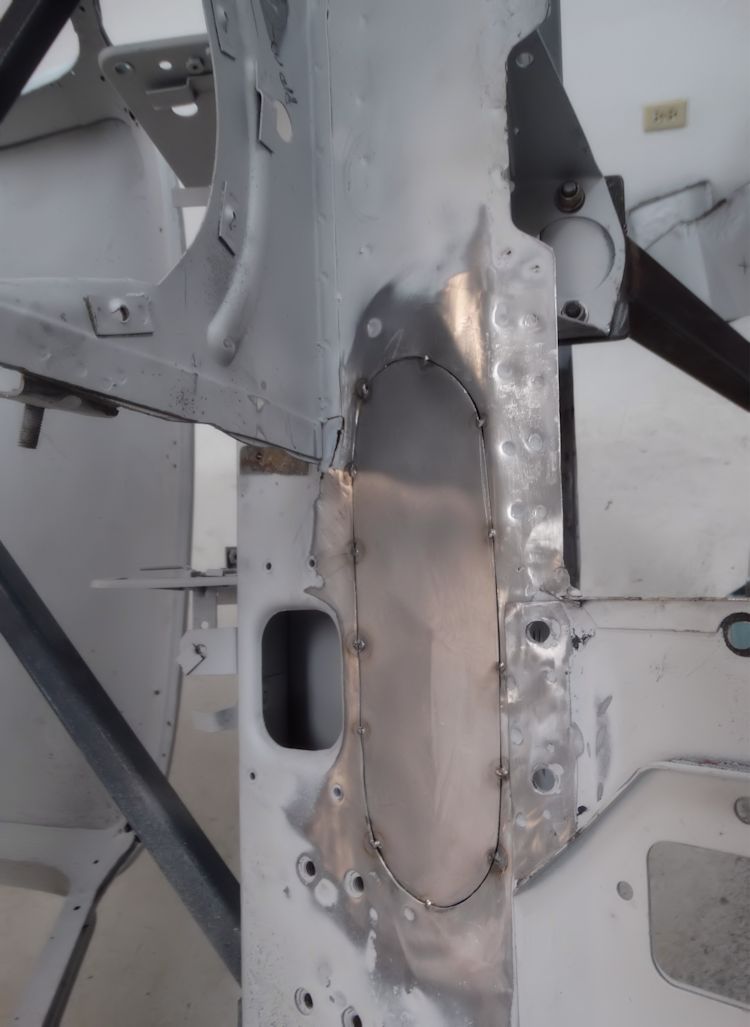
| Tack welding it in place |
|
 |
 |
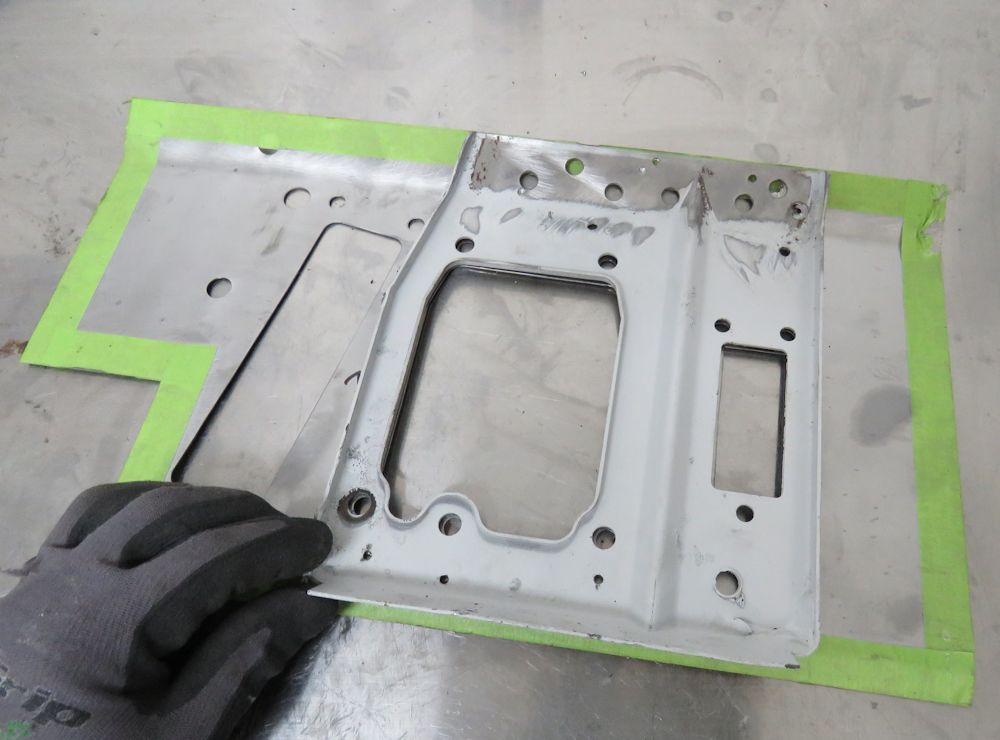
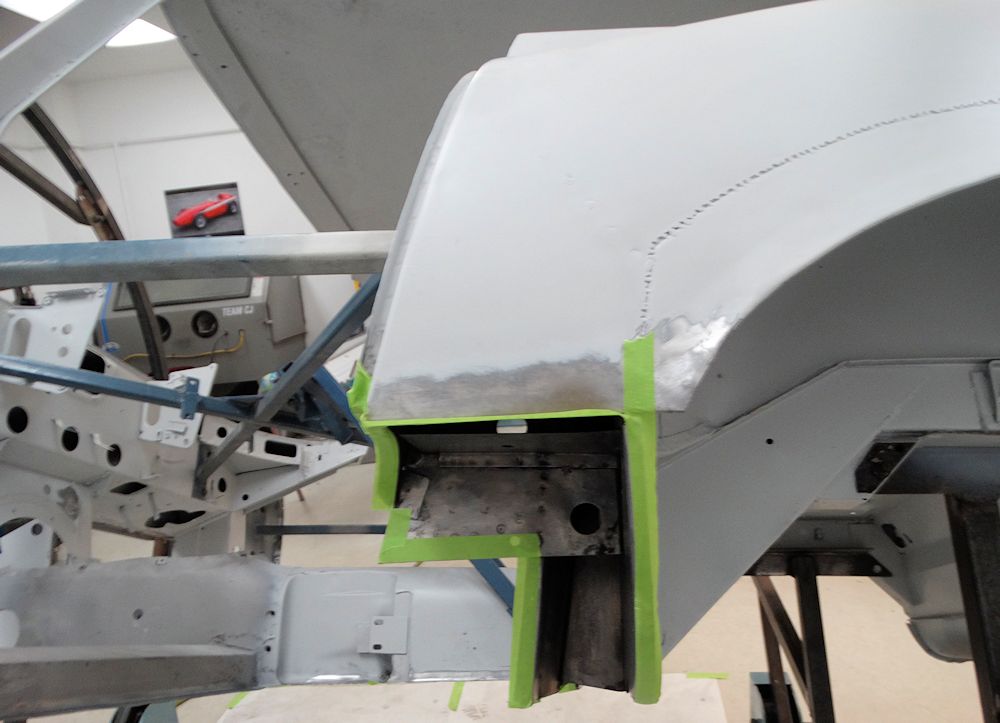
| After metal finishing, the welds are invisible |
|
 |
 |
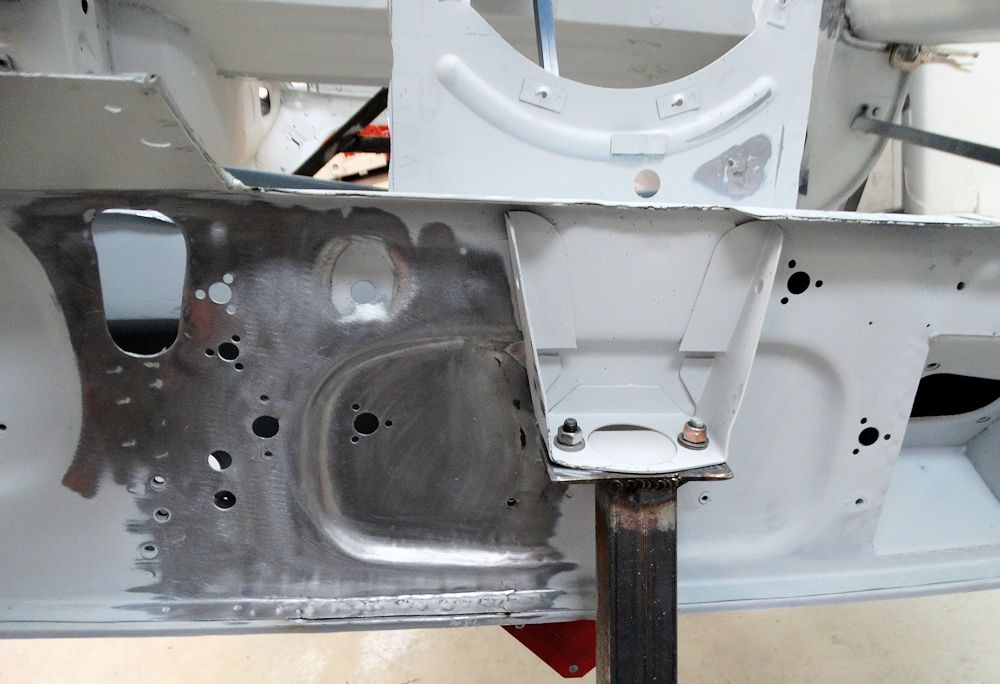
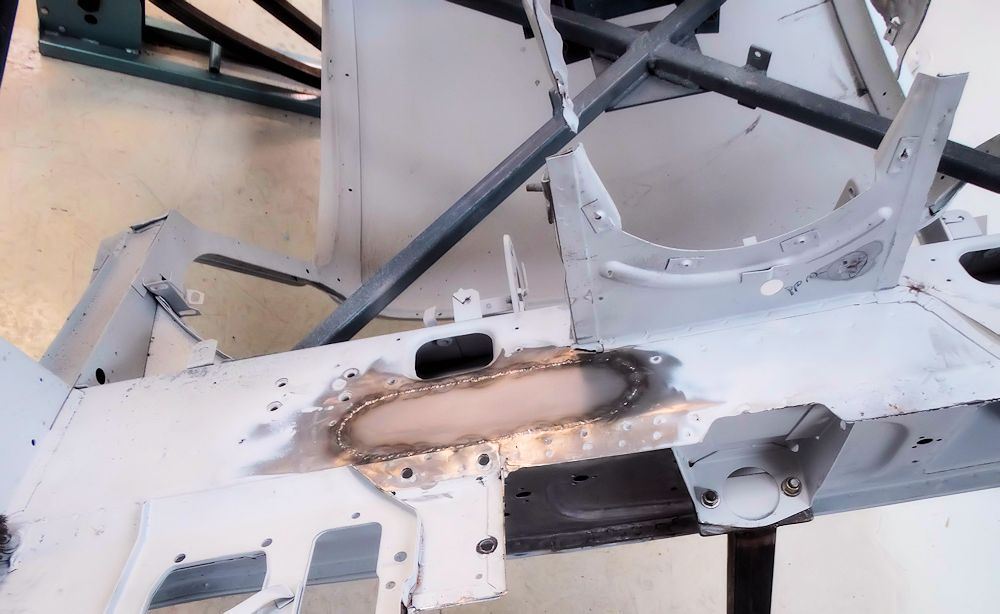
| Another repair panel being trial fitted |
|
 |
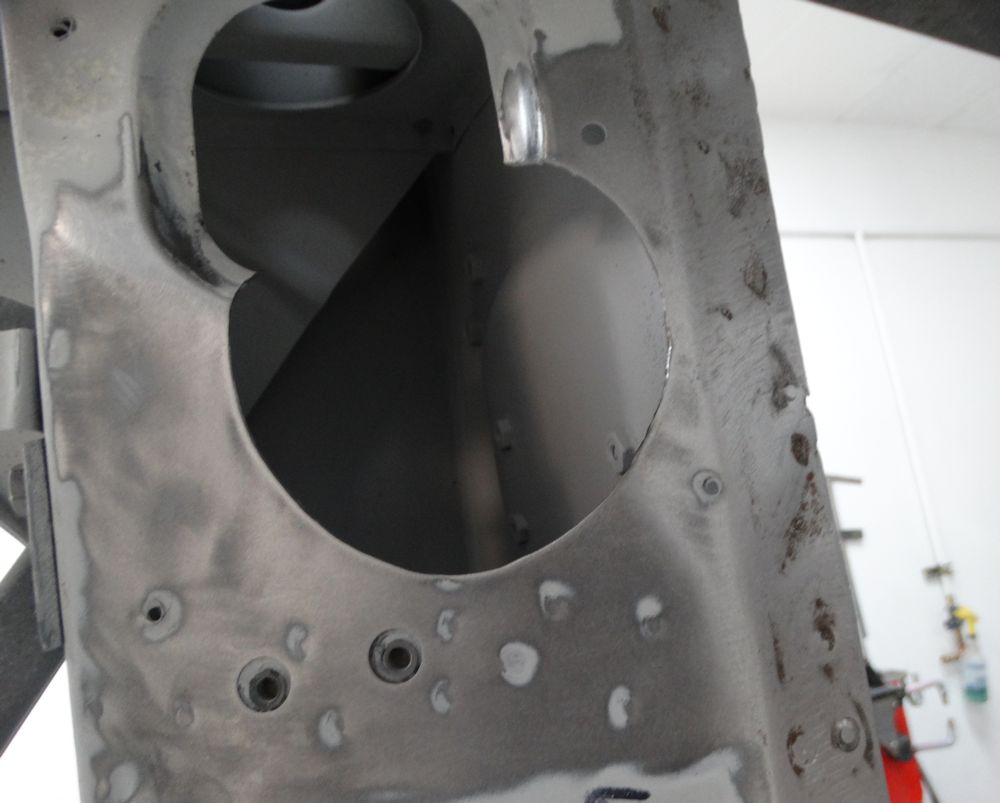 |
| Another huge hole under the driver's side dash |
|
 |
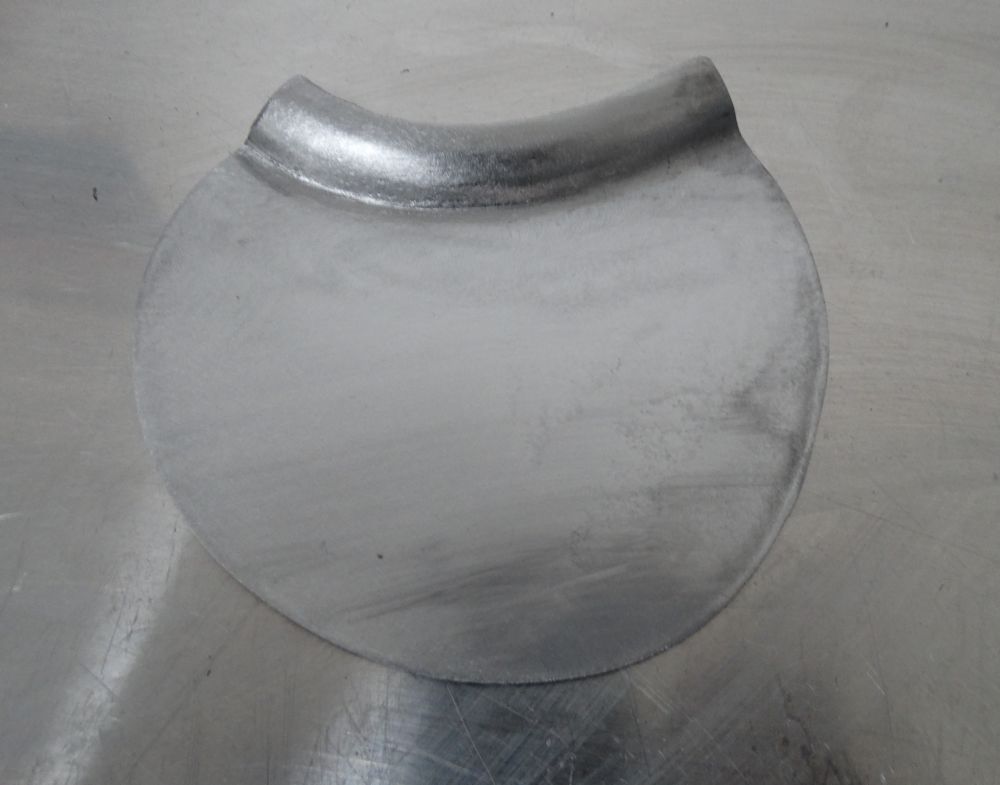 |
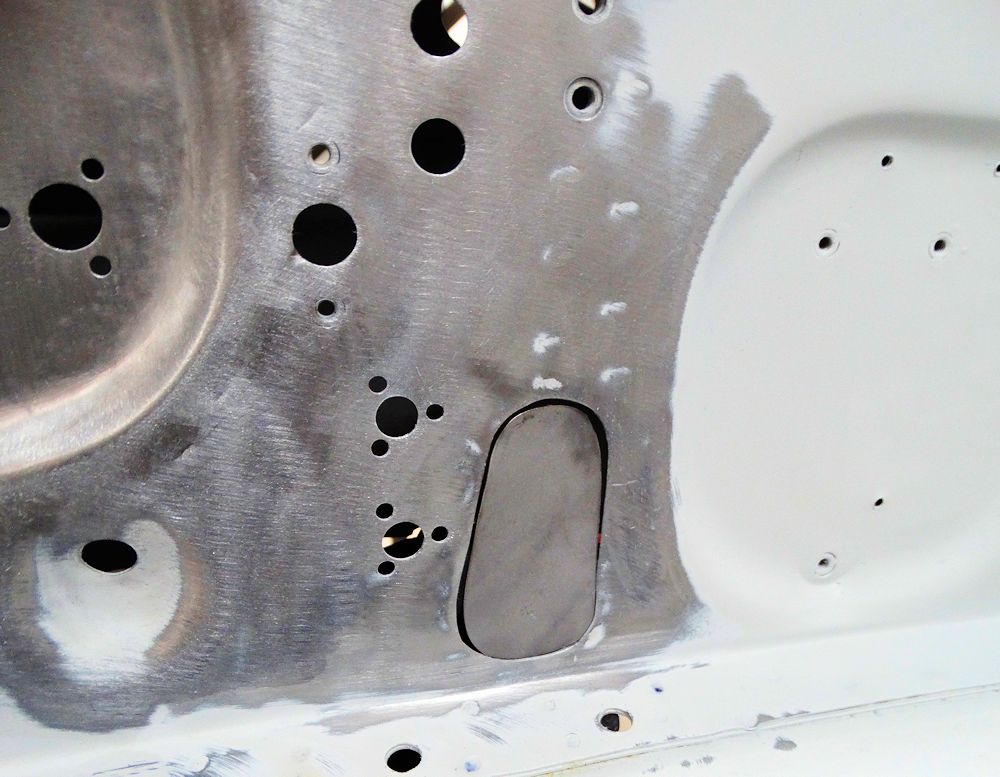
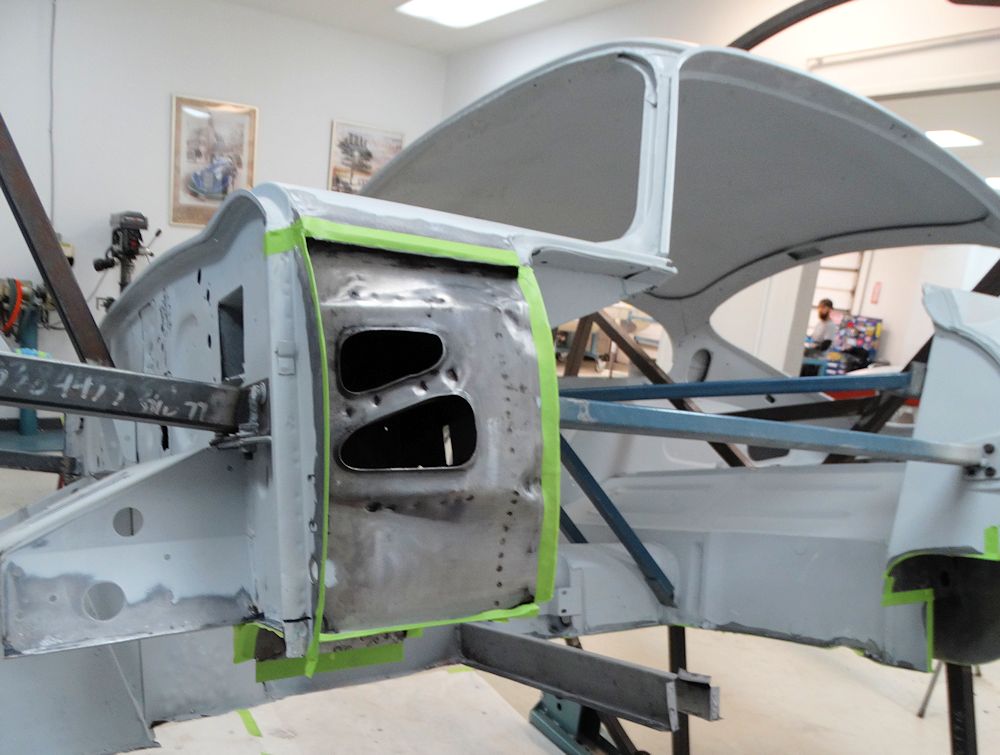
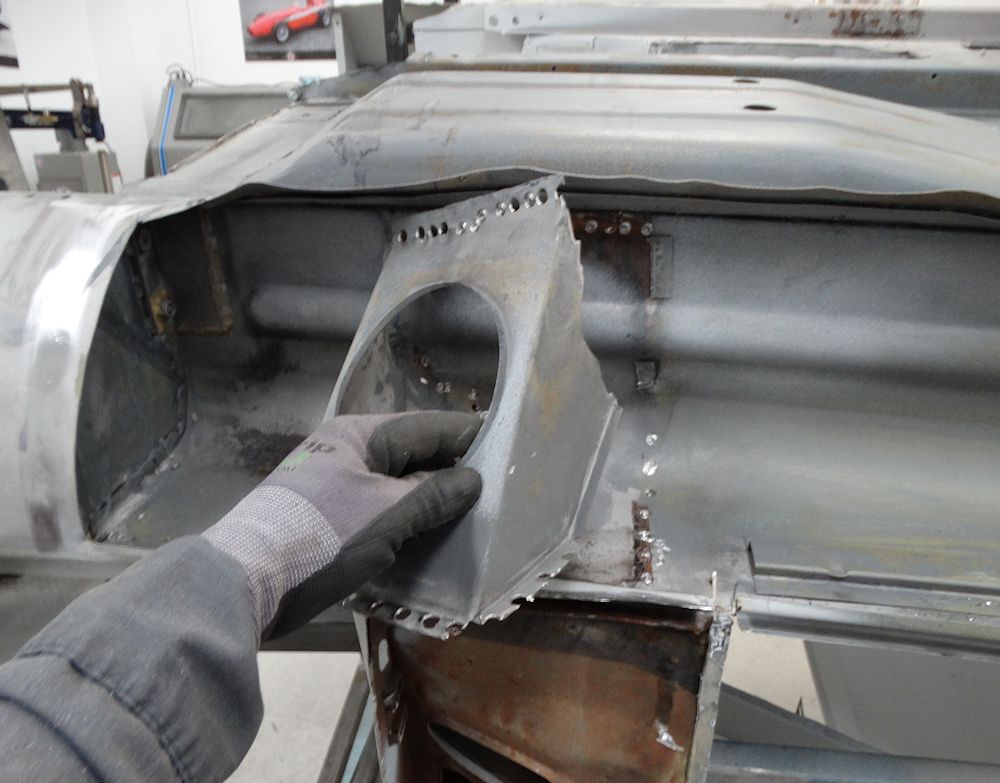
| Trial fitting a patch panel |
|
 |
 |
 |
 |
| Another large patch required beneath the dash |
|
 |
 |
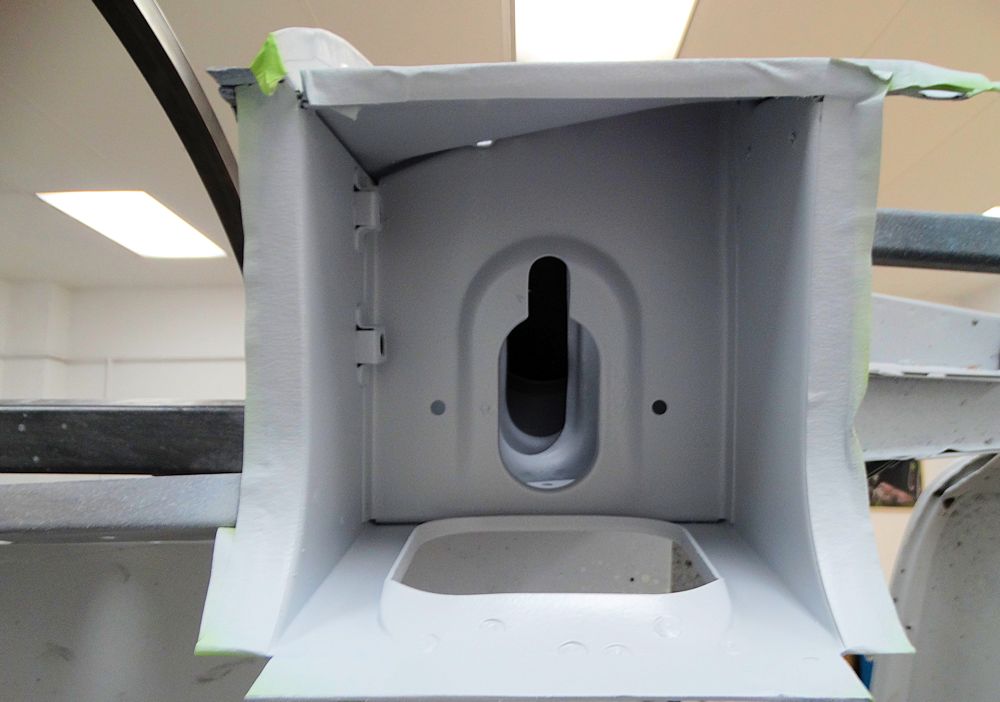
| Trial fitting the patch panel |
|
 |
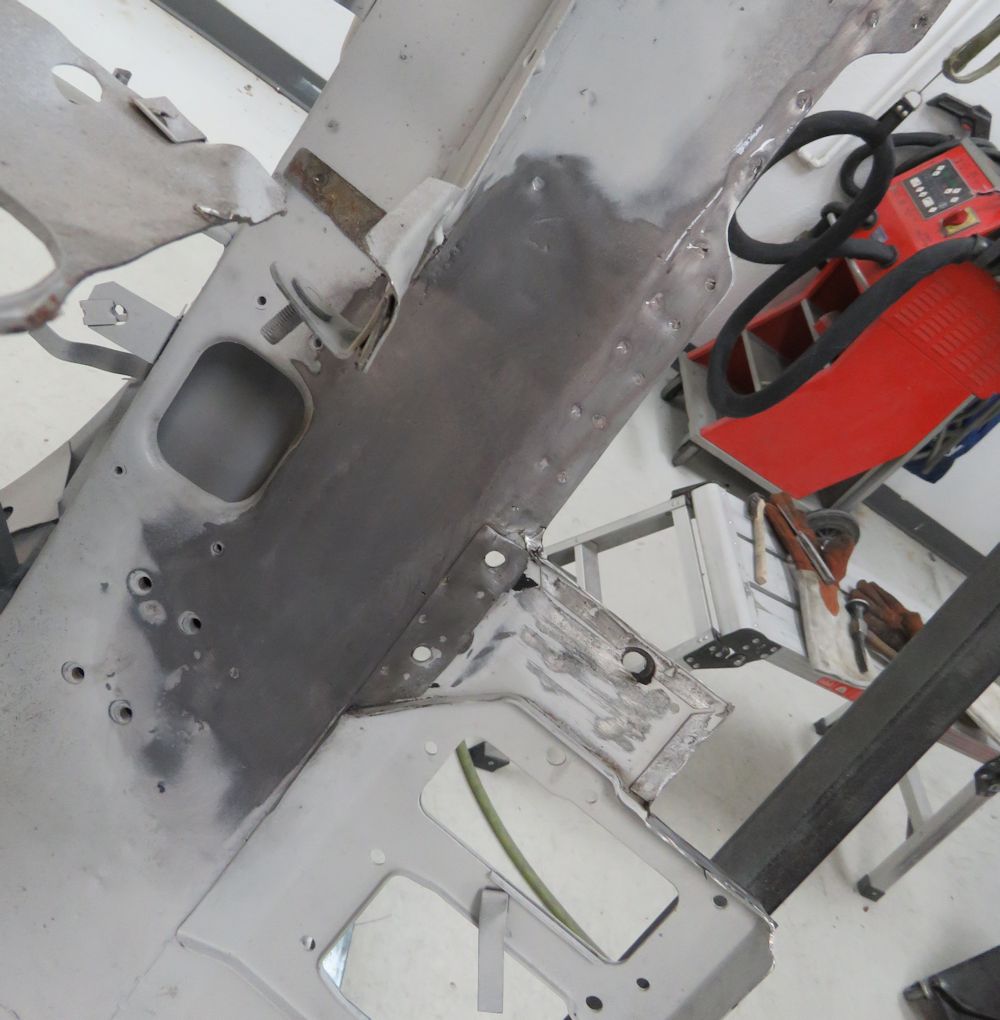 |
| Repaired area metal finished and acid washed, ready for priming |
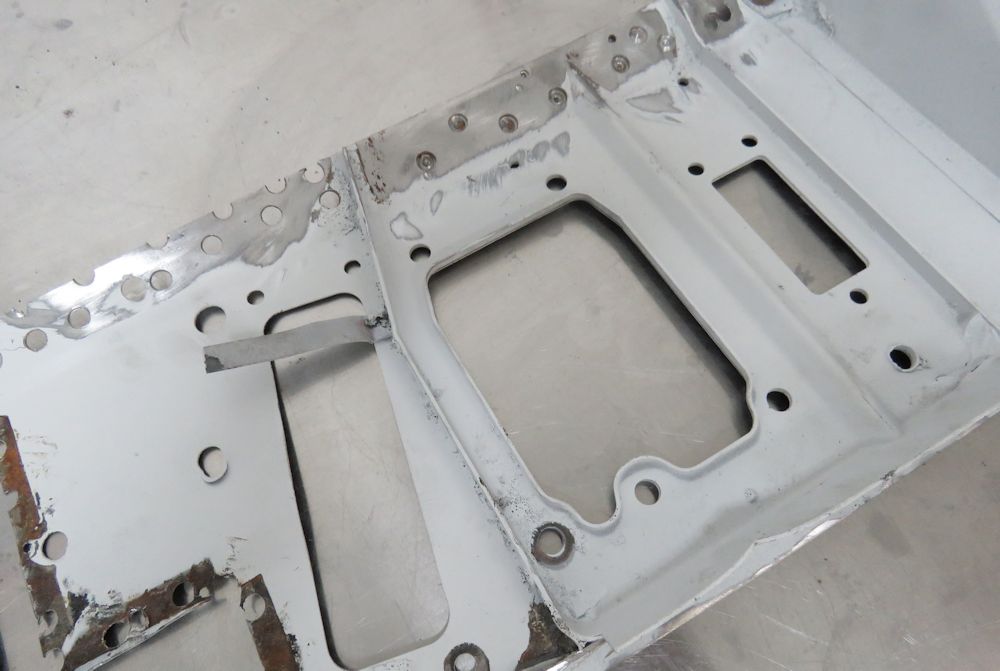
Oscar has been making fantastic progress in the Coachworks since my last update.
 |
 |
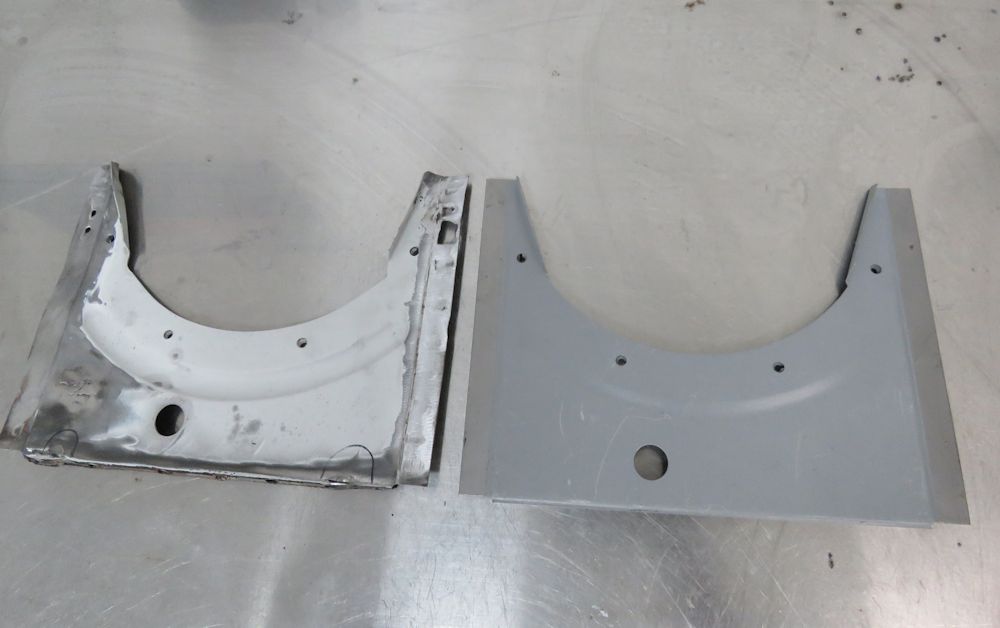
| RH pedal box panel had been crudely repaired in the past and will be replaced |
|
 |
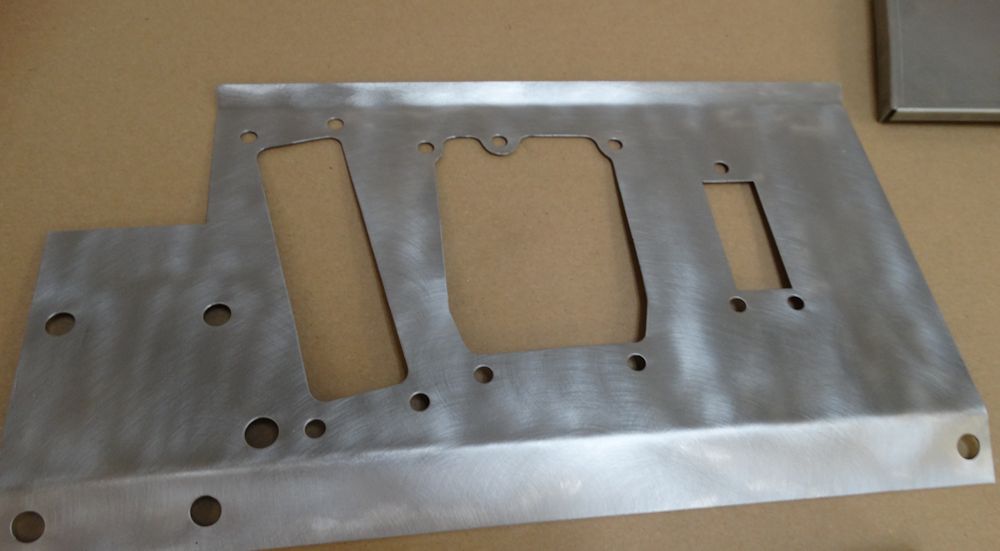 |
| Removing panel after drilling out spot welds |
New panel waiting in the wings |
 |
 |
| Trial fitting new inner sills |
|
 |
 |
 |
 |
| Trial fitting new floors |
|
 |
 |
 |
 |
| Wurth Body Wax sprayed beneath new radius arm cups prior to installation |
|
 |
 |
| Acid washing bare metal inner box sections |
|
 |
 |
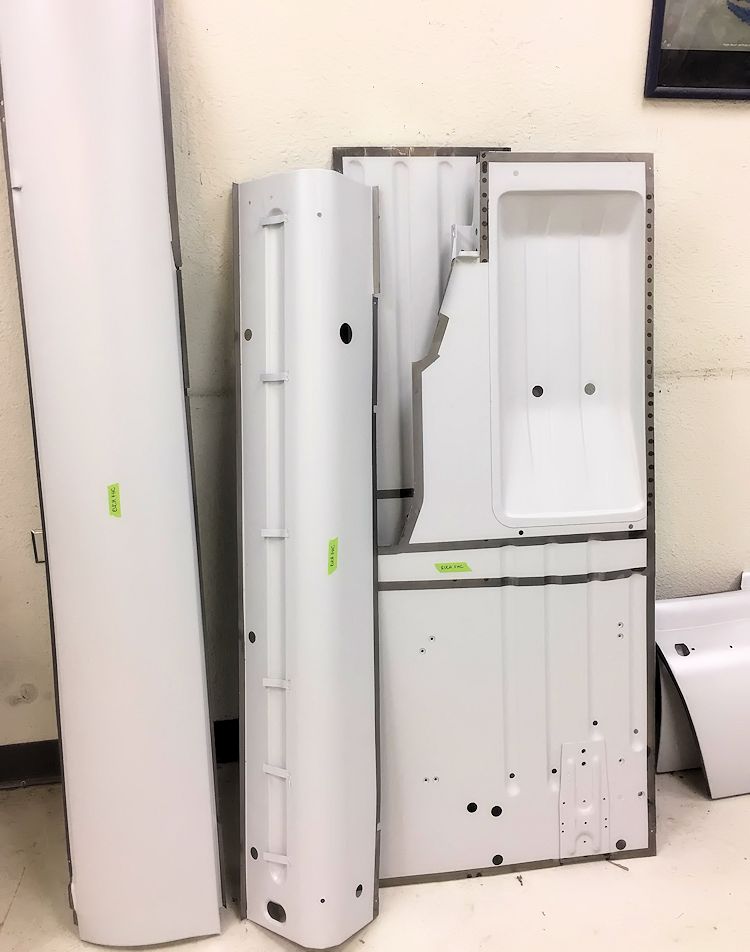
| All inner surfaces will be sealed with epoxy
and coated with Body Wax prior to installing floors |
|
 |
 |
 |
 |
| Sealer applied up inside A post towers |
Trial fitting inner sill gussets |
 |
 |
| Old boot floor assembly cut away |
|
 |
 |
 |
 |
| New bell housing side panels being trial
fitted |
|
 |
 |
 |
 |
| The first of thousands of spot welds! |
|
 |
 |
| We will use 3 inner sill support gussets per
side |
|
 |
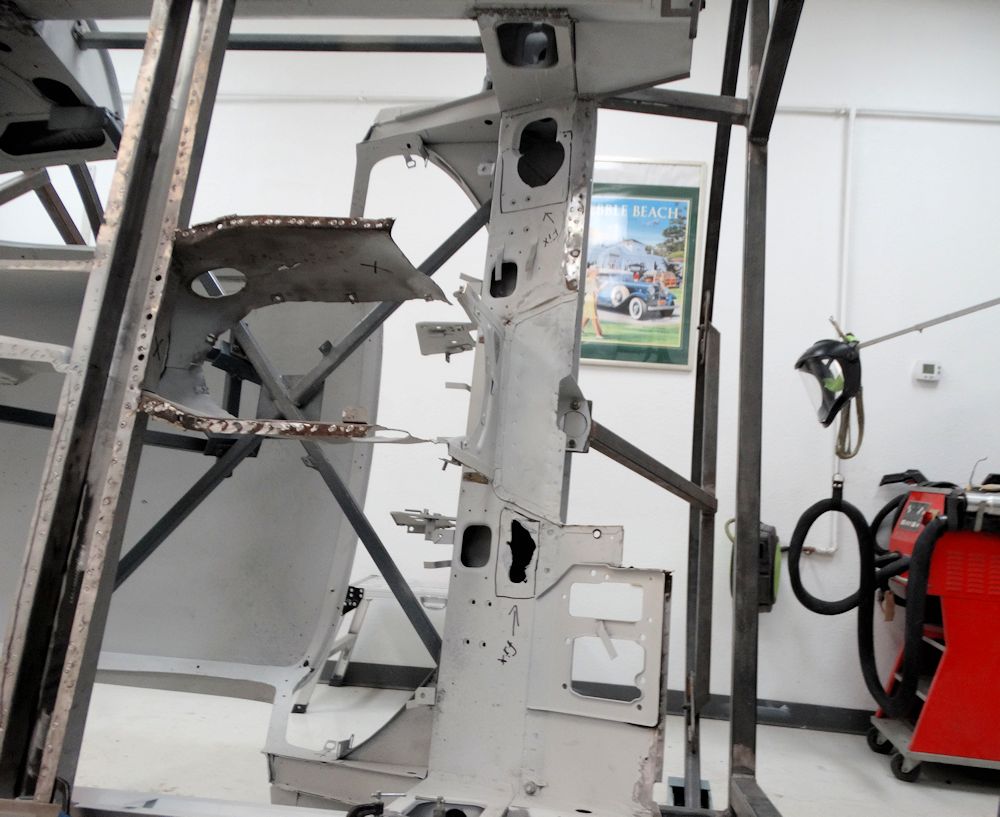 |
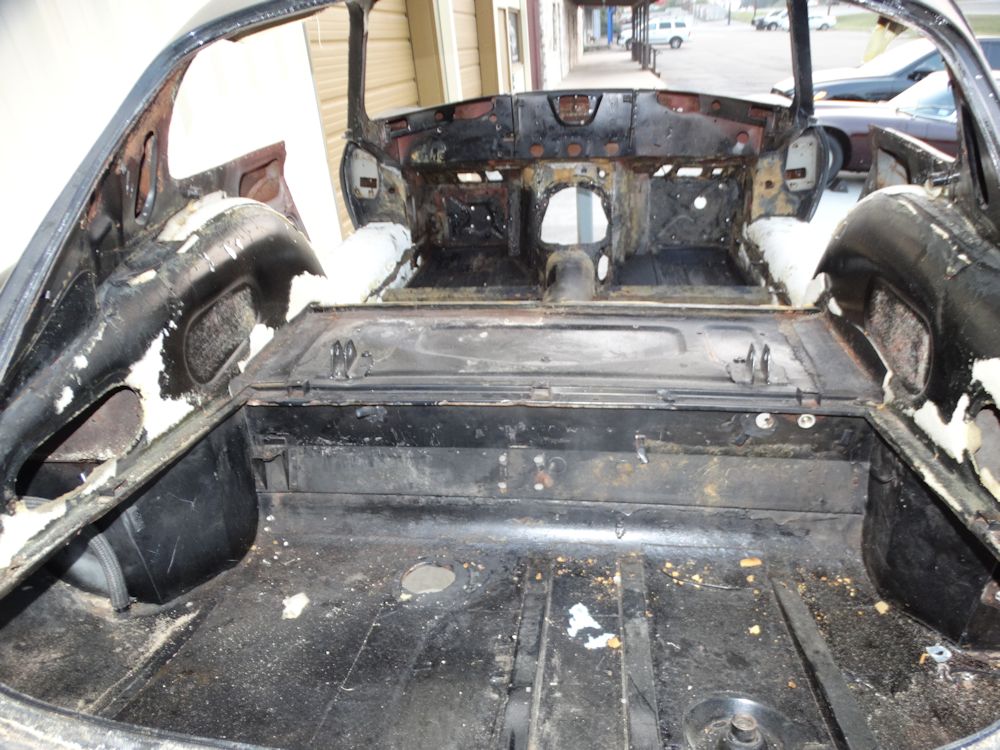
| Underside of dash has been butchered! |
|
 |
 |
 |
 |
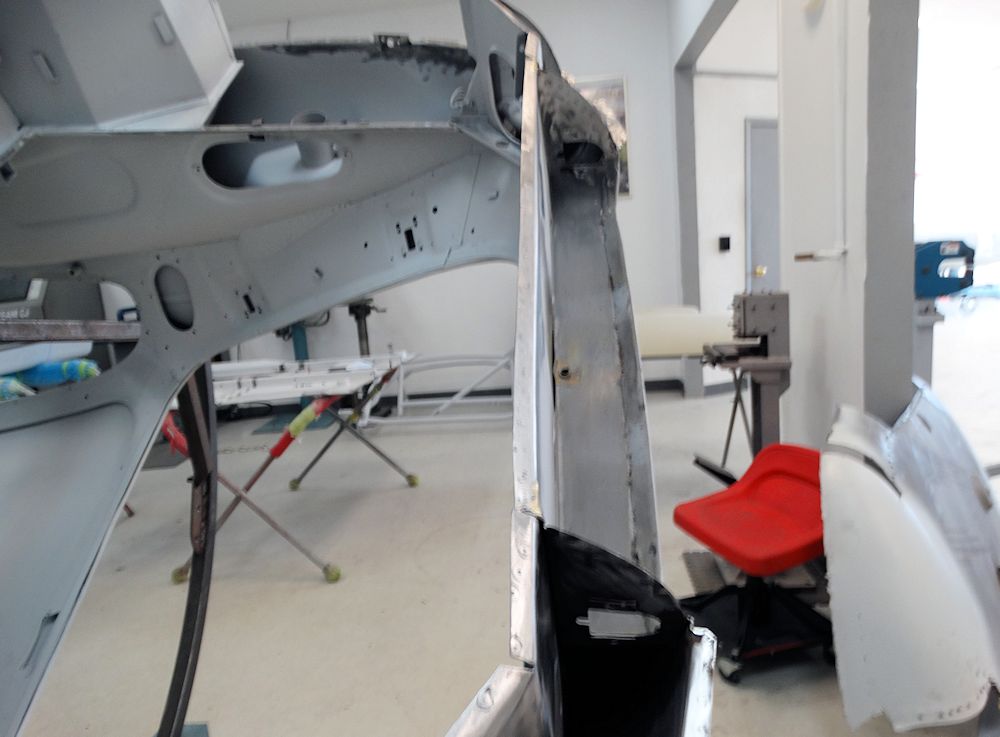
| Central firewall also needs extensive repairs |
Starting to fabricate repair panel for
firewall |
Oscar has begun the process of cutting away all the corroded sheet metal.
 |
 |
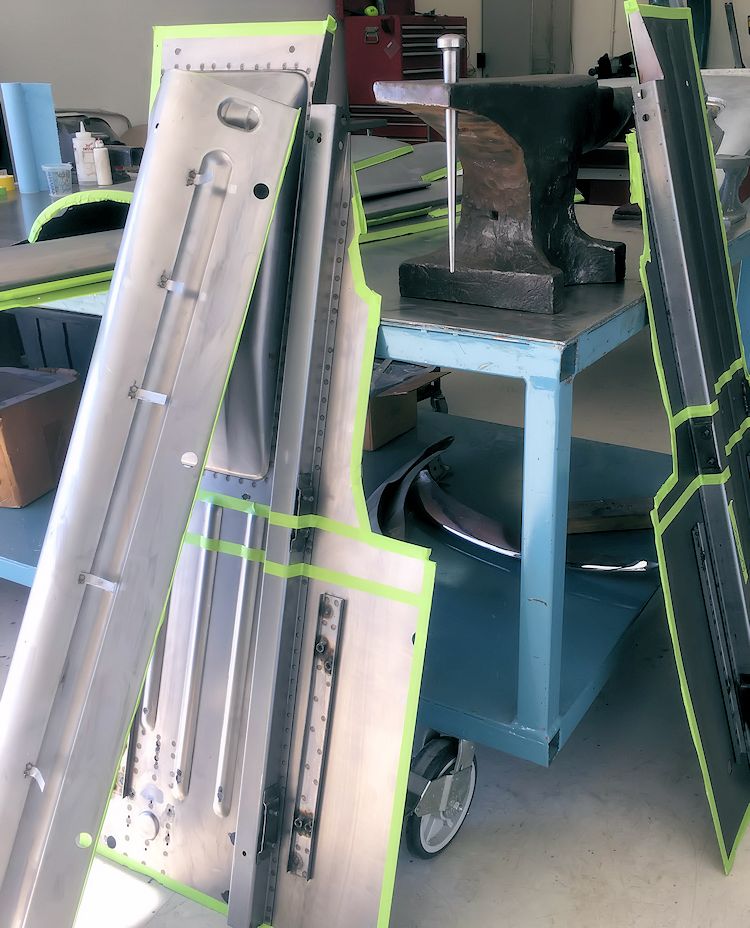
| After stripping shipping primer from new
panel, future weld zones are carefully masked |
New panels sealed with etching primer |
 |
 |
| Rebuilt body will feature additional inner sill stiffening |
|
 |
 |
 |
 |
| Drilling out spot welds to remove floors |
|
 |
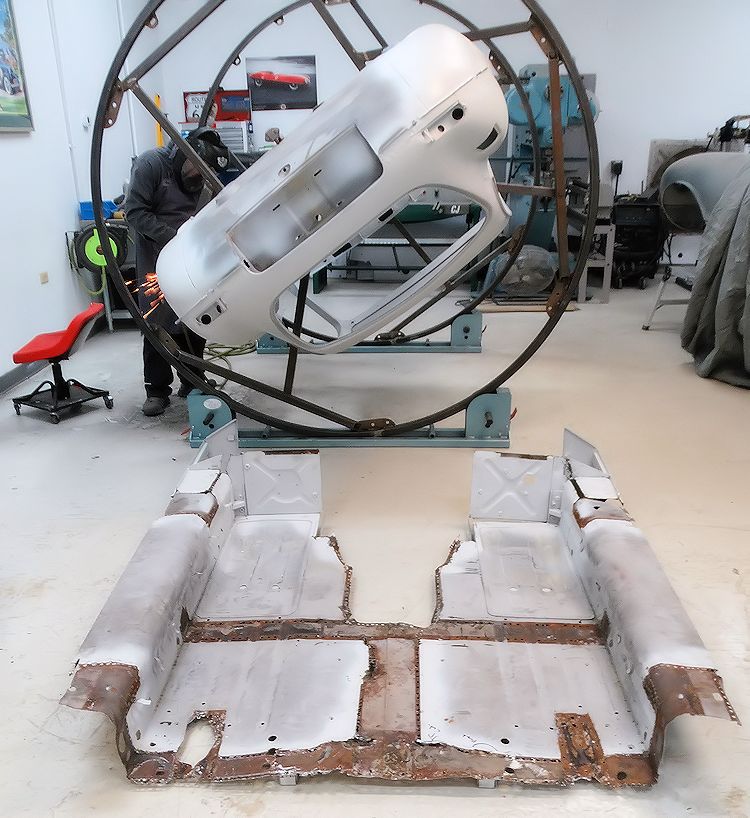 |
| Floors and inner sills removed in one piece |
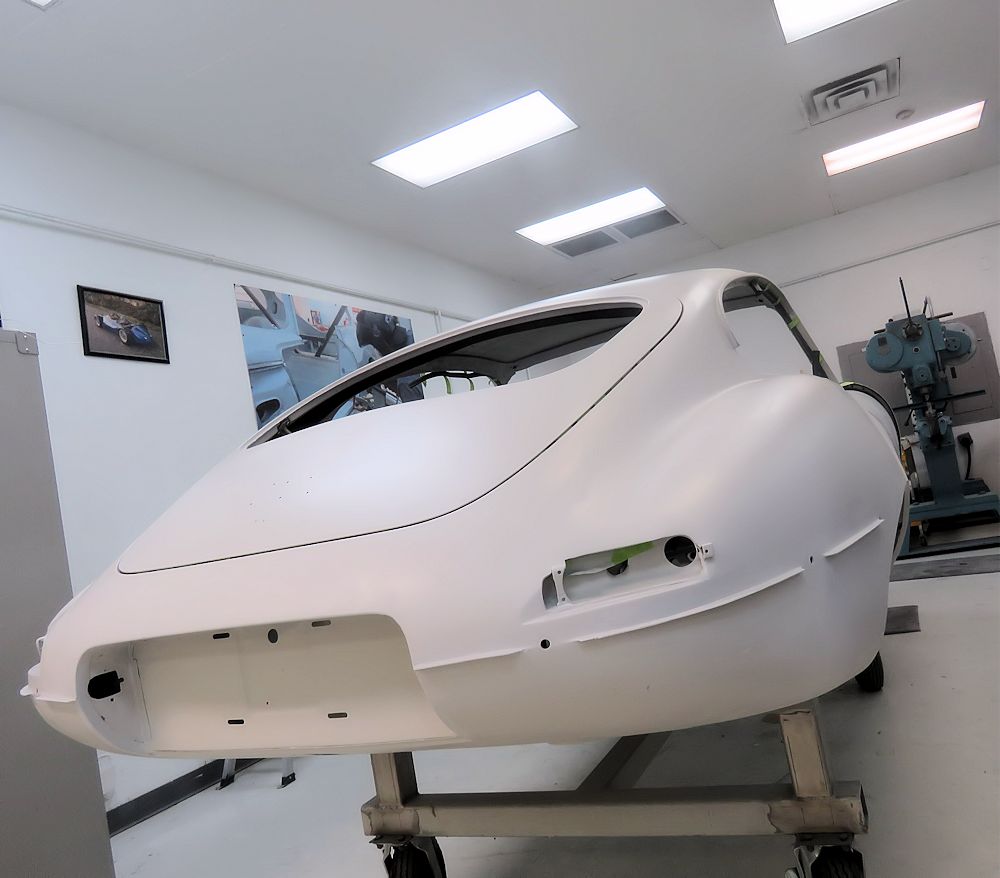
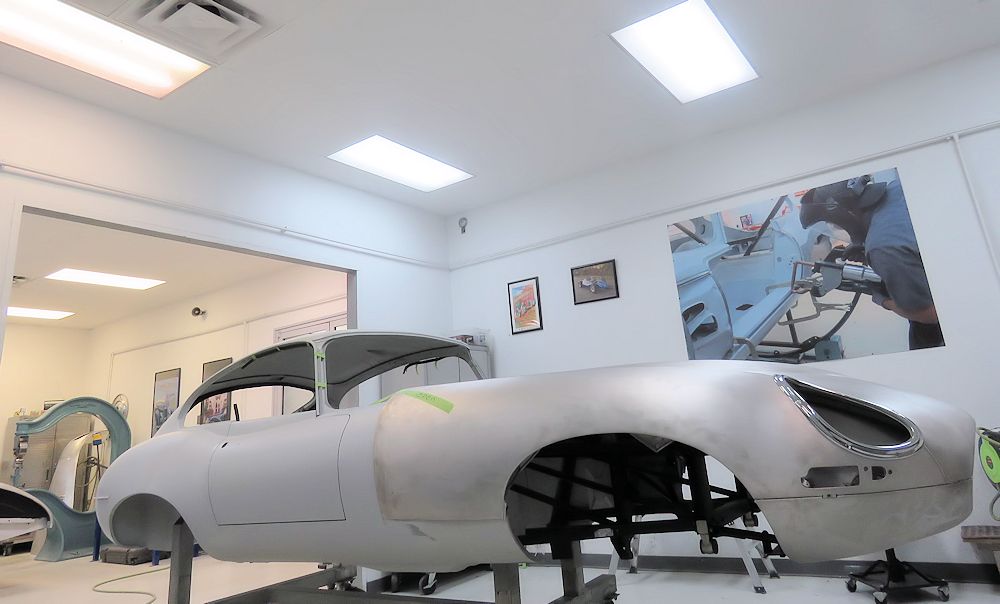
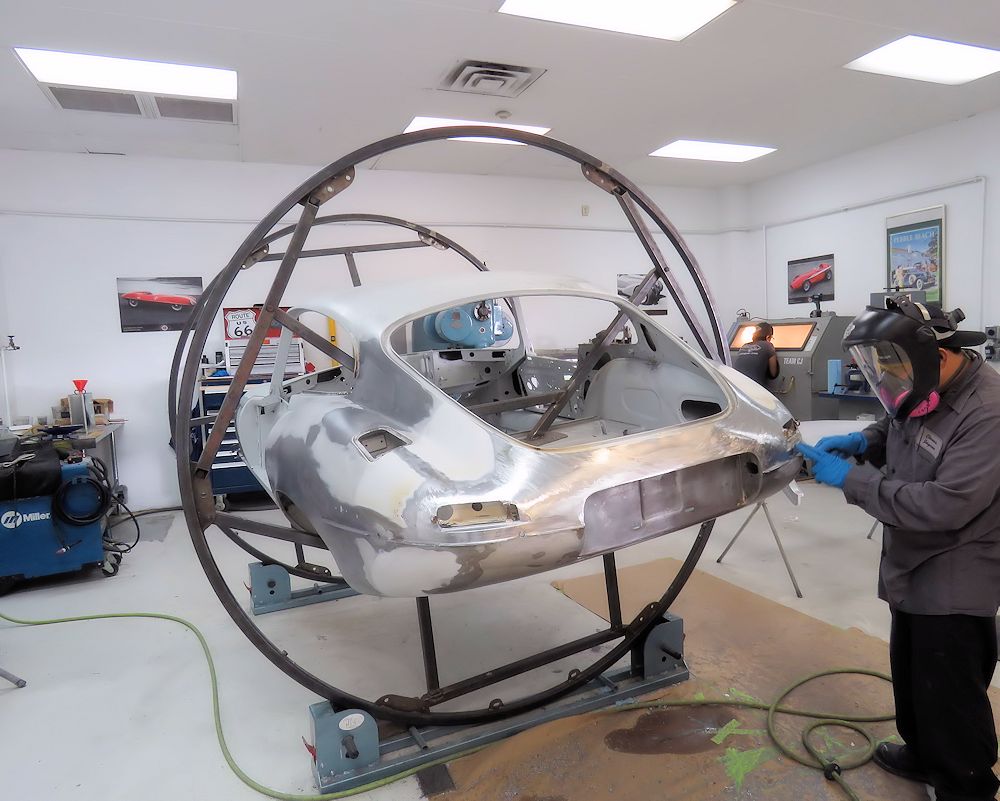
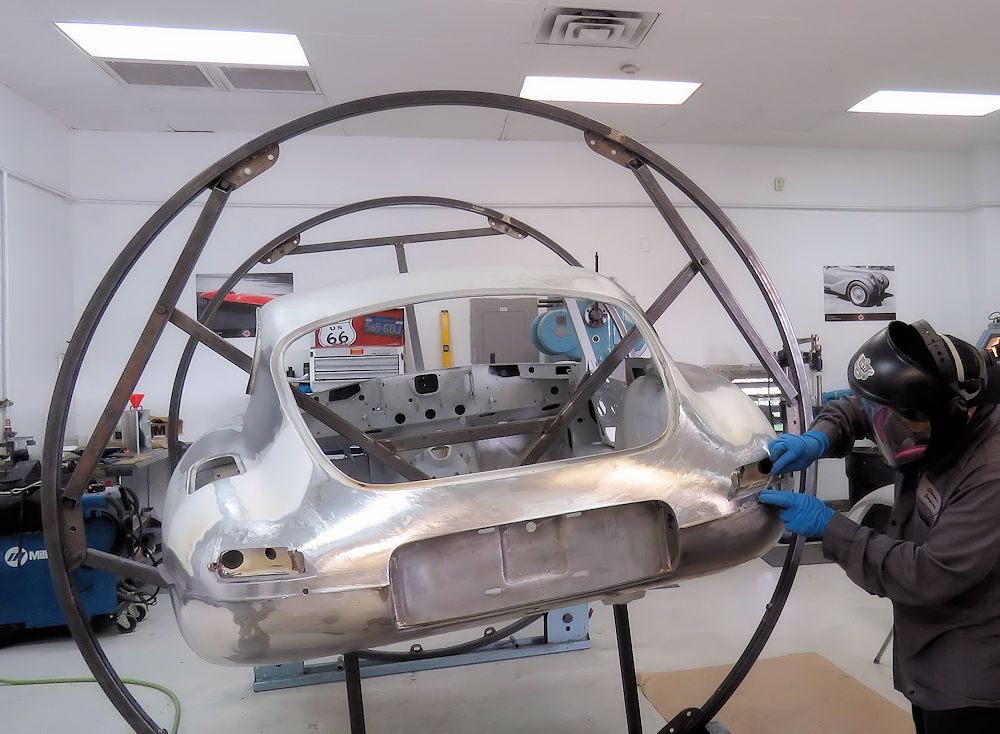
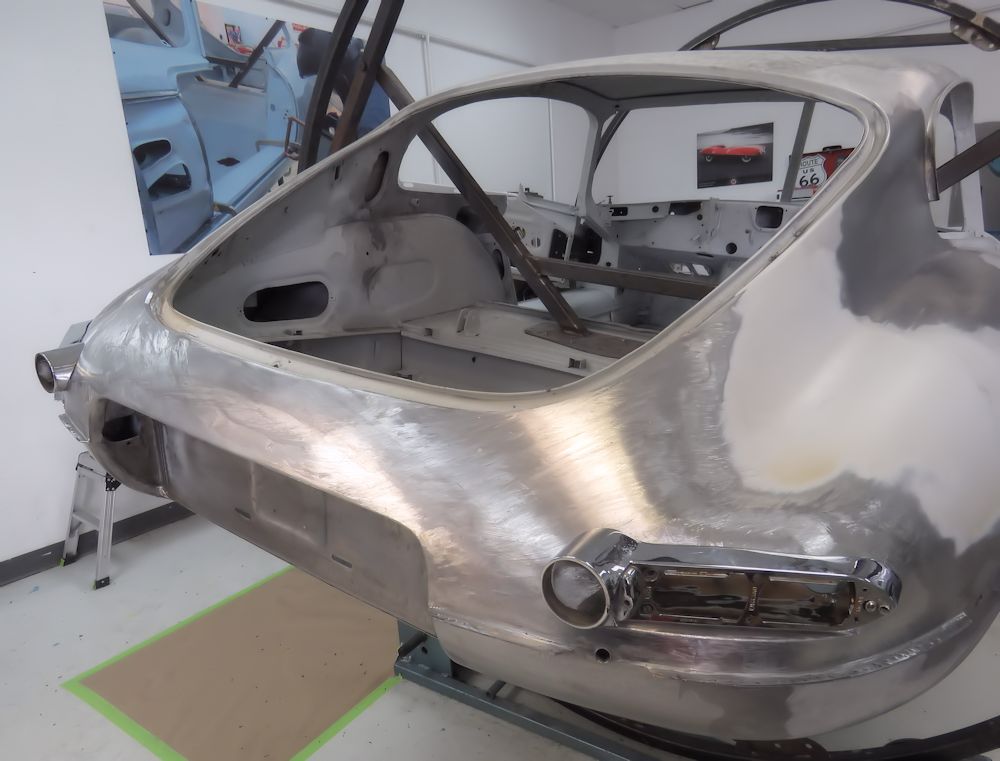
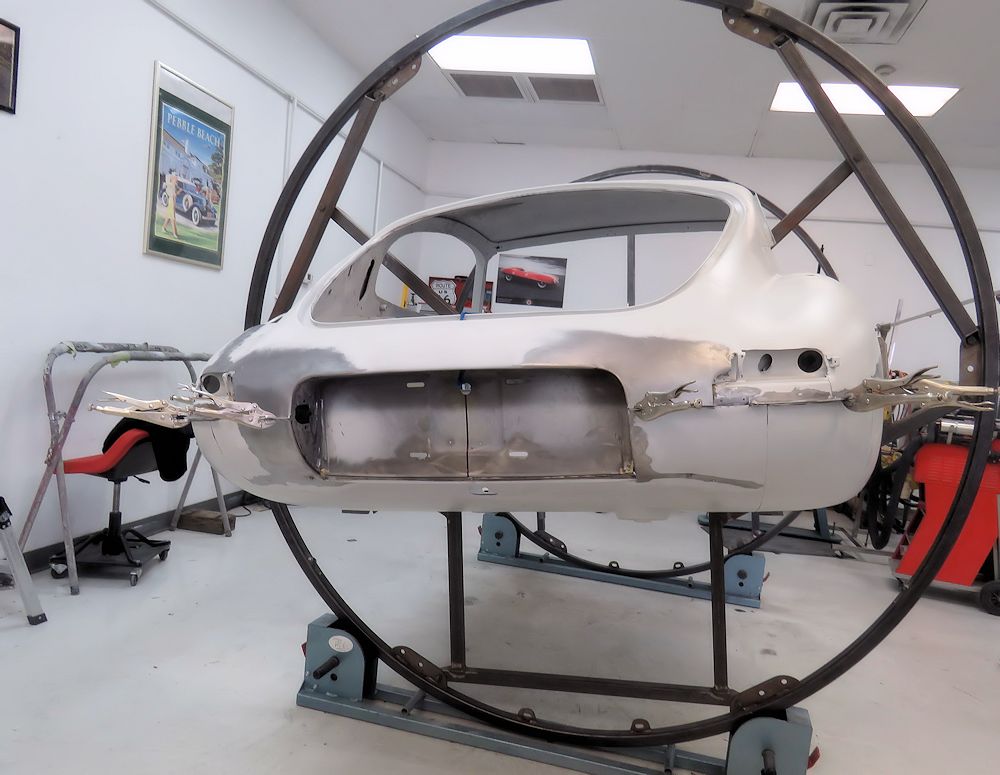
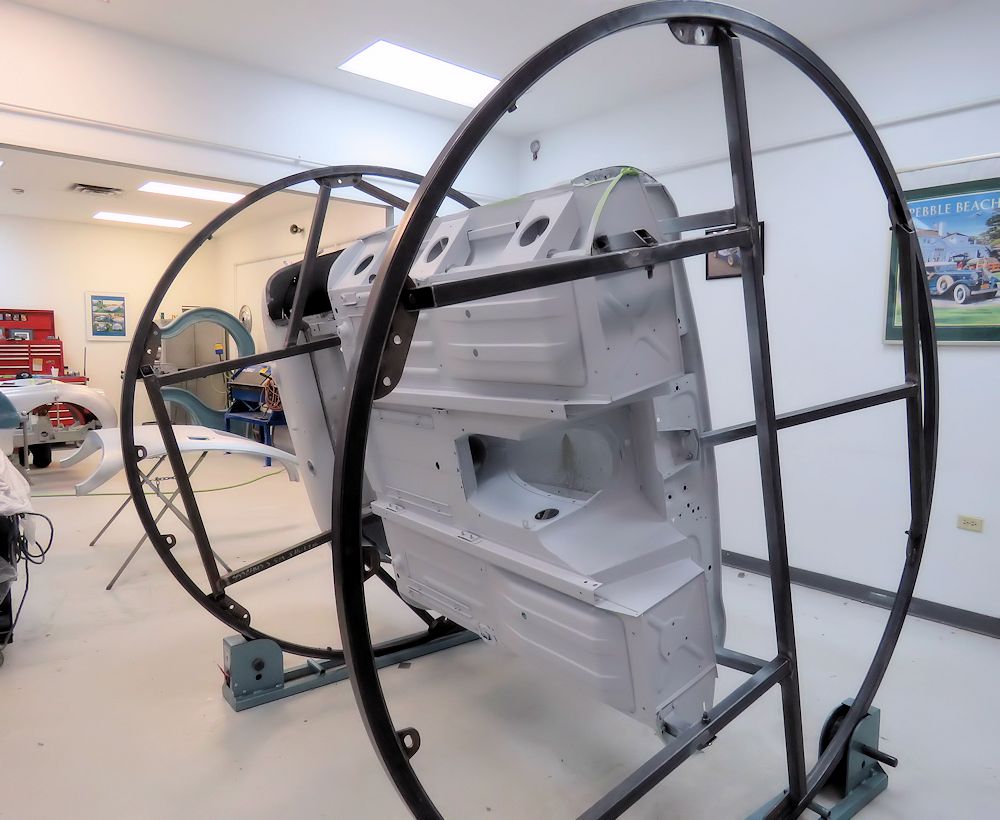
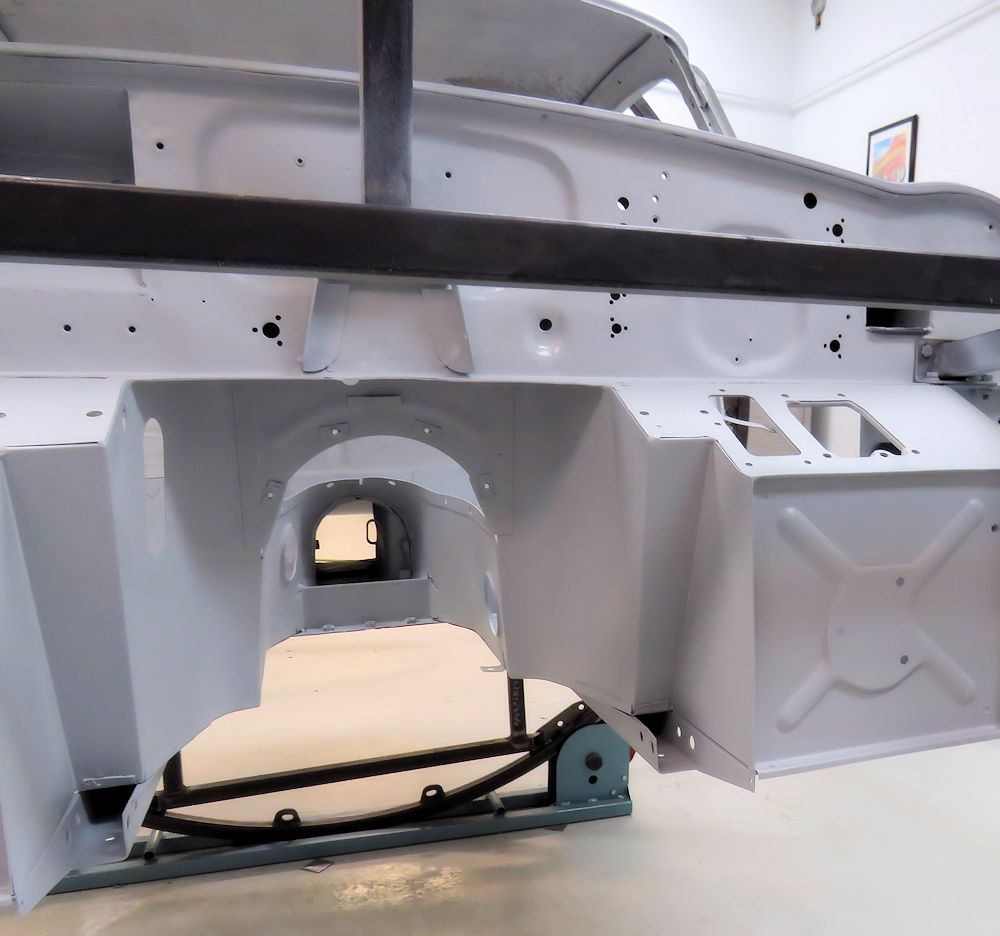
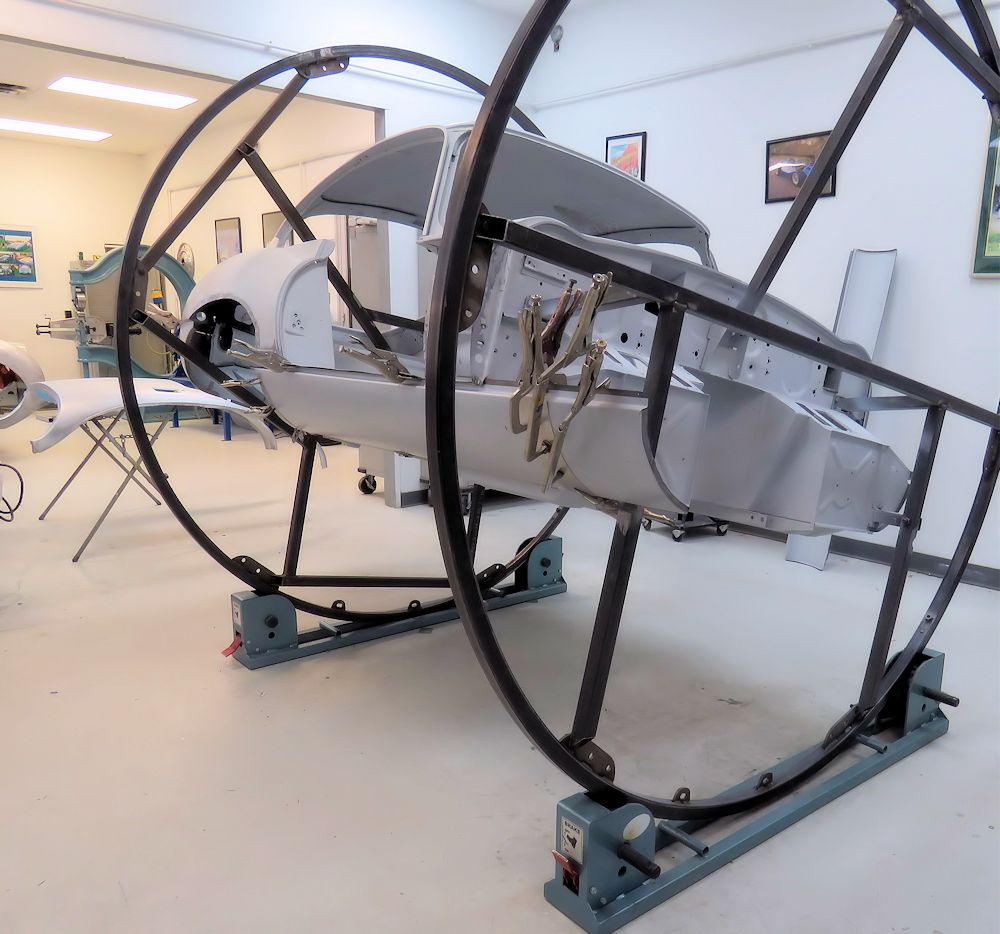
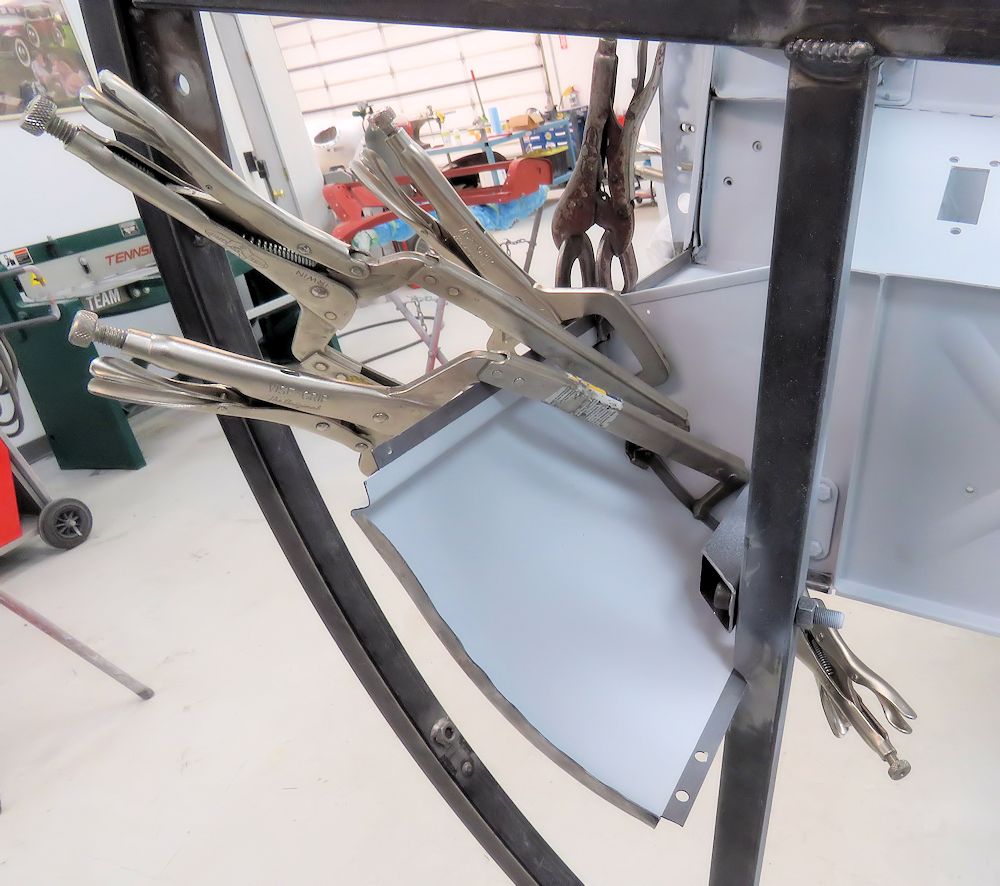
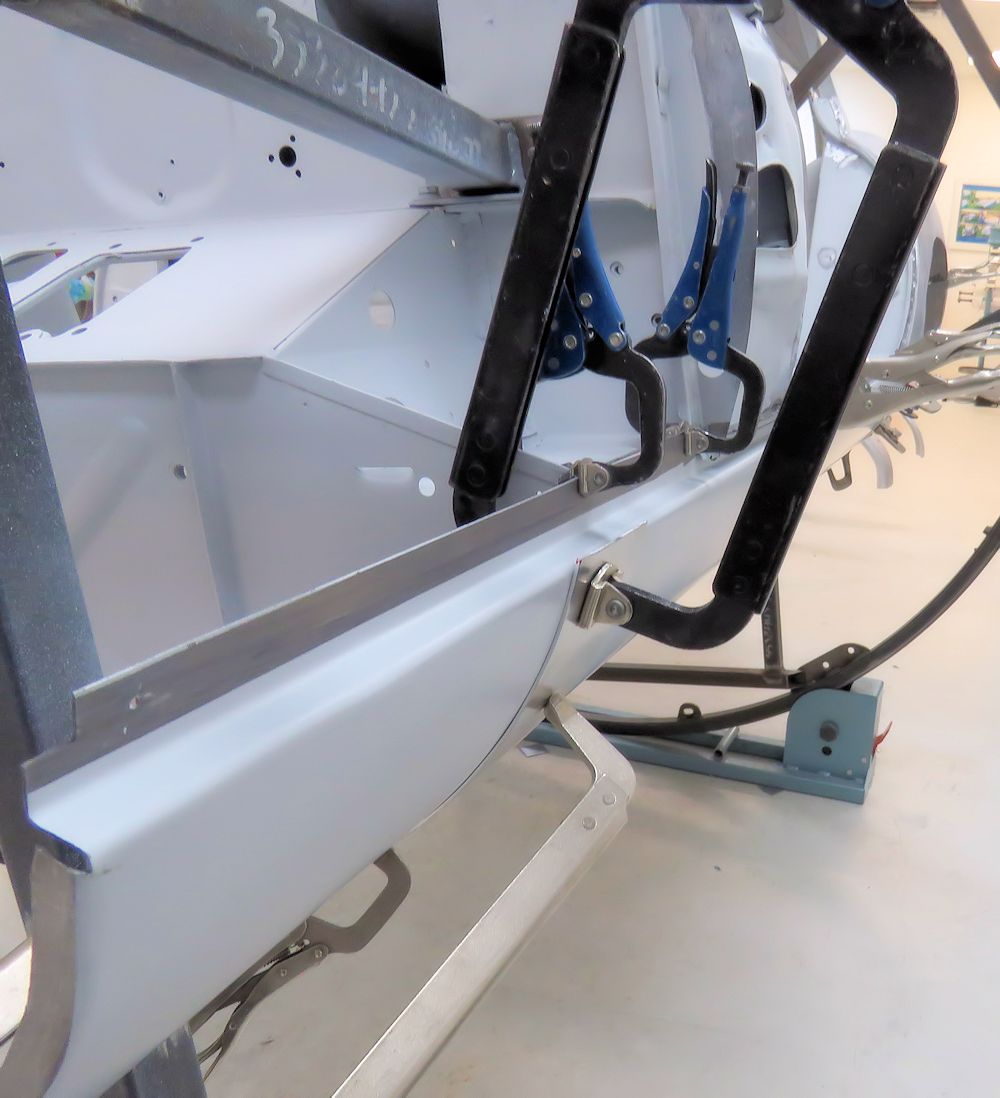
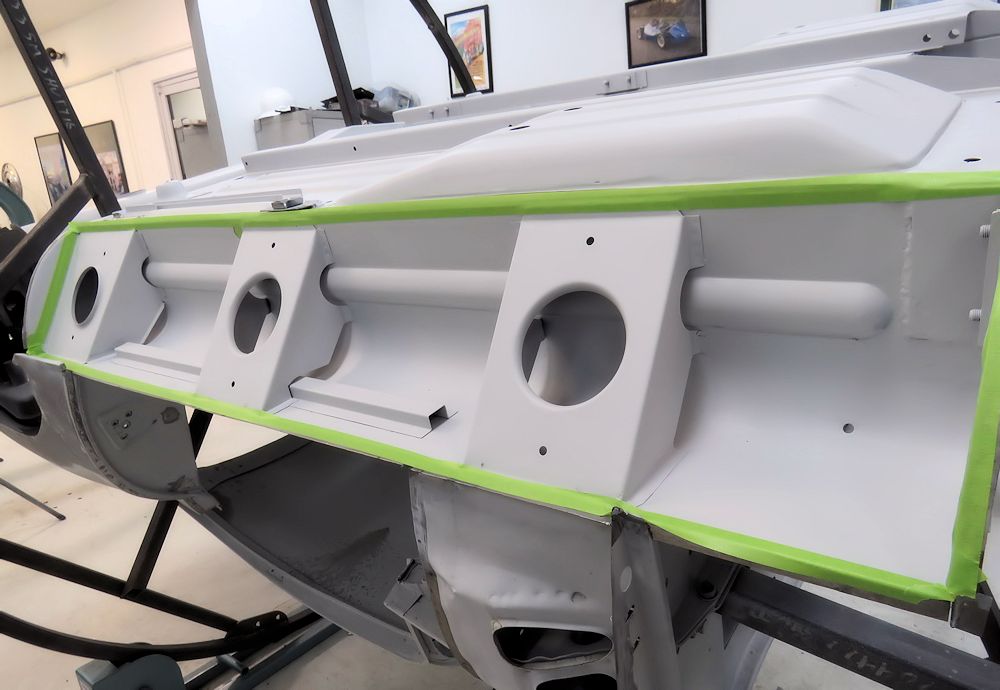
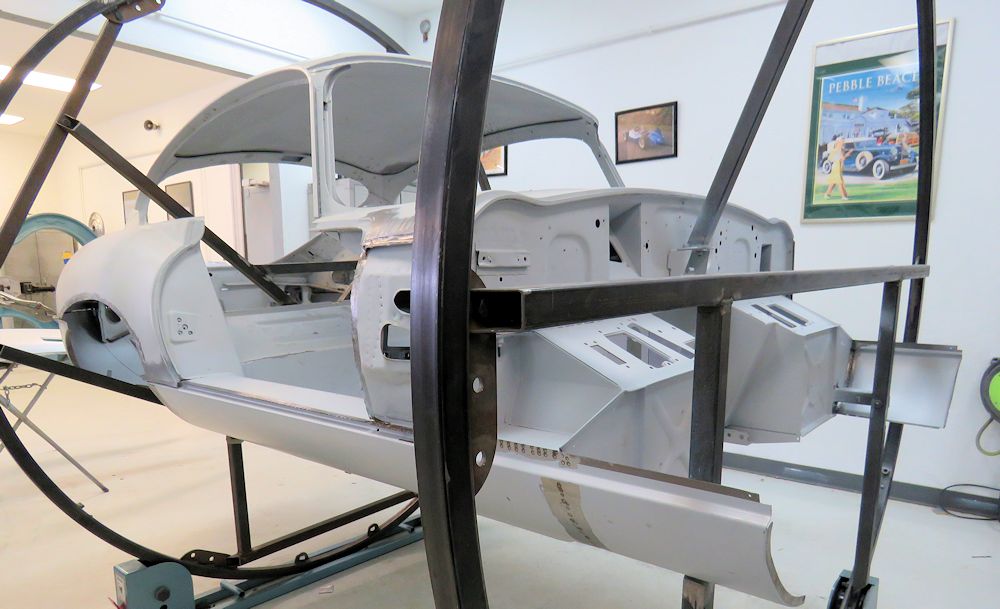
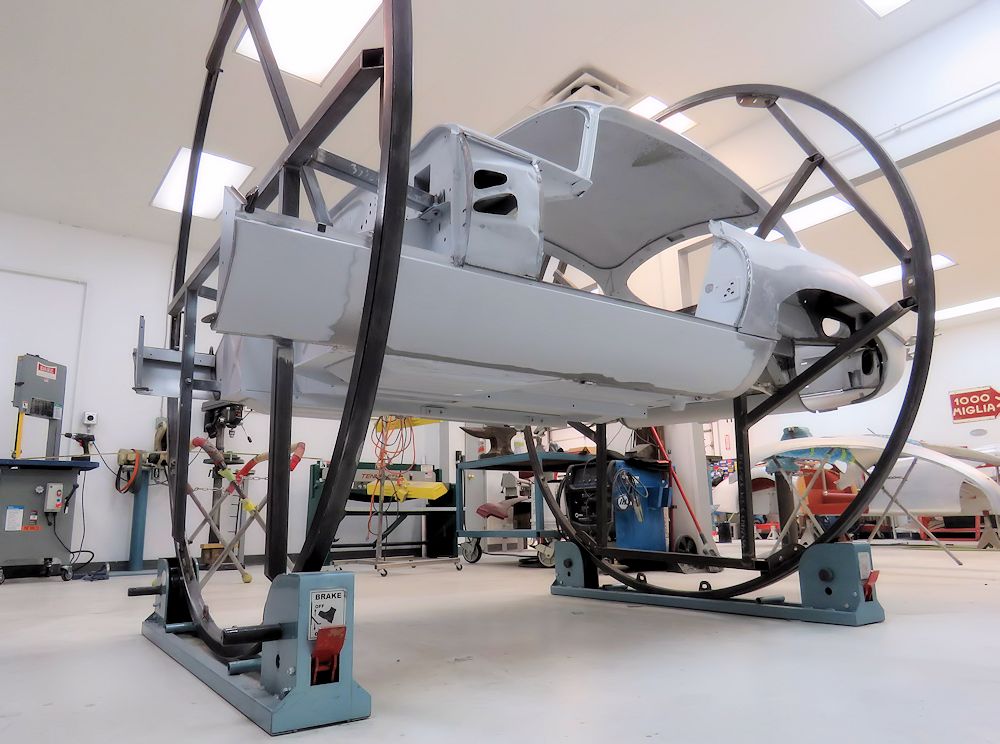
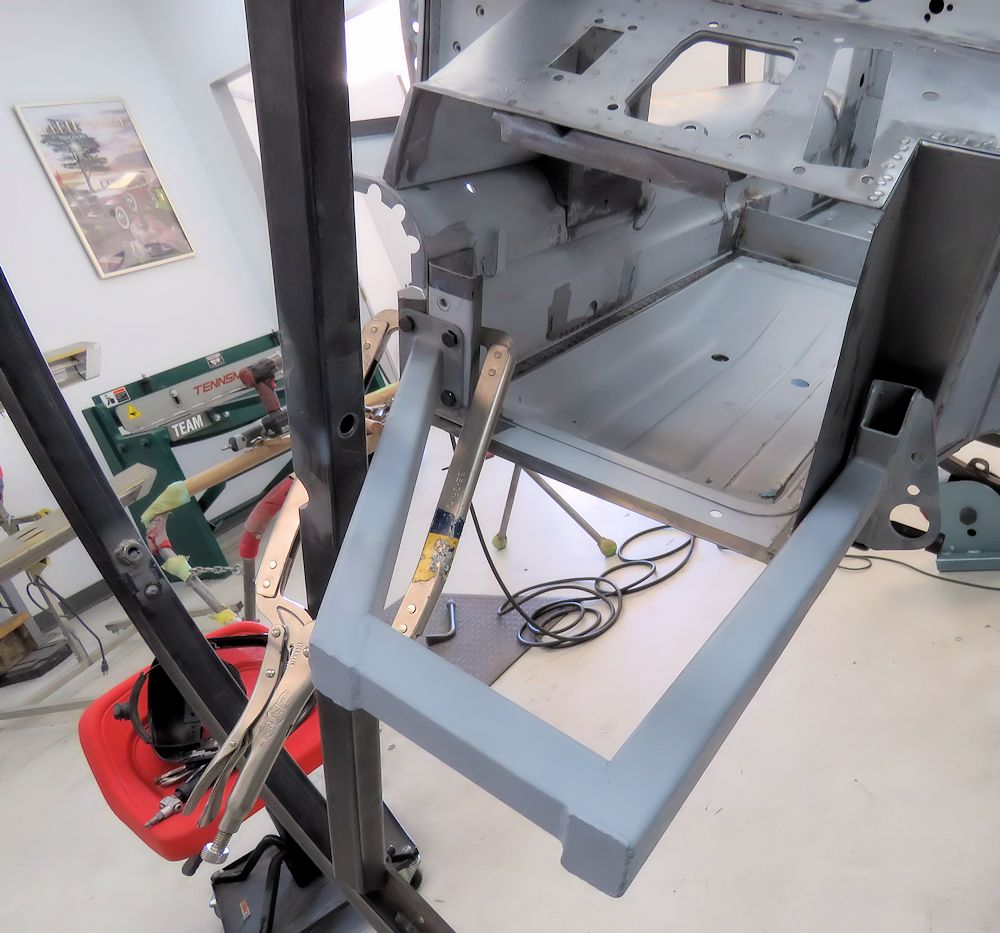
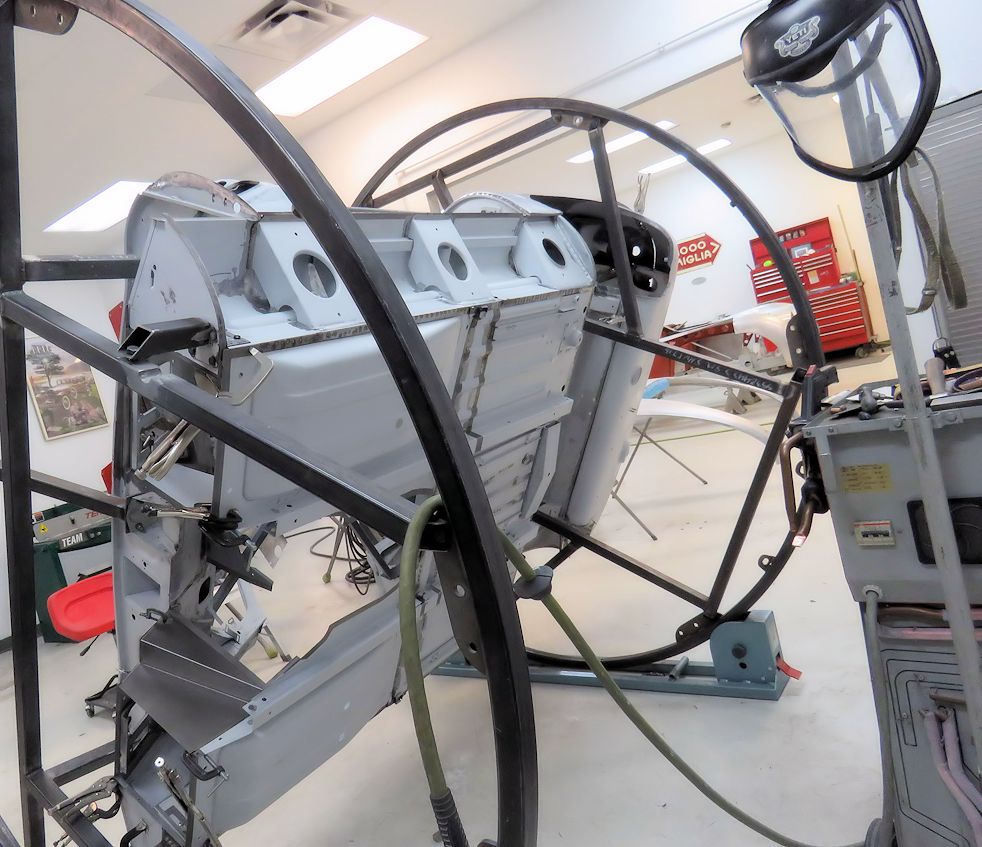
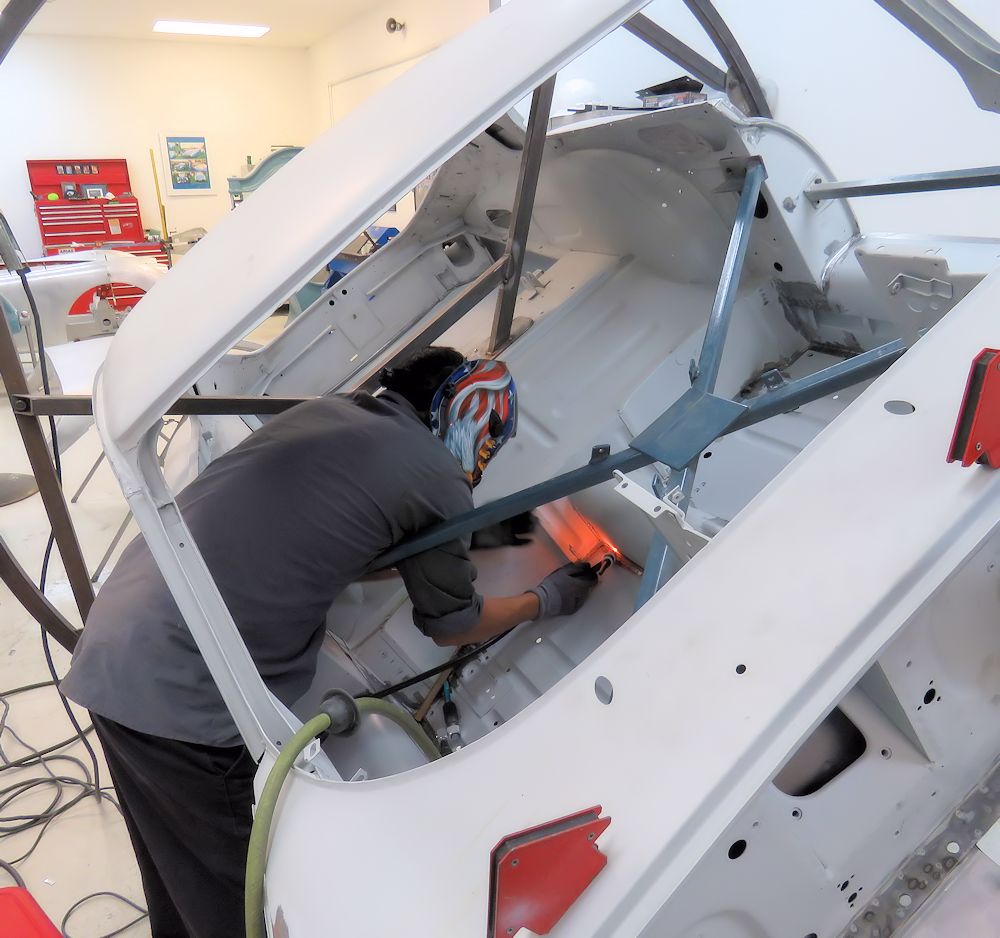
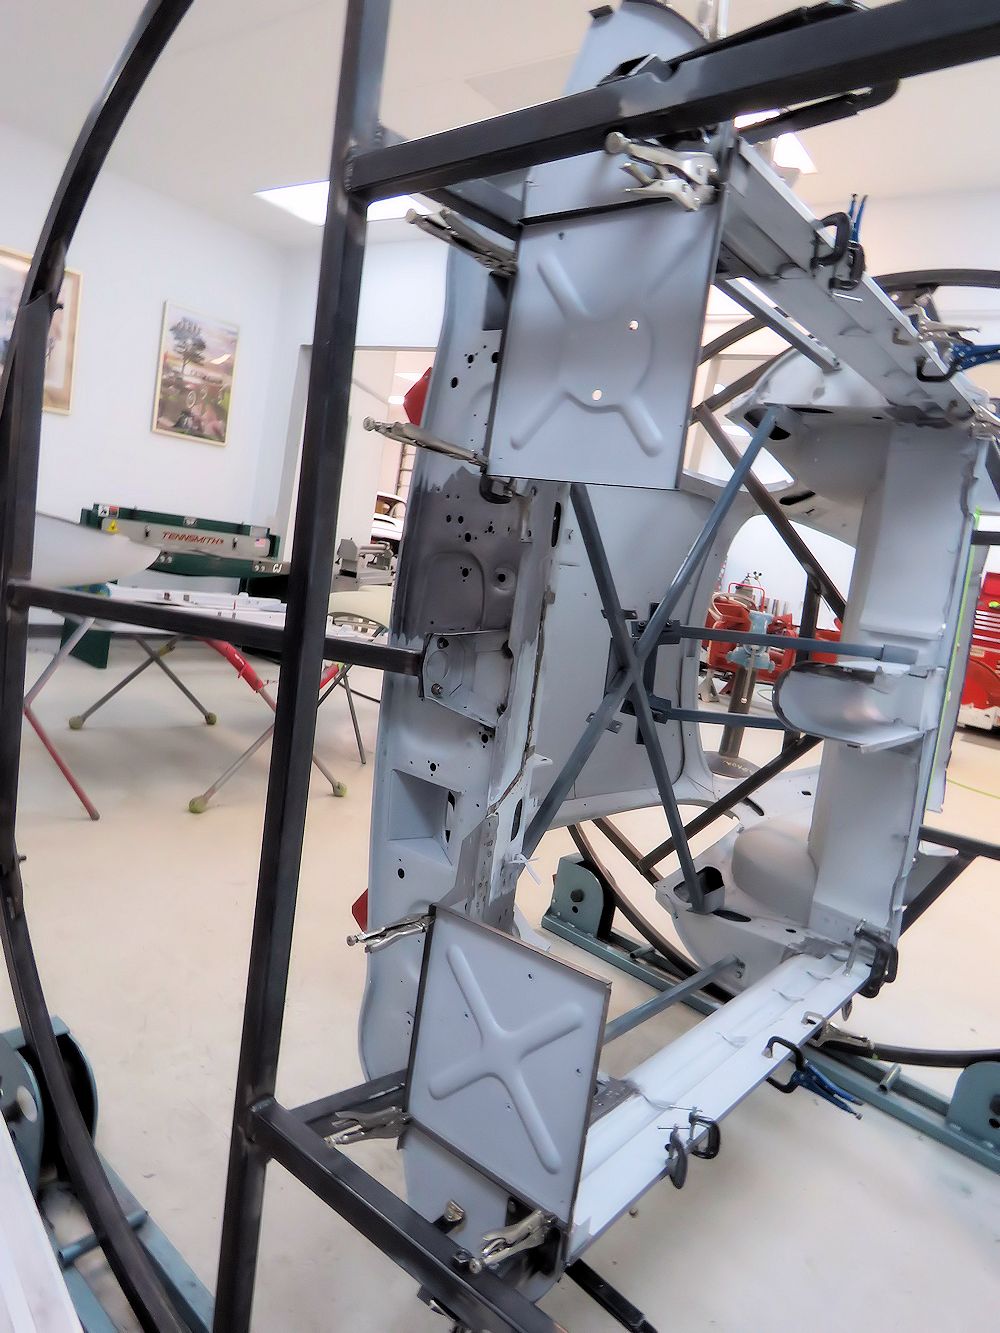
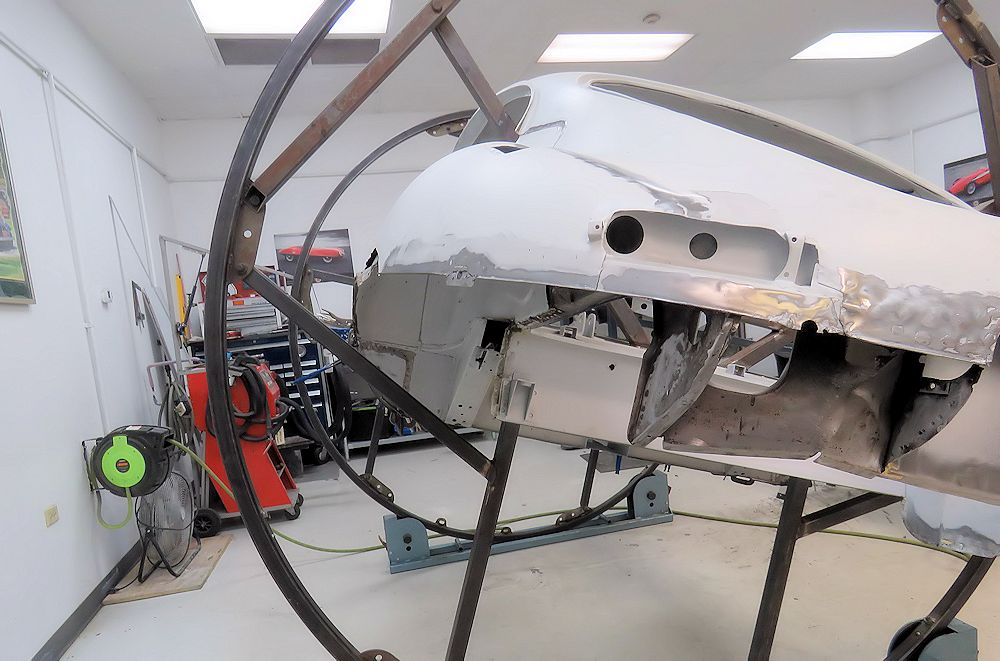
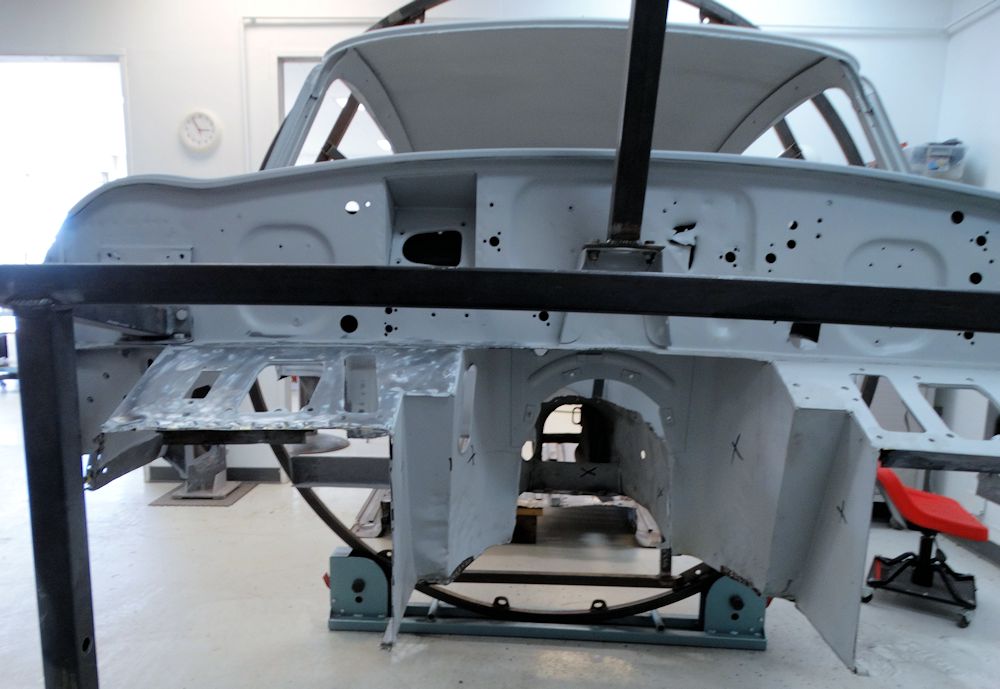
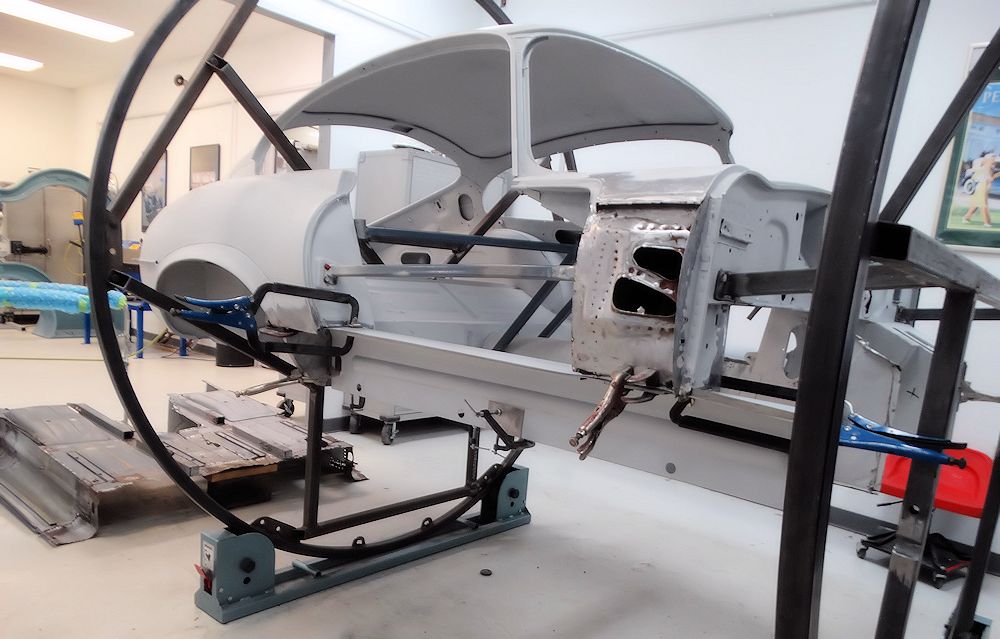
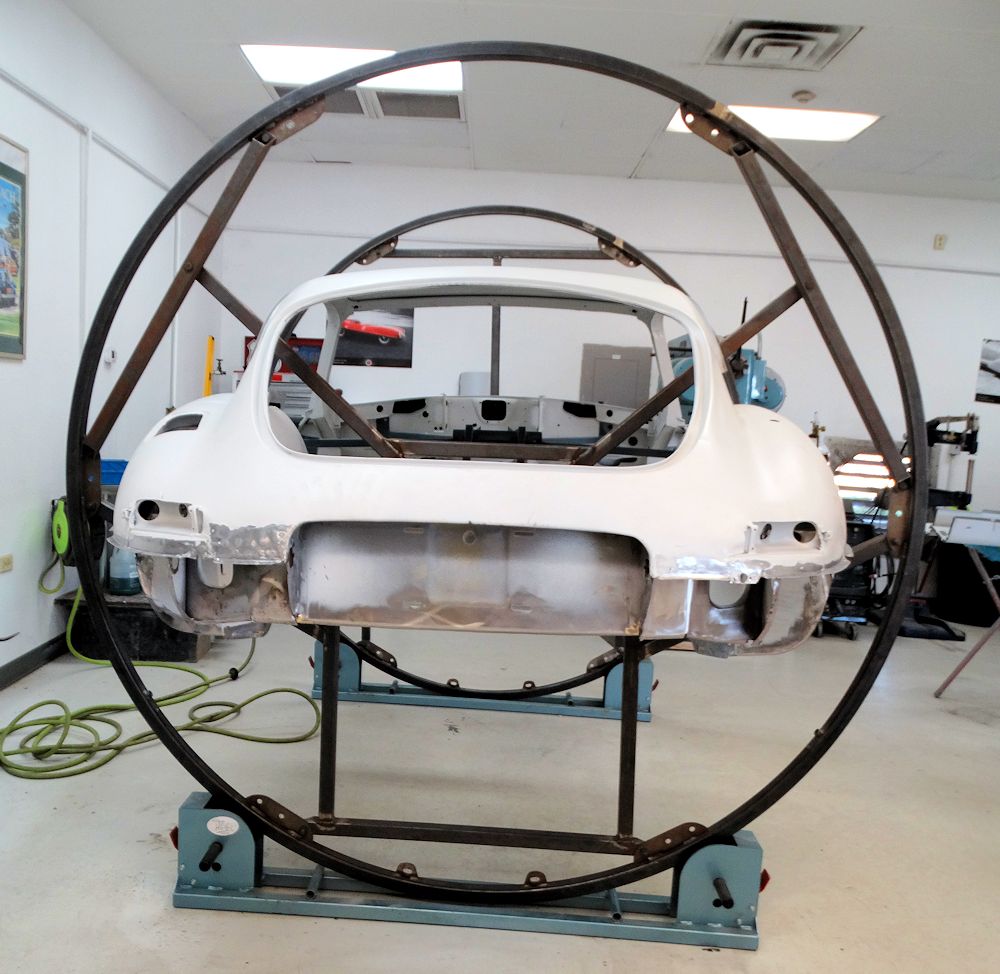
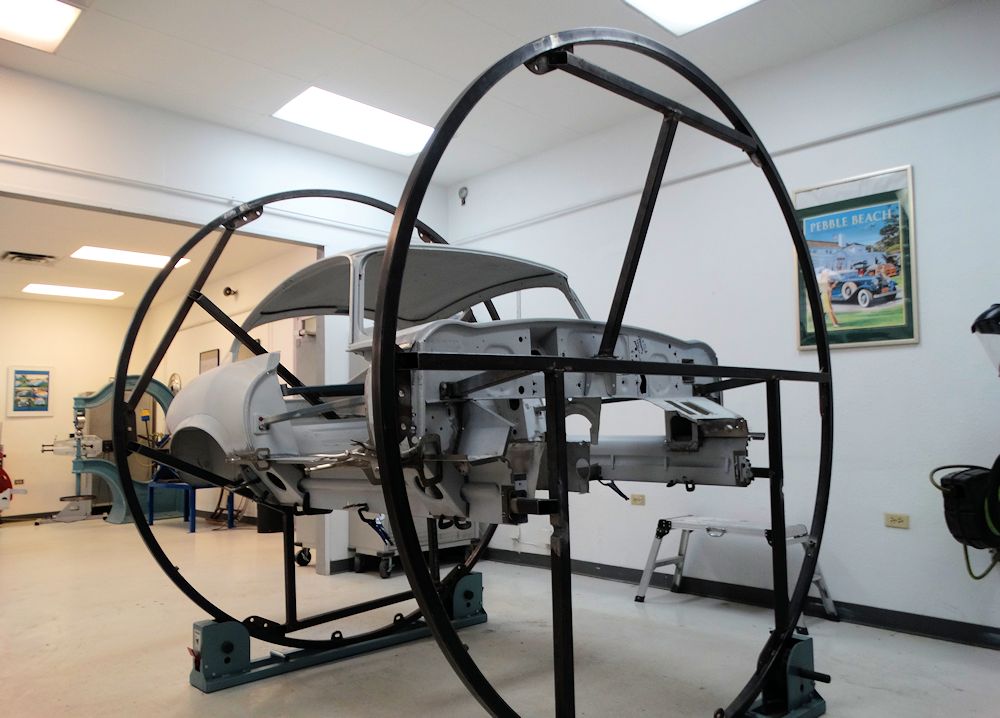
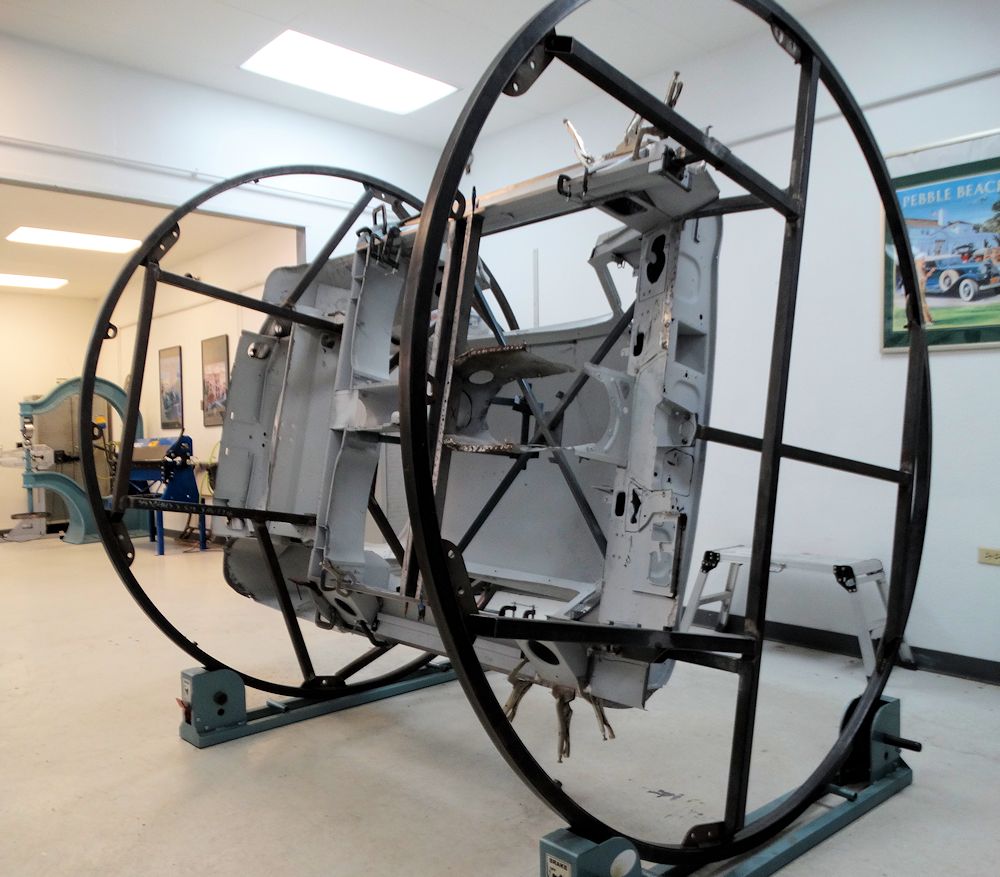
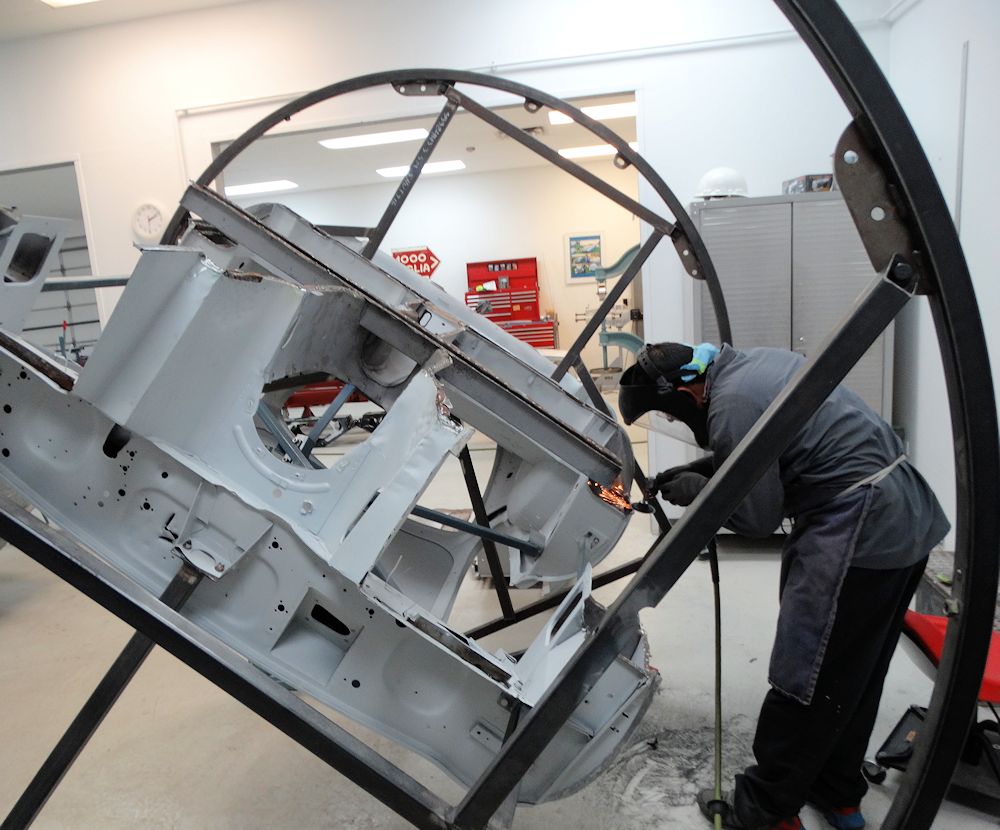
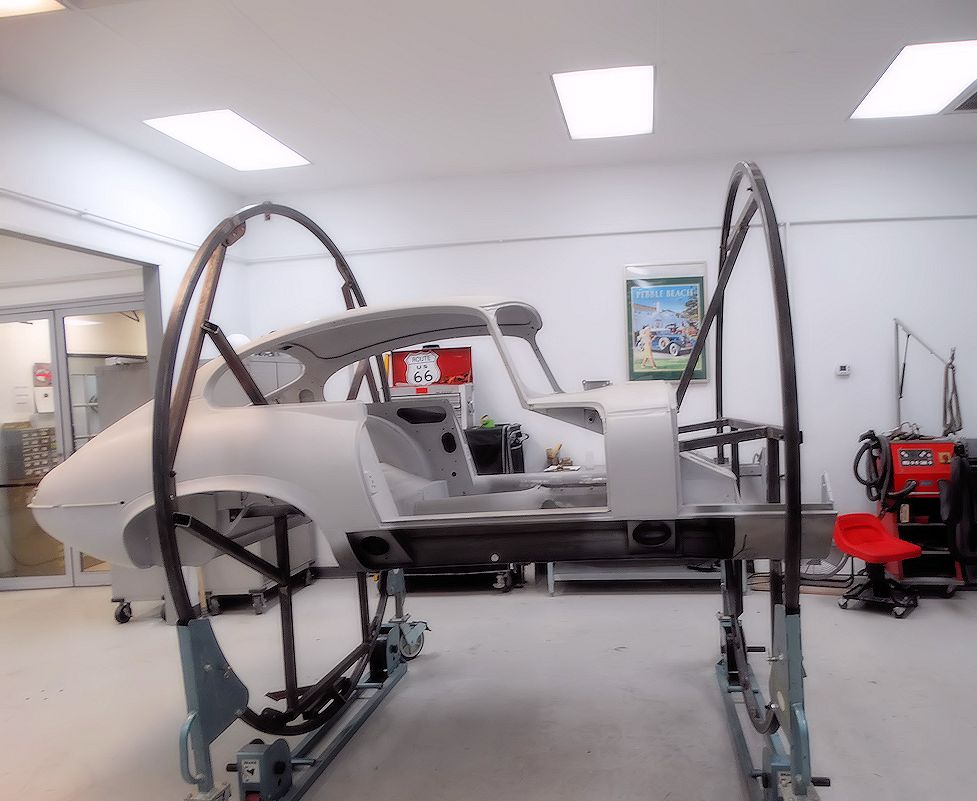
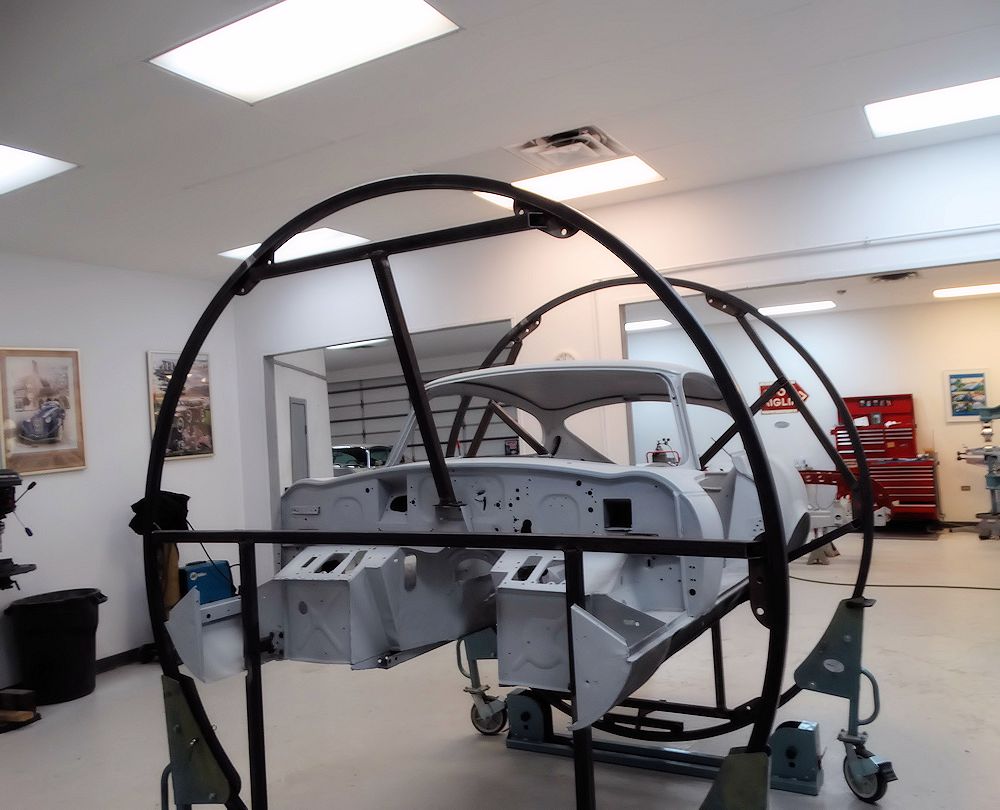
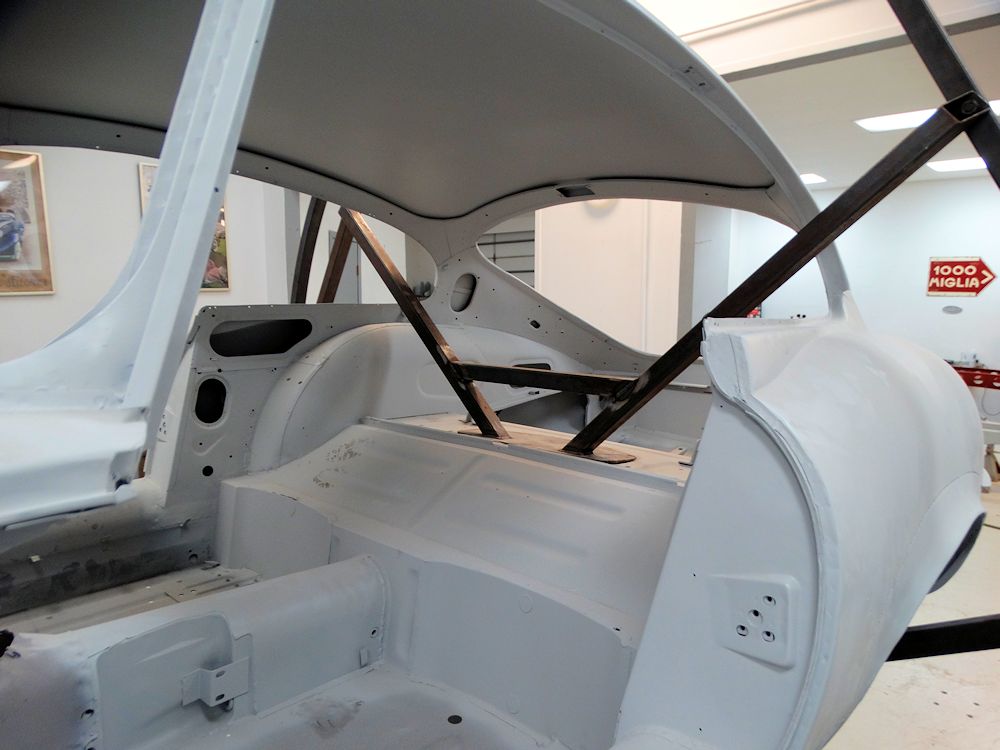
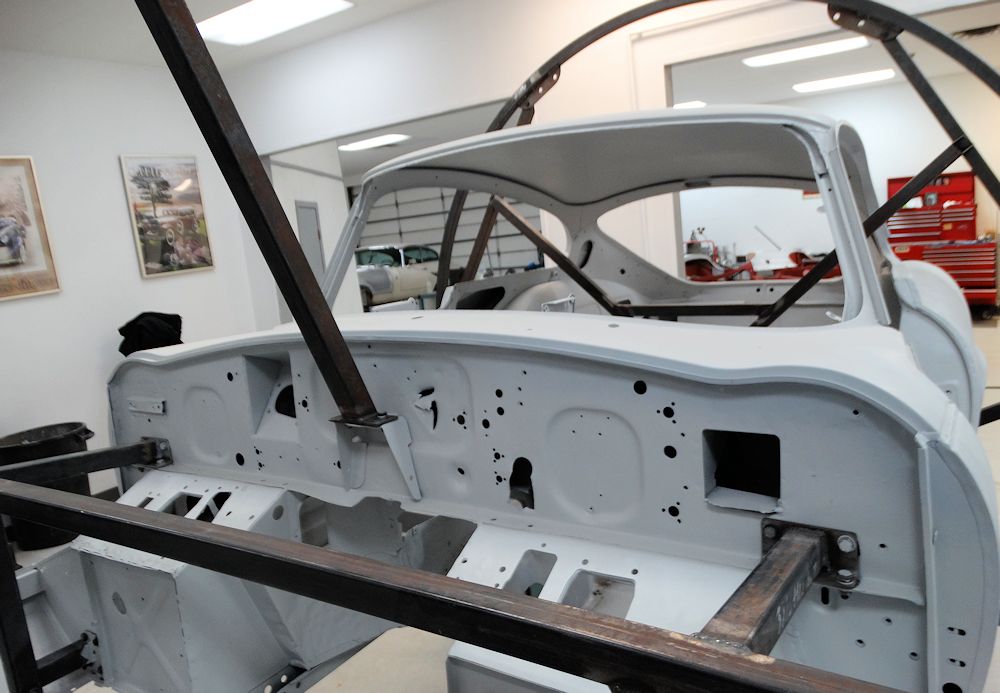
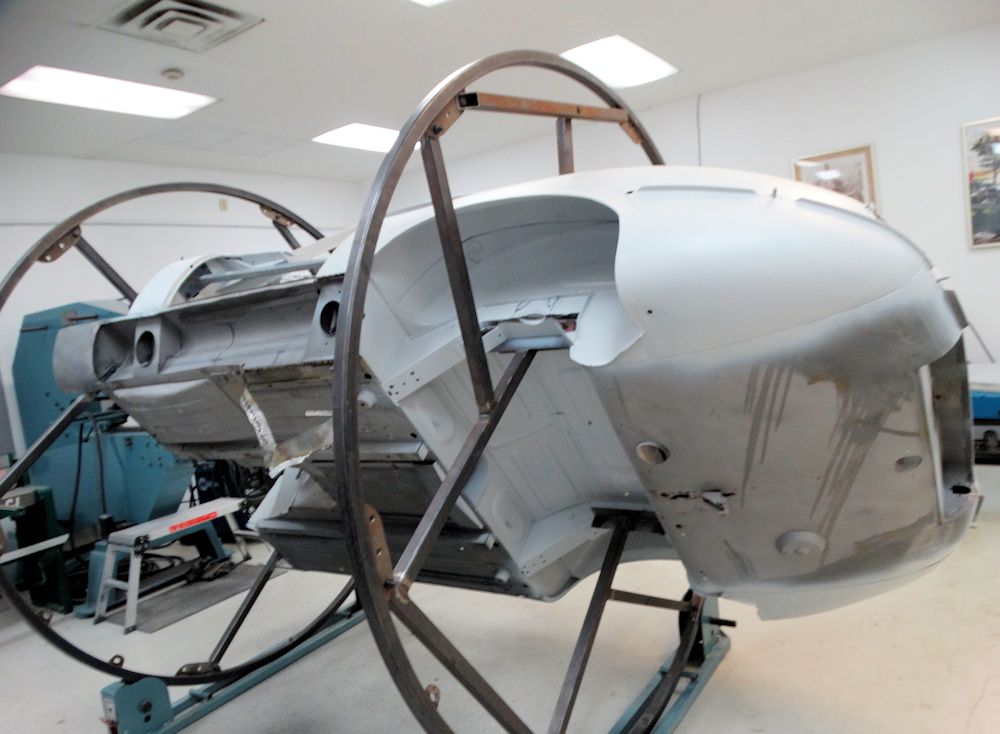
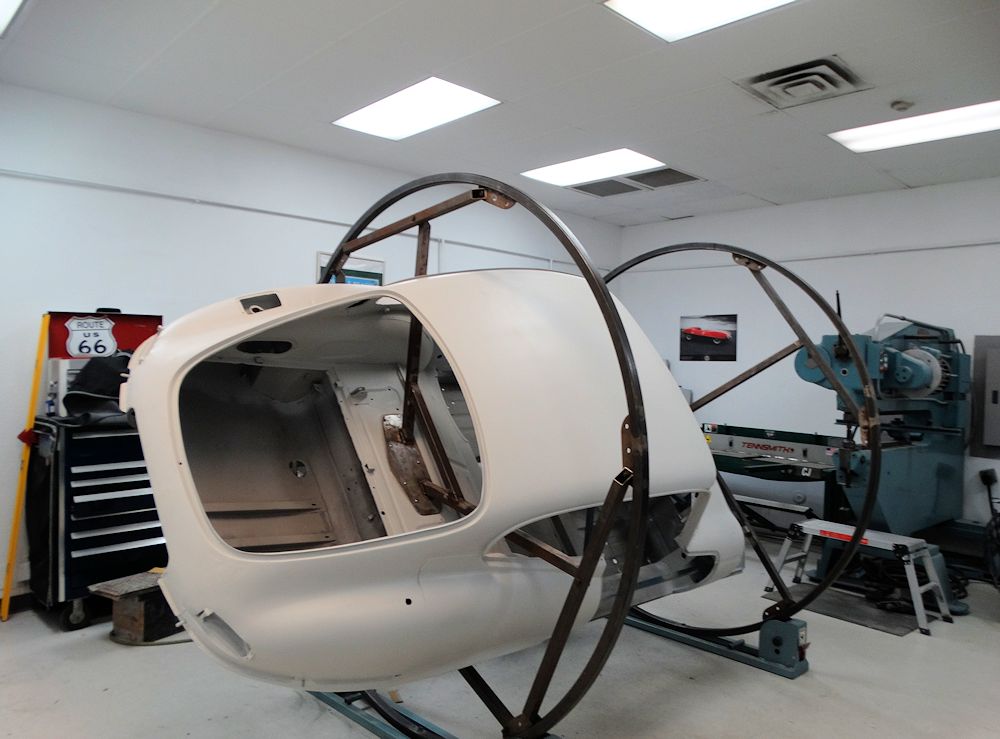
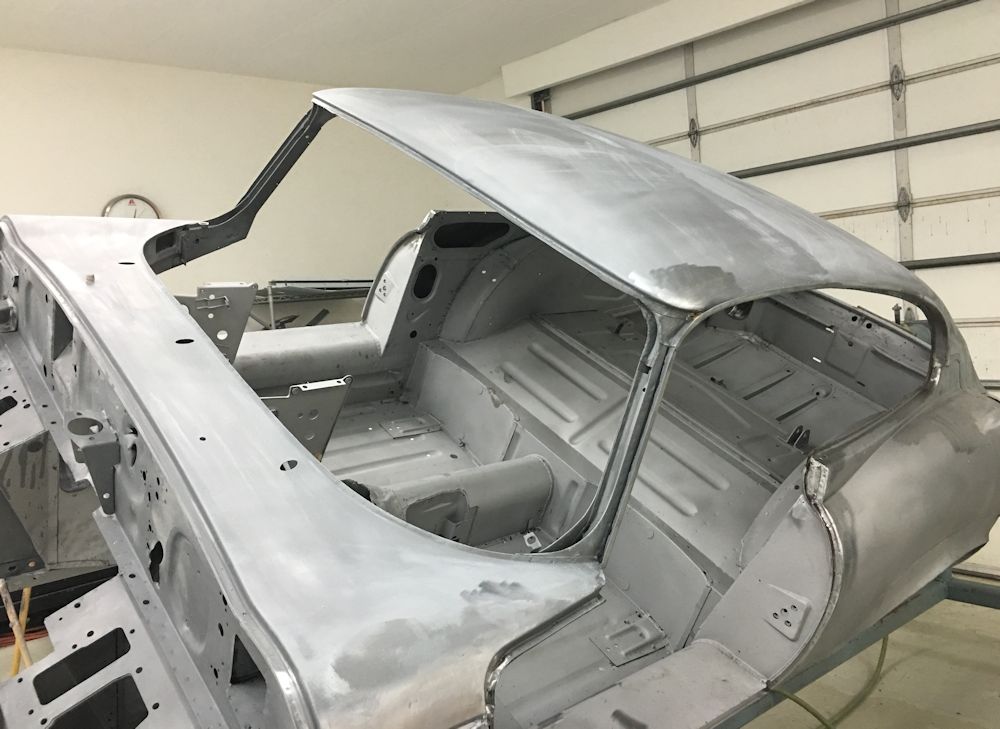
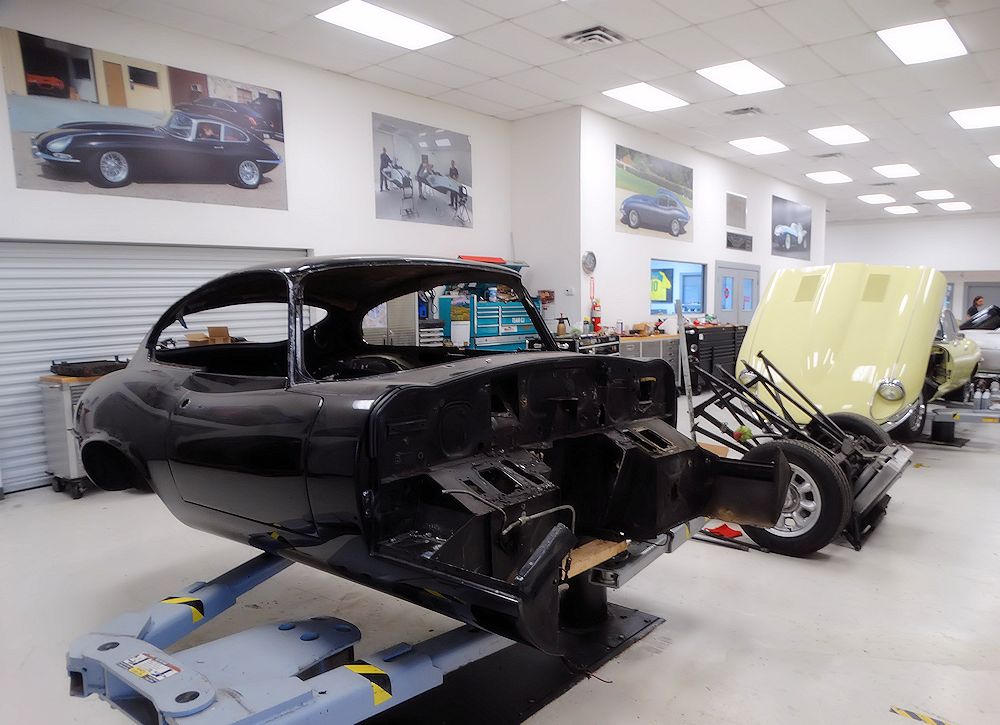
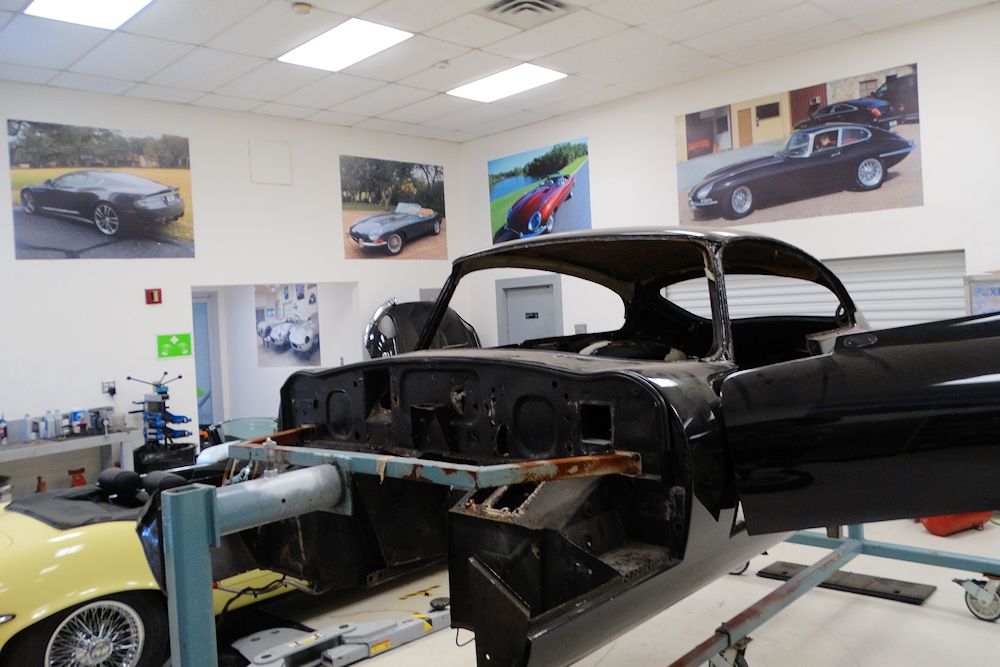
Oscar placed your car on one of the roller-hoop jigs earlier today and has the body restoration underway.
 |
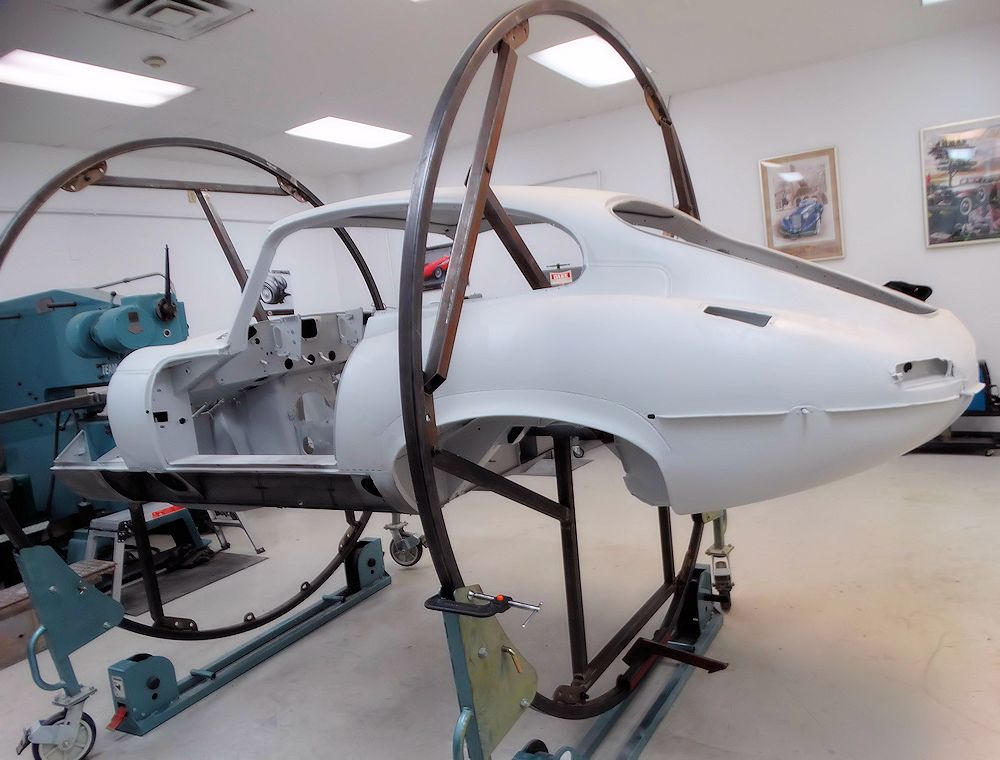 |
| The body will spend the next few weeks
spinning on one of the roller-hoop jigs |
|
 |
 |
 |
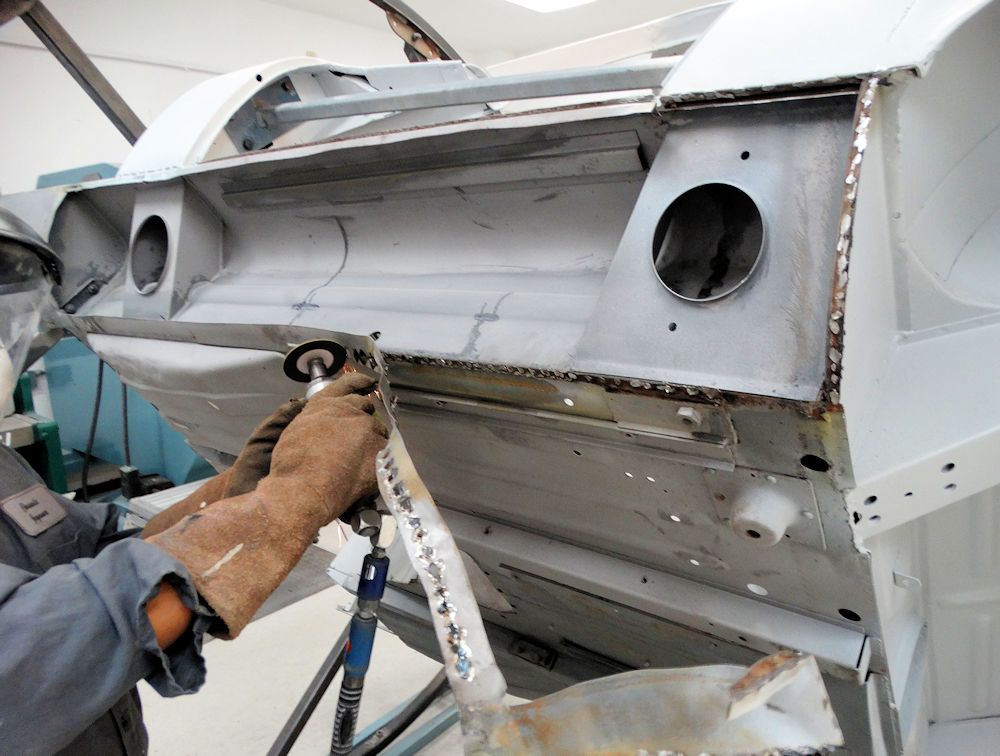 |
| Oscar has the sheet metal replacement underway |
|
 |
 |
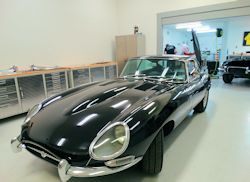
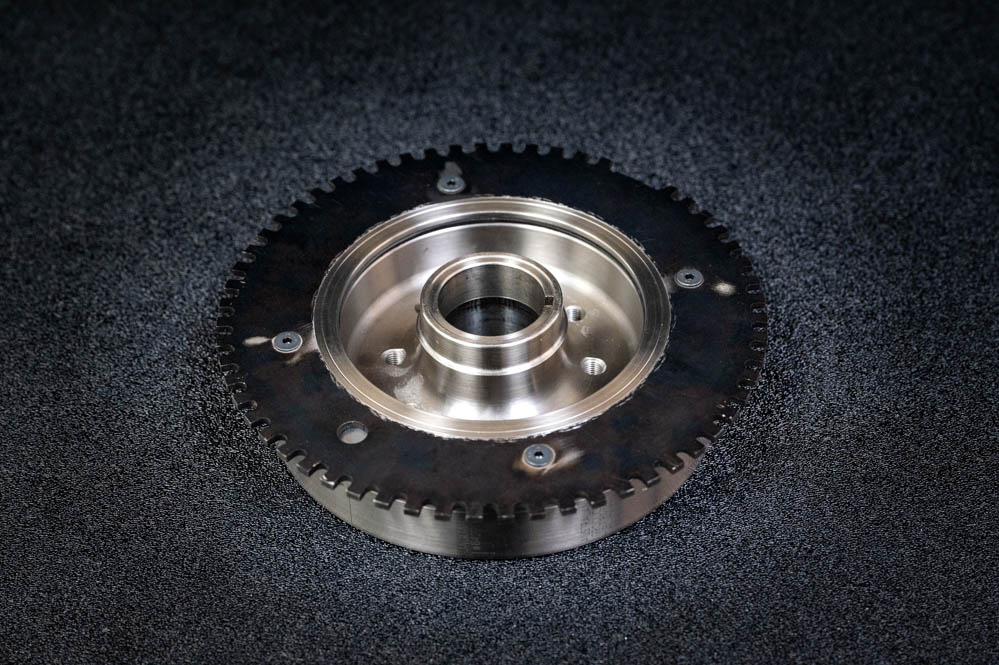
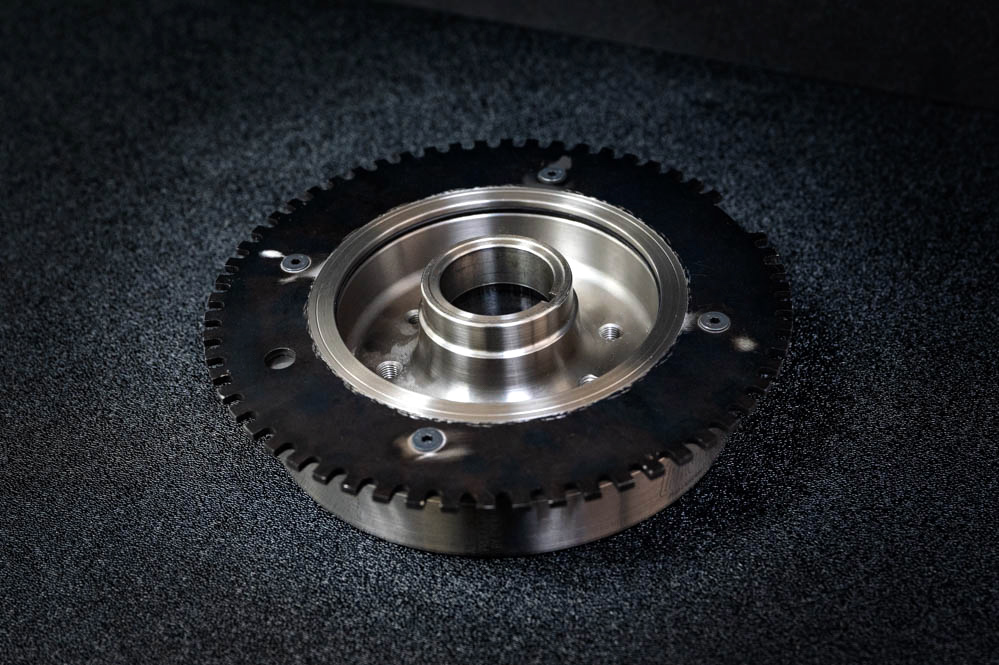
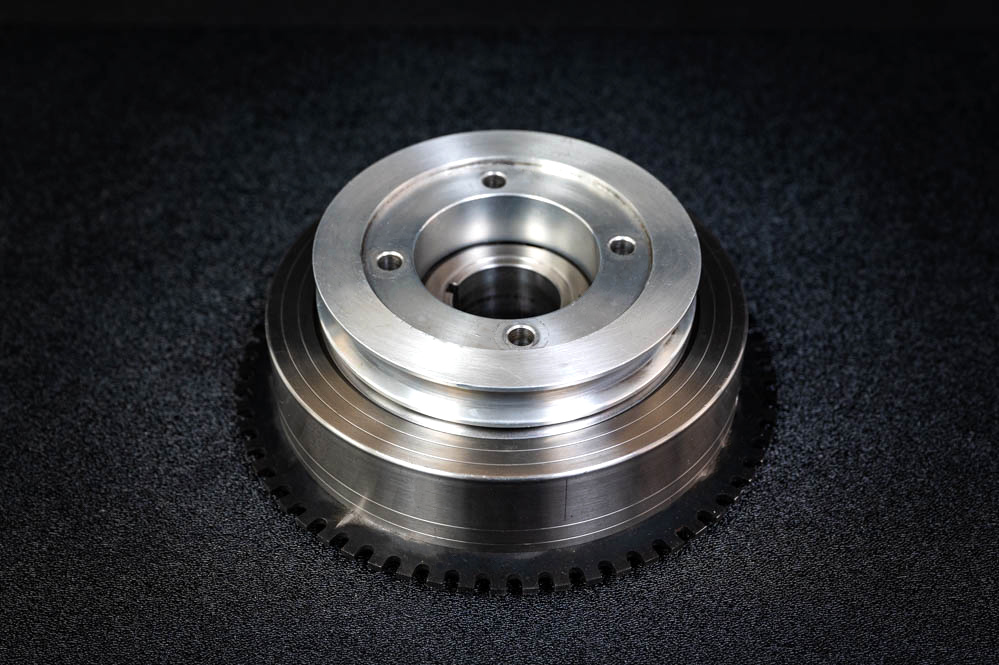
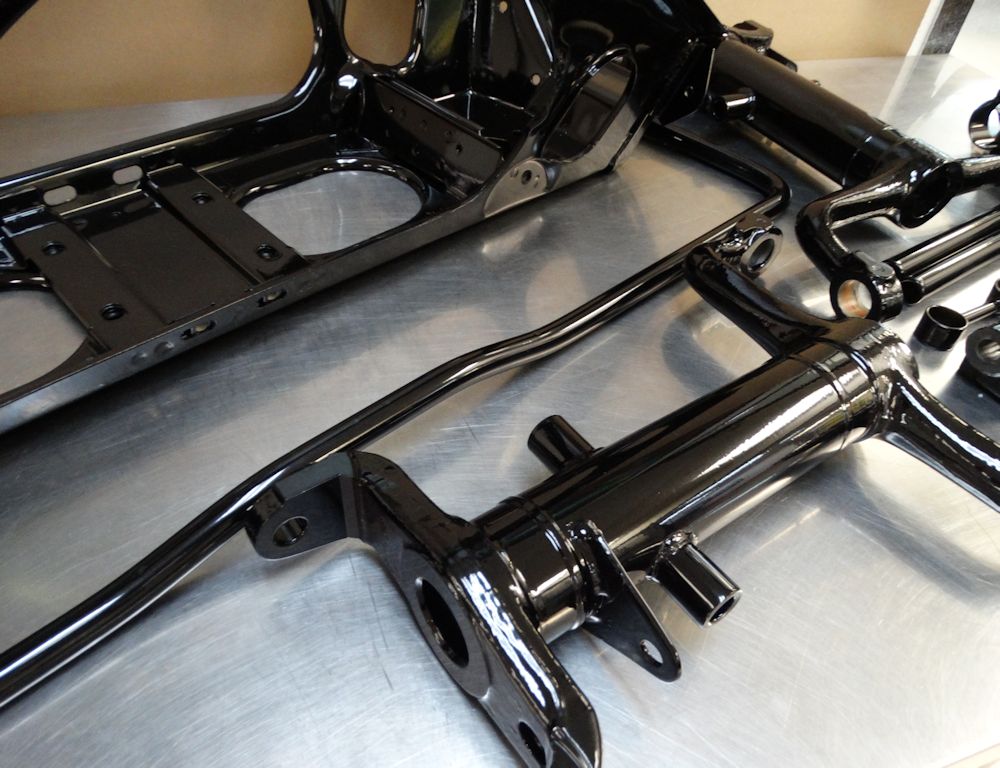
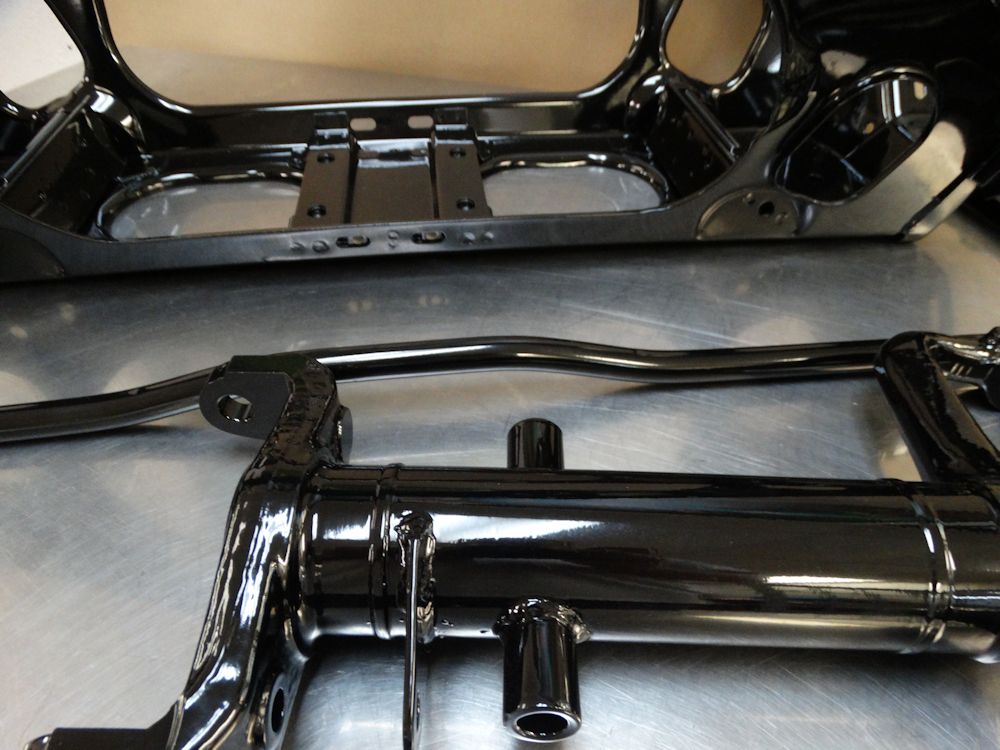
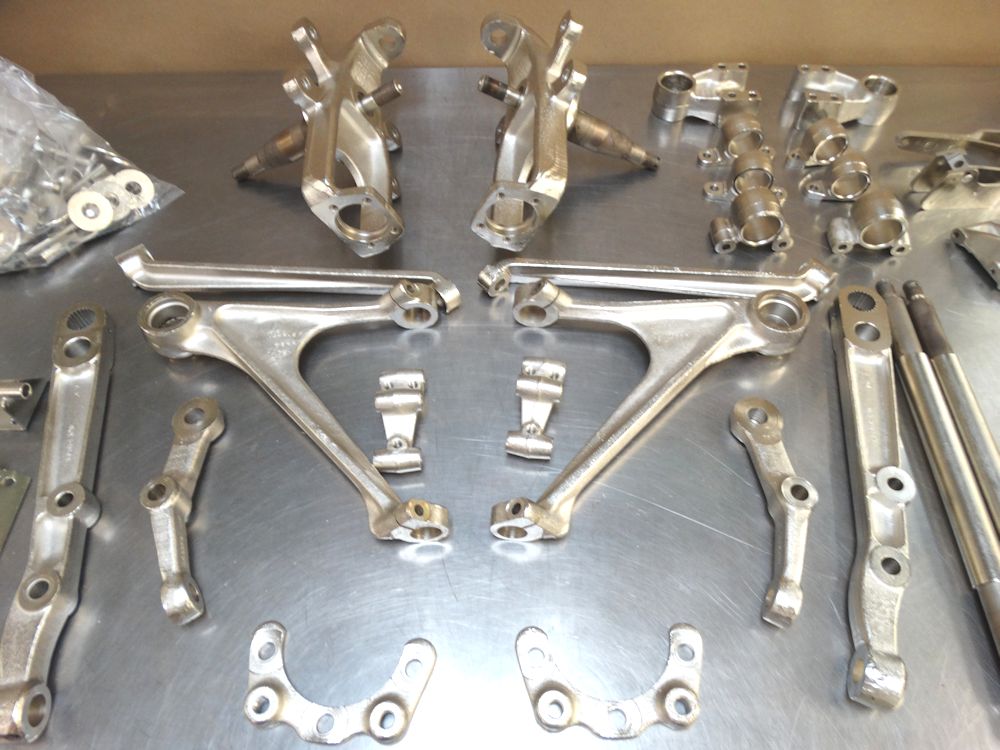
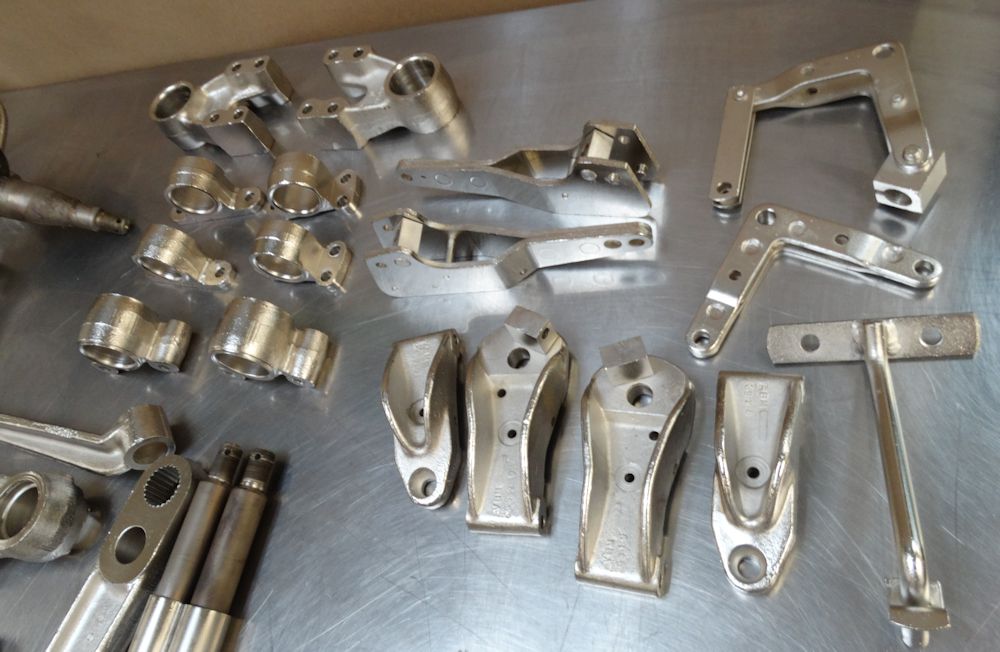
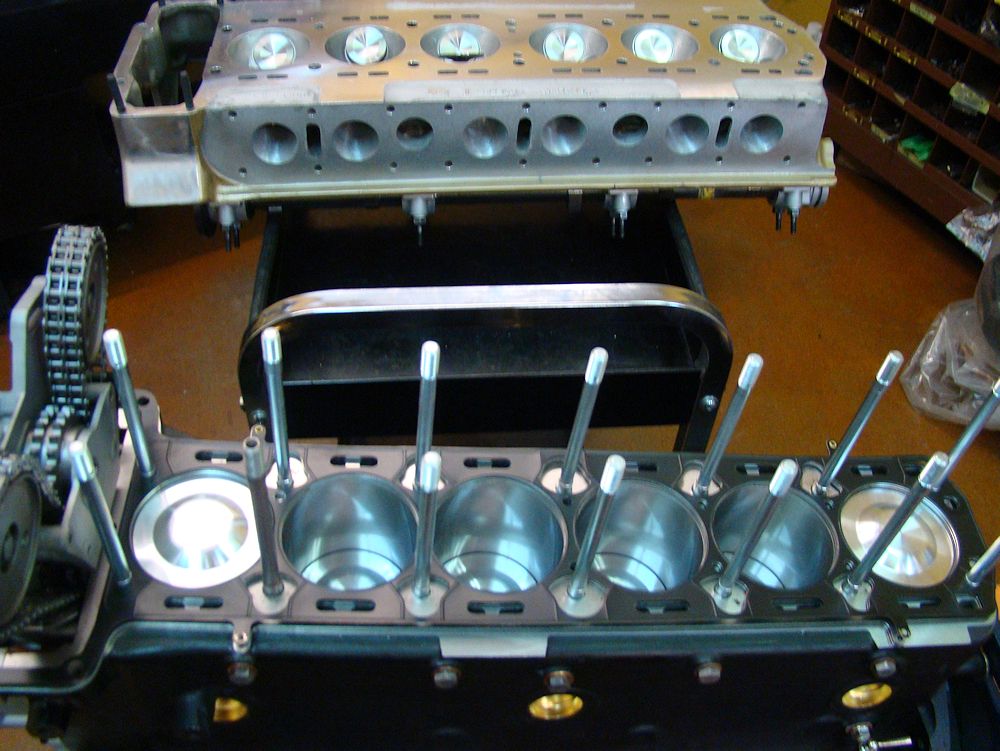
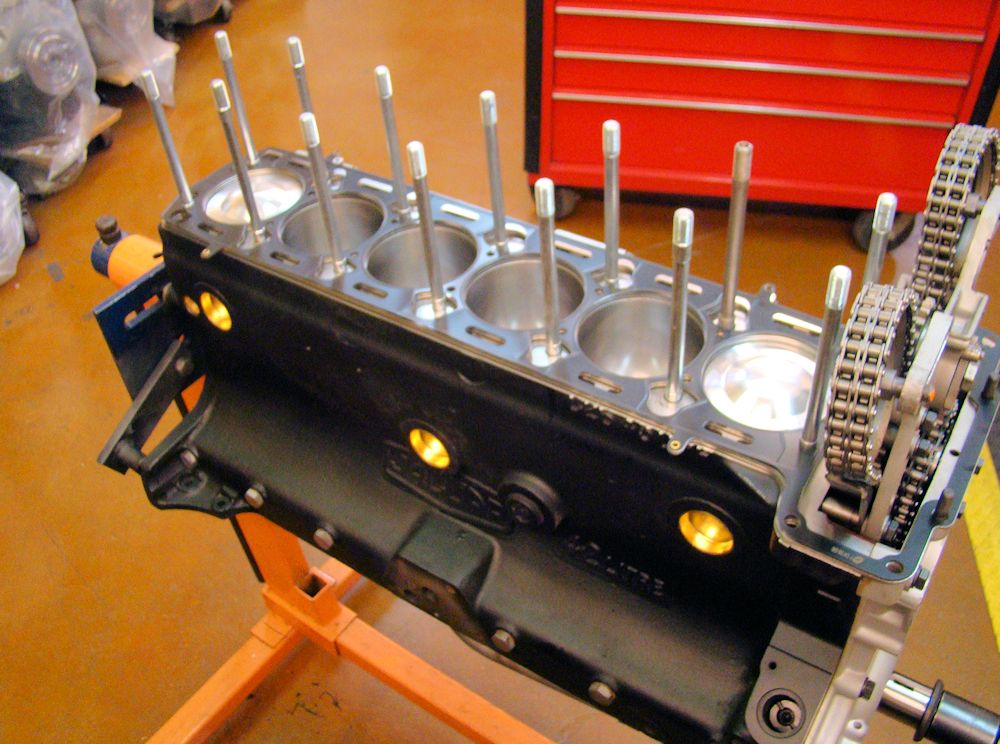
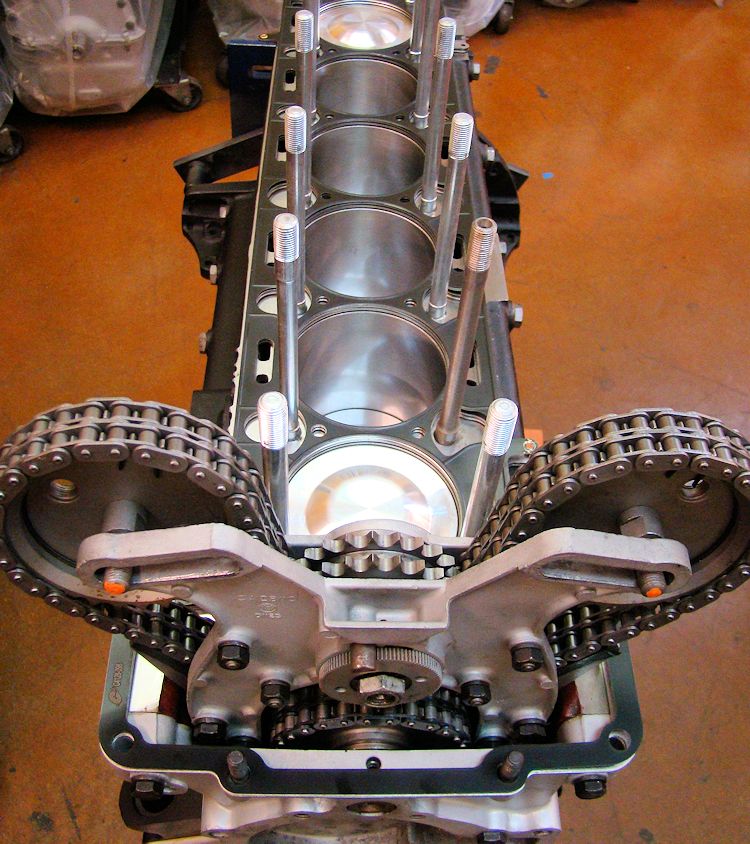
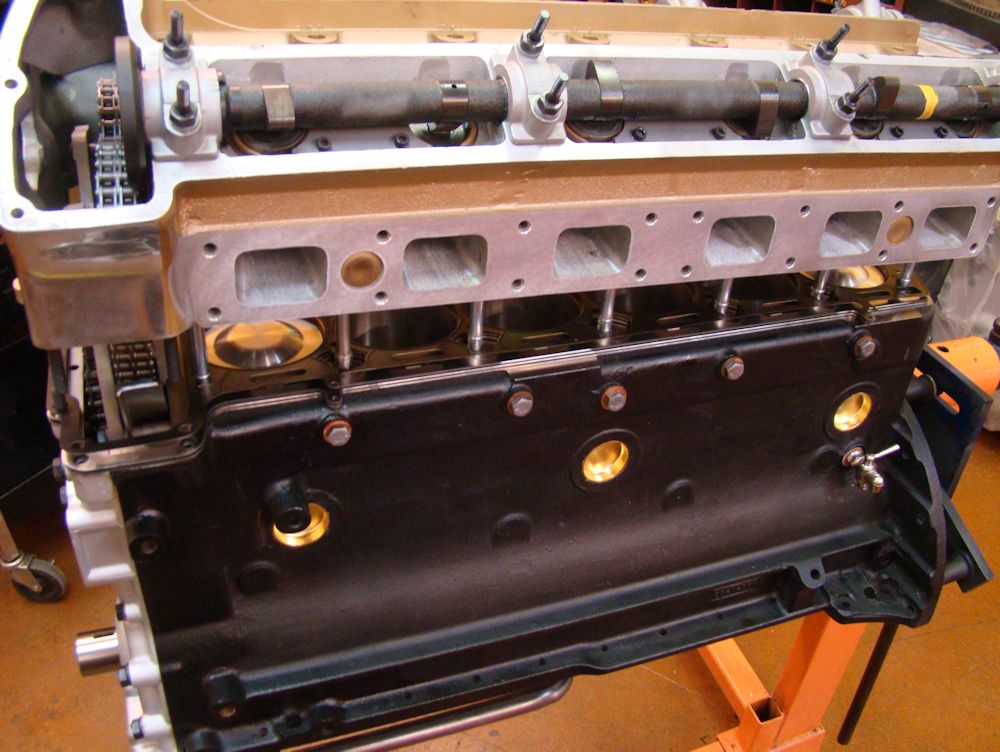
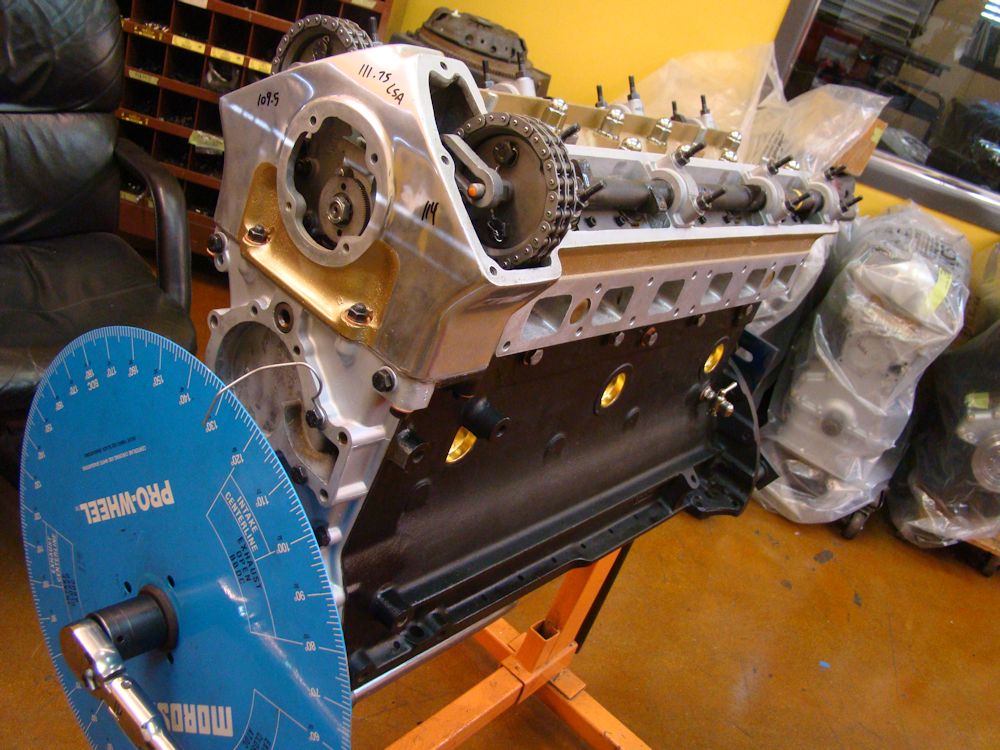
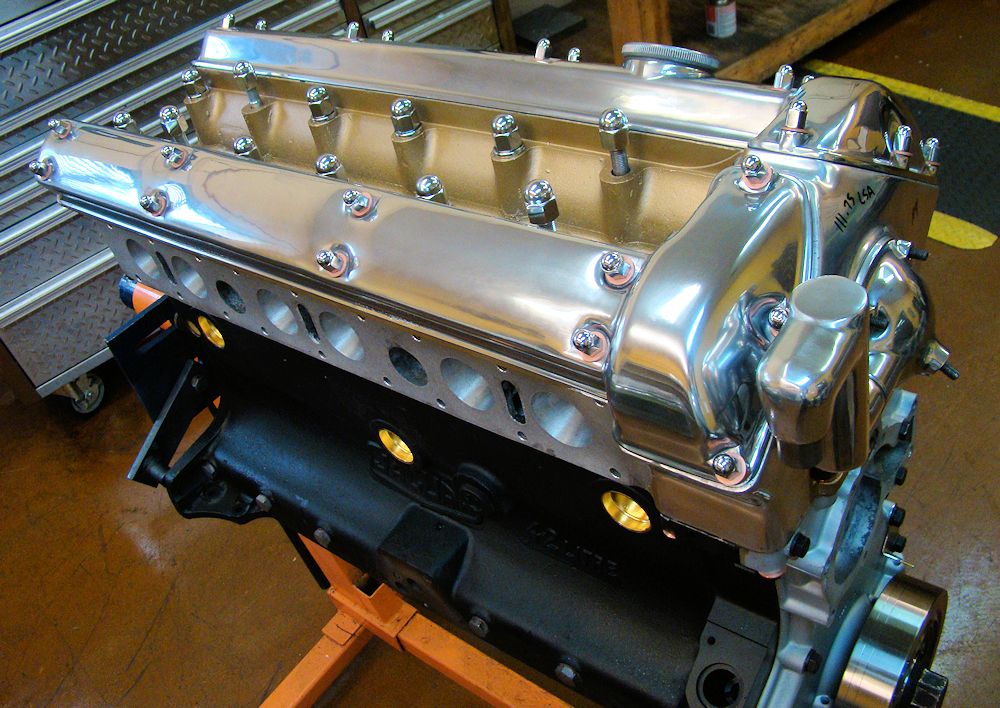
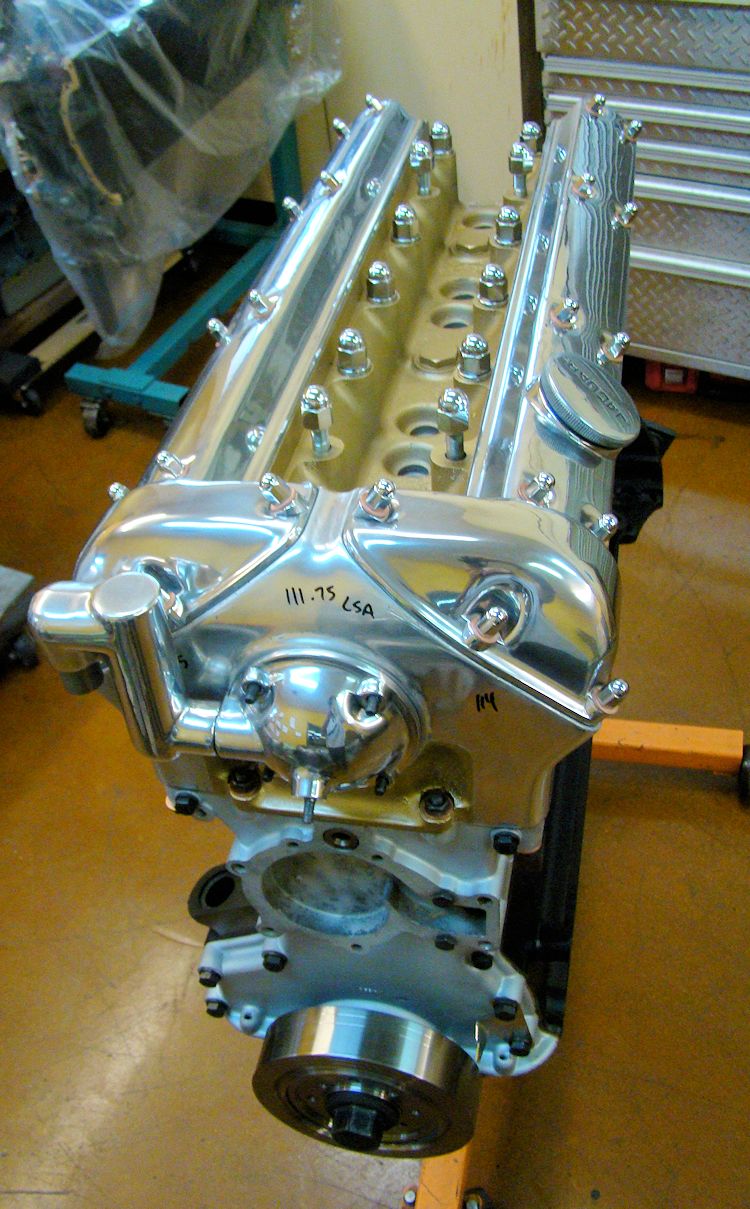
The following sequence of photos show your powder coated IRS components, Nickel plated front suspension, and the finishing assembly of your Stage Two 4.7L engine. Unfortunately the oil pan that came in with your car was not serviceable so we will be restoring an alternative item from our used parts inventory.
 |
 |
 |
 |
 |
 |
 |
 |
 |
 |
 |
 |
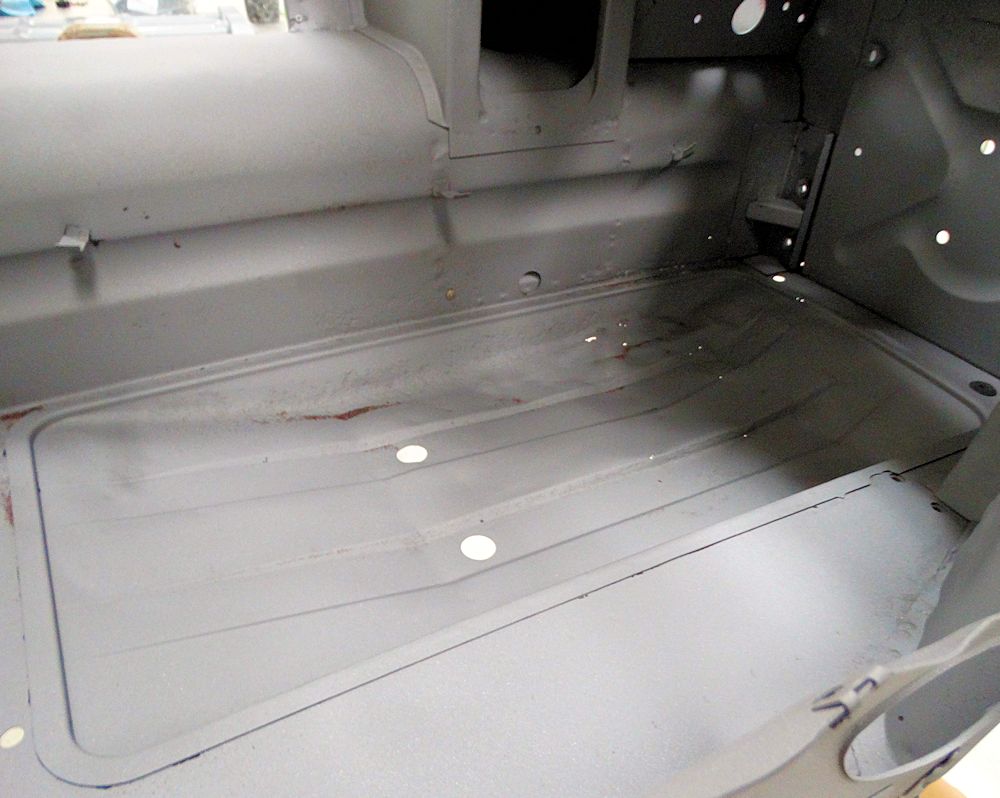
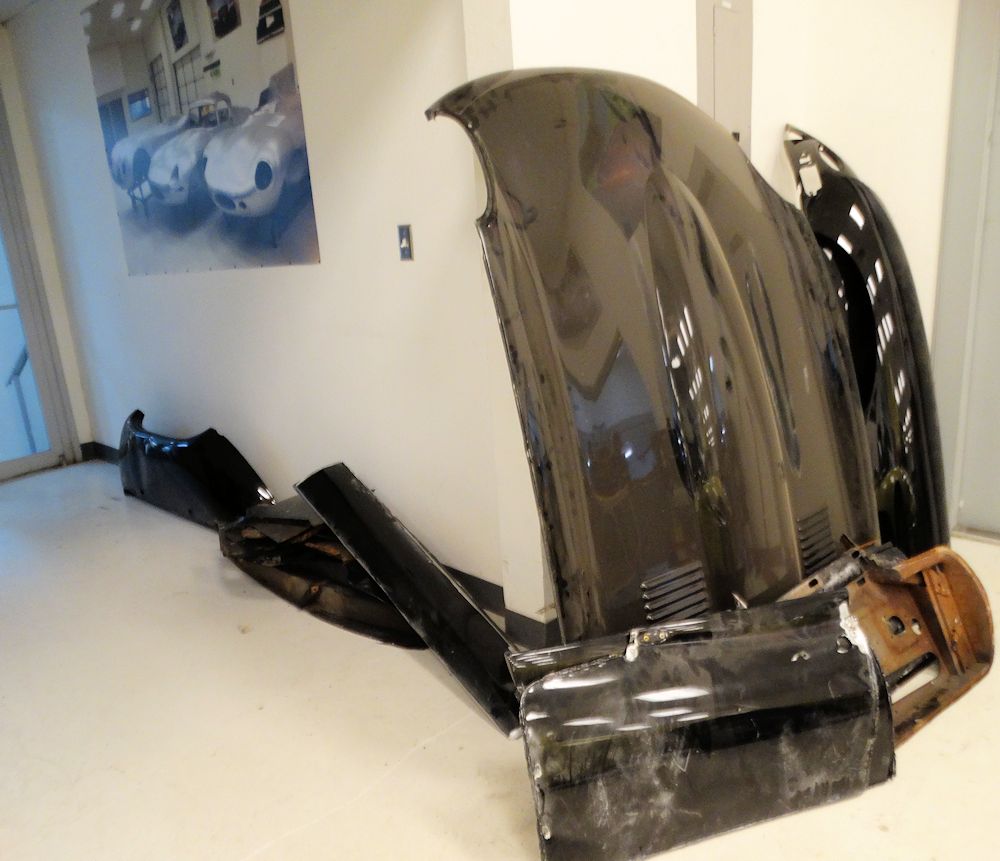
We have now received your car back from the blaster. There are certainly some rough edges, but all in all not too bad...
 |
 |
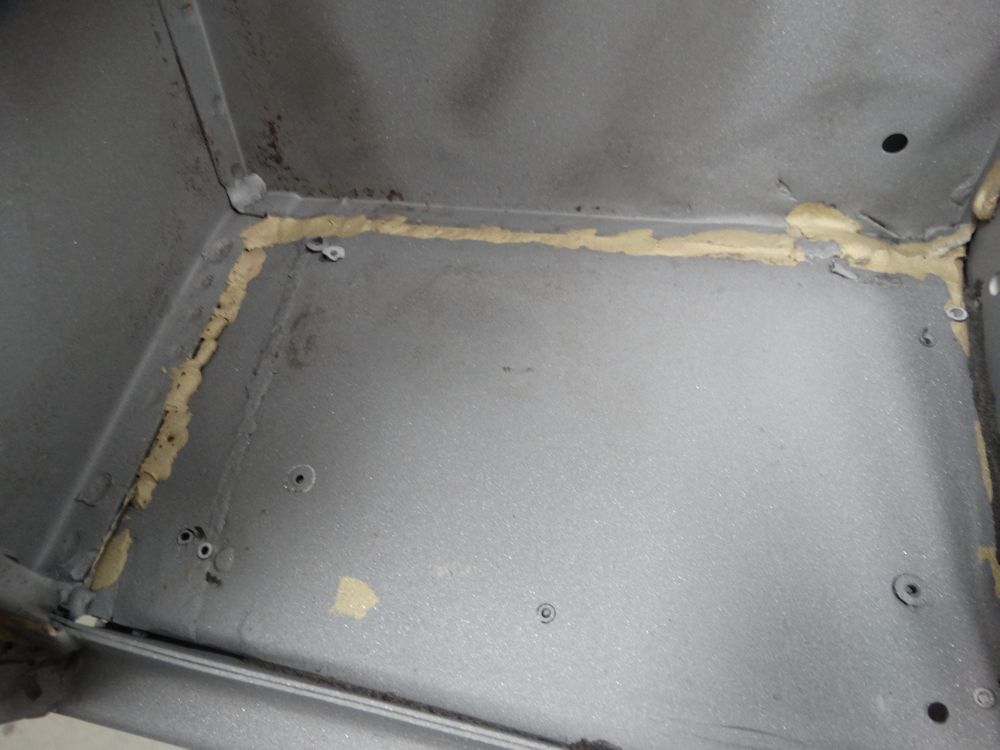
| There are several small rust holes in the
footwells and inner sills |
|
 |
 |
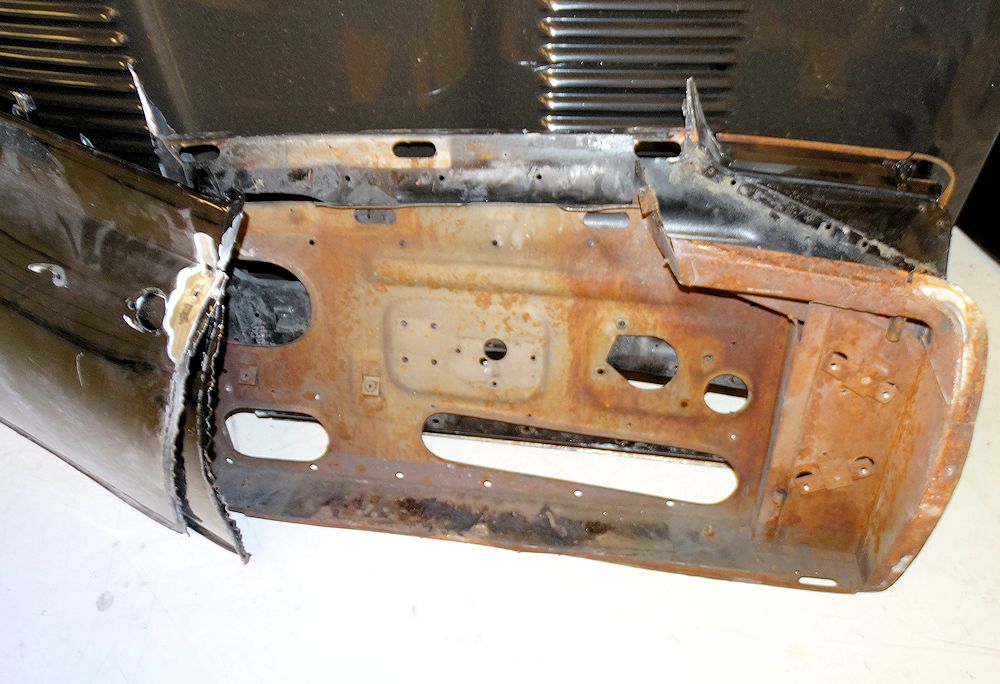
| Floors have several patches |
Boot floor is rusted through |
 |
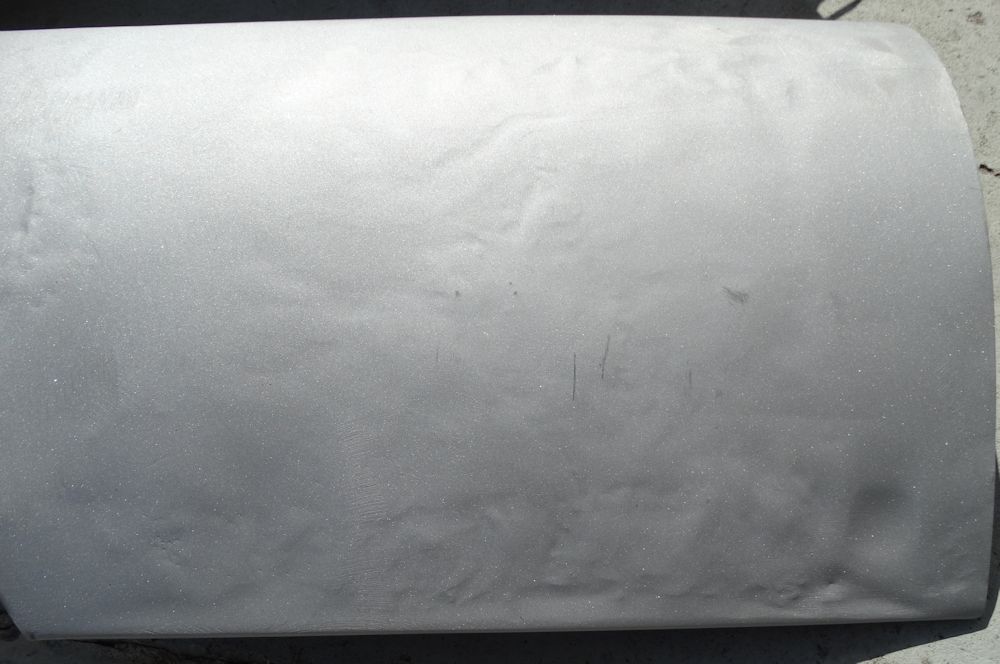 |
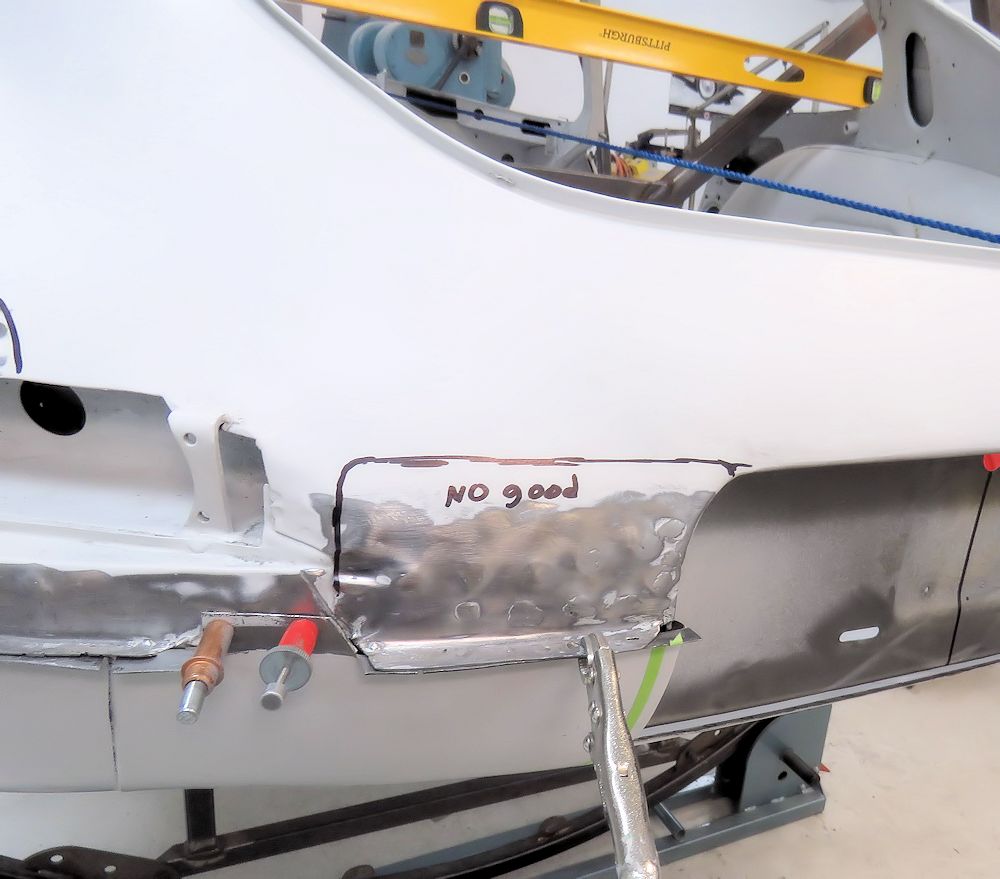
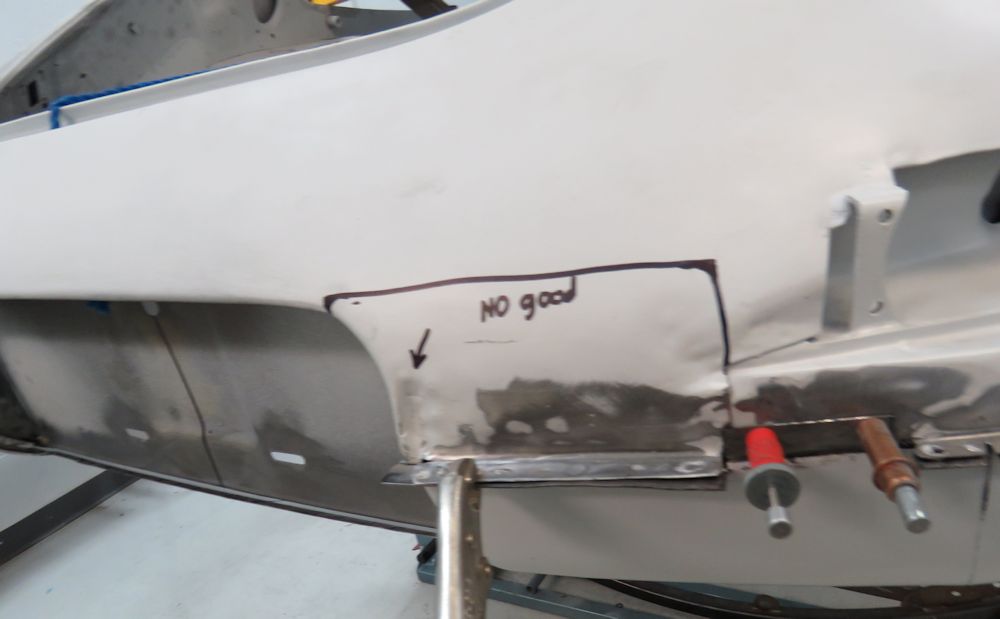
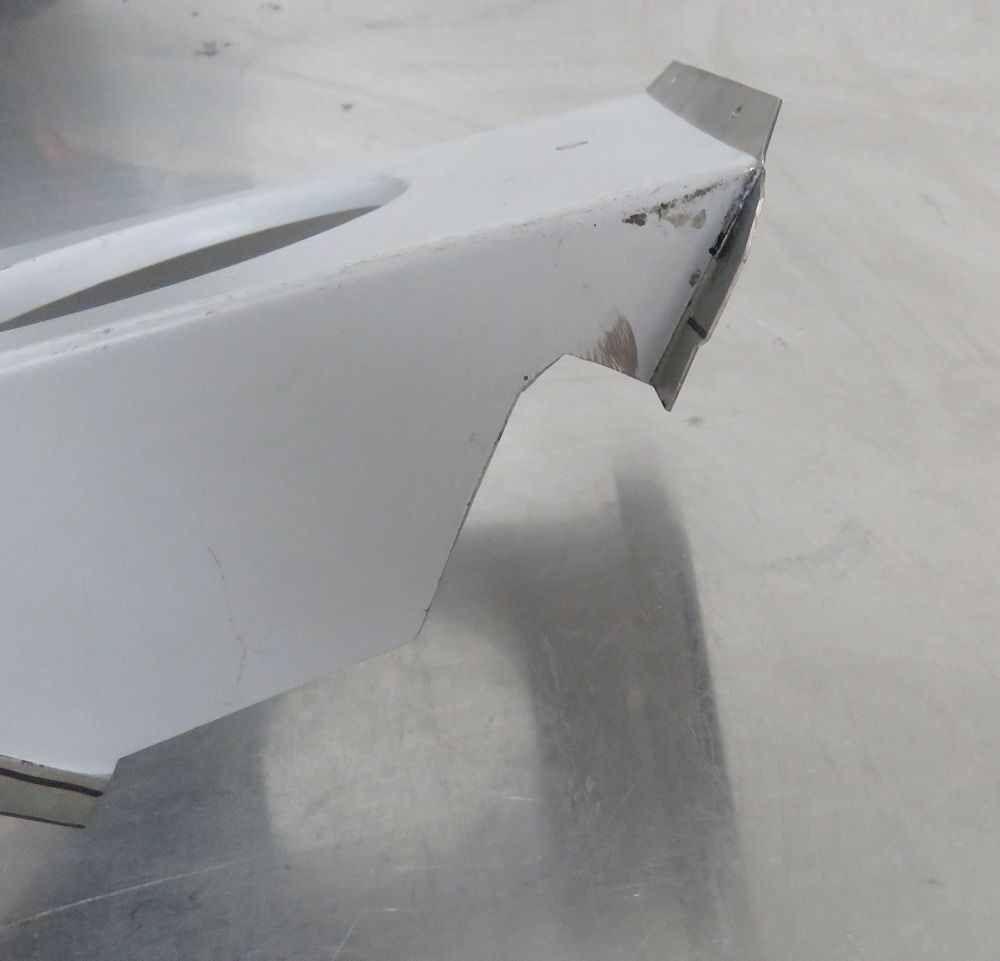
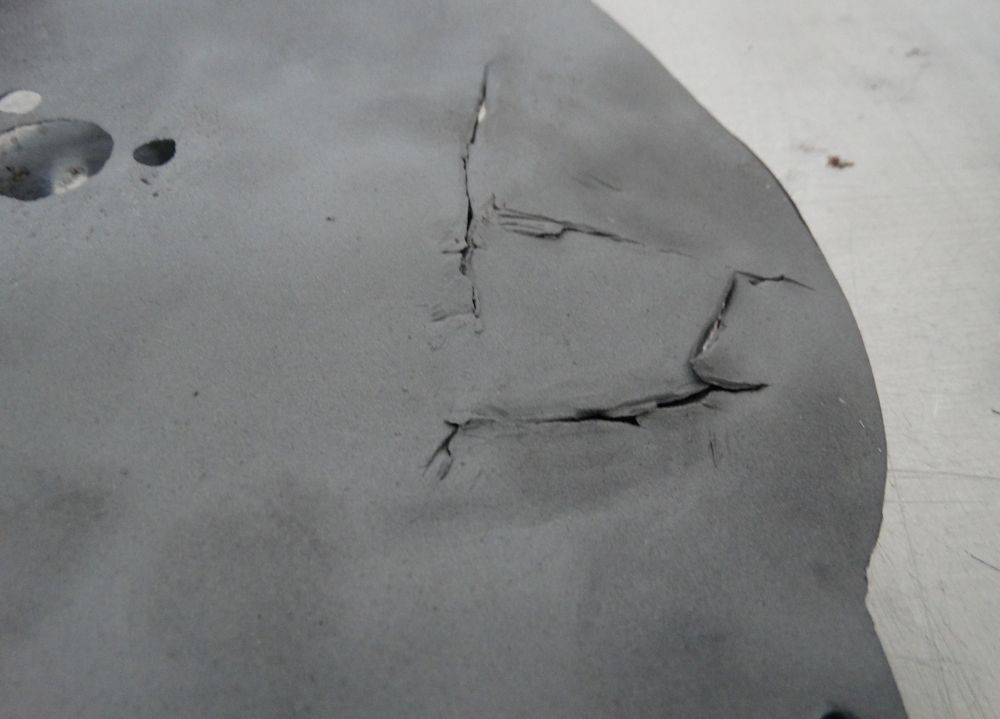
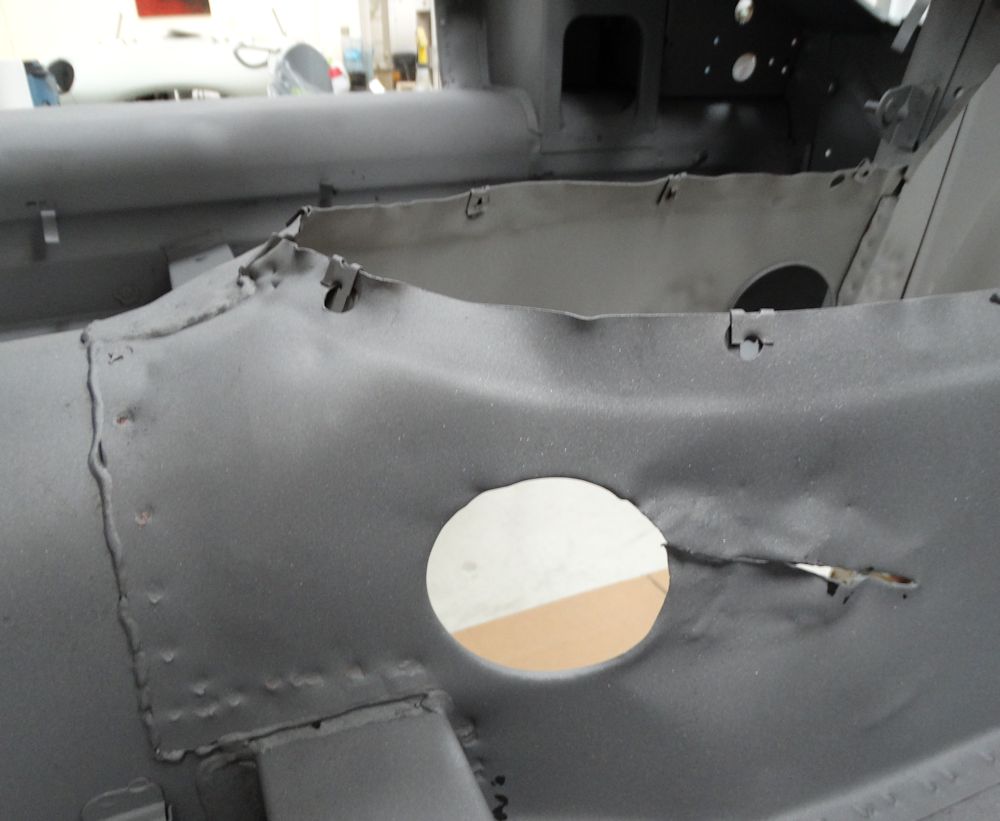
| Several areas of the body have known violence and pain in the past! |
Both bonnet wings have been damaged and patched |
 |
 |
| Difficult to imagine how damage like this happened in the first place? |
|
 |
 |
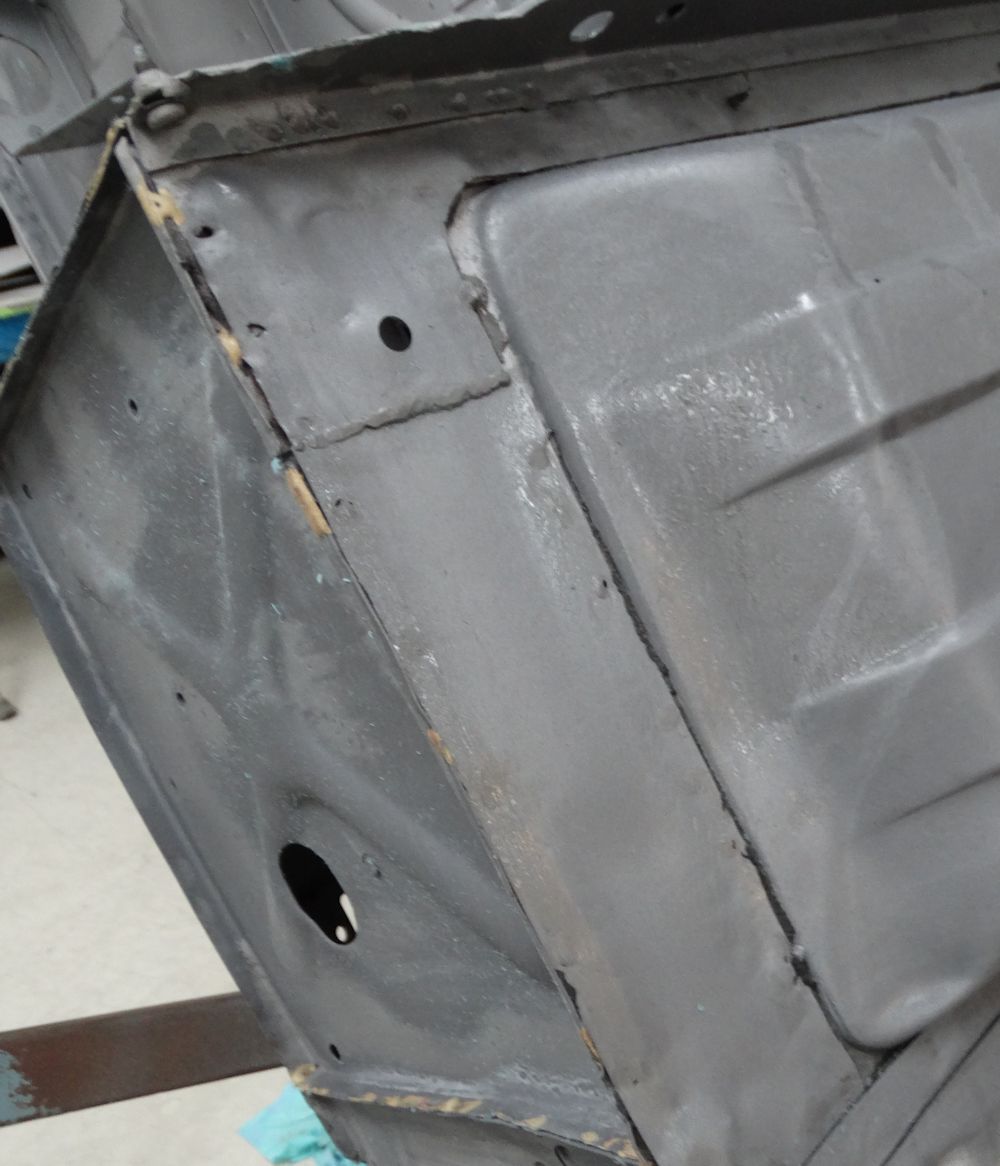
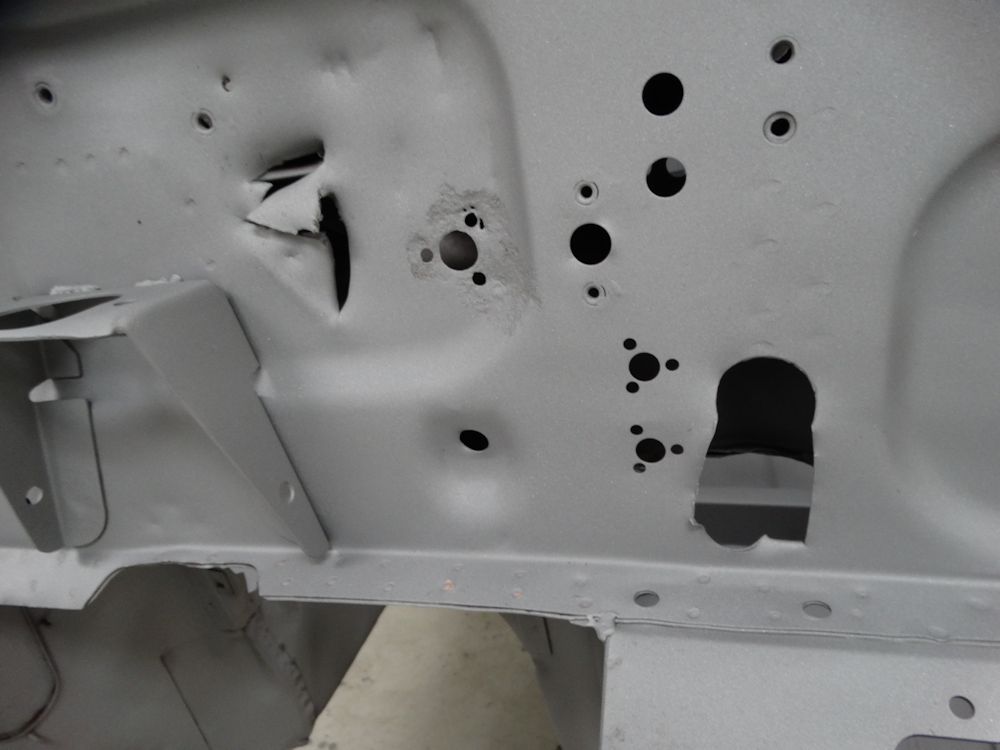
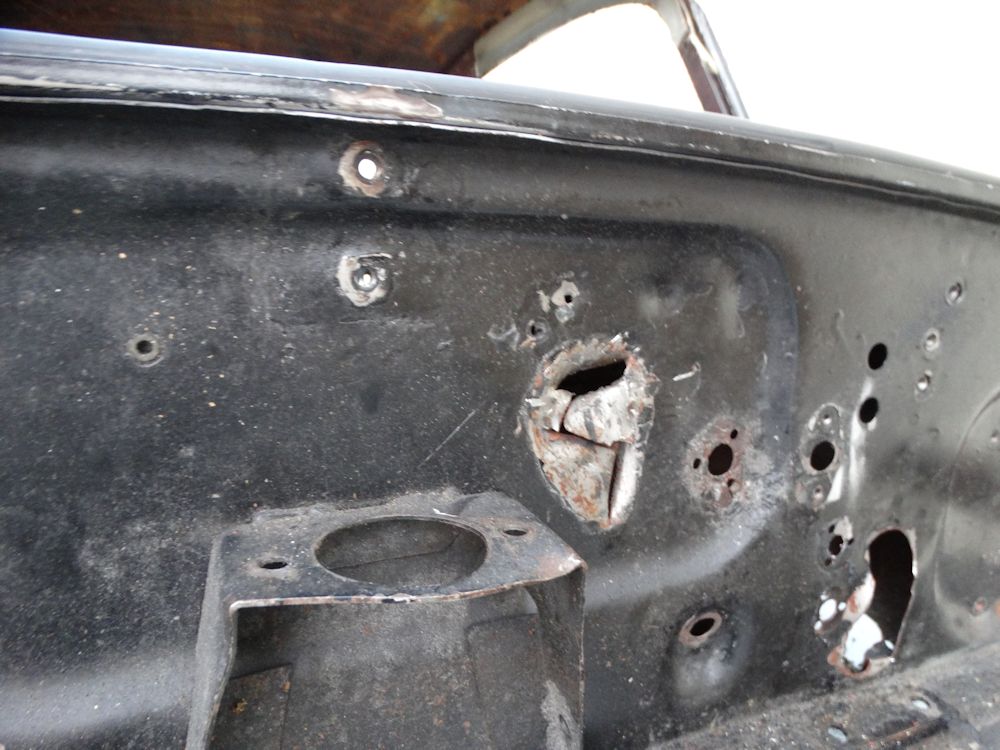
| The firewall has a few areas that will need
attantion |
|
 |
 |
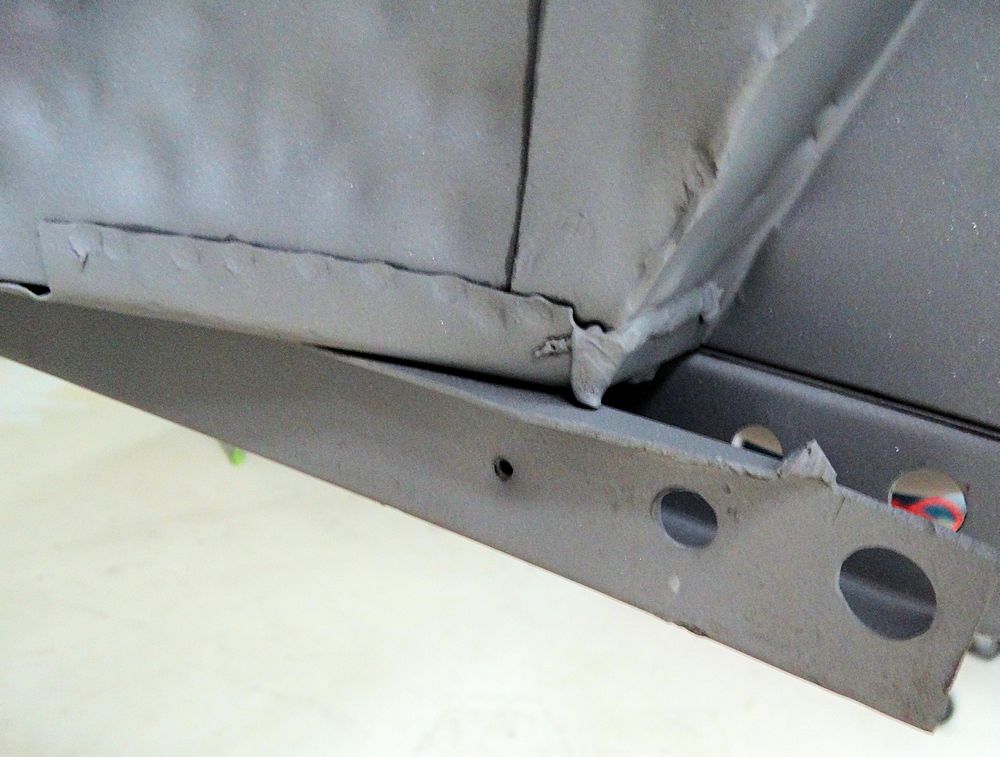
| Patches to upper inner sill by data plate
plinth |
Some rust to deal with beneath passenger A
pillar |
 |
 |
| More patches in inner sills |
Wheel arch flares will be eliminated |
 |
|
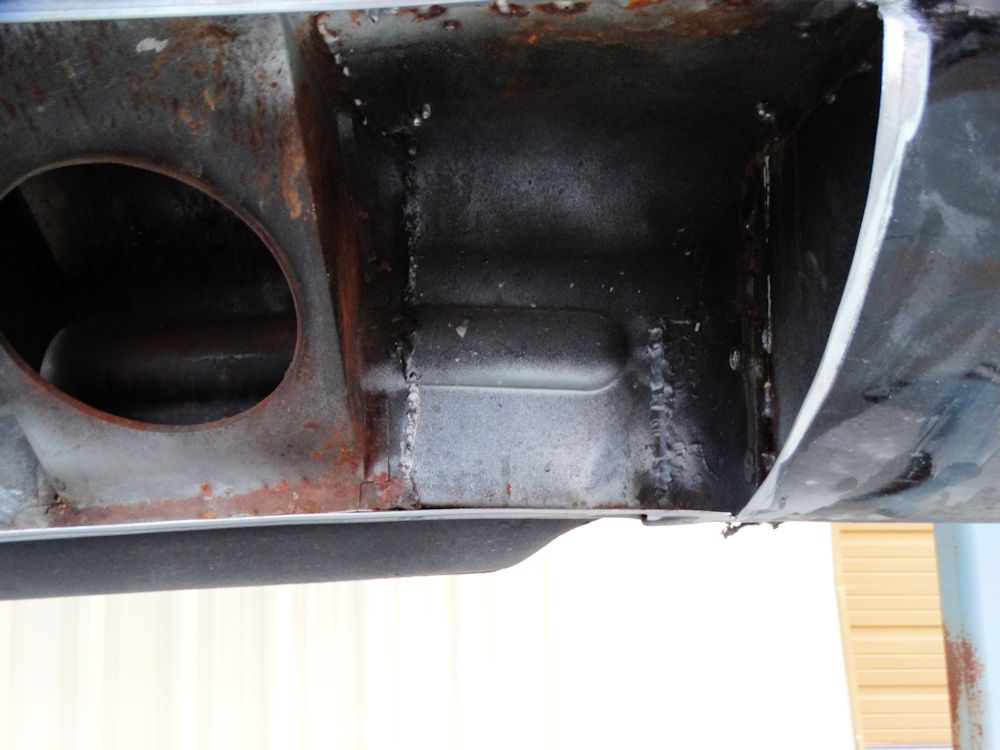
| Not the prettiest of welds... |
Main bodyshell bathed in Ospho acid prior to
being sealed with epoxy primer |
Your car has now been sent off to be media blasted back to bare metal and we expect to have it back in the next few days.
 |
 |
| Bonnet was disassembled prior to blasting |
Door skins were removed, revealing fairly
rusty inner frames |
 |
 |
| With outer sills cut away for access to the
inner sills, several patches were revealed |
|
 |
 |
| Boot floor looks pretty solid, although much
of it is covered with sound deadening material |
|
 |
 |
| Inner sills will obviously be replaced |
After waiting patiently in the wings for 18 months, it is now time to get this very exciting project underway. The first task is to prepare the bodyshell for media blasting, which should place within the next few days. We also have the Stage Two engine well underway in the CJ engine machine shop.
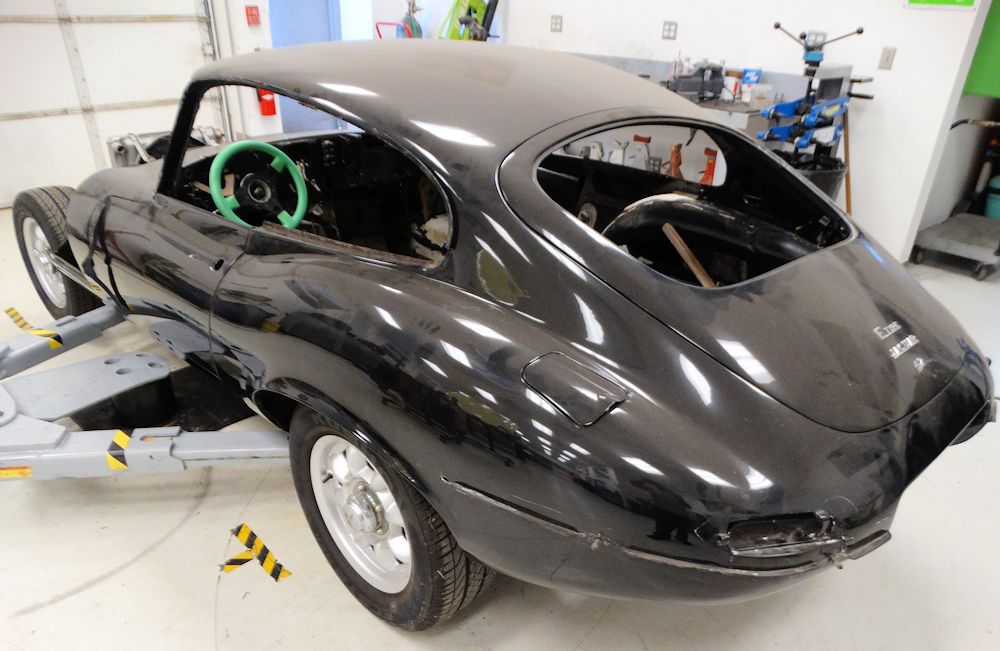 |
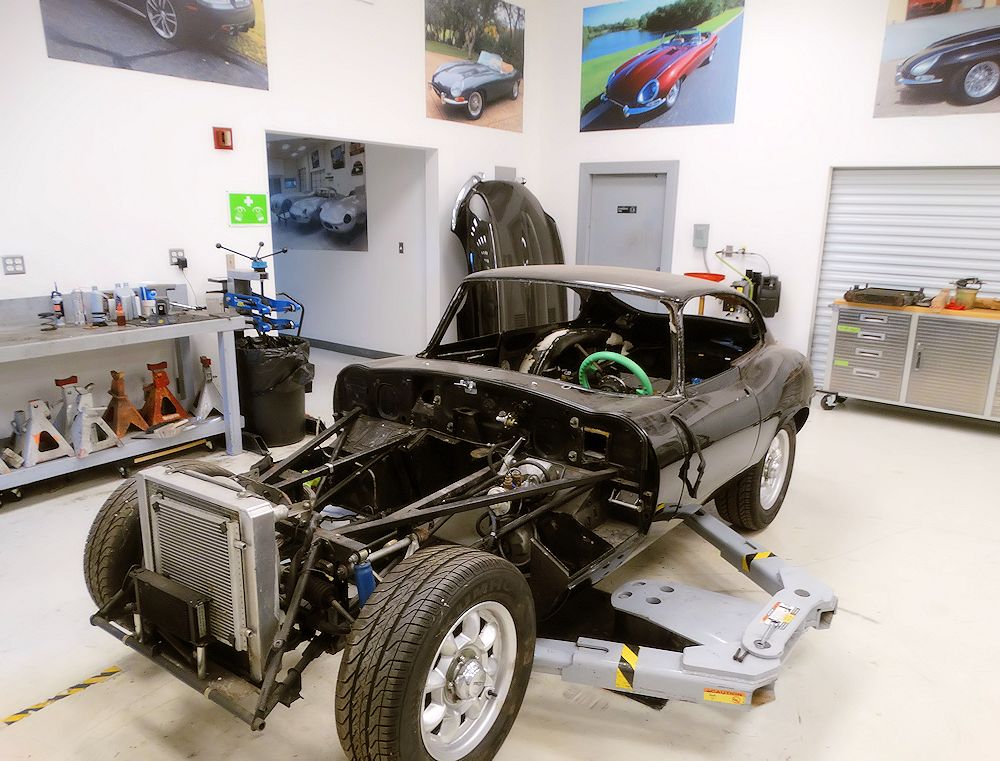 |
| Time to strip the car down for media blasting |
|
 |
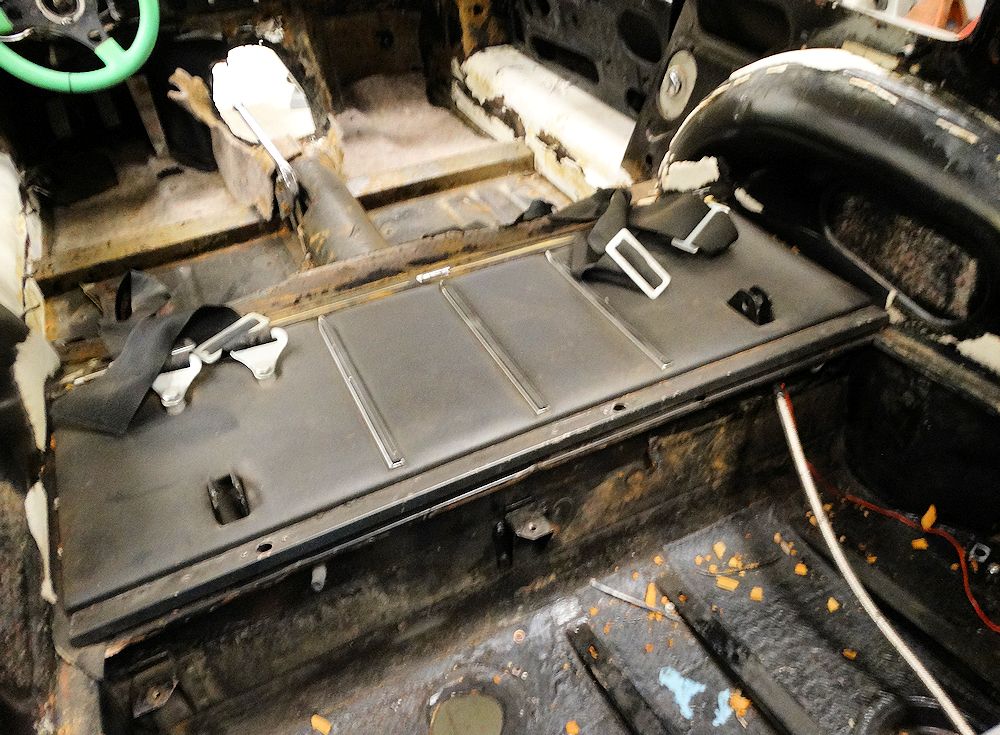 |
| All of the interior trim will be removed prior to media blasting the shell |
|
 |
 |
 |
 |
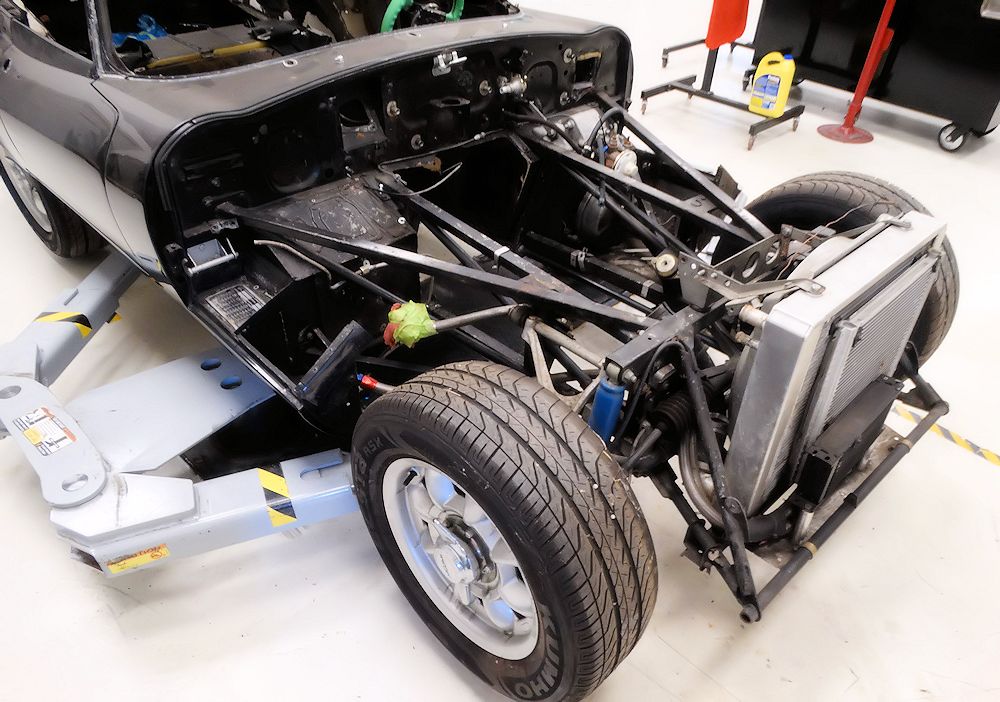
| Old engine frames will be replaced |
|
 |
 |
| Outer sills will be cut away prior to blasting
process |
Shell now on one of the blasting rotisserie
jigs |
 |
 |
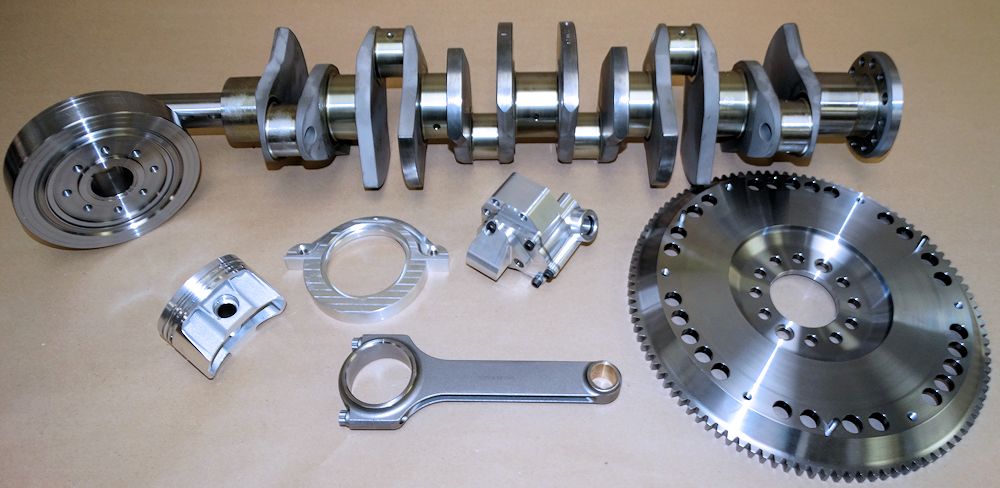
| Engine rebuild will feature CJ Lightweight
Stroker Kit |
Special Trojan CJ valve guides bring F1 technology to this special build |
 |
 |
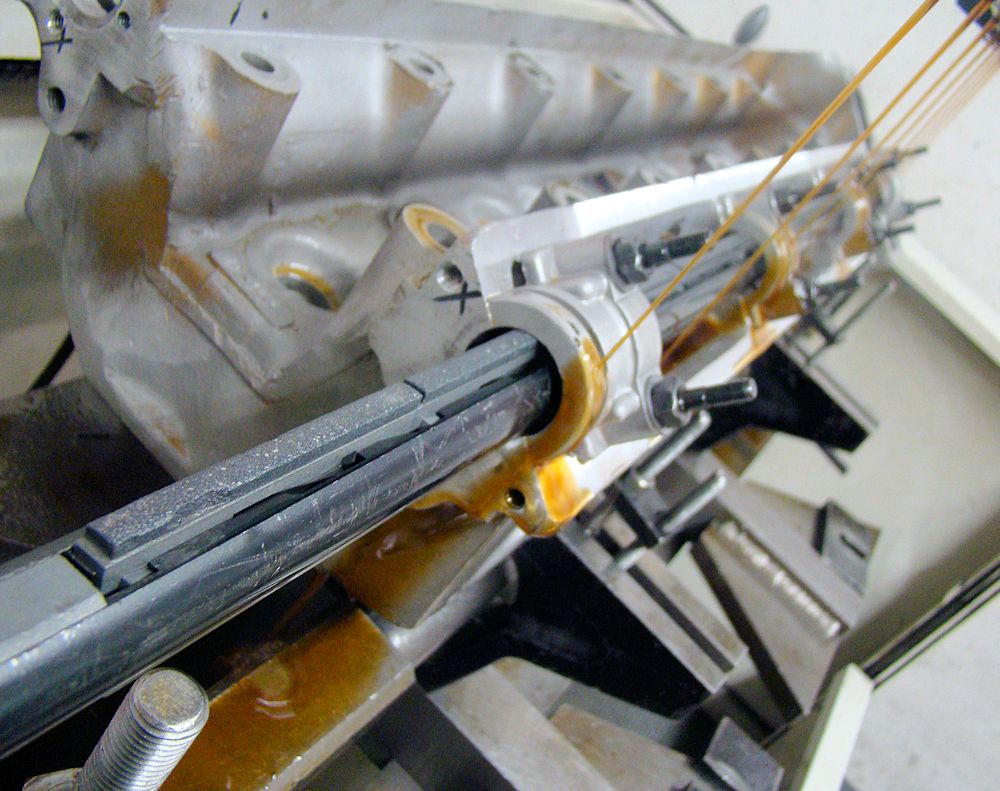
| Align honing cam saddles |
|
 |
 |
| Installing custom CJ valve seats |
Trojan CJ guides installed after port work has been completed |
 |
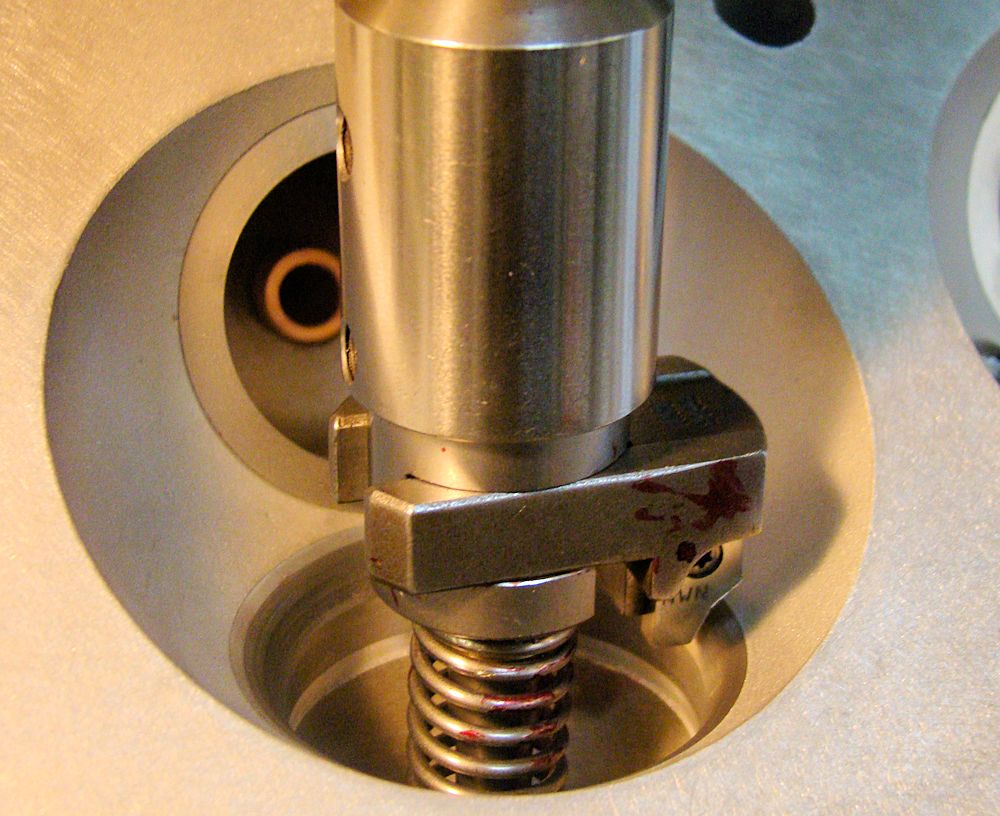 |
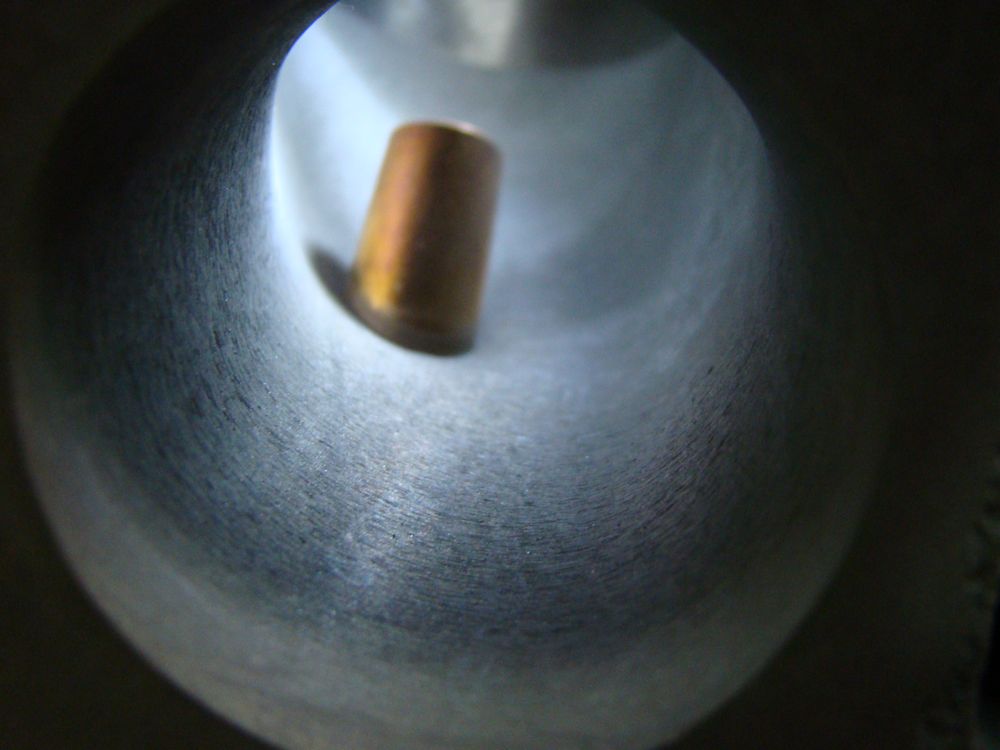
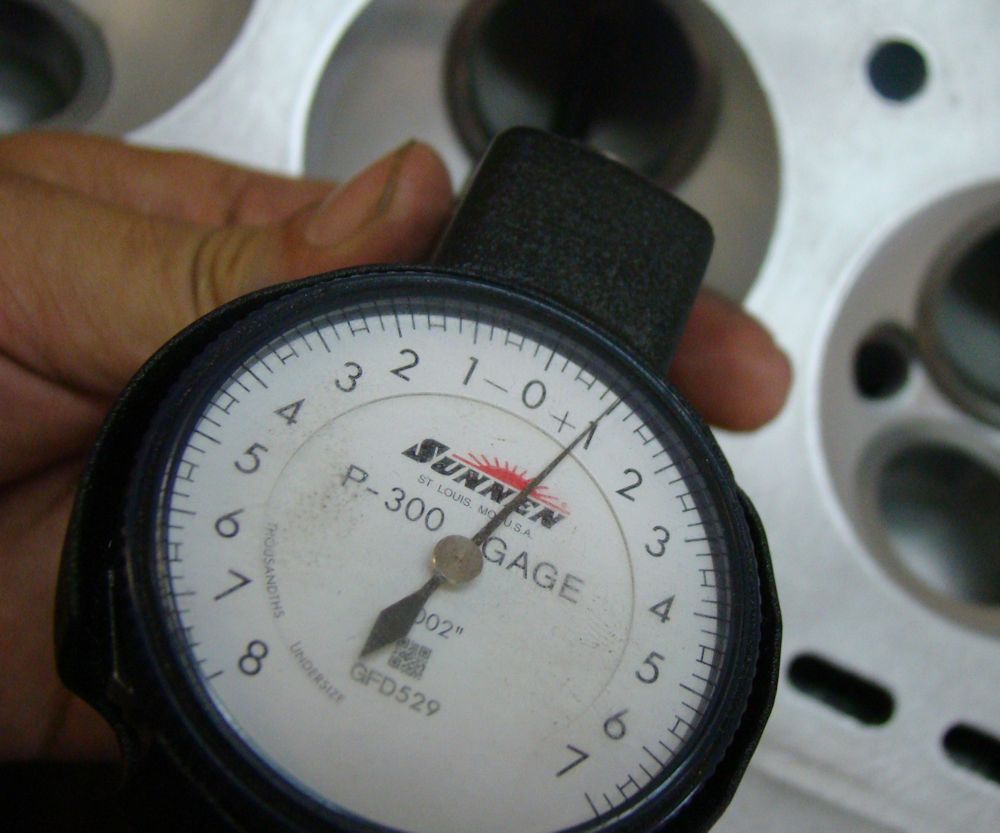
| Honing guides for optimum stem to guide
clearance |
Machining 5 angles valve job |
 |
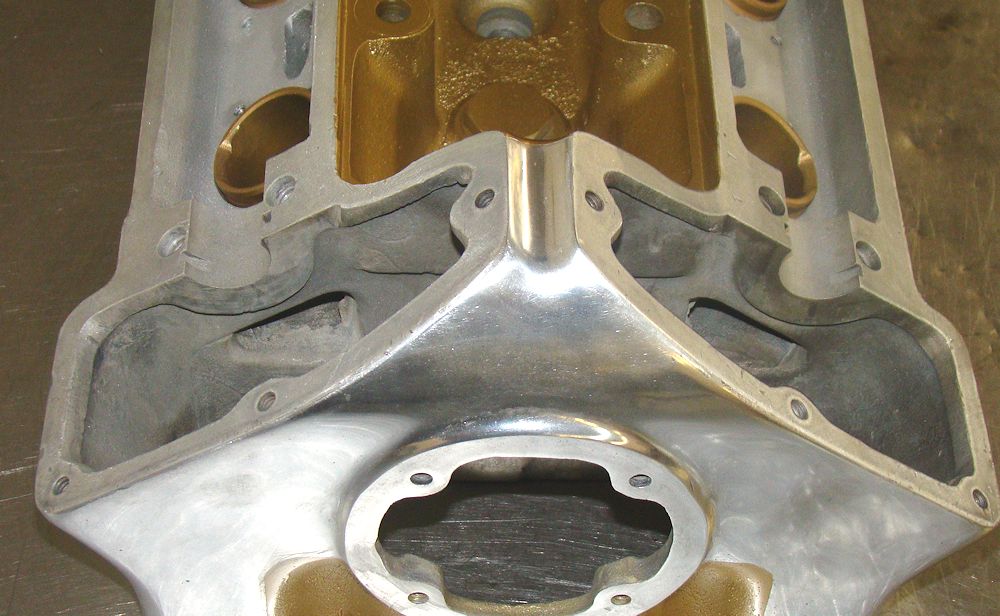 |
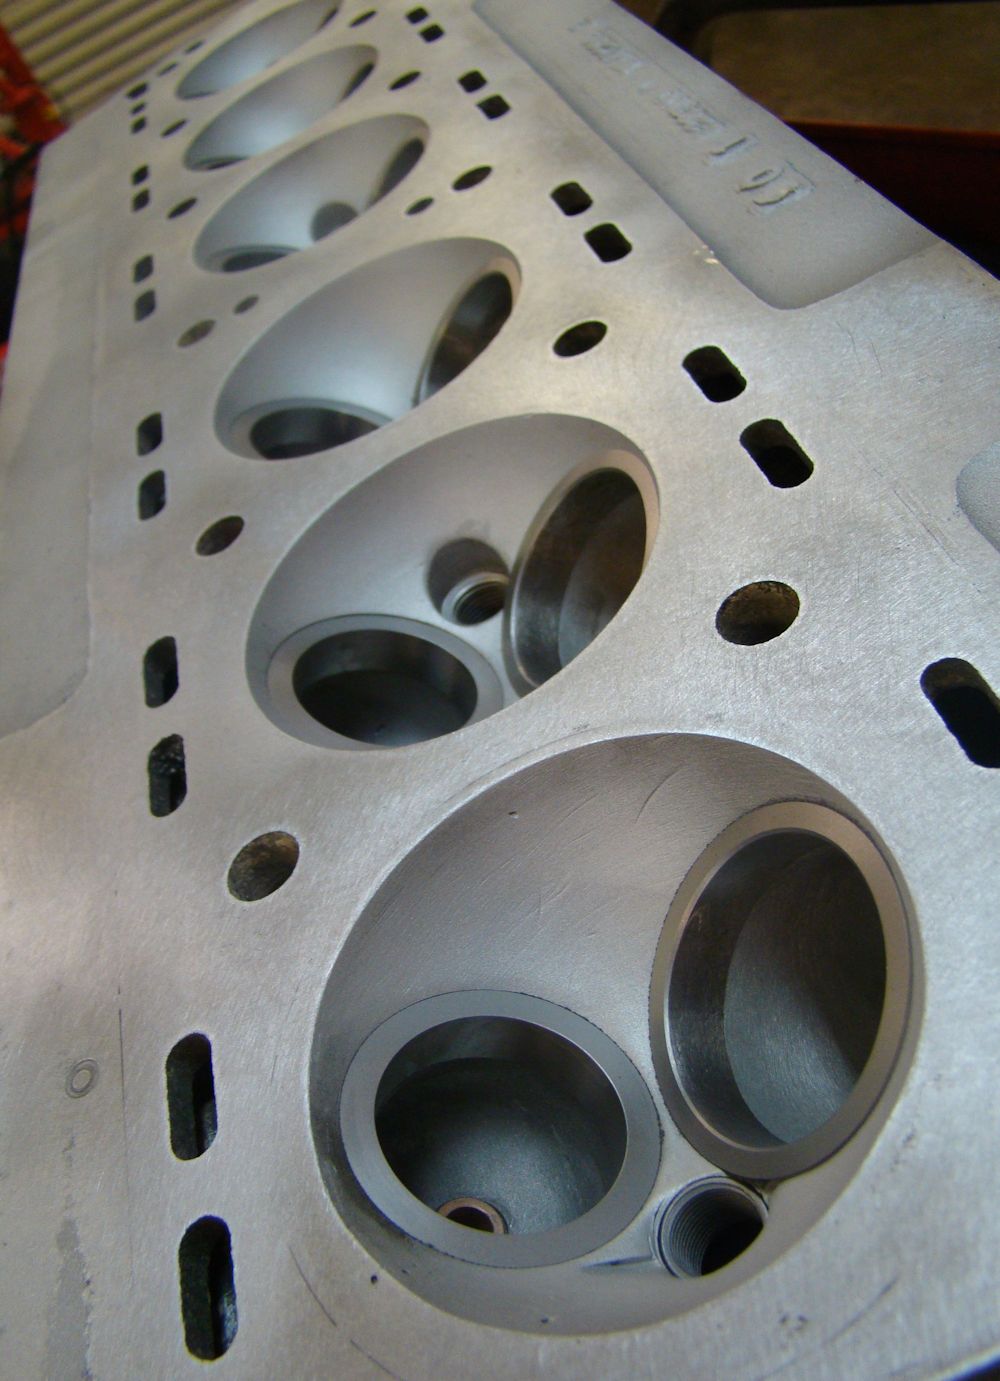
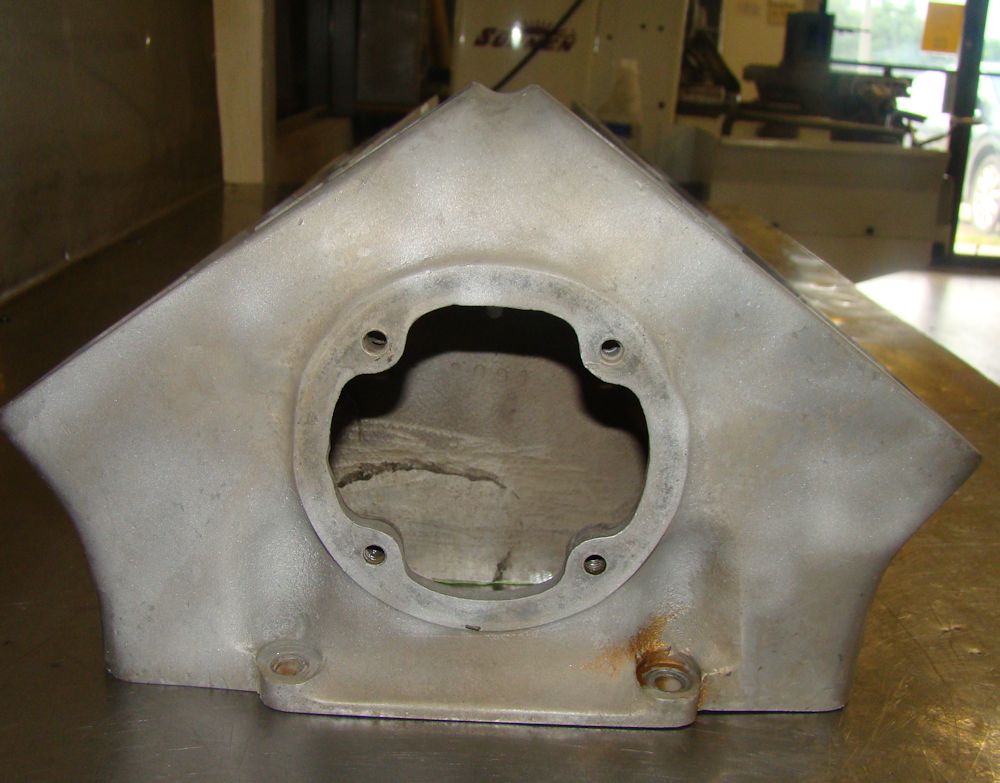
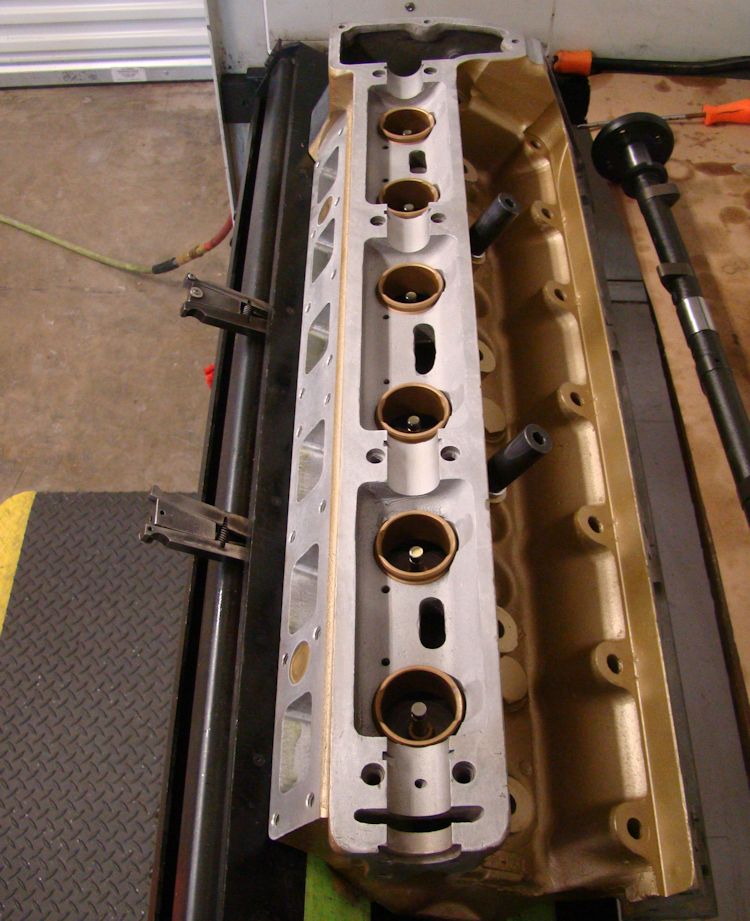
| Front of head prior to cosmetic polishing |
A little more presentable after sanding,
polishing and painting |
 |
 |
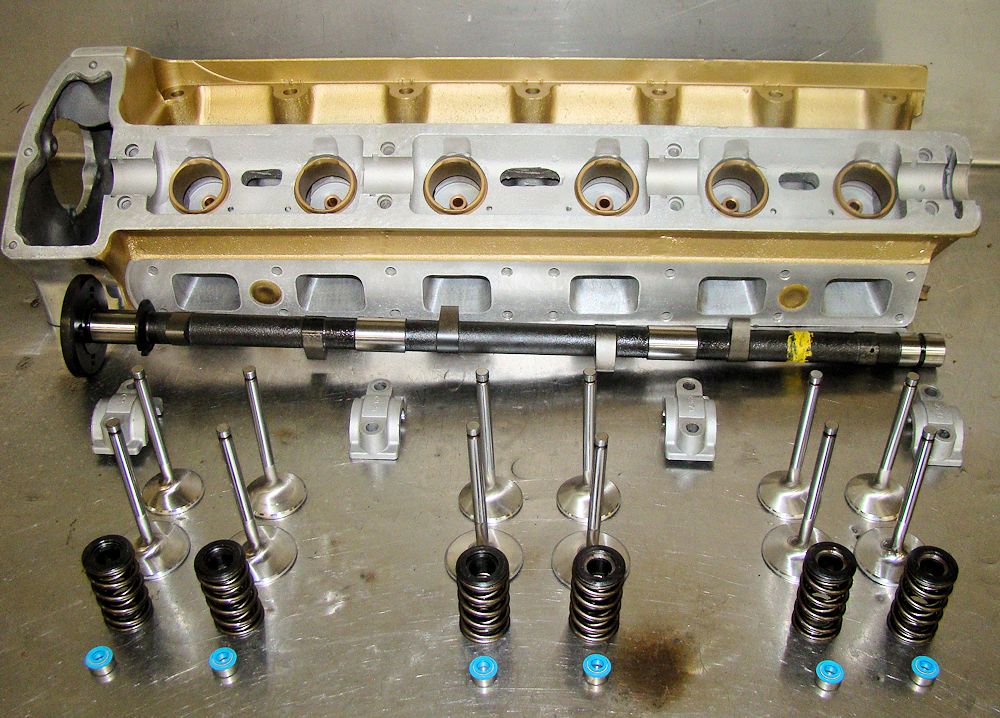
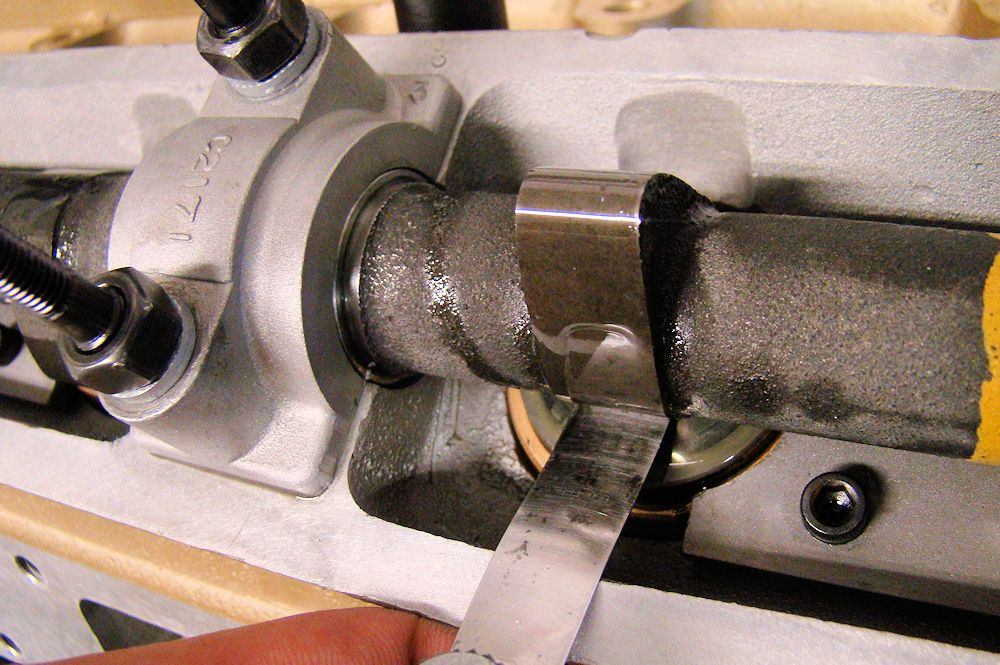
| Head ready for assembly |
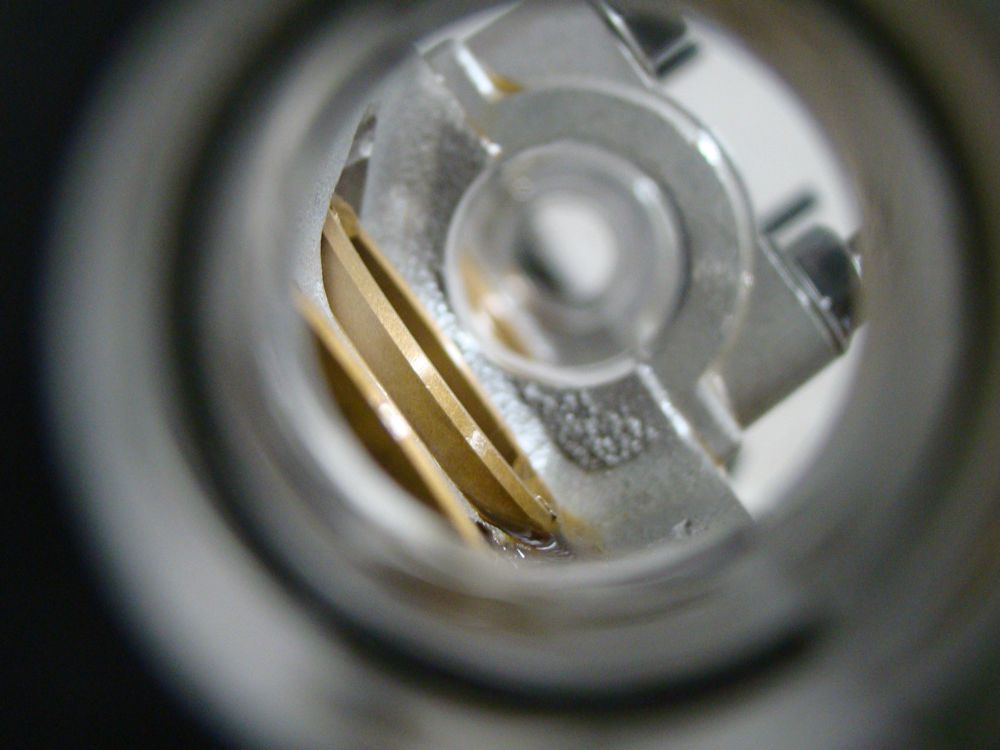
Note special bronze tappet guides, relieved for high list cams |
 |
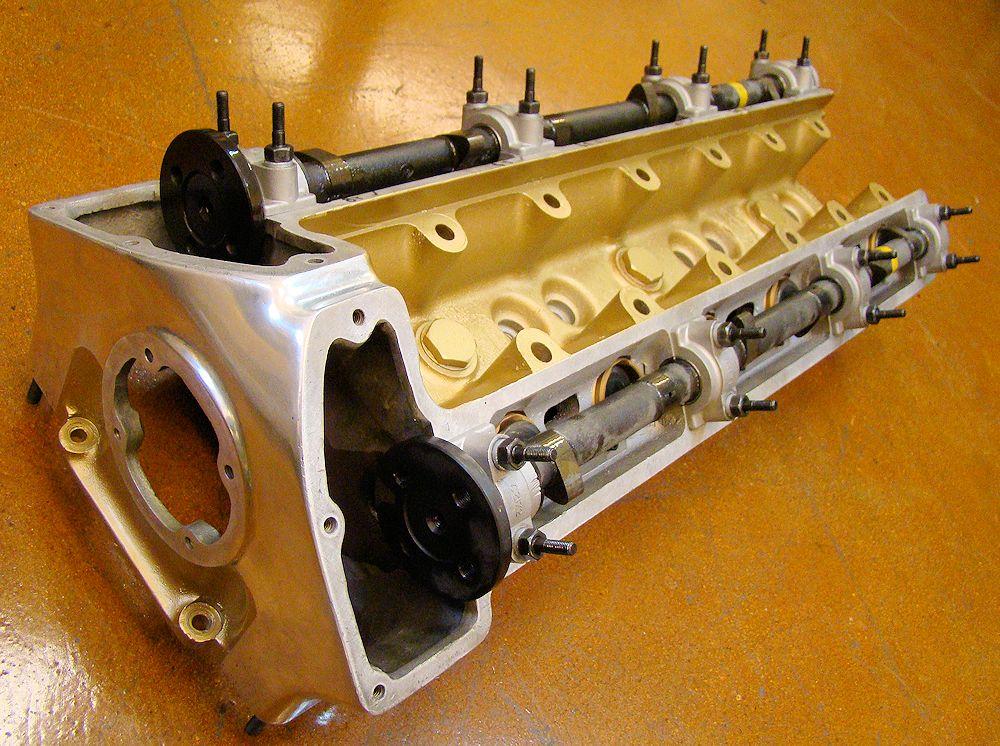 |
| Head rebuild now complete, stroked block is
next! |
We are delighted to have this exciting project in the CJ Workshop and look forward to getting the restoration underway in the next few months.
 |
 |