Total restoration
| 1967 E
Type roadster (JP) Total restoration |
|
|
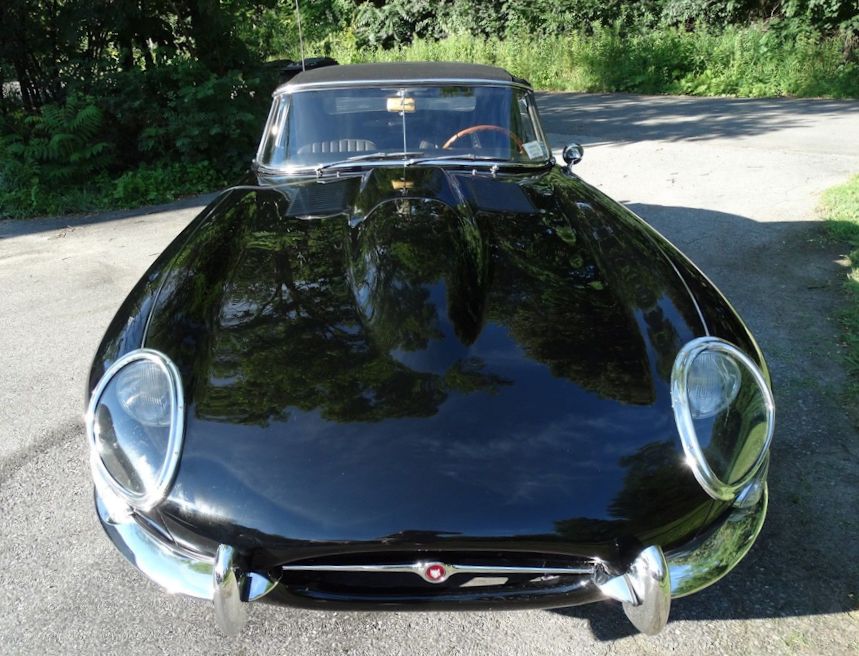
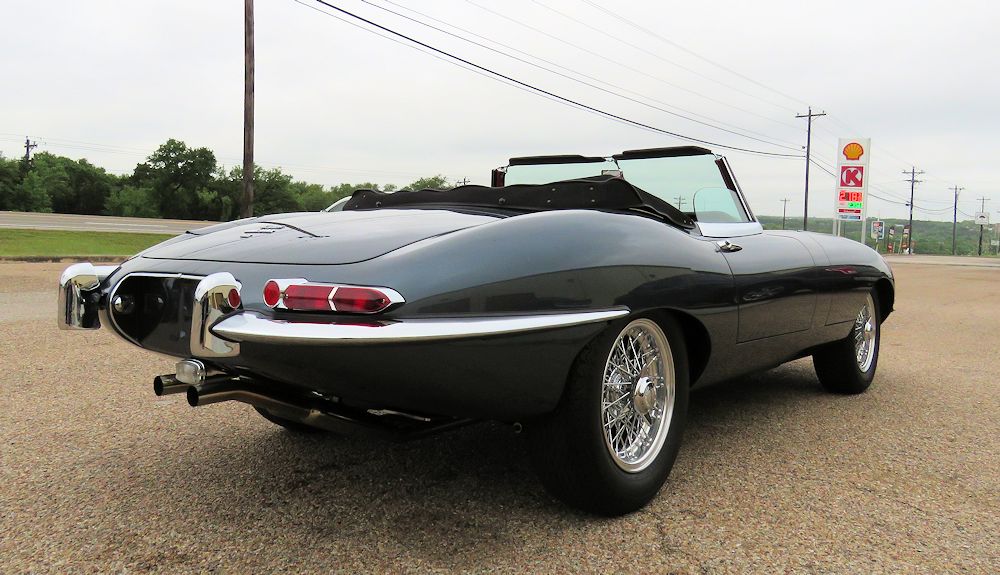
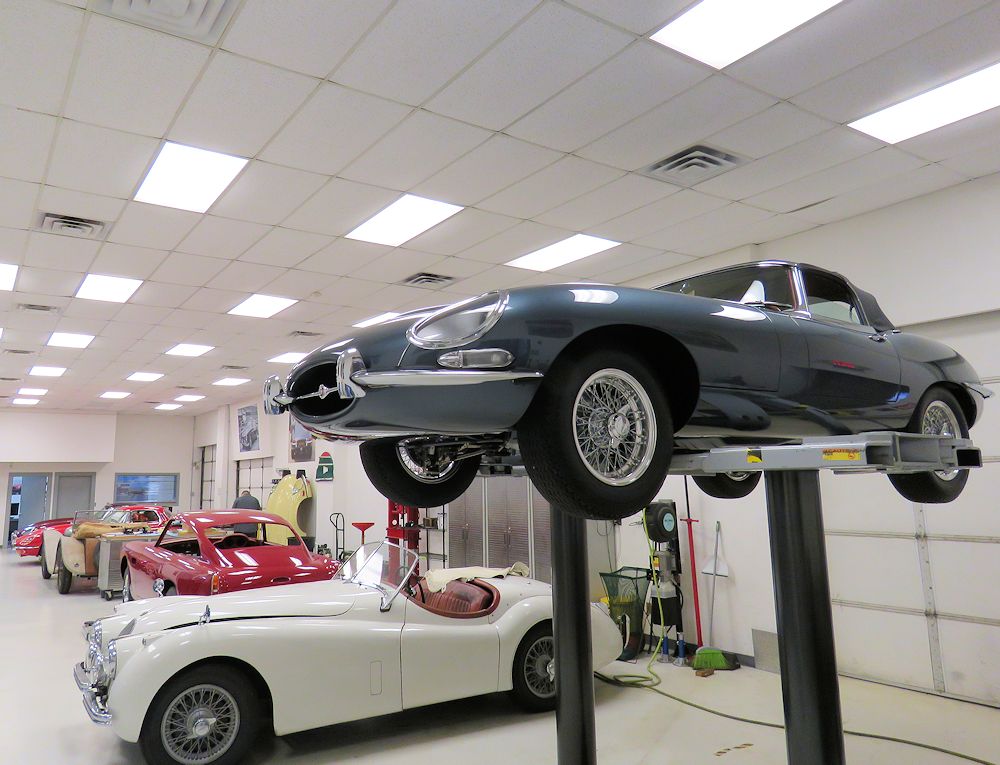
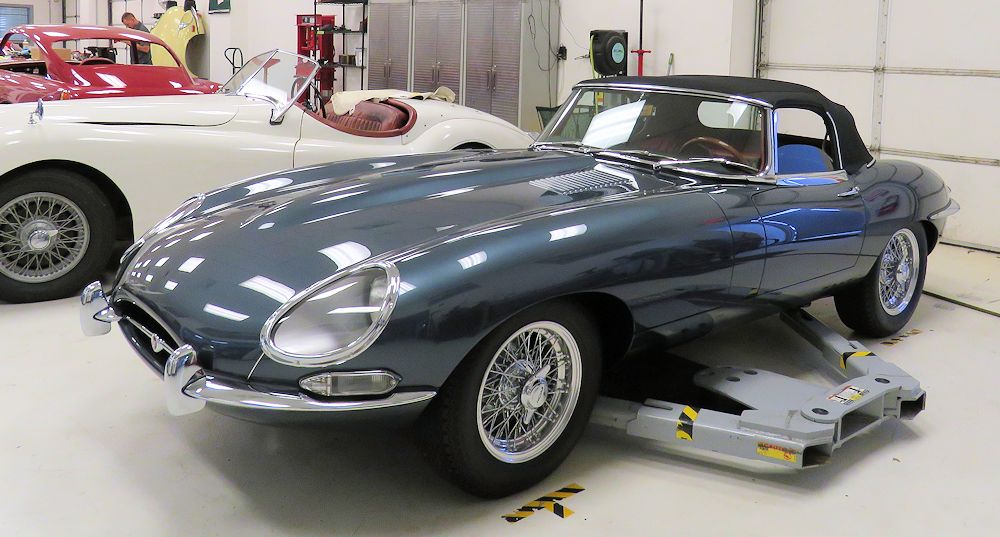
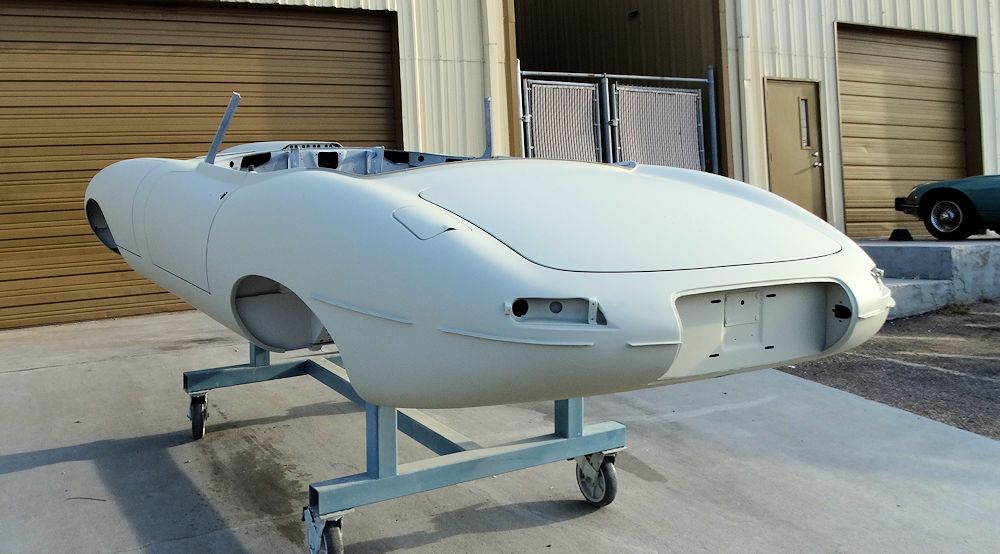
It finally stopped raining in Austin long enough to take a few photos of the finished car outside!

 |
 |
 |
 |
 |
 |
 |
 |
 |
 |
 |
 |
 |
 |
I am delighted to report that this restoration has now been completed and another beautiful E Type is ready for the open road!
 |
 |
 |
 |
 |
 |
 |
 |
 |
 |
 |
 |
 |
 |
 |
 |
 |
 |
 |
 |
 |
 |
 |
 |
 |
 |
 |
 |
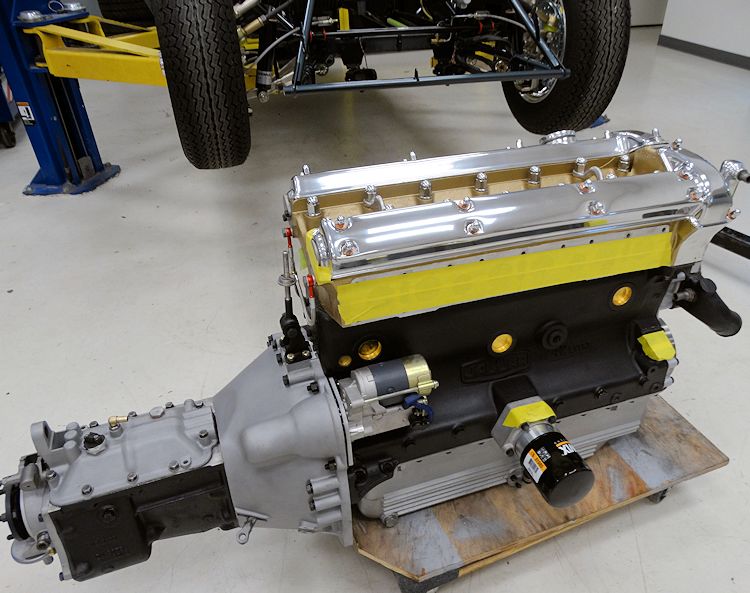
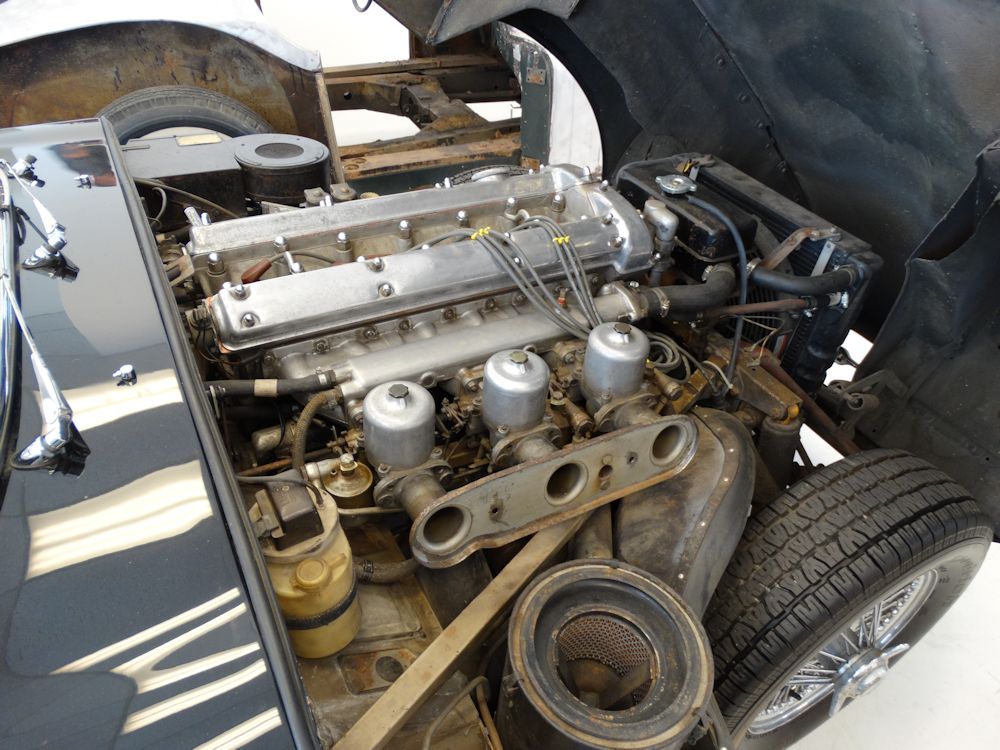
Installing the engine and transmission...
 |
 |
 |
 |
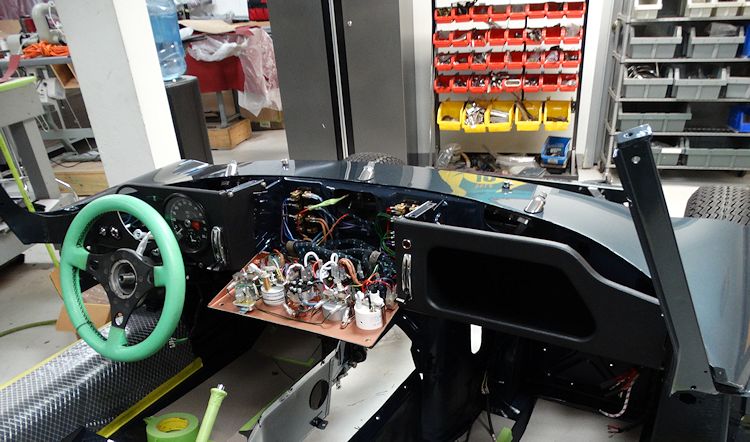
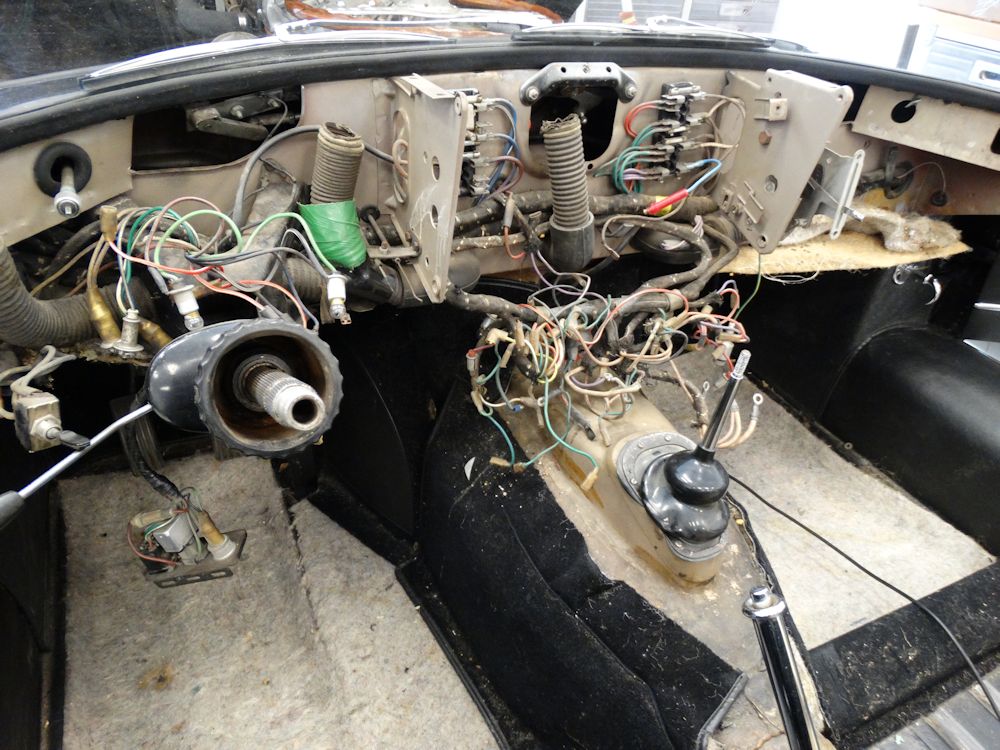
Your car is now in the trim room receiving its new wiring harness, gauges, lighting, etc..
 |
 |
 |
 |
 |
 |
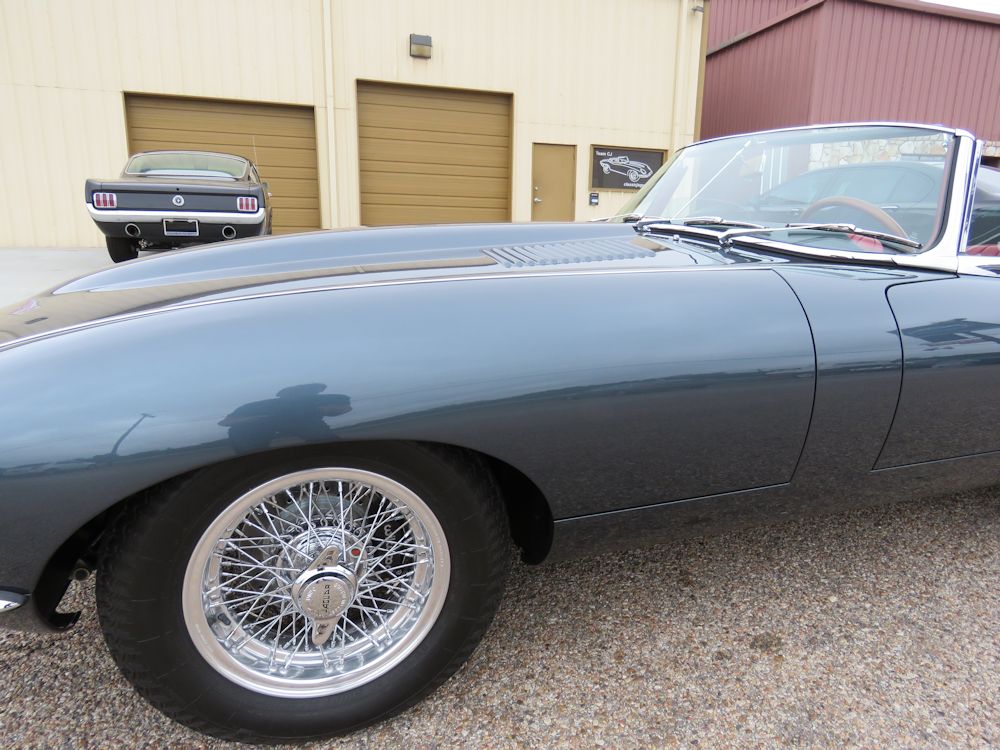
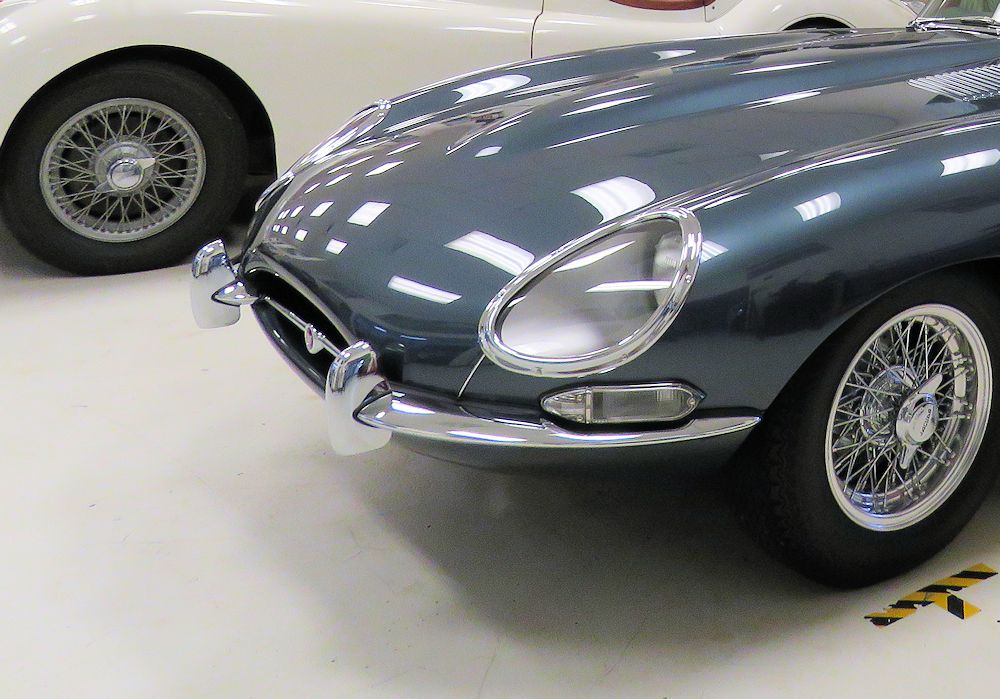
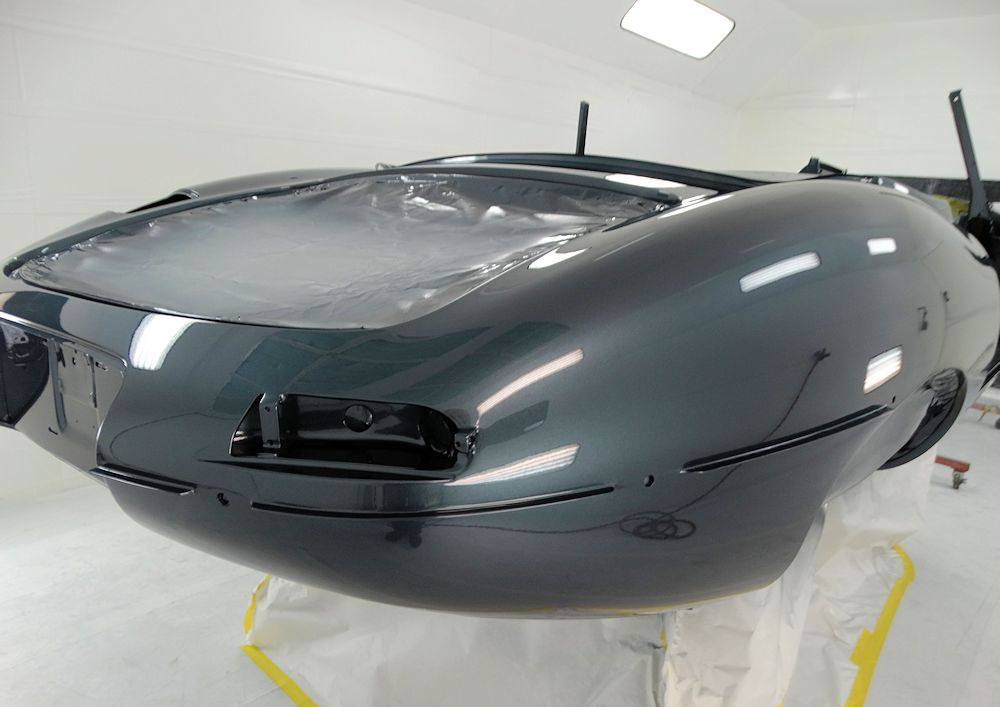
Gerardo has now sanded and buffed the body and the Opalescent Dark Blue paintwork looks absolutely beautiful.
 |
 |
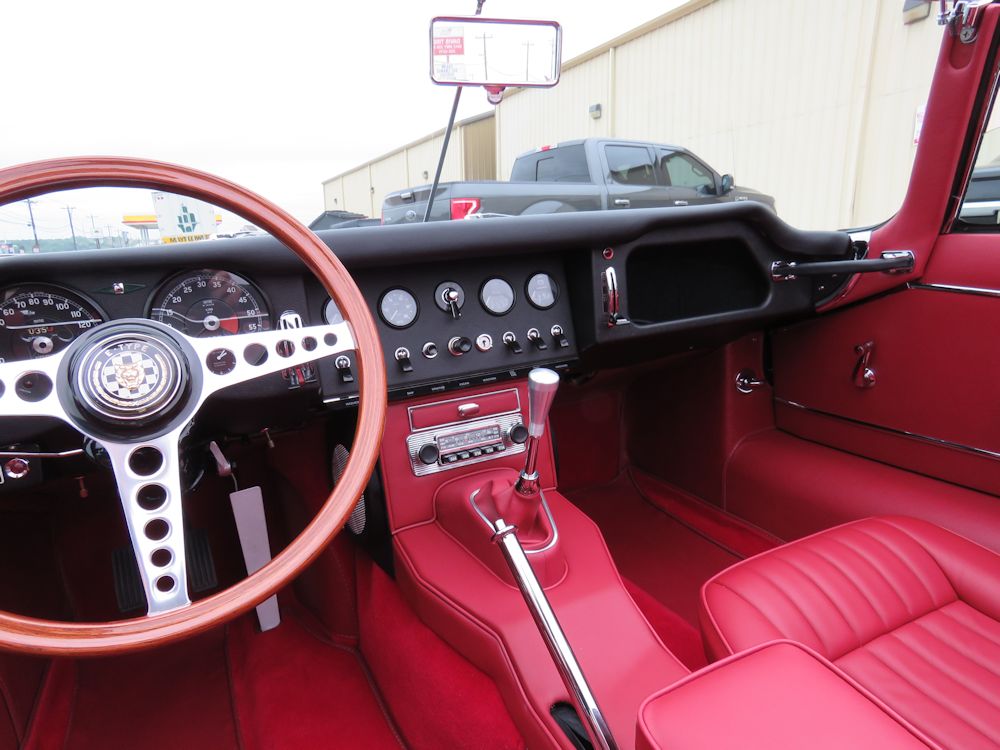
| Beautifully restored Blaupunk with iPhone connectivity |
Gerardo preparing to sand and buff the body |
 |
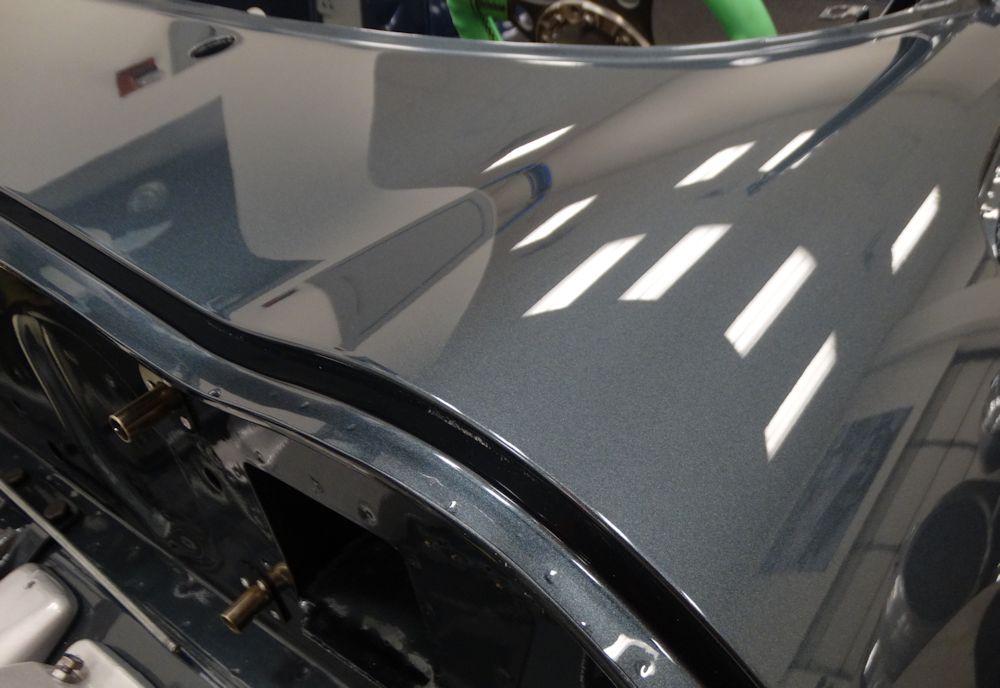 |
| Opalescent Dark Blue paintwork looks
absolutely beautiful under the shop lights |
|
 |
 |
| Check out SS100 stablemate in the reflection! |
|
 |
 |
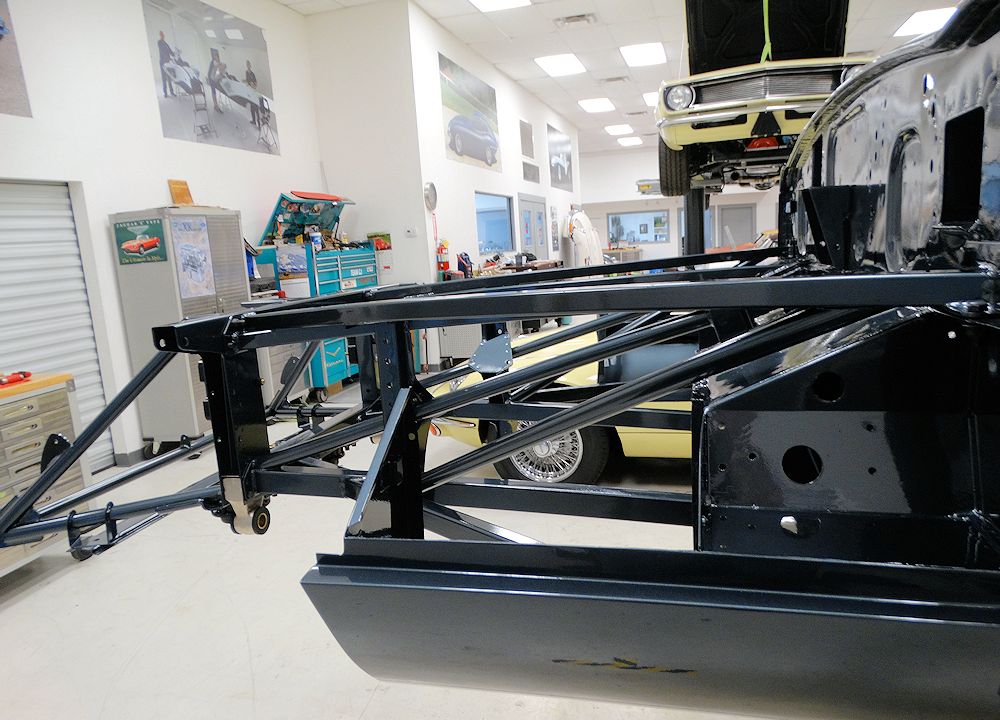
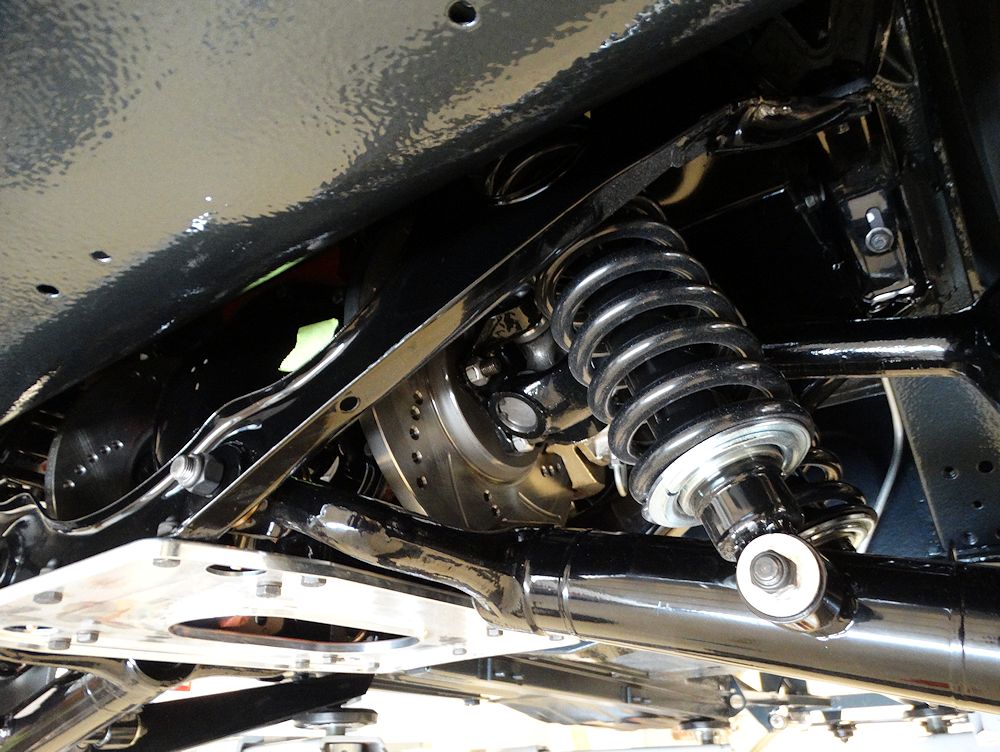
Getting the car back on its wheels is always an exciting milestone in any restoration.
 |
 |
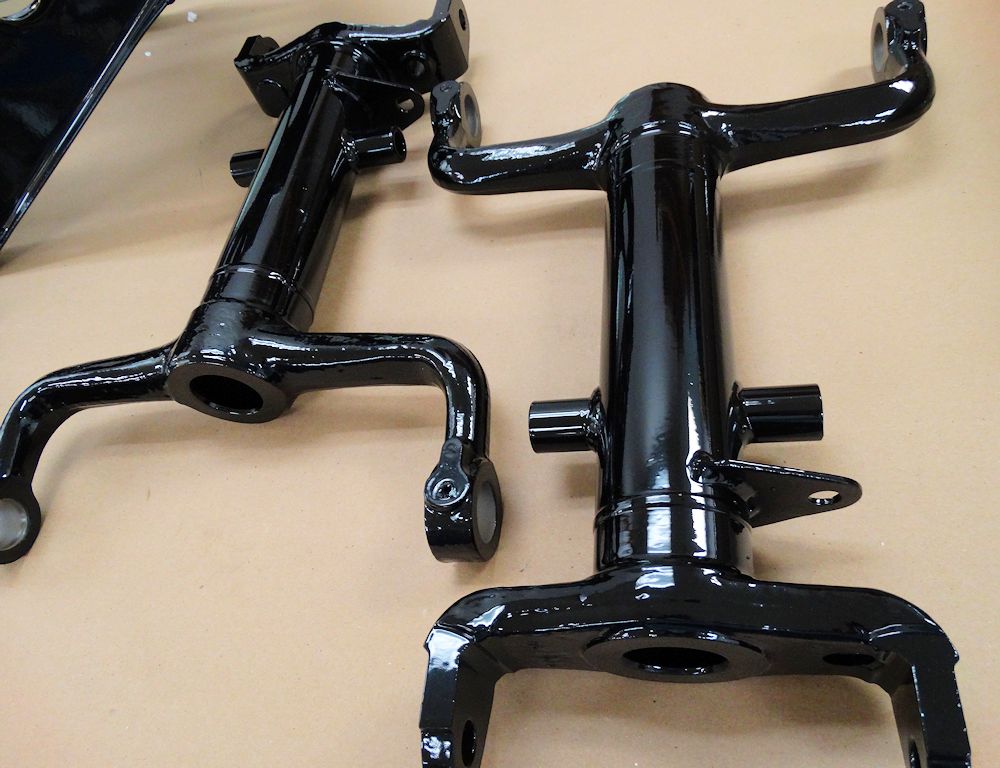
| Bolting new engine frames in place |
|
 |
 |
 |
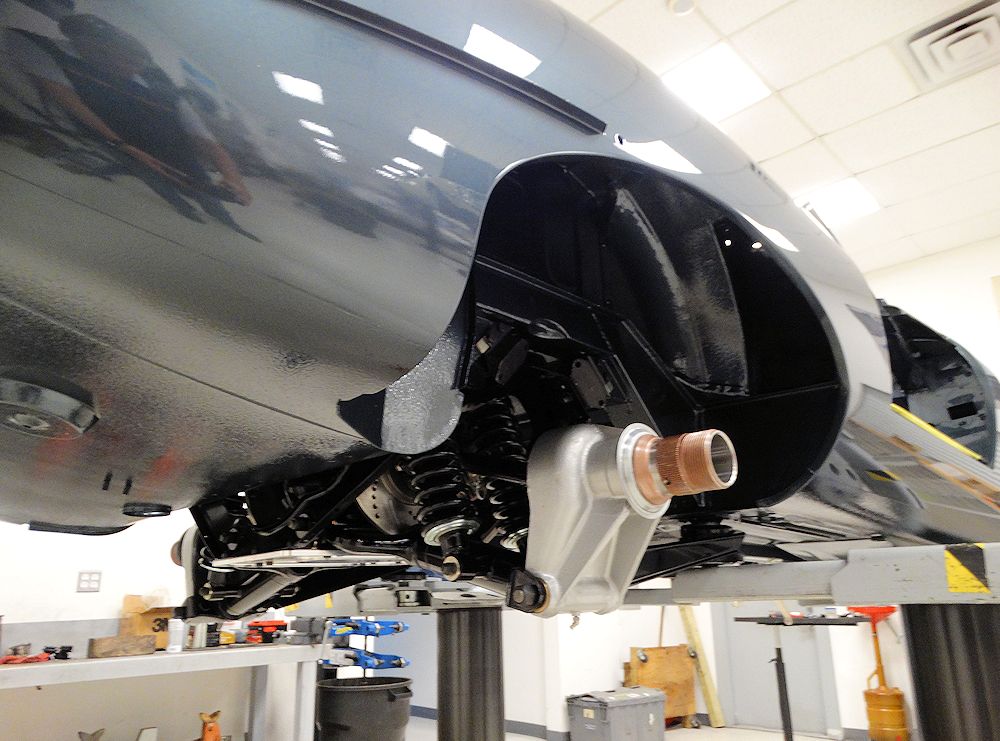 |
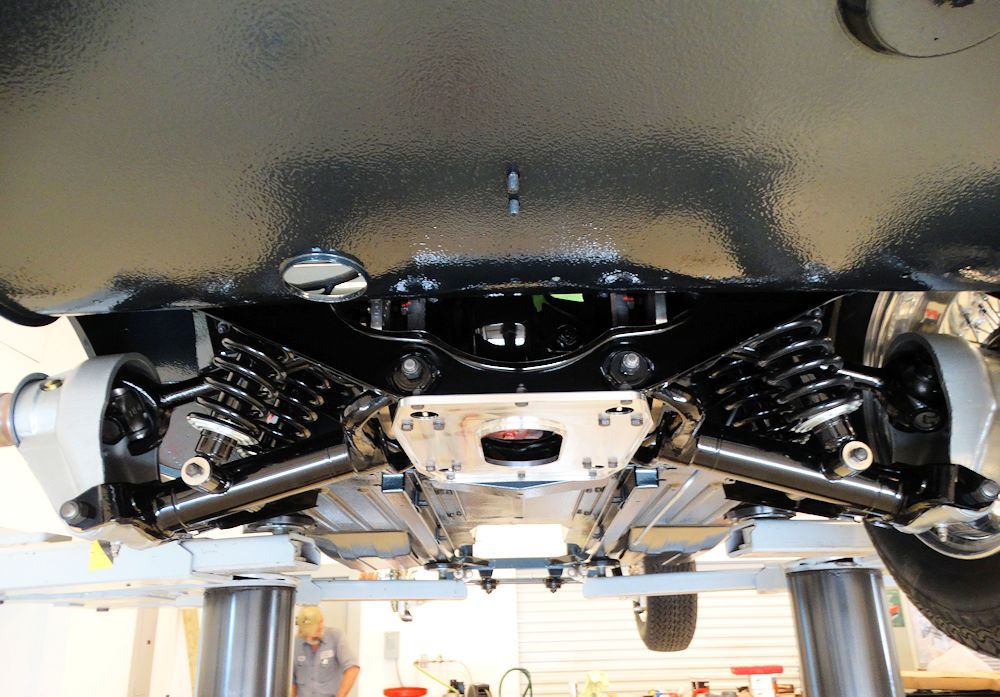
| IRS about to be installed |
|
 |
 |
 |
 |
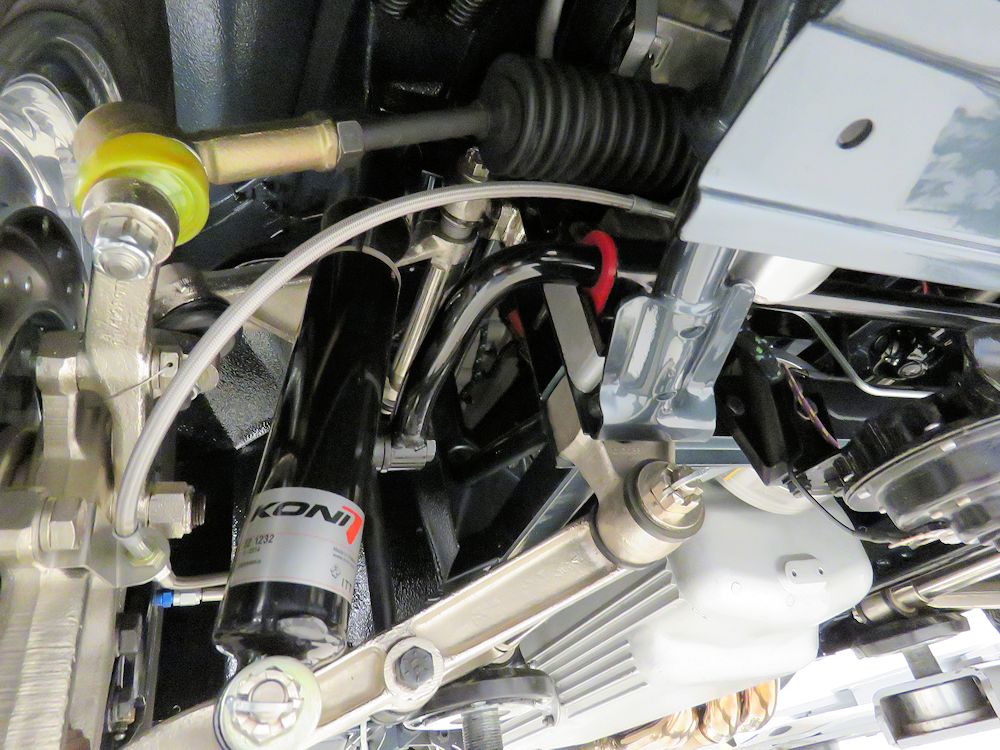
| Front suspension and brakes now installed |
|
 |
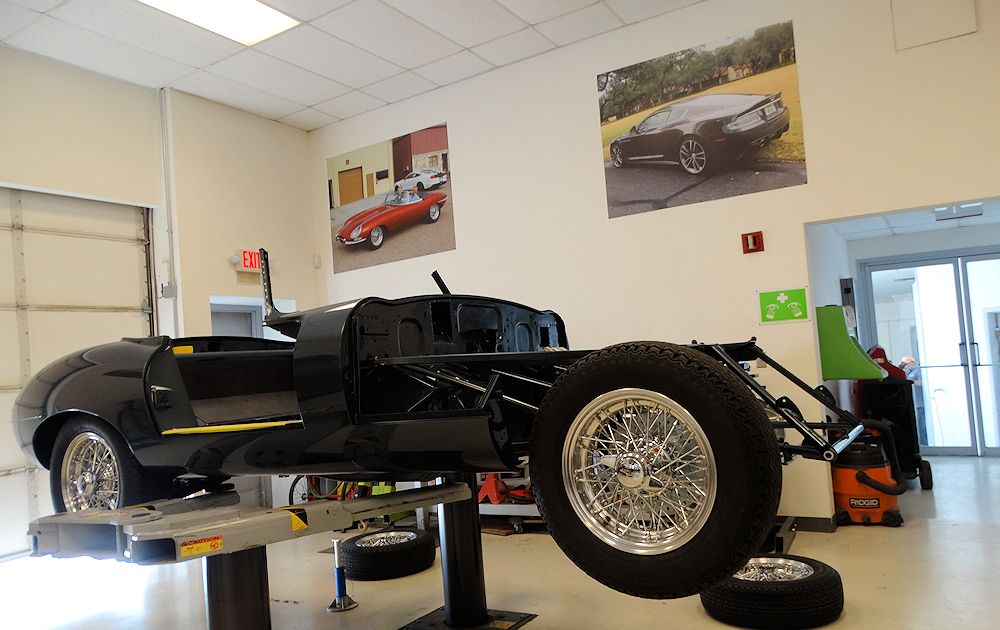 |
| Gorgeous Borrani wire wheels |
Car ready to be placed back on its wheels |
Painting the outer panels...
 |
 |
| Wiping down the body with a tack cloth
immediately prior to pulling the trigger |
Applying the first pass of Opalescent Dark
Blue |
 |
 |
| Body and doors have now been painted |
|
 |
 |
 |
 |
 |
To be continued... |
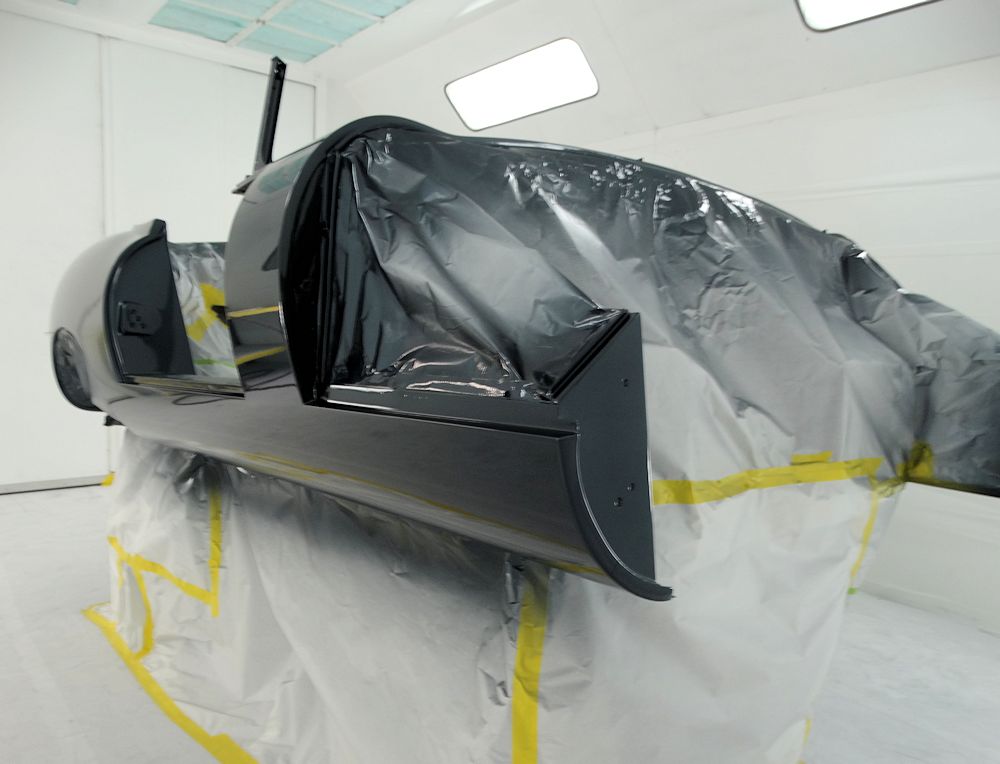
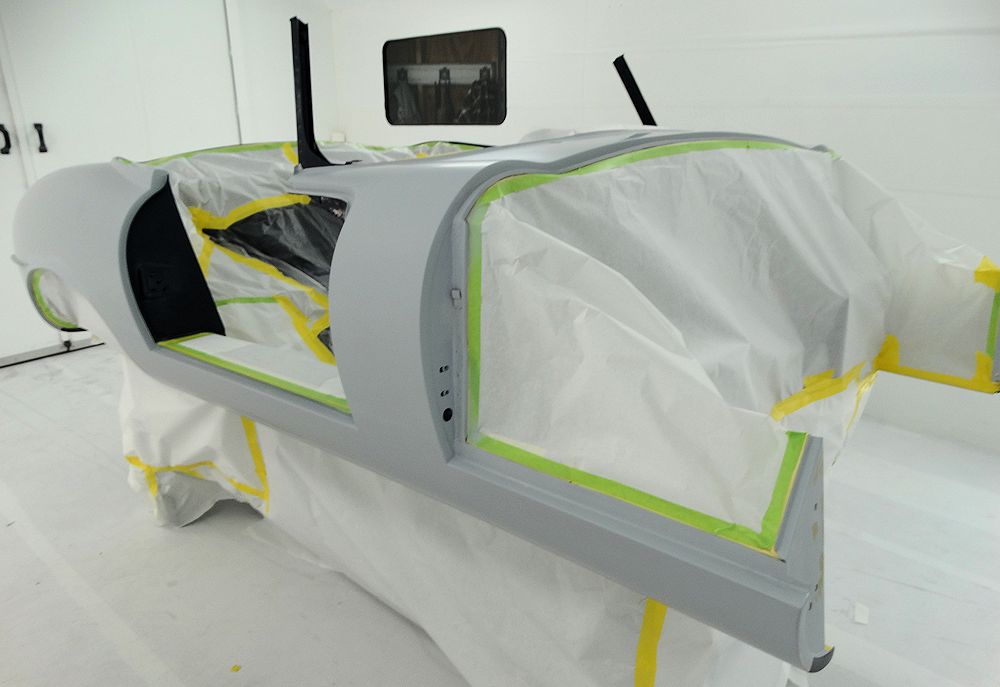
Your car is now in the booth ready for the outer panels to be painted over the next couple of days.
 |
 |
 |
 |
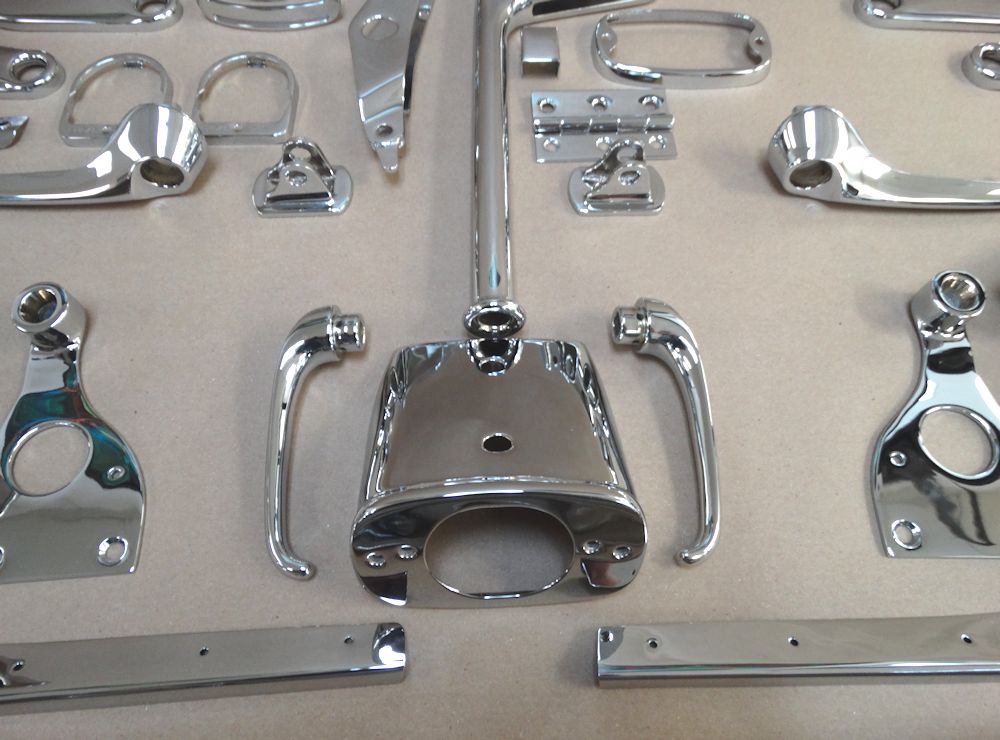
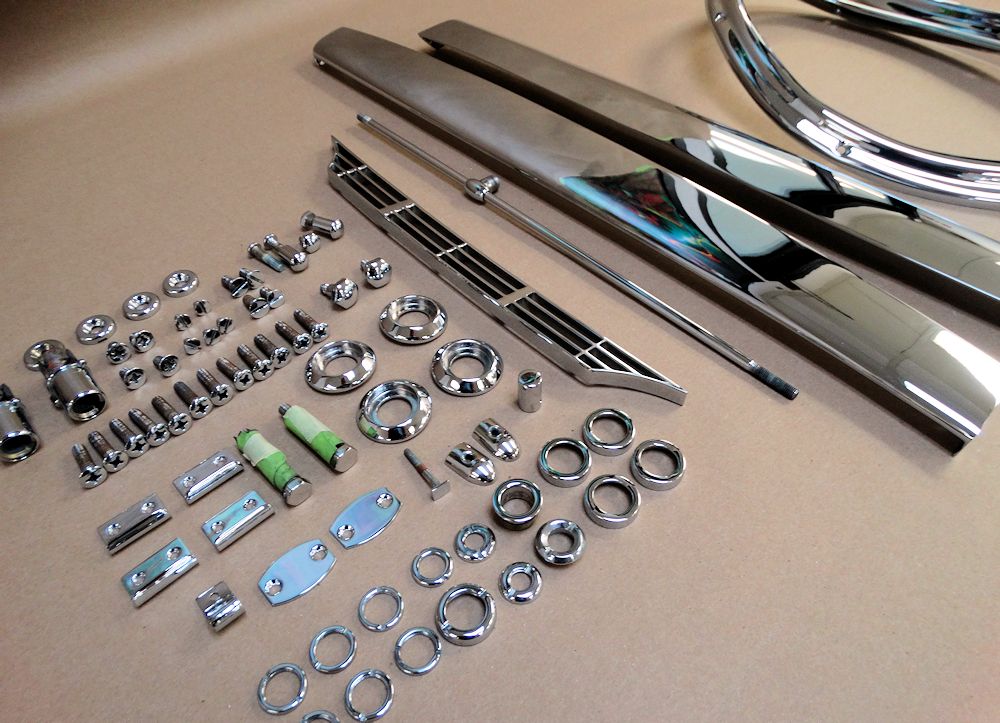
More Opalescent Dark Blue paint being applied - and lots of beautiful new chrome.
 |
 |
 |
 |
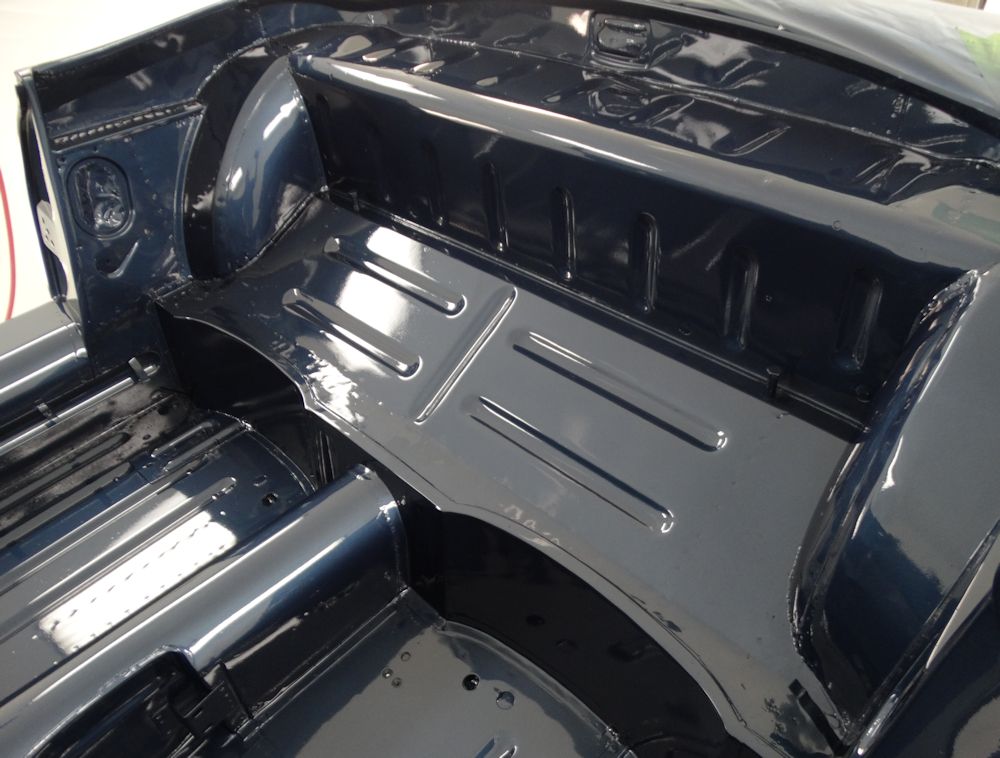
| Boot compartment was painted yesterday
evening |
|
 |
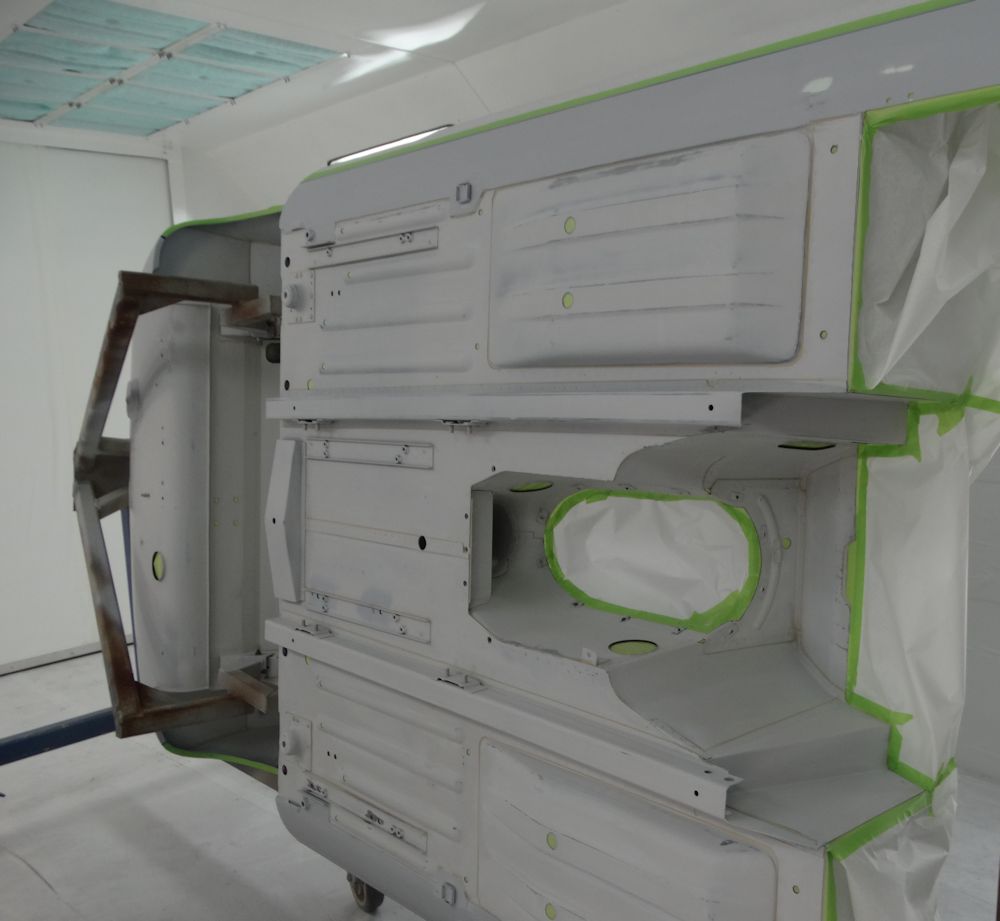 |
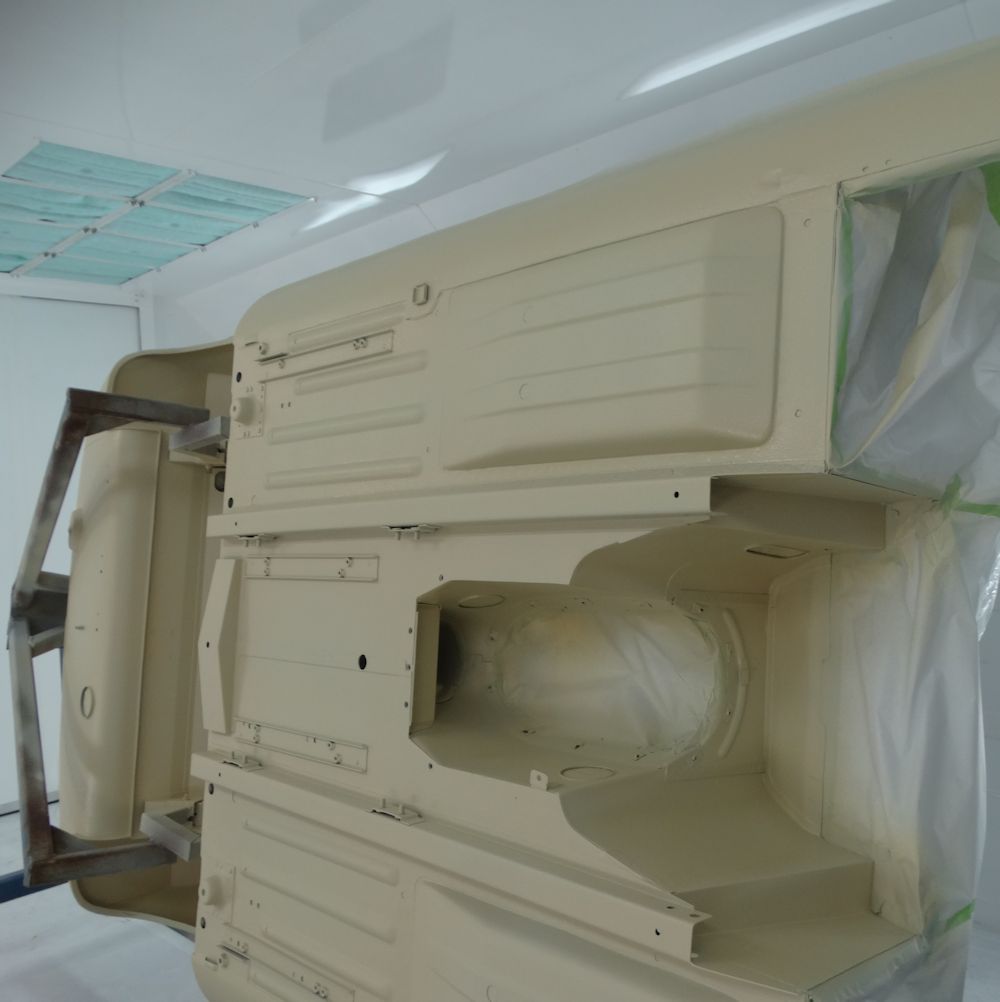
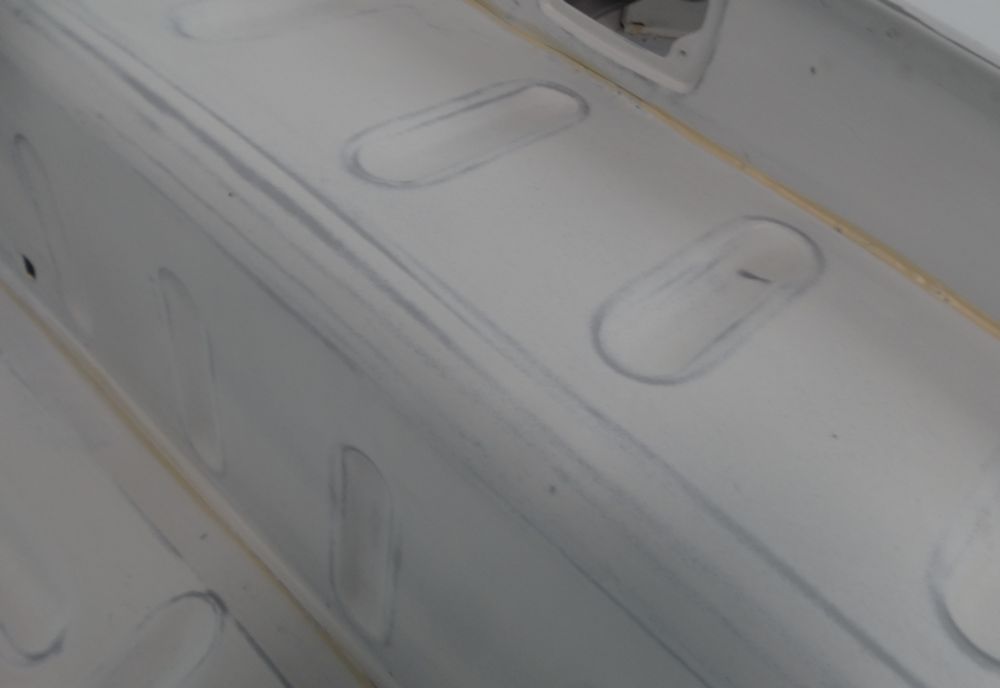
| Masking off the underside of the floors
prior to painting this afternoon |
|
 |
 |
| First sealer is applied |
|
 |
 |
| 3M Rocker Guard is then applied |
Note slight texture of the Rocker Guard |
 |
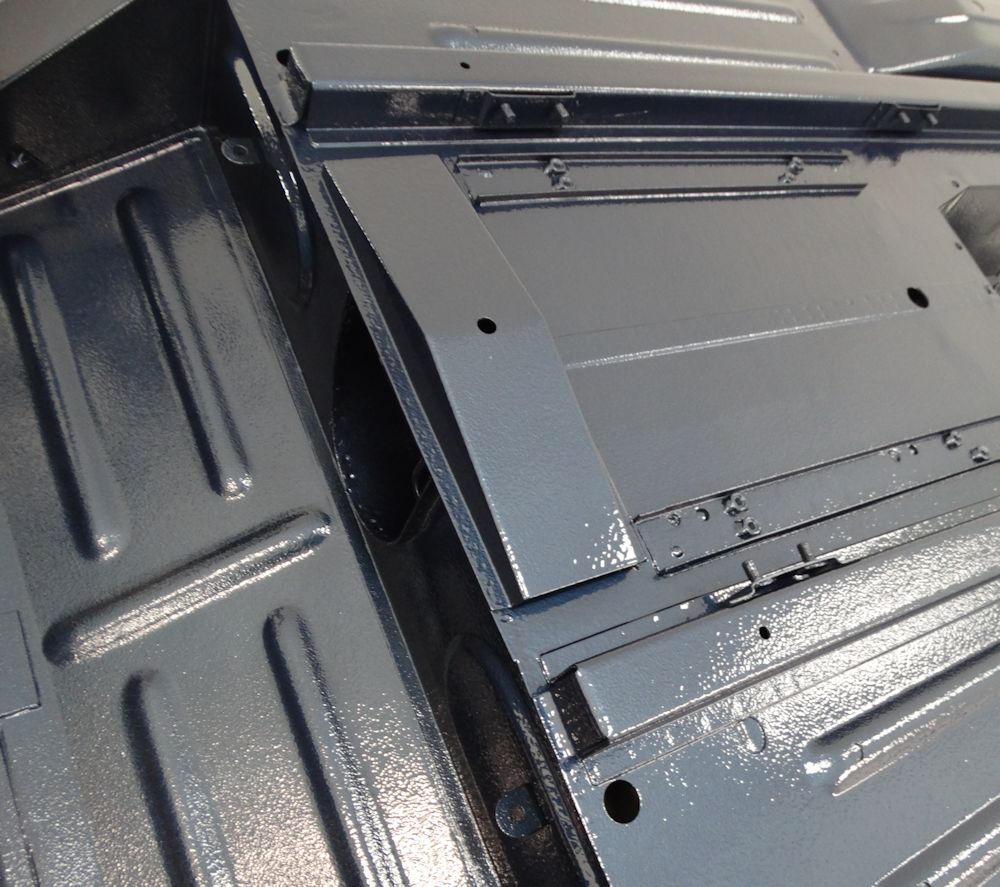 |
| The Rocker Guard is then sealed |
Finally the underside is Opalescent Dark
Blue |
 |
 |
 |
 |
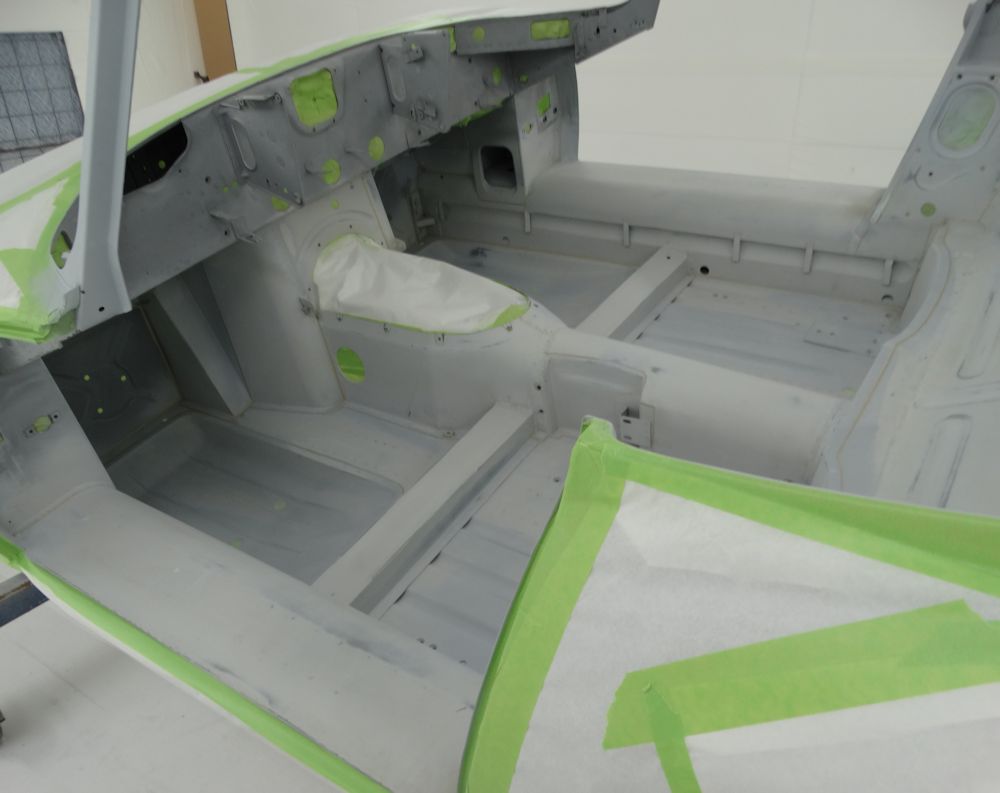
Applying the first of the Opalescent Dark Blue paint. First to be painted is the cabin, followed by the underside of the floors and the boot compartment. It is always very exciting when a project gets to this stage - beautiful new paintwork never gets old!
 |
 |
 |
 |
 |
 |
 |
 |
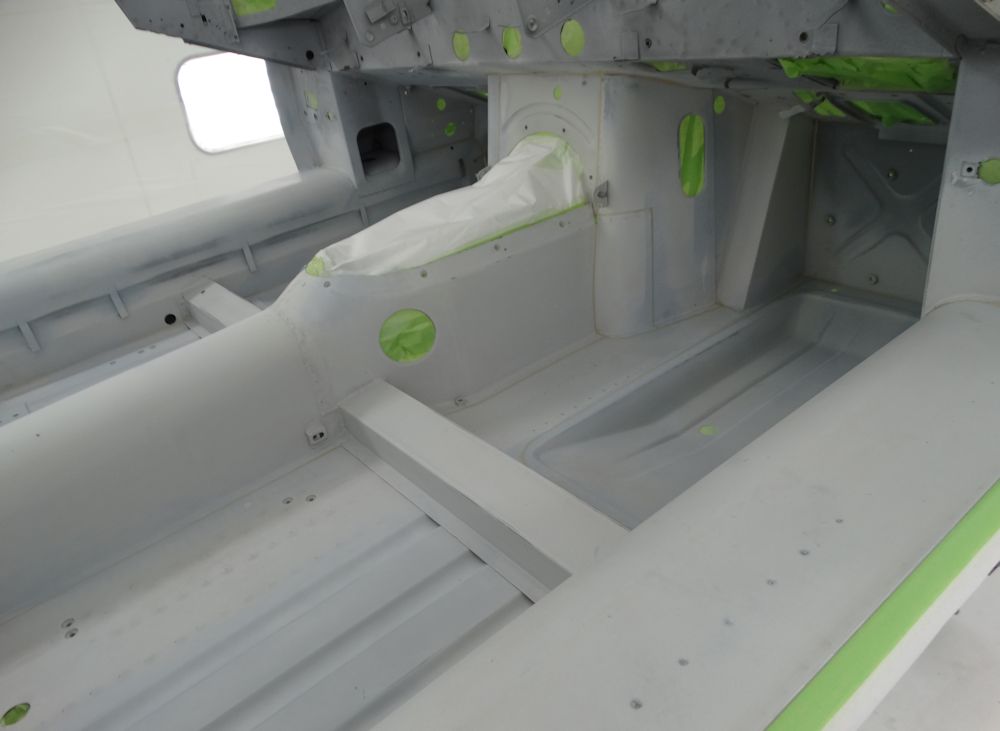
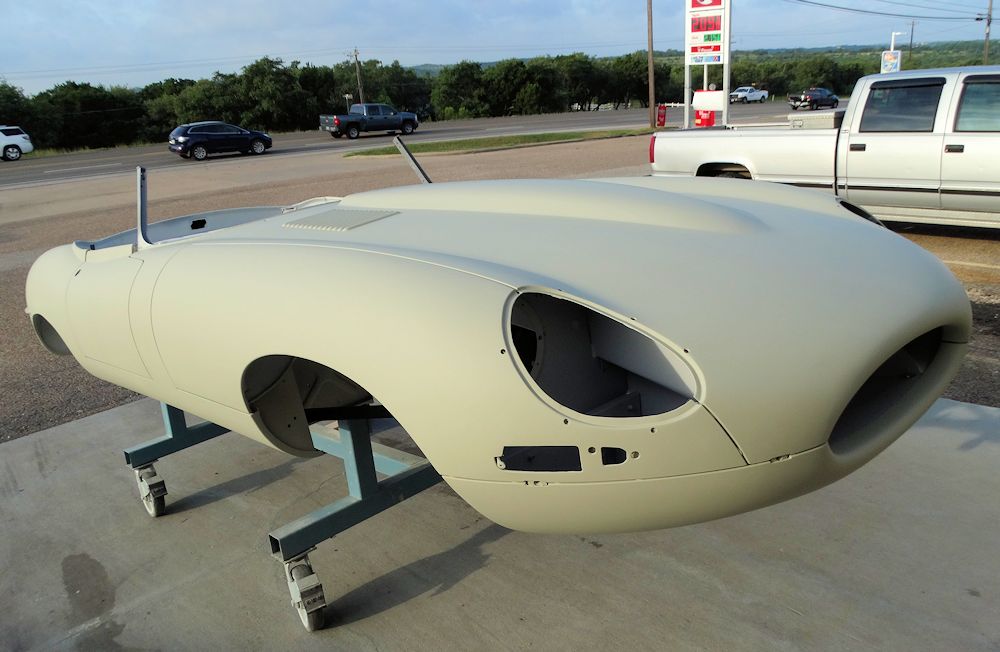
Your bodyshell is currently in the booth being prepped for paint. First up will be the cabin and the underside of the floors. We are scheduled to be applying the first of the Opalescent Dark Blue paint on Tuesday of next week.
 |
 |
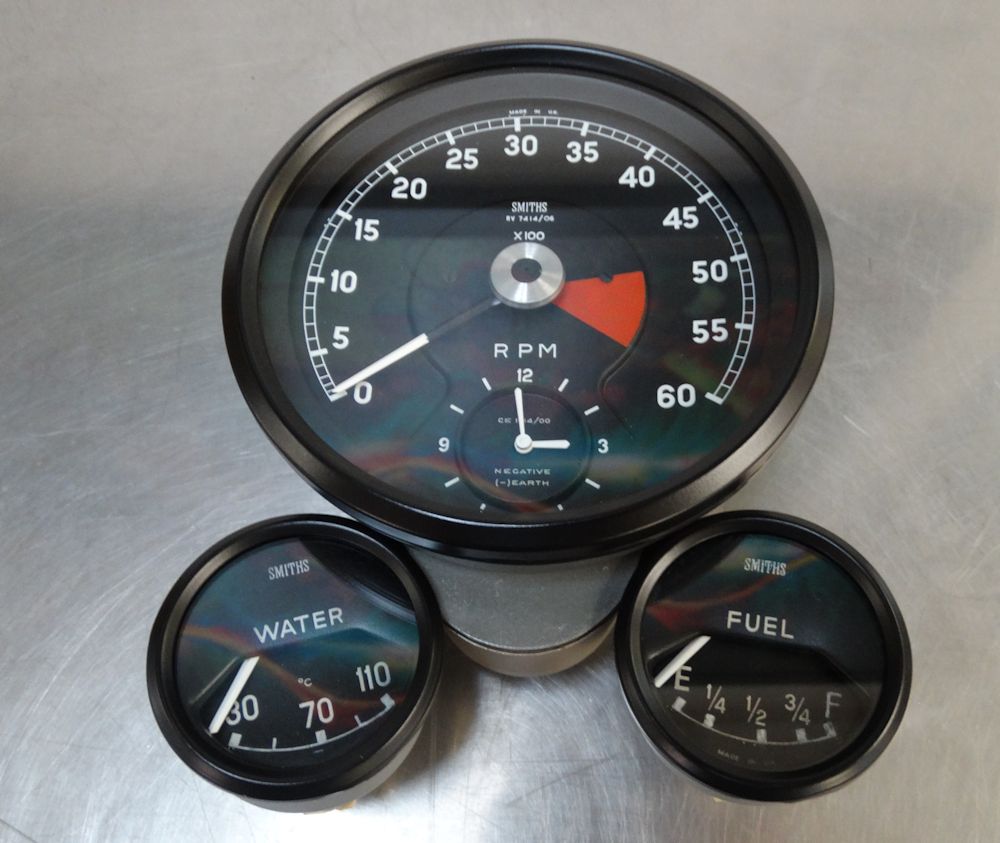
| Rebuilt gauges and clock |
Scuffing and seam sealing the cabin area prior to painting |
 |
 |
Assembling your rebuilt and restored IRS.
 |
 |
 |
 |
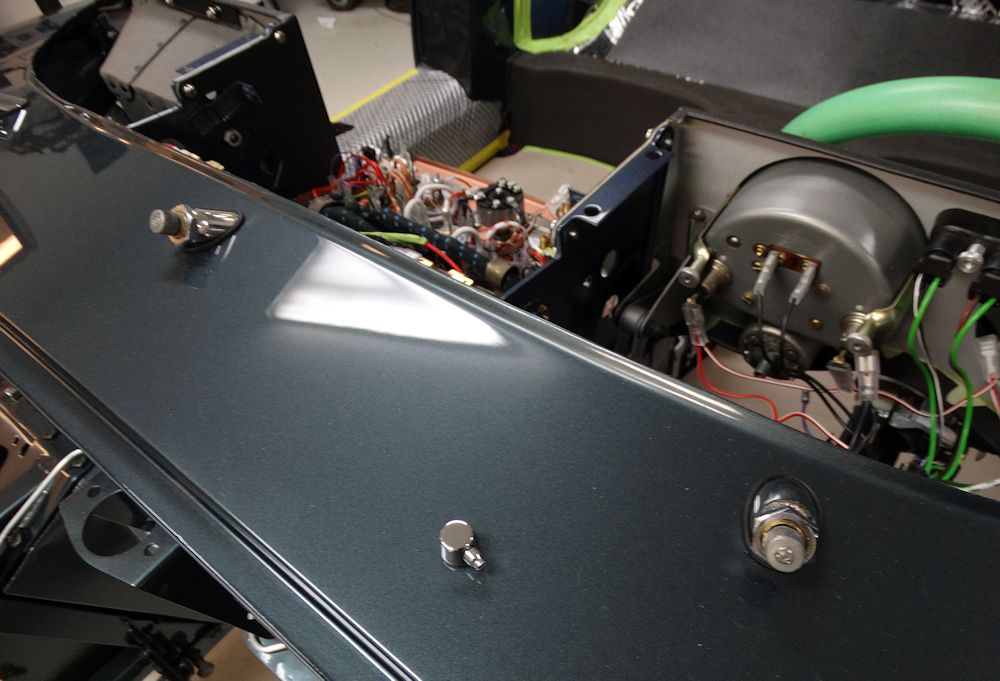
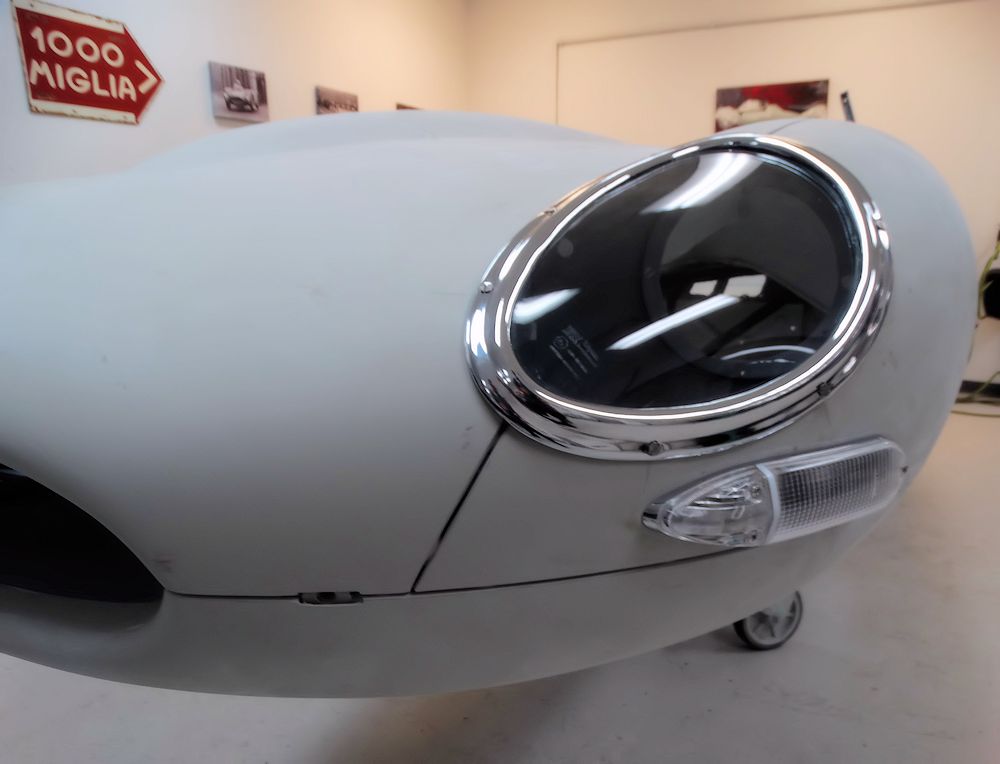
With the bodywork completed, it is now time to trial fit all the chrome and bright work...
|
 |
| Many mechanical components have already been rebuilt |
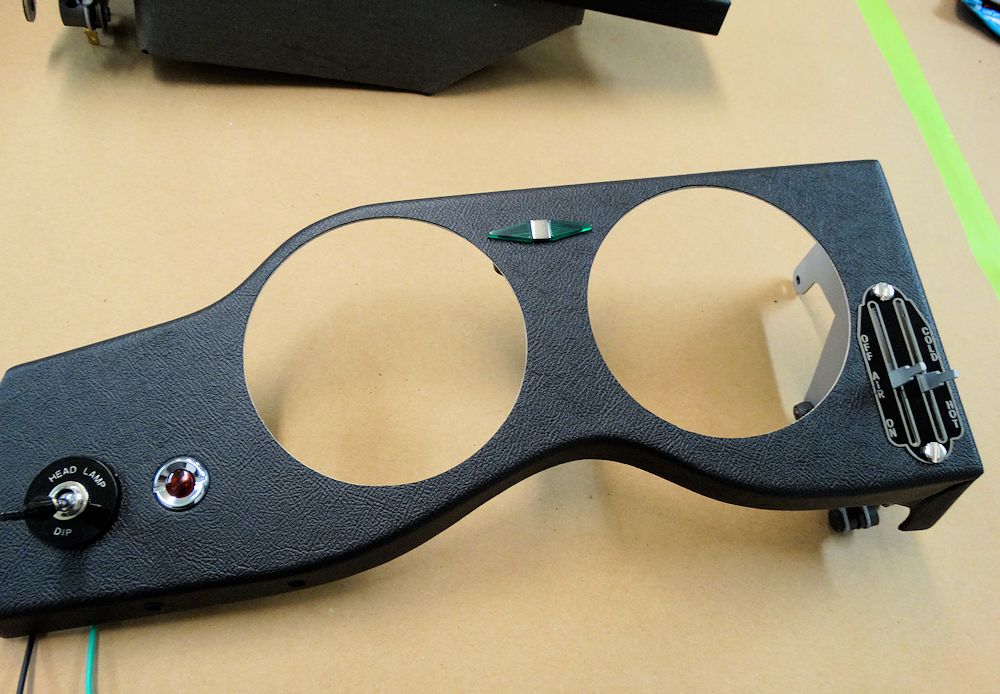
Trimming the dash gauge panels |
 |
 |
 |
 |
| Time to trial fit chrome |
|
 |
 |
 |
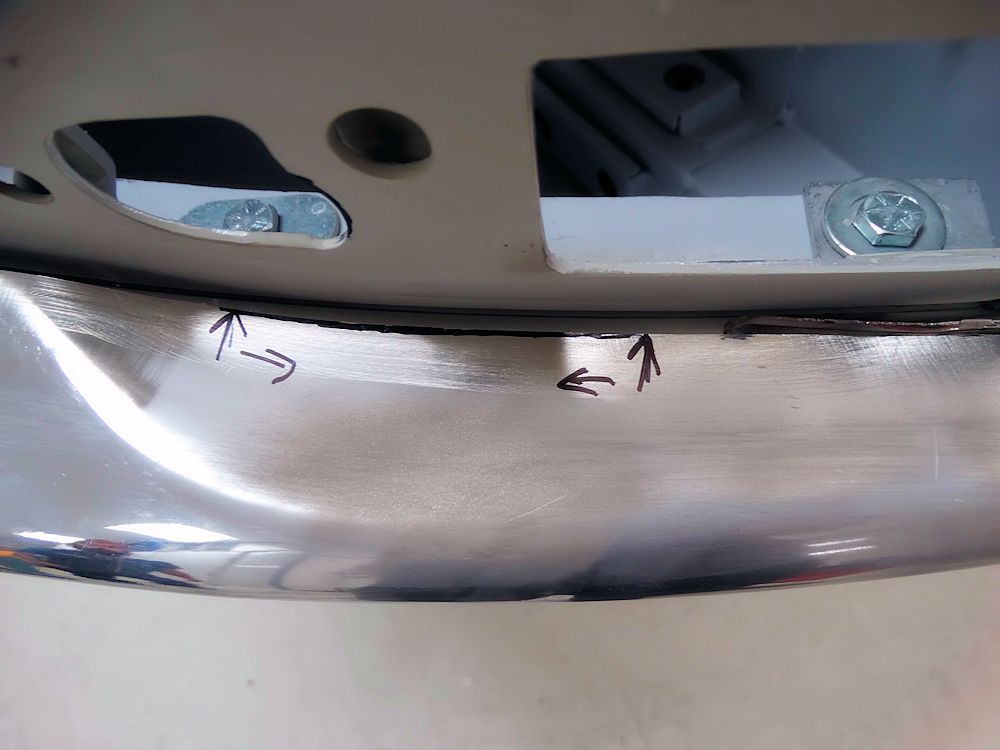 |
| Bumper mounting brackets will be relocated for perfect fit |
|
 |
 |
| Note how badly over-rider finishers fit prior to modification |
After tweaking and grinding, they now fit as they should |
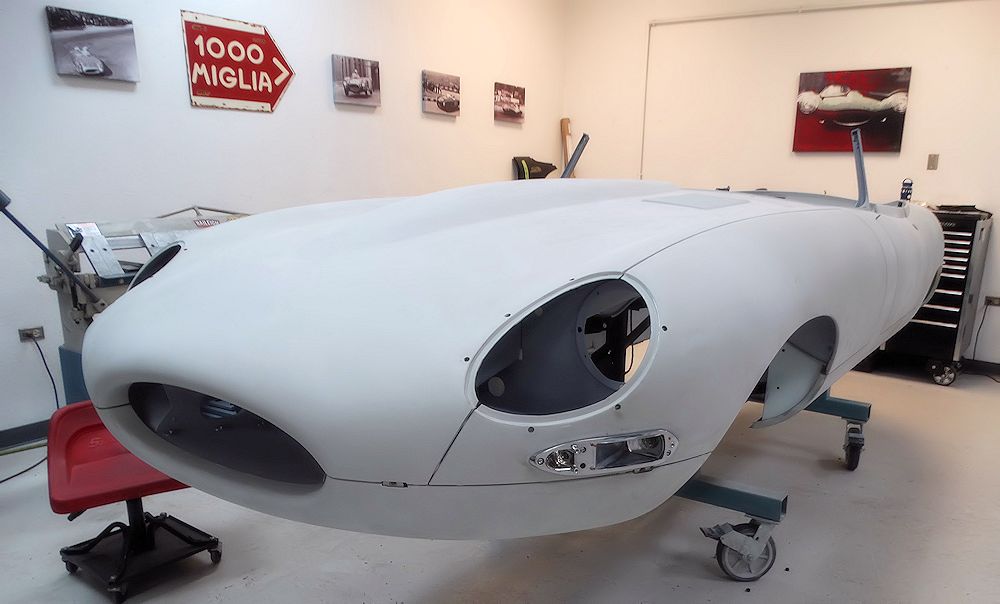
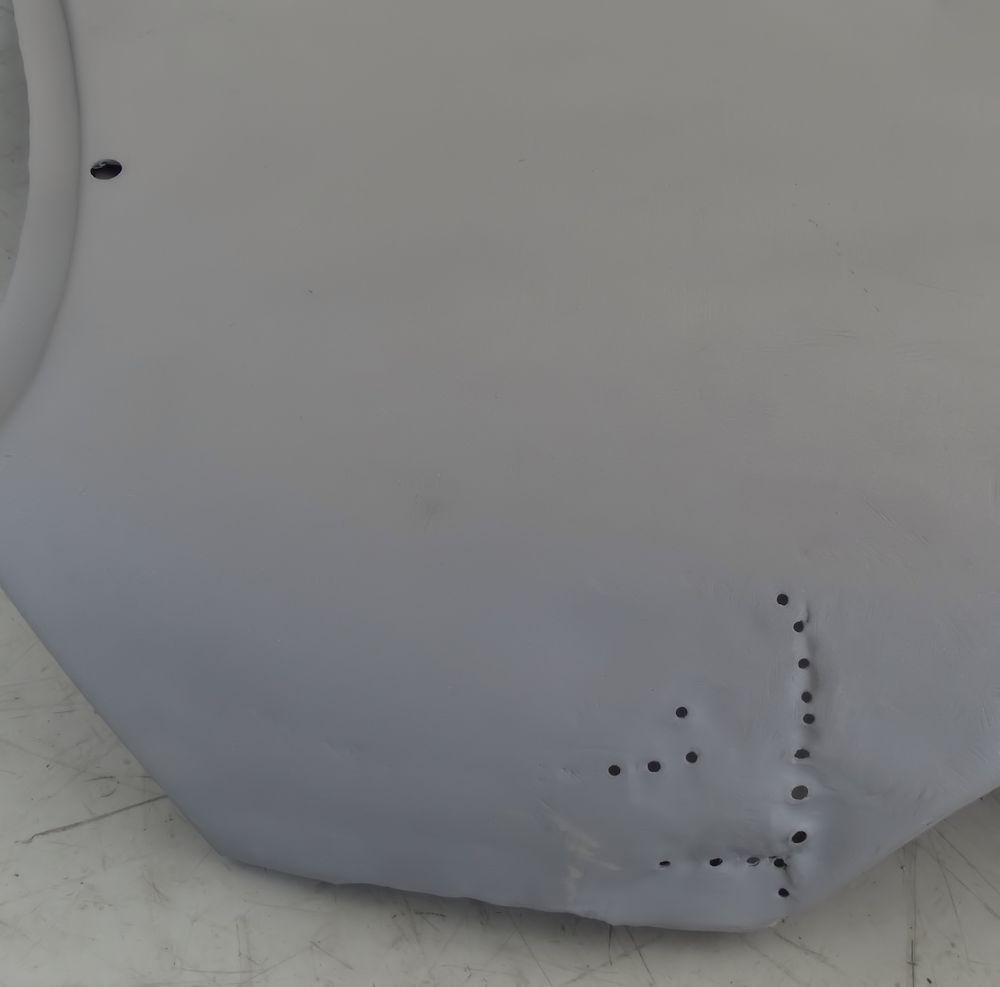
The filler and block work has now been completed and the car has been primed with Spies Hecker Raderal sprayable polyester high build primer.
 |
 |
 |
 |
 |
 |
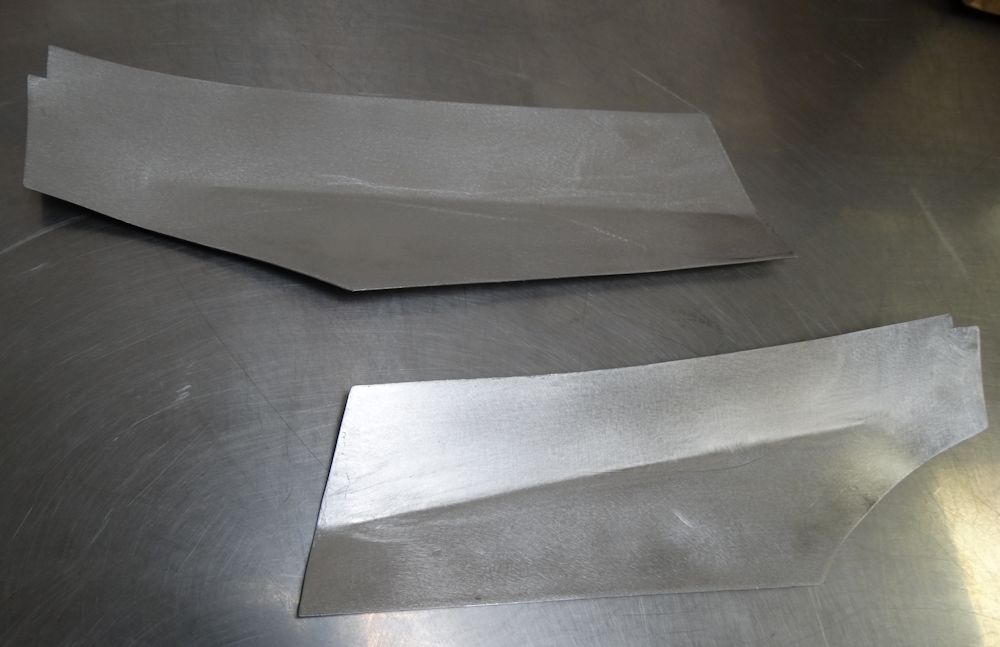
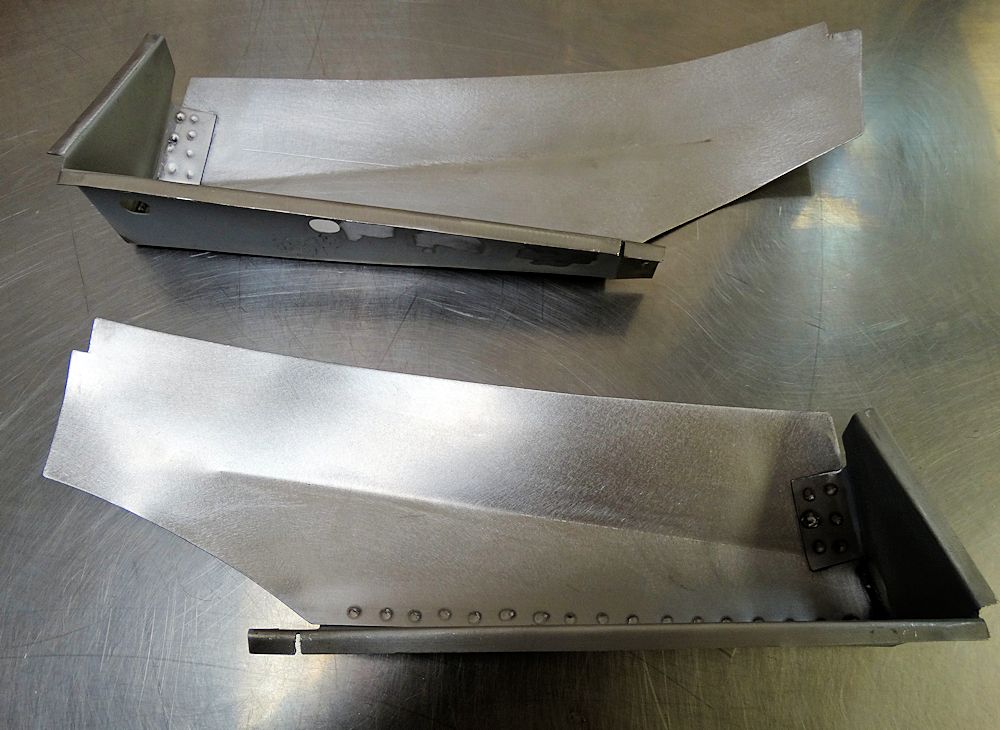
We modified the driver's seat cushion, shaving 3/4" from the foam to provide the maximum possible headroom for a tall driver. The modification is subtle, and really not noticeable when the seats are assembled and installed in the cabin.
 |
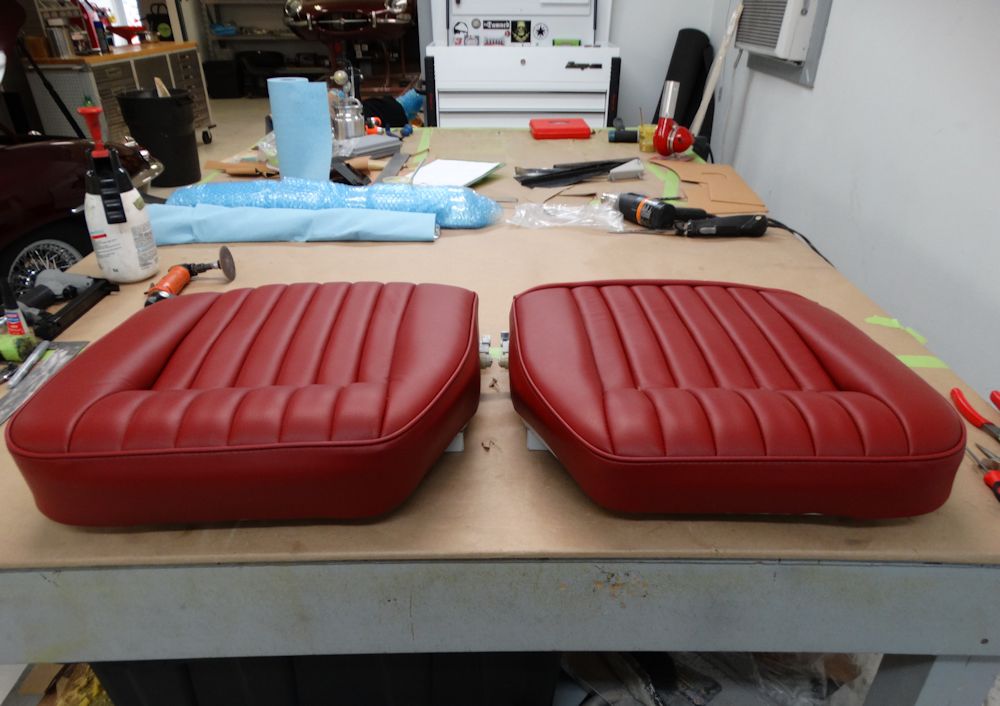 |
| From above, the seat bases look the same |
|
 |
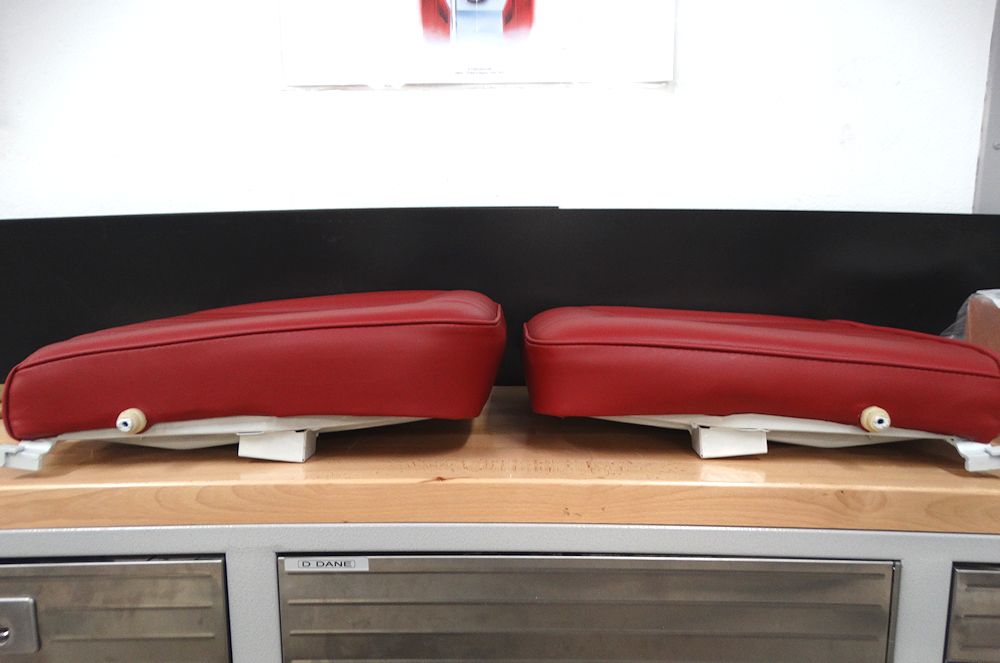 |
| This view shows the difference between the two bases |
Side view also demonstrates difference between the two cushions |
Lead loading in progress..
 |
 |
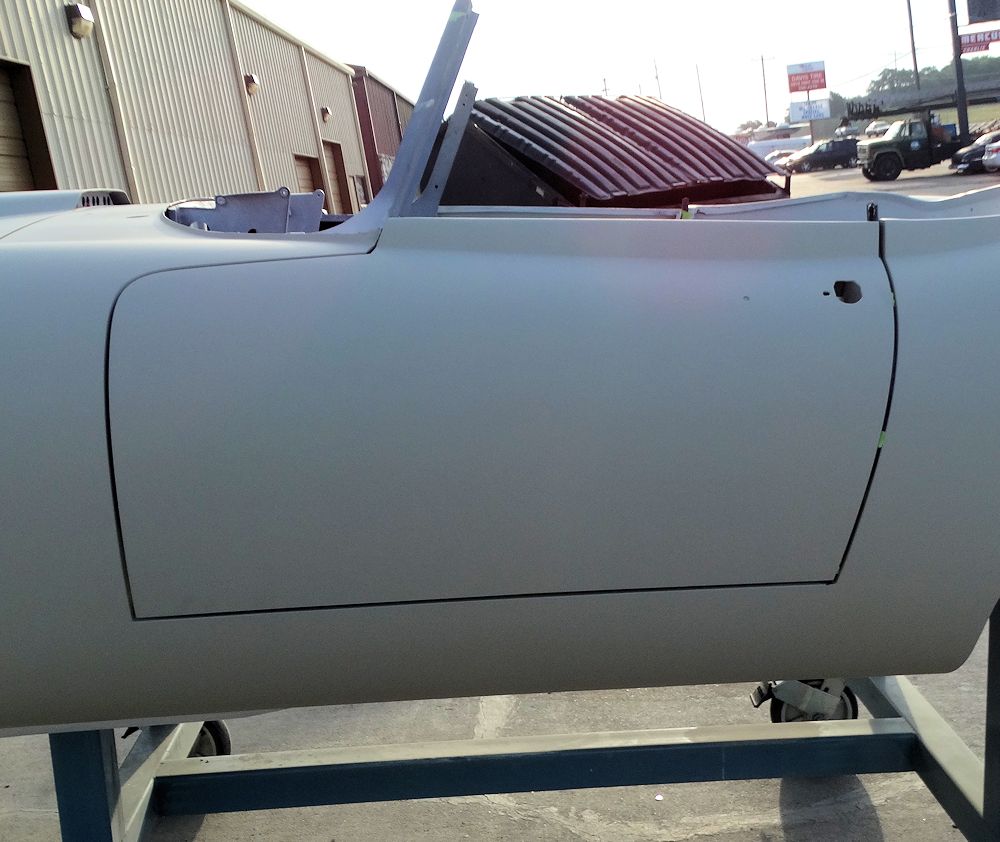
Oscar has now begun the process of fitting the new doors..
 |
 |
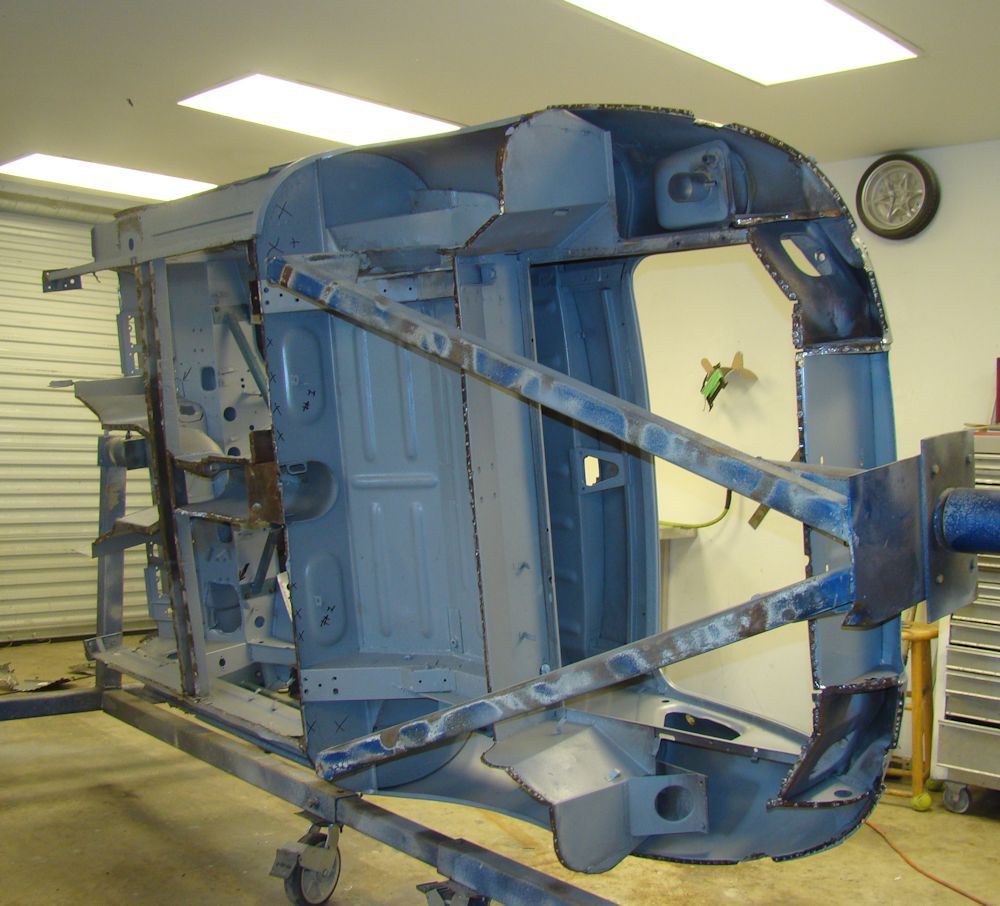
With the panel replacement now virtually completed, it is now time to fit your new alloy bonnet.
 |
 |
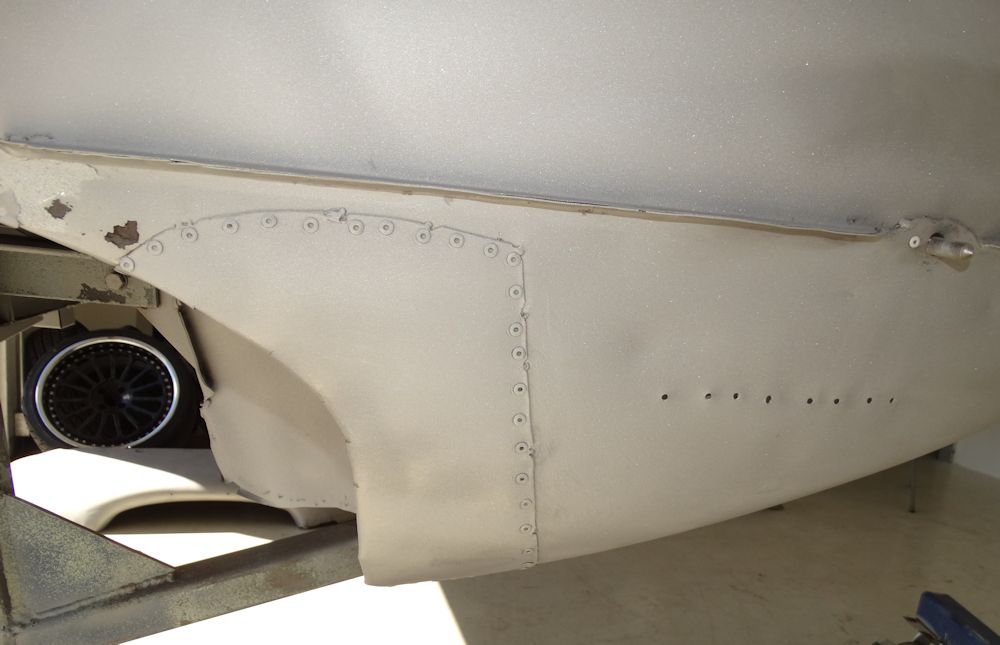
| Fabricating inner quarter filler panels |
Trial fitting the new panels |
 |
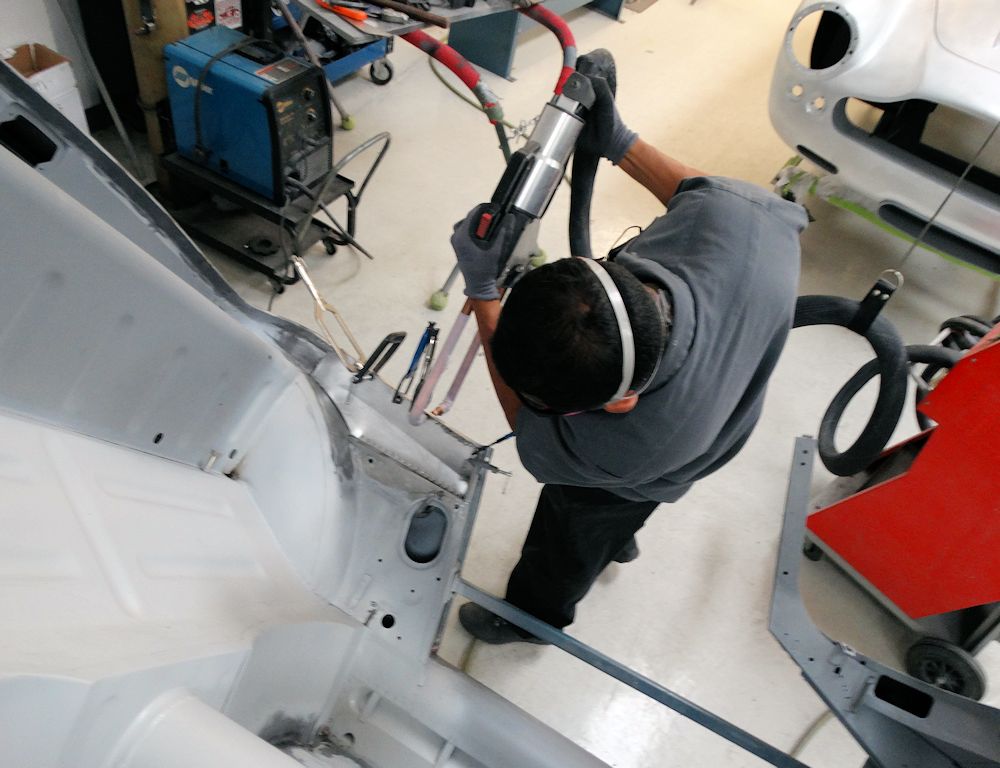 |
| Oscar spot welding the filler panels in place |
|
 |
 |
 |
 |
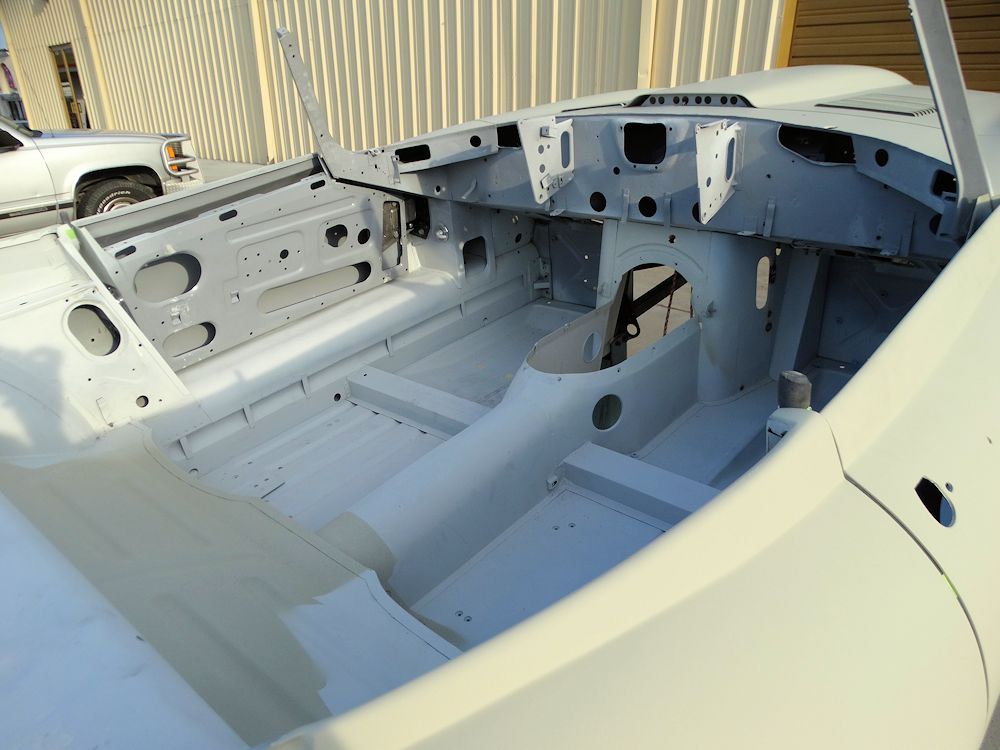
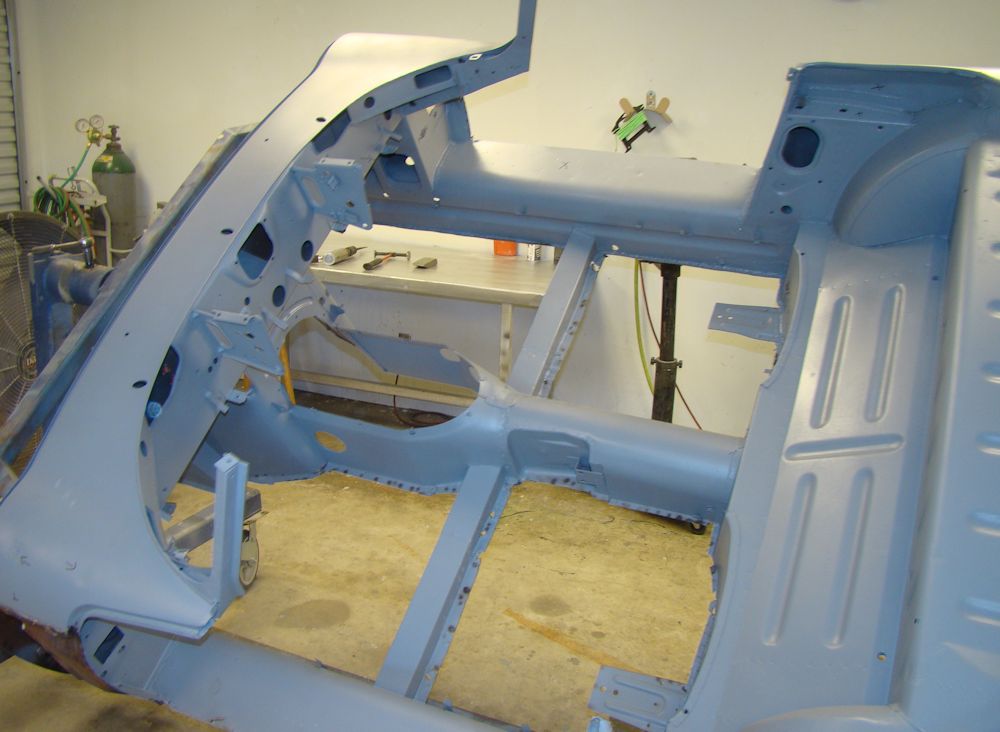
| Cabin and main structure now better than new |
|
 |
 |
| Installing new Robey engine frames |
Trial fitting the new alloy bonnet |
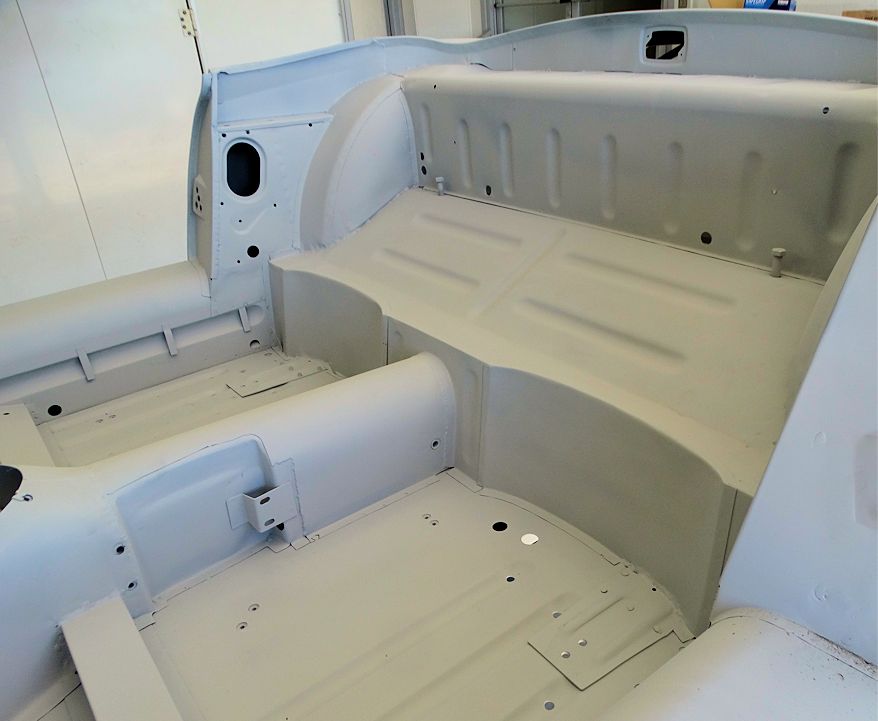
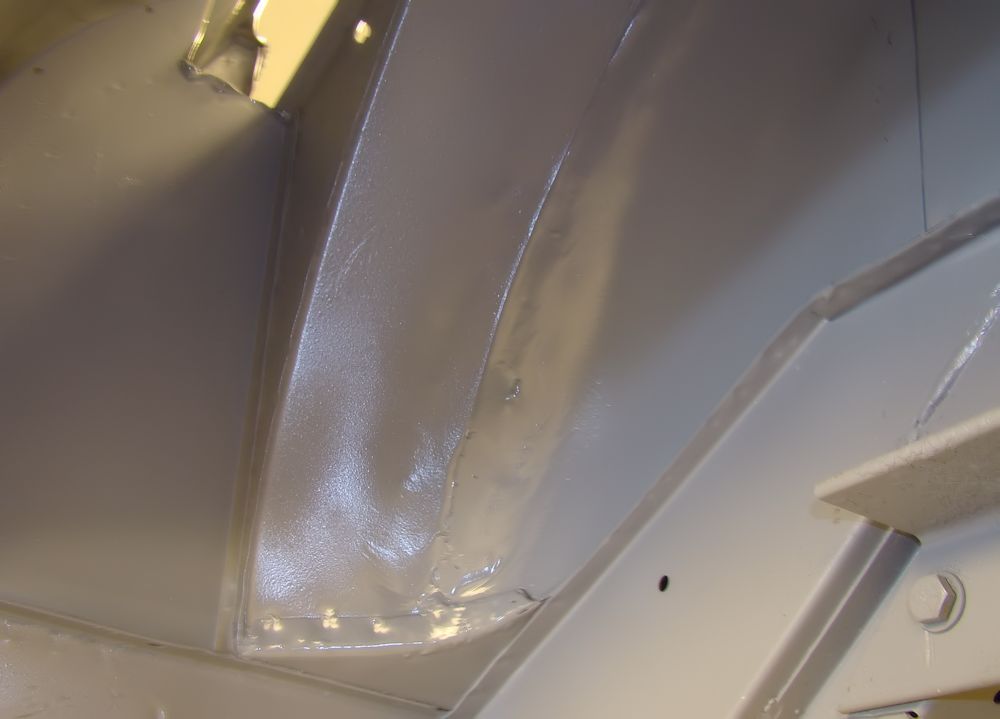
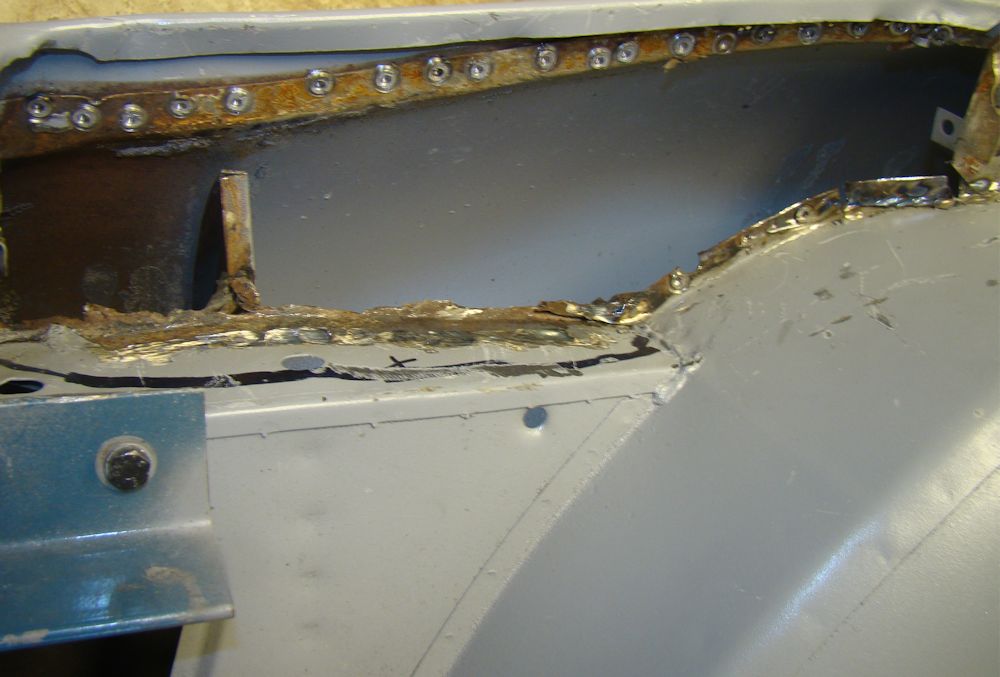
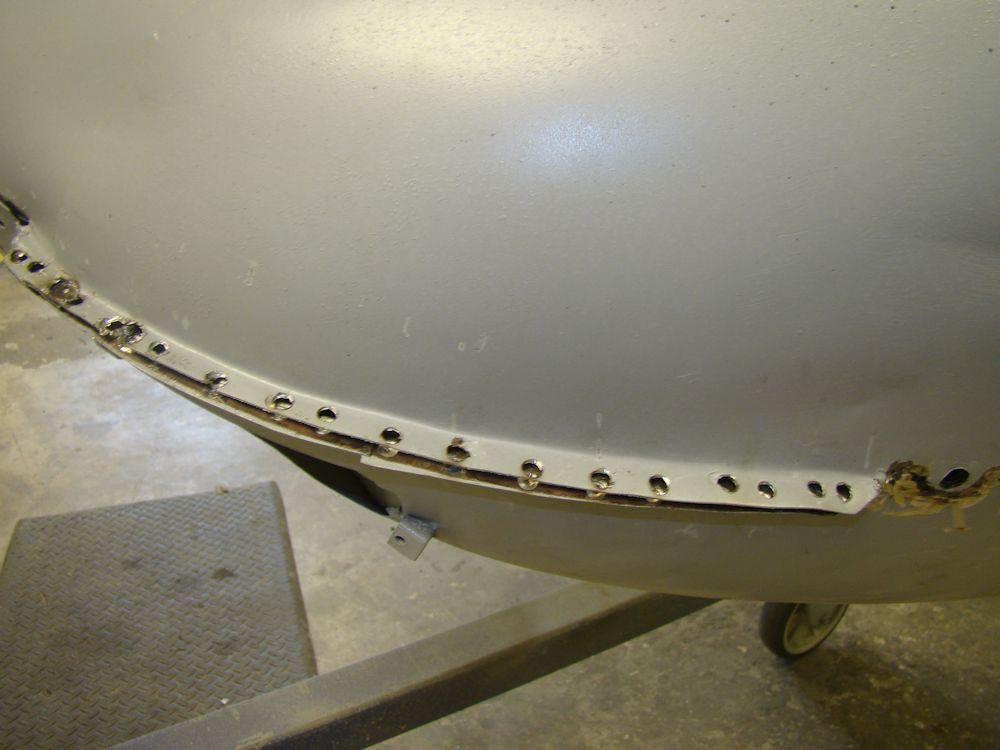
Floors and outer sills now welded in place...
 |
 |
| Floors spot welded together down the center
line |
|
 |
 |
| Wurth Body Wax applied to inner sill surfaces |
|
 |
 |
| New outer sills clamped in position |
|
 |
 |
| Outer sills now welded in place |
|
 |
 |
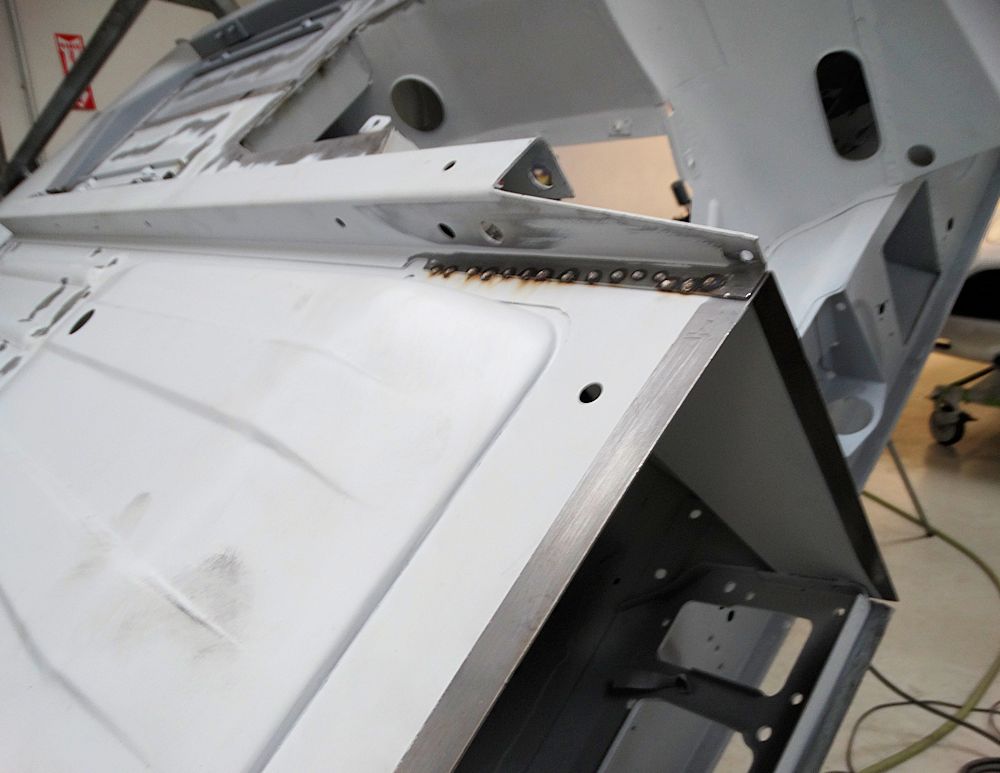
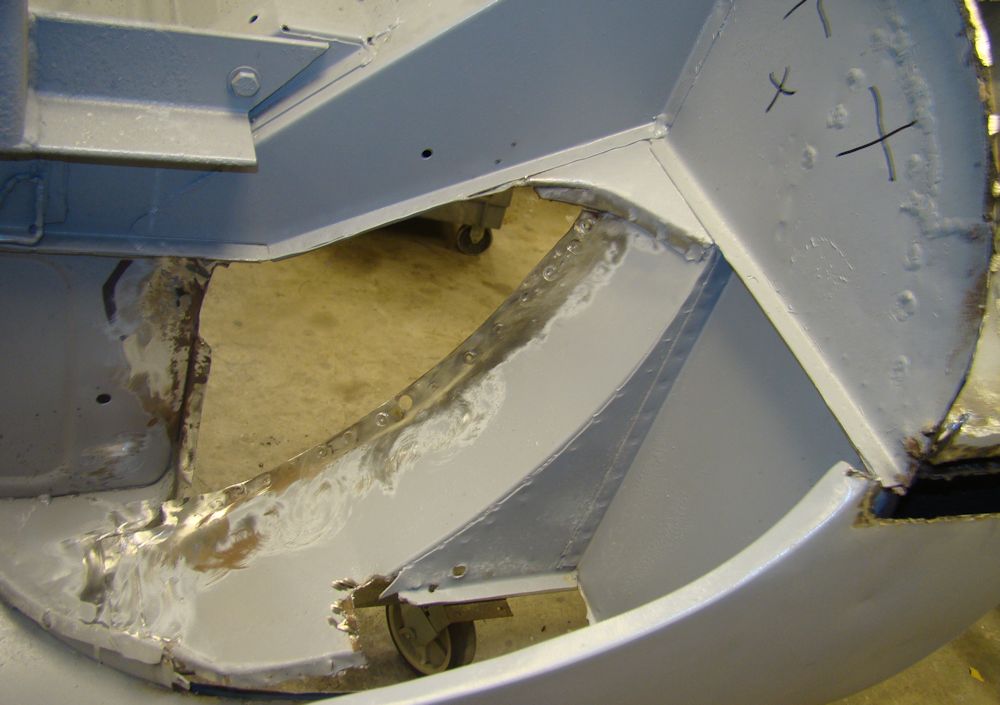
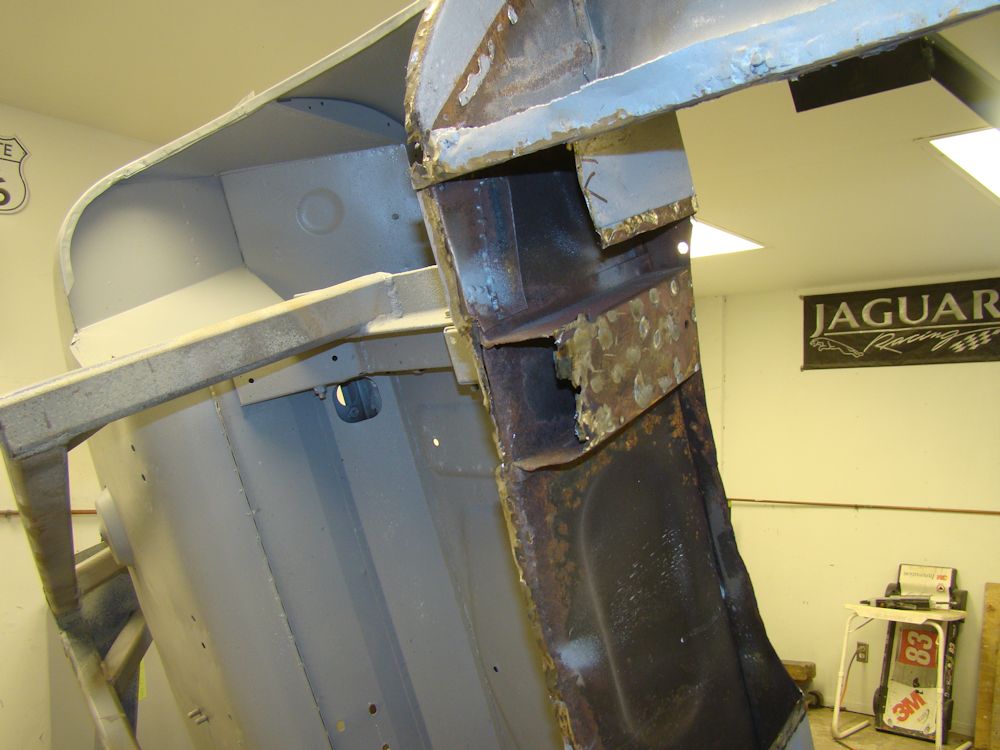
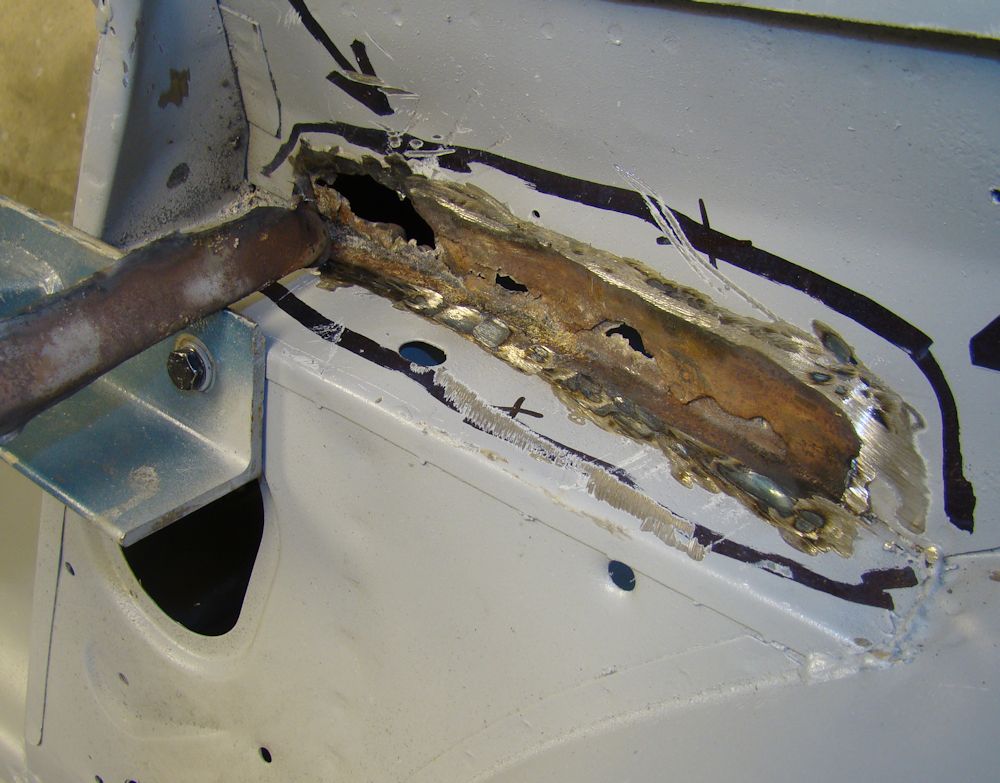
Lots of progress withe the sheet metal repairs and panel replacement...
 |
 |
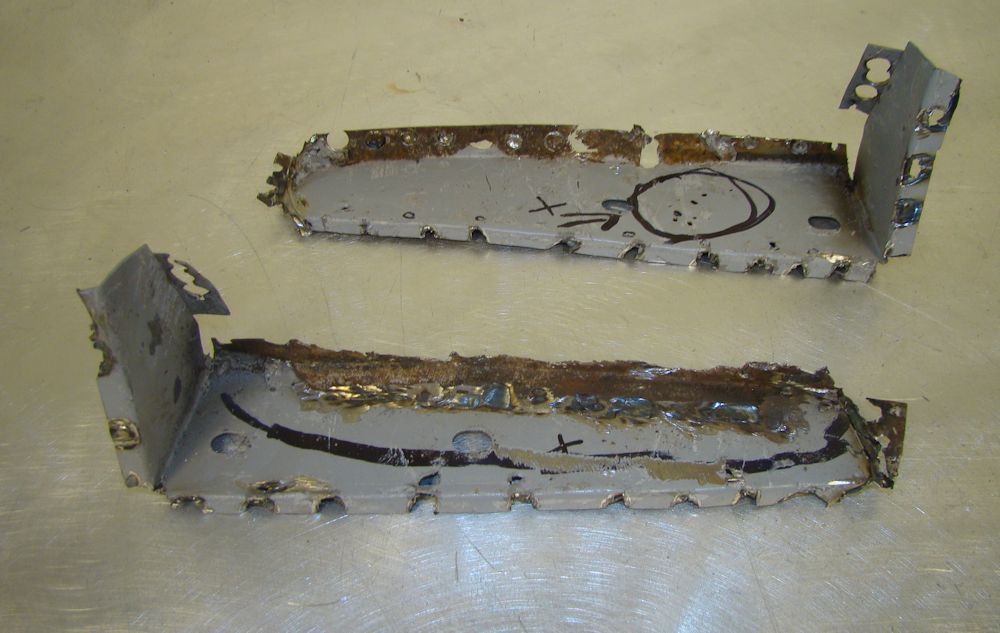
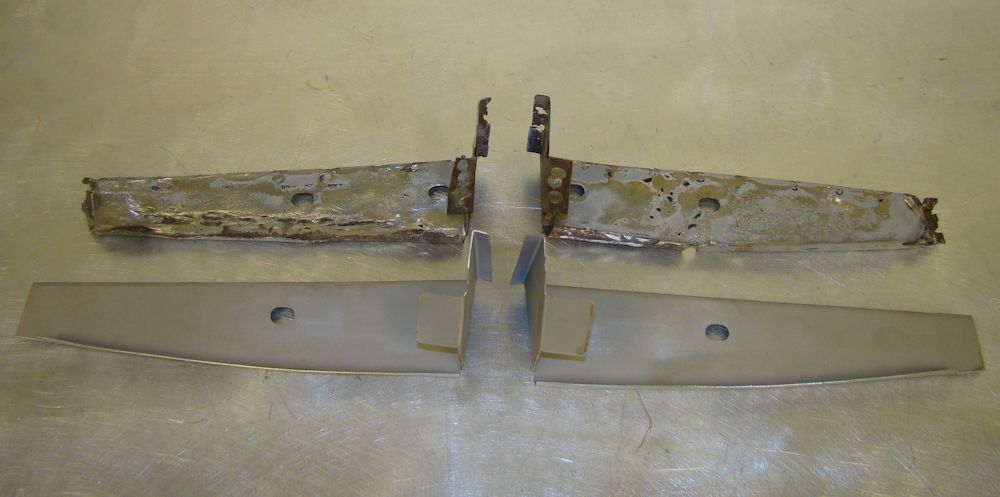
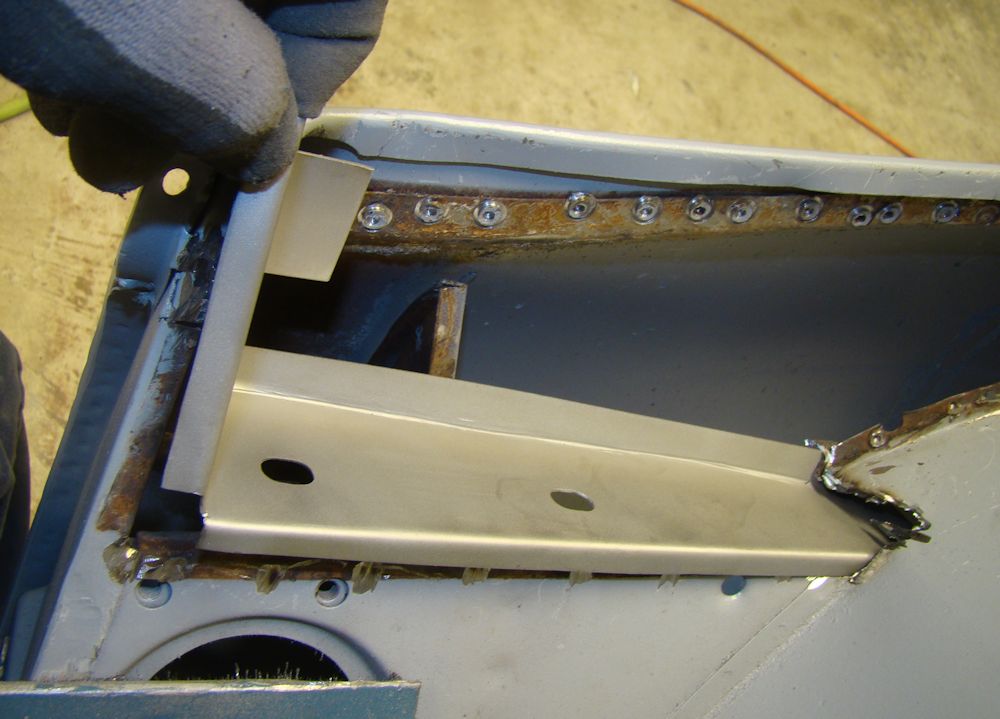
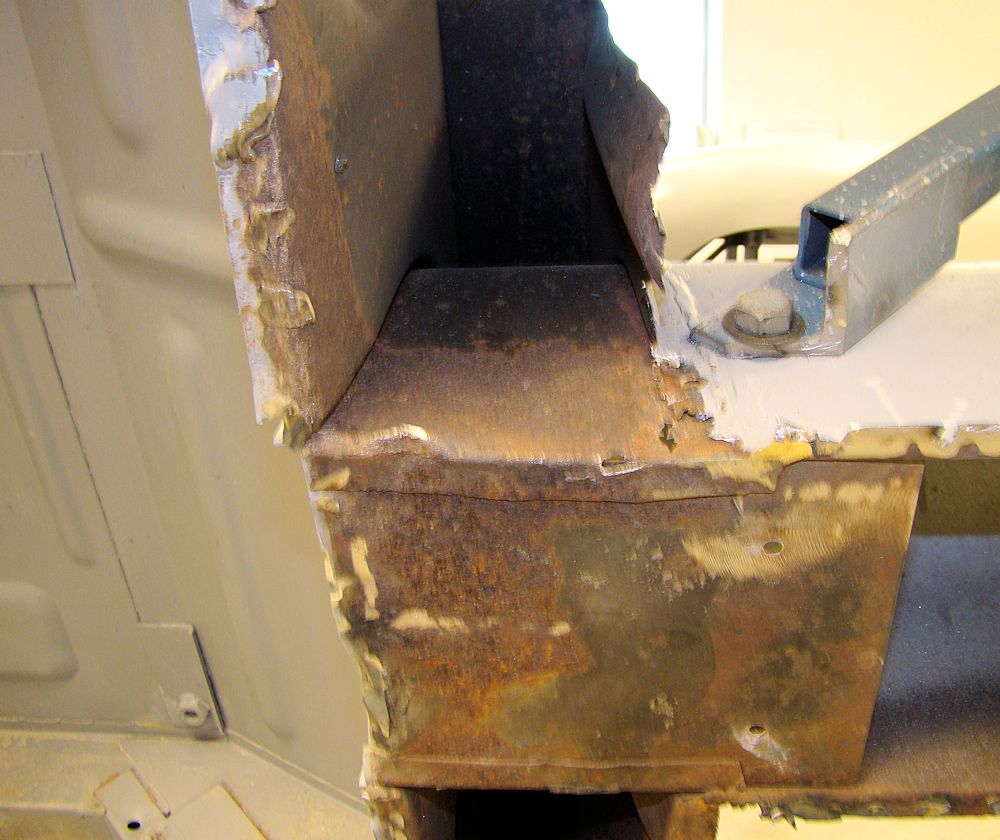
| IRS mounting cross-member has now been repaired and reinforced |
Lengthening trans side panel |
 |
 |
| Trial fitting right hand floor |
|
 |
 |
| Trial fitting trans cover |
|
 |
 |
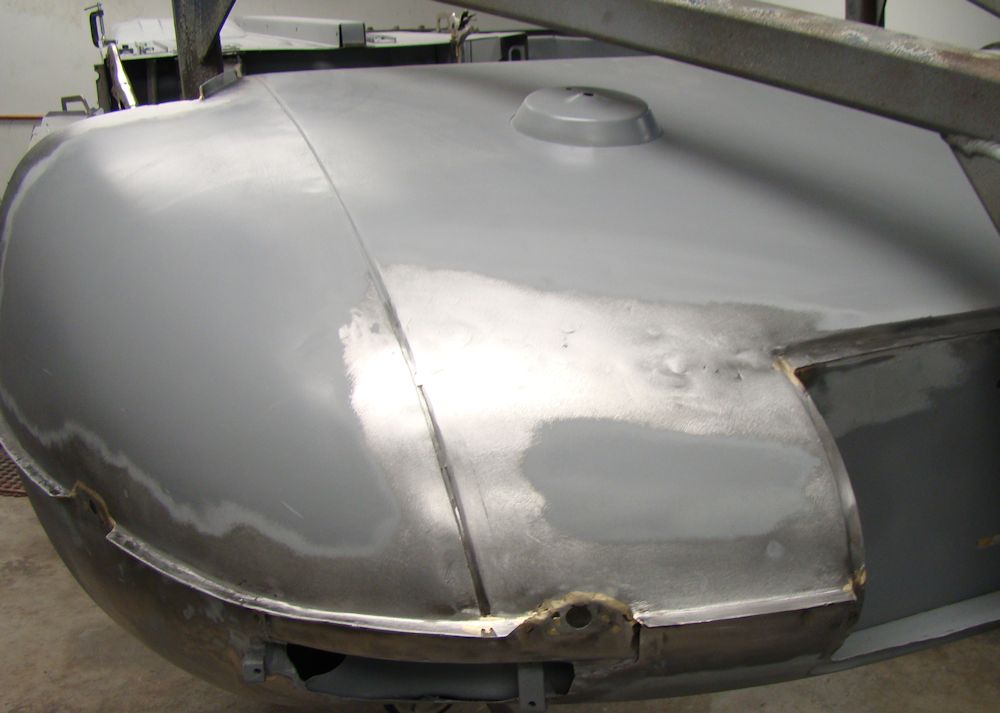
| RH bonnet striker panel will need to be straightened |
|
 |
 |
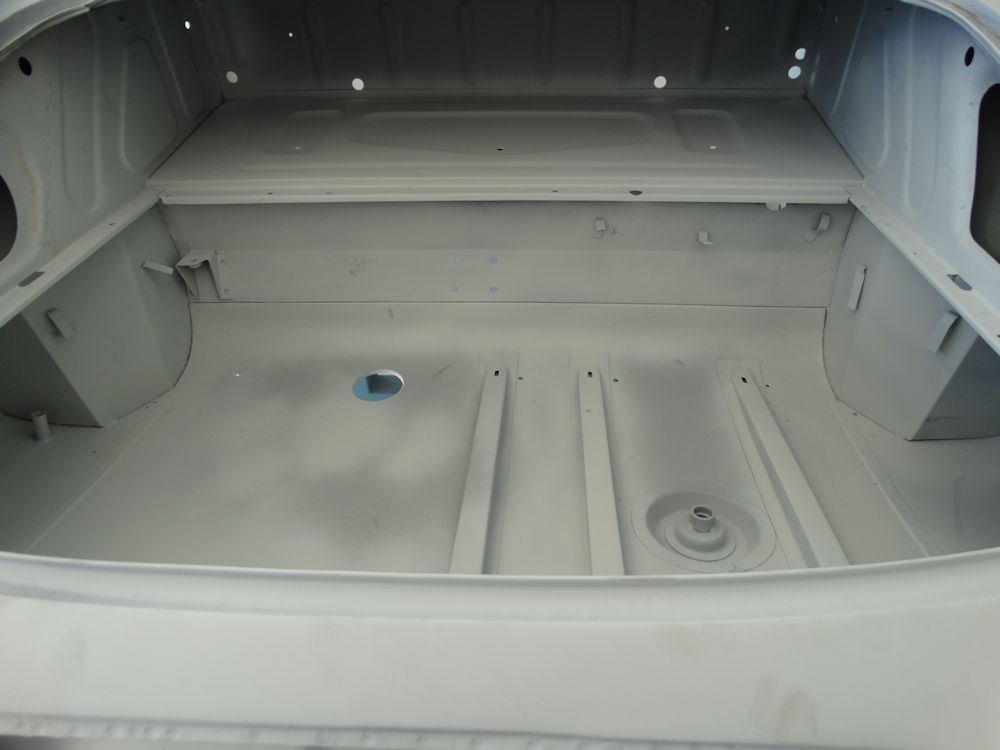
| Boot floor assembly now welded in place |
|
 |
 |
 |
 |
| Lead loading corners of boot floor |
Lead is filed into shape |
 |
 |
| Finally lead is sanded smooth |
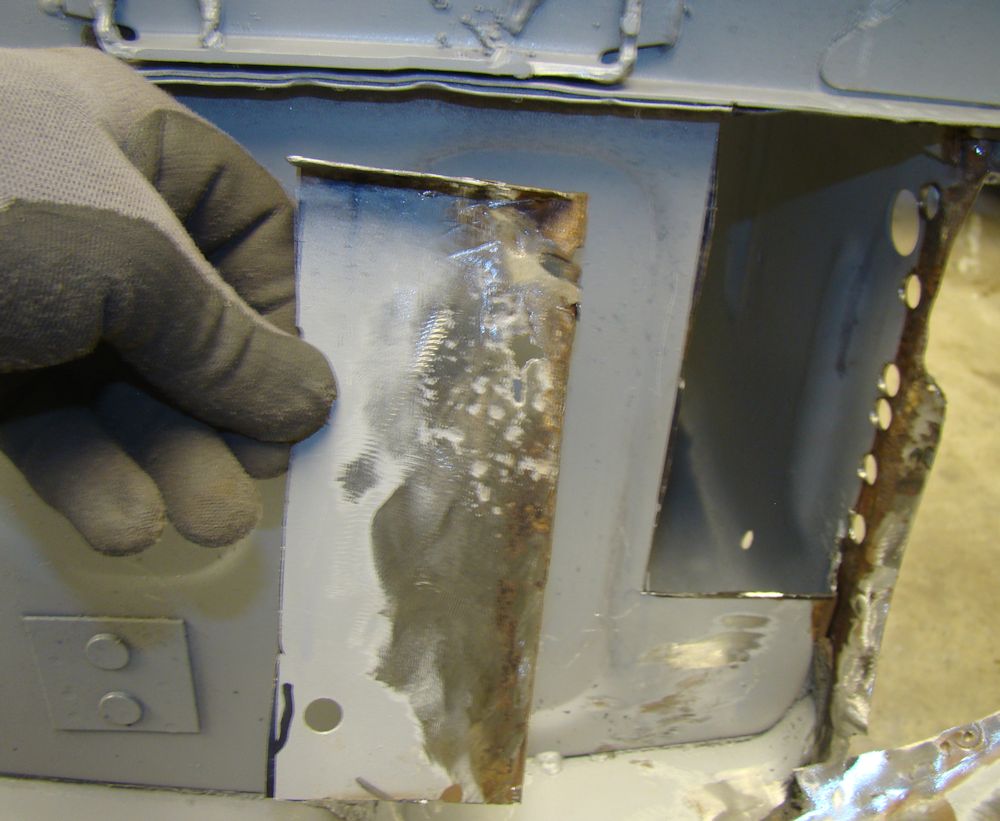
Fabricating new repair panels...
 |
 |
 |
 |
 |
 |
 |
 |
 |
 |
 |
 |
 |
 |
 |
 |
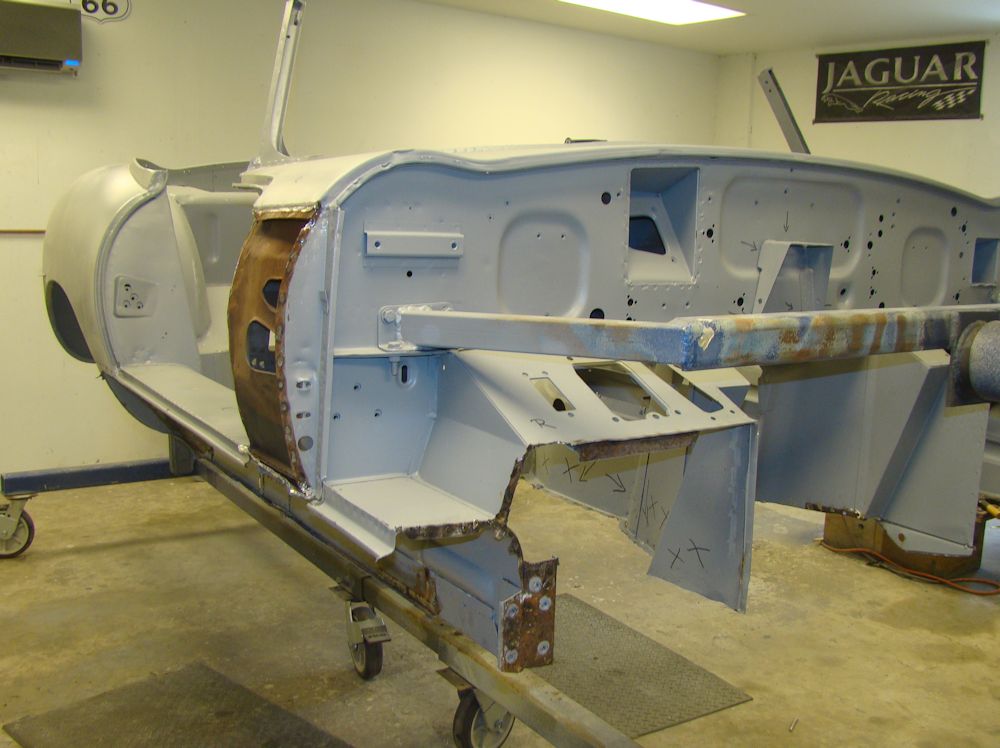
I am pleased to report that we now have your body restoration well underway.
 |
 |
 |
 |
 |
 |
 |
 |
 |
 |
 |
 |
 |
 |
 |
 |
 |
 |
 |
 |
 |
 |
 |
 |
 |
 |
 |
 |
 |
 |
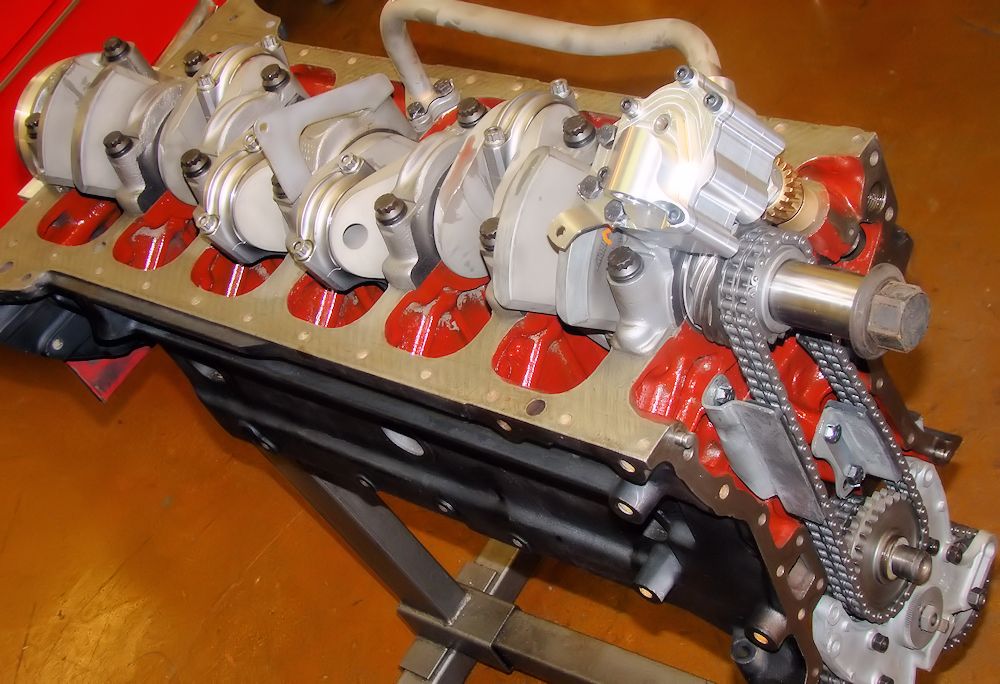
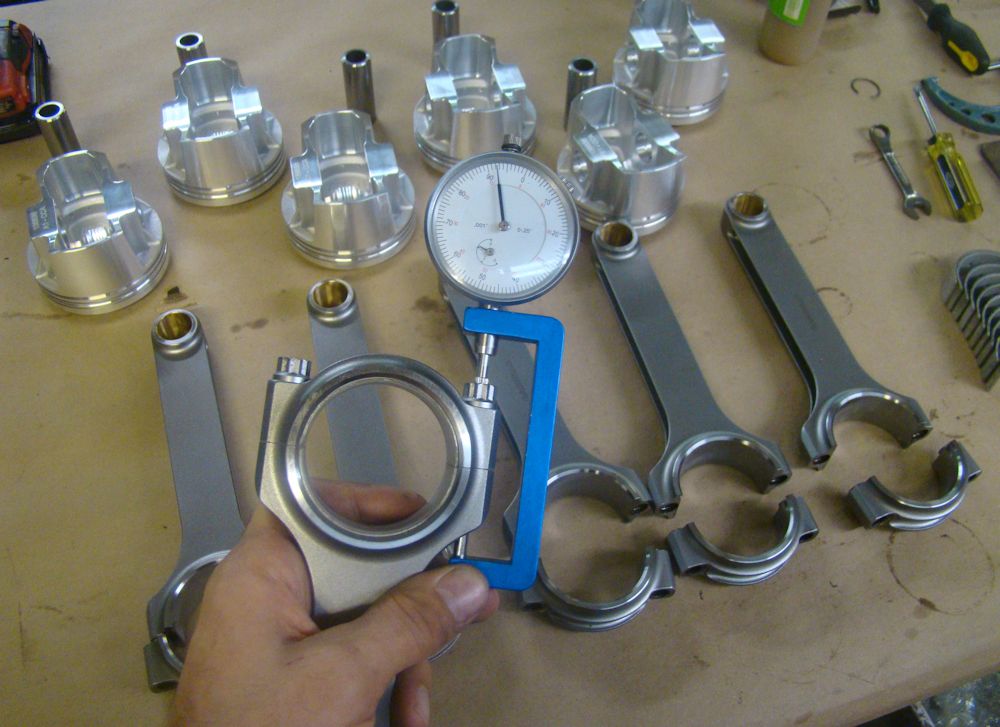
Installing the Team CJ stroked crank, forged pistons and rods, billet oil pump, etc..
 |
 |
 |
 |
 |
 |
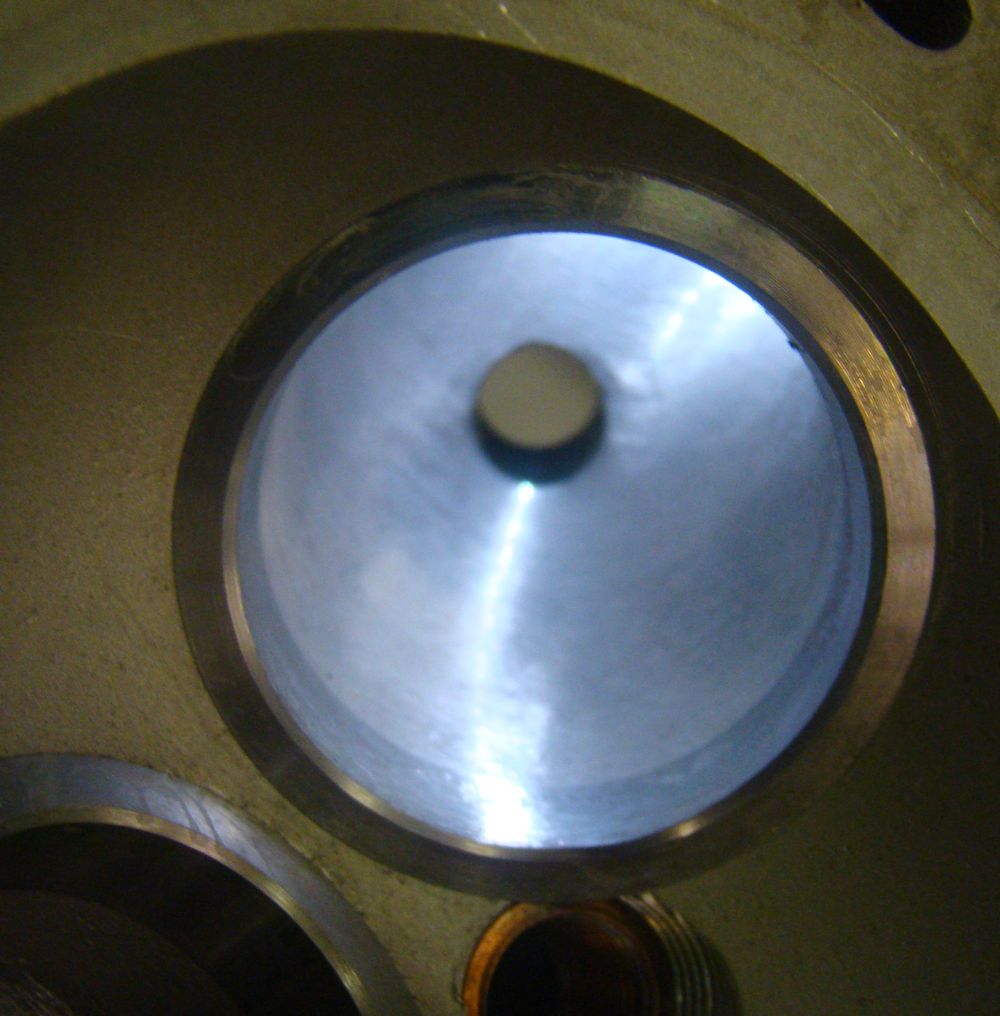
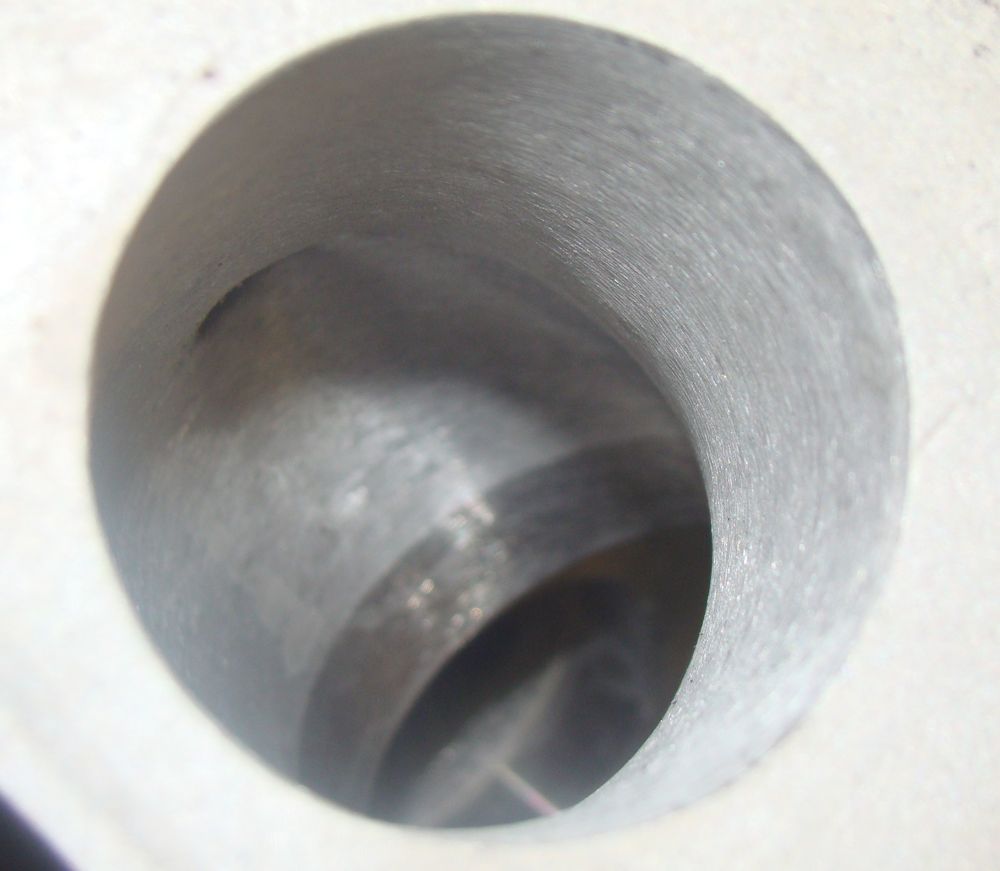
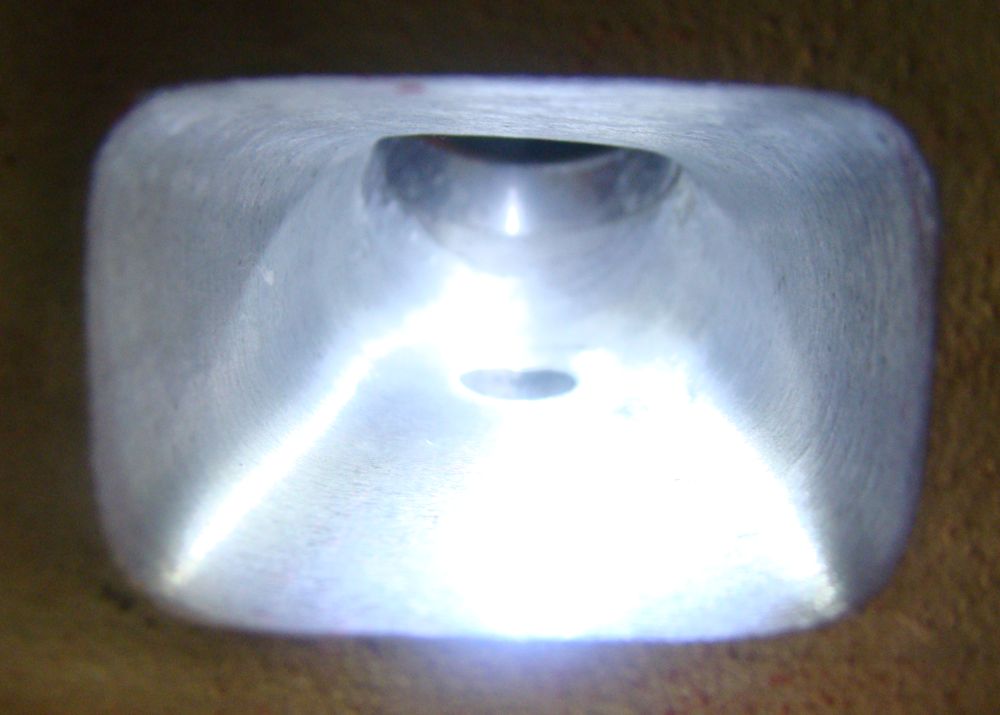
We now have the body and panels back from being blasted back to bare metal. The main body shell is about what we expected to see, although unfortunately the bonnet has several issues that had previously been hidden beneath several layers of bondo. We will have this body restoration underway in the next few weeks. The last 4 images in the sequence below show the flow test results relating to the port work done to your cylinder head.
 |
 |
 |
 |
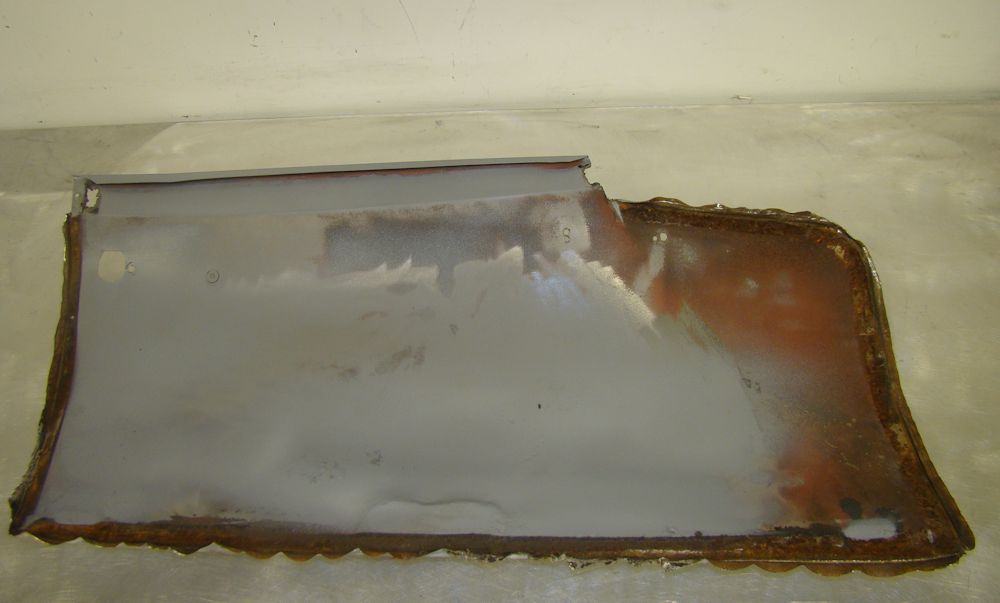
| Left lower quarter panel will be replaced |
Main floors, inner and outer sill will be
replaced |
 |
 |
 |
 |
| Bonnet has several issues and will be replaced |
IRS components have been blasted and powder coated |
 |
 |
 |
 |
| Exhaust port before port work |
Exhaust port after flow work |
 |
 |
| Intake port before port work |
Intake port after port work |
We are expecting the body back from being blasted back to bare metal on Monday or Tuesday of next week.
 |
 |
| Car
on a blasting rotisserie |
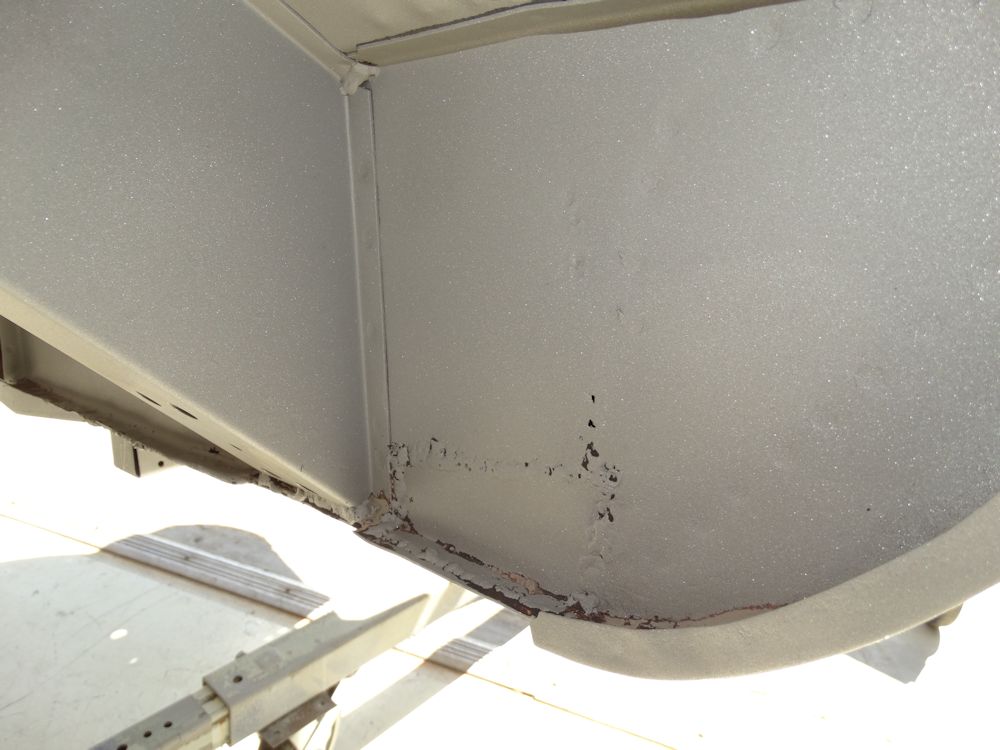
Floors
have been patched in the past |
 |
 |
| IRS completely torn down for rebuild |
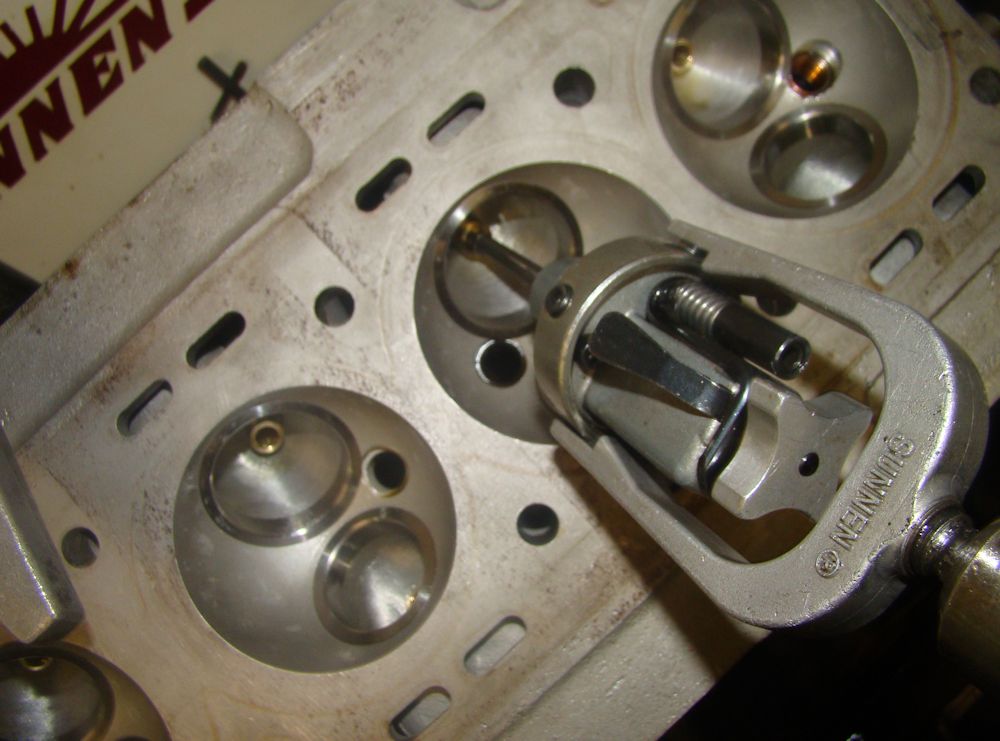
Installing seats, guides, valve job in progress..
 |
 |
| Measuring bolt stretch on Carrillo rods |
Super lightweight CJ forged stroker pistons |
 |
 |
| Port work in progress |
|
 |
 |
| Intake runners reshaped for Stage Two application |
|
 |
 |
| Machining Stage Two magnesium bronze CJ guides for ultimate flow |
|
 |
 |
| CJ guides modified for Stage Two application |
Guides installed |
 |
 |
| Honing guides for optimum stem to guide clearance |
Five angled valve job in progress |
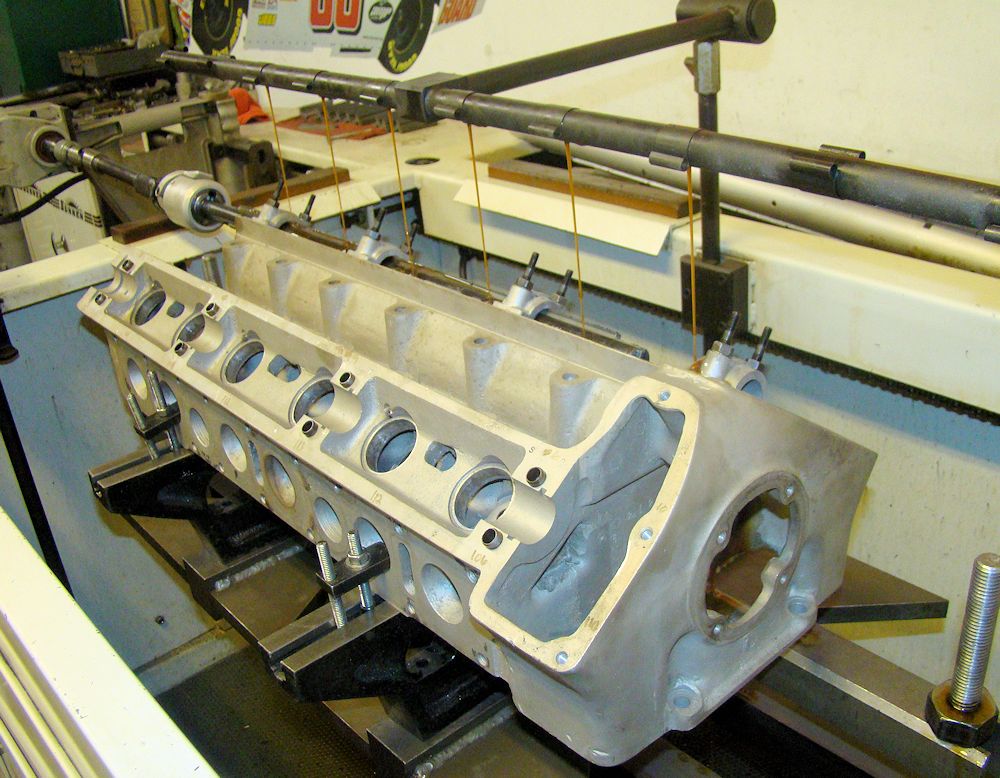
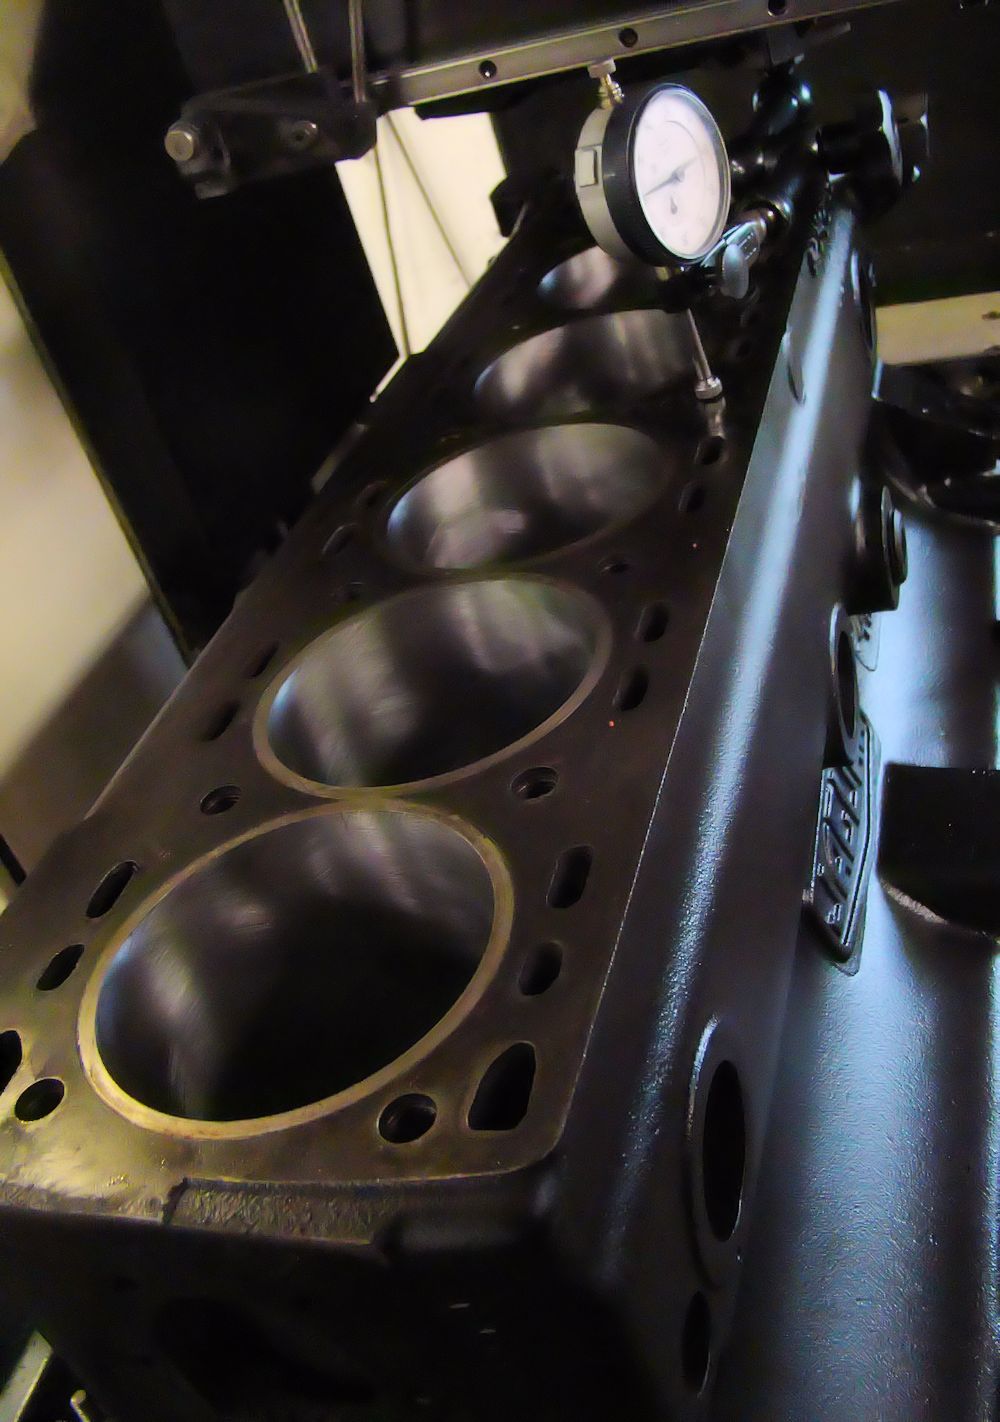
The following sequence of photographs show corrective work to your cylinder head. The deck surface was warped significantly, and the cam caps were also out of alignment. These issues were remedied by several sessions on a straightening plate in the oven, as well as an align hone of the cam caps. The tappet to tappet guide clearances were out of spec, and the guides had been inappropriately staked with a 'home made' securing solution. New tappet guides are currently being installed.
 |
 |
| Head on straightening plate in oven |
Note 'home made' tappet guide hold-down kit |
 |
 |
| Pressure testing head after straightening |
Base line flow test in progress |
 |
 |
| Machining out old valve seats |
|
 |
 |
| Align honing camshaft caps |
|
 |
 |
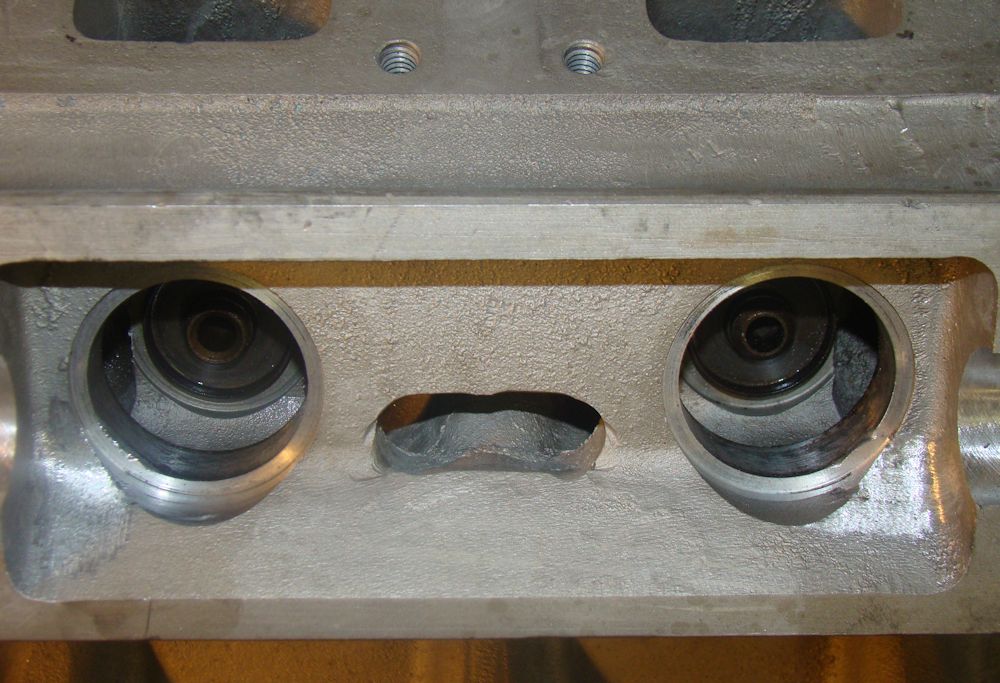
| Previous bolt holes for tappet hold-down kit welded up |
Weld ground back and metal finished |
 |
 |
| Machining tappet guide bores for new guides |
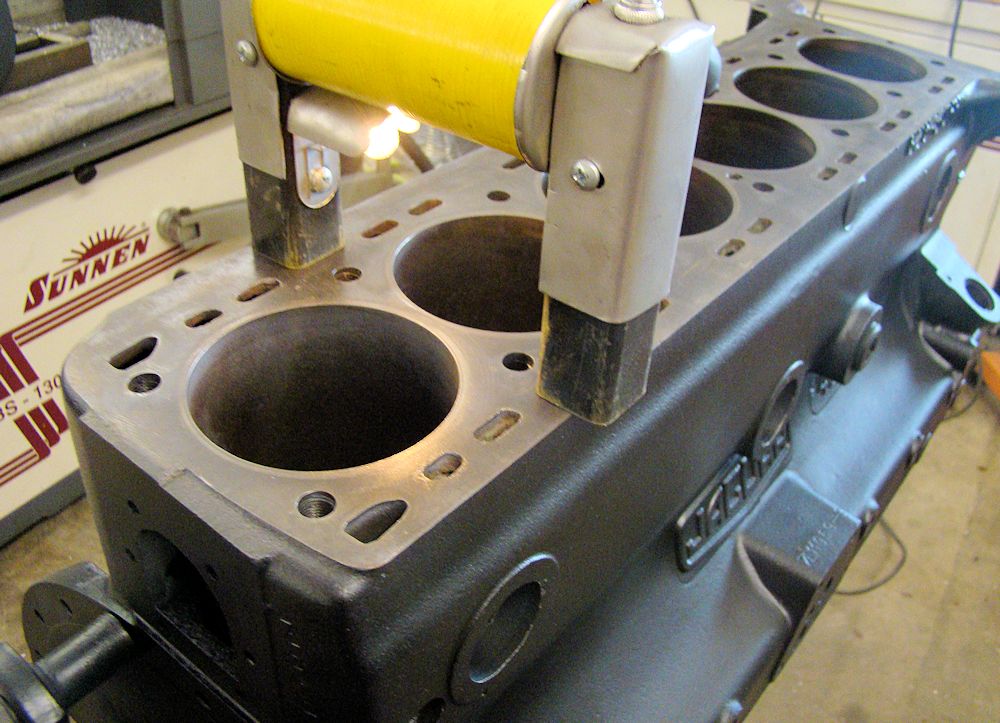
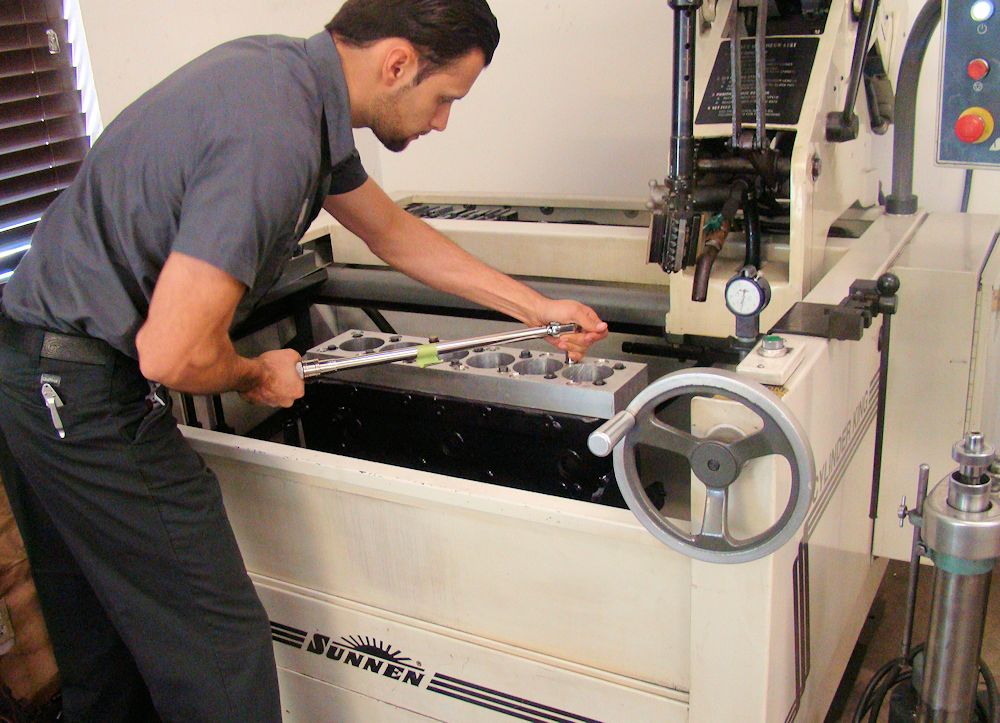
Short block engine machine work underway in the CJ machine shop..
 |
 |
| Time to get this engine rebuild underway |
Machining out old liners |
 |
 |
| Magnaflux crack checking block |
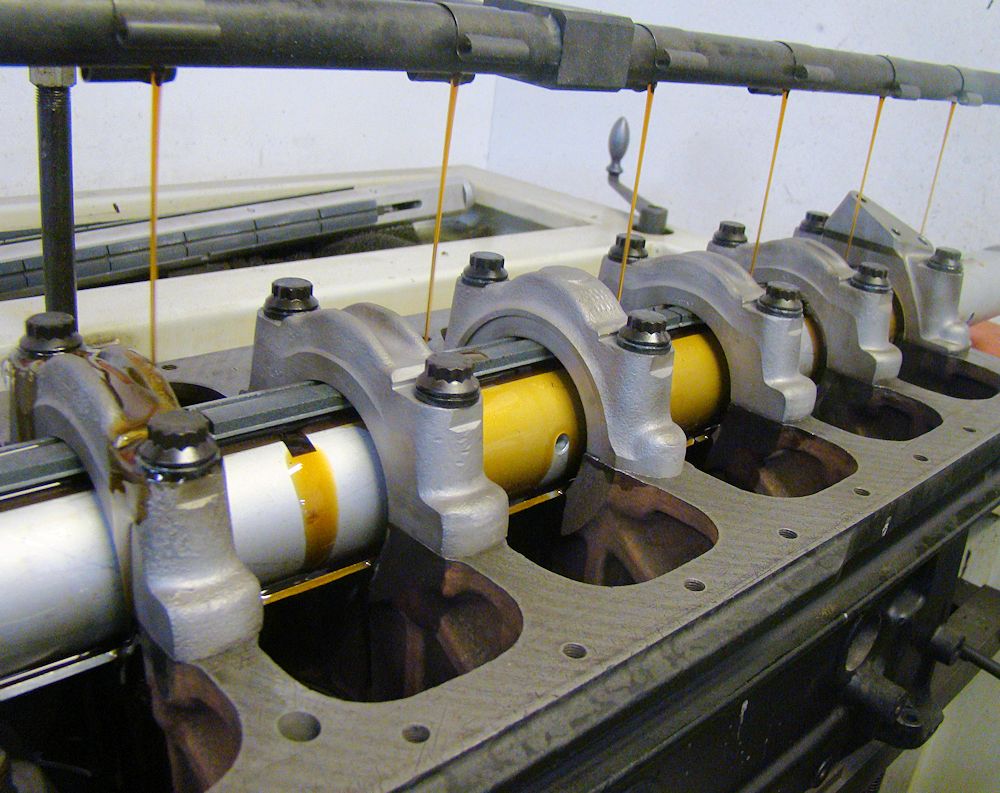
Align hone in progress - note uprated ARP
hardware |
 |
 |
| New top hat liners installed |
Measuring pistons prior to cylinder hone |
 |
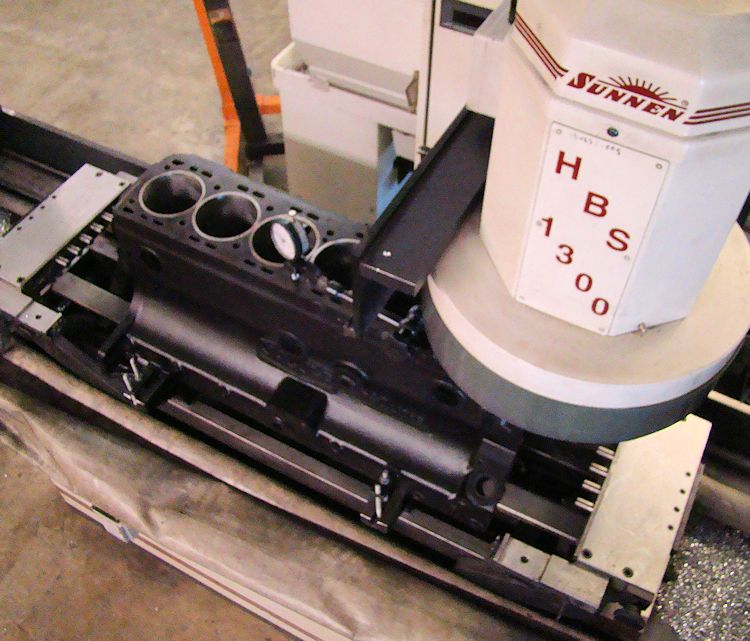 |
| Installing torque plate for cylinder honing
process |
Surfacing the deck of block after honing |
 |
|
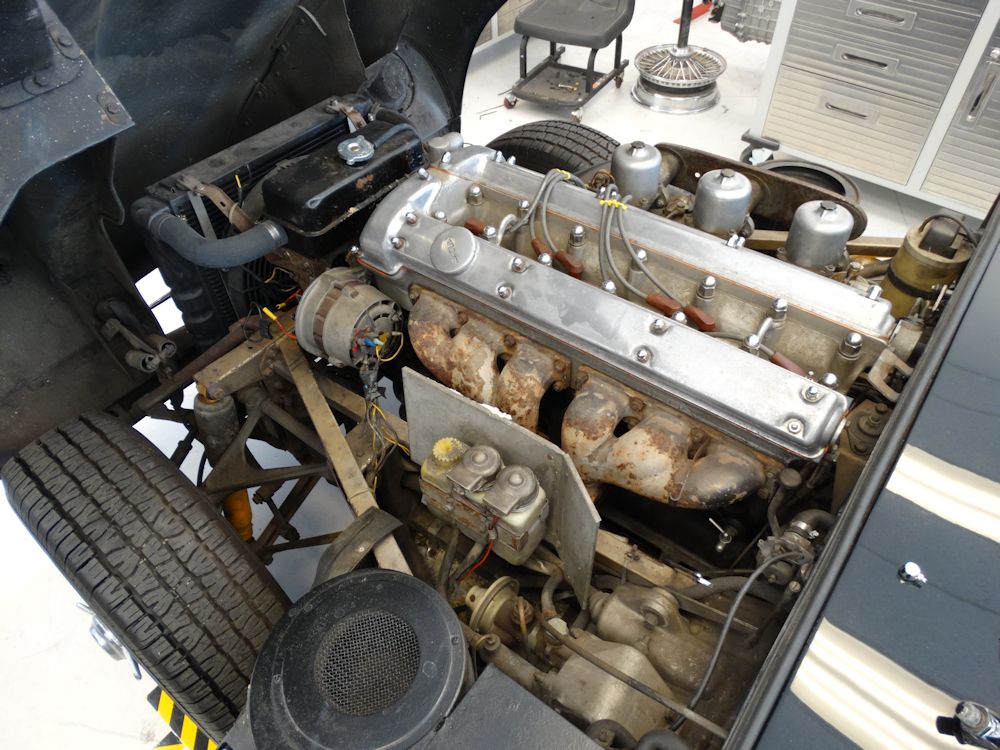
Tear down in progress, interior, engine and transmission removed..
 |
 |
 |
 |
| Starting to remove the interior |
|
 |
 |
| Golden Sand inner dash |
|
 |
 |
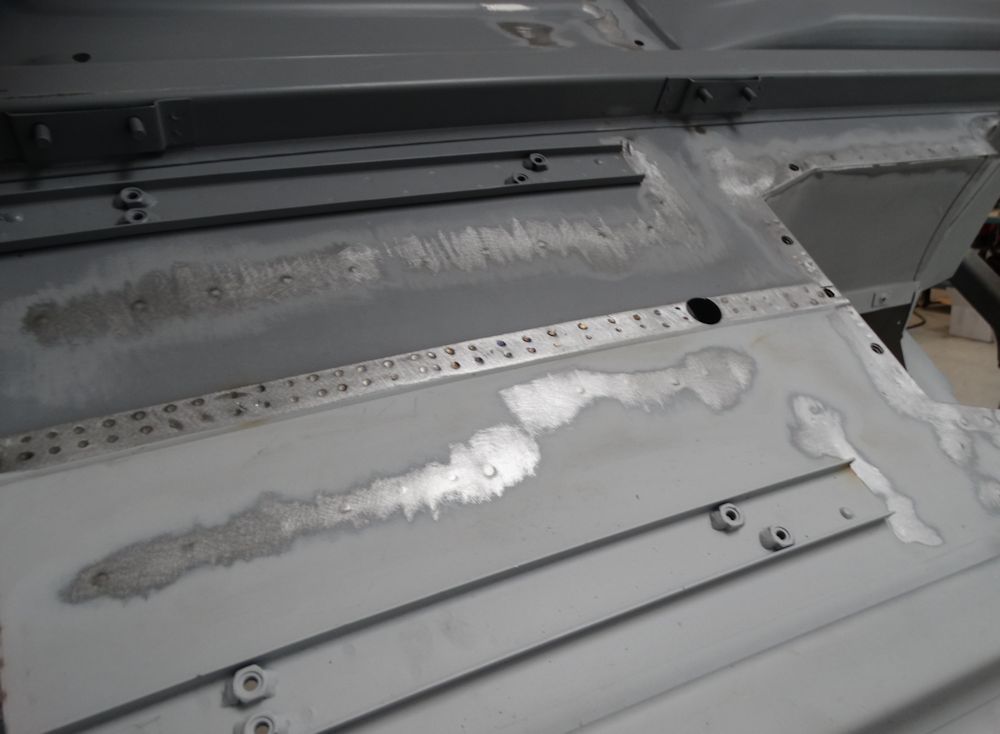
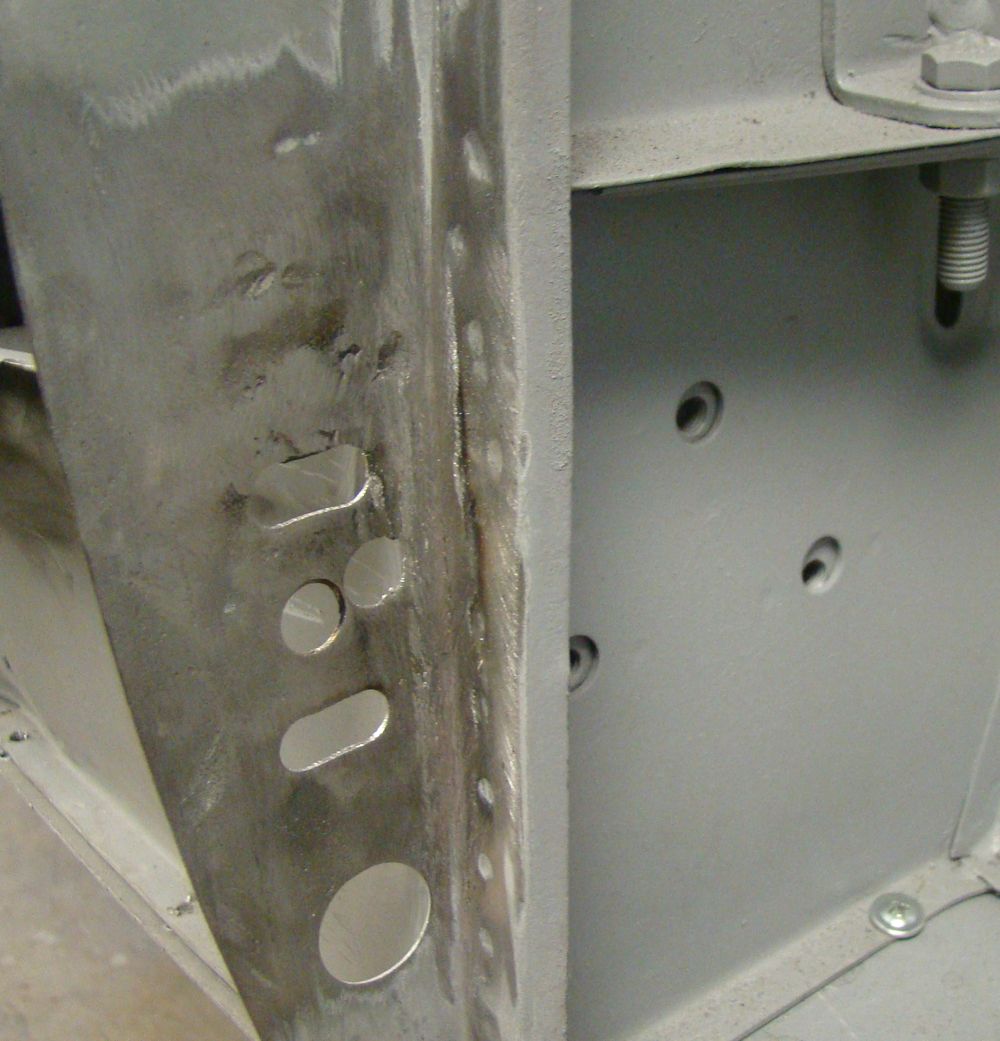
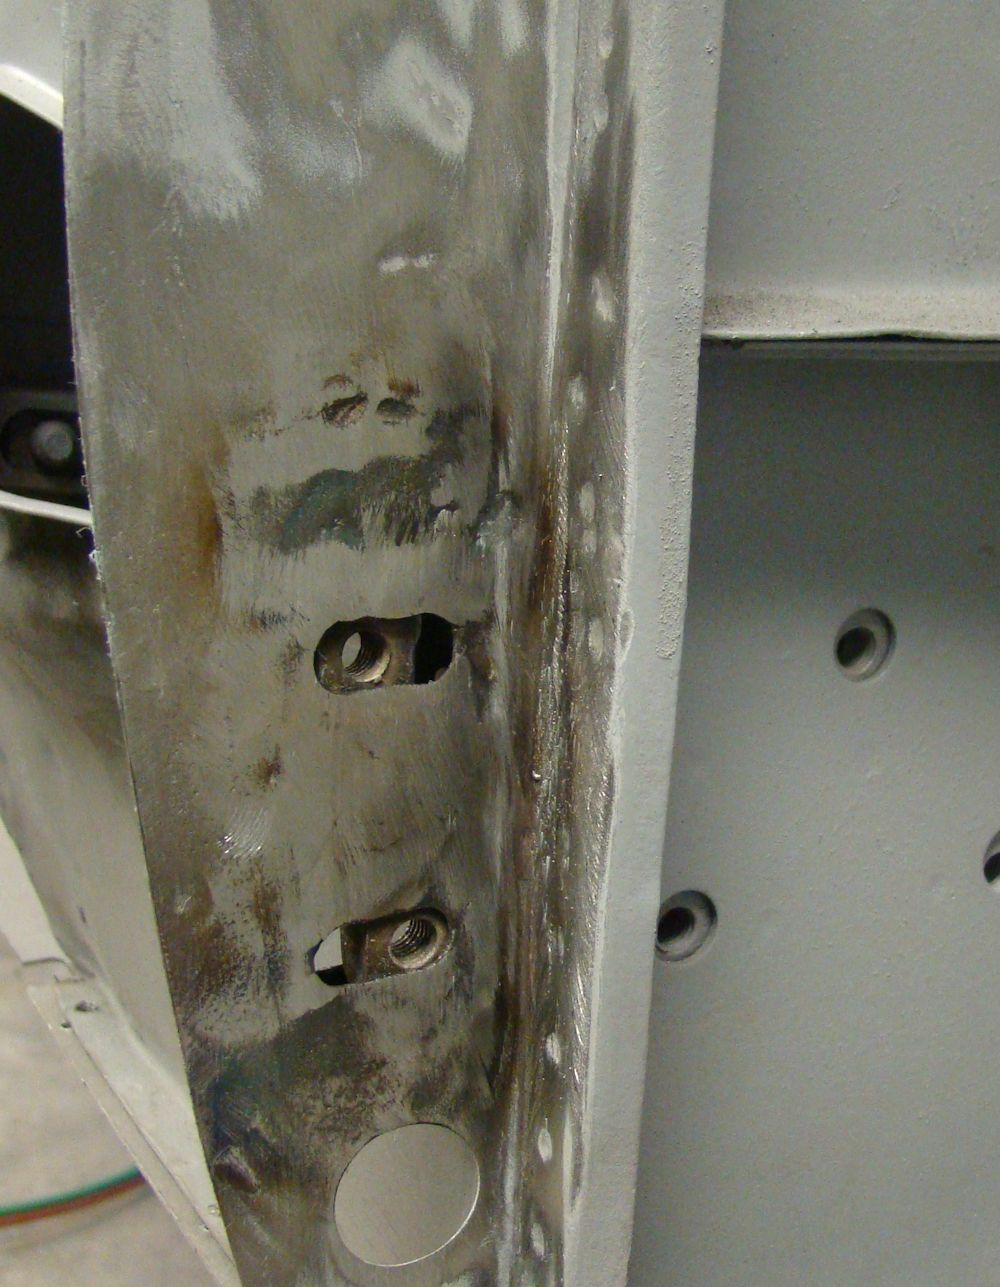
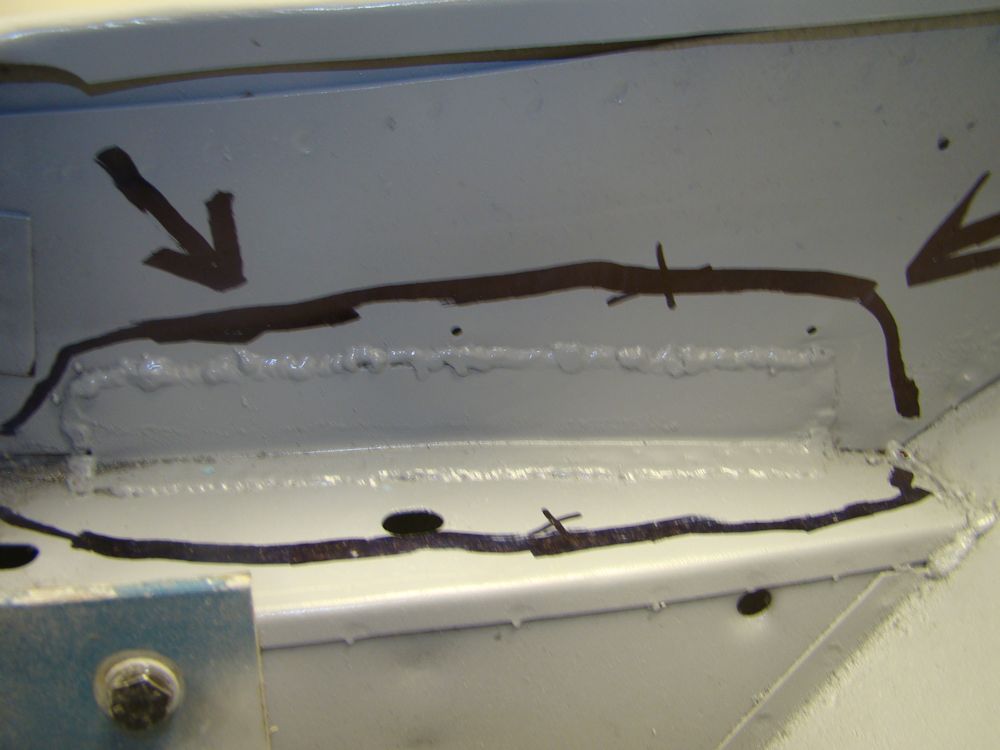
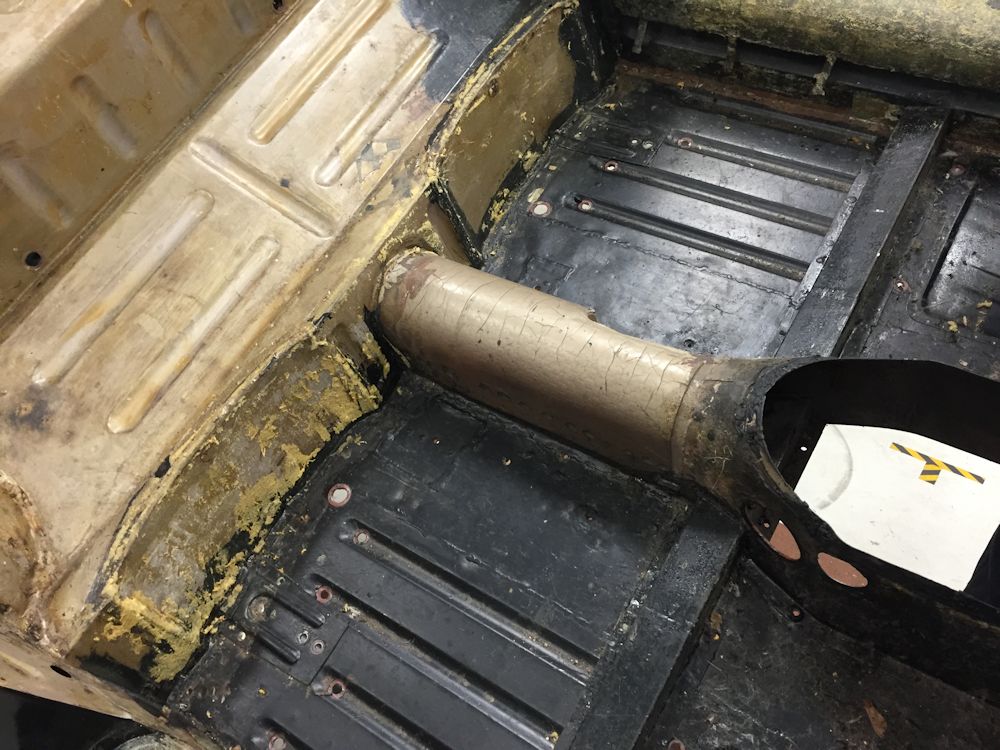
| Removing underfelts revealed some well disguised patching in the floors |
|
 |
 |
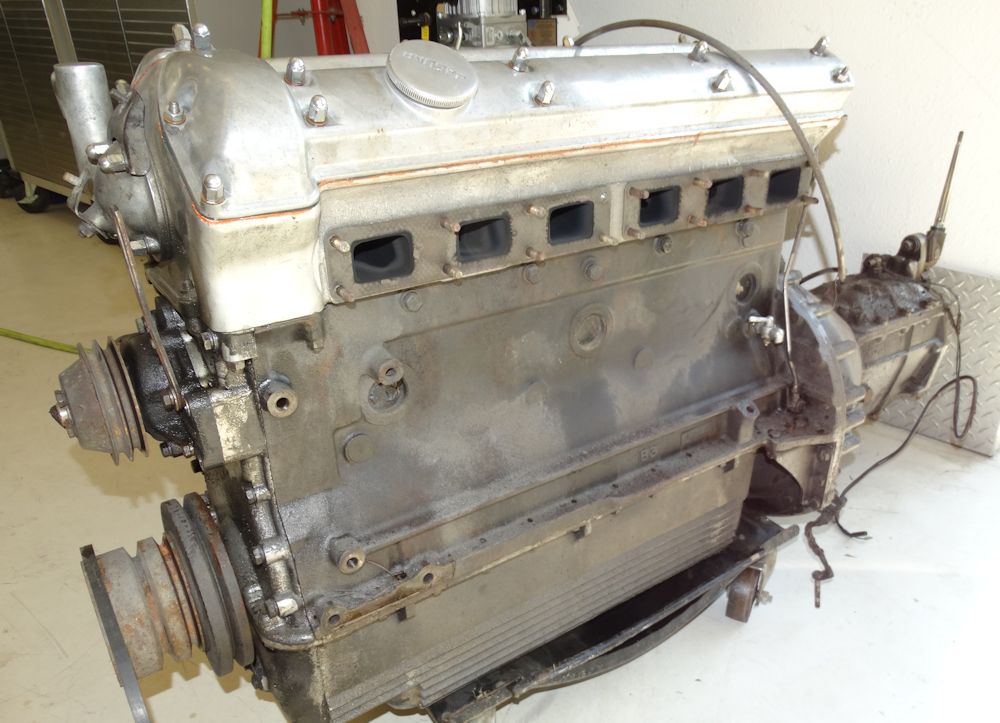
| Engine and transmission now removed |
|
 |
 |
 |
 |
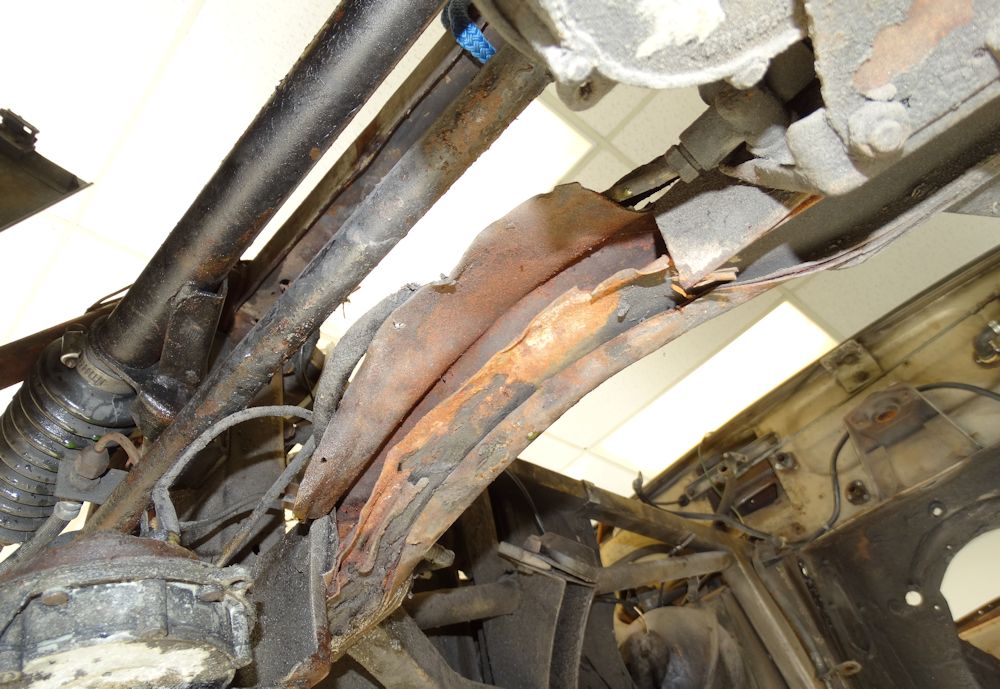
| Bottom side of picture frame in poor shape |
Picture frame will have to be replaced |
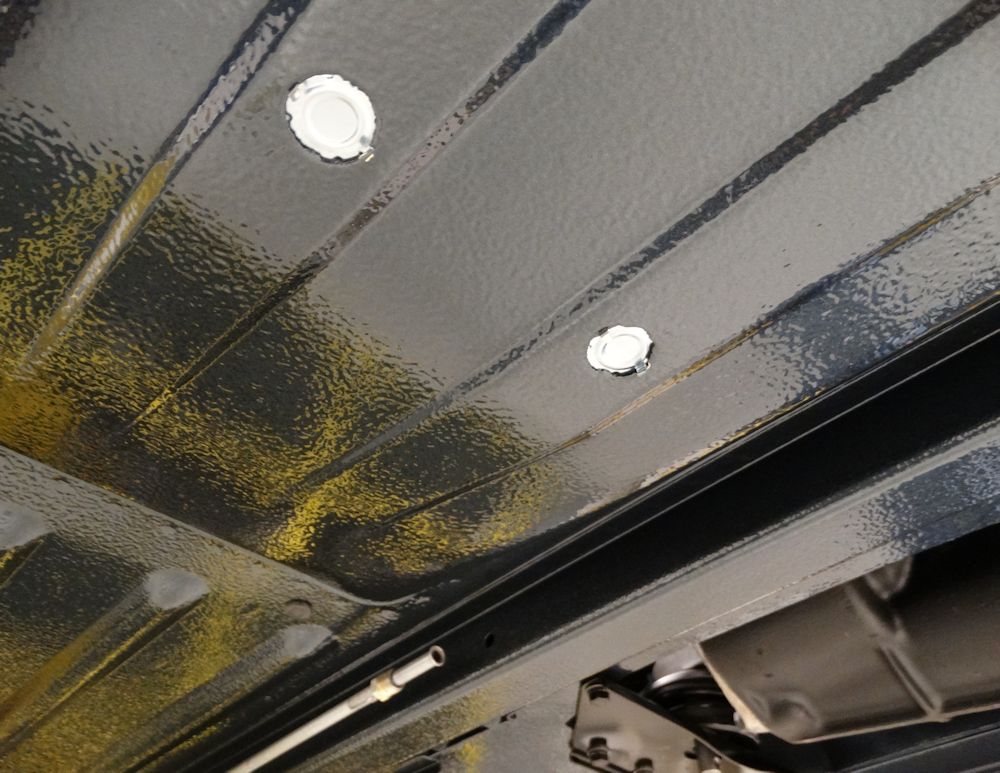
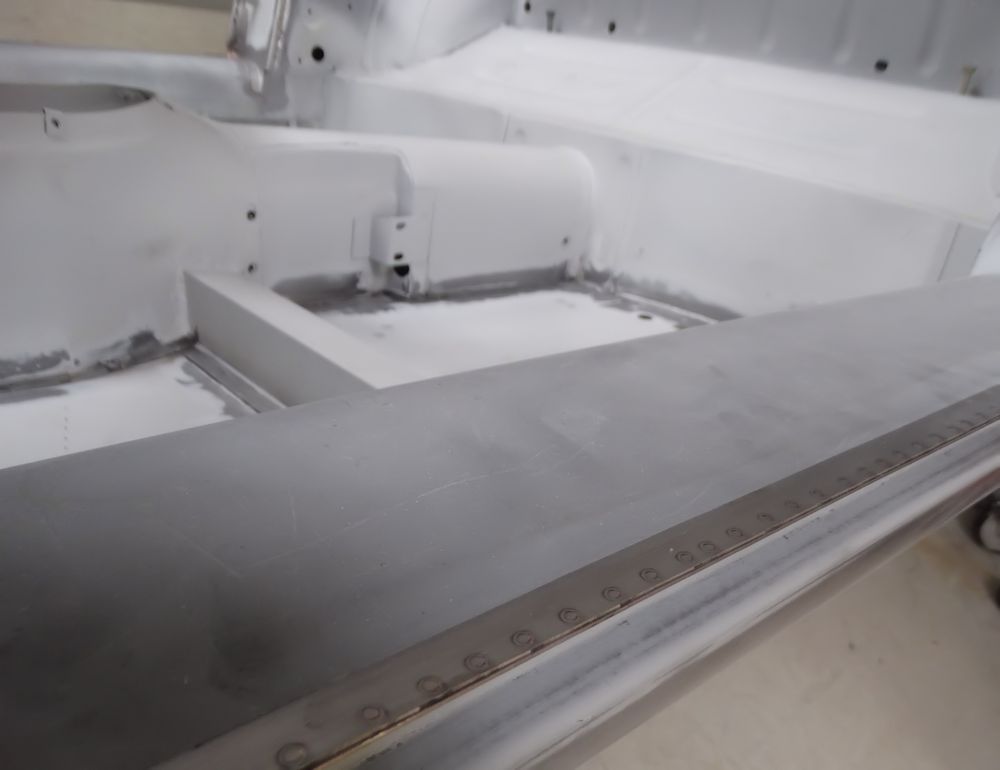
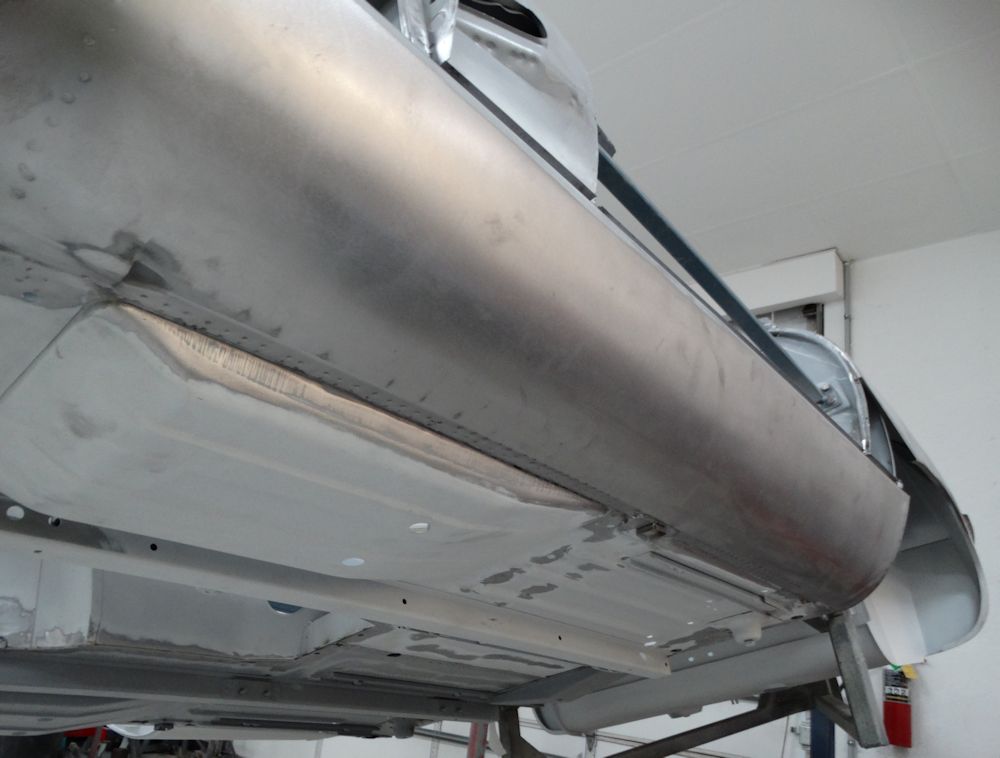
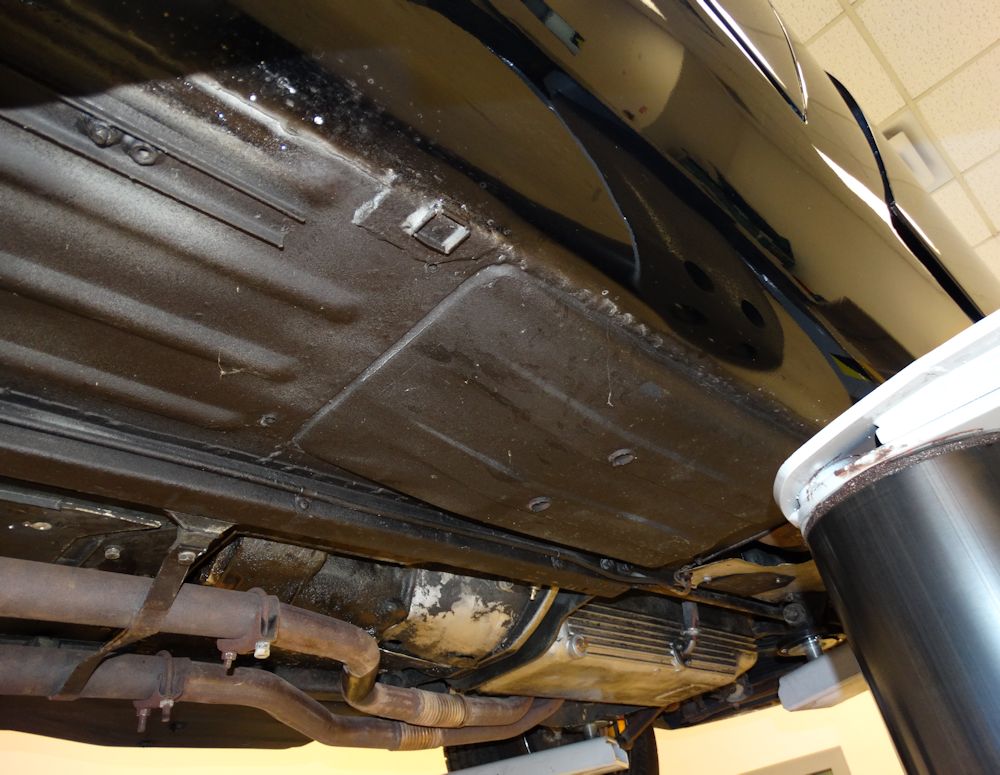
Earlier today we took the opportunity to take a close look at the car on one of the lifts, and also to weigh it on the shop corner scales. The good news is that the underside is about as rust free as you could ever hope to see in an unrestored E Type. The original floors appear to be in wonderful condition. The bad news is that we may have to put this car on a bit of a diet, as it came in about 200lb over weight, tipping the scales at 2,760 lbs.
 |
 |
 |
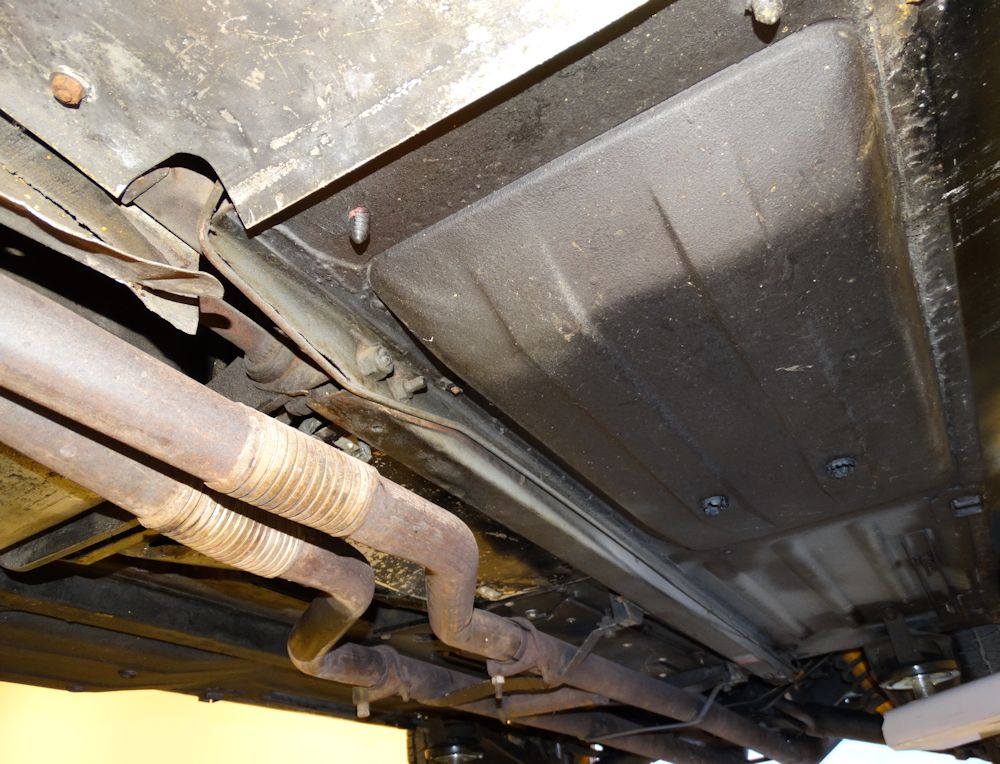 |
| Original floors are in wonderful shape |
|
 |
 |
| Underside of boot floor also looks very promising |
|
 |
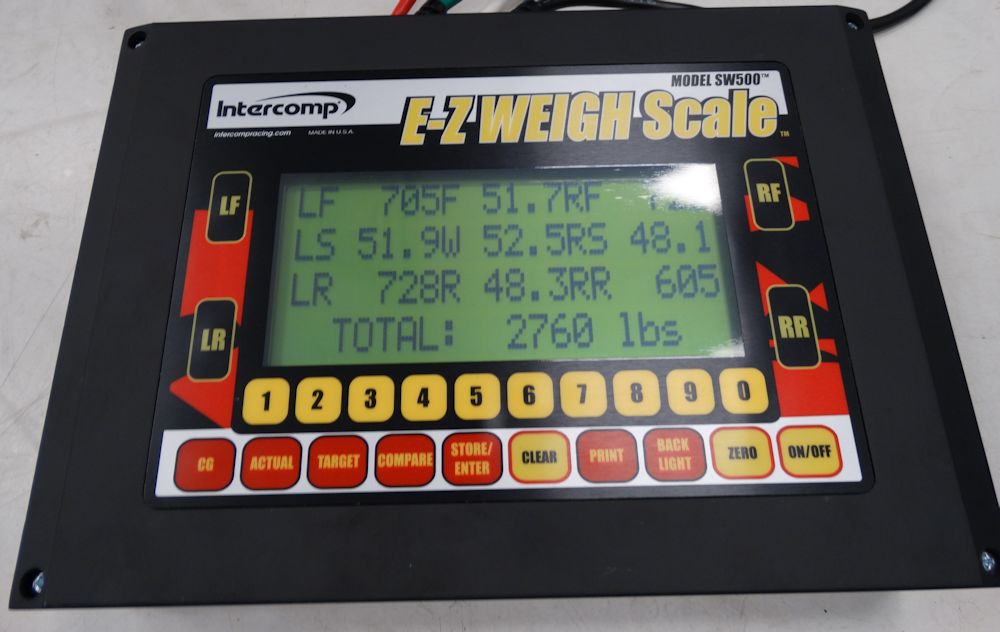 |
| She may be carrying about 200lbs of bondo beneath her paint |
We will have the total restoration of this E Type underway in the next couple of weeks...