Total (highly modified) restoration
| 1973
E Type Roadster (TL)
Total (highly modified) restoration |
|
|
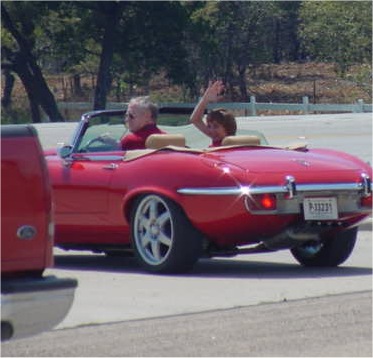
One final photo opportunity in the sunshine before Terry steers his bespoke E Type off into the Texas Hill Country!
 |
 |
 |
 |
 |
 |
 |
 |
 |
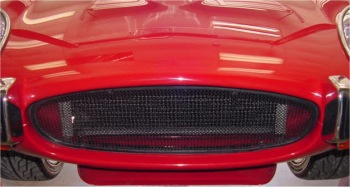
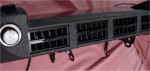
The R style grill is now finished and installed.
The good news is that it is time to start road testing your car. The bad news is that there will be plenty of photo opportunities like this one with the car parked by a gas pump!

We have been busy finishing up some of the last details, including the 'R' style grill which has come out quite nicely, and the installation of the enclosed headlamps. We hope to have your car ready for you in about 2 weeks time.
 |
 |
 |
|
temporary spare |
|
'R' style grill |
 |
 |
 |
|
opening |
great! |
|
 |
 |
 |
|
|
any badging... |
|
 |
||
|
installed |
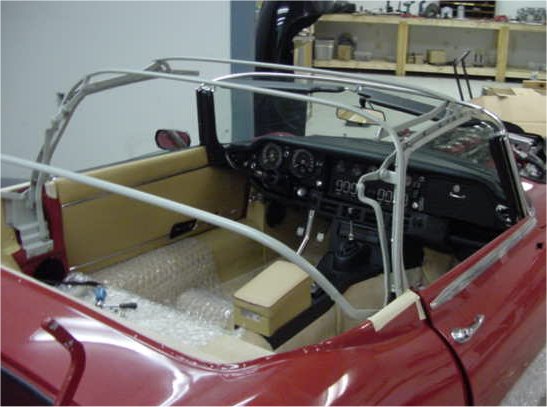
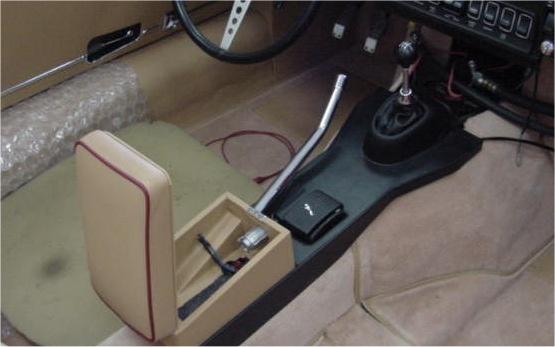
Hardtop repairs, trimming out the conv top bow, fabricating a radio console, restoring the original steering wheel.
 |
 |
 |
|
black) for the header bow |
|
|
 |
 |
 |
|
|
|
console |
 |
 |
 |
|
|
|
good measure |
 |
 |
 |
|
installed - note restored steering wheel |
|
|
Wiring in and installing your Hi-Fi system....
 |
 |
|
the RH 'A' post |
the dash corners.... |
Sam has done a beautiful job restoring your dash top, centre console and the AC dash unit.
 |
 |
 |
 |
 |
 |
 |
Sam has been making great progress with your car - which is well and truly in the finishing straight.
 |
 |
 |
|
rear lamps |
|
|
 |
 |
 |
|
|
|
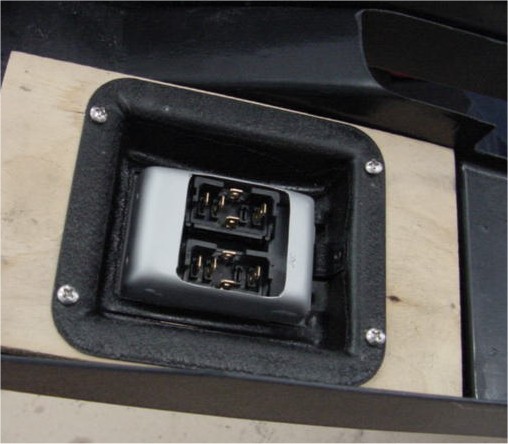
switches |
 |
 |
 |
|
|
|
|
 |
 |
|
|
|
|
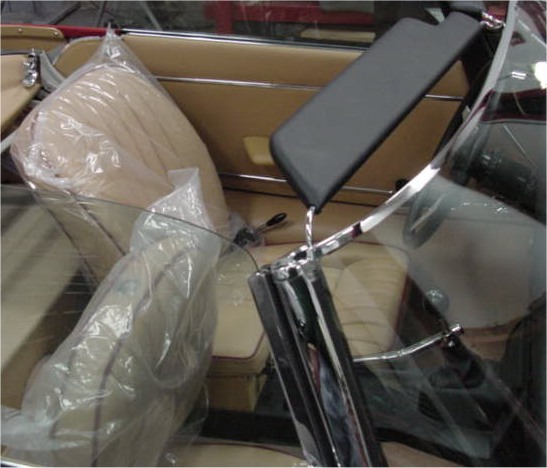
More chrome, plus installation of the door glass, etc. I am pleased to report that the elctric windows work beautifully.
 |
 |
 |
|
|
|
installed |
I am pleased to report that we now have this project back underway. This morning the guys in the CJ workshop were installing your new Triplex windscreen.
 |
 |
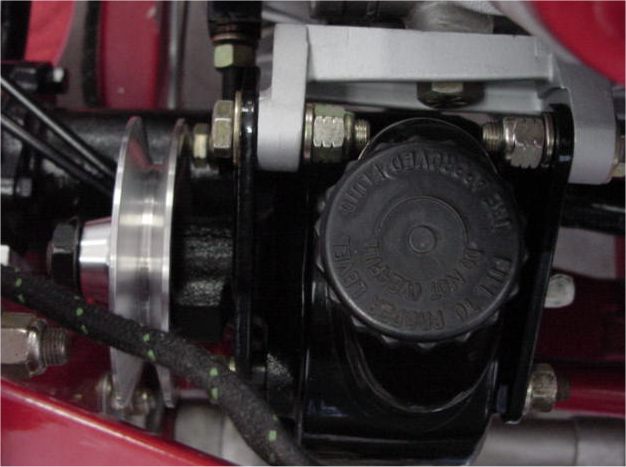
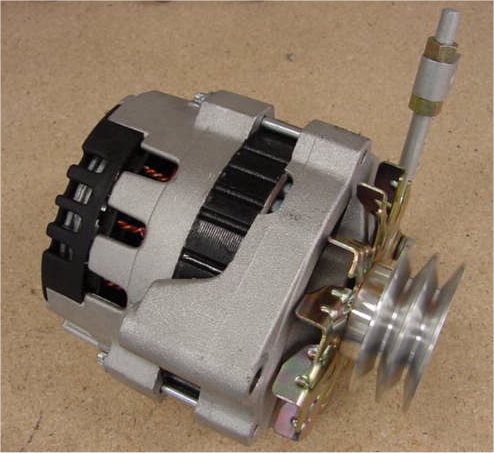
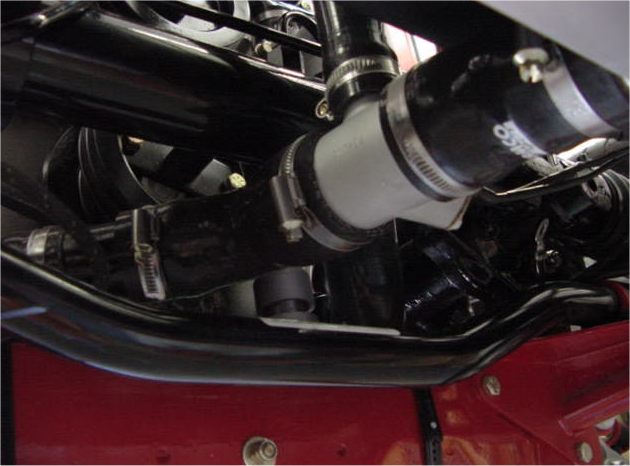
The following photographs don't really do Sam's work justice. When he started installing the AC components, we really didn't like the idea of having rubber freon hoses laid over the front of the engine (for purely aesthetic reasons). Accordingly, we made up special aluminium lines and buffed them to a high polish prior to installing same. This also gave us an opportunity to gain a little extra (any!) clearance between the top of the compressor fittings and the underside of the bonnet.The reason for the custom billet crank pulley is that we needed to overdrive the alternator to bring the voltage output up at idle. We did this by increasing the OD of the crank pulley.
 |
|
|
 |
 |
|
|
|
 |
 |
|
|
|
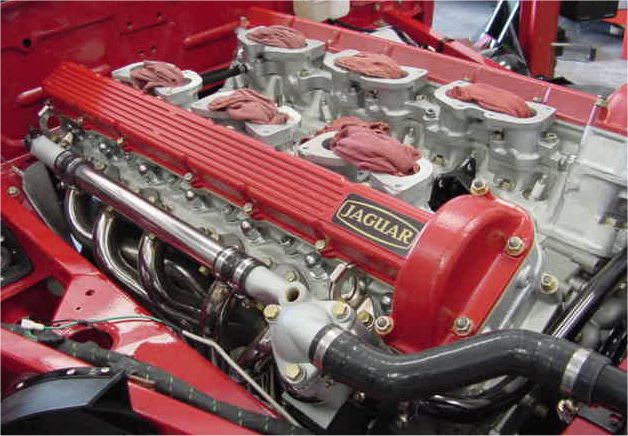
Our two main challenges since the last report have been to obtain clearance between the tops of the Weber carbs and the underside of the bonnet - and also trial fitting the enclosed headlamp covers. With respect to the carbs, we ended up removing the carb tops and machining 3/16" from their undersides, as well as reducing the height of the velocity stacks.The headlamp covers were an absolute bear to install. The kit provided was such a poor fit that I am seriously thinking about making a Team CJ version.

 |
 |
|
|
lower stack height |
 |
 |
|
|
|
 |
 |
|
|
|
We eventually fired and test ran the engine on Friday. A couple of hours later we strapped in a steering wheel and set off around the CJ carpark for a milestone 'maiden voyage'. I am delighted to report that everything went extremely well with no problems whatsoever.Click on each of the photographs below to see short video clips of Sam driving around the carpark!

Off around the CJ carpark
 |
 |
|
|
|
We are now almost ready to fire the engine up for the first time. If you are going to be in town, Tuesday lunchtime would be a great time to stop by!
 |
 |
|
|
|
 |
 |
|
|
|
 |
 |
|
|
the application |
|
|
|
 |
 |
|
|
|
|
|
|
 |
 |
|
|
|
|
|
|
 |
 |
|
|
|
|
|
|
 |
 |
|
|
that Lawrence made for you |
|
|
|
 |
 |
|
|
and gear reduction starter motor |
|
|
|
 |
 |
|
|
|
|
|
|
 |
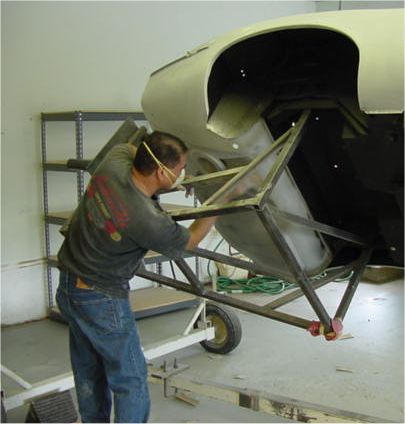
As you can see, we finally have the engine and JT5 five speed shoe horned into place and Sam has already begun installing some of the engine bay ancillaries. Over the next day or so we should be installing the cooling system and hooking up the new stainless exhaust.I am very pleased with the progress we have made in the last couple of weeks - I hope you are!
 |
 |
|
|
|
 |
 |
|
|
|
I was glad that you were able to visit with us the other day and see all the progress we have been making at first hand. I am sure you will agree that Sam has done a beautiful job restoring the dash and installing all the associated wiring/gauges.
 |
 |
 |
 |

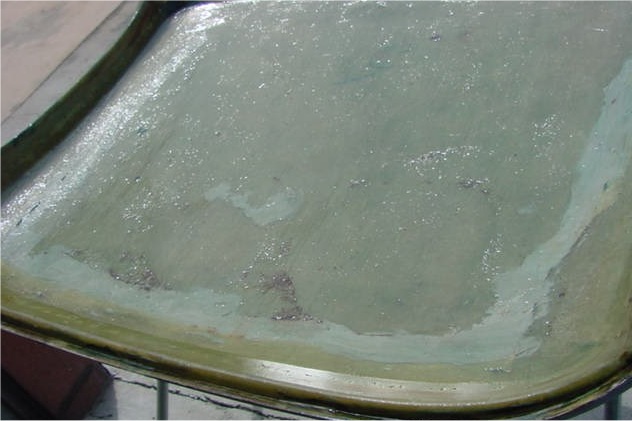
As your car patiently waits its turn for one of the assembly areas, we thought we'd get the restoration of the factory hardtop underway.
 |
 |
|
all the chrome trim and the headliner |
|
 |
 |
|
the fibreglass |
|
Understated, low key, subtle....not really, no.
 |
 |
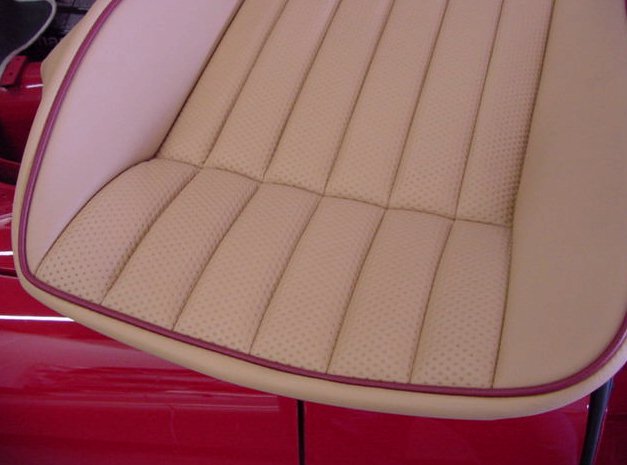
I received your email message from Tokyo this morning inquiring about your engine. What better way to answer than to show you John putting the finishing touches to it yesterday! I have also included a snap shot of one of your Suffolk & Turley seat covers showing the red piping we special ordered for you.I look forward to your visit during the first week of February.
 |
 |
|
the Signal Red |
|
 |
 |
|
Claydon is building your engine |
|
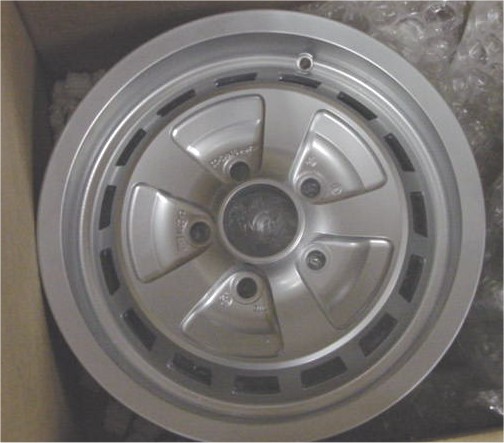
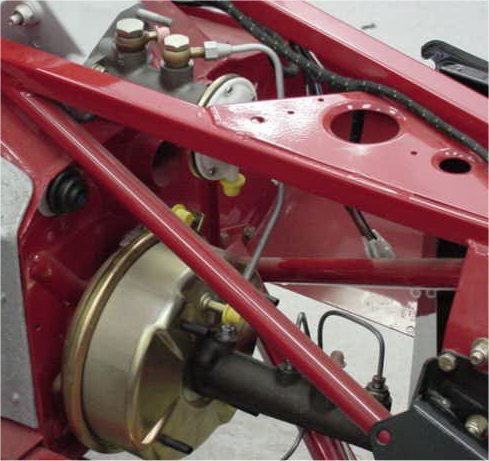
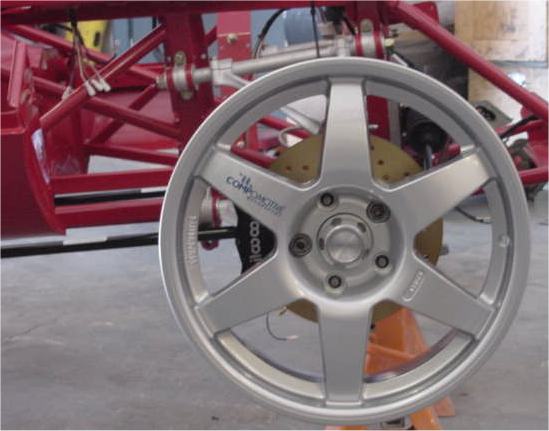
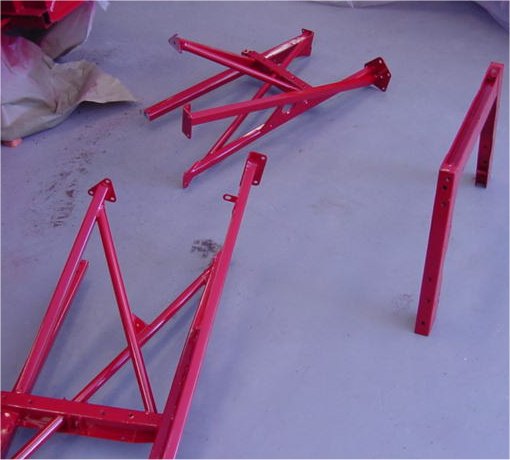
More progress on the front end, including Wilwoods, cross-drilled rotors and the 18 x 8 competition wheels. You will also see the wiring harness starting to go into place.
 |
 |
 |
 |
 |
|
|
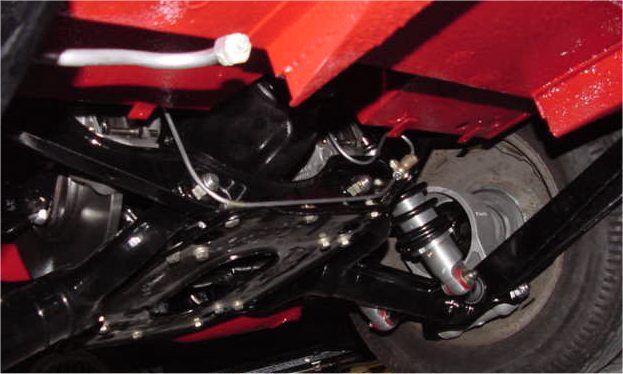
The following photographs show Sam at work preparing to place your car back on its wheels for the first time in many years. The rear end has now been permanently installed and the front suspension is virtually finished. We hope to install the front hubs, rotors and bearings on Monday and have her back on the ground by the time of your visit.
 |
 |
|
the front suspension |
|
 |
 |
|
wheels at the rear |
car will be rolling |
It was good to see you on Monday and I trust you enjoyed watching Cosme paint your E Type! I am glad we were able to arrange the schedule so that you could be present.At the time of writing, Cosme has already begun the sanding and buffing process and the car should be fully assembled by the end of this week. We are still on schedule to have her back on her wheels by the time of your next visit on December 10th.
 |
|
well underway (11/21) |
 |
 |
|
|
|
 |
 |
Both Lawrence and Cosme have done a huge amount of work to your car since our last report. The bonnet has been assembled and installed (easier said than done, of course), and they have achieved absolutely spectacular panel gaps throughout the entire car. Other than another series of priming and blocking, all that remains is to trial fit the new enclosed headlamp conversion and the chome fittings before we are ready to paint.We are still aiming at painting the car in your presence on the morning of the 19th.
 |
 |
 |
 |
The cabin, floor pan and inner dash receive Cosme's attention....
 |
 |
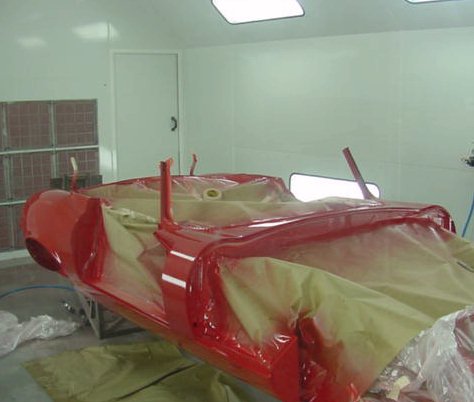
More Signal Red......Cosme is basically flashing in all the interior panels, boot compartment, dash and cockpit areas, etc. Basically all the areas that will be hidden by trim eventually.I think you will agree that he is making excellent progress!
Note: Picture quality is not quite what it should be as the battery was low in my digital camera. I'll try to take some more photographs for you later today.
 |
 |
 |
 |
I hope you haven't changed your mind about Signal Red!
 |
 |
 |
 |

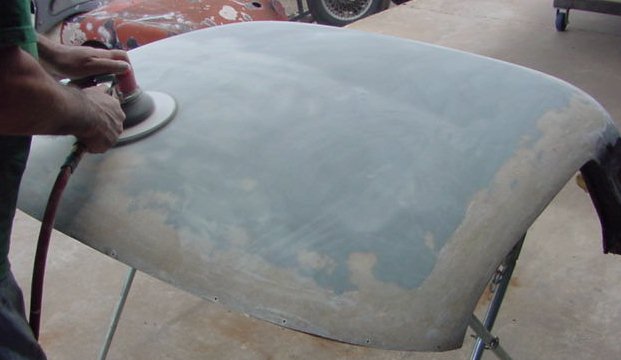
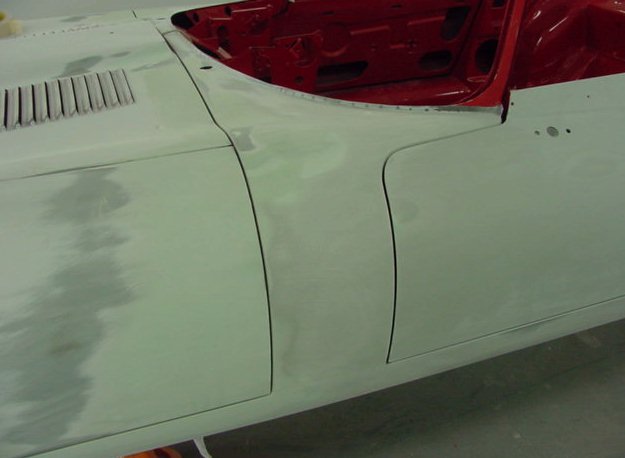
The following photographs show Cosme with your bodwork in progress. Although this really was an exceptionally sound shell in terms of rust, he has spent much of the week blocking out waves and ripples in order to achieve the 'bullet straight' end result we are looking for. The doors, boot lid and rear wings all had significant problems.
 |
 |
|
|
|
 |
 |
 |
 |
 |
 |
|
(and a caged Jaguar!) |
|
 |
 |
|
and boot lid |
|

Both
rear wings were very wavy (not any more)
As delivered: fortunately we like a challenge! Here you see the car filling up a corner of one of the CJ warehouses.
 |
 |
 |
 |